
How to Make and Can Chicken Broth or Stock
This post shows How to Make and Can Chicken Broth or stock. I first share my recipe for Chicken Broth/Stock and then show how to pressure can for long-term pantry storage. This procedure applies to any meat or bone broth. I use a Presto Pressure Canner to pressure can all my stocks, broths, and soups.
At the risk of sounding like Ma Ingalls of ‘Little House on the Prairie’ fame, I’m all about canning my own stocks, broths, and soups. I’ve been making and canning my own chicken broth, beef broth, vegetable broth, and soups for about 15 years now, and can’t even imagine purchasing these pantry staples ever again.
I started canning when my husband was diagnosed with high blood pressure, and we needed to reduce our sodium intake dramatically. Not only can I control the sodium and other additives we consume, but the taste of the homemade broth, stock, and soups just can’t be replicated!
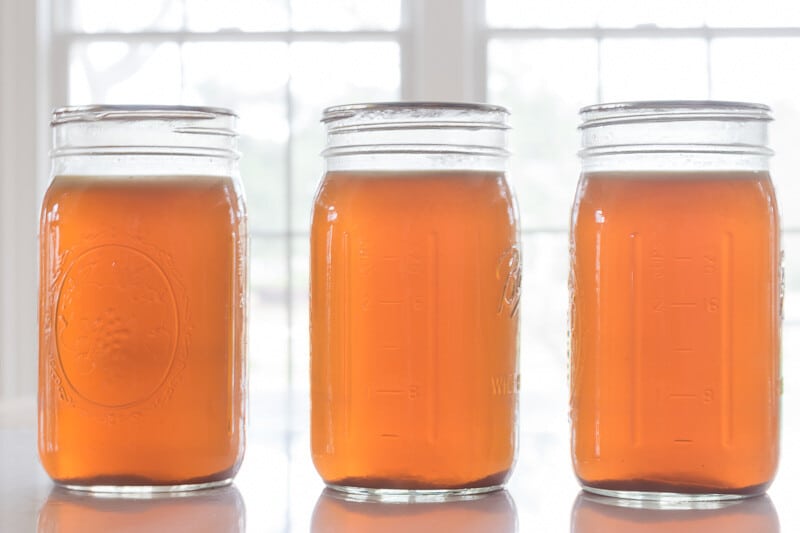
Table of Contents
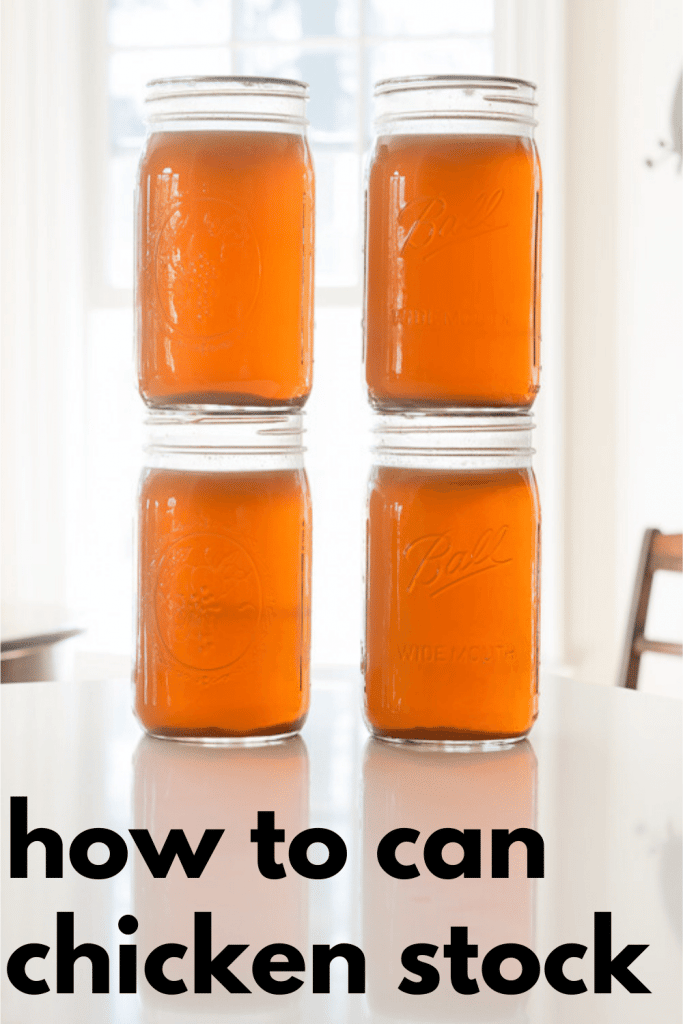
And as if those weren’t enough reasons to convince you to make and can your own homemade chicken broth or stock, the economics of it just might. With 5 pounds of organic chicken legs ($9.00), 8 carrots, 6 stalks of celery, and 3 onions, I can put up 8 quarts of organic, no additives, no sodium, nothing but goodness chicken stock PLUS another 1-2 quarts of chicken bone broth AND (for those with pups at home) 2 dozen ‘chicken cupcakes’ for their true enjoyment.
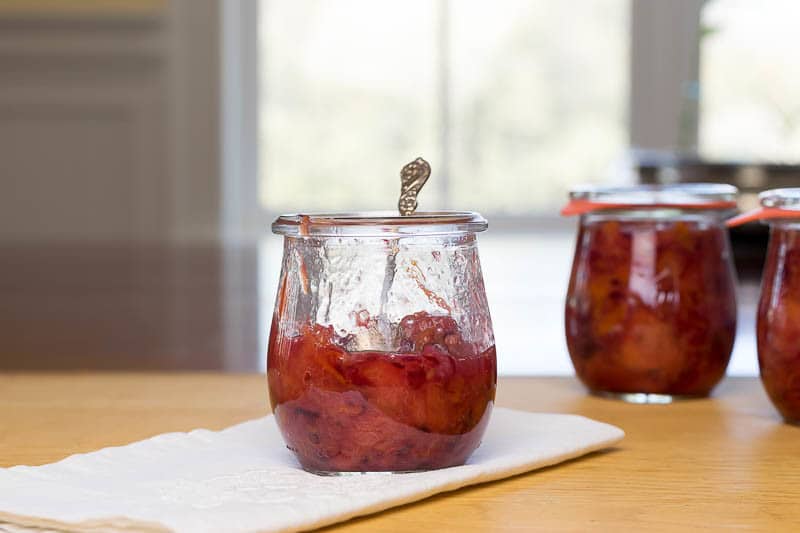
I refrigerate the chicken stock while I make the chicken bone broth and then end up canning the bone broth at the same time that I can the stock.
What’s the difference between chicken broth and chicken stock?
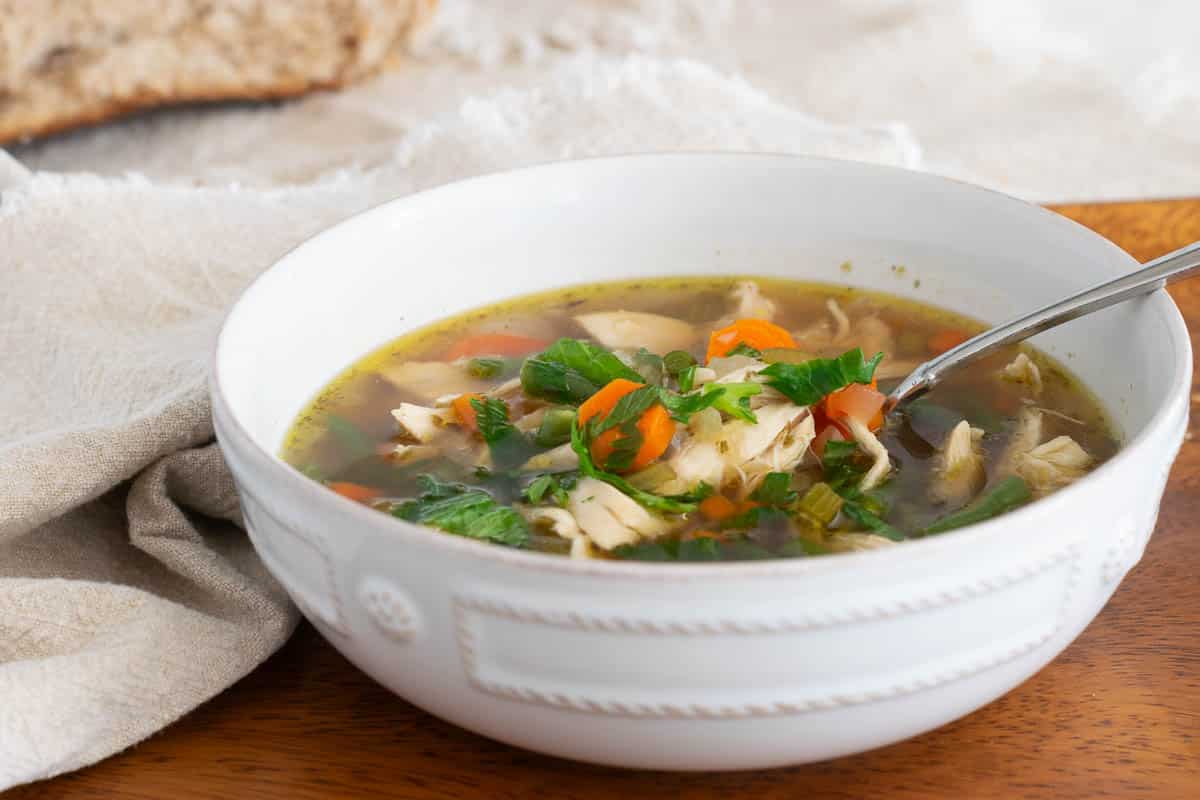
While these terms are used interchangeably (I know I’m guilty), there is a difference between stock and broth. Stock is generally made by slow-cooking meaty bones over many hours; as such, the stock is typically heartier from the gelatin released by the bones. In the strictest sense, the broth is any liquid that meat has been cooked in.
Roasted or Raw Chicken Stock
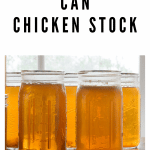
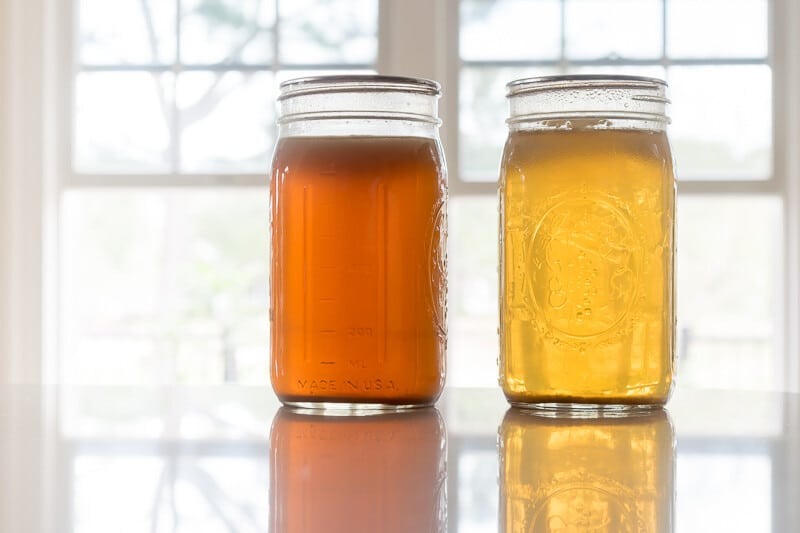
When considering canning chicken stock, you need to decide whether you want roasted chicken stock or raw chicken stock. Roasting the chicken and vegetables results in a richer broth in color and flavor, while a raw chicken broth is a cleaner, more neutral broth. I prefer to have both on hand, so make a batch of each once or twice a year.
That said, feel free to skip the ‘roasting’ part of the recipe if you would rather have simpler-tasting, raw chicken stock. You can see the difference in the roasted chicken broth on the left compared to the raw chicken broth on the right.
When I go to the effort of making and canning broth or stock, I always prefer to use organic meat and produce.
Can You Water Bath Can Chicken Stock or Broth?
In a nutshell, nope! You need the pressurization to reach the necessary temperature to kill any bacteria on this low-acid food. I know I will most likely receive a message that “my grandma canned chicken stock using a water bath canner and lived to be 107!” I’m not a risk-taker, so I follow USDA guidelines.
You Can Use This Method of Pressure Canning for Other Meats As Well
Check out this recipe for Roasted Turkey Stock that we use for our Thanksgiving Turkey Gravy.
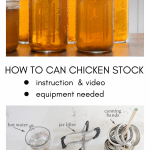
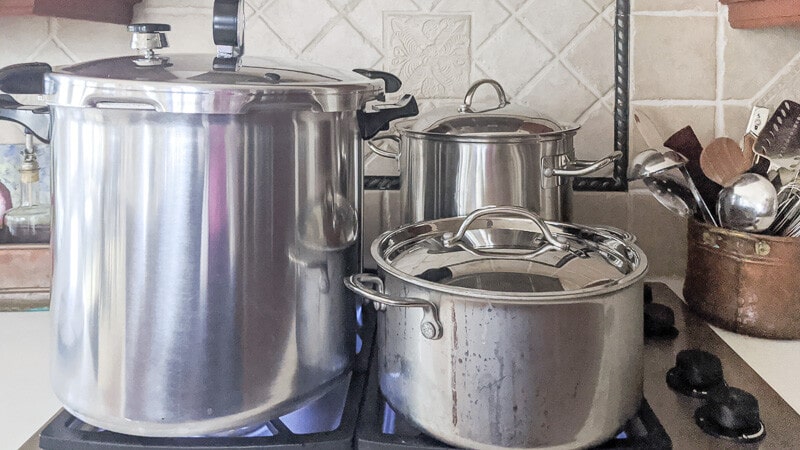
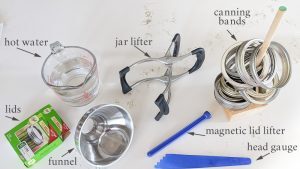
Equipment for Pressure Canning
Some of these links may be Amazon affiliate links and I may earn a small commission off of the sale of these products to help defray the costs of operating this site, but the price you are charged is not affected. You can see my full disclosure policy here.
The very first thing you should purchase if you are considering canning anything is the Ball Complete Book of Home Preserving. It truly is the bible of canning. While I think I have memorized most of the directions, I always keep my dog-eared and stained Ball book open and referenced every time I can.
Pressure Canner. I have both a 16-quart and 23-quart Pressure Canner by Presto.
Quart Jars and Pint Canning Jars. I use Ball or Kerr jars.
Don’t substitute regular jars or lids…canning jars are made specifically for safe canning.Lids and bands. I find that these are often cheaper at my grocery store.
White Vinegar in a bowl with a washcloth or paper towel
Once you have the equipment, the only thing you’ll regularly need to purchase will be new lids. I reuse my jars and bands (until the bands rust, which they will after a while) for years. In fact, I couldn’t even tell you the last time I purchased canning jars.

Chicken Stock
Equipment
Ingredients
- 3 lbs chicken legs or wings
- 2 onions quartered
- 5 carrots
- 3 celery stalks
- 3 quarts cold water
- Olive Oil
- Salt and Pepper
Instructions
HOW TO MAKE HOMEMADE CHICKEN STOCK
- Preheat oven to 450°
- Place chicken pieces, onions, carrots, and celery on a baking sheet
- Drizzle with olive oil, sprinkle with salt and pepper, and rub to coat the pieces in the olive oil
- Roast for 30 minutes
- Remove chicken and vegetables and put them in a crockpot or a large stockpot.
- Add cold water
- Slow cook on low for 24 hours in your crockpot or 3-4 hours at a slow simmer on the stovetop.
- Strain meat and vegetables from the broth and chill the broth, to allow the excess fat to harden and be removed.
- If desired, remove the chicken meat from bones and put it in cupcake tins to freeze for your pups! (Make sure you don't include any onions into these chicken meat pupcakes)
- You can add the chicken bones back to the crockpot with cold water to just cover and 1/4 cup of cider vinegar to cook for another 24 hours to make chicken bone broth.
HOW TO CAN CHICKEN BROTH OR STOCK
- Prepare Jars and Lids
- Bring your stock or broth to a simmer.
- Check the rims of your canning jars to ensure no cracks or chips.
- Wash jars, lids and other canning tools well. I always run my jars, lids, headspace gauge, lid lifter and funnel through the dishwasher right before I use them. If washing well before canning, I put them on a clean baking tray and set them in the oven (not on) just to keep them clean and out of the way until I am ready to use them. I put the stack of lids sideways in a small bowl so that any water left on them from the dishwasher drips off of them. The lids will rust if water settles on them.
- One-half hour before canning, heat the jars so that they aren't cold. If you wash them in the dishwasher right before canning, just leave them in the dishwasher until you are ready to fill them.
- Fill your canner with about 3 inches of water. Put the lid on the pot and bring the water in the pot to a simmer over medium heat and keep the water simmering.
- Check your screw bands and discard any that are rusted or bent. Set your screw bands aside
- Boil water and pour over the lids. Don't put the lids into boiling water on the stove.
- Prepare your work surface: I lay out a clean cloth onto which I place the container holding the hot lids, head gauge, magnetic lid lifter, funnel a bowl of white vinegar and a clean cloth or paper towel, jar lifter, and the screw bands. Set a trivet out for the hot pot of stock or broth.

- Bring your pot of hot broth to your work surface.
- Take one jar from the dishwasher. Or, using your jar lifter or hot mitt, lift one hot jar out of the oven. Place on the work surface.
- Keep your pressure canner at a low simmer throughout this process.
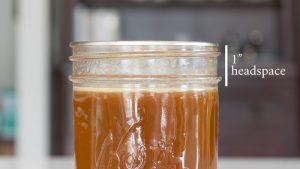
- Using your funnel and insert, ladle the hot broth into the jar. leaving a 1" headspace. That 1" headspace is really important, so add a bit or take out a bit so that you have just 1" between the top of the jar and the top of the broth.
- Wipe the rim of the jar and threads with the vinegar, which will remove any stock or fat that may be on the rim of the jar. Without a clean, fat-free rim, your jars will most likely not seal…which will make you very sad.
- Use your magnetic lid lifter to lift a lid from the hot water and place it on the jar.
- Place a screw band on the jar and ensure it is aligned with the threads and screw until just fingertip tight, which means to tighten, just with the strength in your fingers, not putting your whole hand on to tighten. You want it to be on firmly but not as tight as possible.
- Using your jar lifter, place this jar back into your pressure canner and retrieve another hot jar, repeating the process until all jars are filled.
- Make sure you have the correct level of water in your canner. In my Presto Pressure Canner, there are some little hashmarks/identations which let me know where my water level should be. Use a long spoon or butter knife to feel for that hashmark, and adjust the water level as appropriate.
- When you get down to your last 2-3 canning jars, check the water level of your canning pot and if you need more water in your canner, add water to the pot from the hot jars that you are pulling out to fill.
- Place the lid on your canner and lock it into place.
- Leave the weight off of the vent pipe.
- Bring the water to a boil over medium-high heat. When you see and hear the steam venting out of the vent pipe in a strong and steady stream, start your timer for 10 minutes.
- At the end of 10 minutes, place the weight over the vent pipe.
- If you are using a weighted-gauge pressure canner at altitudes of 1,000 ft or below, slowly bring the pressure up to 10 lbs. (Consult an altitude chart for altitudes above 1,000 ft, or if you are using a dial gauge canner)
- I find that if I start easing the temperature back when the gauge starts reading 8.5 – 9 lbs, I can ease into the 10 lbs without going too much over.
- Once your gauge reaches 10 lbs, start your timer. (processing time of 20 minutes for pints or 25 minutes for quarts. If you have a mix of pints and quarts, set your timer for a processing time of 25 minutes.)
- Stay near your stove to monitor your gauge. You don't want to fall below 10 lbs or rise too far above 10 lbs. You will have to nudge your stove's heat control just in the tiniest increment to find the sweet spot.
- If you do fall below 10 lbs, you need to start your timer again. It must process for the designated time at 10 lbs.
- When the processing time is complete, turn off your stove and let the canner cool on its own. I find that it takes about 25-30 minutes for that to happen. You will know that the canner has cooled when the Air Vent/Cover Lock drops down on its own.
- Once the pressure has returned to zero, and the cover lock drops down, wait an additional 2 minutes.
- Then, remove the weight from the vent, unlock and remove the lid, making sure to open it away from you so that you don't get a face full of steam.
- Let the jars sit in the canner for 10 minutes to adjust to room temperature.
- Using your jar lifter, lift the jars from the canner, holding them as level as possible without tilting.
- Place the jars, 1-2 inches apart, on a cooling rack or cutting board somewhere where they won't be disturbed. Let sit for 24 hours.
- Listen for the lids to pop. Remove any jars on which the lid has not popped and place them in the refrigerator.
- After 24 hours, remove the bands and wipe down your jars. Check that all lids have sealed. They will curve downward and will not give when pressed.
- Once again, jars that haven't sealed must be reprocessed or refrigerated.
- Store jars in a cool, dark place.
Video
Notes
Nutrition
For you visual learners, I have made a video to show the process I use showing How to Can Chicken Broth, stock, or soups. You can see the video on canning chicken stock here.
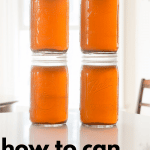
To refer back to this post on How to Can Chicken Broth, bookmark this page or pin the following image.
Thanks so much for spending a few minutes of your busy day with me!
To ensure you don’t miss future content, pop your email in the pale green box on the right or click here. I usually send one email weekly, so I won’t inundate your inbox. I’m sensitive to an overflowing email inbox!
We will only use your email address to send you emails, no more than 1-2 weekly. In addition, you will have access to my growing library of knit & crochet patterns and other printables. Check back often as this library will continue to grow. You can unsubscribe anytime by emailing me or clicking on the “unsubscribe” link at the bottom of all emails.
And you can access many of the products I refer to on my Nourish and Nestle Amazon Page. You can access it here.
So, if you’d like to participate in the ‘subscriber benefit’ action, simply subscribe to Nourish and Nestle here or use the form on the right sidebar. It’s slightly towards the top.
I have sent all my subscribers the link to the Subscriber Benefits Library. If you missed it or misplaced it, let me know.
Until next time…

What a great and informative post for canning your own chicken broth or stock, thanks Lynn!
Lynn, this is fabulous, I make my own stock and broth, but I admit sometimes I get lazy, mainly because I don’t have the freezer space for it, but you have convinced me to start canning! Thank you!
Thanks, friend. My pantry is full of stock right now, I take comfort in opening the door and seeing all the jars. Let me know if you have questions as you go along!
When adding water to the slow cooker, how much? Just to cover the chicken? I feel if you use too much your stock will be diluted.
Good Morning Michelle,
I 100% agree with you! In fact, I’ve recently adjusted my meat/water ratio to be closer to 1 quart of water for each pound of meat (chicken) for a deeper flavored broth.
Lynn
If you don’t want to get into canning, etc., can you make chicken stock and keep in the frig for a while?
Hi Nancy, You can absolutely freeze the stock.
Hugs, Lynn
Hi Laura, It is so tasty and good for the body and soul!
It’s such a great staple to have on hand!
I’m so glad, Nikki!
Hi Kathi,
So glad…I like having a choice of broths! I think you will too
Thank you for this article. I’ve never thought about canning my stock, but it makes sense. I usually freeze mine, but next time I will give canning a try! I have always used the carcass of a rotisserie chicken instead of buying chicken specifically for stock though. We regularly purchase a rotisserie chicken from Costco. I hate for all those tiny bits of goodness still clinging to the bones to go to waste!
Hi Kim,
I do use rotisserie chicken carcasses, but I don’t eat enough rotisserie chicken to make all the broth we use. I’ll save all sorts of bones and bits and throw them all in together.I think you’ll find canning a very space efficient way to store your stocks and broths. Let me know if you have questions.