
Crochet lace edge on your pillowcase
Step-by-step instructions and crochet edging pattern ideas on how to crochet lace edging on pillowcases. Includes a crochet edging tutorial showing how to crochet a border on a pillowcase.
I trust you’ve had success putting together your Perfectly Adorable Pillowcases. Are you ready to embellish them with a little crochet lace edge?
Trust me, I am not an experienced crocheter (is that a word? ‘Knitter’ is a word, so I assume ‘crocheter’ is a word as well.) In fact, I taught myself to crochet about a month ago. Switching from knitting to crocheting does take a little concentration. I kept wanting to keep my stitches on my crochet hook. In fact, crocheting is just the opposite, you take your stitches off of your hook. The other difference I found, bearing in mind I’m a right-handed knitter, is that when knitting I like my yarn on my right side. For crochet, having the yarn on the left side of me made a big difference. Now, on to how to crochet lace edging for our pillowcases.
There are plenty of tutorials in the blogosphere that teach you to knit. I’m not a ‘re-create the wheel’ kind of gal, so here are some links to sites that I found useful for specific crochet stitches:
Blanket Stitch
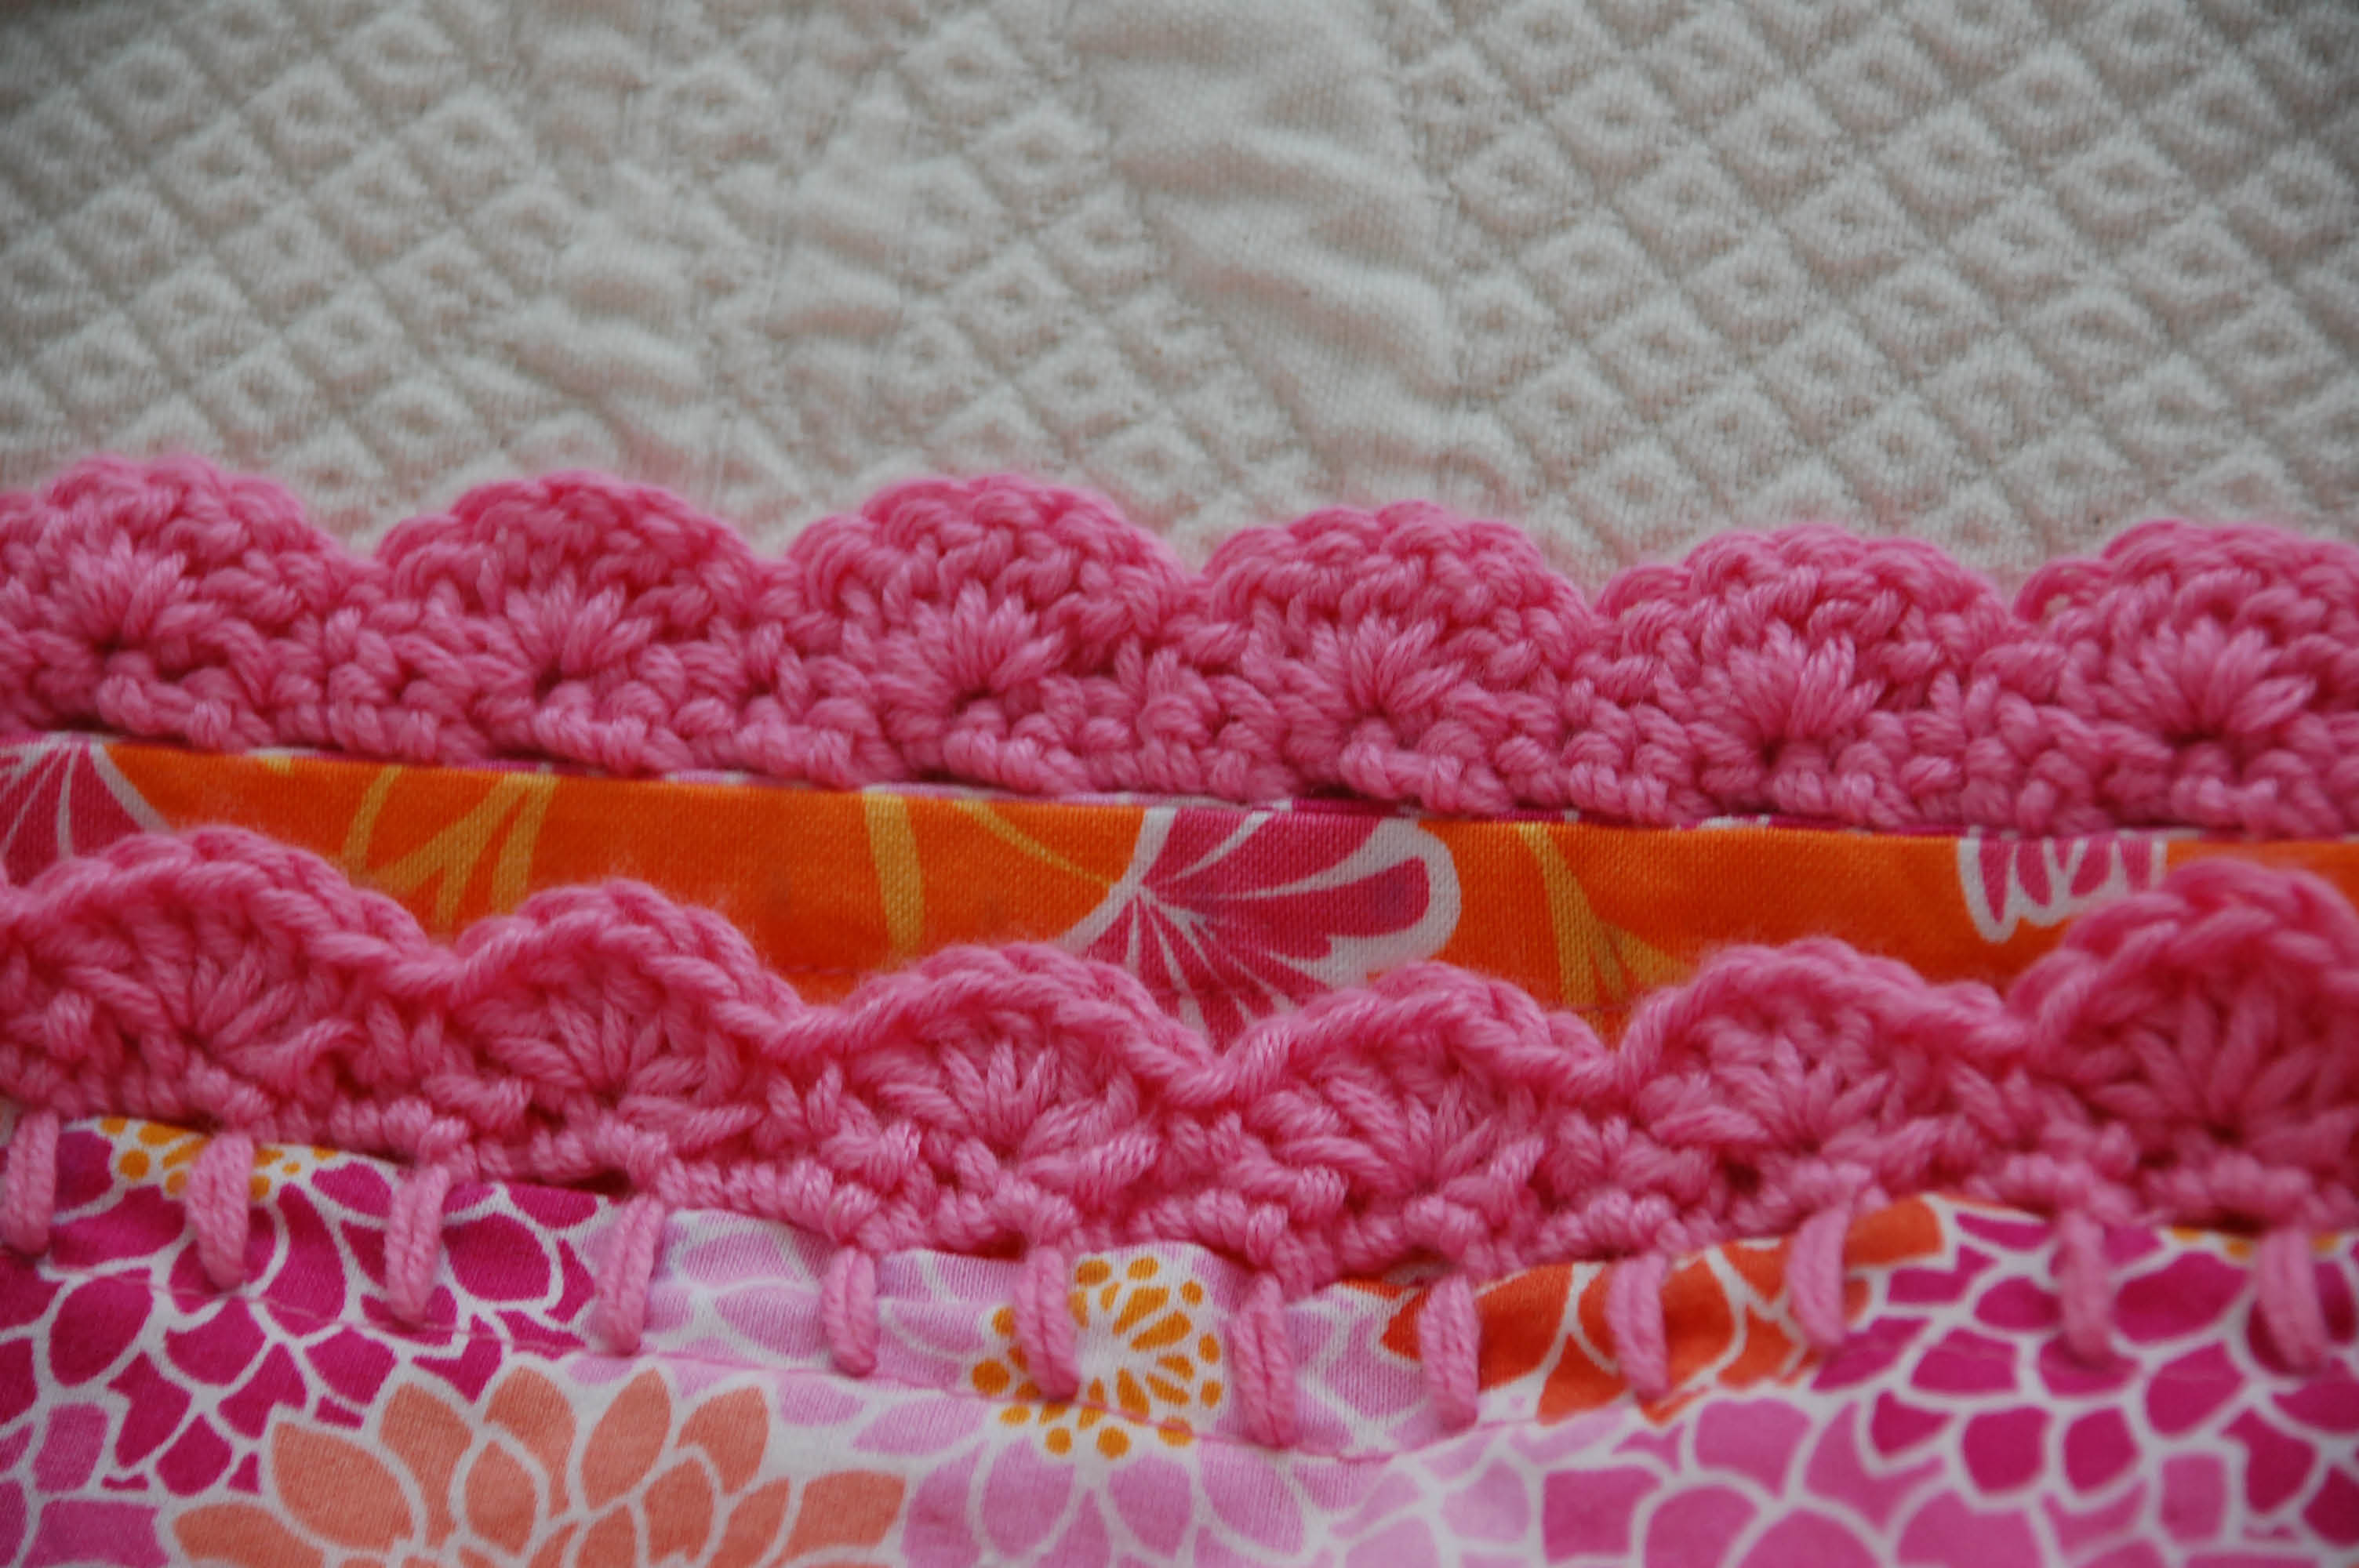
You will be doing a blanket stitch around the opening of your pillowcase. This provides the anchor for your crochet edging pattern. Here’s a video that shows how to do that if you are unfamiliar with the blanket stitch.
Chain Stitch (ch)
www.anniescatalog.com does a great job explaining this foundation stitch. There are illustrated, step-by-step instructions, as well as a video. Bear in mind that when making the crochet lace edging of the pillowcase, you’ll be working your chain stitch under the blanket stitch you’ve put on the edge of your pillowcase.
Single Crochet (sc)
Once again, www.anniescatalog explained the stitch very well.
Double Crochet (ds)
www.anniescatalog.com, sticking with what works.
Slip Stitch (sl st)
Going with Lions Brand on this one.
Before I jumped in to work on the crochet trim of my pillowcase, I got a scrap piece of long-ish fabric. I sewed the 2 short ends together to fashion a ‘column’ like the pillowcase opening. I practiced my blanket stitch and crochet for a bit on this fabric to get my tension down and learn some stitches.
Some of these are affiliate links and I will earn a small commission off of the sale of these products, but the price you are charged is not affected. You can see my full disclosure policy here.
Supplies needed to crochet lace edging on a pillowcase:
- Yarn, I think a fine or a light work best for this project. I like Patons Grace (a 100% Mercerized Cotton). When you shop for your fabric, have a sense of the color you’ll be using for the trim and make sure you have that yarn.
- Crochet Hook, I used a G6.
- Darning Needle
- Scissors

If you can’t find what you need, Michaels will have supplies for most every crafting need under the sun. You can order online here and have it shipped or you can pick it up at your convenience.
Crochet Lace Edging: How I put the border/lace edge on my pillowcases:
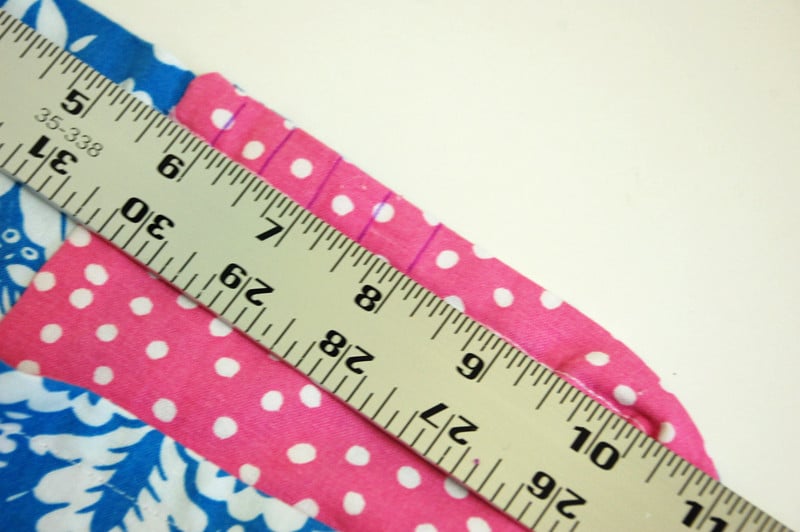
- I marked 1/2″ all around the pillowcase opening. Bear in mind, you need 78 marks, so if you need to fudge and make one of your marks a little on either side of 1/2″, not a problem. I would try and do it around your seams. Given the size of the pillowcase opening, you should be pretty darn close. From the photo, see how I marked from the top stitch seam all the way to the edge. I needed to do that to make sure my blanket stitches were straight.
- Worked my blanket stitch with a doubled strand of the cotton yarn I’ll be crocheting the edge with. I read on YouGoGirl’s website that she recommends working the blanket stitch for half of the pillow, then cutting a new piece of yarn for the second half. This eliminates the crazy long piece of yarn. As it is, measure a piece of yarn 8 times the width of your pillowcase, which should be around 19″, so about 4 yds.
- Don’t knot your yarn when you start the blanket stitch but leave a tail. I start and finish each blanket stitch section so that it ends within the pillow pocket so I can get in there to tidy it up.
- Once you’ve gone around your pillowcase with your blanket stitch, tie your ends together (so the end of the 2nd blanket stitch section should tie off with the beginning of the first blanket stitch section). I double tie and put a dab of glue on as well.
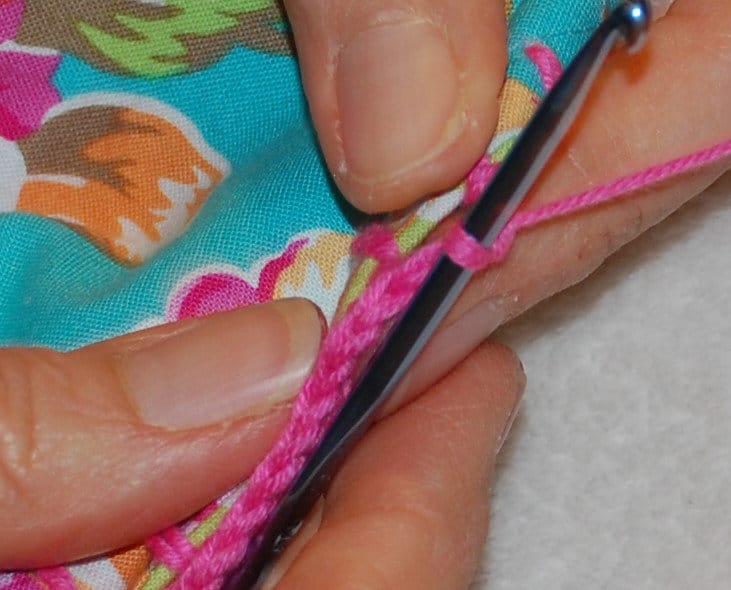
- Now you’re ready to crochet your edging. Work 3 chain stitch or 3 single crochets in each section of your blanket stitch.


- When you get back to the beginning, you’ll begin your scallop pattern.
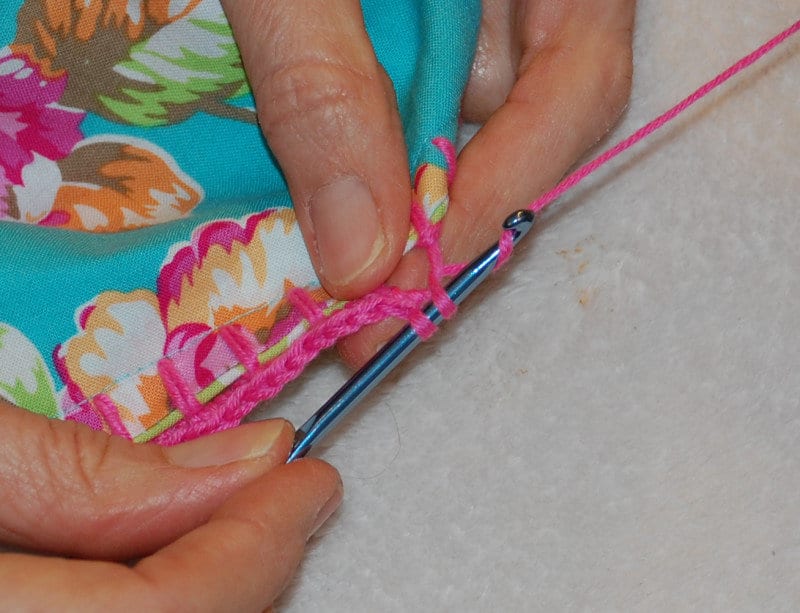
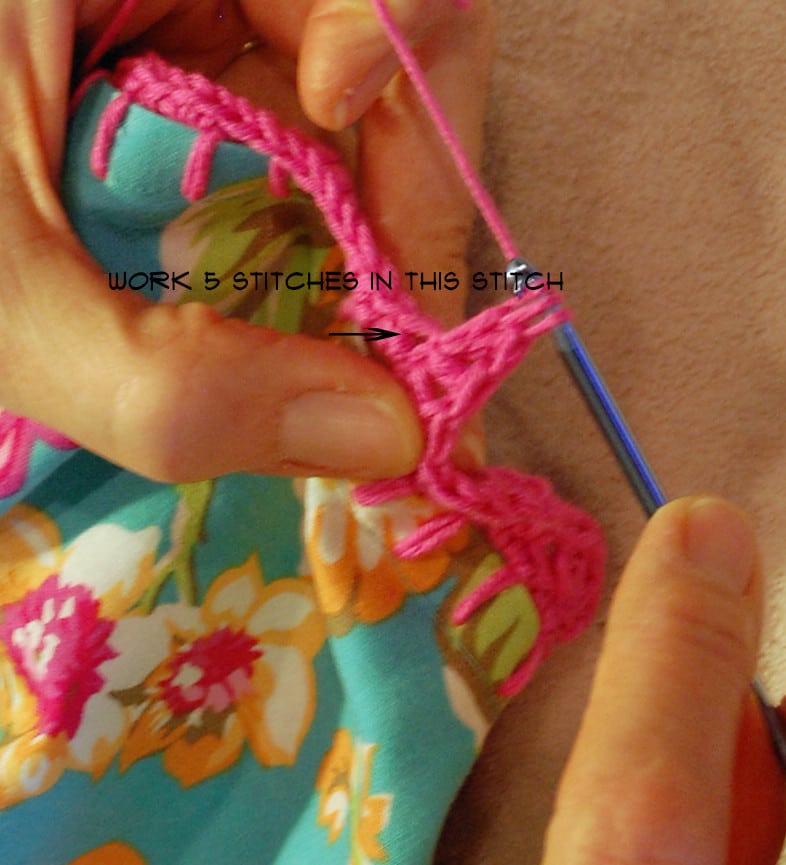
- Ch1 and SC in the first stitch. Skip 2 stitches, then work 5 dc in the same stitch. This will build your scallop.

- Skip 2 stitches, then work 1 SC in the next stitch.
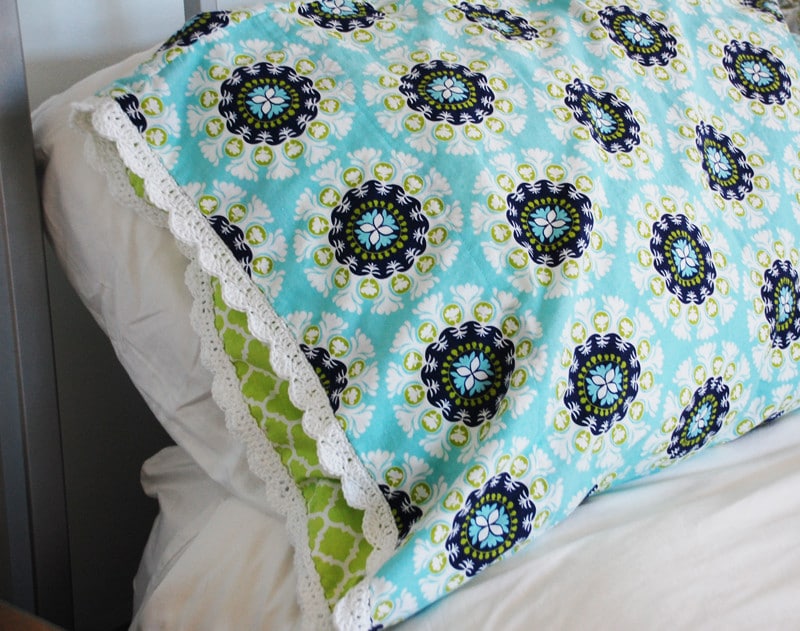
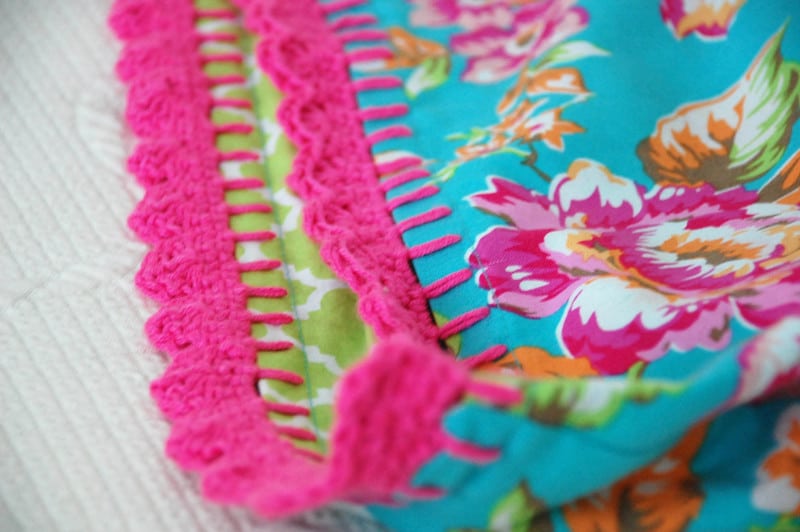
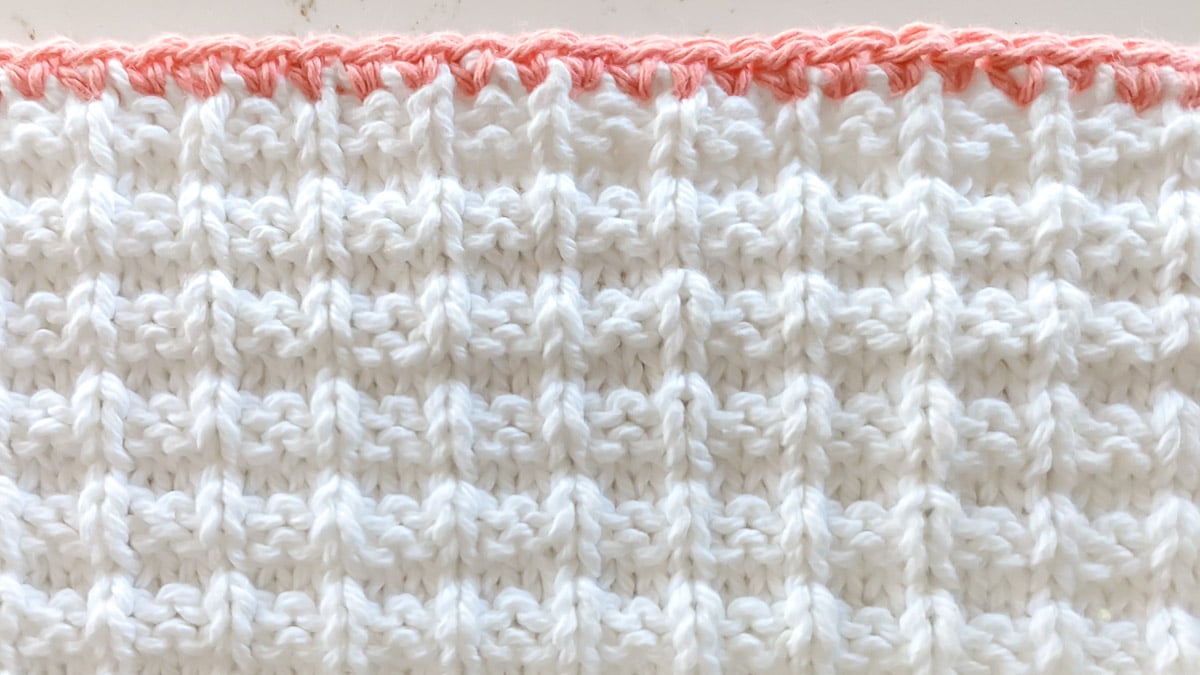
- Continue in this pattern (skip 2, work 5 dc in next stitch, skip 2, work 1 sc in next stitch) until you are at the beginning. Work a slip stich (sl st) in the first stitch you worked. This will give you the border shown on the pink/orange pillowcase.
- I then work the thread back into the pillowcase right at one of the blanket stitches so it is hidden. Tie both ends off within the pocket, where you tied off the blanket stitches.
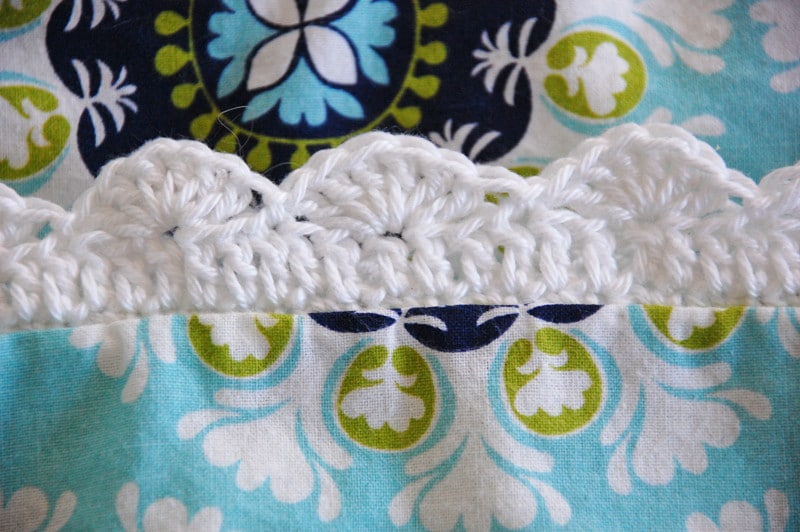
Once you’ve mastered this stitch, try some variations. Instead of 5 dc in your scallop, try doing 2 dc, 1 tc (triple crochet) and then 2 more dc. This will give just a wee bit of a point to your scallop. This is shown on the turquoise/pink pillowcase.
Another variation of a crochet edging pattern I tried is working a double crochet all around the pillowcase opening before I started my scallop, as shown below.
I hope this wee tutorial gives you novice crocheters just the nudge you need to make this fun project.
Looking for other knit and crochet patterns? Pop over here for all my knit & crochet patterns in one place! And, if you want to be ‘in the knit know’ and you’d like to be notified of the publication of any knit or crochet pattern before the rest of the world, you can do that here.
Thanks again for spending a few minutes of your busy day with me today.
Please know that I welcome each and every comment that comes my way. If you want to make sure you don’t miss future content, pop your email in the beige box up on the right or click here. I usually send out 2-3 emails a week, so I won’t inundate your inbox…believe me, I’m sensitive to an overflowing email inbox!
By subscribing to Nourish and Nestle, we will only use your email address to send you emails (no more than 2-3 per week) that will keep you up to date with the latest news and content on the site. In addition, you will have access to my growing library of knit & crochet patterns, as well as other printables. This library will continue to grow, so check back often.
And please know that you can unsubscribe at any time by emailing me or clicking on the “unsubscribe” link at the bottom of all of our emails.
You can access many of the products I refer to in all of my posts on my Nourish and Nestle Amazon Page. You can access it here.
So, if you’d like to get in on the ‘subscriber benefit’ action, simply subscribe to Nourish and Nestle here or using the form on the right sidebar. It’s towards the top a bit. I have sent all my subscribers the link to the Subscriber Benefits Library. If you missed it or misplaced it, drop me a line.
Until next time…
Hugs,


hi – thank you for creating this so-helpful tutorial, with the great pictures. would there be any way to add a ‘print’ option? I don’t have a way to follow this while I play with my crochet 🙂
Thanks
Hi Rebecca,
Sorry for the late response…we have been in traveling and then got home in time to prepare for the hurricane! I did not prepare a printable option for this one…but will definitely get busy on that. Give me a couple of days…need to get the hurricane shutters down and do some hurricane clean up today.
Hugs,
Lynn
Ummmm, you didn’t say how you actually crocheted around the pillowcase. How did you get the yarn onto the pillowcase? Did you poke holes in the fabric? This is important. Couldn’t find that info. That’s what I needed to know the most.
Hi Katajojo,
I did share that I used a blanket stitch around the edge of the pillow case to attach the crochet. There is a link to a video that shows it step by step.
Happy croceting!
Hugs, Lynn
Hello! I tried the link to the blanket stitch tutorial on YouTube and it just brought me to an Airbnb commercial. Just wanted to let you know that link is not working correctly. Love your pillowcases and the edging! Looking forward to trying my hand at one.
Thanks so much for letting me know. I’ve fixed that so that it does link to a video showing how to do the blanket stitch. I love those pillowcases too! Enjoy and let me see your finished work!
Lynn