
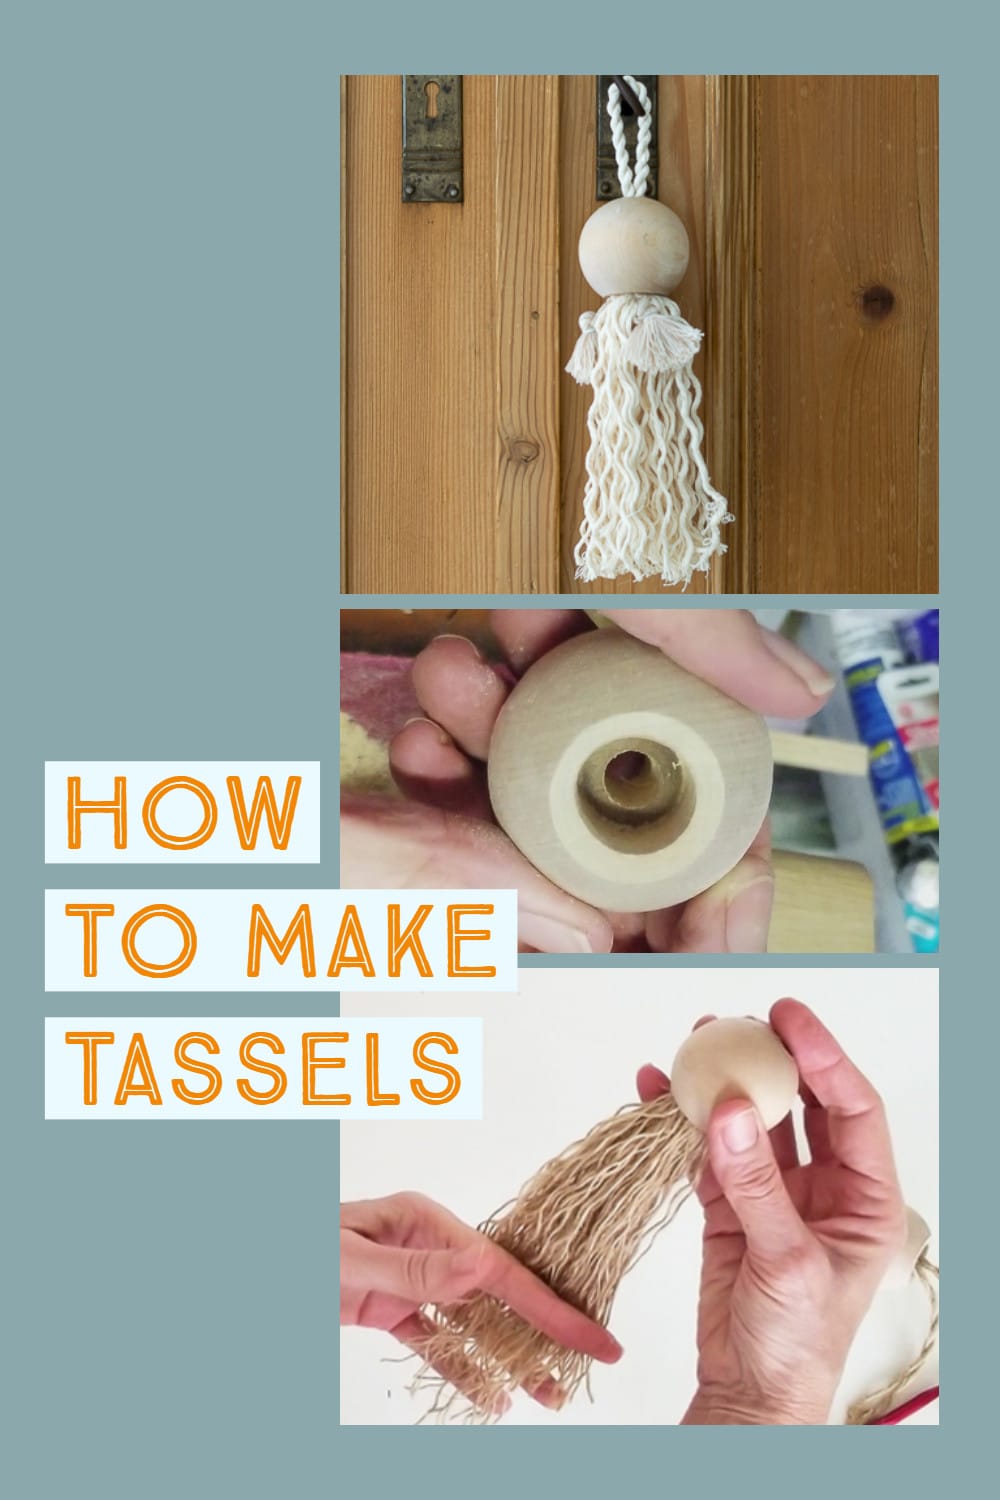
Make Decorative Tassels with Large Wood Beads
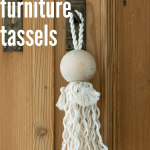
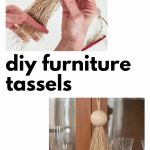
How to DIY Furniture Tassels, which are sometimes called Key Tassels. You can personalize them to fit any decor style or room style. I especially love the large wood bead tassels that I’ve seen about, so once I figured out how to drill the balls of wood, I was tickled to discover just how easy it is to make these Decorative Tassels…now I just need more pieces of ‘tassel-able’ furniture!
We were so blessed 20 years ago when, after my grandma’s death, my grandpa sent us the dining room set that belonged to my grandparents. While not necessarily my ‘taste’…I am thrilled to have furnishings in our home that have a ‘history’…a story to them.
My grandparents were products of the Depression; my grandpa never finished high school because he was needed on the family farm. He was a hard worker and over the years, he and my grandma built a very comfortable life. That said, it was ‘kinda a big deal’ when they invested in their dining room set many years ago.
Fast forward 60 years and this furniture resides in my dining room. It is much more formal than I am, so I’ve tried to ‘casual down’ the room with a jute rug and simple white linen chair covers and draperies.
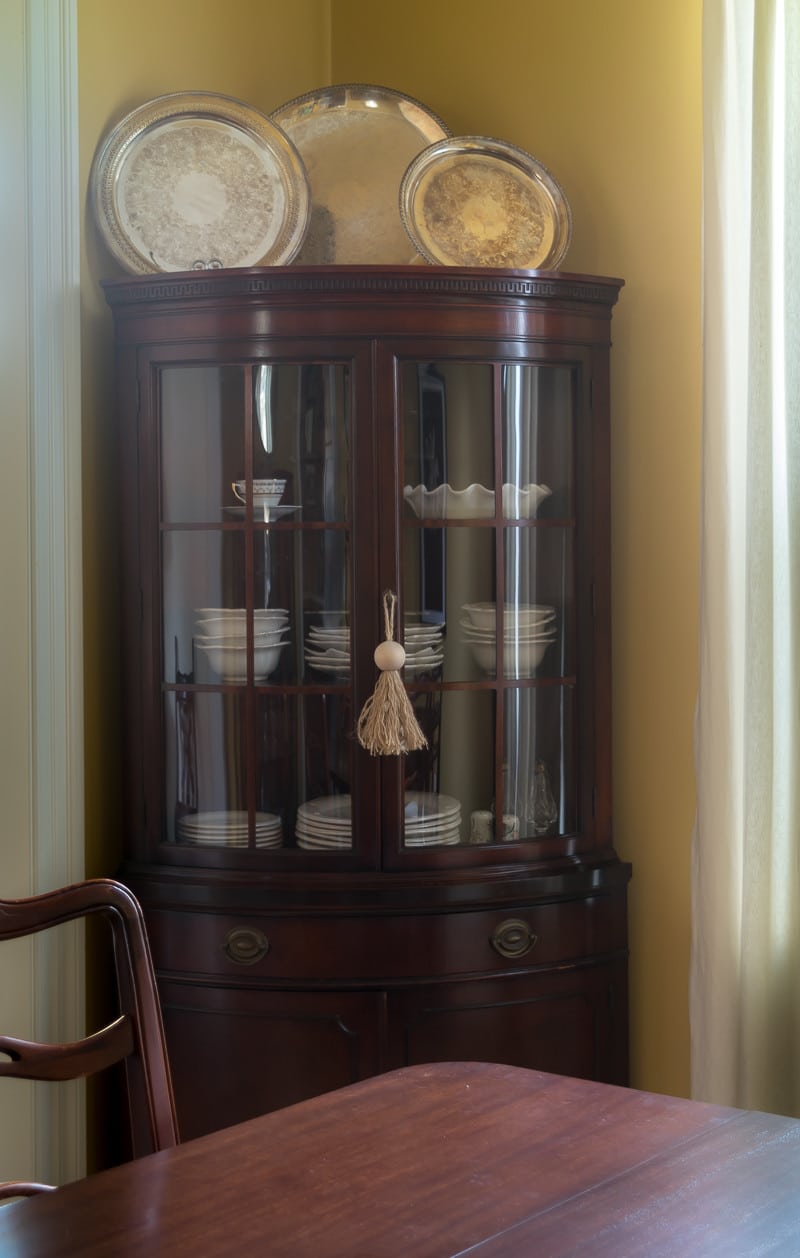
Table of Contents
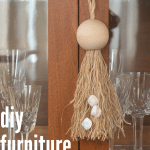
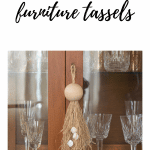
The corner china cabinet is lovely, but I am forever ‘noodling’ ways to make it more ‘my style’. I do have some plans that don’t involve painting the whole thing, but for the time being these DIY Decorative Tassels were a simple, fun and casual addition to the cabinet.
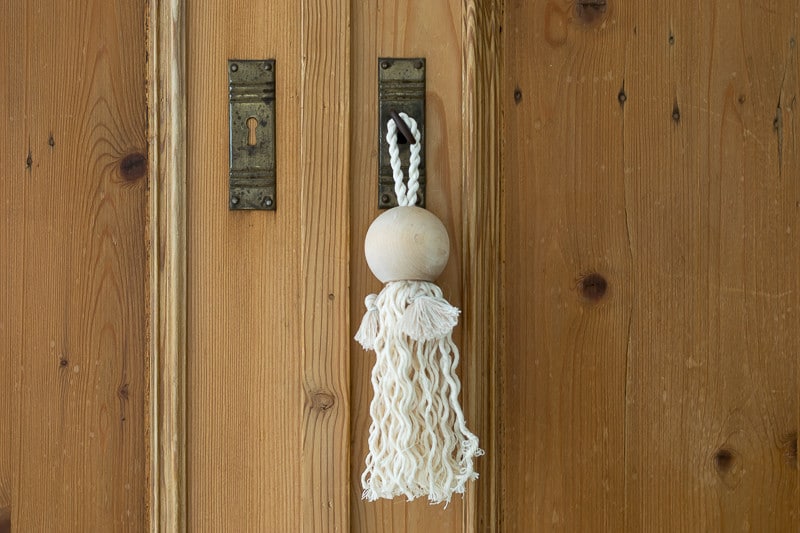
The cabinet has an old key that is used to open it, so I was looking to make a Key Tassel to hang from that key.
Supplies I Used to Make These Decorative Wood Bead Tassels
Some of these are affiliate links and I will earn a small commission off of the sale of these products, but the price you are charged is not affected. You can see my full disclosure policy here.
- Wooden Beads or Round Wooden Knobs, mine were 2″
- Drill
- 3/4″ Wood Boring Drillbit
- 3/8″ Drill Bit
- Jute ( I used 1/4″)
- White Cotton Rope (I used 1/4″)
- I used mother-of-pearl beads similar to these.
- Trim, similar to this one.
How To DIY Furniture Tassels
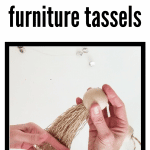
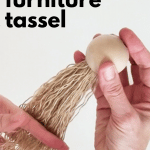
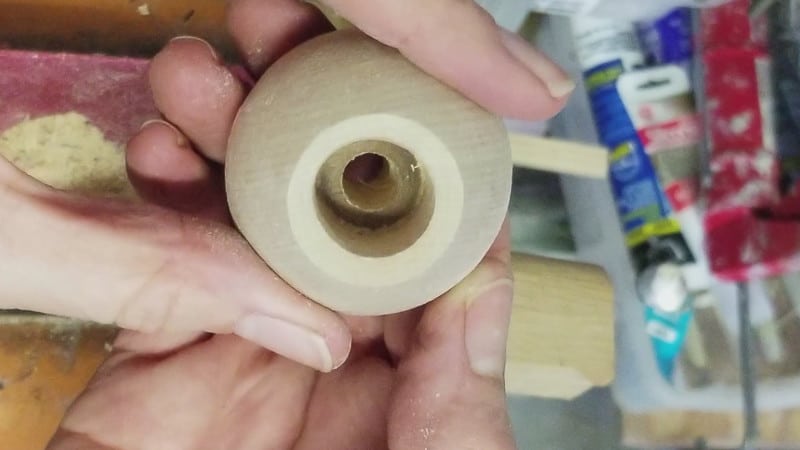
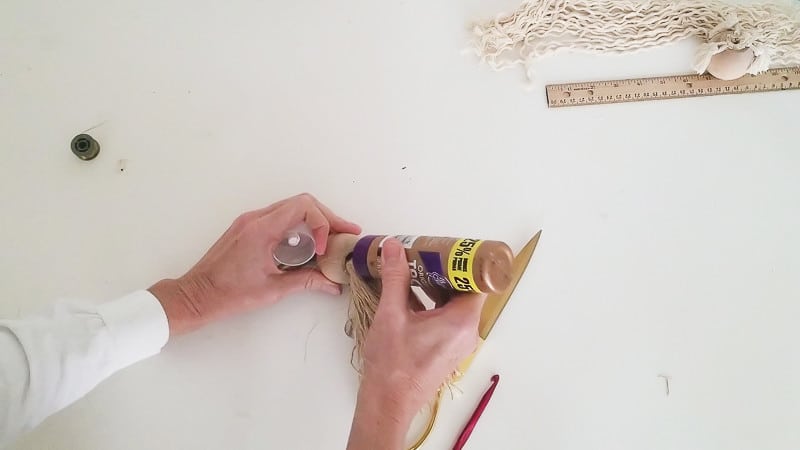
- Drill 3/4″ holes in wooden beads. I found it easier to use the knobs as the flat surface is easier for the bore to drill into.

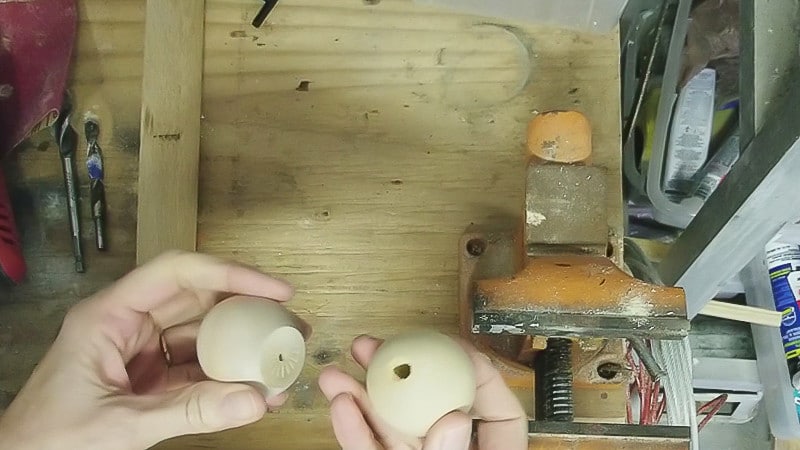
- For the knobs, I also needed to drill smaller holes for the hanger.
- I drilled about 1″ deep.

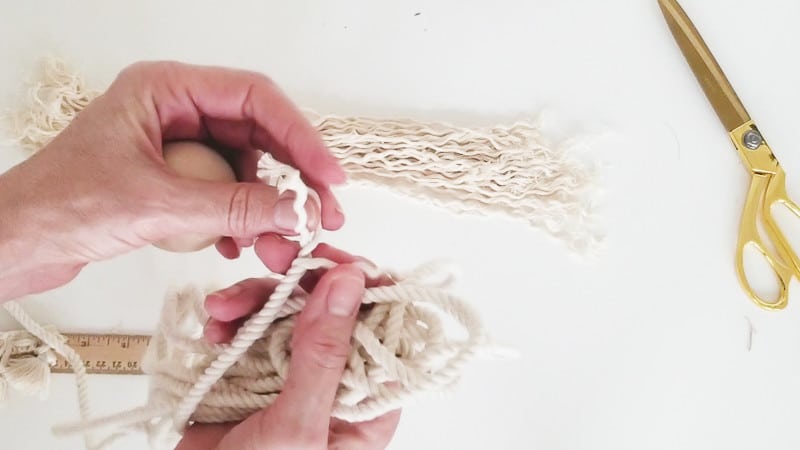
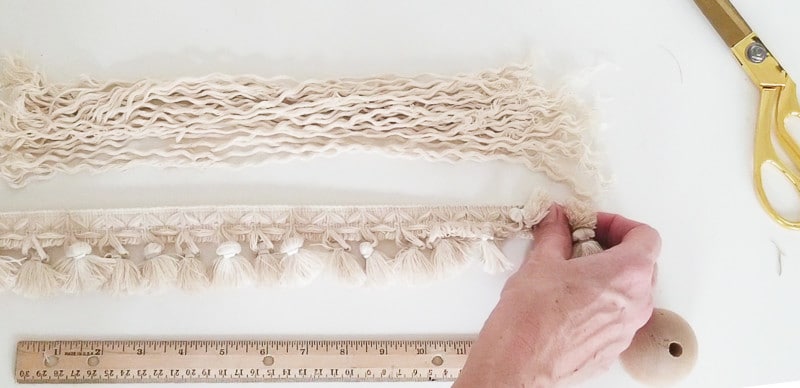
- With the wood balls drilled, it was time to add the ‘tassely’ stuff. I made my decorative tassels out of both jute and cotton rope. I untwisted and separated the rope…for the jute, I was able to pull individual strands. For cotton, I used several strands.
- I pulled off enough threads to make sure that these furniture tassels looked full enough.

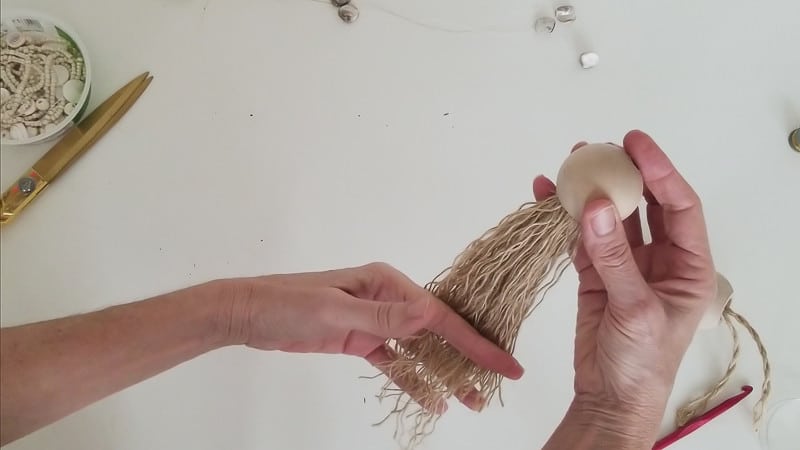
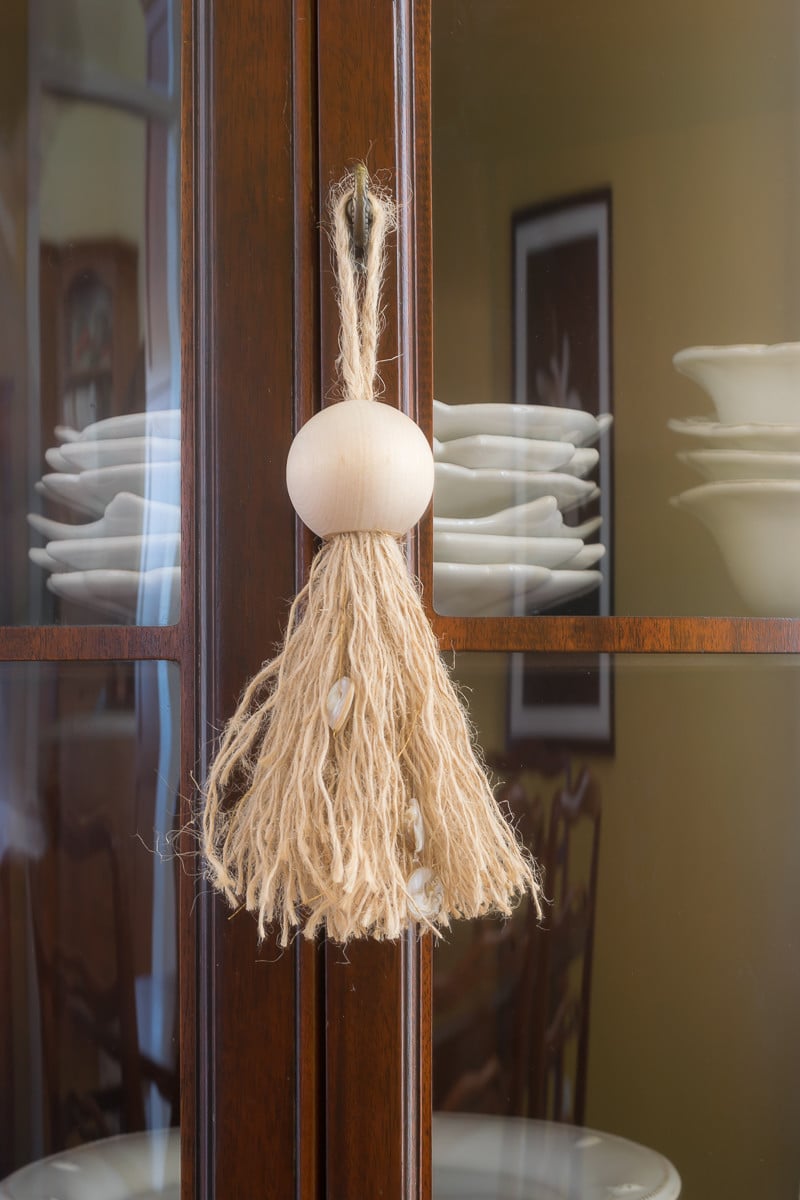
- I trimmed the tassel to the desired length…too long and my wood bead tassels looked a little ‘jelly fish-ish’…not the look I was going for.
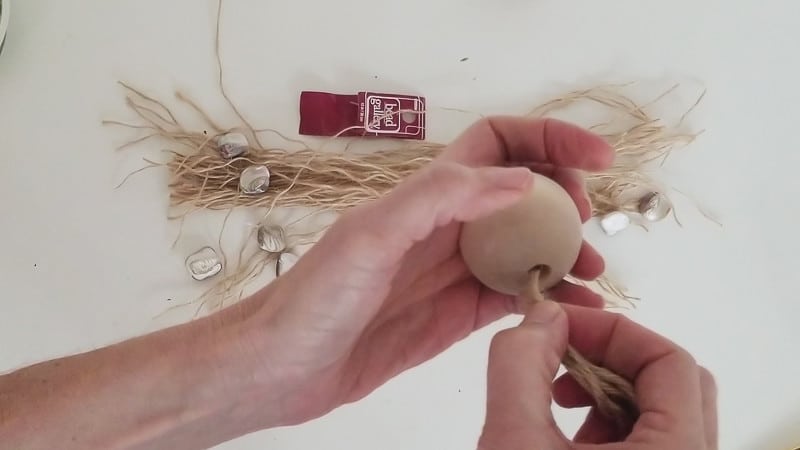
- Then, I attached the beads to the transparent line in lengths similar to the length of the jute.

- I threaded what would be the tassel hanger through the top hole. For the tassel hanger, I separated the rope such that it was 2 plys.
- Then, I glued the transparent line with the shells on to the ball. I found that this was the best way to keep the shells from getting swallowed up by the jute.
- Once the glue was dry, I tied my bundle of jute onto the tassel with the long pieces from the hanger.
- Once I made sure all the shells were where I wanted them, I glued the whole thing in place.


That was the process for the jute DIY decorative tassels. The only thing I did differently for the cotton tassels was that I used cotton rope instead of jute and some leftover trim instead of shells.
The armoire in our bedroom also has an old key that is used to open and close the door, so a key tassel was perfect here too.
Once I figured out how to get the hole I needed in the large wooden bead, the rest was very easy and fun. And since I did that figuring for you, get busy making those wood bead tassels! I mean, you have no excuses.
There are so many variations you could do to make these work for you. I have plans to do something a little less ‘natural’ for my daughter’s armoire…stay tuned.
Here’s a wee video to show you the process I used to DIY Furniture Tassels…
(shameless plug time…if you haven’t subscribed to my YouTube channel, it would be so wonderfully fantastic if you would consider doing so! The small income I earn from YouTube helps support my channel and this blog. Many thanks!)
So go forth and DIY your furniture tassels! I do believe that I read somewhere that you truly can not have too many tassels, did you read that too?
If you like DIY projects for your home, you might enjoy one of my all-time favorite projects, this Oyster Shell Mirror. It definitely has a ‘coastal’ feel to it with all the oyster shells, but it is not truly what I would consider ‘beach decor’.
If you think you might want to Make Decorative Tassels, then by all means…bookmark this page or pin this image for your future reference.

Thanks again for spending a few minutes of your busy day with me today. Please know that you are appreciated and that I welcome each and every comment that comes my way. If you want to make sure you don’t miss future content, pop your email in the beige box up on the right or click here. I usually send out 2-3 emails a week, so I won’t inundate your inbox…believe me, I’m sensitive to an overflowing email inbox!
Printables and knit patterns are available to all of my subscribers in the Subscriber Benefits Library. I will continue to add patterns and printables to this page as we go along.
You can also access all the products I referred to in this post on my brand new Nourish and Nestle page on Amazon. You can access it here.
So, if you’d like to get in on the ‘subscriber benefit’ action, simply subscribe to Nourish and Nestle here or using the form on the right sidebar. It’s towards the top a bit. I have sent all my subscribers the link to the Subscriber Benefits Library, but if you missed it or misplaced it, drop me a line.


These are wonderful, Lynn. My favorite thing is they are really pretty without the fuss of a traditional tassel. And who doesn’t love a fun easy project! Also, I can totally relate to having passed down furniture that may not be my style but I love it because it reminds me of family.
XO,
Jenny
So true my friend! And I’m digging those tassels. Now my daughter wants some for her room…they will be a little flashier, I’m sure.
Thanks for posting a picture of your corner china cabinet. My mother had one that was identical; she sold it when my parents downsized. I would have taken it, but I did not have the room. I will always remember it. Thanks again. Kathy
Hi Kathy, I do love that cabinet…but we are downsizing soon as well and not sure it’s going to fit!!! ?