
How to Knit a Christmas Stocking

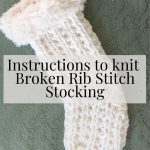
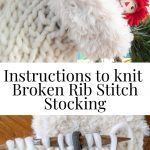
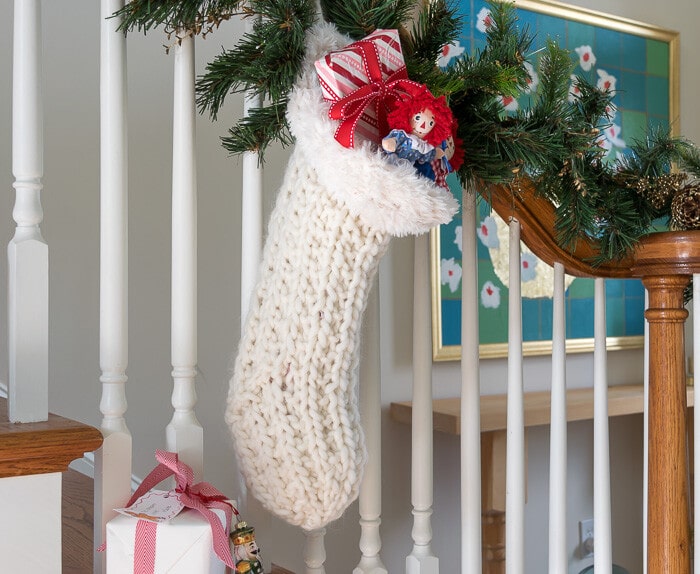
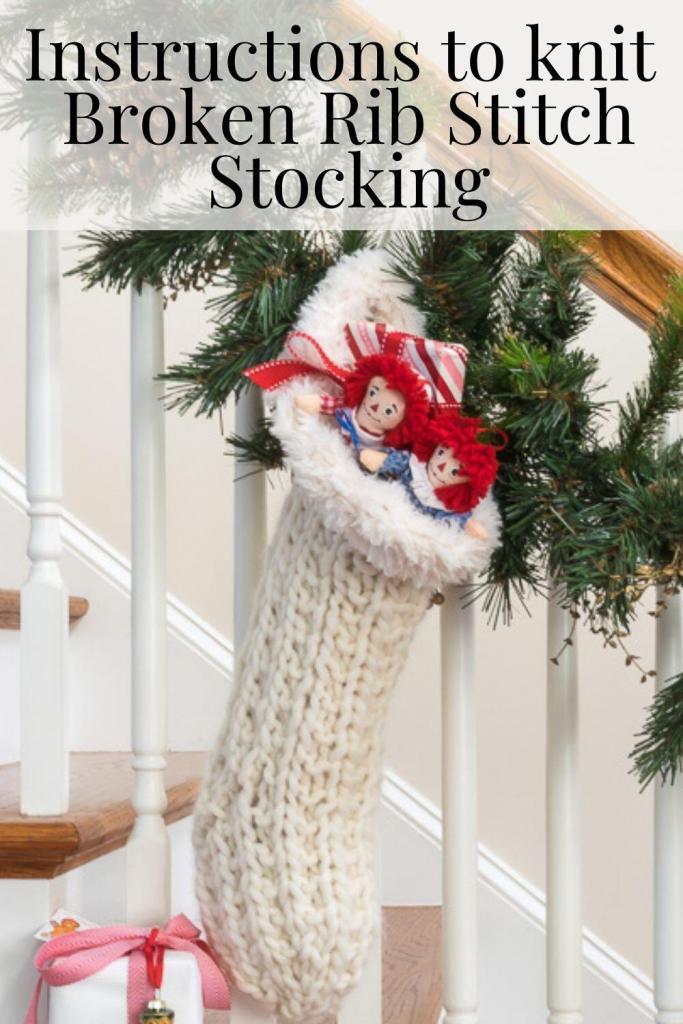
This Knit Christmas Stocking Pattern uses the broken-rib stitch for a little bit of a pattern and Sirdar Alpine for a soft and lovely faux fur cuff. Not only is the full printable PDF pattern available for free, but a full-length video shows all the steps for this Christmas Stocking Knitting Pattern, including the Magic Loop and Kitchener Stitch. If you’re looking for an easy Christmas stocking to knit, you’ll love this one!
Holiday stockings hung at the mantel are as ubiquitous to Christmas as Christmas Trees. One of the joys of Christmas morning is the sight of stockings straining under the weight of the gifts tucked in overnight.
This post is for those of you considering making a hand-knit Christmas stocking for someone special in your world.
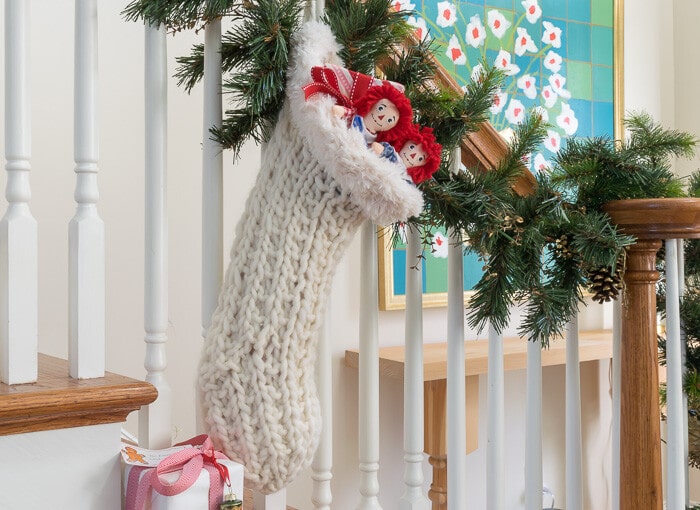
Table of Contents
After the success of my original Chunky Knit Handmade Stockings knit in stockinette stitch, I figured some of you were looking for a ‘variation on a theme.’ This Christmas Stocking Knitting Pattern is similar but uses the broken-rib stitch instead of the stockinette stitch for some added texture and a faux fur cuff at the top of the stocking because… well…FUR CUFF!
For those of you considering which Christmas Stocking to knit; if you have never knit a stocking before, I’d try the original Knit Christmas Stocking using stockinette stitch. This stocking is still rather easy, but the broken rib stitch is just more than the stocking stitch. Even if you’ve never knit a sock or stocking before, if you have a basic understanding of knitting, you will be able to knit this Knit Christmas Stocking Pattern. The associated video does walk you through the process and will help with new techniques.
Of course, this is a Free Knitting Pattern like all my patterns.
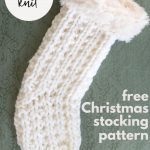
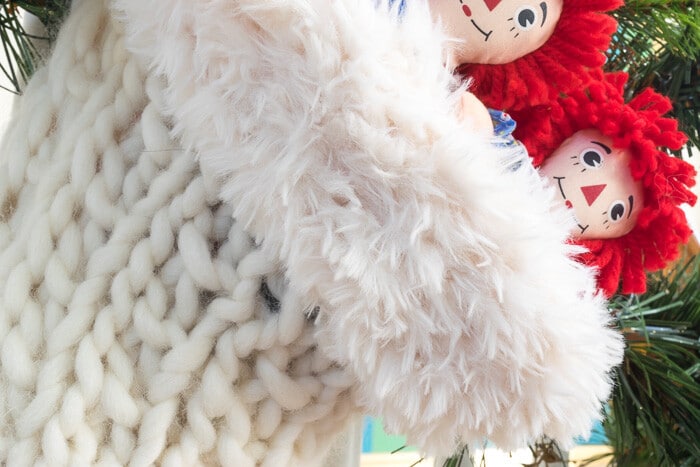
The fur cuff is knit with Sirdar’s Alpine; I used the color Polar for this knit Christmas stocking. This is my second project with Sirdar’s Alpine, the first being this Half-Linen Stitch Fur Trimmed Knitted Blanket. I fell in love with the softness of this faux fur yarn and looked for another way to use it and it seemed it was made to be used as a cuff for a stocking!
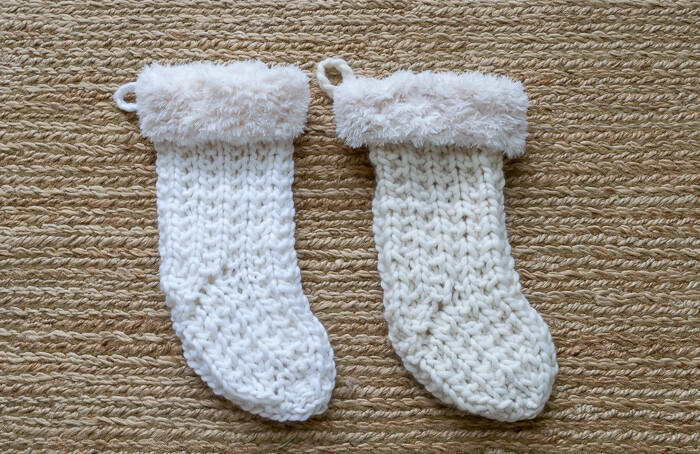
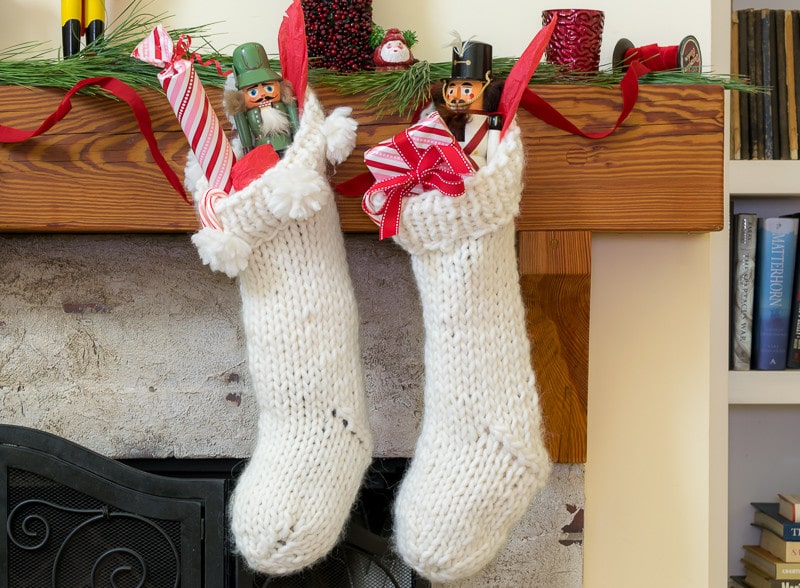
The body is knit in Cascade’s Magnum, a super bulky yarn, which surely helps make this a quick knit. Without exaggeration, it’s such an easy Christmas stocking pattern, and you could knit one of these stockings from start to finish in a day. I’ve knit the stocking in both ecru (on the right) and white (on the left). You can see the difference below; both cuffs are knit with the Sirdar Alpine in Polar.
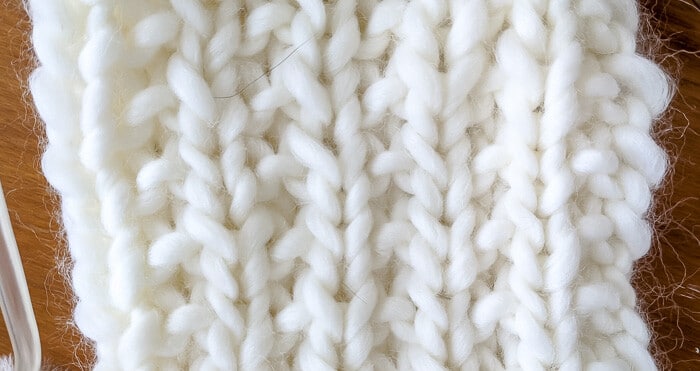
The broken-rib stitch makes a very easy Christmas Stocking knitting pattern and creates a lovely texture that you just don’t get with stockinette stitch. So when I was thinking about which Christmas stocking to knit, something just a little different was a big consideration. Not that there is anything wrong with stocking stitch! It’s just that sometimes you want to mix it up a bit…AMIRIGHT?
This Knit Christmas Stocking pattern uses the Magic Loop for the majority of the stocking and the Kitchener stitch to bind off the toe. If you’ve never used the Magic Loop before, don’t be intimidated! It is a very easy method to knit ‘columns’ like socks, stockings and caps. Once again, the videos will walk you through the process.
If you’re a beginning knitter or you’re still uncertain about how to knit a Christmas stocking, I videoed the process of making one of these stockings so that you can see each step. It’s an hour-long video, so don’t feel like you need to watch the whole thing…just find what you need to see. But you can follow along in the process if you need visual guidance for any of the steps. You can see the whole video here.
Material for this Knit Christmas Stocking Pattern (20” long x 6” wide):
Some of these links may be Amazon affiliate links and I may earn a small commission off of the sale of these products to help defray the costs of operating this site, but the price you are charged is not affected. You can see my full disclosure policy here.
· 1 Skein Cascade Magnum, a soft, super bulky yarn (1 stocking uses 66 yards)
· 1 Skein Sirdar Alpine—Color Polar(44) (1 stocking uses 14 yards)
· Size US 19 (15mm) 40” circular needles
· Tape Measure
· Piece of wire to fashion a needle
· Yarn for stitch marker
Other Bulky Weight Yarn to Consider for Knit Stockings
I haven’t used these yarns for this project, so be sure to swatch and test your gauge. You may have to change the number of stitches or your needle size.
- KnitPicks Tuff Puff 100% wool
- Berroco Macro 50% wool/40% acrylic/10% alpaca. Stocking will most likely be heavier, denser
- Cascade Spuntaneous 100% wool. Stocking will most likely be less dense
How to Knit a Christmas Stocking:
Stitches and Methods Used
· K – knit
· P – purl
· SL 1 – Slip 1, you simply slip one stitch onto the right needle without working it. You will SL1 both purlwise and knitwise and noted in the pattern.
· K2T – knit 2 together
· P2T – purl 2 together
· SSK and SSP– slip the next 2 stitches as if to knit and then either knit them together or purl them together.
· Kitchener Stitch
· Magic Loop
Gauge
Using US 19 and Cascade Magnum, 7 stitches and 8 rows in stocking stitch will result in a 4” by 4” square
Cast on, Work Cuff and Body of Knit Christmas Stocking
With Sirdar Alpine and US 19 (15mm) circular needles, Cast on 22 stitches.
Place stitch marker
Using Magic Loop, knit for approximately 4-5 inches. (9-10 rows)

Switch to Cascade Magnum. Continue using Magic Loop, but switch to Broken Rib Stitch for 24 rows.
· Every odd row knit all stitches
· Every even row, *K, P rep from * all stitches.
As you will be working in the round for these 24 rows you will only be working on the right side of the stocking.
Your 24th row will be a *K, P row. (If you change the length of the body of your stocking, just make sure your last row is a K, P row.)
Christmas Stocking Heel Shaping
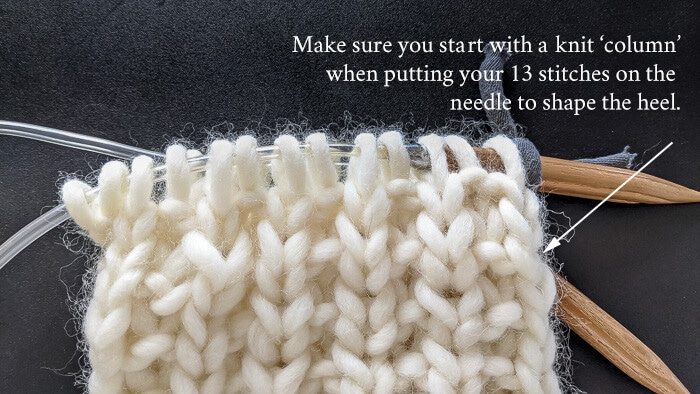
Separate the 22 stitches so that you have 13 on one needle and 9 on the other.
For the needle with 13 stitches, make sure that your first stitch to be worked is always going to be a knit stitch…that column will never have a purl stitch. This is important to help you stay in pattern.
You will work the 13 stitches for the heel, leaving the other 9 untouched for the time being. And while we worked only the right side of the fabric for the first 24 rows, now we will be working the front and back. You will be working rib stitch on the back, so check the front from time to time to make sure you are staying in pattern.
1st-row Knit 13, Turn
2nd row *P, K rep from* P (13 stitches), Turn
3rd row SL1 knitwise, SSK, K7, K2T, K (11 stitches), Turn
4th row SL1 purlwise, *P, K rep from* K (11 stitches), Turn
5th row SL1 knitwise, SSK, K5, K2T, K (9 stitches), Turn
6th row SL1 purlwise, *K, P rep from *, P (9 stitches), Turn
7th row SL1 knitwise, SSK, K3, K2T, K (7 stitches), Turn
8th row SL1 purlwise, *P, K rep from *, K (7 stitches), Turn
9th row SL1 knitwise, SSK, K, K2T, K (5 stitches) Turn
10th row SL1 purlwise, *K, P rep from*, P (5 stitches). Make sure your yarn marker is at the end of the row, Turn
11th row SSK, K, K2T resulting in 3 stitches
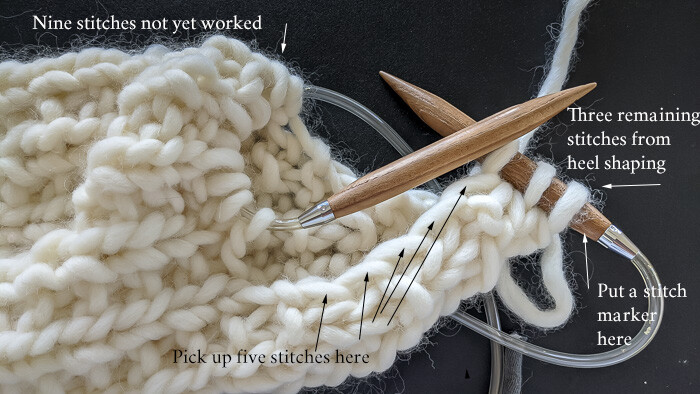
Using the needle with the 3 stitches, and with right side facing you, pick up 5 stitches along the side, knit the 9 stitches that were on the other needle and then pick up 5 more stitches along the other side, resulting in 22 stitches. This will be a knit row.
Work 11 more rows, starting with rib stitch row (*P, K rep from *) immediately following the stitch marker. You will be working this Christmas stocking pattern in the round again, so the right side of the stocking should always be facing you.
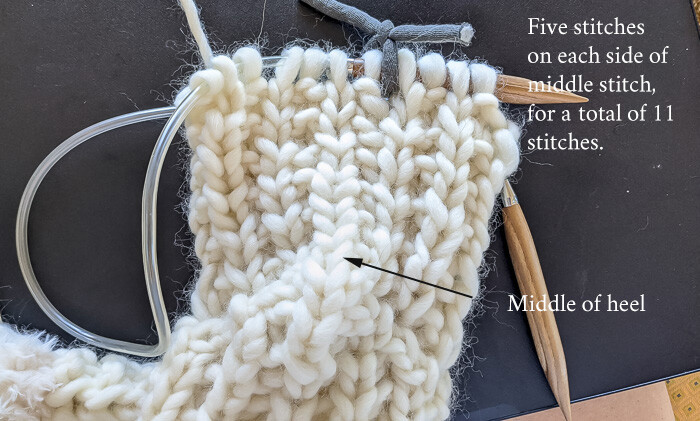
When you reach the 11th row, stop when you have 4 stitches left before the row marker. Keep 11 stitches, starting with the 4 you haven’t worked on one needle and the remaining 11 on the second needle. Ensure that the center stitch of the heel, which should be a column of KNITS is in the center of the needle facing you.
How to Shape the Stocking Toe
(for your decreases, either when you are K2T or SSK, bear in mind you might want to P2T or SSP in order to keep the pattern intact)
With your 22 stitches divided evenly between the two needles:
Work first 2 stitches in pattern, K2T, Work 3 in pattern, SSK, Work 2 pattern…on both needles. (9 stitches)
Work 9 stitches on each needle, staying in pattern as much as possible. You will have to ‘finagle’ the stitches on either end, but make sure that the stitches at the center of each needle are in the pattern.
K1, K2T, Work 3 in pattern, SSK, K1 for both needles (7 stitches)
Knit 7 on each needle
K1, K2T, Work 1 in pattern, SSK, K1 for both needles (5 stitches)
Work 5 in the pattern on each needle
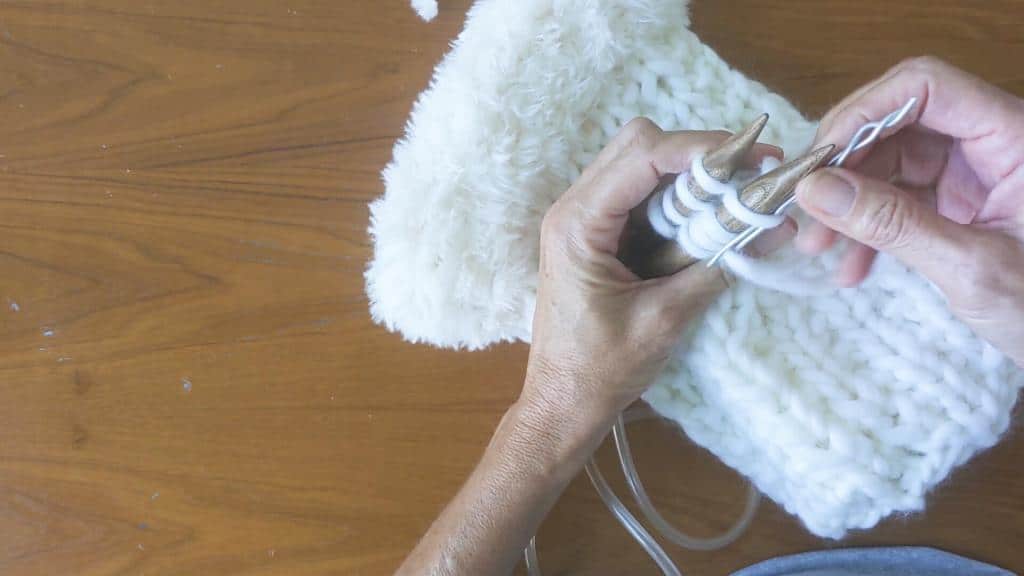
With 5 stitches remaining on each needle, use the Kitchener Stitch to bind off the toe.
Kitchener Stitch:
We will use the Kitchener stitch to graft the 2 sides and close the toe in this Christmas Stocking Pattern.
With an equal number of stitches on each needle and purl sides together, hold your needles such that the points are facing right and the working yarn is on the back needle.
Set Up Stitches are performed only once at the beginning of your cast-off row:
With your yarn on a tapestry needle (or in this case a piece of wire formed into needles, with the pointy ends bent down)…
On the needle in front, go through the first stitch as if to purl, or from back to front, but don’t pull the stitch off the needle. If you are working with a tail, you can pull the yarn all the way through, but if you are working with a separate piece, make sure to leave an end long enough to weave in later.
On the needle in the back, go through the first stitch as if to knit, or from front to back, but don’t pull the stitch off the needle
The following steps are performed for the rest of your cast-off row:
On the front needle, go through the first stitch as if to knit. Pull the stitch off the needle.
Still, on the front needle, go through the next stitch as if to purl, but do not pull the stitch off the needle.
On the back needle, go through the first stitch as if to purl. Pull the stitch off the needle.
Still, on the back needle, go through the next stitch on the needle as if to knit, but don’t pull the stitch off the needle.
Repeat these steps for the rest of the Kitchener stitch.
When you have one stitch on the front and back needle, knit off the front stitch and purl off the backstitch.
Only tighten lightly as you are going along. You will be able to adjust this row of stitches later to match the gauge of the rest of your project
How to Finish the Stocking:

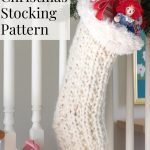
I made a braid of 8”, with about 3-4 inches unbraided on both ends. I found the center of the back of the stocking by following the column in the middle of the heel and attached the braid in two places, 1 inch apart, going through both the cuff and the body of the stocking. I secured the braid by sewing it to the stocking, both through the cuff and the body. Use your needle and thread to tack the cuff to the body in 3 more places.
Weave in all your loose ends.
You are DONE! Don’t you just love this stocking? And, be honest, this easy Knit Christmas Stocking Pattern knits up quite quickly doesn’t it, and……it’s free! What could be better? After you have made it, I’d love to see your finished stocking, please send us a pic!
How to Care for Your Knit Christmas Stocking:
Hand wash in cold water. Lay flat to dry.
Make sure to head over to this list of 🎄 Free Christmas Knitting Patterns 🎄! I think there is something for everyone on this list!
Subscribers to Nourish and Nestle have access to the free, printable PDF for this Knit Christmas Stocking Pattern in the Subscriber Benefits Library. If you’d like to get in on the Subscriber benefits and receive this pattern, click the button below and subscribers who would just rather have the pattern sent directly to them can click below as well! We aim to please!
Bookmark this page or pin the following image to refer back to this Knit Christmas Stocking Pattern in the future.
Thanks so much for spending a few minutes of your busy day with me!
To ensure you don’t miss future content, pop your email in the pale green box on the right or click here. I usually send one email weekly, so I won’t inundate your inbox. I’m sensitive to an overflowing email inbox!
We will only use your email address to send you emails, no more than 1-2 weekly. In addition, you will have access to my growing library of knit & crochet patterns and other printables. Check back often as this library will continue to grow. You can unsubscribe anytime by emailing me or clicking on the “unsubscribe” link at the bottom of all emails.
And you can access many of the products I refer to on my Nourish and Nestle Amazon Page. You can access it here.
So, if you’d like to participate in the ‘subscriber benefit’ action, simply subscribe to Nourish and Nestle here or use the form on the right sidebar. It’s slightly towards the top.
I have sent all my subscribers the link to the Subscriber Benefits Library. If you missed it or misplaced it, let me know.
Until next time…


I really wanted to make this. After trying to get the magic loop to work with the Alpine at least 15 times, I gave up. I will have to look for another pattern that has a cuff I can use the Alpine yarn on. I guess I just don’t get the magic loop and can’t see enough to make sure it isn’t twisted, etc. Bummed
Hi Janet, I hate to hear that. I’d really love to help get you over the hump if you’d like. Can you explain what your challenge is? I do find that the first row using the Alpine is tricky, but once you get past that row, it does get easier.
I’d like to knit the Broken Rib Stitch stocking for my granddaughter but would like to make it a little wider. How do I increase the width to stay in pattern?
As written, the stocking is 7” wide, laying flat. If you add two additional stitches, using the same yarn and gauge, you’ll add a little over an inch and will stay in pattern for the broken rib.
When you split the stitches to form the heel, I’d add the two stitches to the heel side; so instead of 13st and 9 st, I’d make it 15 st and 9 st. Just be mindful that you take into account those two more stitches when working the heel.
You could easily cut a few rows out before you start shaping the heel to make it shorter.
I hope this helps! Let me know how it works out for you.
Hugs,
Lynn