
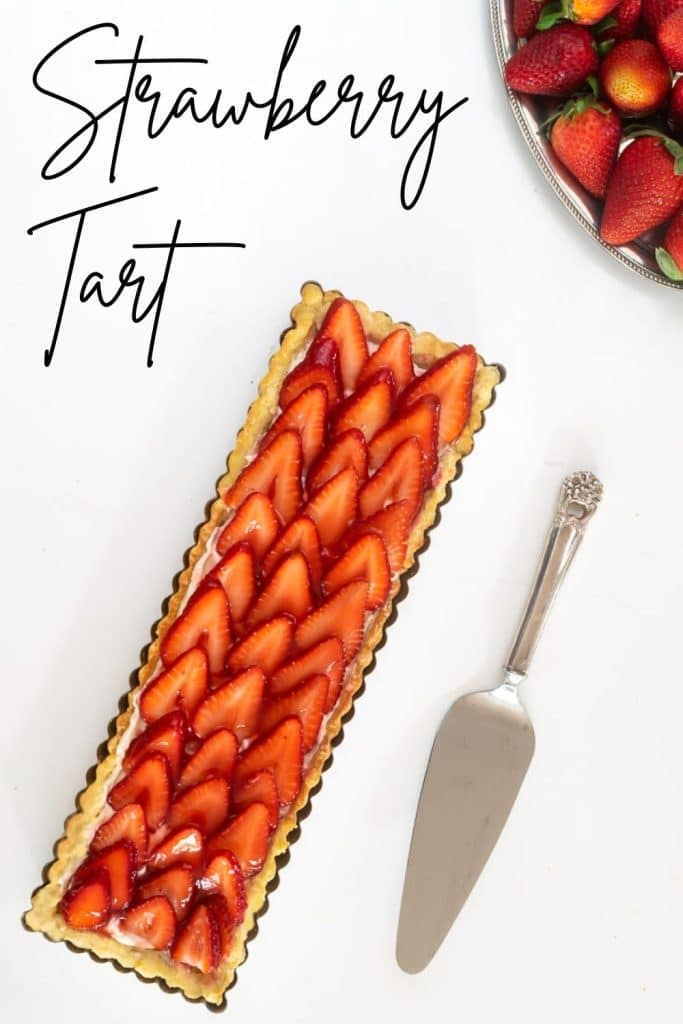
Strawberry Tart Recipe 🍓


Make this delicious fresh strawberry tart recipe to take advantage of the fruit’s bounty during spring and summer. Fresh Juicy Strawberries nestled in a sweet cream cheese filling and a buttery tart shell, then topped with a strawberry glaze, make a beautiful dessert.
In my perfect world (where my pants fit no matter what I eat), I would have a strawberry tart or strawberry pie after every dinner in May and June. And there would be just a little leftover in the morning so I would have it again for breakfast. Does it sound like your perfect world, too?
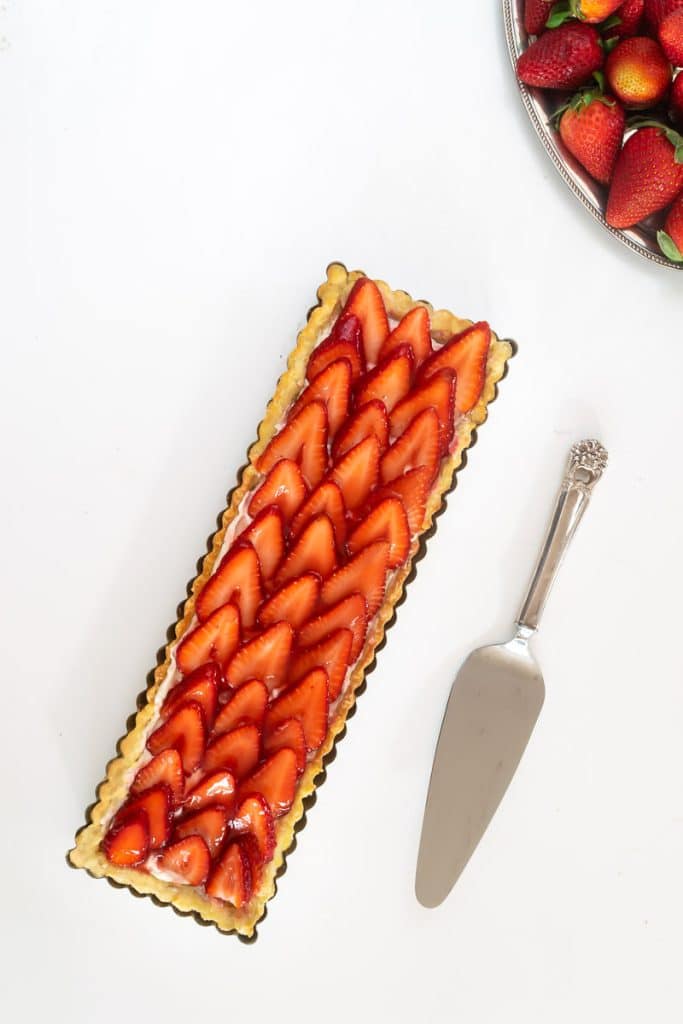
Table of Contents
Until Utopia happens, I’ll make this Strawberry Tart for special occasions and pick up the gait on my walk the following day…an easy trade-off. It’s a beautiful tart, the perfect ending to a lovely dinner party.
Featured Comment
“I just made this! It’s absolutely gorgeous! I used 2 containers of strawberries, which was good because then I could choose ones of similar size for the slices on top. I’m not usually a baker and am so thrilled with the result!“
Heather
Why You Will Love This Strawberry Tart Recipe
- Fresh and Seasonal: This recipe uses the bounty of fresh strawberries available in spring and summer, ensuring a dessert packed with the best flavors of the season.
- Visually Stunning: With its glossy strawberry glaze and vibrant red strawberries, this tart is a dessert and a centerpiece that will impress any guest.
- Balanced Flavors: The sweetness of the strawberries is perfectly balanced with the creamy, tangy cream cheese filling and the buttery tart shell, creating a harmonious blend of flavors.
- Versatile Dessert: Ideal for special occasions, dinner parties, or as a luxurious treat for yourself, it’s versatile enough to suit any event.
- Healthier Dessert Option: Compared to many heavy desserts, this tart offers a lighter, fruit-forward option. It’s a delightful way to satisfy your sweet tooth without feeling too indulgent.
- Make-Ahead Friendly: Parts of this recipe can be made ahead of time, making it convenient for entertaining. You can assemble the tart a few hours before serving, ensuring a fresh, delicious dessert without any last-minute stress.
- Customizable: Offers room for customization, such as using different berries or adding a personal touch to the decoration, making it a recipe you can make uniquely yours.
Tips for a Successful Strawberry Tart
Before jumping to the strawberry tart recipe, read over some tips for general tart success.
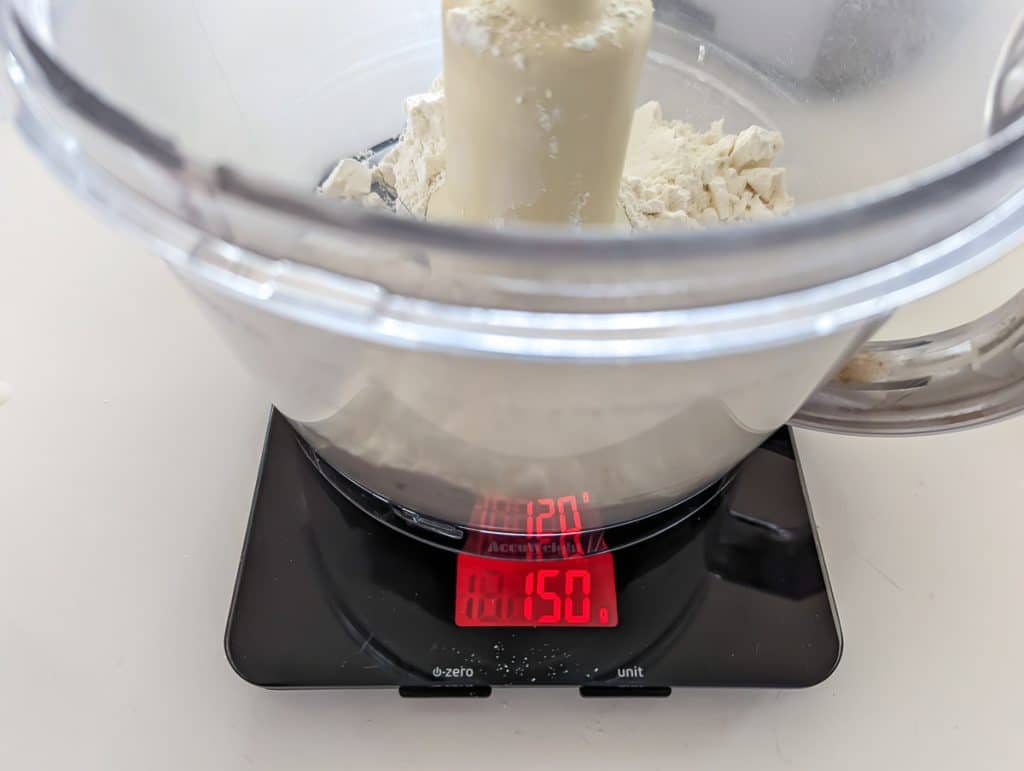
- Weigh your flour. I am in the habit of weighing flour when baking; you’ll be surprised how many times there is a difference between the volume and weight measurements.
If you don’t have a kitchen scale, treat yourself to one. You’ll wonder how you survived without it. I use mine almost daily. I used to have this one with the pull-out display. After many years of use, I replaced it with a cheaper model, and I have a bear of a time reading the display if there is a big bowl on it. Splurge on one with a pull-out display.
- Have all your tart dough ingredients chilled, even your flour and sugar. The colder the ingredients, the less likely the fat from the butter will melt. Those hard bits of butter translate to air pockets while baked, which translates to a flaky, buttery crust!
- Don’t overwork your dough; handle it as little as possible. When I turn it out on the counter after it has just been combined, I don’t work it at all. I gently press it together in the shape I want and then wrap it. It will get worked together again when it is rolled out.
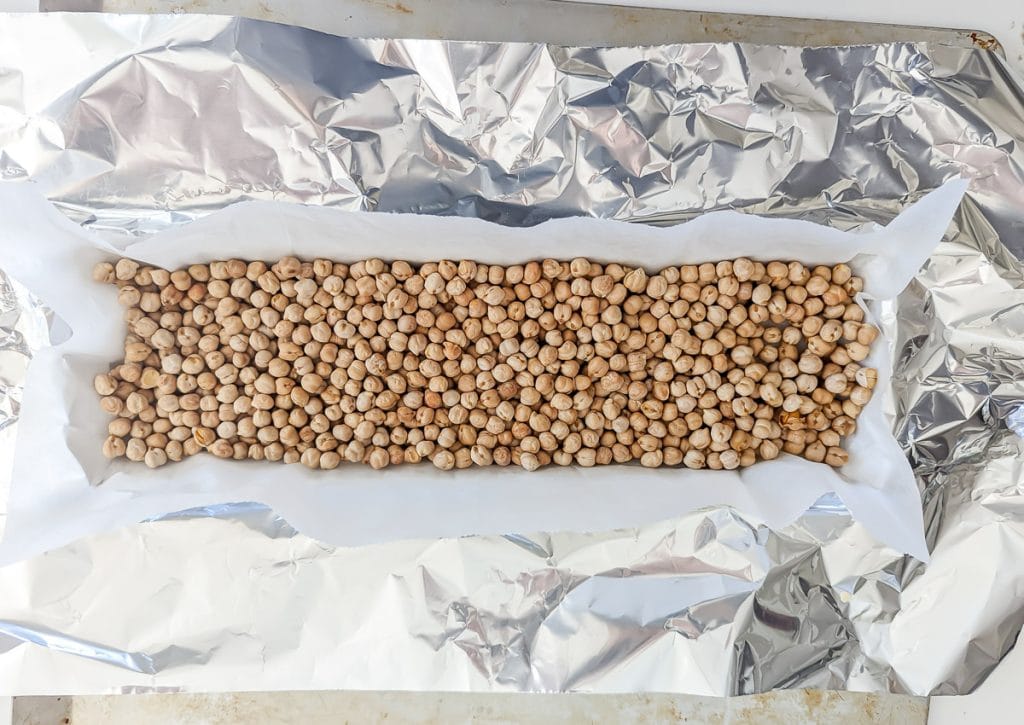
- When blind-baking a tart or pie crust, make sure to prick the bottom of the dough. Adding weight, such as pie weights, dried beans, or rice, will also help keep the crust from shrinking or bubbling. Make sure the weight goes to the top of the crust. Place a piece of parchment paper between the dough and your weights.
- An aluminum foil ‘shield’ will prevent the edges of your tart crust from browning too quickly. I know this seems like a lot of work, but it is easy and will help ensure you have a tart you are tickled with.
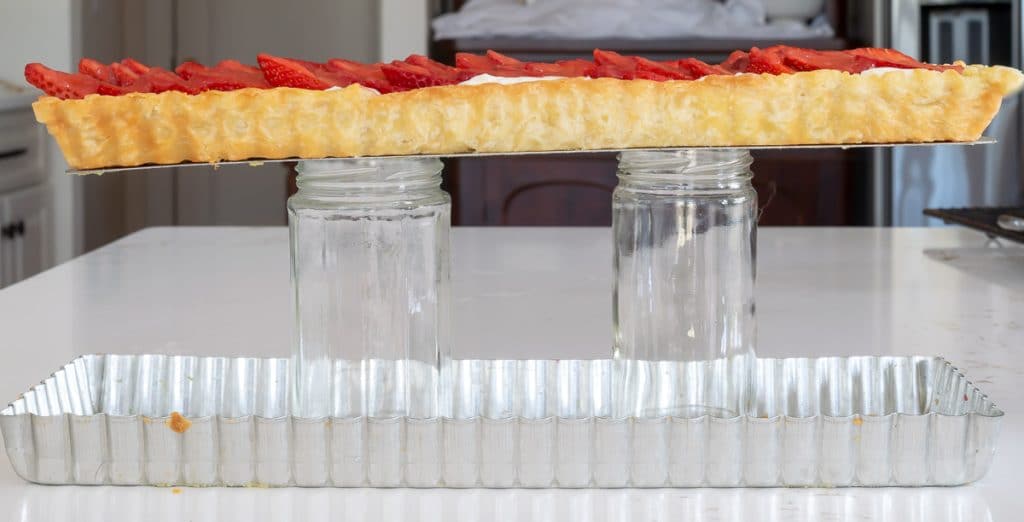
- You need a tart pan with a removable bottom to remove your tart in one piece.
- When you are ready to remove the rim of the tart for serving or presentation, place the pan over two jars with diameters smaller than the removable bottom. The jars will hold up the tart on the insert, letting the outer rim fall away. Serve the tart on the removable insert.
- You can make the tart components ahead of time, but assemble the tart a few hours before serving to keep the crust crisp.
Frequently Asked Questions
While fresh strawberries are recommended for the best flavor and presentation, you can use frozen strawberries in a pinch. If you can use fresh berries for slicing and placing on the cream cheese and frozen for the glaze, that would be a better option. In any event, thaw and drain them well before use to avoid adding excess moisture to the tart.
A tart pan with a removable bottom is ideal for this recipe. It allows easy removal of the tart once it’s baked, ensuring your dessert looks as good as it tastes.
Pre-bake the crust, let it cool, wrap it well in plastic wrap, and store it at room temperature for up to 2 days or in the refrigerator for up to 5 days.
Make the cream cheese filling, then cover and refrigerate it. It can be made 1-2 days ahead of time. Before using, stir it quickly to ensure it’s smooth and spreadable.
Assemble the tart a few hours before serving to keep the crust crisp.
Yes, feel free to customize the tart with other fruits. Blueberries, raspberries, or sliced peaches make excellent additions or substitutions. Just ensure the total amount of fruit remains the same for the best results.
You can substitute the regular flour with a gluten-free all-purpose flour blend in a 1:1 ratio. Ensure the blend includes xanthan gum, or add it according to the package’s instructions to help with the texture.
If you prefer not to use Triple Sec, you can simply omit it or replace it with orange zest to maintain the citrus note without the alcohol.
Yes, a 9″ round tart pan has the same area as a 14″ x 4″ rectangular pan.
More Strawberry Recipes
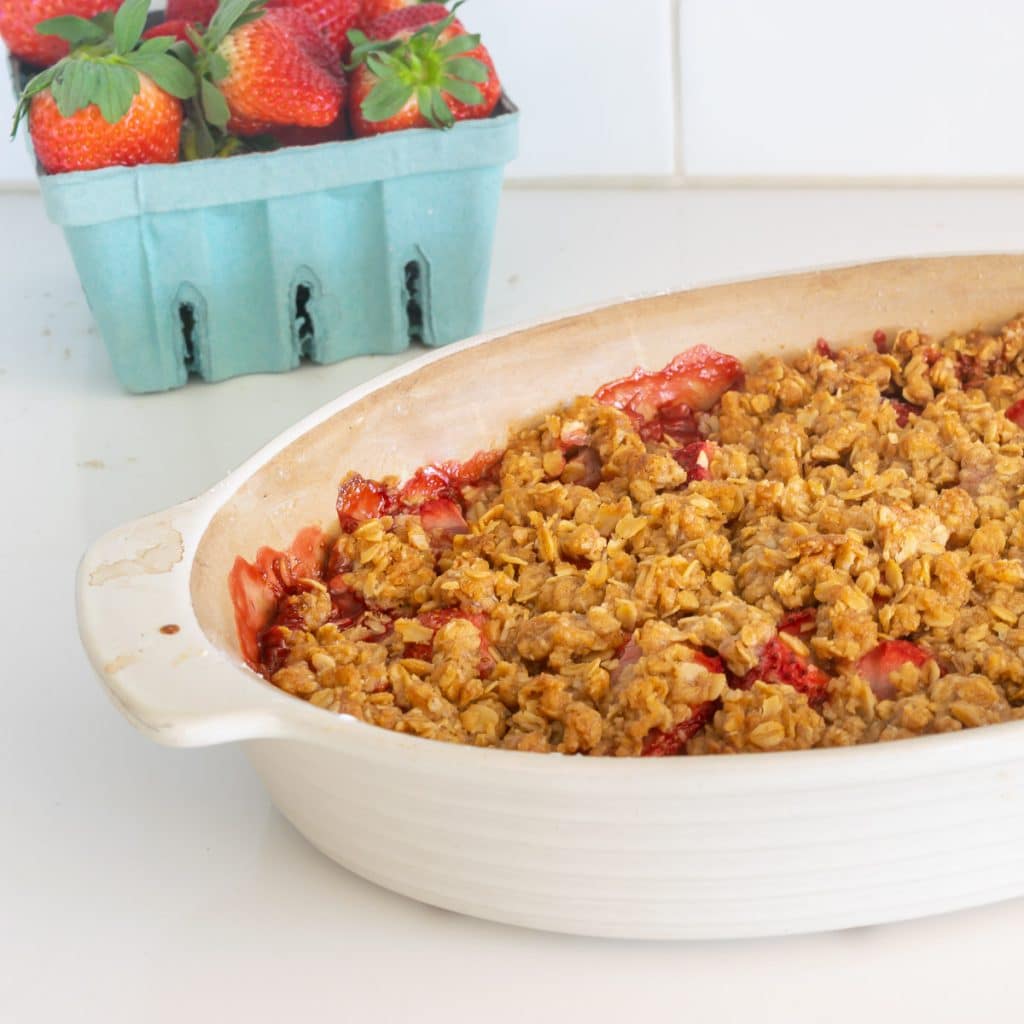
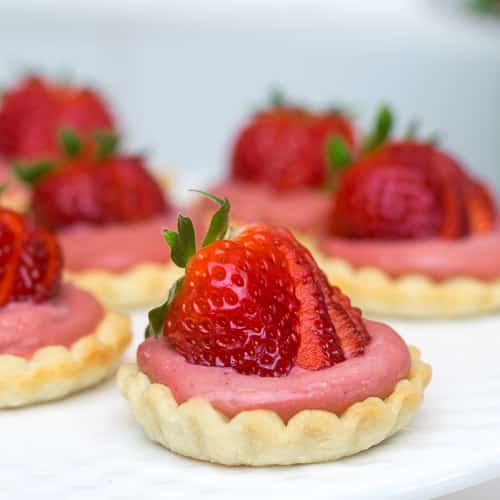
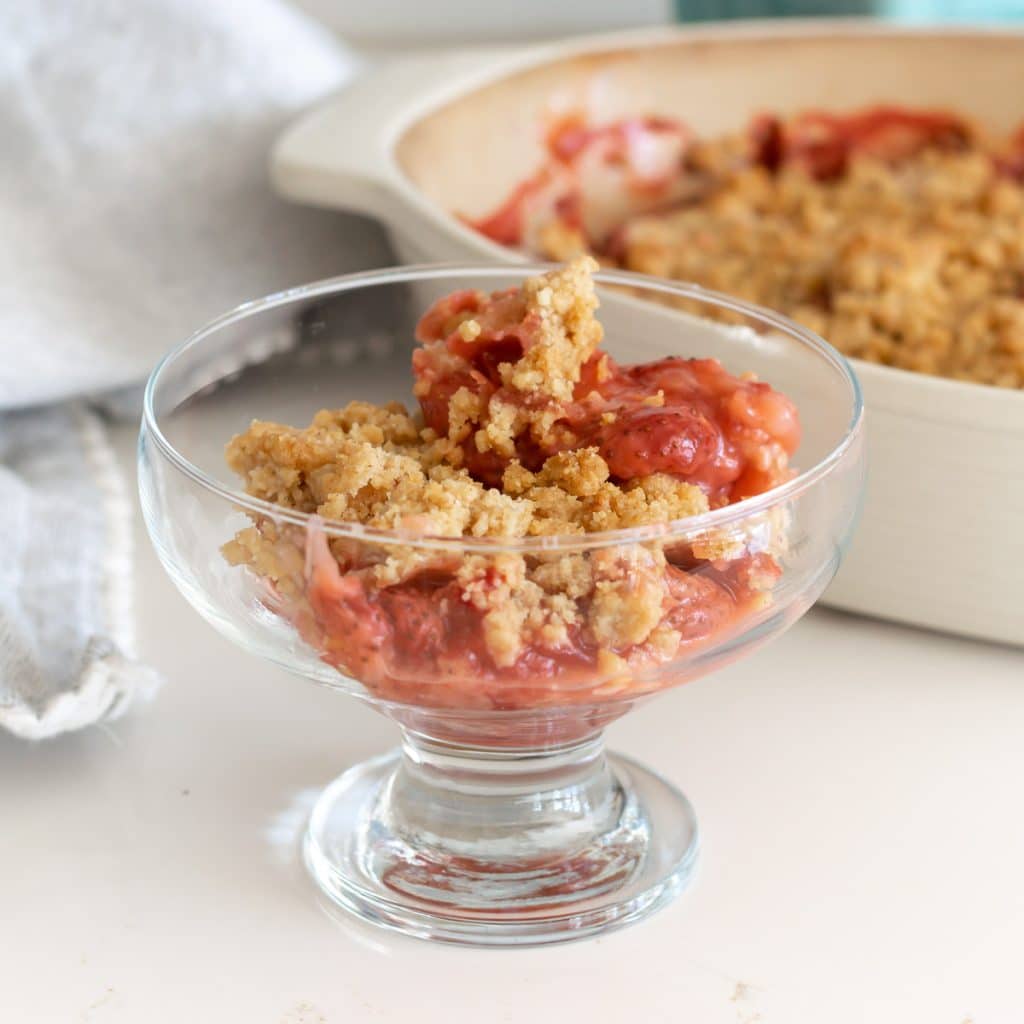
If you enjoyed this Strawberry Tart Recipe and would like some more strawberry recipes, you have come to the right place! These Mini Strawberry Tarts use a sugar cookie crust and a tart strawberry curd for a delightful little dessert. Strawberry Crisp is an easy strawberry dessert of cooked strawberries topped with oatmeal and brown sugar topping.

Strawberry Tart
Equipment
- 14" Rectangular Tart Pan - with removable bottom
- OR 9" Round Tart Pan - with removable bottom
- Pie weights - or beans
- Aluminum foil
Ingredients
- Sweet Tart Dough
- 1 & 1/4 cup 150g all-purpose flour or pastry flour, chilled if possible. (see note 1)
- 1/3 cup powdered sugar
- 1/4 teaspoon fine salt
- 1/2 cup 8 tablespoons unsalted butter
- 1 egg yolk
- 2 tablespoons whole milk or heavy cream
- 1 teaspoon vanilla extract
- Filling
- 8 ounces cream cheese at room temperature
- 1/4 cup sugar
- 1 teaspoon vanilla
- 1 teaspoon Triple Sec Cointreau, or Grand Marnier (optional)
- Strawberry Glaze
- 1 cup diced strawberries
- 1/2 cup water
- 1/4 cup sugar
- 1 tablespoon cornstarch maybe more, as needed
- 14 fresh strawberries cleaned and hulled (all around the same size) (note 2)
Instructions
For Tart
- Cut butter in half lengthwise, turn it on the side, and cut it half lengthwise again. Then slice down the length of the stick of butter into 1/2 inch cubes. Put the butter back in the refrigerator.
- Mix egg yolk, cream, and vanilla extract in a small bowl. Put in refrigerator.
- Combine the flour, sugar, and salt in the bowl of a food processor.
- Add the cold butter all at once to the flour and pulse until the texture resembles coarse cornmeal. There may be a few larger pieces, but no bigger than pea-sized.
- Add the egg yolk mixture and pulse a few more times until the dough just starts to pull together.
- Transfer the dough to a lightly floured work surface and gather it together. If your tart pan is round, gather the dough into a ball and flatten it into a disk. If you have a rectangular tart pan, gather it into a log and flatten it to a rectangle. Handle the dough as little as possible.
- Wrap the dough in cling film or plastic wrap and refrigerate for at least 30 minutes, preferably an hour. If need be, you can freeze the dough for up to 3 months, well-wrapped.
- To roll out, place the dough on lightly floured parchment paper. Lightly flour the surface of the dough as necessary. Roll out from the center of the dough, turning a quarter after each roll.
- Roll the dough into either a disc or a rectangle, 2" wider than your pan.
- Slide the dough parchment paper with the dough onto a cookie sheet and place the cookie sheet in the refrigerator for 20 minutes. This makes it easier to get it into your pan.
- Spray tart pan with oil or release spray or butter it.
- After 20 minutes, remove the dough from the refrigerator and lay it over the pan. Gently tuck the dough into the pan without stretching or pulling it.
- Roll your rolling pin over the top of the pan to cut off the excess. Gently push the dough into each fold and bend of the tart pan. Save the excess dough to patch any cracks that appear during baking.
- Cut a rectangle from a piece of aluminum foil slightly smaller than the inside of the tart pan and set the aluminum foil aside.
- Prick the inside of the tart multiple times with a fork.
- Place the tart in the freezer for 10-15 minutes.
- Spray one side of the aluminum foil with oil or release spray.
- Remove the tart from the freezer and place the aluminum foil over it. Bend the inside edges down over the edges of the tart pan. This will keep the edges from getting too brown.
- Place a parchment paper over the tart shell and fill it with pie weights, beans, or rice. This will keep the dough from shrinking or bubbling up.
- Place the tart back in the freezer for another 10-15 minutes. And preheat the oven to 375°F.
- Bake the tart for 20 minutes. Take it out and carefully remove the aluminum foil and the parchment paper with your weights. Return to the oven for another 10-15 minutes, until dry and golden brown.
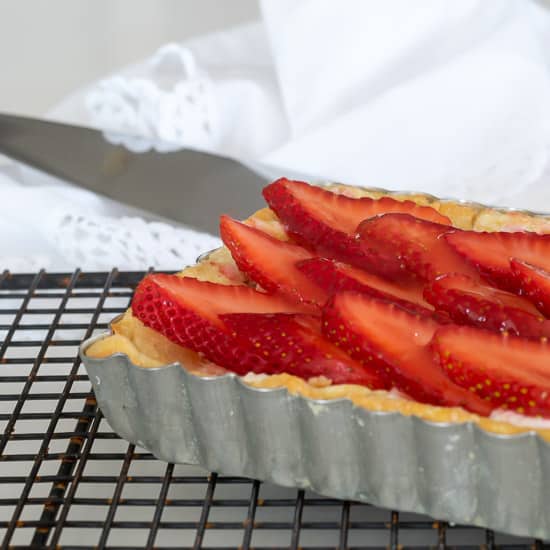
- Remove the oven and let cool on the wire rack. Please DO NOT remove the tart from the pan until you are ready to serve it!
- At this point, you can wrap the baked tart carefully and store it in the refrigerator.
For Cream Cheese Filling
Place cream cheese, sugar, vanilla, and liquor in the bowl of a mixer and blend until combined. Set aside if you are using it immediately, or you can refrigerate it for later use.
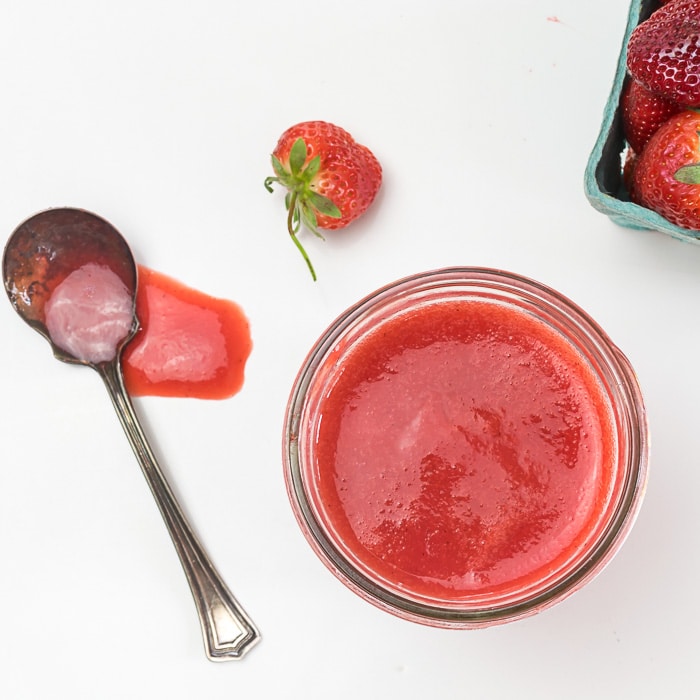
For Strawberry Glaze
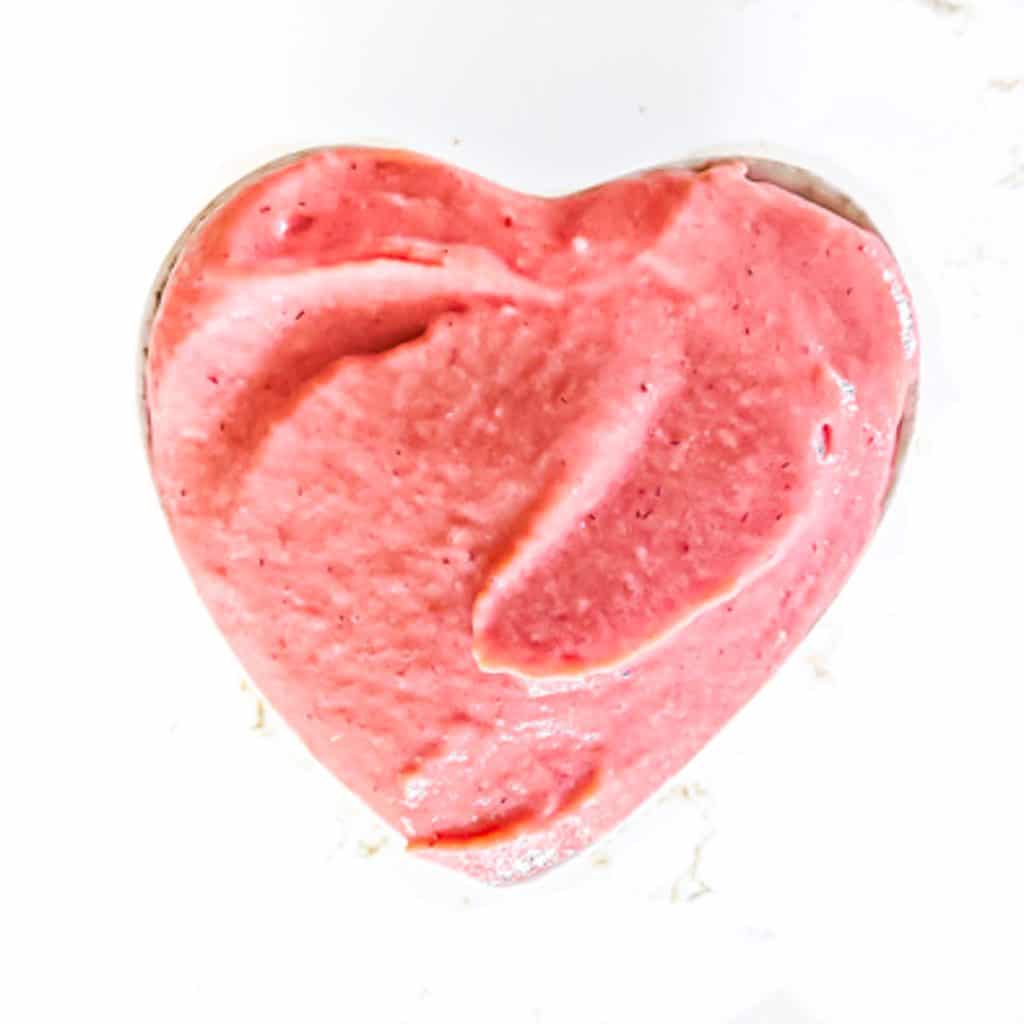
Place diced strawberries, sugar, and water in a saucepan over medium-high heat. Stir from time to time while it comes to a boil.- Once the mixture comes to a boil, reduce heat to low and let simmer for 10 minutes, stirring from time to time. While it is cooking, use a potato masher or spoon to mash the fruit, allowing more juices to be released.
- Remove the pan from the heat and pour strawberries and liquid into a fine-mesh sieve over a medium-sized bowl. Gently press the strawberries to release more juice, but not so much that you push the pulp through the sieve.
- Toss (or eat 😉) the soft fruit and pour the liquid back into the saucepan over low heat.
- Whisk the cornstarch with two tablespoons of cold water until cornstarch is fully incorporated. SLOWLY pour/dribble the cornstarch mixture into the berry juice while whisking constantly.
- Increase heat to high and whisk until the glaze thickens (3-5 minutes).
- Remove from heat, and when cooled to room temperature, place in refrigerator until chilled. A piece of plastic wrap against the surface of the glaze will prevent the top from drying out. It will thicken a little more when cool.
- If you'd like it a little thicker when you remove it from the fridge, you can return it to the stove over medium heat and whisk in more cornstarch/water, starting with one teaspoon cornstarch to 1 teaspoon water. Make sure your cornstarch is chilled before you use it on your tart.
- You can freeze any leftover glaze. It may be a little lumpy looking when you defrost it, but just gently warm it on the stove, whisking it until it smooths out again.
Slice your Strawberries
Cut a thin slice off of both sides of each berry. Then cut the berry from top to bottom, about a 1/4" for each slice.- Alternately, you could keep your berries whole.
Tart Assembly
Spread the cream cheese mixture inside the tart.- Lay your berry slices or place your whole berries, stem side down over the cream cheese.
- Brush the glaze over all.
- While I think it doesn't need anything else, my mom loves it with a dollop of fresh whipped cream or a scoop of ice cream.
Notes
Nutrition

Bookmark this page or pin the following image to return to this strawberry tart recipe in the future.
Thanks so much for spending a few minutes of your busy day with me!
To ensure you don’t miss future content, pop your email in the pale green box on the right or click here. I usually send one email weekly, so I won’t inundate your inbox. I’m sensitive to an overflowing email inbox!
We will only use your email address to send you emails, no more than 1-2 weekly. In addition, you will have access to my growing library of knit & crochet patterns and other printables. Check back often as this library will continue to grow. You can unsubscribe anytime by emailing me or clicking on the “unsubscribe” link at the bottom of all emails.
And you can access many of the products I refer to on my Nourish and Nestle Amazon Page. You can access it here.
So, if you’d like to participate in the ‘subscriber benefit’ action, simply subscribe to Nourish and Nestle here or use the form on the right sidebar. It’s slightly towards the top.
I have sent all my subscribers the link to the Subscriber Benefits Library. If you missed it or misplaced it, let me know.
Until next time…


I just made this! It’s absolutely gorgeous! I used 2 containers of strawberries, which was good because then I could choose ones of similar size for the slices on top. I’m not usually a baker and am so thrilled with the result!
Oh YAY! I am so glad. I’m not surprised because I know you have mad skills! Thanks so much for commenting, my friend! It helps others find the recipe.
Hugs, Lynn
Lynn, this dessert was so lovely and just perfect for my ladies luncheon. I received so many compliments on this yummy tart!
I love a strawberry dessert so much, and this tart was out of this world. We’ll definitely be making this again!
This was SO GOOD! We always do a strawberry dessert at Easter and I did a test run earlier this week… It is LONG gone. Can’t wait to make it again this weekend!
This is the most wonderful dessert and a very special recipe. The combination of sweet glazed strawberries, creamy vanilla filling, and buttery crust (with that irresistible dash of salt!) is incredibly delicious!
Thanks Liza! It is a special treat in our home, truly made for spring!
Making this for Easter this weekend, made it last year too and it was a request again for this year! So good, and so very pretty!
You made my heart sing! Thanks for your kind comment.
This was SO GOOD! We always do a strawberry dessert at Easter and I did a test run earlier this week… It is LONG gone. Can’t wait to make it again this weekend!
Hi Lynn,
Oh yay! So glad this sweet treat graced your Easter table.
such a gorgeous presentation and the taste is amazing!
Thanks Michaela! It is almost too pretty to eat, but that’s never stopped us before!