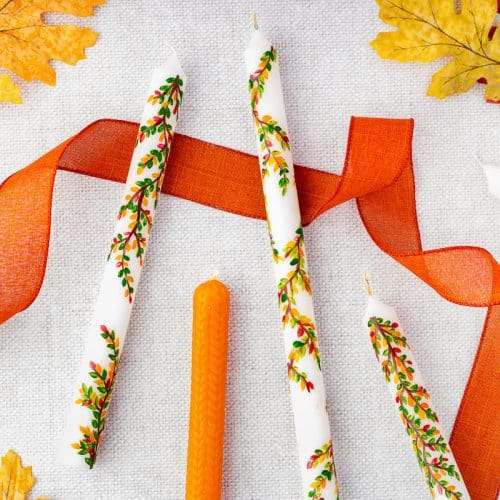
DIY Painted Candles
This is a tutorial for painting wax candles. While the paint colors on th ematerial list and design instruction was specifically tailored for these fall-themed leaves candles, the general material list and instructions are suitable for any painted candle project.
Ingredients
- White taper candles
- RubbingAlcohol
- Cottonballs
- Acrylic Matte Medium
- Yellow Ochre acrylic paint
- Pumpkin Spice (orange) acrylic paint
- Crimson (red) acrylic paint
- Burnt Umber (brown) acrylic paint
- Light Green acrylic paint
- Small, skinny paint brush for small lines (size 0)
- "Round” medium-sized paint brush (size 9)
- Water
- Paper towels
Instructions
- Wipe down the candle with rubbing alcohol on a cotton ball to remove anything that may be on the surface that will keep the paint from sticking.

- Apply a thin layer of the acrylic matte medium to help the paint adhere to the wax surface. This will only take a few minutes to dry if the layer is nice and thin.

- To the brown (burnt umber) add a pea sized dollop of the matte medium and blend into the brown.*Note: the matte medium will help the paint adhere to the wax but if you use too much the paint will become more translucent.
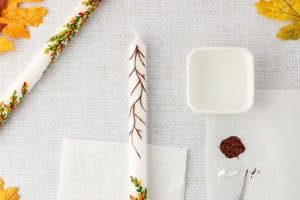
- Using a thin brush and starting at the bottom of the candle, brush on thin lines to create “branches”. The main branch should go about ¼-⅓ up the candle.*Use the rule of odds by adding three main branches on one side and five on the other. Odd numbers tend to be more visually appealing.

- The paint dries quickly so you can go back over your lines and darken them up or fill in any spots before working on the leaves.
- Next, mix some green and yellow ochre (about two parts green and one part yellow). This makes a more earthtoned green. Add a small dot of the matte medium and blend together.
- With the medium round brush and the green paint mixture, start painting on leaves. Start with a small amount of paint on the tip of the brush, dot on or brush leaves on to thebranches. Add the green leaves sporadically, alternating and leaving space forthe other colored leaves. *Practice the leaf strokes on scrap paper beforehand to get the feel and look before painting them onto the candle*Tip: Angle the leaves toward the tip of the branche sinstead of perpendicular to the branch for a more natural and cohesive look.*Note: if at any time you do not like the look of something you painted or accidentally get paint in an area where it was not meant to go, use a cotton ball or q-tip to “erase” the paint with the rubbing alcohol. If the paint has already dried completely then use nail polish removerto “erase” the paint as well.

- Rinse your brush with water and dry with a paper towel or napkin. Water will prevent the paint from adhering tothe wax so ensure the brush is dried before adding more color.
- Repeat the leaf pattern with the other three colors (red, yellow and orange adding a dot of the matte medium to each before hand) *Note:One or two colored leaves per branch is sufficient at first to make sure you have enough room for the other colors. You can always go back and add more of any color once all the colors are dispersed evenly.

- Allow the paint to dry and repeat the branch and leaf pattern starting at the top of the candle going down toward the middle. Use the same process that you did for the branches and leaves you painting starting at the bottom of the candle and you will be adding more branches than the bottom. Continue adding them until they reach just past the middle of the candle.
Tried this? Love it? Let us know how it was!