Sourdough Discard Pizza Dough
6/25/2025…This Sourdough Discard Pizza Dough recipe has been updated to include instructions on freezing the dough before baking.
Our preferred pizza place in Wilmington uses a sourdough pizza base, which is rapidly becoming my favorite for pizza crusts! As I frequently feed my sourdough starter, I end up with a lot of discard, so it was logical to begin making my own sourdough discard pizza dough at home.
If you’ve already had sourdough pizza and love it, or you think the sound of tangy, flavorful pizza dough is pretty darn good, this post is for you. Making sourdough discard pizza dough is really quite simple, and the good news is that it stores well in your fridge!
The instructions will guide you through crafting two perfect sourdough discard pizza crusts, employing either a traditional pizza stone or a trusty cast iron skillet. Whether you’re a seasoned baker or a novice in the kitchen, this recipe promises a fun and rewarding experience, culminating in a pizza night that will delight everyone at the table.
Enjoy experimenting with your favorite toppings to customize your pizza to your taste.

Table of Contents
Why You Will Love This Pizza Dough Recipe
- Use Your Discard: I don’t know about you, but I’m always looking for great ways to use up my sourdough discard. Instead of throwing away excess starter, you can incorporate it into a delicious pizza crust.
- Enhanced Flavor: Sourdough discard adds a unique tangy flavor to the pizza crust you won’t find in typical yeast-based doughs. This depth of flavor elevates your homemade pizza, making it comparable to artisanal offerings from gourmet pizzerias.
- Simple, Budet-Friendly Ingredients: This recipe uses basic ingredients likely already in your pantry. This makes it convenient and cost-effective, aligning perfectly with a budget-friendly kitchen.
- Versatility: This dough is a blank canvas for any topping you desire. Whether you prefer classic toppings like cheese and pepperoni or more gourmet options like prosciutto and arugula, this crust complements them beautifully. I’ve included some suggested pizza toppings below.
- Perfect Texture: The texture of this sourdough pizza crust strikes the ideal balance between chewy and crispy. It’s sturdy enough to hold generous toppings without becoming soggy.
- Fun to Make: Preparing this pizza dough is a hands-on, enjoyable process, especially when shaping the dough and choosing your toppings. It’s a great way to involve family or friends in cooking, making meal preparation fun.
- Adaptable to Schedules: The flexibility in fermentation times allows you to work this recipe around your schedule, whether you choose a long overnight ferment or a quicker same-day preparation.
- Make it Ahead! If you’d like, you can put the pizza dough in the fridge for 24 hours! The refrigerator time in the recipe is so that it can be made in the morning and cooked at night. The dough needs to come to room temp before baking.

Difference Between Sourdough and Yeast Pizza Crusts
The obvious difference is that sourdough pizza crusts use sourdough starter, in this cast the sourdough discard, to leaven the dough while yeast pizza crusts use yeast to leaven the dough.
Making yeast pizza dough is quicker; sourdough dough relies on a lengthier fermentation. The extended fermentation time for sourdough not only helps develop a tangy flavor but also improves the texture and digestibility of the dough. While this results in a higher-quality crust, it does require more planning and time.
Sourdough pizza crust has a distinct tangy flavor, resulting from natural fermentation. The lactic acid produced by the bacteria in the sourdough starter imparts a slightly sour taste, which can range from mild to sharp depending on the sourdough starter’s age and the fermentation length. Traditional yeast crusts tend to have a more neutral, subtly sweet flavor.
Yeast crusts are typically softer and less chewy than sourdough crusts.
Some Pizza Toppings for You to Consider
The possibilities are endless once you’ve mastered this Sourdough Discard Pizza Crust! You might already have your favorite toppings, but here are some other ideas for your homemade sourdough pizza if you feel creative.
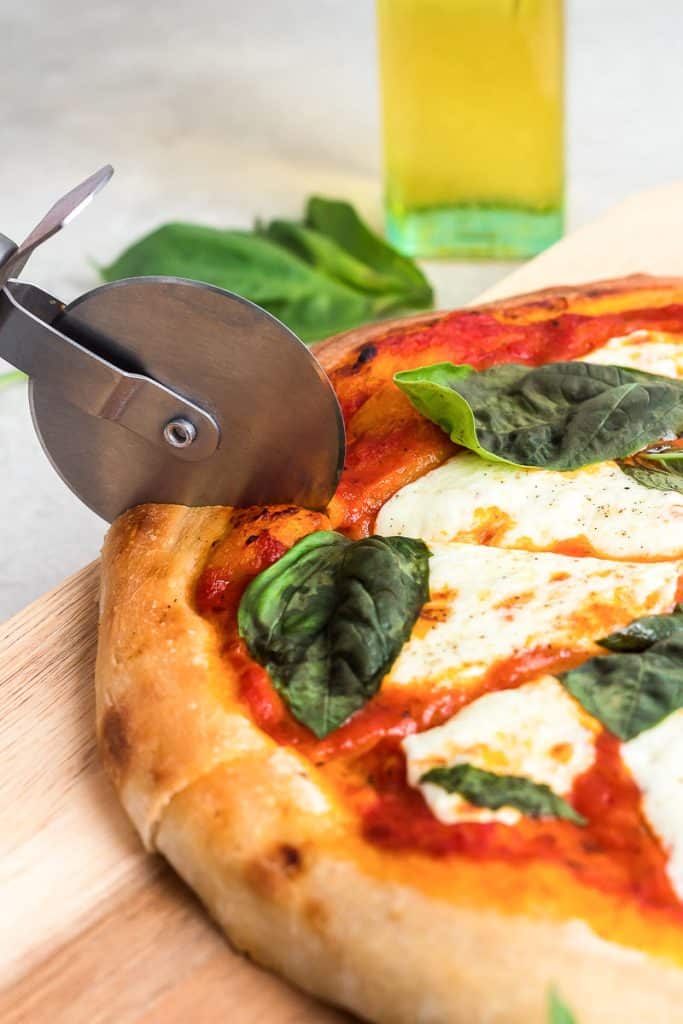
- Classic Margherita: Fresh mozzarella, sliced tomatoes, and fresh basil leaves combine for a never-fail classic. Drizzle with olive oil, balsamic vinegar, and a sprinkle of sea salt after baking for a fresh, vibrant flavor.
- Italian Sausage, Mushroom, and Black Olive: This is my go-to. Add the toppings over traditional pizza sauce. Bonus points for dollops of ricotta!
- White Garlic & Mushroom: Spread a garlic cream sauce, then top with mozzarella cheese, sautéed mushrooms, and thyme. After baking, finish with a drizzle of truffle oil for an earthy, rich taste.
- BBQ Chicken: Use BBQ sauce as the base, add cooked chicken, red onions, and mozzarella cheese, and garnish with cilantro after baking. My kiddos loved this one growing up. It is a great way to use up leftover chicken.
- Prosciutto & Arugula: Start with a basic tomato sauce and mozzarella. After baking, top with thin slices of prosciutto, a handful of arugula, and shavings of Parmesan cheese. Drizzle with a balsamic glaze.
- Caramelized Onion & Goat Cheese: Spread a thin layer of olive oil and top with caramelized onions, crumbled goat cheese, and rosemary. This combination is especially good with a dash of honey drizzled over after baking.
- Veggie Delight: Spread a pesto base, then add mozzarella cheese, bell peppers, red onions, cherry tomatoes, and olives. Top with feta cheese for extra flavor.
- Fig, Prosciutto, and Ricotta: Spread a thin layer of ricotta as the base, then top with sliced fresh figs, strips of prosciutto, and a sprinkle of arugula and balsamic reduction after baking.
What is your go-to, all-time favorite pizza topping combination?
Ingredients in this Sourdough Discard Pizza Dough Recipe
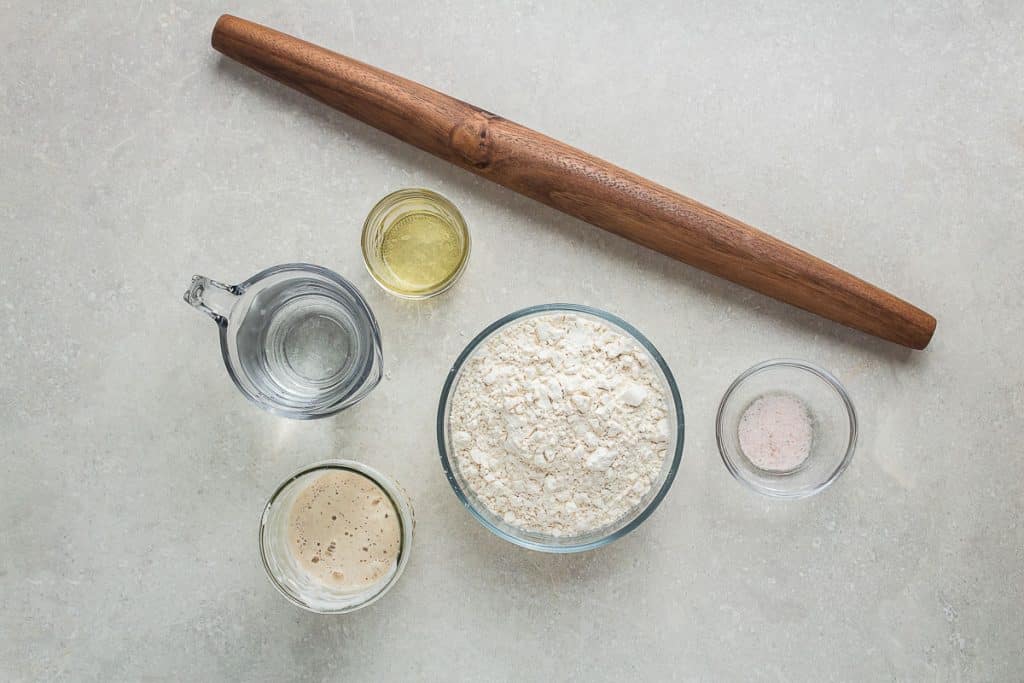
Five simple pantry staple ingredients are all you need to make this pizza crust recipe. This recipe will make two 10-12″ pizzas.
- All-purpose flour
- Sourdough discard
- Olive Oil
- Salt
- Water
Step-by-Step How to Make Sourdough Pizza Dough
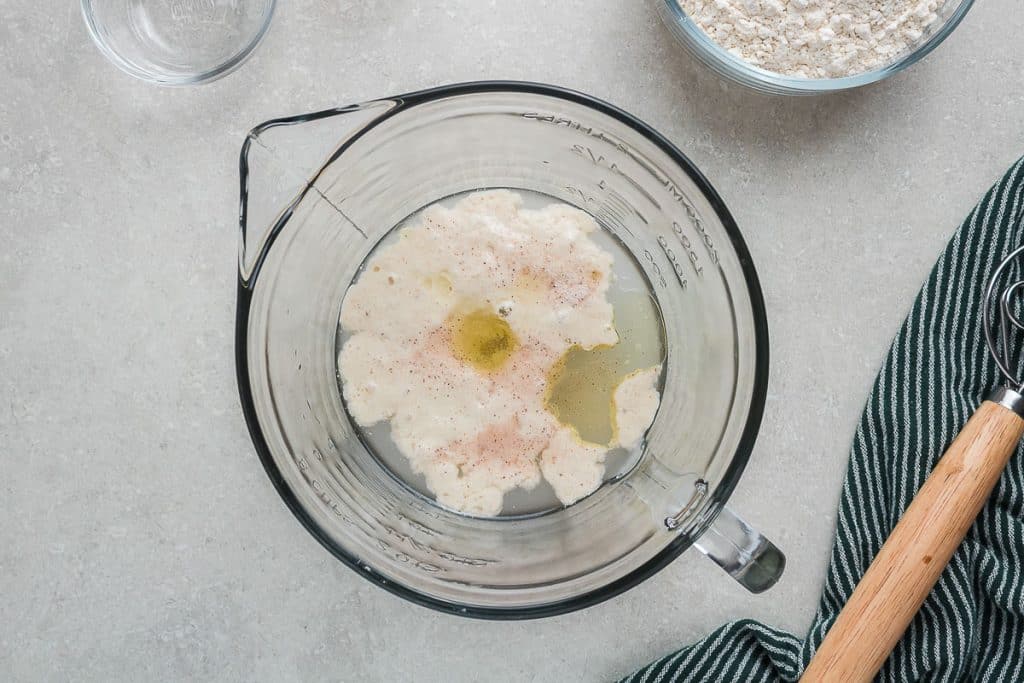
Step 1: Combine liquid ingredients. In a large bowl, mix together the water, sourdough discard, salt, and oil. Mix until combined.
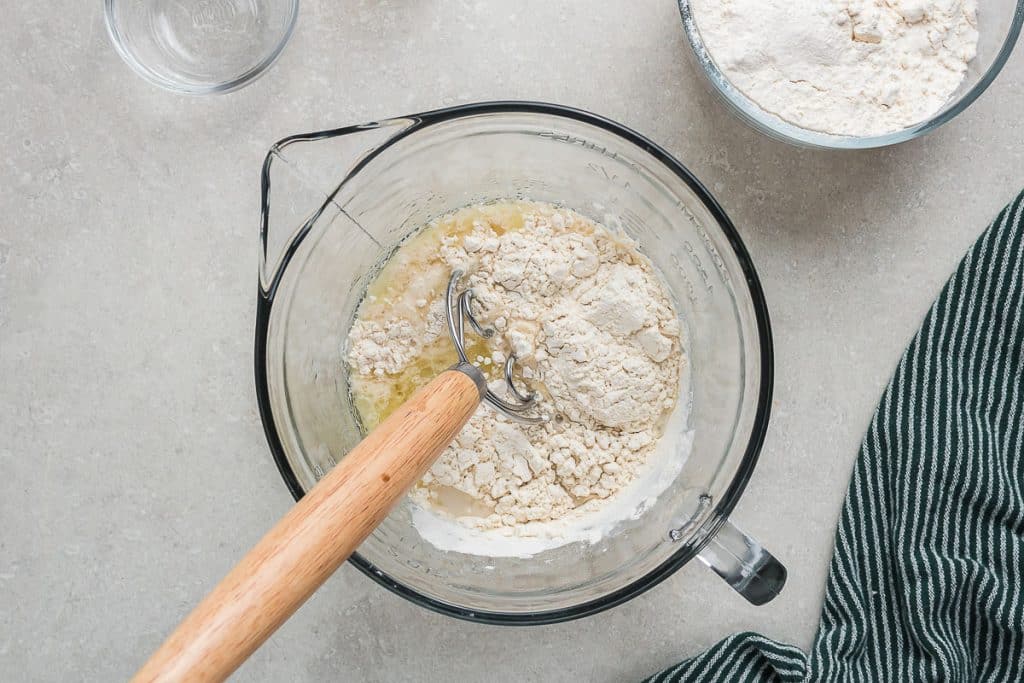
Step 2: Add flour and mix. Add the flour slowly, about ½ cup at a time, and mix it in using a whisk.
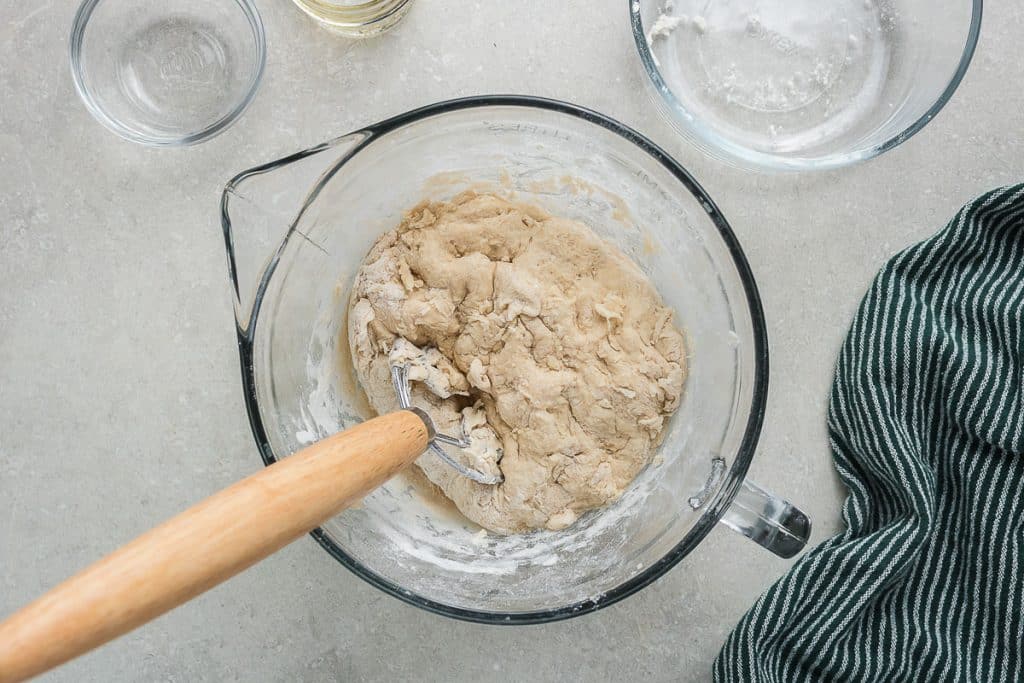
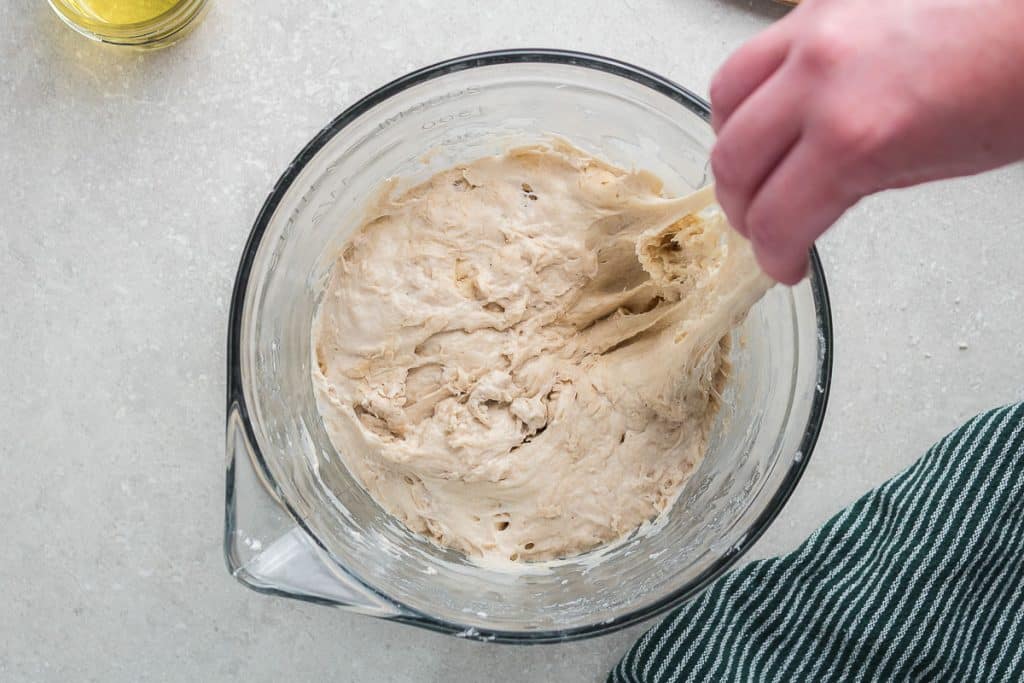
Step 3: Incorporate all ingredients. When the dough becomes too difficult to mix with a whisk, use your hands to combine it until it has a shaggy consistency, but all ingredients are fully incorporated.
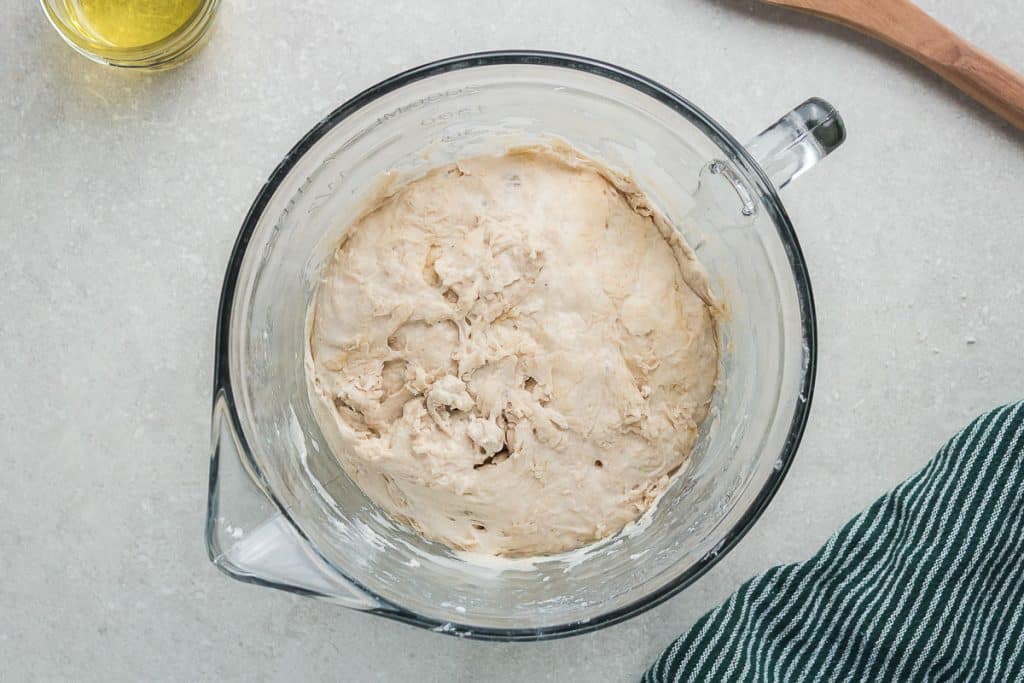
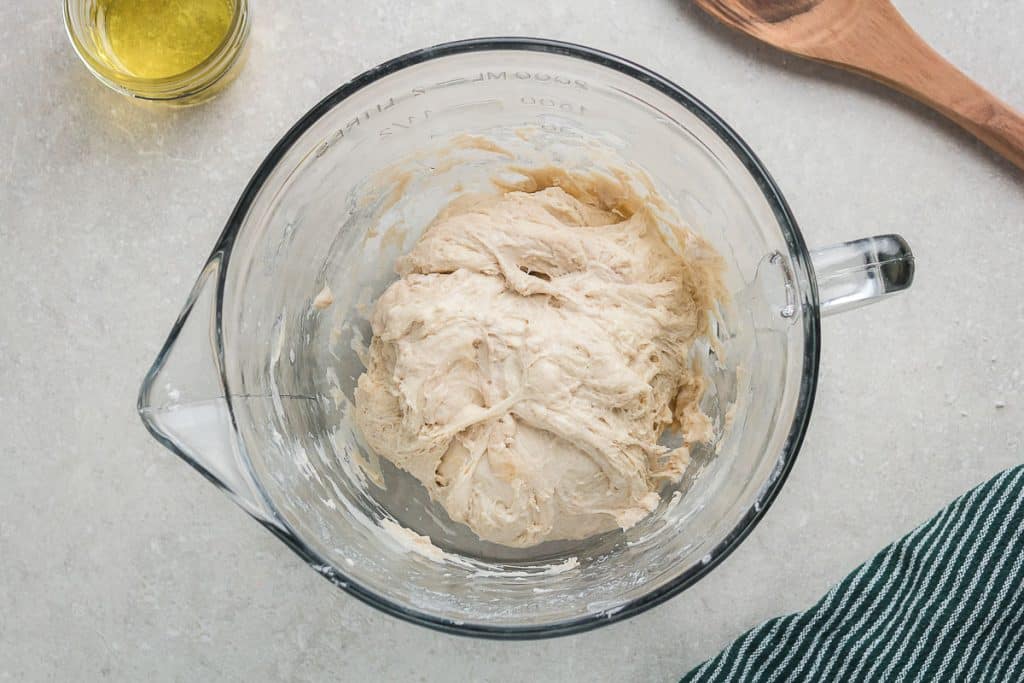
Step 4: Bulk ferment. Cover the dough with plastic wrap, and let it sit for 6-8 hours or overnight at room temperature. The dough should double in size, and you will see bubbles if you use a glass bowl.
Step 5: Stretch and fold. After the dough has doubled, perform one set of stretch and folds. Pull up a piece of the dough and stretch it over the top of the dough ball. Turn the bowl and repeat until the whole ball of dough is folded.
Step 6: Refrigerate. Cover the dough and place it in the fridge for 1–4 hours. Note that you can skip the refrigeration if time does not allow. If you skip the refrigeration, then the bulk ferment in Step 4 is even more important and you may need to allow a bit more time.
A Note on Refrigerating the Dough
Refrigerating the dough is not a mandatory step, but it can be helpful for planning your meal. If you have more free time the day before you plan to eat the pizza, you can make it in the evening, let it ferment overnight, and refrigerate it during the day. However, if you have a relaxed pizza day, you can whip up the dough in the morning, let it ferment during the day, and cook it at night. This recipe has some flexibility, so you can choose the option that suits you best.
Step 7: Bring to room temperature. Remove the dough from the fridge and let it come to room temperature for 30 minutes.
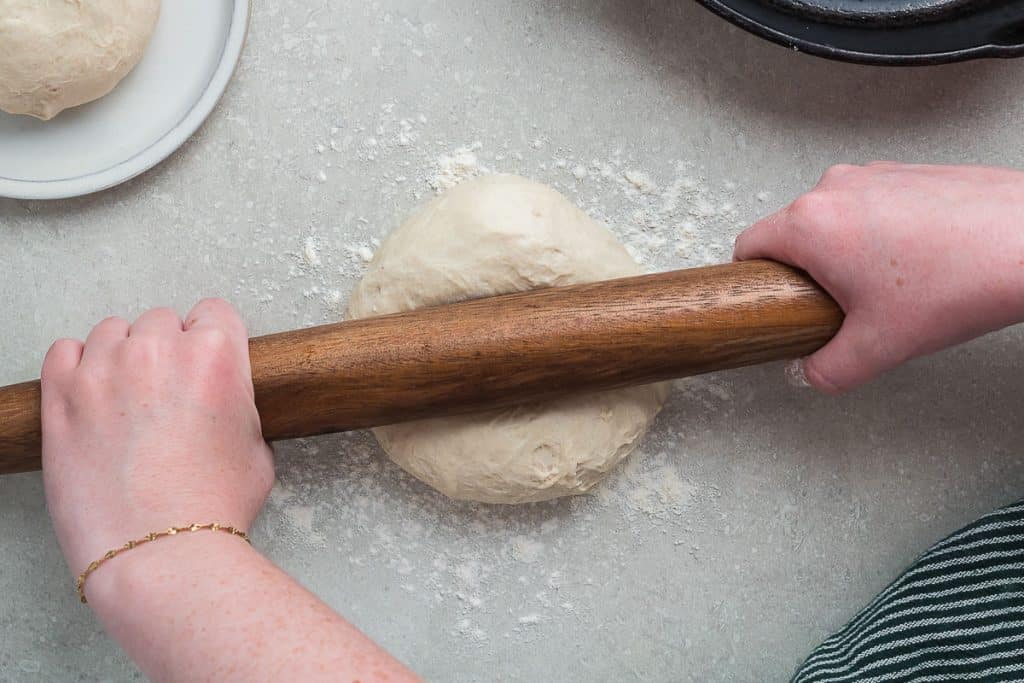
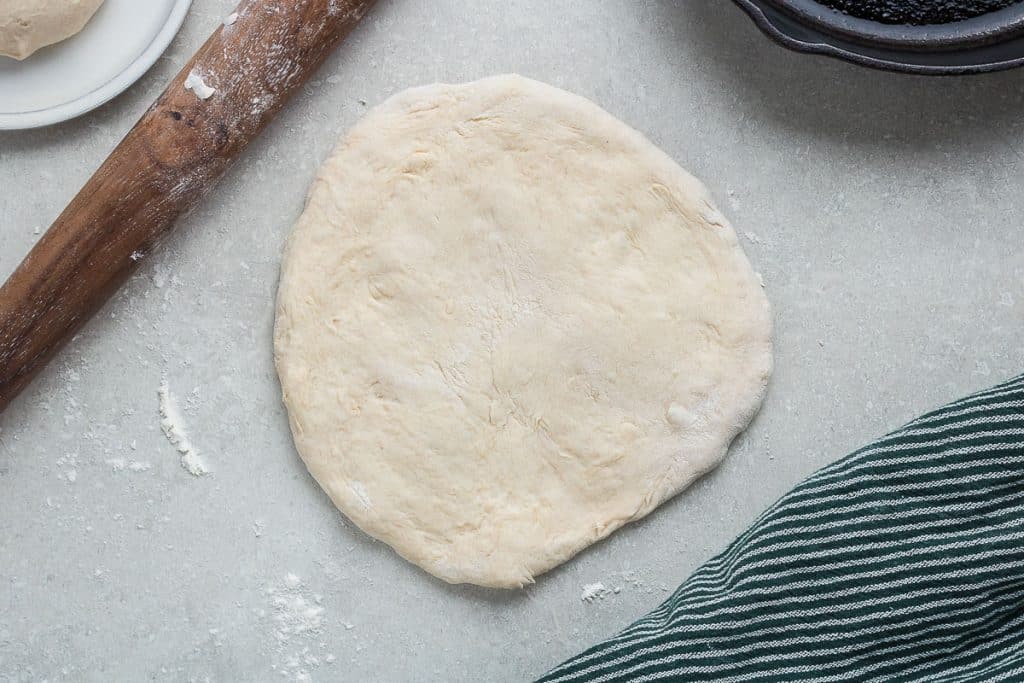
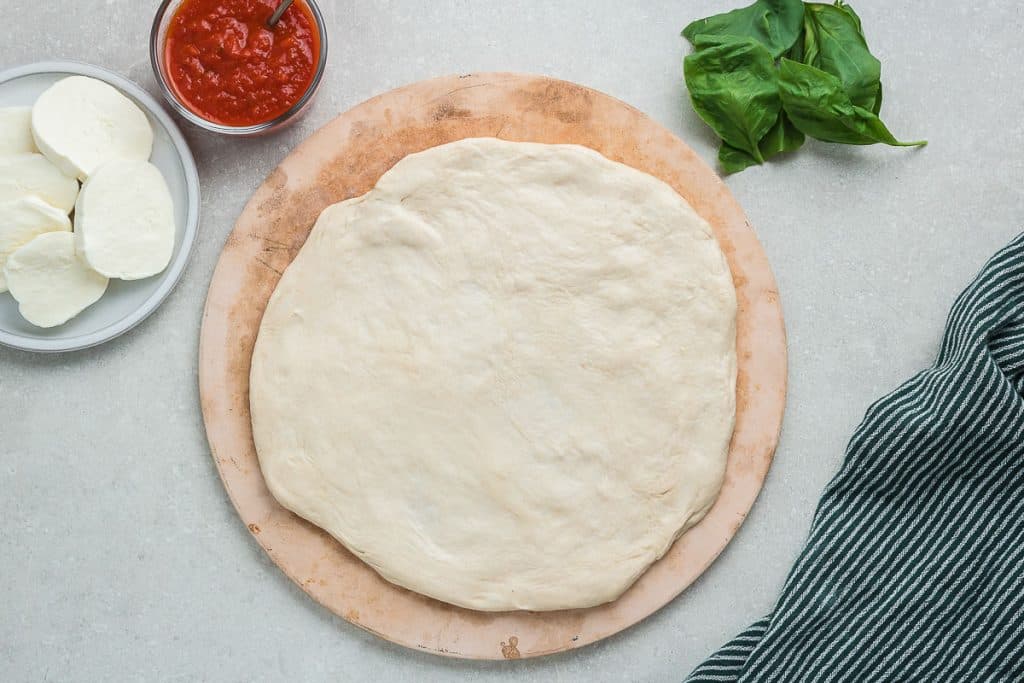
Step 8: Roll out dough. To start, first sprinkle some flour on a clean surface. Then, divide the dough in two halves and roll each half into a disk shape. Use a rolling pin to flatten the dough until it becomes a circle shape that is approximately 1/4 inch thick. If required, you may use your hands to stretch the dough after rolling it out, so that it maintains a circular form.at it maintains a circular form.
Step 9: Preheat oven and pizza stone.Preheat the oven to 450°F (232°C). Place a pizza stone in the oven while it preheats. This will ensure that the crust is crispy and the cheese is melted to perfection.
Step 10: Place dough on the heated stone. Once the oven is heated, using oven mitts, cautiously remove the pizza stone and sprinkle some flour or cornmeal on it. Then, carefully place your prepared dough on the stone.
Step 11: Add toppings and bake! Add your toppings to the pizza and bake for 10–15 minutes. Turn oven to broil, and broil for 2 minutes to brown the crust and toppings.

Step 12: ENJOY! Let the pizza cool slightly before cutting and enjoy!
How to Make it the Day Before So It’s Ready for Dinner
To make the dough a day ahead, let it rest for 1-4 hours, do the stretch and folds, then let it sit in the fridge until you’re ready for dinner! One set of stretch and folds is essential; then it can sit in the refrigerator until used.
Leave it out while you wait for your oven to preheat and prepare the pizza topping ingredients. When the oven is preheated, shape it and roll it out. Usually 15-30 minutes, depending on your oven.
How to Freeze and Thaw this Sourdough Discard Pizza Dough
This recipe makes enough for two 10-12″ pizzas, depending on how thin you make your crust. If you only need one tonight, then freeze the second for an easy dinner on a busy night. Of course, it goes without saying that freezing will slightly change the the taste and texture.
Freeze
Once the dough has risen, freeze after the first bulk fermentation and stretch and folds (after step 5 in the recipe card). At this point, divide the dough into two balls.
Rub each dough ball lightly with olive oil to prevent sticking, then place each one in its own airtight freezer bag or container. Squeeze out any excess air before sealing. Lay the bags flat and store them in the freezer for up to 3 months.
Thaw and Bake
When you’re ready to enjoy pizza, thaw the dough in the refrigerator for 8 to 12 hours. Then, let it sit at room temperature for about 1 to 2 hours to allow the yeast to reactivate and the dough to become easier to shape. Once you’ve shaped or stretched the dough, let it rest for 10 to 15 minutes so it can relax and resist springing back. Top it with your favorite ingredients, then bake at 450°F for 20 to 25 minutes, adjusting the time slightly if you prefer a thinner or thicker crust.
Frequently Asked Questions
Yes! But there are a few considerations when subbing active for discard. Because an active sourdough starter is more ‘active,’ using it instead of discard can lead to a quicker rise in your dough. This means you might need to adjust rising times accordingly. An active starter may also impart a milder sour flavor than a discard, which can develop a more pronounced tanginess due to its longer fermentation time.
Yes, you can use sourdough discard straight from the fridge. However, letting it come to room temperature before mixing can make it easier to incorporate into the dough.
It might be necessary to adjust the hydration levels slightly depending on the consistency of your sourdough discard, which can vary. Discard can be more or less hydrated based on how frequently it’s fed and maintained, so you may need to tweak the amount of water or flour to achieve the right dough consistency.
All sourdough benefits from a longer fermentation time to develop flavors and texture. If you have the time, try a slow fermentation in the fridge for about 24 hours. But if you’re short on time, you can let it ferment at room temperature for several hours.
This could be due to several factors, including insufficient fermentation time, too little hydration, or overworked dough. Ensure the dough has enough time to rise and adjust the hydration to suit the texture of your discard.
Yes, I suggest you use 50/50 whole wheat and white all-purpose flour. So, I would use slightly less than 1 2/3 cups each, ensuring the total flour doesn’t exceed 3 1/4 cups.


Sourdough Discard Pizza Crust
Equipment
- Pizza stone or cast iron pan
- Bowl
Ingredients
- 3¼ cups all-purpose flour
- ½ cup sourdough discard
- 1 cup room temperature water
- 2 tsp olive oil plus more for brushing dough before putting it in the oven
- 1 tsp salt
Instructions
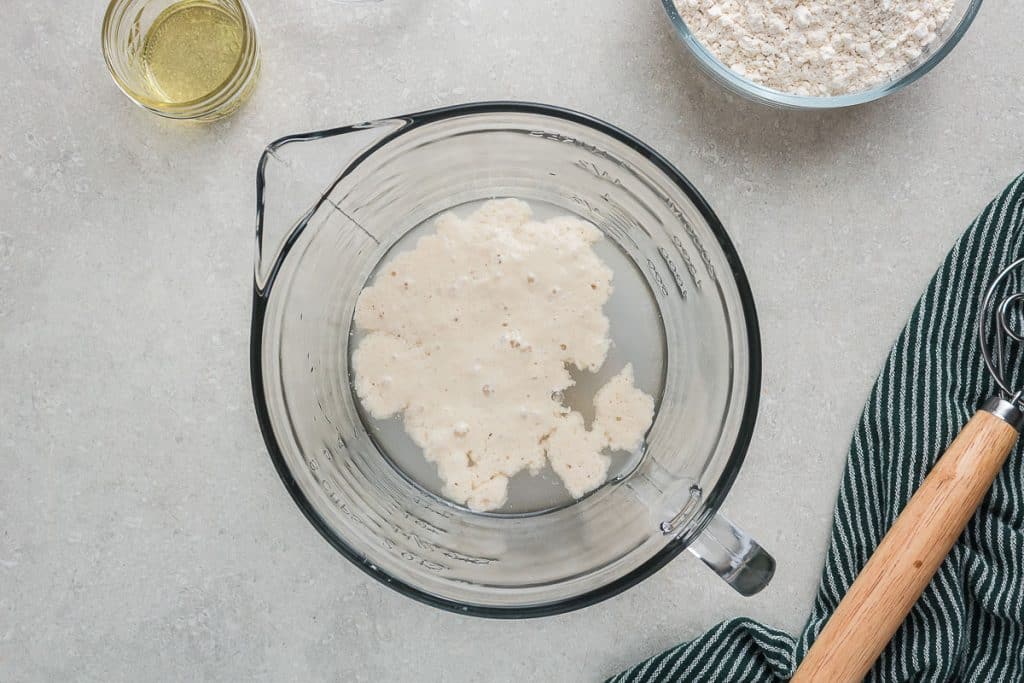
- In a large bowl, mix together the water, sourdough discard, salt, and oil. Mix until combined.
- Add the flour slowly, about ½ cup at a time, and mix it in using a whisk.
- When the dough becomes too difficult to mix with a whisk, use your hands to combine it until it has a shaggy consistency, but all ingredients are fully incorporated.
- Cover the dough with plastic wrap, and let it sit for 6-8 hours or overnight at room temperature. The dough should double in size, and you will see bubbles if you use a glass bowl.
- Once the dough doubles in size, perform one set of stretch and folds. Pull up a piece of the dough and stretch it over the top of the dough ball. Turn the bowl and repeat until the whole ball of dough is folded.
- Cover the dough and place it in the fridge for 1–4 hours. Note that you can skip the refrigeration if time does not allow. If you do skip the refrigeration, then the bulk ferment in Step 4 is even more important and you may need to allow a bit more time. See Note 1.
- Remove the dough from the fridge and let it come to room temperature for 30 minutes.
- Sprinkle some flour on a clean surface. Then, divide the dough into two halves and roll each half into a disk shape. Use a rolling pin to flatten the dough until it becomes a circle approximately 1/4 inch thick. If required, you may use your hands to stretch the dough after rolling it out so that it maintains a circular form.
- Preheat the oven to 450°F (232°C). Place a pizza stone in the oven while it preheats. This will ensure the crust is crispy and the cheese is melted to perfection. See Note for tips on baking the pizza in a cast iron pan instead of on a baking stone.
- Once the oven is heated, using oven mitts, cautiously remove the pizza stone and sprinkle some flour or cornmeal on it. Then, carefully place your prepared dough on the stone.
- Add your toppings to the pizza and bake for 10–15 minutes. Turn oven to broil, and broil for 2 minutes to brown the crust and toppings.
- Let the pizza cool slightly before cutting and enjoy!
Notes
- Refrigerating the dough is not a mandatory step, but it can be helpful for planning your meal. If you have more free time the day before you plan to eat the pizza, you can make it in the evening, let it ferment overnight, and refrigerate it during the day. However, if you have a relaxed pizza day, you can whip up the dough in the morning, let it ferment during the day, and cook it at night. This recipe has some flexibility, so you can choose the option that suits you best.
How to Make it the Day Before So It’s Ready for Dinner.
To make the dough a day ahead, let it rest for 1-4 hours, do the stretch and folds, and then refrigerate it until you’re ready for dinner. One set of stretch and folds is essential, and then it can be refrigerated until used. Leave it out while you wait for your oven to preheat and prepare the pizza topping ingredients. When the oven is preheated, shape it and roll it out. Usually 15-30 minutes, depending on your oven.Cast Iron Pan Baking Instructions
- To use a cast iron skillet for this recipe, heat the cast iron in the oven while it preheats at 450°F (232°C) degrees.
- Remove the cast iron skillet from the oven and place the pizza crust in it.
- Add toppings and bake for 10–12 minutes until the crust is golden brown.
- Broil for 1 minute to brown the toppings.
Nutrition
Other Sourdough Recipes
Our sourdough recipes are divided between sourdough discard recipes and active starter sourdough recipes. We also have a recipe and tutorial for making your sourdough starter.
Sourdough Discard Recipes
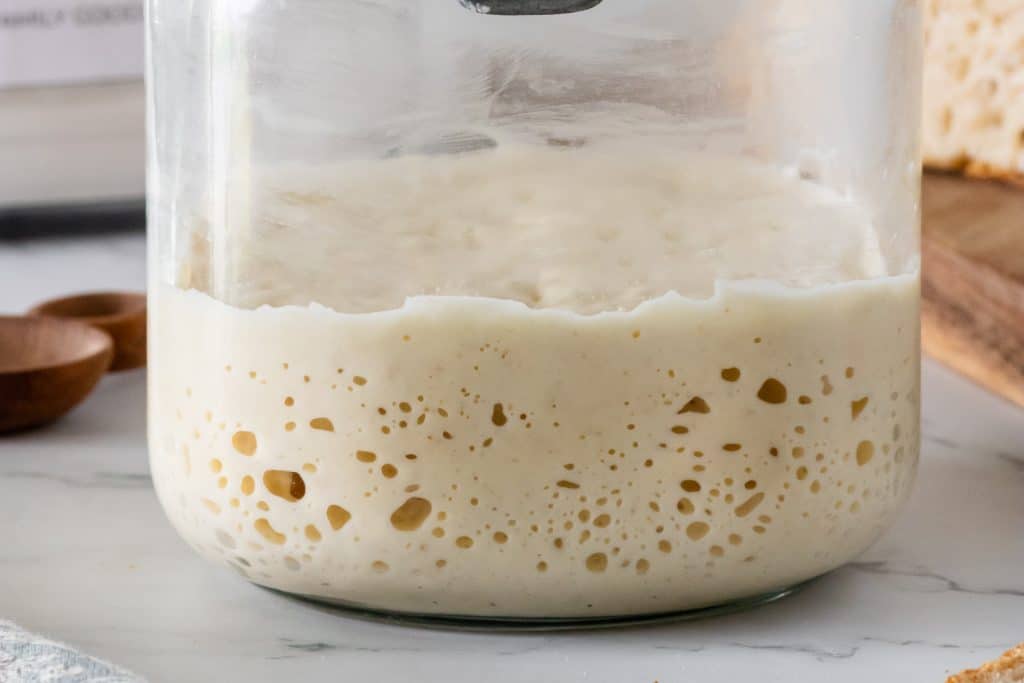
Sourdough discard is the portion of sourdough starter removed during feeding to maintain a healthy and active culture. When you feed a sourdough starter, you typically add fresh flour and water, but before doing so, a portion of the existing starter is discarded to prevent it from growing too large and to maintain the right balance of yeast and bacteria.
- Sourdough Discard Cheese Crackers
- Sourdough Discard Tortillas
- Sourdough Discard Pancakes
- Sourdough Discard Waffles
- Sourdough Discard Banana Muffins
Sourdough Recipes
- Sourdough Bread Recipe
- Sourdough English Muffin Bread
- Sourdough Cinnamon Rolls
- Easy Sourdough Flatbread
- Sourdough Focaccia
Bookmark this page or pin the following image to refer back to this Sourdough Discard Pizza Dough Recipe in the future.

Thanks so much for spending a few minutes of your busy day with me!
To ensure you don’t miss future content, pop your email in the pale green box on the right or click here. I usually send one email weekly, so I won’t inundate your inbox. I’m sensitive to an overflowing email inbox!
We will only use your email address to send you emails, no more than 1-2 weekly. In addition, you will have access to my growing library of knit & crochet patterns and other printables. Check back often as this library will continue to grow. You can unsubscribe anytime by emailing me or clicking on the “unsubscribe” link at the bottom of all emails.
And you can access many of the products I refer to on my Nourish and Nestle Amazon Page. You can access it here.
So, if you’d like to participate in the ‘subscriber benefit’ action, simply subscribe to Nourish and Nestle here or use the form on the right sidebar. It’s slightly towards the top.
I have sent all my subscribers the link to the Subscriber Benefits Library. If you missed it or misplaced it, let me know.
Until next time…










I’m going to try this hopefully this weekend, Lynn. I want to do the version in the cast iron pan. I’ll let you know how it comes out. I will have to start saving my discard! Do you have any idea how long discard stays viable in the fridge? Jan in MA
Hi Jan,
I’ve used refrigerated discard that is as old as two weeks, if you see mold then toss it.
Enjoy the pizza, think we will be having it this weekend tool.
Hugs, Lynn
I made this once and it was delicious! However if I planned on making the dough the day before would I still ferment on 1-4 hours, stretch and fold and then go to the refrigerator until the next night for dinner??
Hi Michelle,
Let it rest for the 1-4 hours, do the stretch and folds, then let it sit in the fridge until you’re ready for dinner! One set of stretch and folds is important, then it can sit in the fridge until it is used.
Leave it out while you wait for your oven to preheat and while you get the pizza topping ingredients ready. When the oven is preheated; shape it and roll it out. Usually 15-30 minutes depending on your oven.
Are you able to freeze this dough for another time?
I wouldn’t freeze the dough. You can freeze a pizza crust once it’s cooked, then heat it up and add toppings later if you want. You can freeze sourdough bread dough, but pizza crusts would dry out/ change texture in the freezer from my experience.
Can I make it the day before? I’m making it for a party that’s at night on Saturday but I have to make it Friday. What’s the best way to store it for an extended time? Also this recipe is amazing this is the 4th time I’ll be making this!
Hi Laura,
Sorry for late response.
To make the dough a day ahead, let it rest for the 1-4 hours, do the stretch and folds, then let it sit in the fridge until you’re ready for dinner! One set of stretch and folds is important, then it can sit in the fridge until it is used.
Leave it out while you wait for your oven to preheat and while you get the pizza topping ingredients ready. When the oven is preheated; shape it and roll it out. Usually 15-30 minutes, depending on your oven.
Hi there I’m making these for Christmas Eve and would love to long ferment in the fridge but if I start the process tonight it’ll be a little longer than 24 hours in the fridge is that okay or should I adjust my times? Thanks!
That should be fine to leave it in the fridge until Christmas eve! Just let the dough come to temperature for a little while to finish the process once you take it out of the fridge. Merry Christmas!
Easy and delicious. Definitely will do this one again.
I’m so glad you enjoyed it Karen! Thanks so much for taking the time to review the recipe! 🫶🏼
I loved it. Sent some to my parents who said it was also excellent! My only question would be can you freeze the dough or no?
Hi Megan, I wouldn’t freeze the dough. You can freeze a pizza crust once it’s cooked, then heat it up and add toppings later if you want. You can freeze sourdough bread dough, but pizza crusts would dry out/ change texture in the freezer from my experience.
Hi! Sourdough newbie here. I’d like to start this the night before using for dinner. In your replies to others trying the same schedule, you suggest letting it rest 1-4hrs and then doing stretch and folds, but in the recipe it says to do the stretch and folds first and then refrigerate for 1-4hrs. Which order should it be if I start this dough the night before I want to use it for dinner? And I’m assuming by resting 1-4hrs, you mean refrigerating for 1-4hrs? Thanks!!
Hi Cassidy,
So the dough should rest before doing the stretch and folds, then after the stretch and folds you can put it in the fridge. If making the dough for dinner the next day I would just let it sit overnight at room temp, then do the stretch and folds in the morning, then let it sit in the fridge until you’re using it for dinner.
The recipe says to let it sit at room temp overnight, then stretch and folds, then 1-4 hours in the fridge, so I would just extended the time in the fridge to whenever you need it for dinner!
I divided the dough in 2 made a pizza with one which was great. The left over dough sat in my fridge a few days and decided to add roasted garlic Italian seasoning and then divided into 4 pieces and grilled them. Turned out great and flavorful!
Hi. How many pizza doughs will this make?
Hi Kasey,
Of course it depends on the size you make them, but I get one large or two small pizza crusts from this recipe.
Enjoy!
I love this recipe for its ease! I find that I have to use a mix of mostly bread flour with a little AP flour to get the right dough consistency, however. All AP leads to a soupy dough. I use King Arthur flour. I love the chewy texture that the bread flour brings out, though.
Thanks so much for your input, Whitney. The success of our little blog is dependent on the reviews, ratings and input readers, cooks and bakers like you provide. Thanks for taking the time to share your review.
Have a great day!