
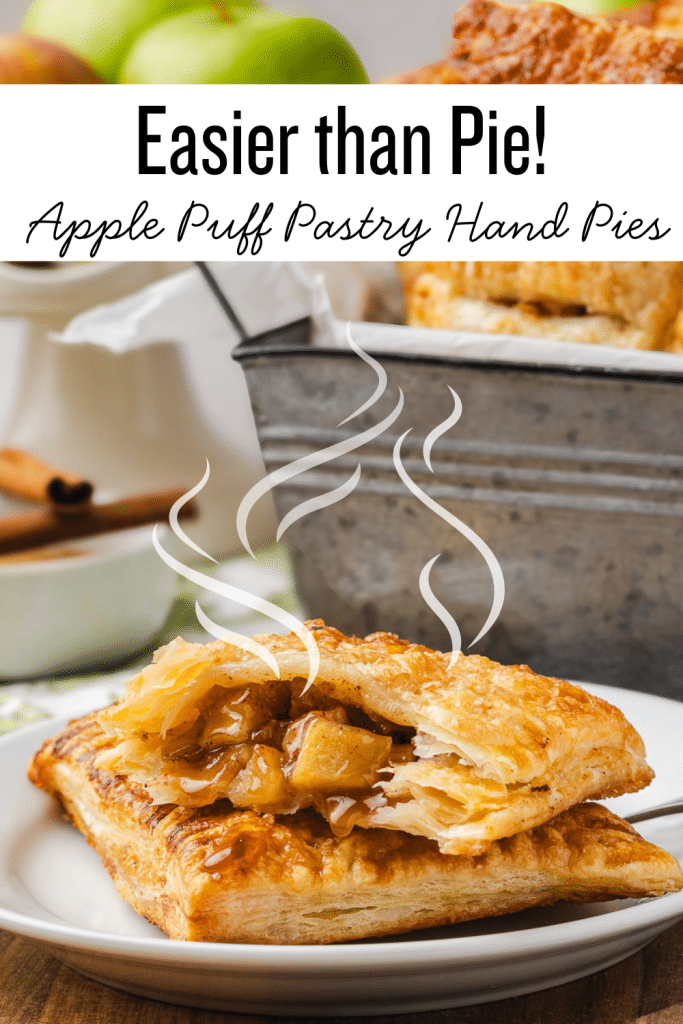
Apple Puff Pastry Hand Pies


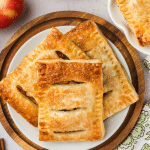

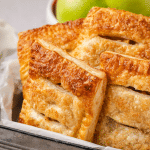
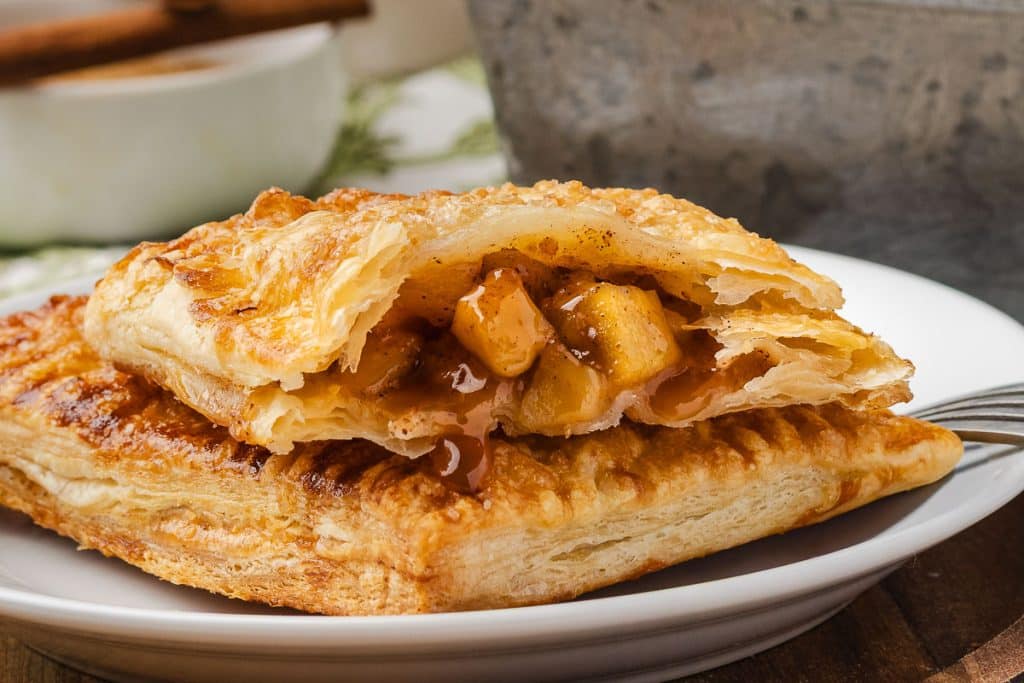
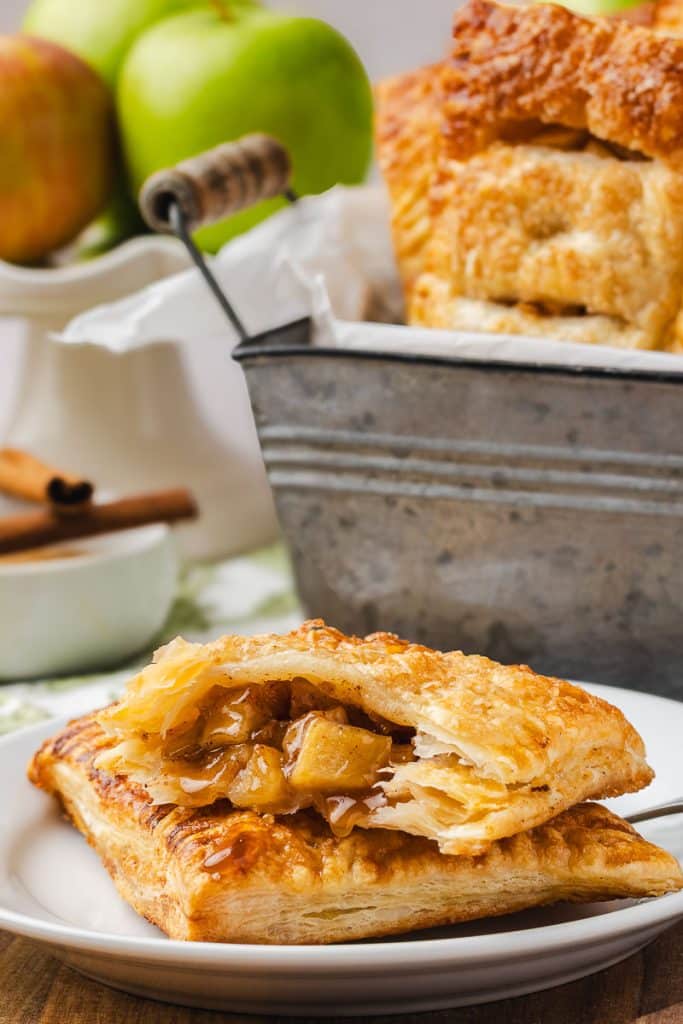
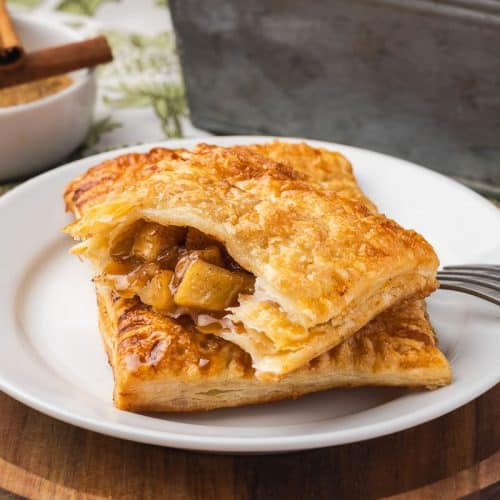
These Apple Puff Pastry Hand Pies are golden, flaky, and absolutely delicious. They pack all the flavor of classic apple pie into a buttery, crisp package you can eat with your hands. Each bite is filled with tender, spiced apples, cinnamon, and nutmeg, featuring the perfect balance of tart and sweet from a blend of Granny Smith and Honeycrisp apples.
Using store-bought puff pastry makes these little pies surprisingly easy to pull off. They bake up with those beautiful flaky layers and fill your kitchen with the kind of smell that makes everyone come running. The key trick is to cook the apples for just a few minutes first – this prevents them from shrinking in the oven and leaving you with sad, hollow pastries.
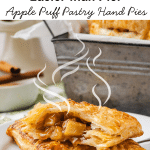
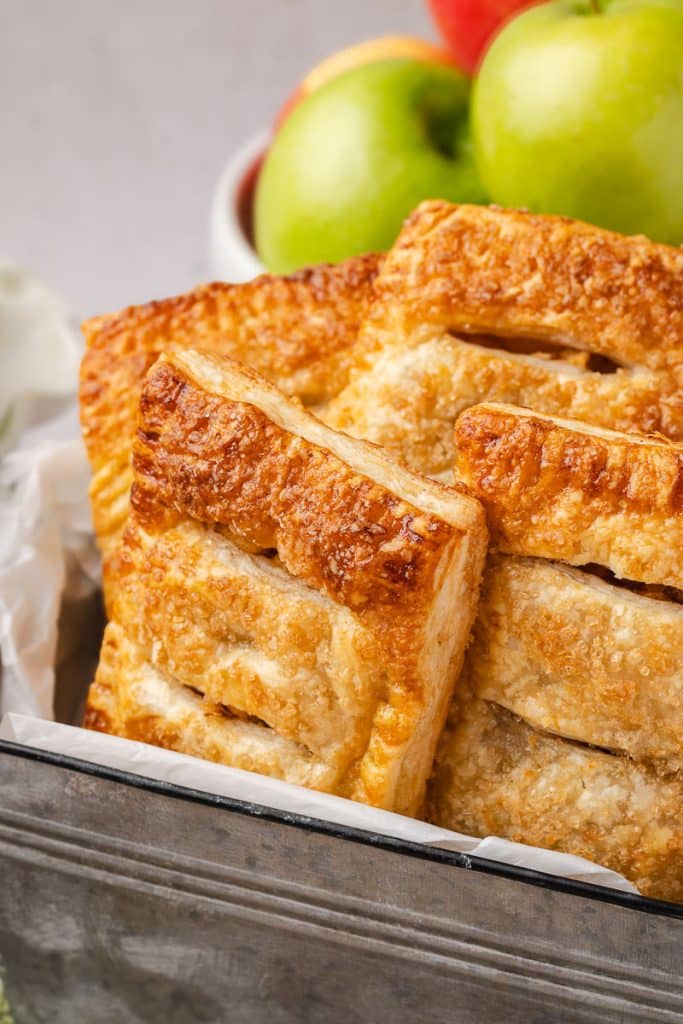
These hand pies are incredibly practical. You can make them ahead and freeze them; they reheat perfectly, making them suitable for breakfast, lunch, or dessert. They’re great for busy mornings, school lunches, or when you need something portable for a gathering. Once you try these, you’ll understand why they’re worth the small effort of making them from scratch.
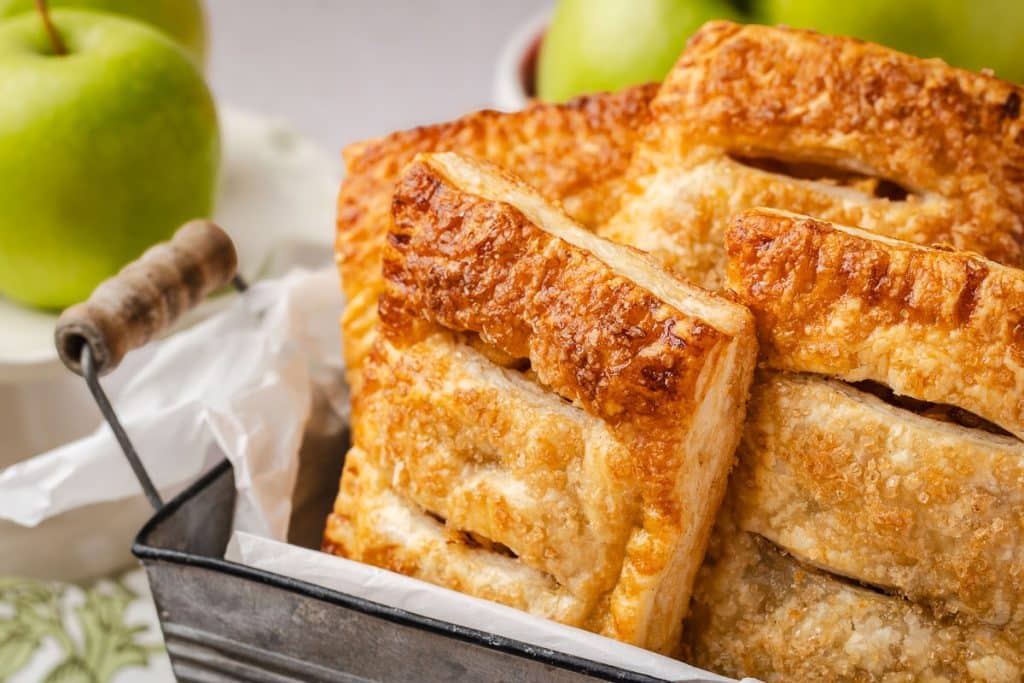
Table of Contents
Why You’ll Want to Make These Hand Pies:
- Weekend project with weekday payoff – Make a batch on Sunday, freeze it, and have homemade breakfast or snacks ready all week
- Kid-friendly cooking – Simple enough for older kids to help with, great for teaching basic pastry skills
- Impressive but approachable – Looks fancy enough for guests but uses store-bought pastry
- Portion control built in – Individual servings mean no cutting into a whole pie
- Travel-friendly dessert – Perfect for picnics, potlucks, or school events
- Uses pantry staples – Most ingredients you probably already have
Tips for Success for the BEST Apple Puff Pastry Handpies:
- Keep your pastry cold – Chilling the puff pastry before cooking ensures maximum rise and prevents spreading. Chilling locks in the butter layers. Freezing is best if your kitchen is very hot or if you want super clean edges. Puff pastry loves to go from frozen to hot. After cutting the tops of the dough and returning it to the refrigerator, be sure to cover your handpies with plastic wrap to prevent them from drying out on top and becoming crusty.
- Don’t overfill – Less is more; overstuffed pies will burst open.
- Don’t let your apples sit in the sugar mixture for too long. If you allow the apples to sit in the sugar mixture for too long, they will start to release liquid (thanks to osmosis). The sugar macerates the fruit, drawing out its juices, which makes for a runny mess on the dough. The liquid will start to spill out over the dough, which makes the edges slippery and more challenging to seal.
- Seal completely – Press firmly with a fork around all edges to prevent leaks.
- Use skewers for lines – You can use a skewer to create line guides to cut on the dough. Gently press the lines into the dough, then cut with a knife or pizza cutter.
- Watch the egg wash – Too much will pool and burn; a light brush is all you need.
- Test doneness – Look for golden brown color and listen for sizzling when you tap the pastry.
- Choose your apples wisely – Granny Smith apples are a classic for apple pie. They are tart, stay firm, and have a bright apple flavor. They can sometimes be a bit boring when there is only one apple, which is why I chose to add some Honey Crisp apples to balance out these hand pies. Avoid very soft apples, such as Red Delicious or McIntosh, as they tend to be more susceptible to bruising. They are very watery and break down quickly, making for a runny, mushy pie.
A Word About Puff Pastry
There are different-sized puff pastry sheets. I used Jus-Rol, which are 9×14 inches each. When making the 3×4-inch rectangles, some dough was left over at the bottom edge. I liked this brand because it rolls out nicely and easily (no creases). It also held its shape better than the other brands and seemed to puff up more effectively as well. It is found at Walmart, Target, and Kroger.
I also tried the Pepperidge Farm brand, which is folded into thirds. It comes in a set of two and appears to be available everywhere. It was not my favorite because each sheet is smaller and folded, so you have two creases that need to be rolled out, unless you cut down the creases, which only gives you six rectangles then.
Trader Joe’s offers puff pastry, which comes in two rolls per box. Each roll is 12×13 inches, so if you choose to use Trader Joe’s, you will end up with a couple more hand pies or leftover dough.
General Tips for Working with Puff Pastry Dough
Work quickly when working with the pasty dough right out of the fridge. It’s easier to work with when it’s cold. When it warms up, the underside becomes sticky, and the dough becomes soft and hard to move or shape.
If using pastry dough that has been folded, unfold it and lightly roll out the creases with a rolling pin. Do not press too hard or the pastry will not puff up as much as it should.
Chilling your assembled hand pies before baking isn’t optional – it’s what makes the difference between mediocre and amazing puff pastry. Cold pastry holds its shape better and puffs more dramatically because the butter layers remain distinct, rather than melting into the dough. If your kitchen is warm or you want really sharp, clean edges, go straight to the freezer for 20-30 minutes instead of the fridge. Puff pastry actually performs better when it is baked directly from frozen in a hot oven. When refrigerated or frozen, don’t leave your cut pastry or assembled pies uncovered – they’ll develop a dry, crusty skin that won’t bake properly. Cover the surface with plastic wrap or parchment to prevent it from drying out.
Frequently Asked Questions:
Q: Can I use a different type of apple? A: Yes, but stick to firm varieties. Good alternatives are Braeburn, Jonagold, or Pink Lady. Avoid soft apples, such as Red Delicious or McIntosh.
Q: My pastry didn’t puff much. What went wrong? A: Usually, this means the pastry got too warm before baking, or you pressed too hard when sealing. Keep it cold and handle gently.
Q: Can I make these dairy-free? A: Replace the butter with vegan butter and brush with plant milk instead of egg wash.
Q: How do I prevent soggy bottoms? A: The heated baking sheet trick is key, plus don’t skip pre-cooking the apples.

How to Make Apple Puff Pastry Hand Pies
The Basic Process
Making these hand pies is straightforward once you understand the flow. You’ll prep your apples first by cooking them briefly to remove excess moisture, then work with cold puff pastry to create individual parcels, and finally bake them on a preheated tray for maximum crispness.
Apple Preparation
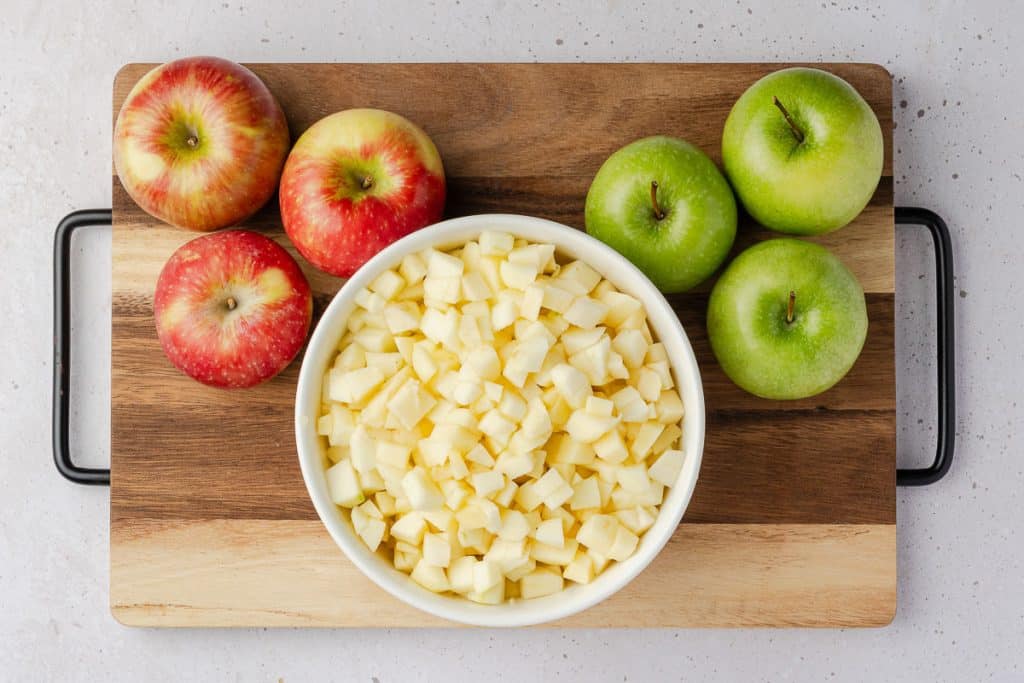
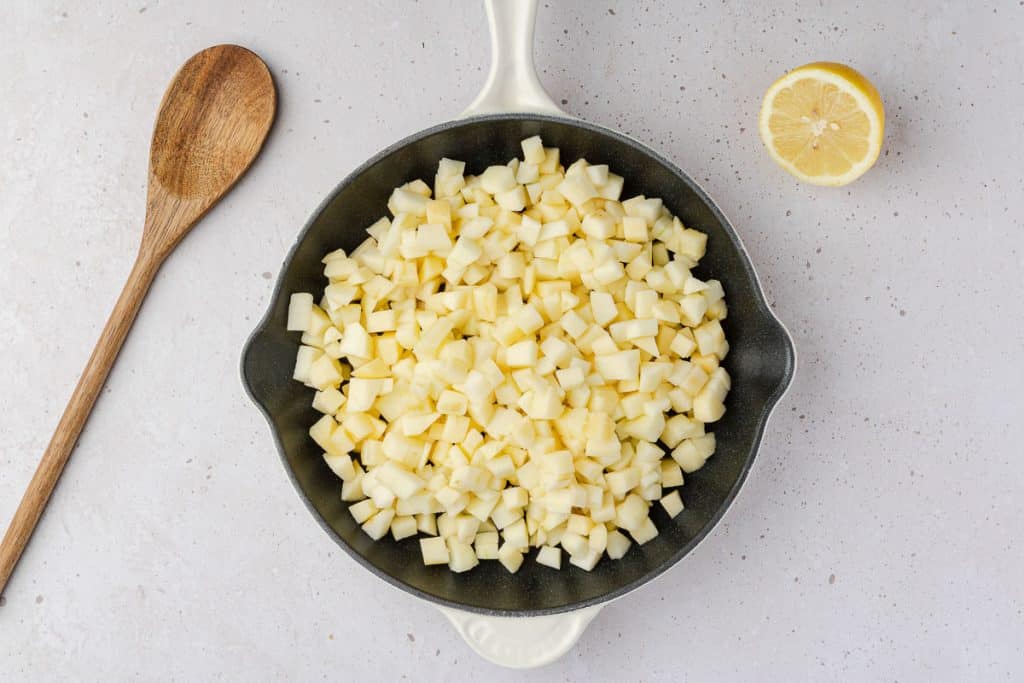
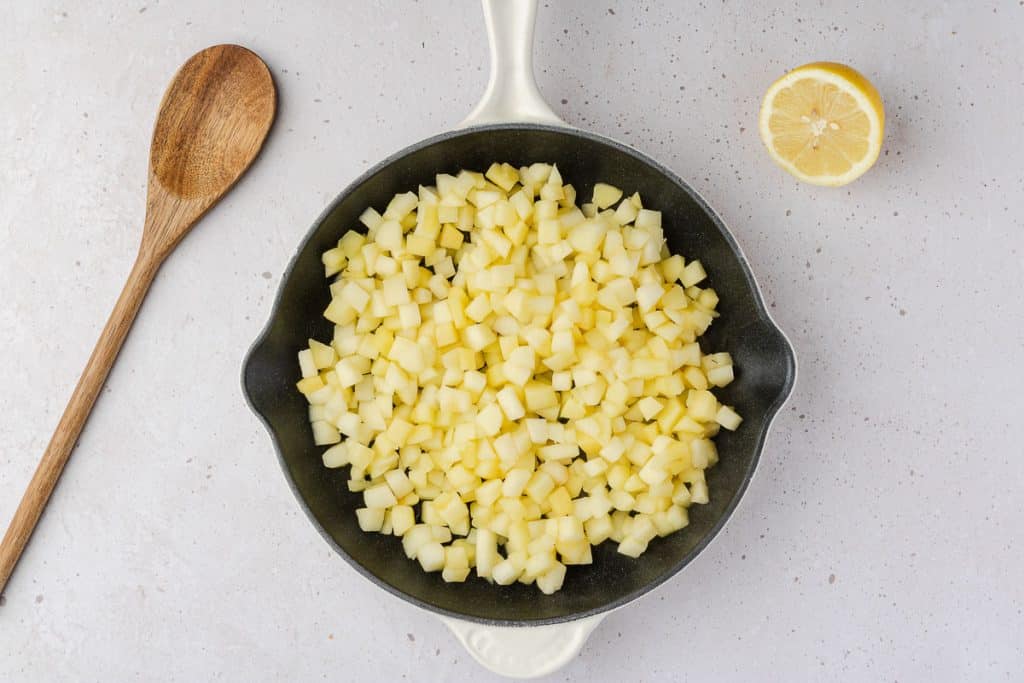
Start by dicing 4 cups of mixed apples (half Granny Smith, half Honeycrisp) into ½-inch cubes. Cook them in a skillet with lemon juice for 5-6 minutes over medium heat until they’re soft but still hold their shape. This step is crucial – it prevents the apples from shrinking dramatically in the oven and leaving you with hollow, sad pastries. Let them cool completely while you work on the pastry.
Pastry Setup
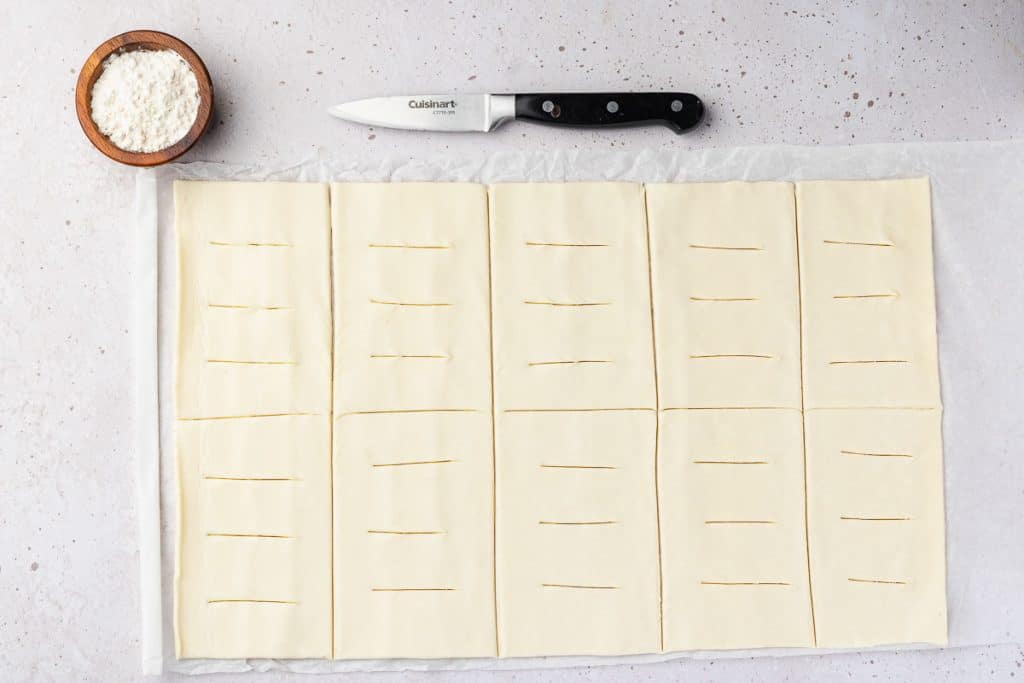
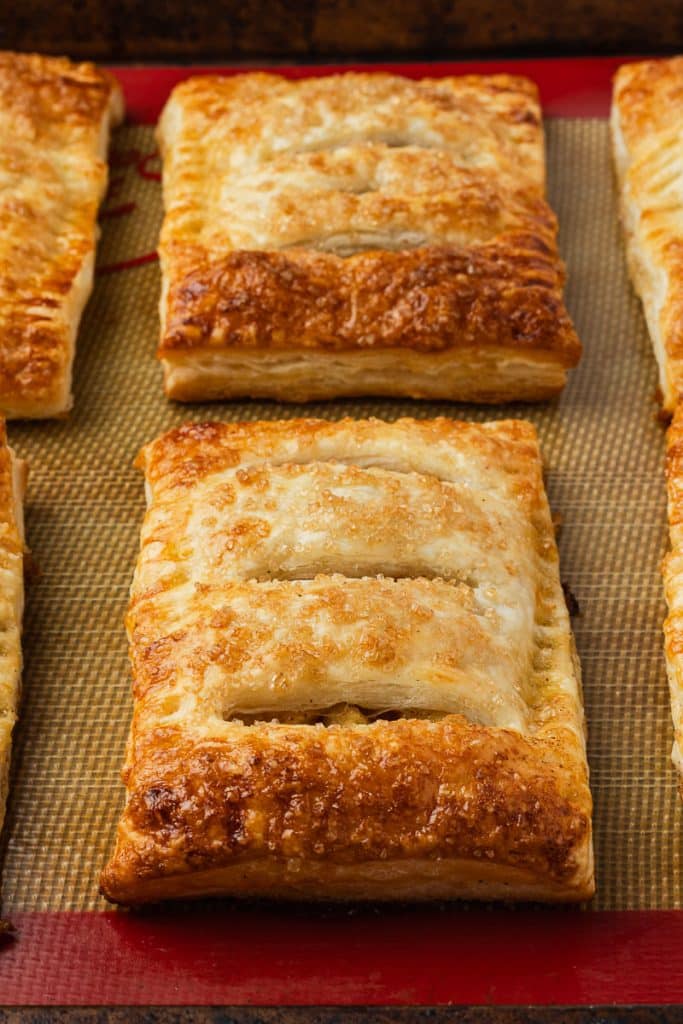
Working with cold puff pastry is key to success. Cut your first sheet into 3×4-inch rectangles for the bottoms and place them on a Silpat or parchment-lined baking sheet. Cut the second sheet the same way, but add three horizontal venting slits to each rectangle. Keep everything covered and chilled while you work – warm pastry becomes sticky and won’t puff properly.

Assembly Process
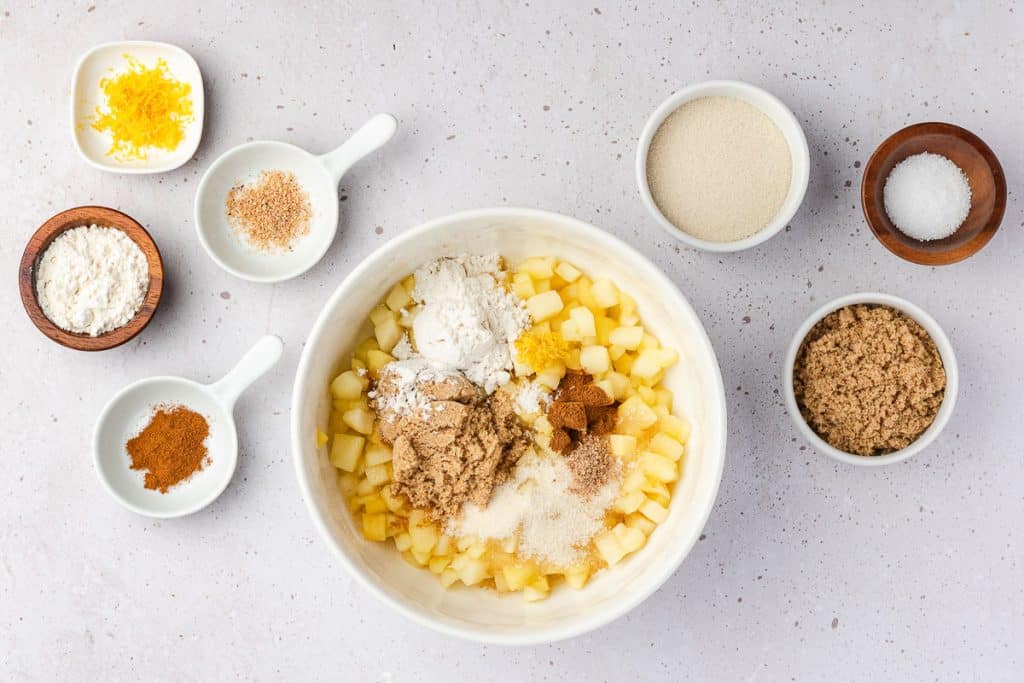
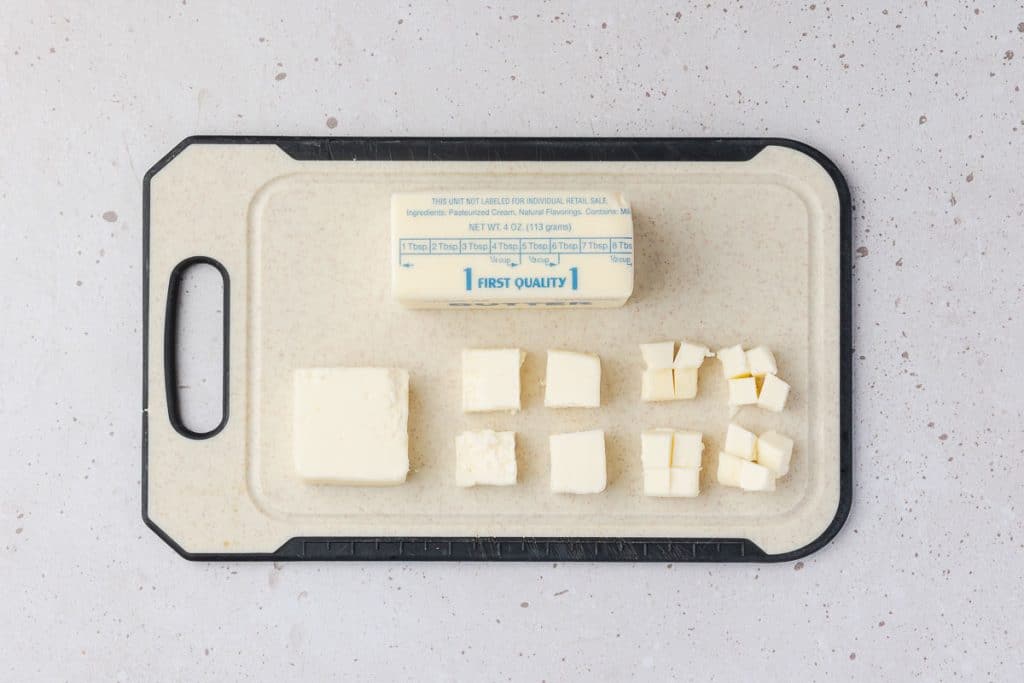
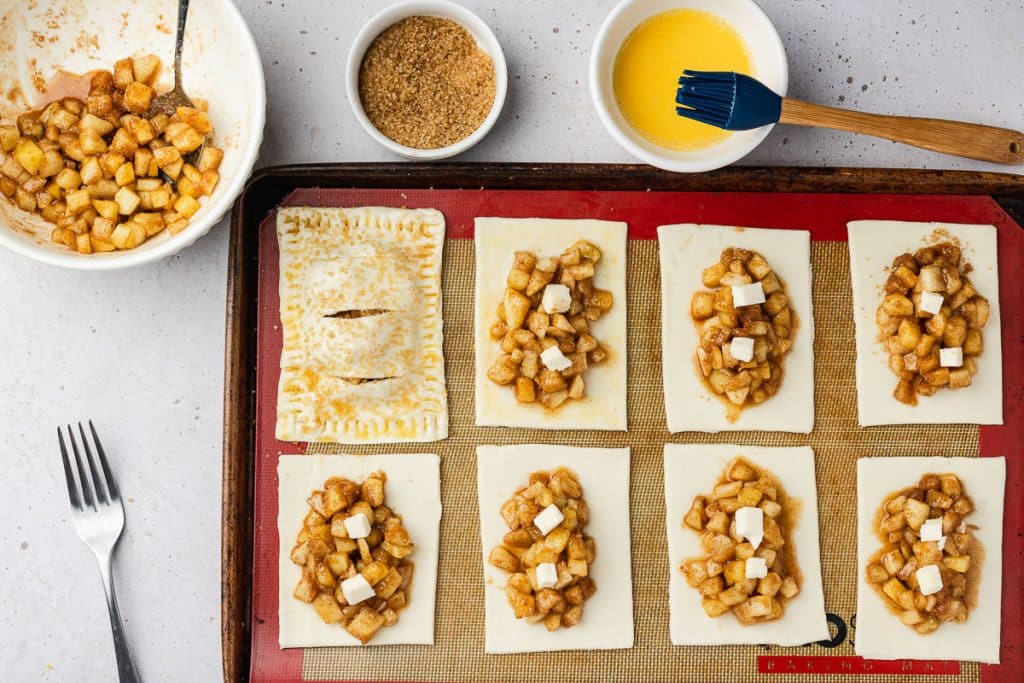
Once your apples are cool, toss them with flour, both sugars, spices, and a pinch of salt. Work quickly to distribute the apple mixture onto each bottom pastry rectangle, leaving a ½-inch border. Add a few cold butter cubes to each mound, brush the edges with egg wash, and top with the vented pastry pieces. Seal the edges firmly with your fingertips, then go around with a fork to ensure they’re completely closed.

The Final Steps
Brush each pie with egg wash and sprinkle with coarse sugar if using. Here’s where patience pays off – chill the assembled pies for 45 minutes in the fridge or 20-30 minutes in the freezer. Meanwhile, preheat your oven to 400°F (200°C) with an empty baking sheet inside. This heated sheet will crisp the bottoms and prevent them from becoming soggy.
Baking
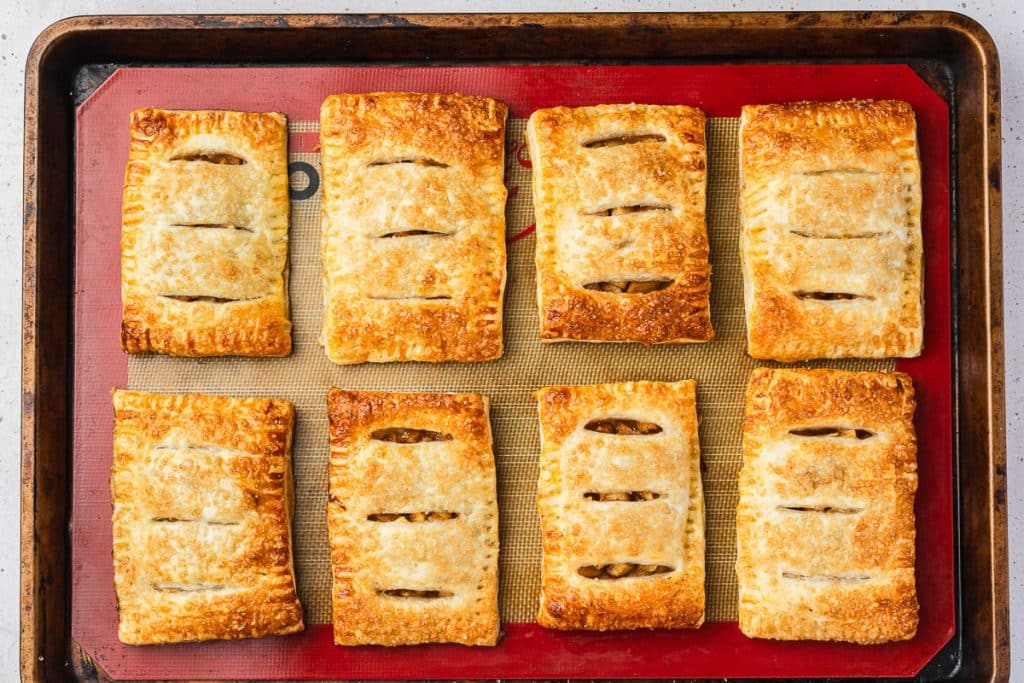
Transfer your chilled pies (still on their Silpat or parchment) directly onto the hot baking sheet and bake for 18-22 minutes until golden brown and puffed. The key indicators are color and sound – they should be golden all over, and you might hear a slight sizzling. Let them cool for 5 minutes before serving; they’re honestly best eaten warm.
Why This Method Works
The success of these hand pies hinges on temperature control and moisture management. Pre-cooking the apples removes excess water that would otherwise make the pastry soggy and cause the filling to shrink. Keeping the pastry cold maintains the butter layers that create the flaky texture. The heated baking sheet ensures the bottom cooks through completely. Every step has a purpose, and skipping any of them will affect your results.
This process takes about an hour from start to finish, but most of that time is hands-off chilling and baking. The active work is maybe 20 minutes, making these much easier than they look.
Troubleshooting Common Issues
Problem: The Pastry didn’t puff up properly
- Cause: Pastry got too warm before baking or was handled too roughly
- Solution: Keep pastry cold at all times. If it feels soft, chill for 15 minutes before continuing
Problem: Filling leaked out during baking
- Cause: Edges weren’t sealed properly, or pies were overfilled
- Solution: Press the fork firmly around all edges and leave a ½-inch border when filling
Problem: Soggy bottom crust
- Cause: Skipped the heated baking sheet or didn’t pre-cook apples
- Solution: Always preheat an empty baking sheet and cook apples first to remove excess moisture
Problem: Pastry is tough instead of flaky
- Cause: Overworking the dough or pastry, it was too warm
- Solution: Handle pastry minimally and keep it cold throughout the process
Problem: The Filling is too runny
- Cause: Apples released too much juice or weren’t drained after cooking
- Solution: Let cooked apples cool and drain any excess liquid before adding to the pastry
Problem: Hand pies burst open while baking
- Cause: Not enough venting slits or overfilled
- Solution: Cut adequate vents in the top pastry and don’t overstuff
Storing and Reheating Apple Puff Pastry Hand Pies
Storage Instructions
For short-term storage, always let your hand pies cool completely before putting them away. Warm pies create steam that will make your crispy pastry soggy. Store them in a loosely covered container or lightly tent with foil for up to two days at room temperature. Avoid using airtight containers or refrigerating them, as both will soften the beautiful, crisp crust you worked so hard to achieve.
If you want to freeze unbaked hand pies for later, assemble them completely with egg wash and sugar, then freeze in a single layer on a baking sheet for 2-3 hours until solid. Transfer to freezer bags or containers with parchment between layers, remove as much air as possible, and store for up to two months. The beauty of this method is that you don’t need to thaw them – bake directly from frozen at 400°F (200°C)for 23-27 minutes.
For baked hand pies, cool them completely first, then wrap each one individually in plastic wrap, followed by foil, or place them in freezer bags with parchment between layers. They’ll keep for up to two months. Remember that fresher pastry freezes better, so don’t wait until your pies are getting stale to freeze them.
Reheating Instructions
The best way to reheat room-temperature hand pies is in a 350°F (175 °C) oven for 8-10 minutes, until they are warmed through and crisp. For frozen baked pies, use the same temperature but give them 20-25 minutes without thawing first. Check that the center is heated by inserting a knife – it should come out warm.
The microwave works in a pinch, but is less than ideal since it won’t give you that crispy pastry texture. Heat room temperature pies for 30-45 seconds and frozen ones for 1-2 minutes, checking every 30 seconds. The pastry will be soft rather than crisp, but it’ll still taste good if you’re in a hurry.
Apple Puff Pastry Hand Pies
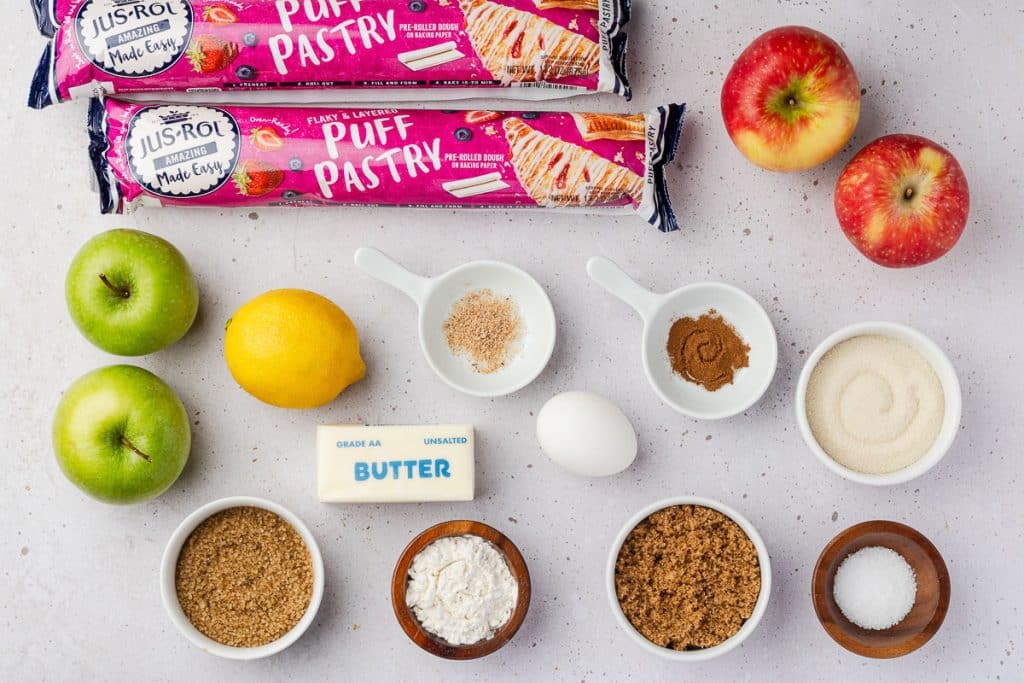
Ingredients
- 2 sheets of puff pastry thawed but cold
Filling:
- 2 Granny Smith apples (2 cups) peeled and diced into ½ in cubes
- 2 Honeycrisp apples (2cups) peeled and diced into ½ inch cubes
- 1 tablespoon lemon juice
- 2 tablespoons flour
- ¼ cup white sugar
- ¼ cup brown sugar
- 1 teaspoon cinnamon
- ½ teaspoon lemon zest
- ¼ teaspoon nutmeg
- Pinch salt about ⅛ teaspoon
- 2 tablespoons cold butter cut into tiny cubes. Keep refrigerated until ready to use.
Egg Wash:
- 1 egg beaten
- 1 tablespoon water
Optional:
- 2-3 tablespoons of coarse sugar for sprinkling
Instructions
Prepare the Apples
- Core, cut, peel and dice 4 cups of apples (2 cups granny smith and 2 cups honeycrisp) into ½ inch cubes.
- In a skillet, place the apple cubes and 1 tablespoon of lemon juice and heat the apples over medium heat for 5-6 minutes, just until soft but still firm (you do not want mushy). Place them in a bowl and set them aside allowing them to cool.
Prepare the dough
- Unroll 1 of the pastry rolls onto a lightly floured surface and cut it into 3 x 4-inch rectangles; these will be the bottoms of the pies. Place them onto a baking sheet lined with a silicone mat or parchment paper. Cover and return them to the refrigerator to stay cold. You may need more than one baking sheet.Cover them with plastic wrap or the parchment paper from the package. This will prevent them from drying out while working on the tops and filling.
- Unroll the second sheet of pastry and cut it into 3 x 4-inch rectangles. Additionally, cut three venting slits approximately 1 ½ inches horizontally on each (you can also use an X). Cover and return the tops to the fridge.
Prepare the filling
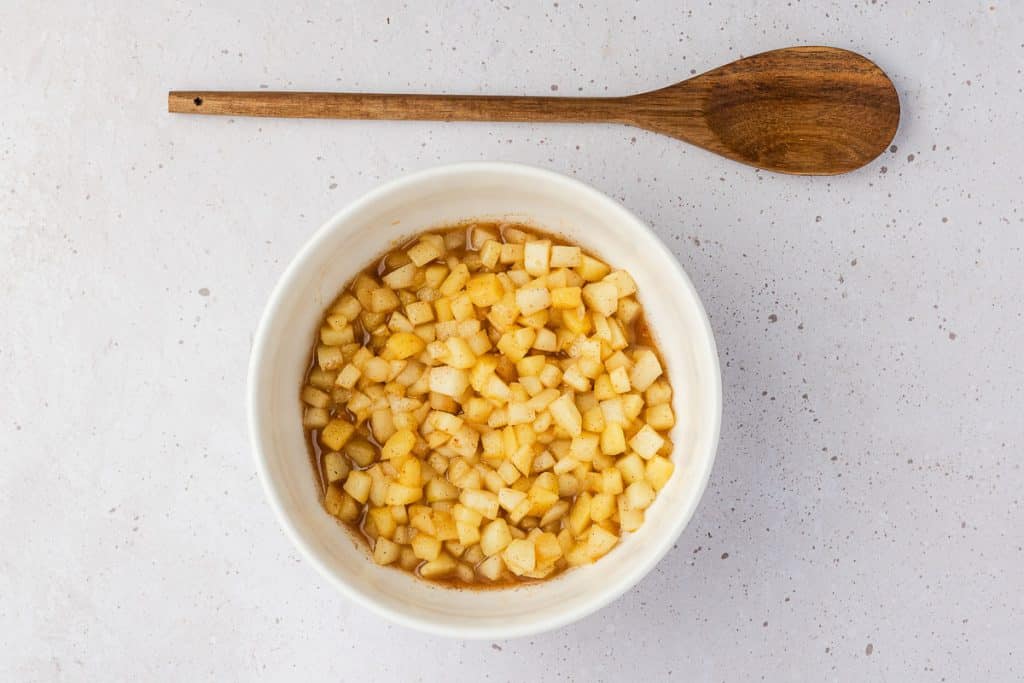
- Coat the cooled apple cubes in 2 tablespoons of flour, then add ¼ cup of white sugar, ¼ cup of brown sugar, 1 teaspoon of cinnamon, ½ teaspoon of lemon zest, ¼ teaspoon of nutmeg, and a pinch of salt, and mix until coated.
Filling and Sealing
- Working quickly, evenly distribute the apple mixture onto each of the bottom pastry rectangles, leaving a half-inch border of pastry around the edges.
- Distribute the cold butter cubes onto each mound of apples.
- Brush the egg wash (1 egg beaten with 1 tablespoon of water) onto the edges of each pastry and place the pastry tops over the apples. Gently seal the edges with your fingers tips and finish the edges by pressing a fork around all four edges until completely sealed.
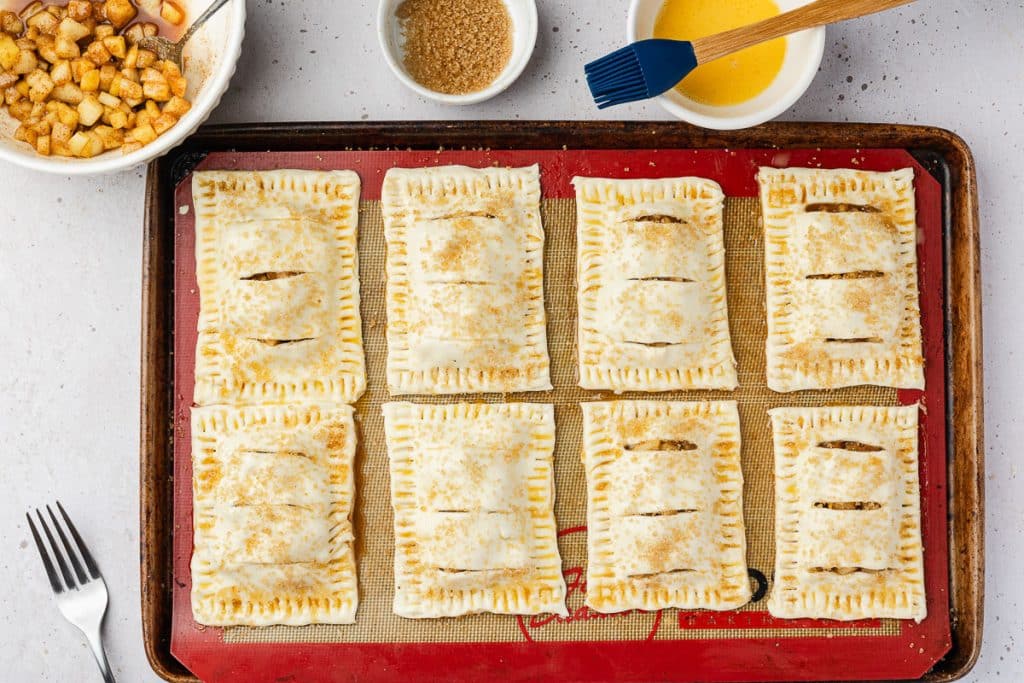
- Brush each pastry with egg wash and sprinkle them with coarse sugar.
Chill and Bake
- Place the trays of filled pastry, uncovered, in the fridge for 45 minutes or the freezer for 20-30 minutes.
- Preheat the oven to 400°F (200℃). Place an empty baking tray into the heated oven, 5-10 minutes before cooking the chilled pastry. The heated tray prevents undercooked or soggy bottoms.
- Carefully place the silicone mat or parchment with the chilled pastry onto the heated tray and bake them for 18-22 minutes or until they are puffed and golden brown.
- Allow them to cool for 5 minutes and enjoy while warm!
Nutrition
More Apple Recipes?
You need ’em, I’ve got ’em! See if any of these Apple recipes strike your fancy.
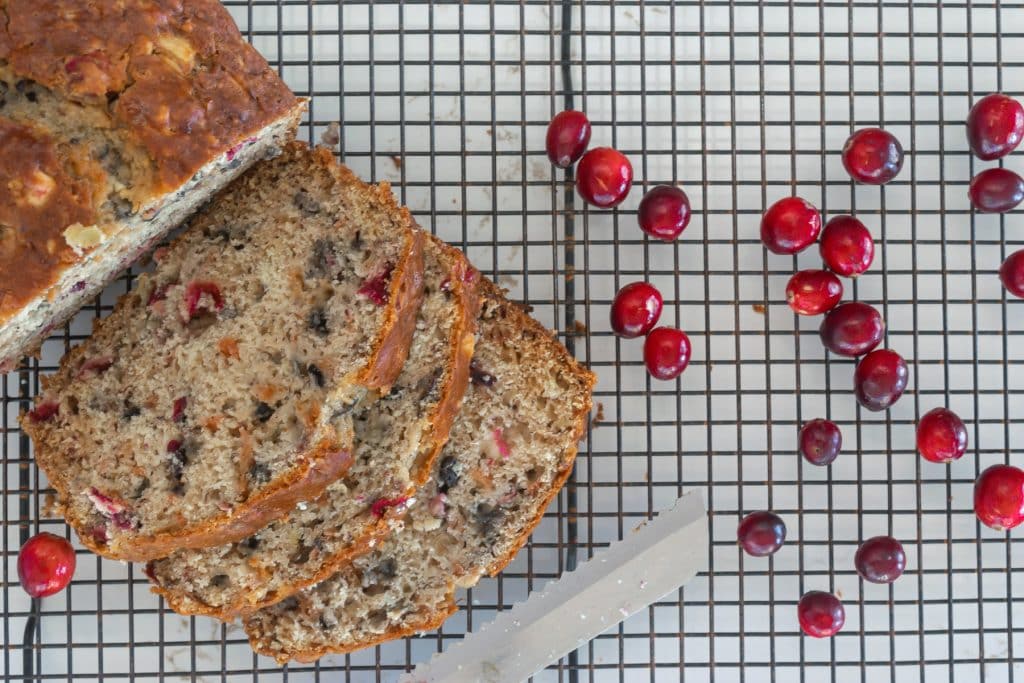
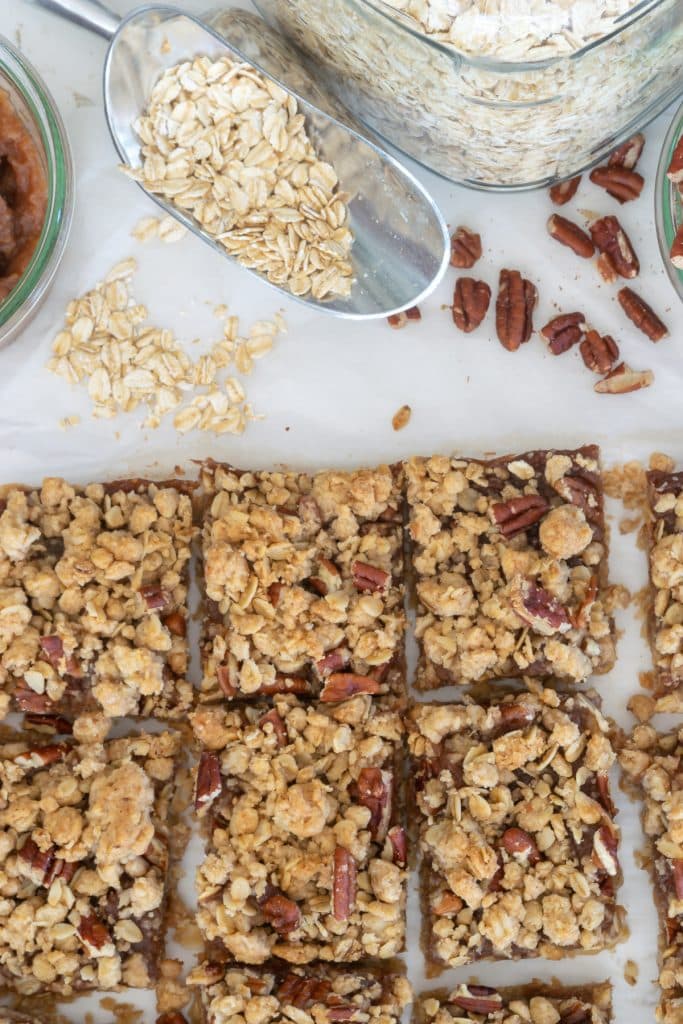
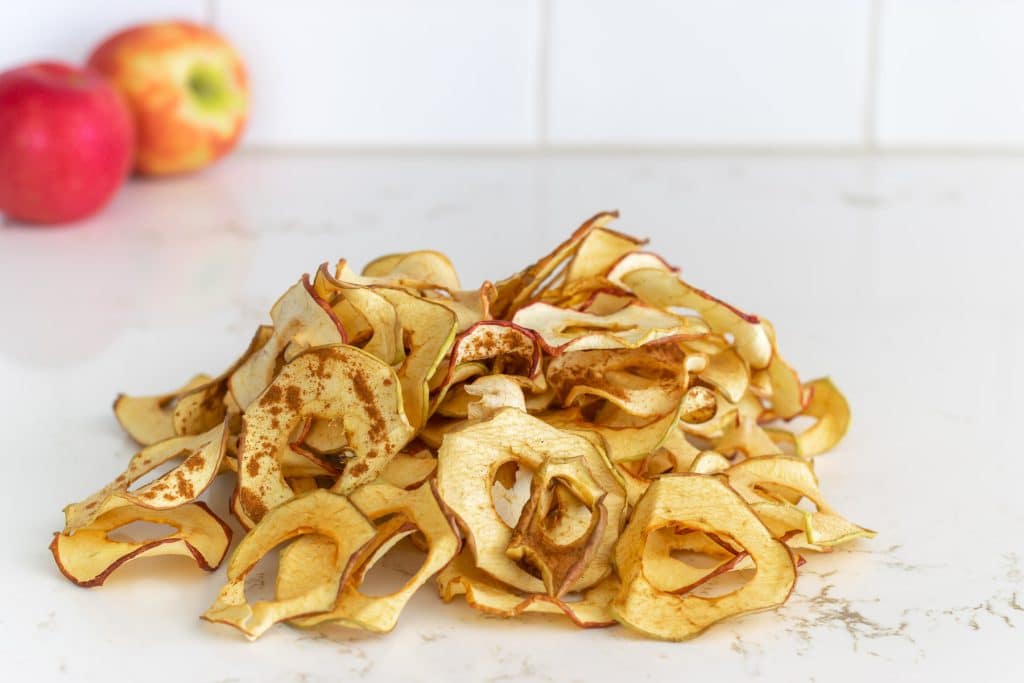
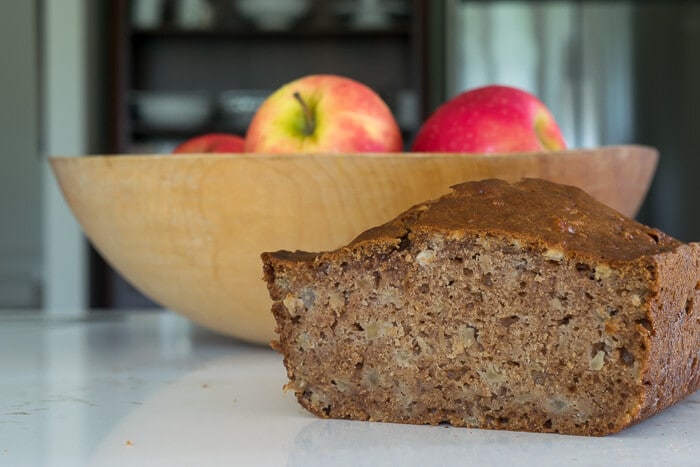
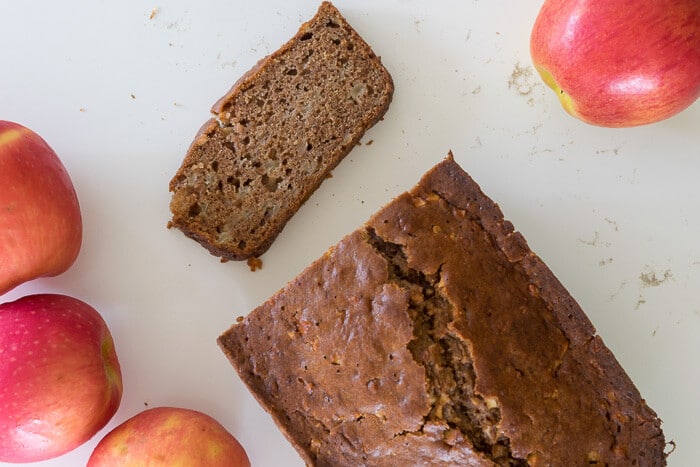
If you’re enjoying these apple hand pies, you’ll love exploring more ways to use apples this season. When you have extra apples on hand, try making my Cranberry Apple and Banana Bread – it’s moist, flavorful, and a great way to use up ripe bananas too. For another portable treat, these Apple Butter Oatmeal Bars are ideal for lunchboxes and afternoon snacks. If you find yourself with more apples than you can use fresh, learn how to Dehydrate Apples Without a Dehydrator – it’s easier than you think and makes excellent snacks.
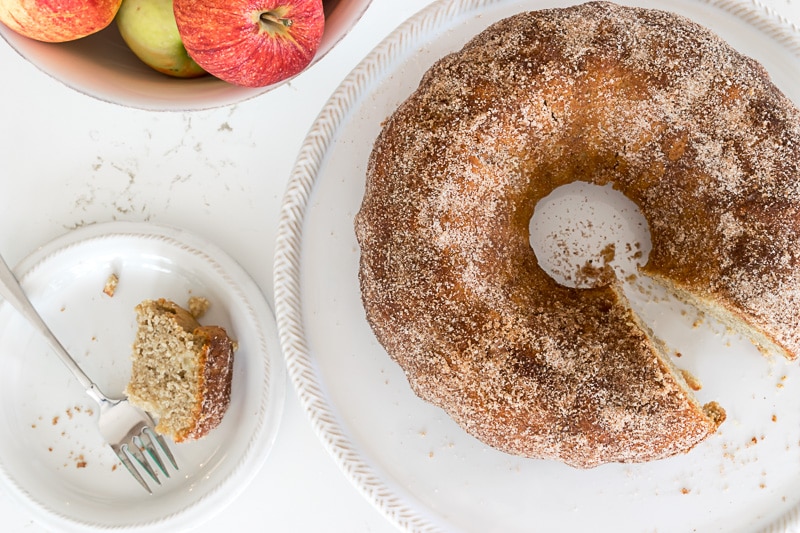
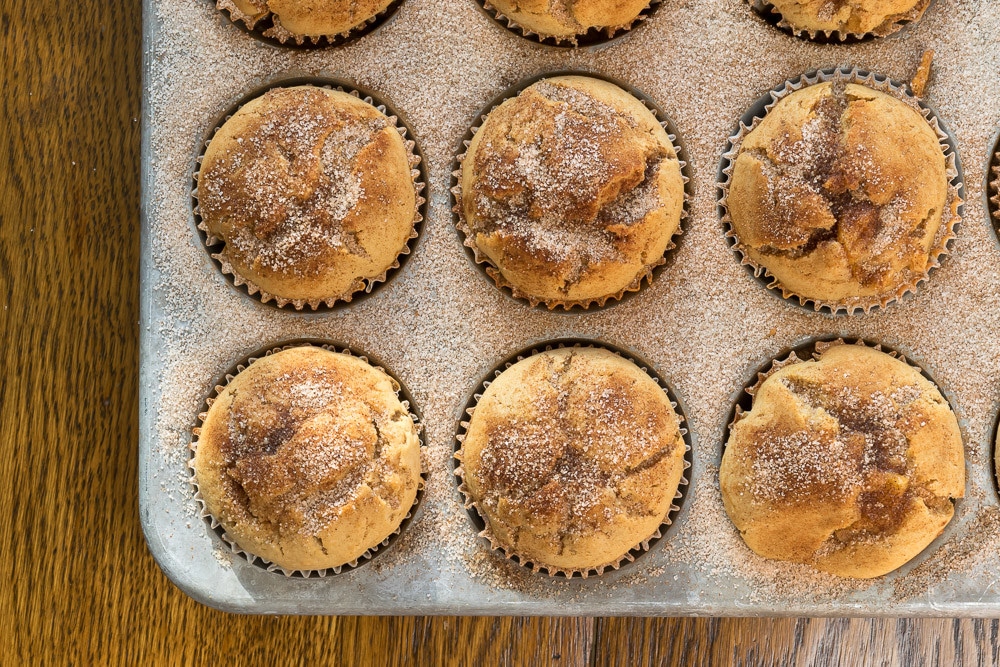
For more baked apple treats, the Apple Cider Doughnut Cake brings all those fall flavors into an easy cake form, while my Apple Spice Bread is a quick bread that fills your kitchen with the same warm cinnamon aroma you get from these hand pies. And if you loved the portability of these hand pies, you’ll want to try the Apple Cider Muffins with Apple Filling – they’re another grab-and-go option that’s perfect for busy mornings.
Bookmark this page or pin the following image to return to this Apple Puff Pastry Hand Pies recipe in the future!
Thanks so much for spending a few minutes of your busy day with me!
To ensure you don’t miss future content, pop your email in the pale green box on the right or click here. I usually send one email weekly, so I won’t inundate your inbox. I’m sensitive to an overflowing email inbox!
We will only use your email address to send you emails, no more than 1-2 weekly. In addition, you will have access to my growing library of knit & crochet patterns and other printables. Check back often as this library will continue to grow. You can unsubscribe anytime by emailing me or clicking on the “unsubscribe” link at the bottom of all emails.
And you can access many of the products I refer to on my Nourish and Nestle Amazon Page. You can access it here.
So, if you’d like to participate in the ‘subscriber benefit’ action, simply subscribe to Nourish and Nestle here or use the form on the right sidebar. It’s slightly towards the top.
I have sent all my subscribers the link to the Subscriber Benefits Library. If you missed it or misplaced it, let me know.
Until next time…


Just a thought. To save time could I leave the sheets of puff pastry whole and fill them with the apple filling and bake it in one large rectangle. That way I might serve a crowd.
Hi Rita,
That’s true! I guess it wouldn’t be easier to eat with a fork if you did it that way.