
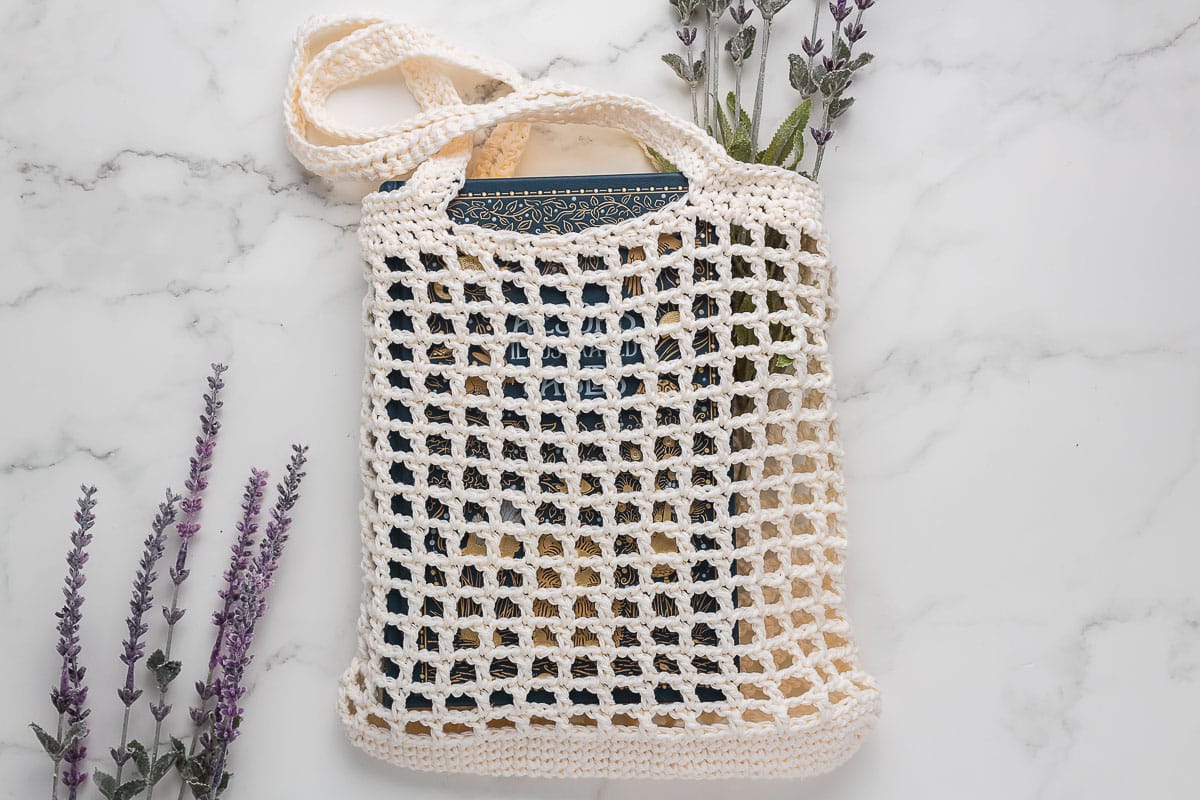
Crochet Purse Pattern – Free
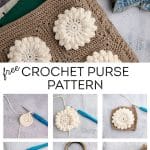

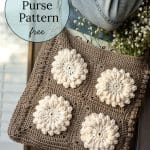

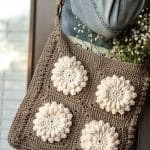
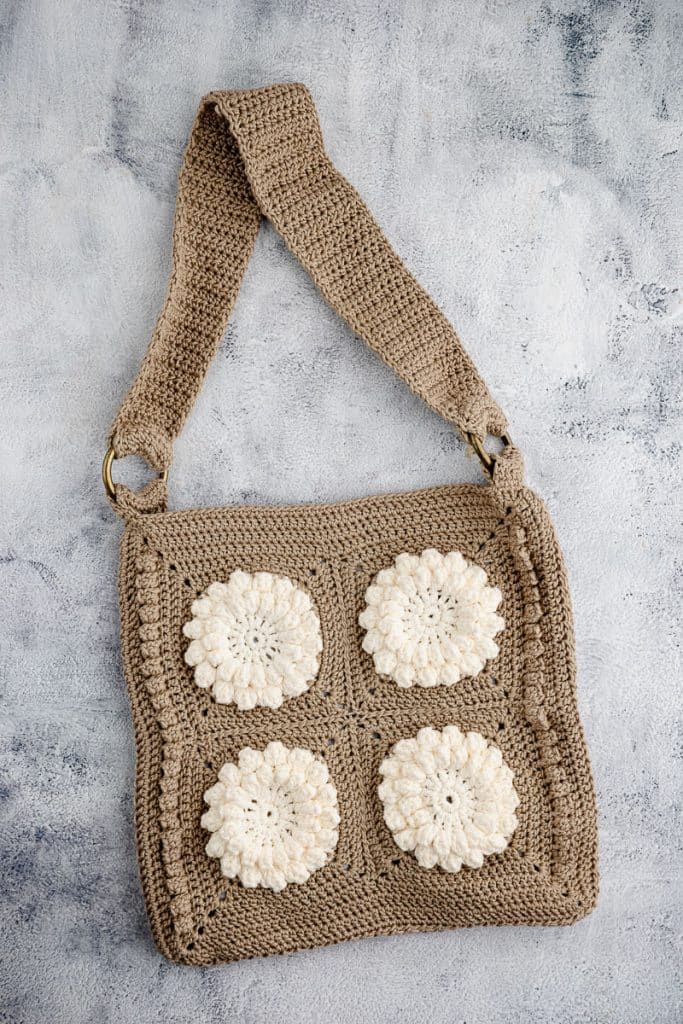
Whether you’re just discovering crochet or you’ve been at it a while, this free crochet purse pattern is a joy to make. You’ll build it square by square—which means you can grab your hook and yarn and work on it wherever. The texture of those popcorn stitches and the repetition of the granny squares make this purse unique. And when it’s done, you’ve got a custom tote that’s as useful as it is charming.
The pattern walks you step by step—first granny squares, then joining them, then shaping the body of the bag, and includes optional details like lining and strap tabs. It’s simple enough to follow, but flexible enough that you can tweak it along the way—more squares for a roomy tote, fewer for a petite wristlet. I love that kind of crafty freedom.
Best of all, you can make it your own. Choose your favorite two or more colors and mix them up in granny squares. Give the popcorn stitch a chance to shine. Want a lining for added polish—or skip it for a breezy, quick finish? Go for it. Let your personality shine through this crochet purse.
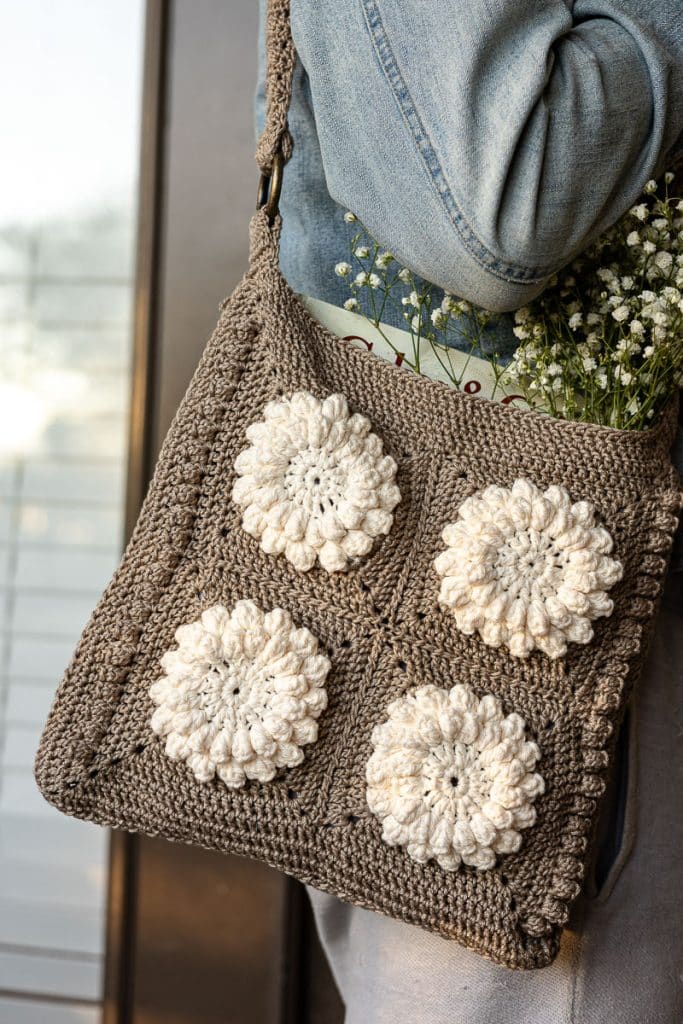
Table of Contents
Material Needed for Crochet Purse
Some of these links may be Amazon affiliate links and I may earn a small commission from the sale of these products to help defray the costs of operating this site, but the price you are charged is not affected. You can see my full disclosure policy here.

- Yarn: 2 colors of worsted-weight cotton. I used Lion Brand 24/7 Cotton in Taupe and Loops & Threads Classic Cotton in Chiffon (because it was leftover from this project).
- Hook: 4.0 mm crochet hook
- Notions:
- 2″ rings (optional)
- Fabric for lining (optional)
- Tapestry needle
- Sewing needle and thread (for lining)
- Scissors
- Tape measure
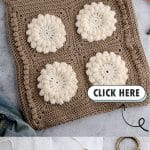
- This free Crochet Purse Pattern is available in this post below and as an ad-free printable PDF for subscribers. You can find the pattern in the Library (your super secret password is included at the bottom of every Monday’s Newsletter email) or email me, and I’ll send it to you. Not a subscriber? C’mon—we’d love to have you. A subscription costs nothing and gives you access to all our printables and pattern PDFs. Click here to have the Crochet Purse Pattern emailed to you.
Finished Size
Adjustable — make more or fewer granny squares to customize the bag size.
Pattern Abbreviations and Terminology
Magic ring (magic circle) – A technique for starting projects worked in the round. The yarn is looped into a ring, stitches are worked into it, and the ring is pulled tight to close the center hole. I have previously published a video showing how to crochet the magic ring, which you may find helpful.

Sc (single crochet)
Sl st (slip stitch) – Insert hook into stitch, yarn over, pull through both the stitch and the loop on the hook in one motion. Creates a small, flat stitch used for joining rounds or moving the working position.
St(s) (stitch/stitches)
Ch (chain) – Yarn over, pull through loop on hook. Creates the foundation row or adds height at the beginning of a row/round.
Dc (double crochet) – Yarn over, insert hook into stitch, yarn over, pull up a loop (3 loops on hook), yarn over, pull through 2 loops, yarn over, pull through remaining 2 loops.
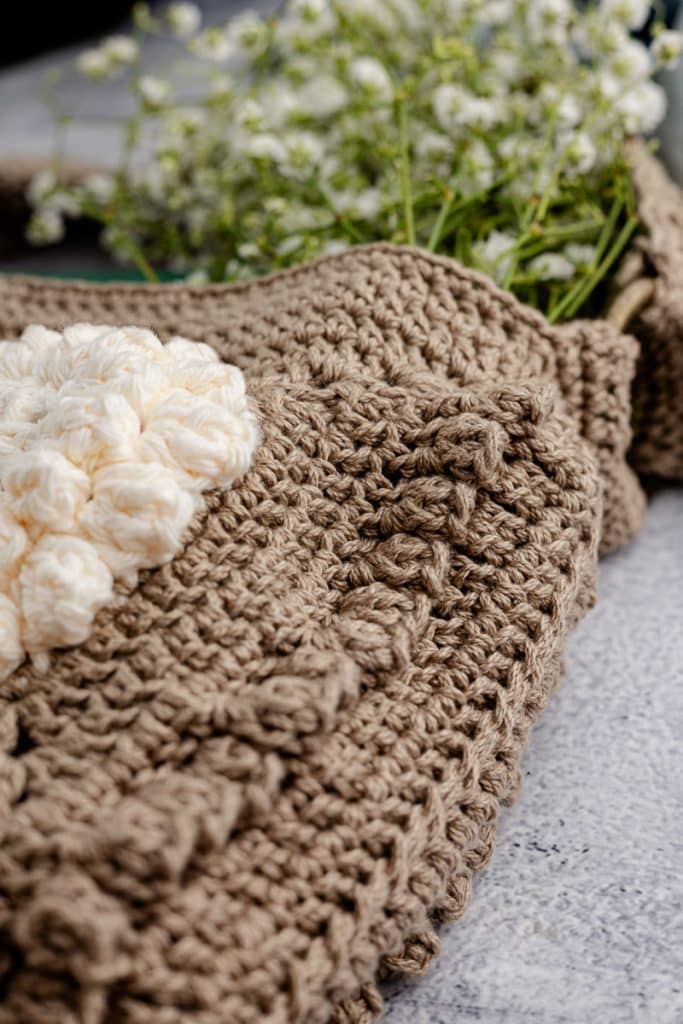
Popcorn stitch – Typically made by working 4–5 dc stitches into the same stitch or space, removing the hook from the loop, inserting the hook into the first dc of the group, picking up the dropped loop, and pulling it through to form a raised “popcorn” bump.
Ch-sp (chain space) – The space created when chains are worked in the previous row/round, often between groups of stitches.
Hdc (half double crochet) – Yarn over, insert hook into stitch, yarn over, pull up a loop (3 loops on hook), yarn over, pull through all three loops.
Corner (in granny squares) – Usually refers to (2 dc, ch 2, 2 dc) worked into the same space, forming the square’s corner.
Fasten off – Secure the final stitch by pulling the yarn tail through the last loop on the hook, then tighten to prevent unraveling.
Weave in ends – Use a yarn needle to thread and hide the loose yarn tails within the stitches for a neat finish.
Instructions for this Crochet Purse Pattern
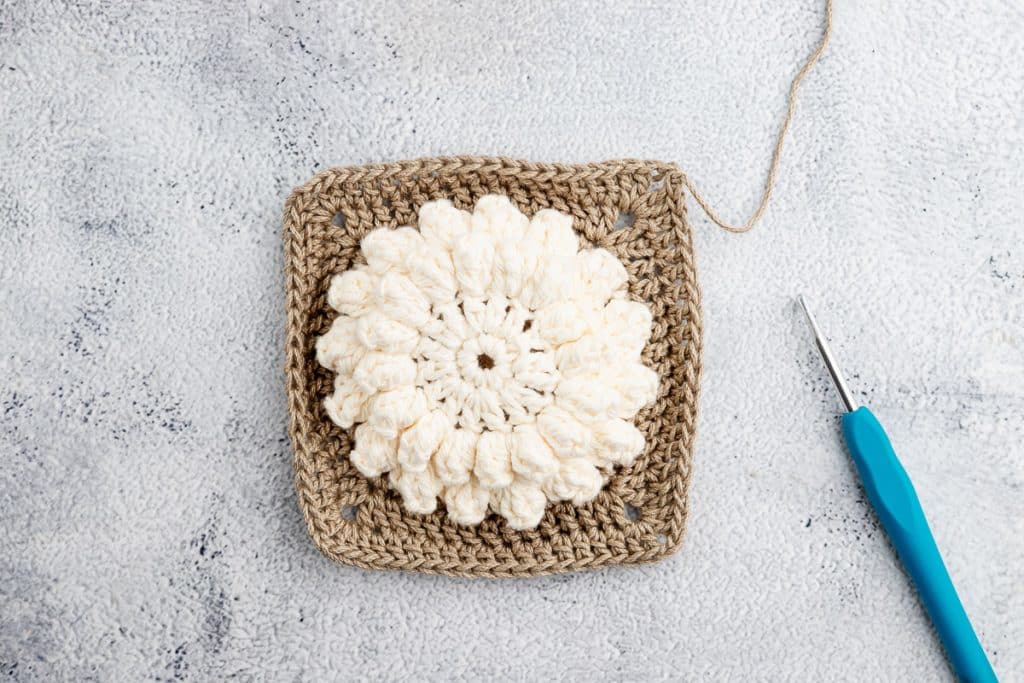
Granny Squares (Make eight or as many as desired)
Round 1:
- 8 sc into a magic ring. Sl st to first sc to close. (8 sts)

Round 2:
- Ch 3 (counts as dc), dc in the same st, 2 dc in each st around. Sl st to top of ch-3. (16 dc)
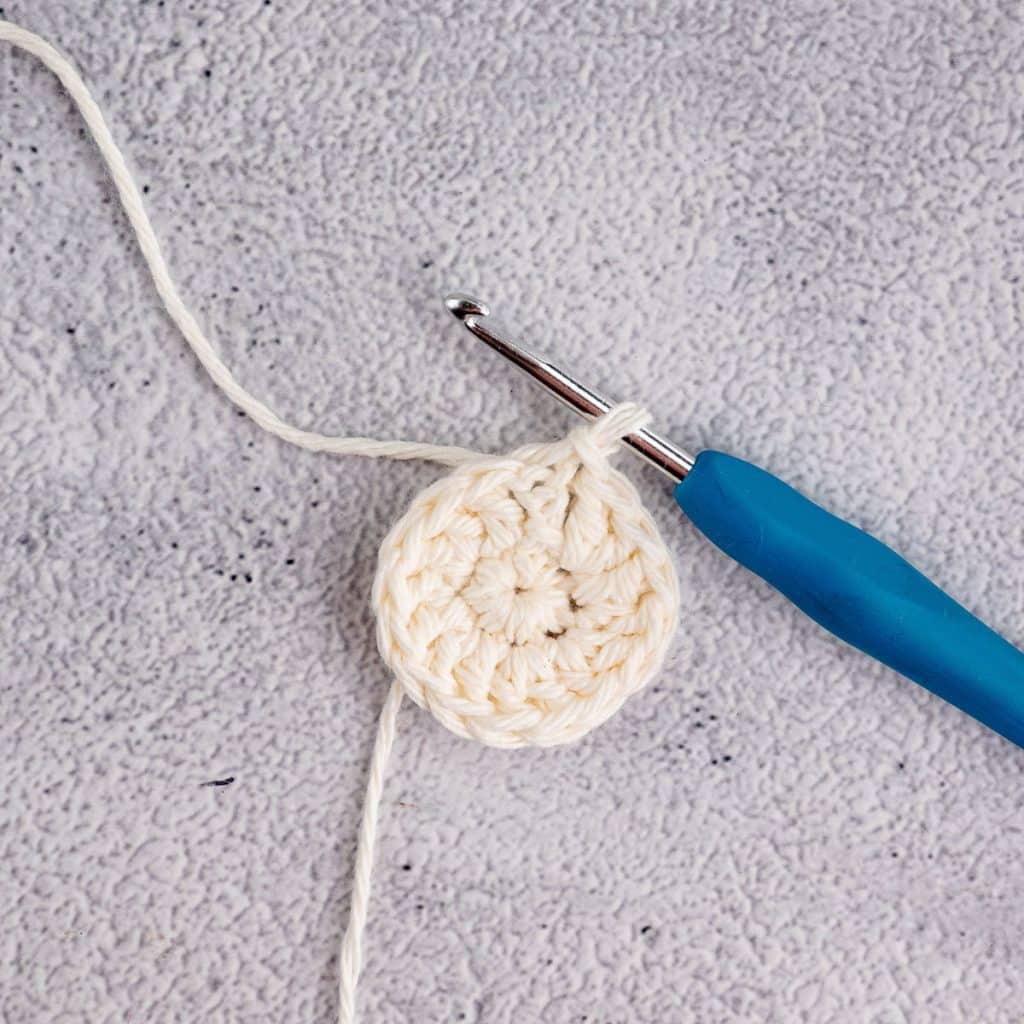
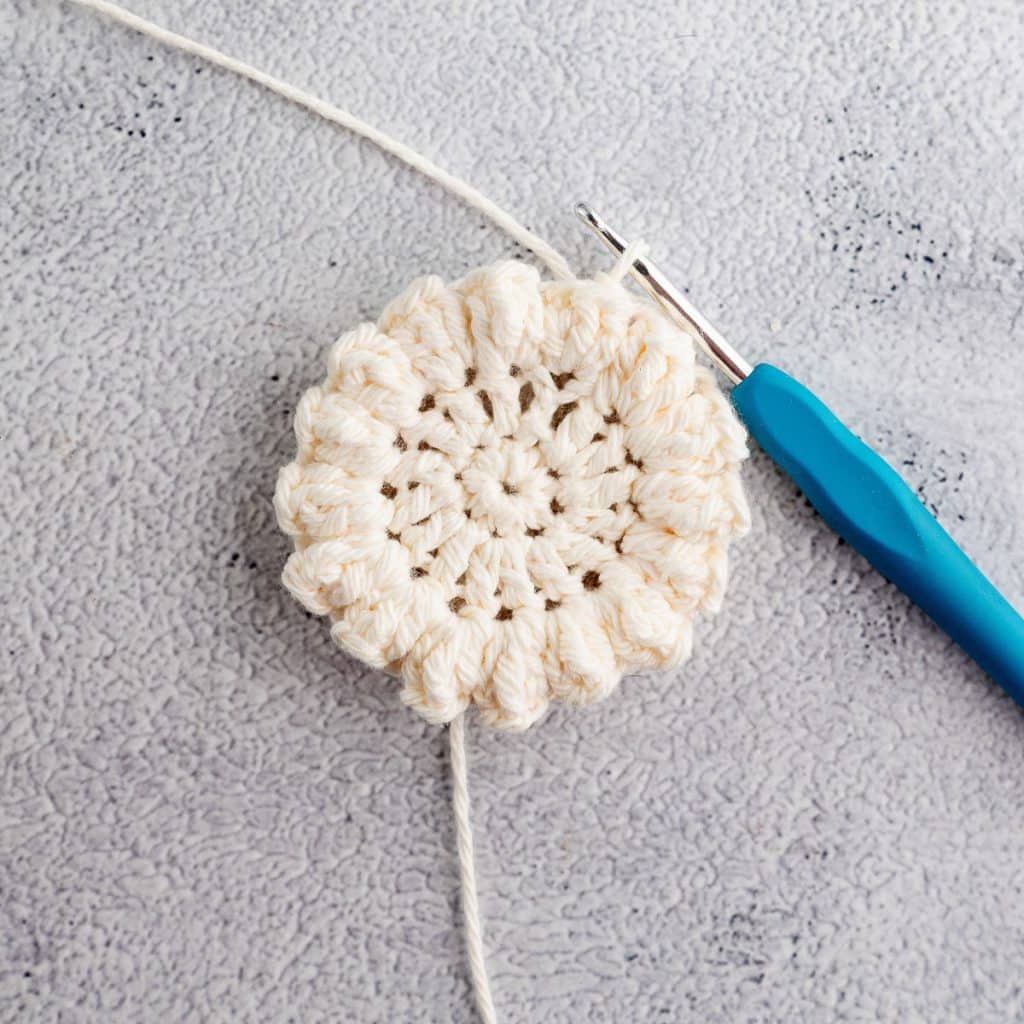
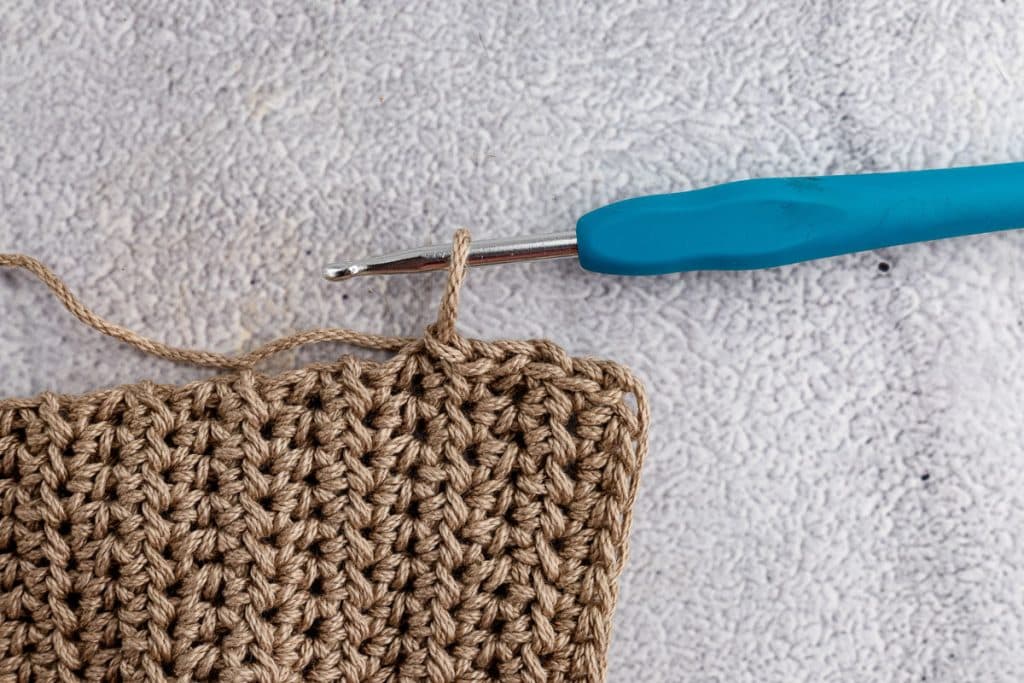
Round 3 (Popcorn Round):
- Ch 3, work 4 dc in same st. Remove hook from loop, insert into top of ch-3, pull working loop through to form popcorn stitch. Ch 2.
- 5 dc in next st, form popcorn, ch 2 . Repeat around for a total of 16 popcorns.
- Sl st to join.
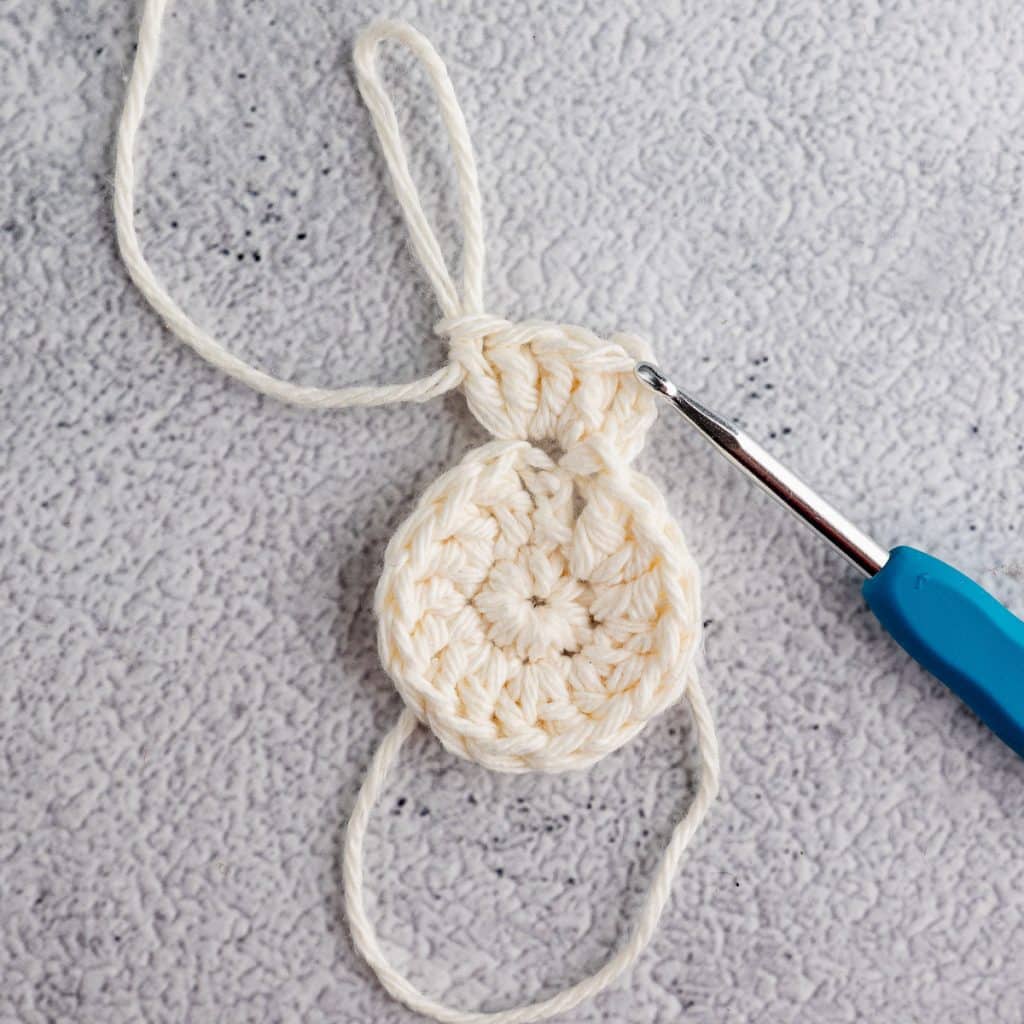
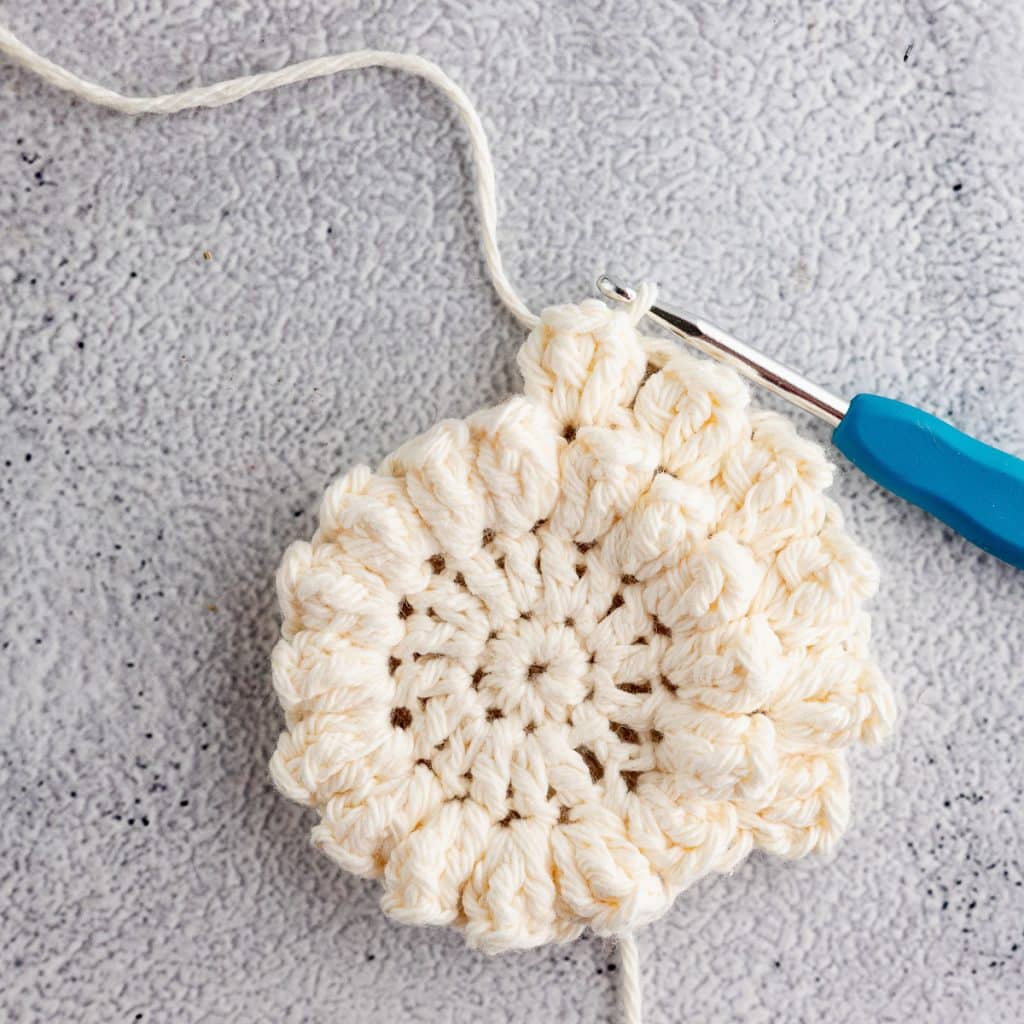
Round 4:
Second round of popcorn petals.
- Sl st to next ch-2 space.
- Popcorn in ch-2 sp, ch 2; repeat all around (16 popcorns).
- Sl st to join.
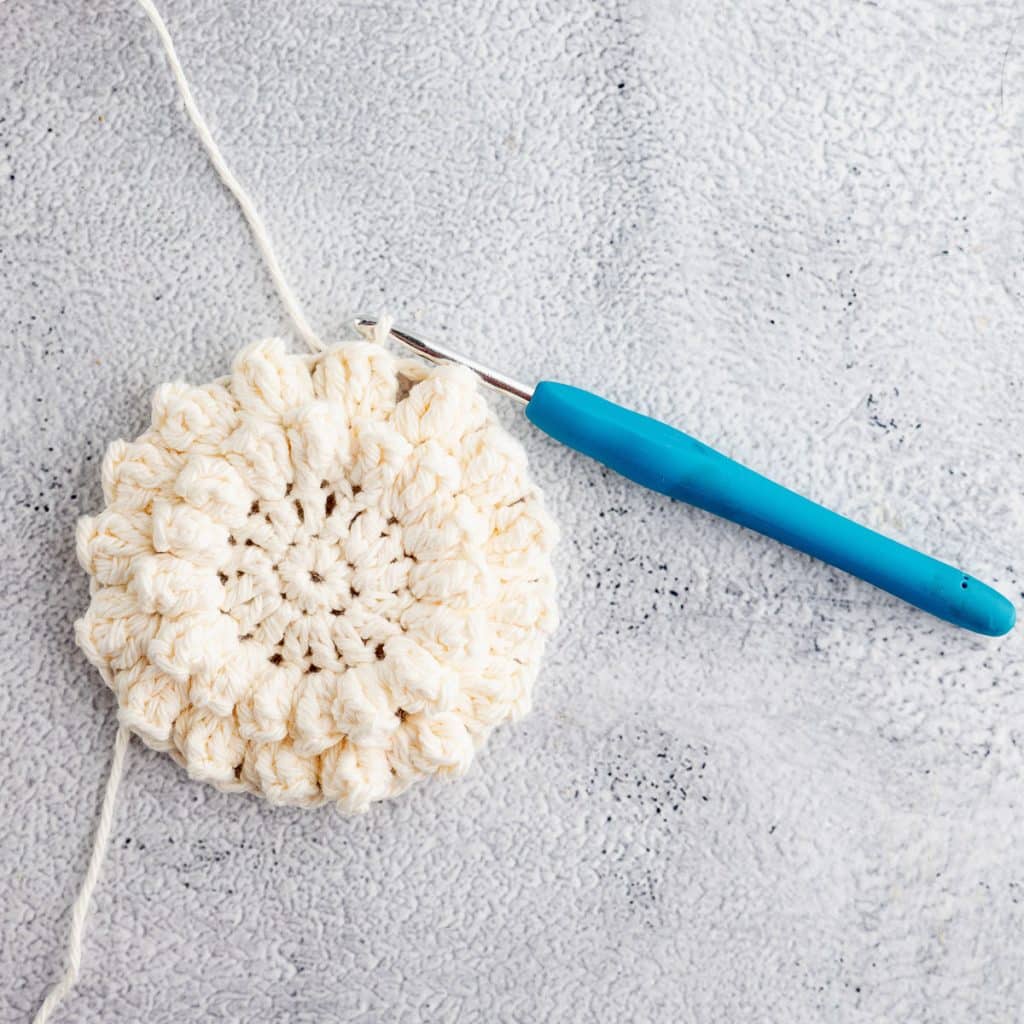
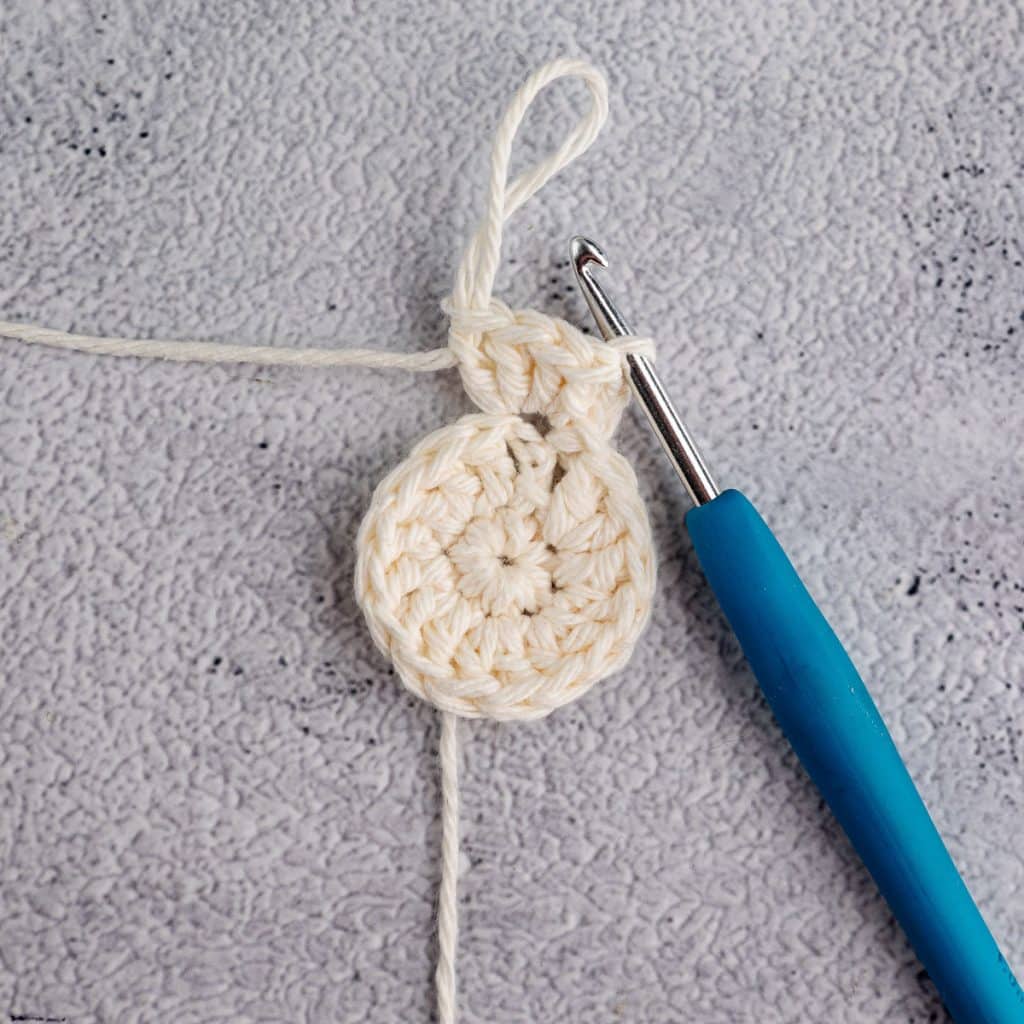
Round 5:
Change to Color B
- Work 48 sc evenly around the flower:
- – 2 sc in each ch-2 space
- – 1 sc on top of each popcorn stitch
- Sl st to join. (48 sc)

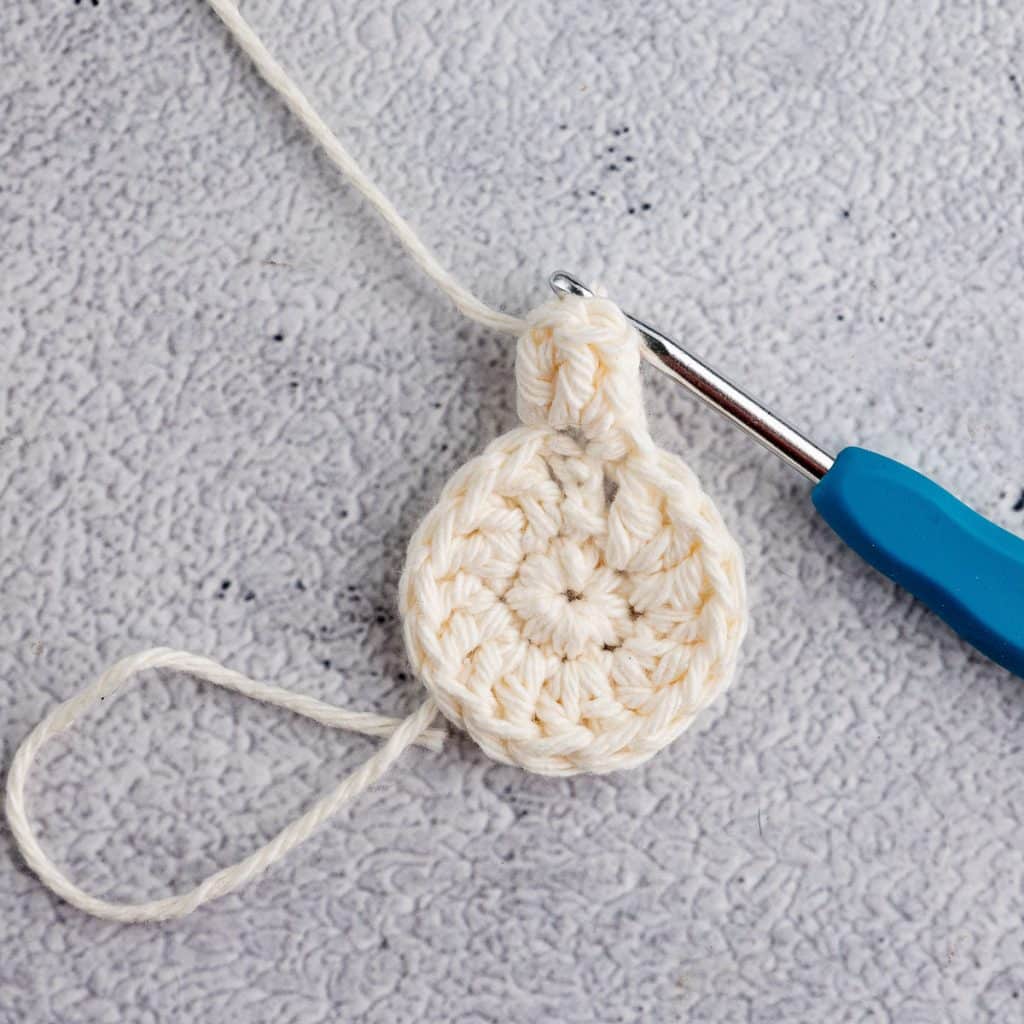
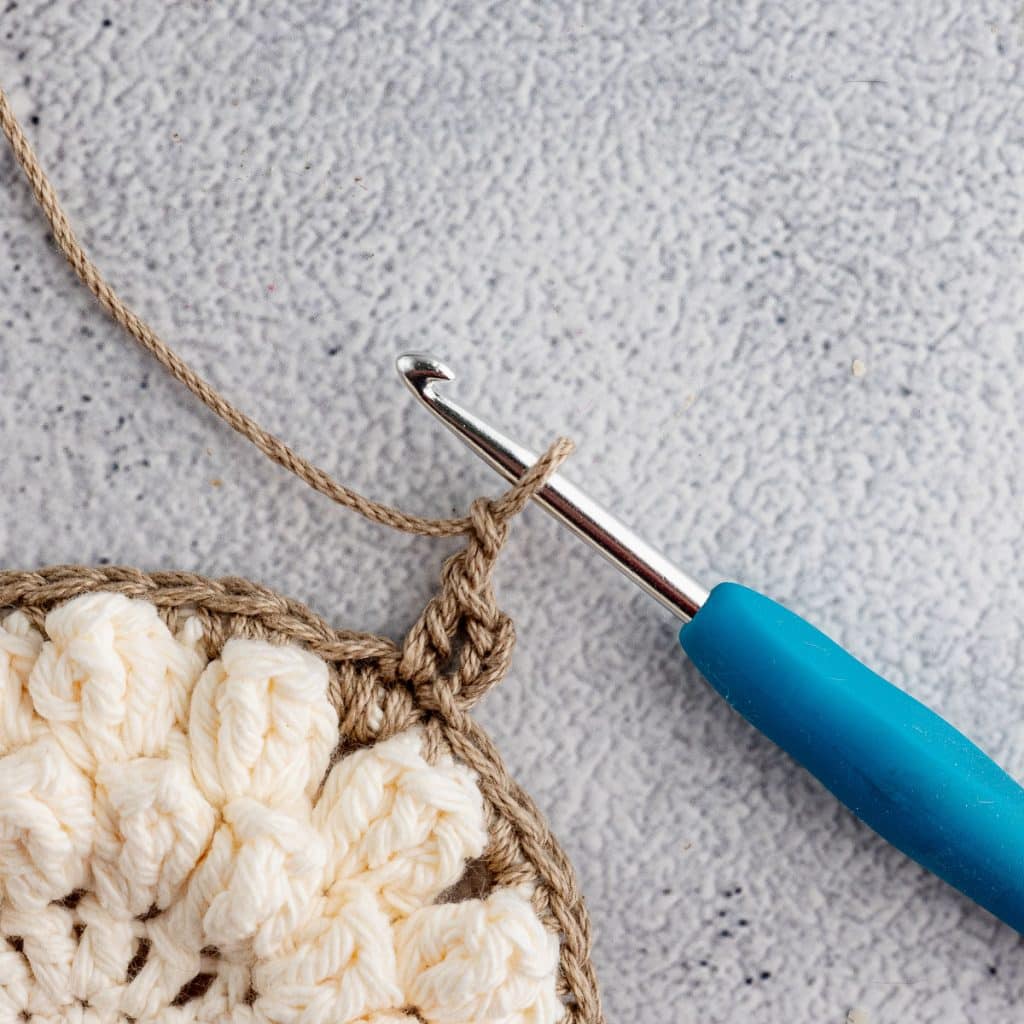
Round 6:
Begin Granny Square
- Ch 3 (counts as dc), dc in same st, ch 2, 2 dc in same st (corner made).
- Dc in next 11 sts, (2 dc, ch 2, 2 dc) in next st, and then repeat around for four corners.
- Sl st to join.
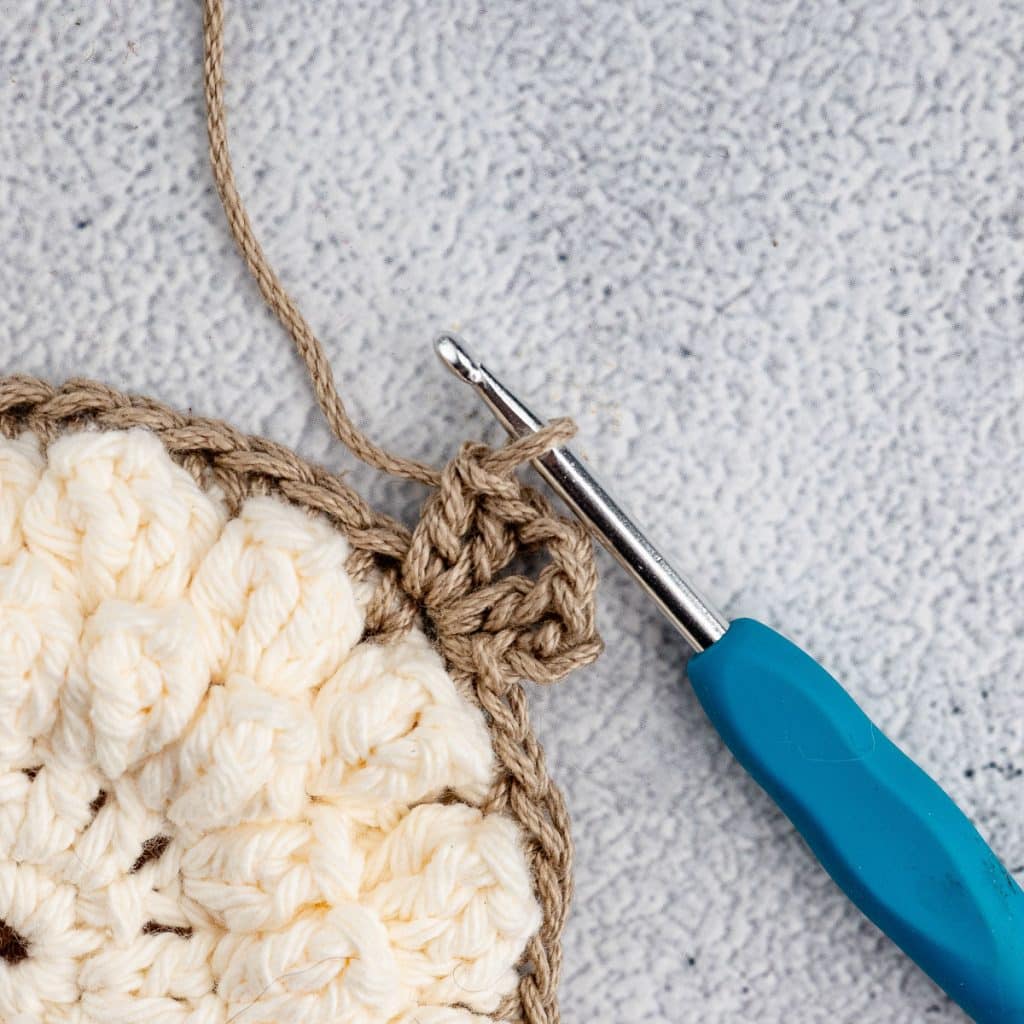
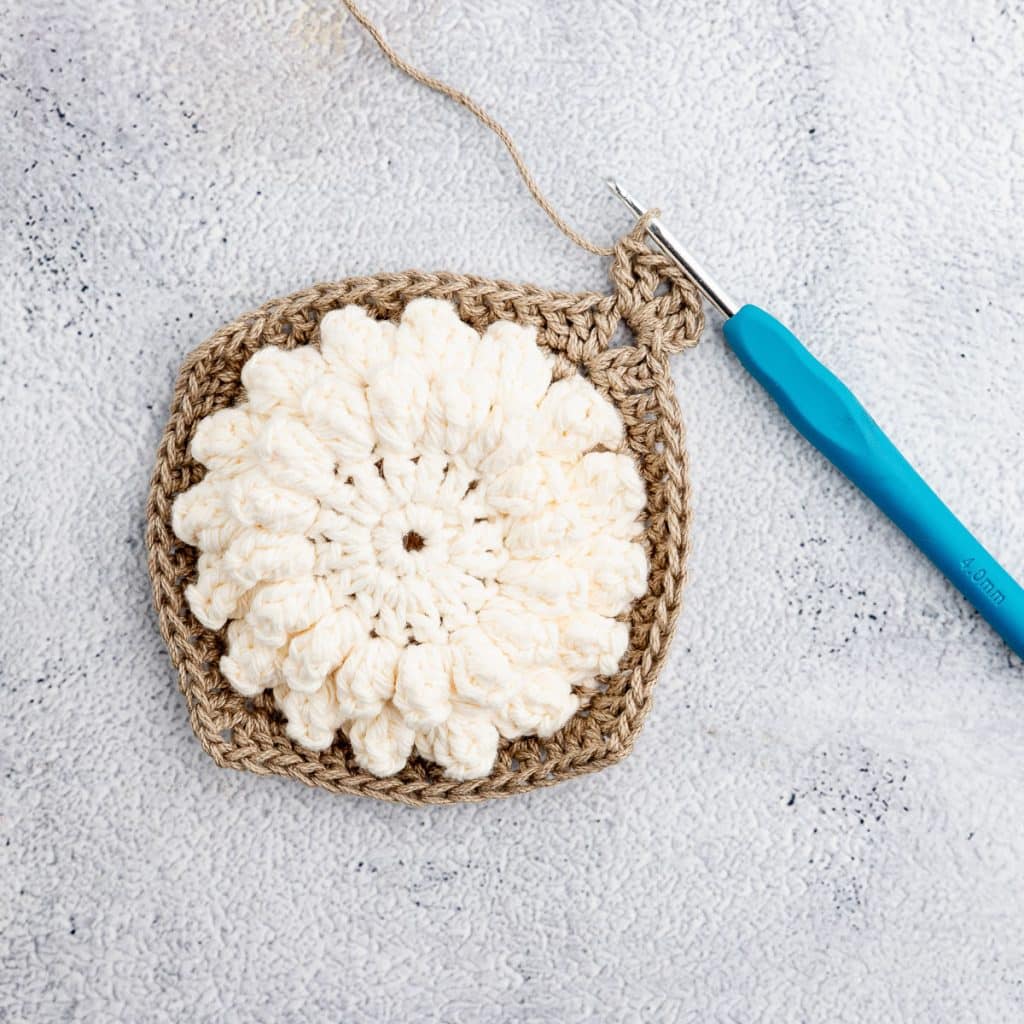

Round 7:
- Repeat Round 6, placing one dc in each st between corners. (15 dc between each corner).
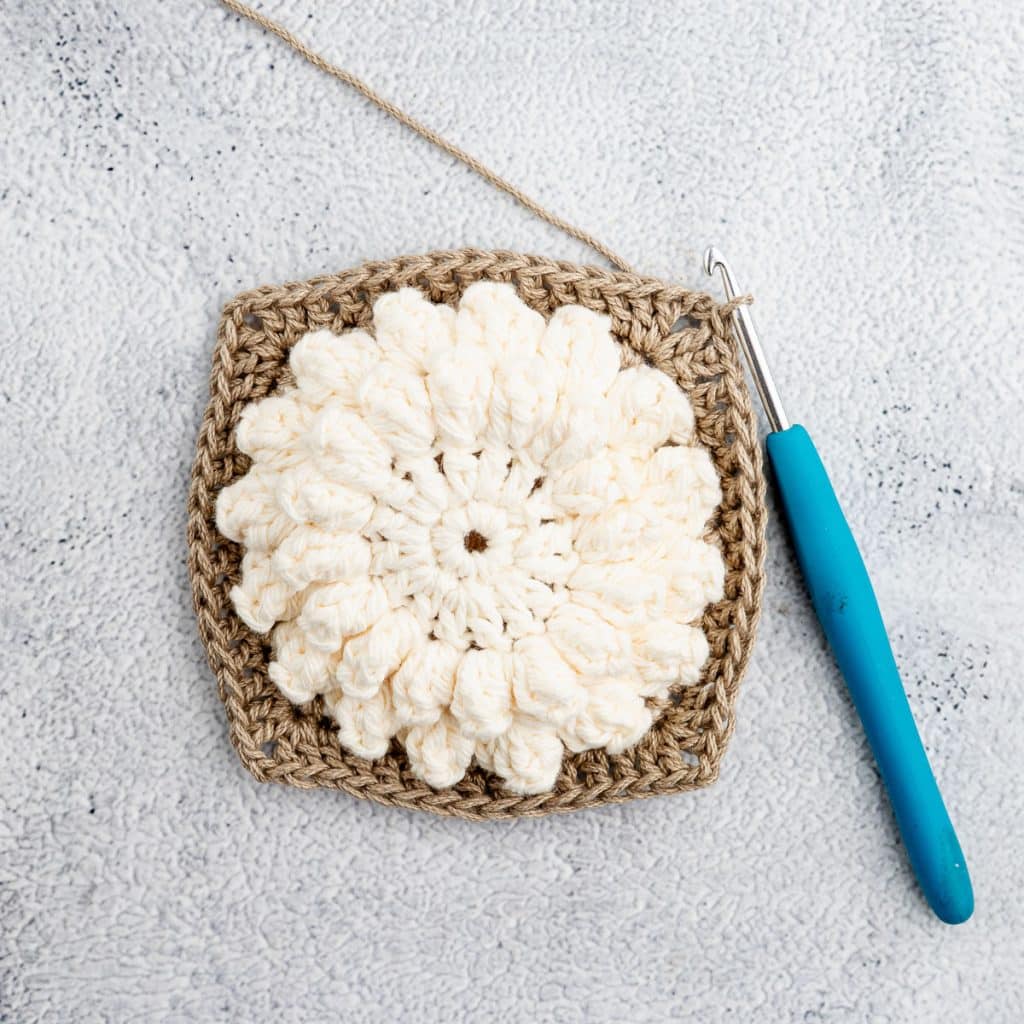
- Fasten off and weave in ends.

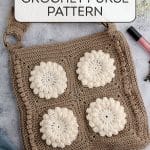
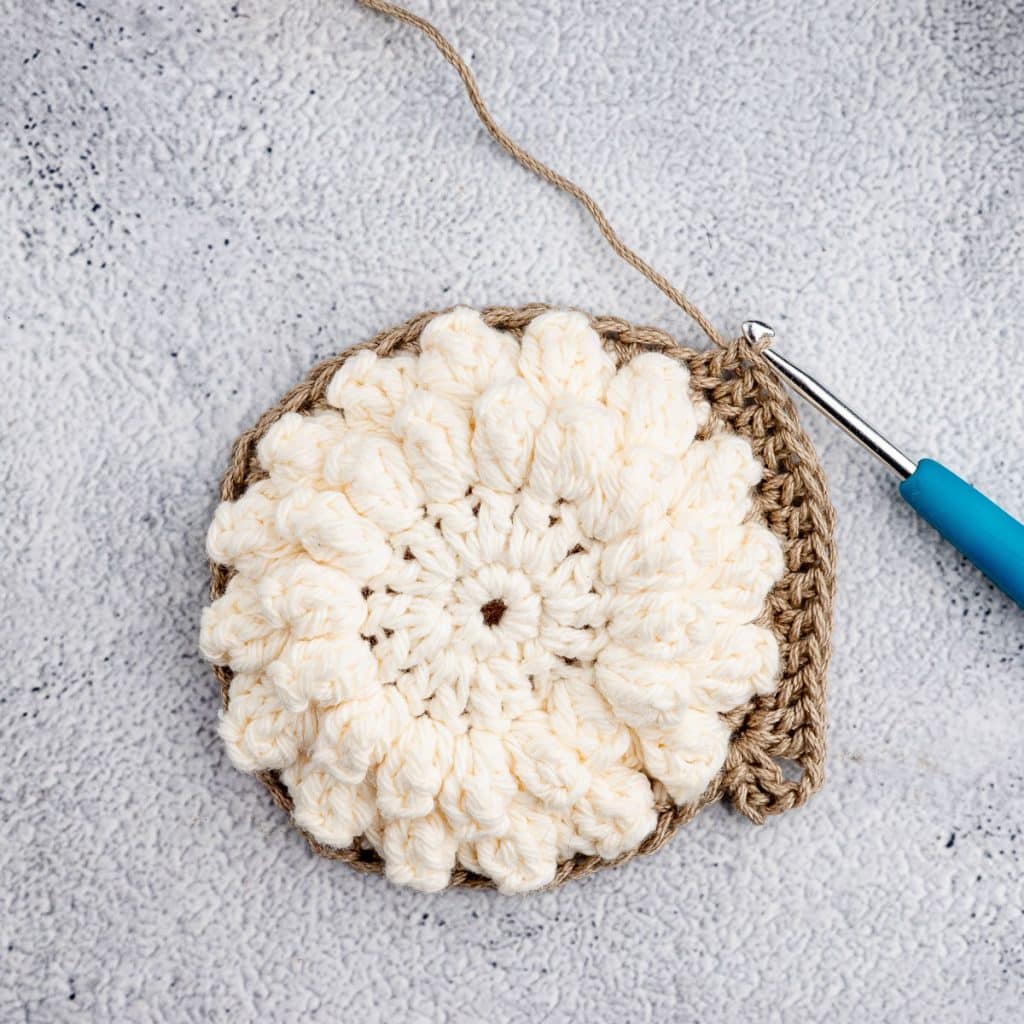
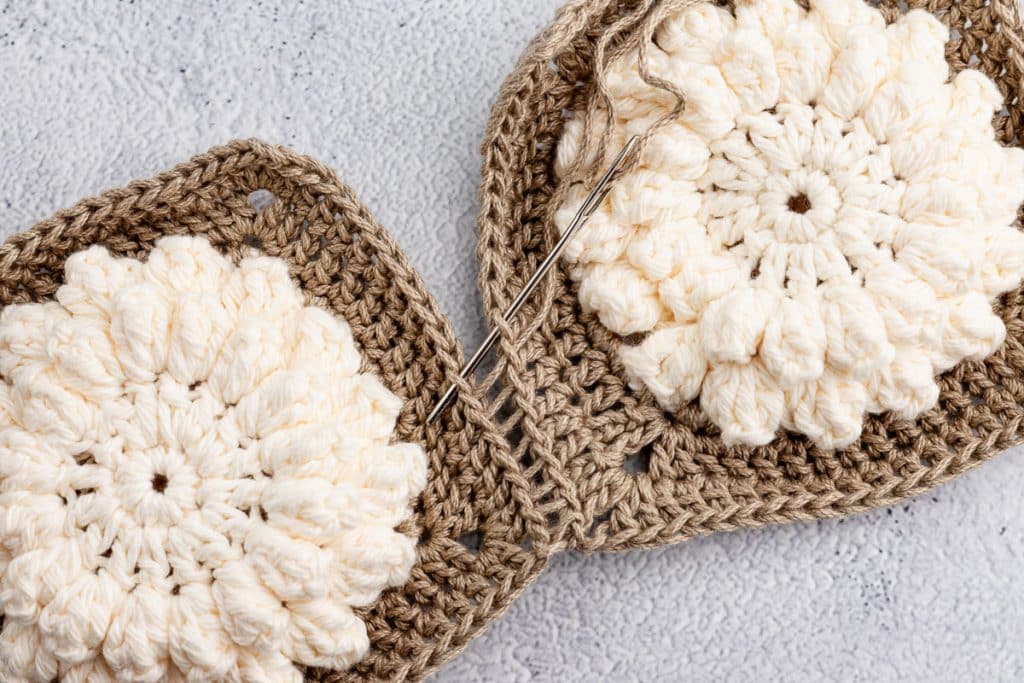
Joining the Squares
Arrange your granny squares — 4 for the front and 4 for the back.
Join using your preferred method to create two panels. I used Mattress Stitch.
Body of the Bag
Now we’ll build onto each panel to create one large granny square per side.
Round 1 (Attach yarn to any corner):
- In a corner space, crochet 2 dc, ch 2, 2 dc.
- Dc in each st across — you should have 41 dc between corners.
- Repeat around. Sl st to join.
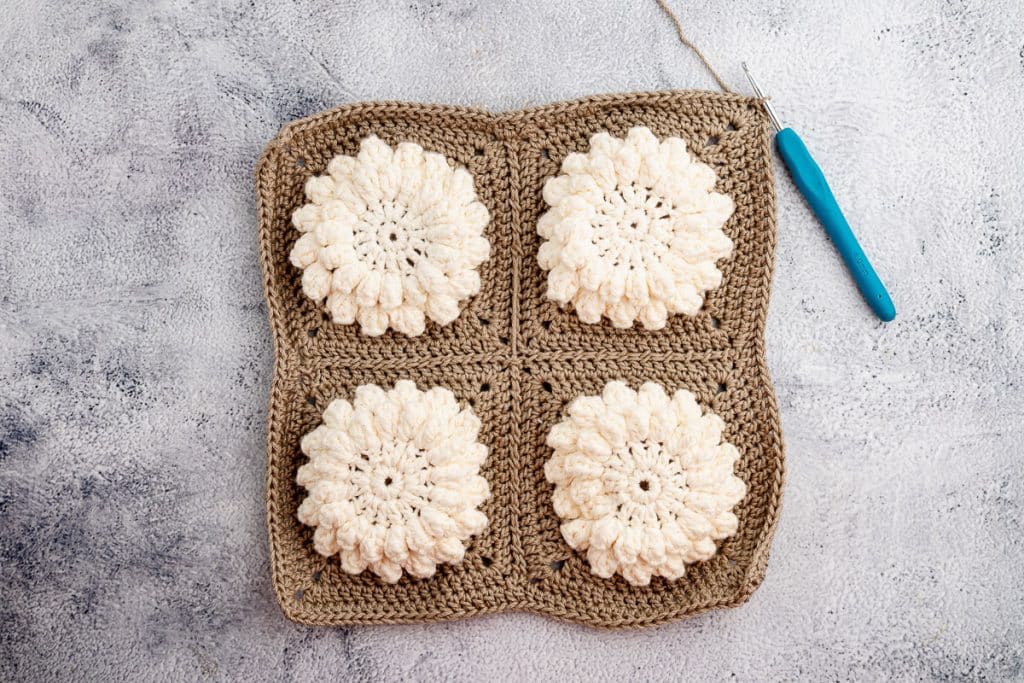
Round 2:
Repeat as above, now with 45 dc between corners. Sl st to join.
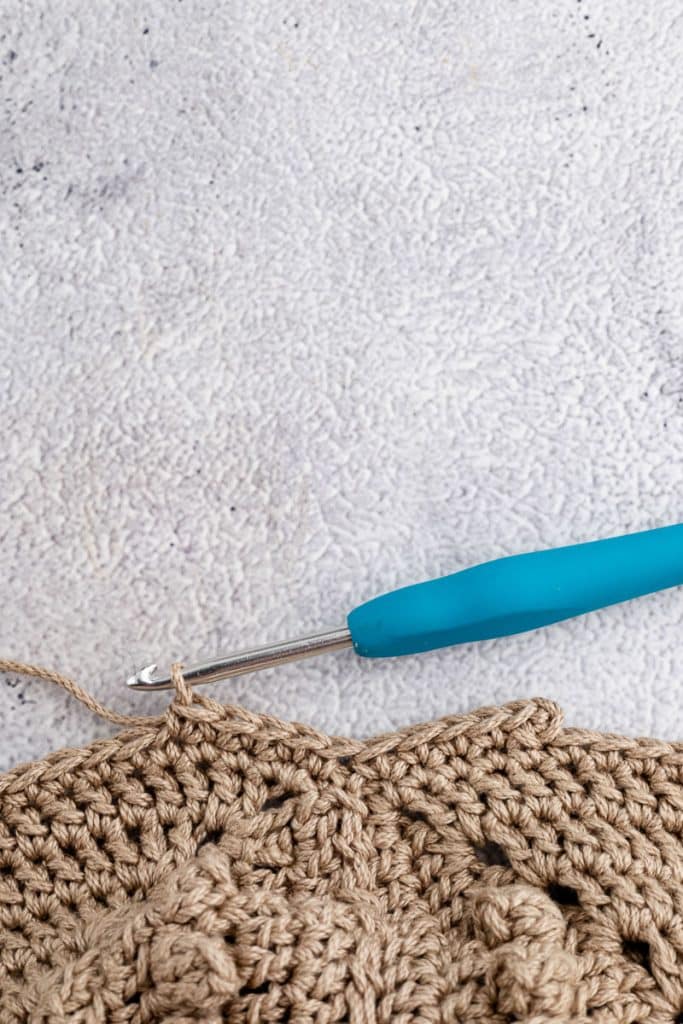
Round 3 (Popcorn Detail):
After a corner going up or down the side:
- 1 dc, 1 popcorn stitch in next st; repeat across the side.
- Work regular dc across top and bottom edges.
- Repeat the popcorn pattern on the opposite side. Sl st to join.
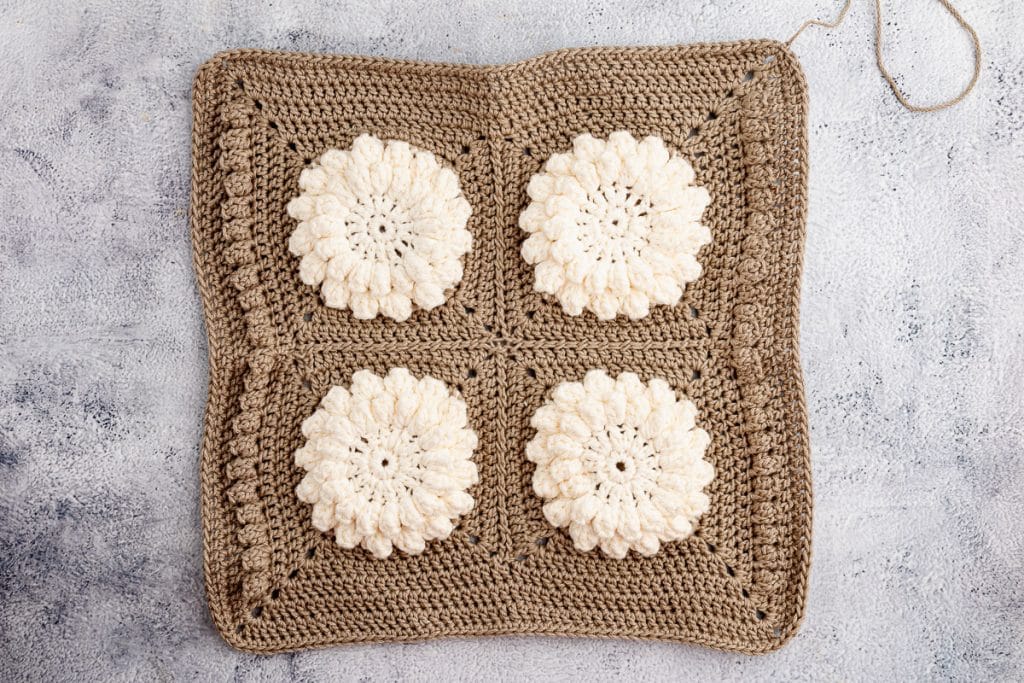
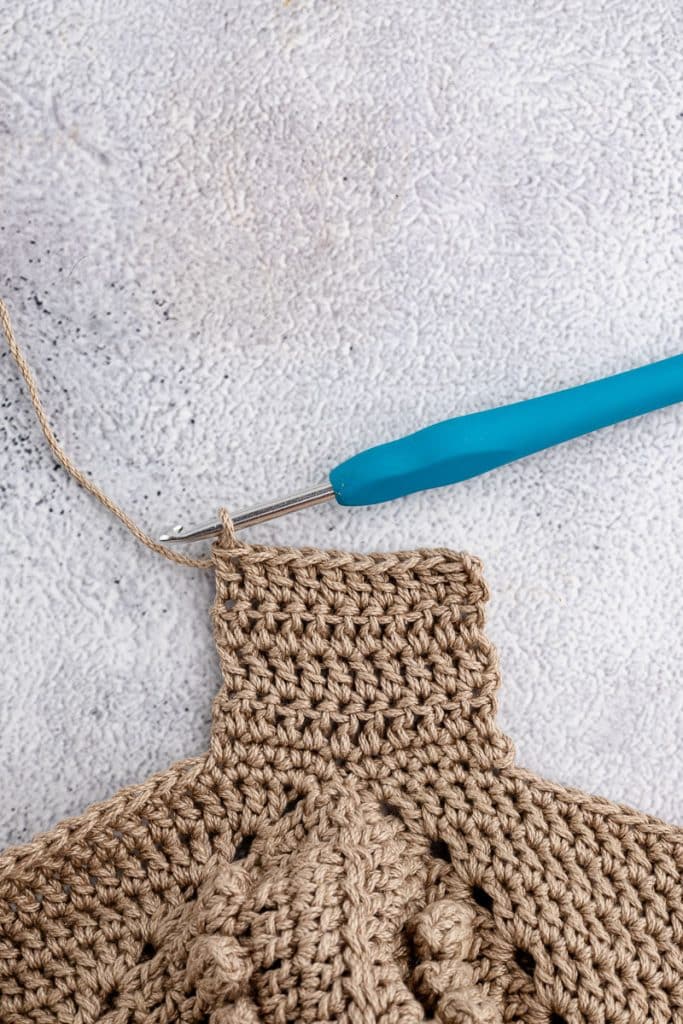
Round 4:
- Dc in each stitch around, maintaining corner increases.
Round 5 (Finishing Round):
- 2 sc in ch-2 corner space, sc across top, 2 sc in next corner
- Dc across next side, 2 sc in next corner
- Sc across the bottom, 2sc in the next corner, dc across the final side
- Sl st to join. Fasten off.
- Repeat this entire body section for the second panel.
Assembling the Bag
Sew panels together around the sides and bottom using your preferred method. Leave the top open.
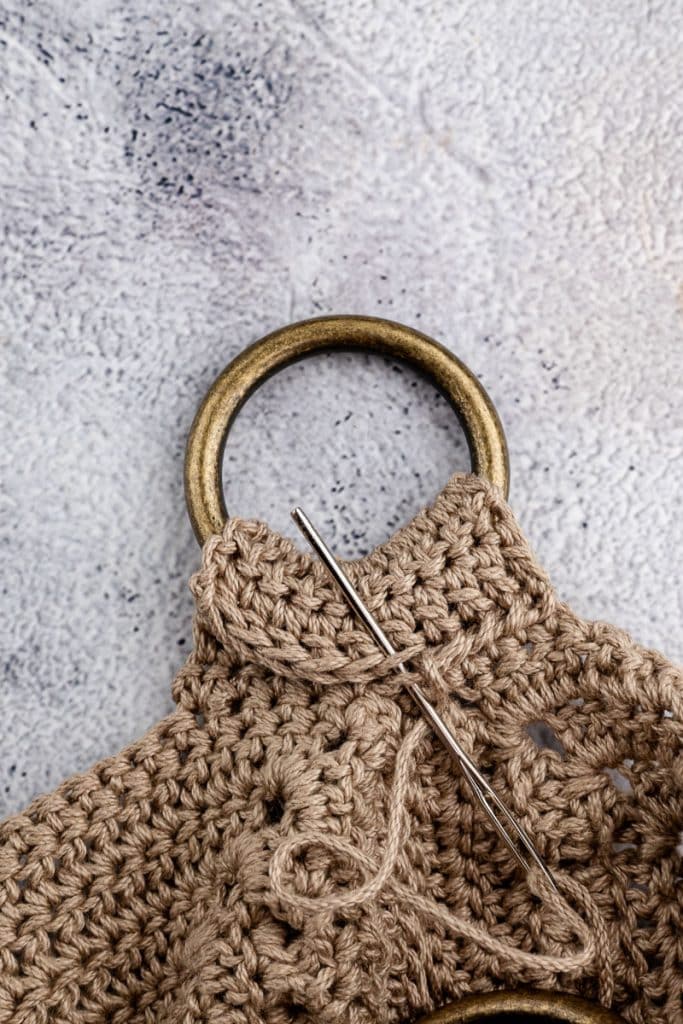
Strap Attachment Tabs with Purse Rings (Optional)
Count five stitches on each side of the seam to center the tab.
Row 1: Attach yarn and sc across 10 stitches.
Rows 2–5: Ch 2, turn, 10 dc across.
Fasten off, leaving a long tail. Sew tab securely around the purse ring. Repeat on the opposite side.
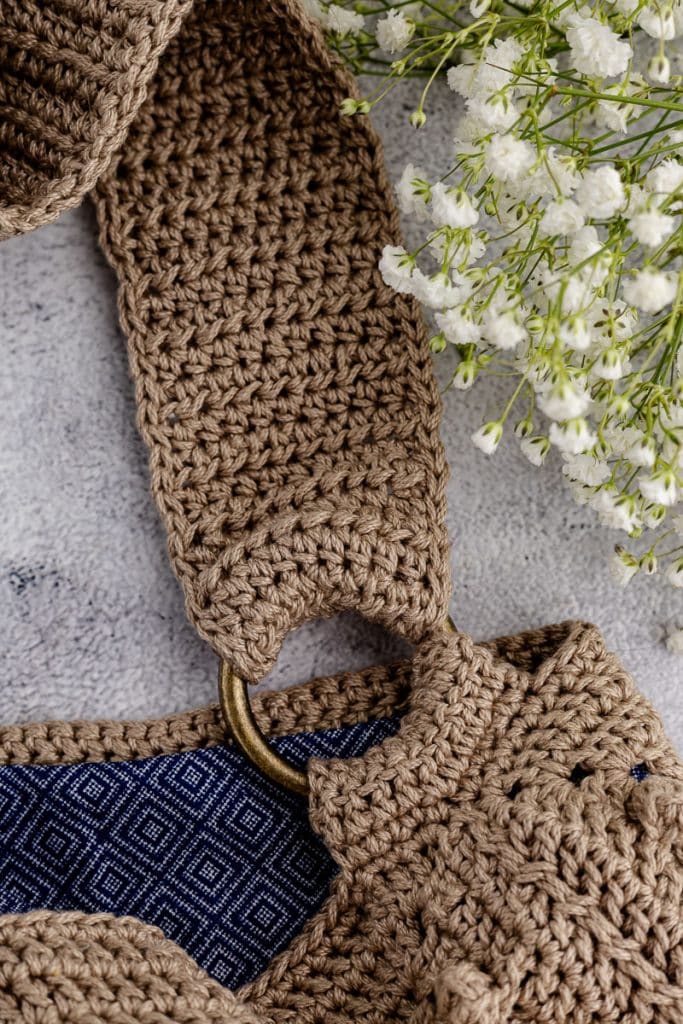
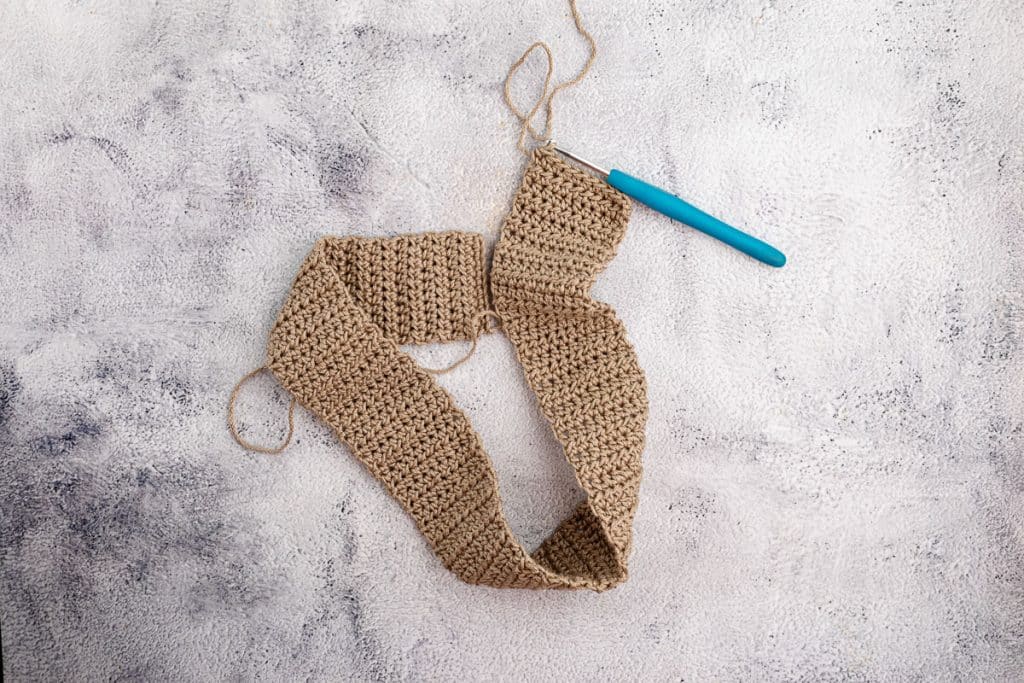
Strap
- Ch 10
- Hdc in each stitch across.
- Turn and repeat rows of hdc until the desired length is reached.
Finishing: Sl st evenly around all edges of the strap for a clean look.
Sew each end to the tabs or directly to the bag.
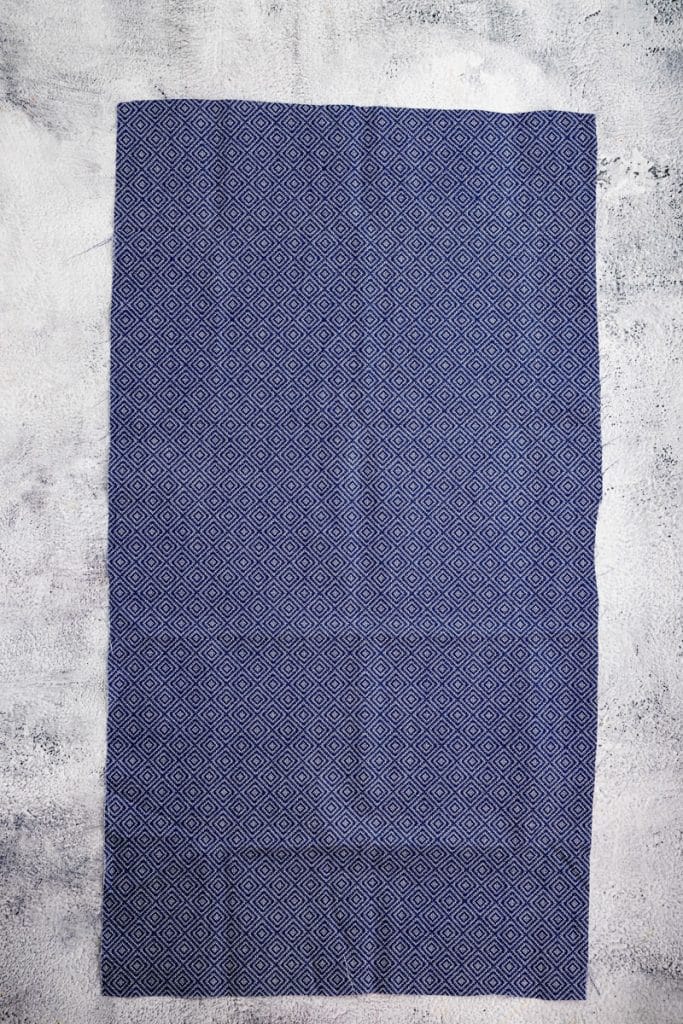
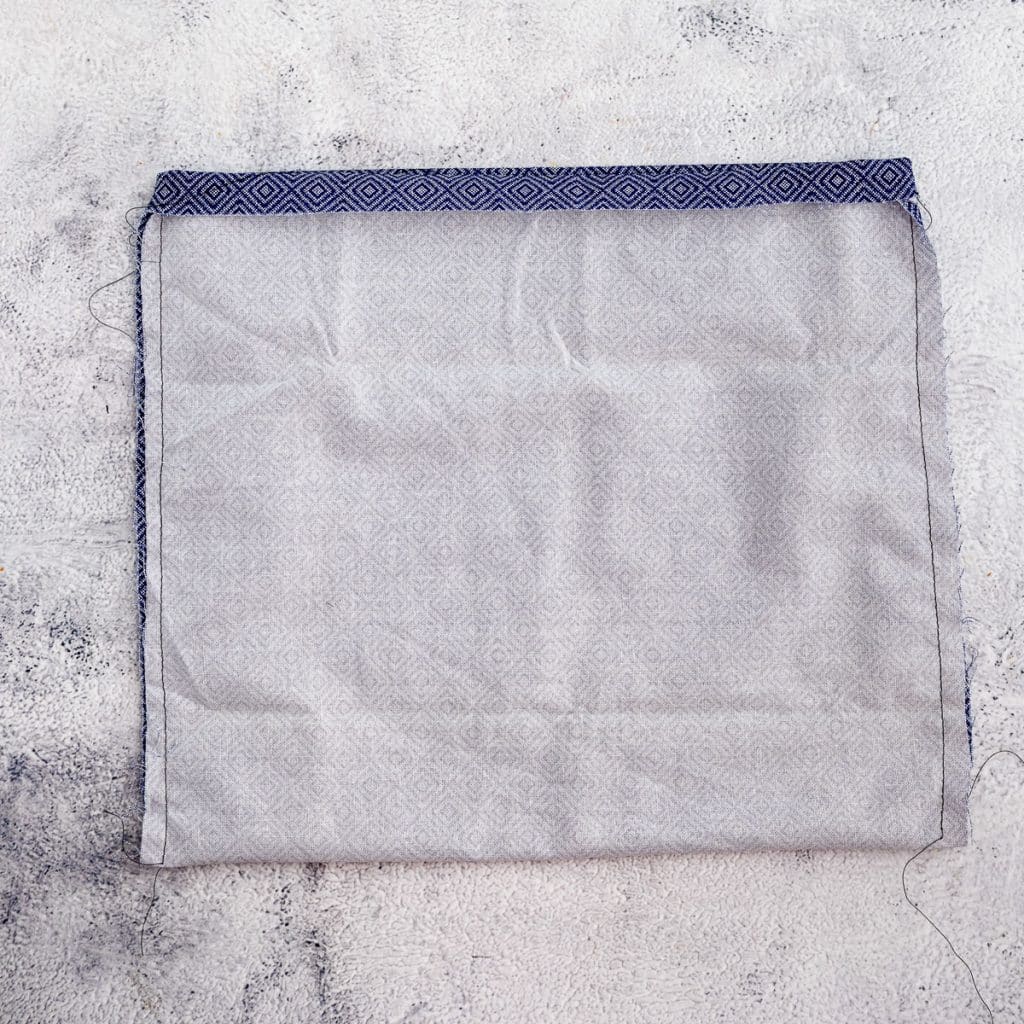
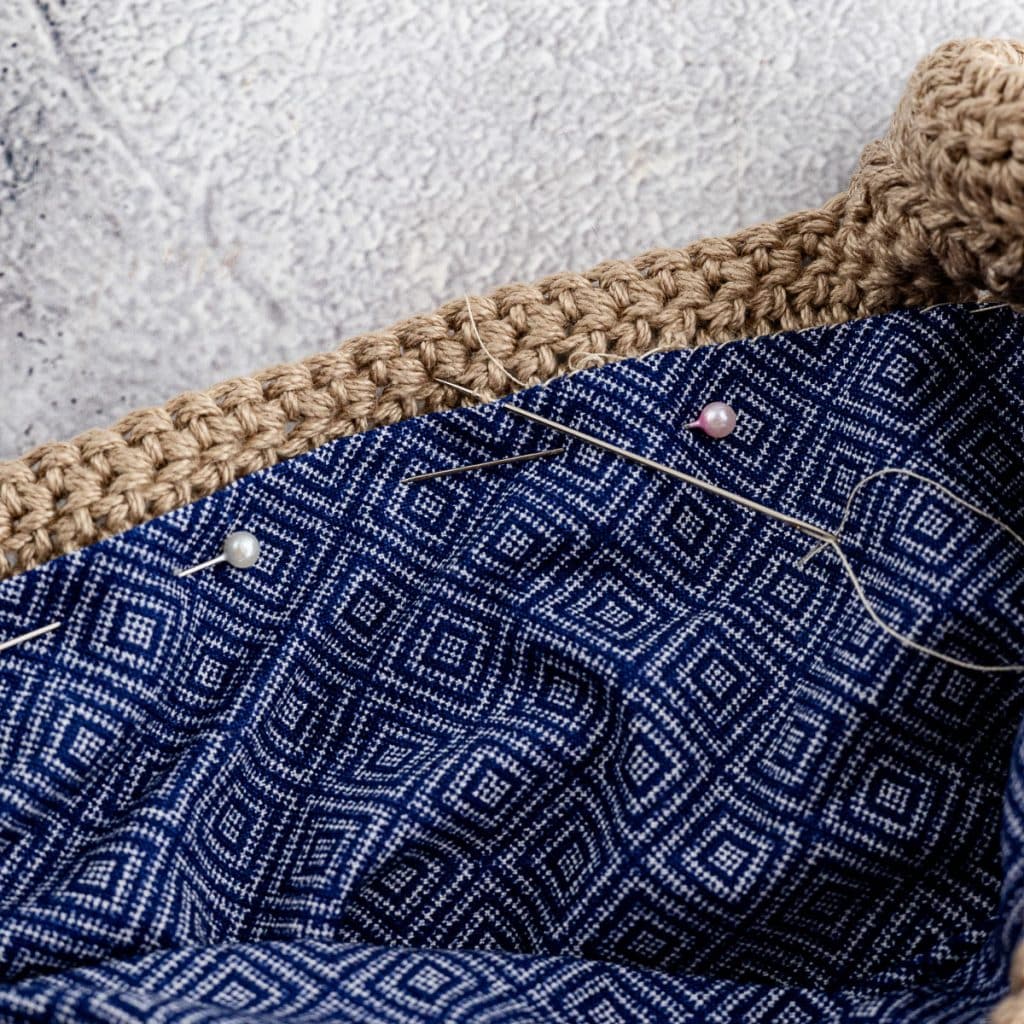
Lining Your Crochet Purse (Optional)
- Cut a rectangle of fabric the same width as your finished bag and twice the height.
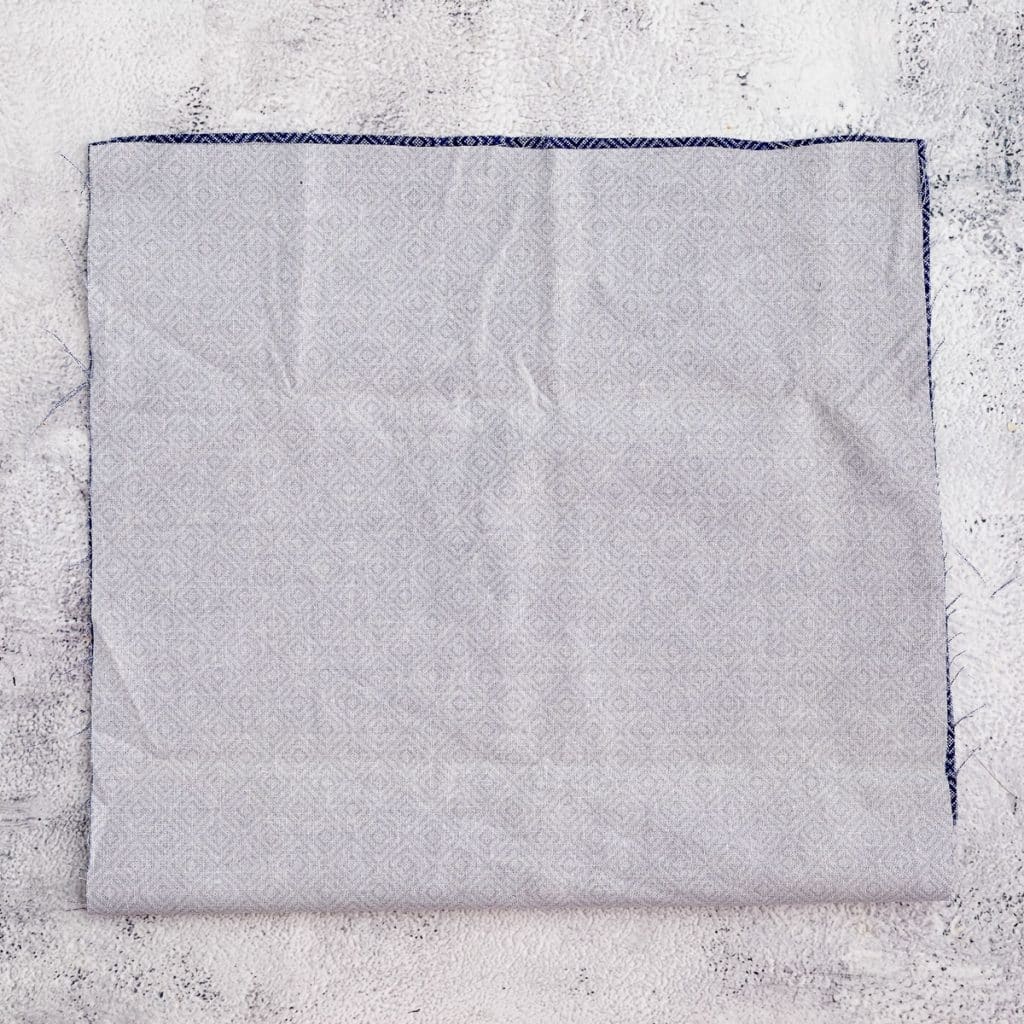
- Fold in half with the right sides together and sew the sides.
- Fold the top edge outward. You want the right side of the fabric to be what shows when you open the purse.
- Slip inside the bag and sew along the top using an invisible stitch for a polished finish.
Bookmark this page or pin the following image to return back to this Free Crochet Purse Pattern in the future.
Thanks so much for spending a few minutes of your busy day with me!
To ensure you don’t miss future content, pop your email in the pale green box on the right or click here. I usually send one email weekly, so I won’t inundate your inbox. I’m sensitive to an overflowing email inbox!
We will only use your email address to send you emails, no more than 1-2 weekly. In addition, you will have access to my growing library of knit & crochet patterns and other printables. Check back often as this library will continue to grow. You can unsubscribe anytime by emailing me or clicking on the “unsubscribe” link at the bottom of all emails.
And you can access many of the products I refer to on my Nourish and Nestle Amazon Page. You can access it here.
So, if you’d like to participate in the ‘subscriber benefit’ action, simply subscribe to Nourish and Nestle here or use the form on the right sidebar. It’s slightly towards the top.
I have sent all my subscribers the link to the Subscriber Benefits Library. If you missed it or misplaced it, let me know.
Until next time…

I love your newsletter and especially at this time of year! You have so many great ideas! I wanted to download your Christmas Pillow and the Granny Square purse, however, when I clicked on the Download button, a file presented itself with press here to download, but it was and .exe file. I never click on executable files. I did find a place to have you send to my email the Christmas Pillow pattern, but not the Granny Square purse. Is the only way to get that is by cutting and pasting all the instructions? If that is what I have to do, I will do it, but I’d prefer not to do it that way.
Again, thank you for always sharing your talents with us! I’m sorry if I’m whining, but I just had heart surgery and recuperating.
Sorry for the frustration, Nan.
I’ve emailed those patterns to you.
Happy knitting and feel better soon!