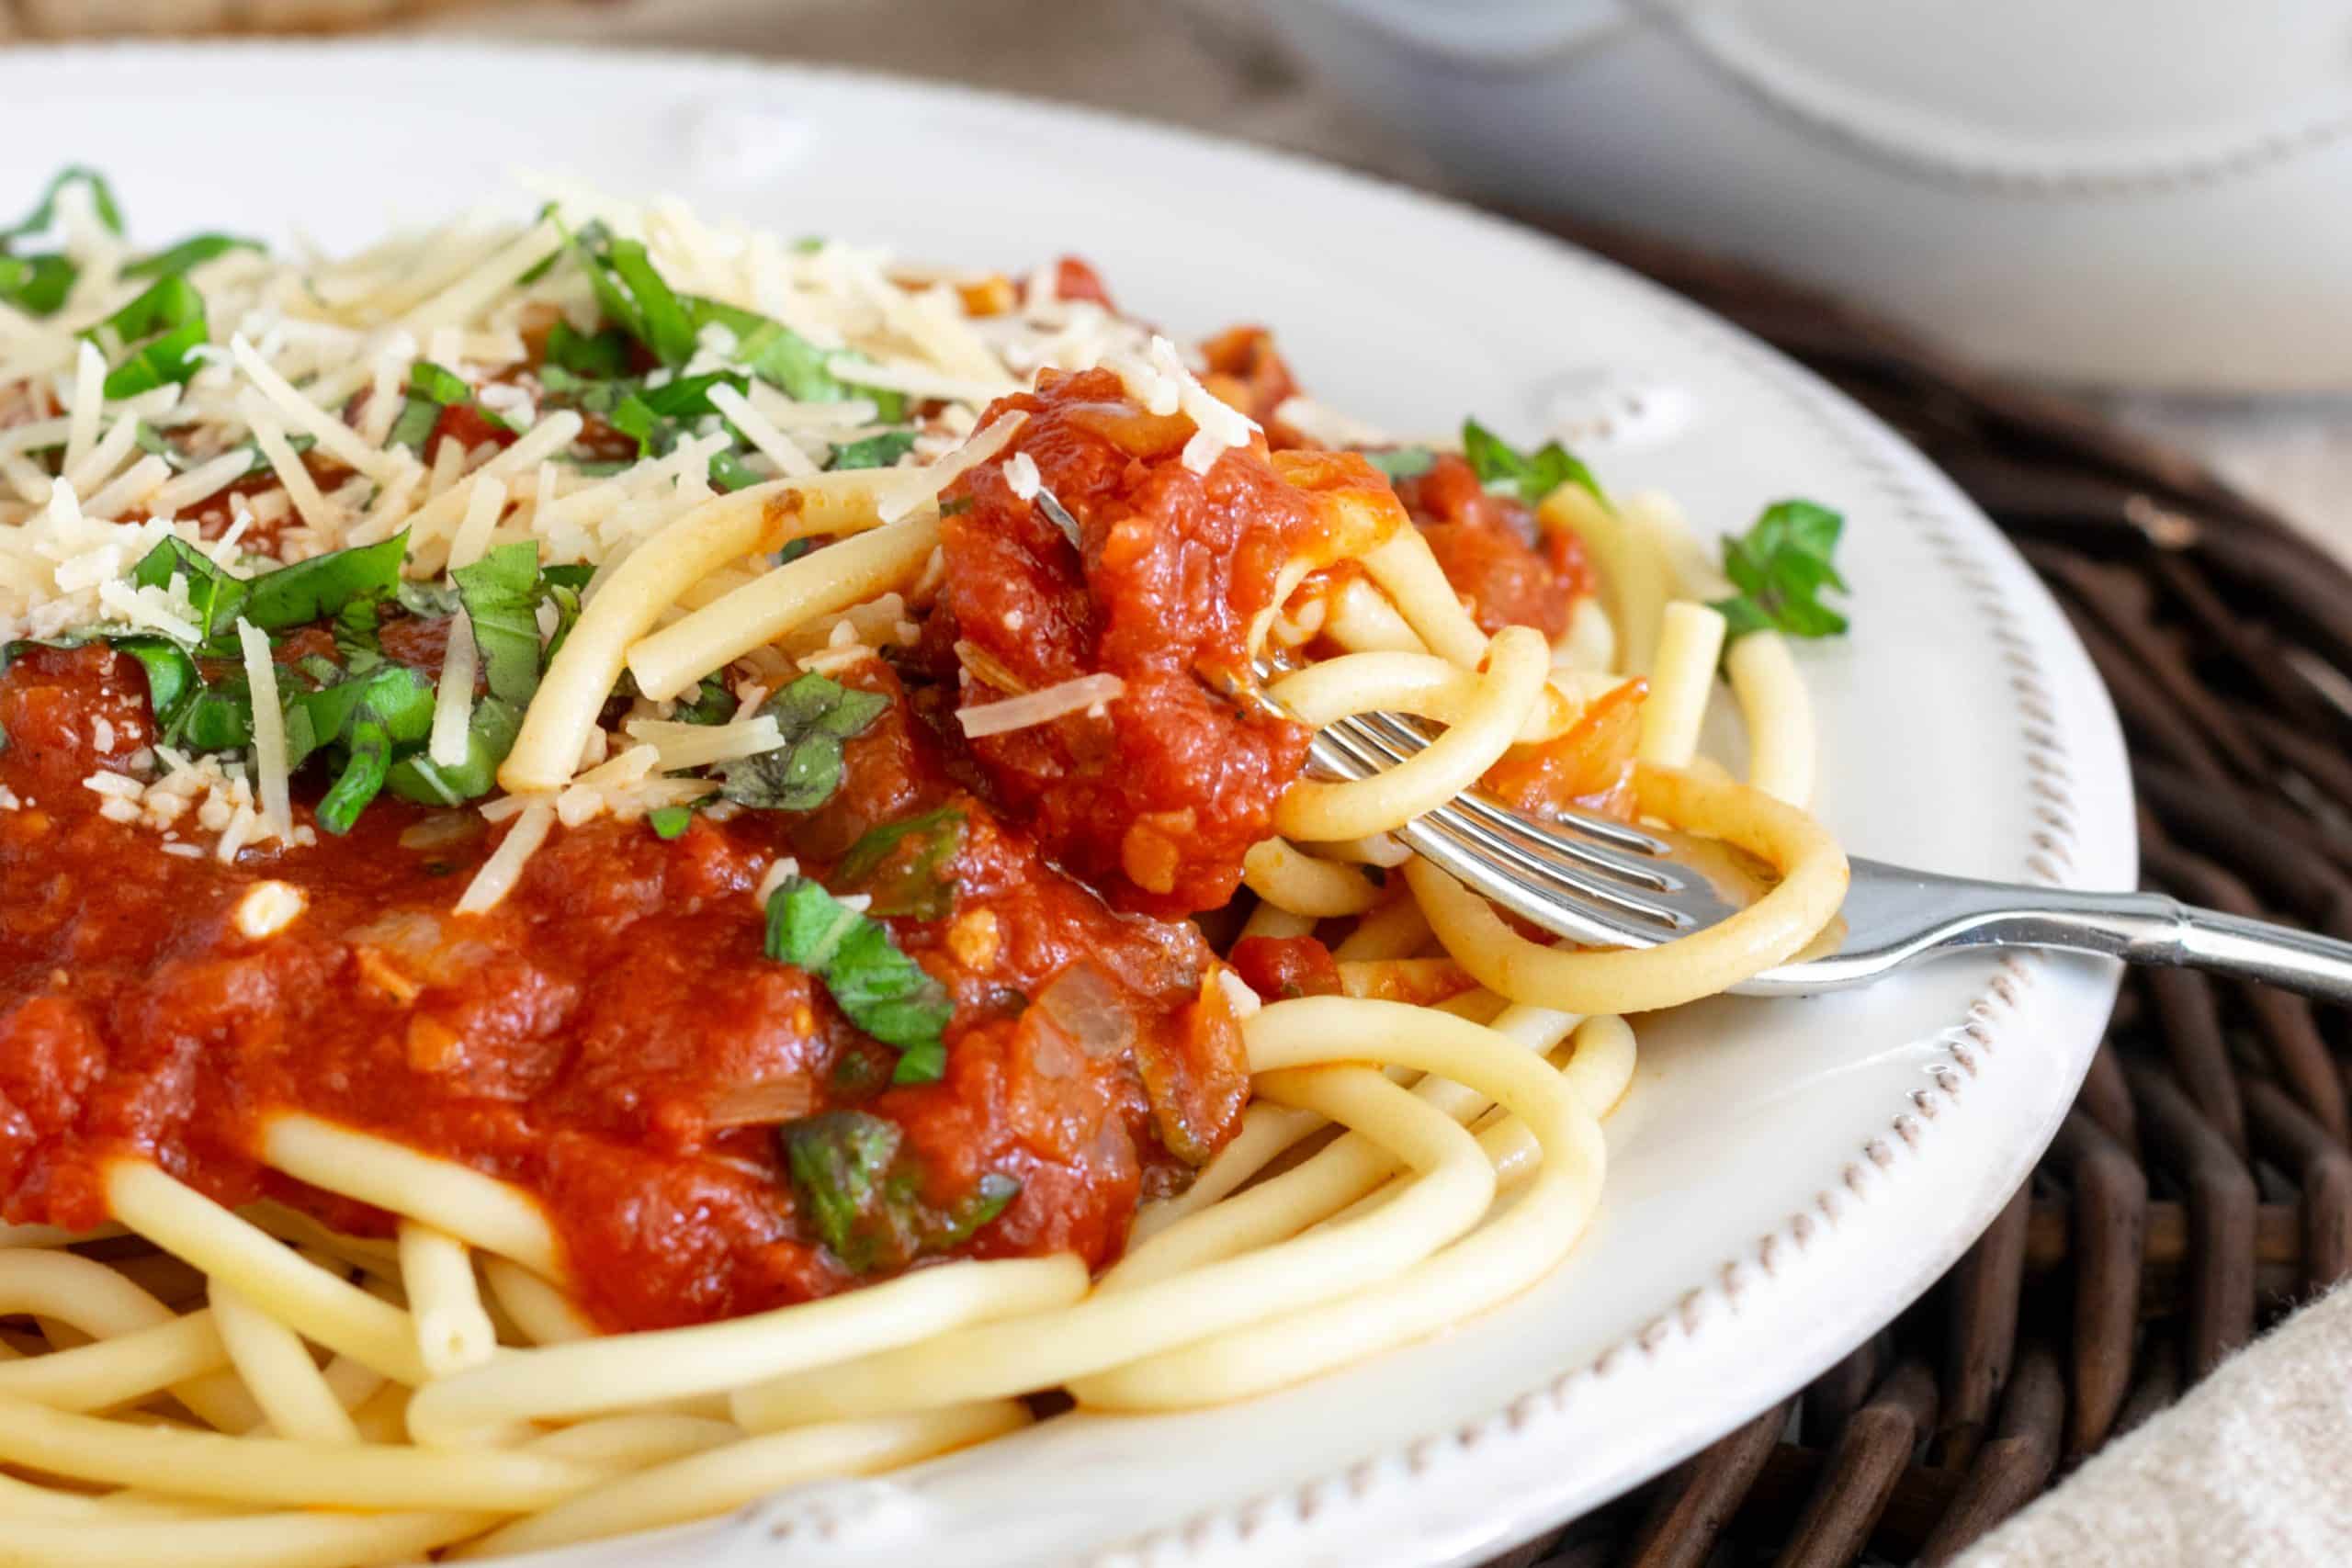
Easy Chicken Parmesan Pasta Bake
A crispy-on-the-outside, juicy-on-the-inside chicken cutlet meets a creamy pasta bake, and somehow it all comes together for less than two dollars per serving. That’s the real magic of this Chicken Parmesan Pasta Bake. You get restaurant-quality results without the stress of juggling three pans or busting your grocery budget.
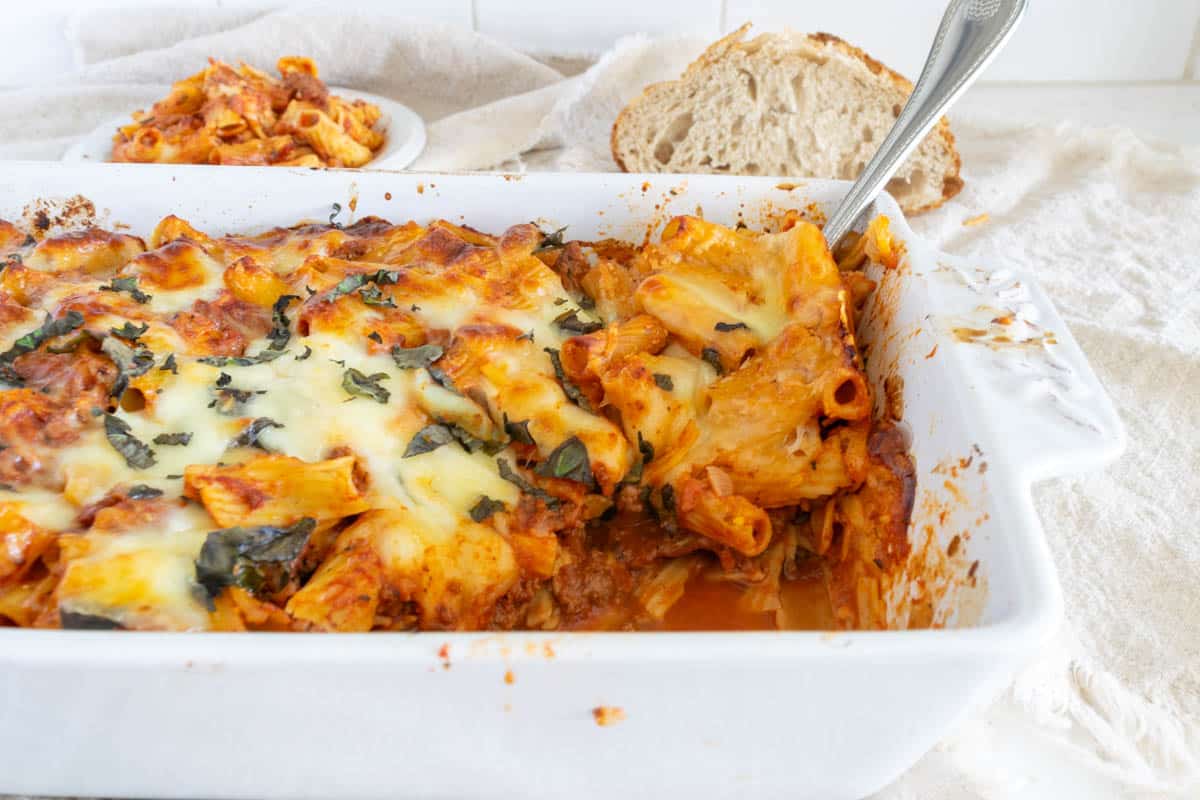
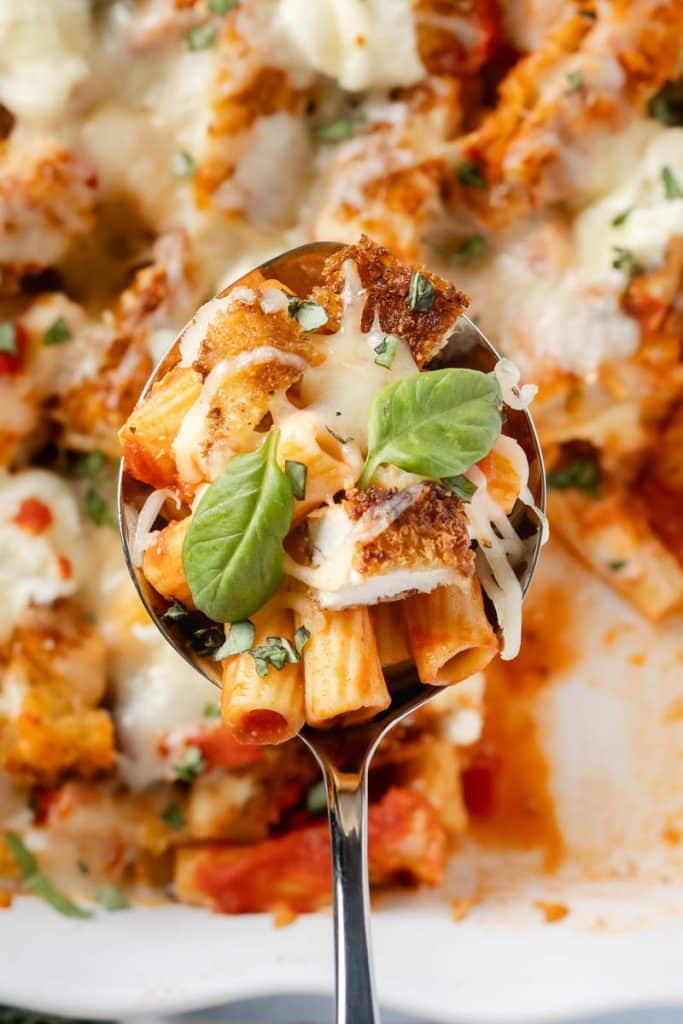
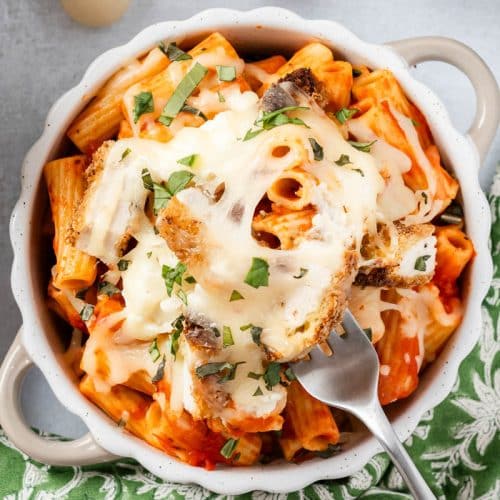
The technique makes the difference. The chicken gets a proper pan-sear first, which builds flavor and texture before it ever hits the oven. Then it nestles into a bed of pasta and marinara sauce, where it soaks up all those flavors while the whole dish comes together in the oven. The ricotta dollops are the ‘secret sauce’ in this recipe, melting into creamy pockets throughout. Fresh basil on top adds brightness and makes it look like you fancy!
This Chicken Parm Pasta Bake feeds eight people, reheats beautifully, and comes back to the table better the next day. Make it on a weeknight when you want something that feels special, or scale it for a gathering. Either way, you’re looking at one of those recipes that proves the most satisfying dinners don’t have to be complicated or expensive.
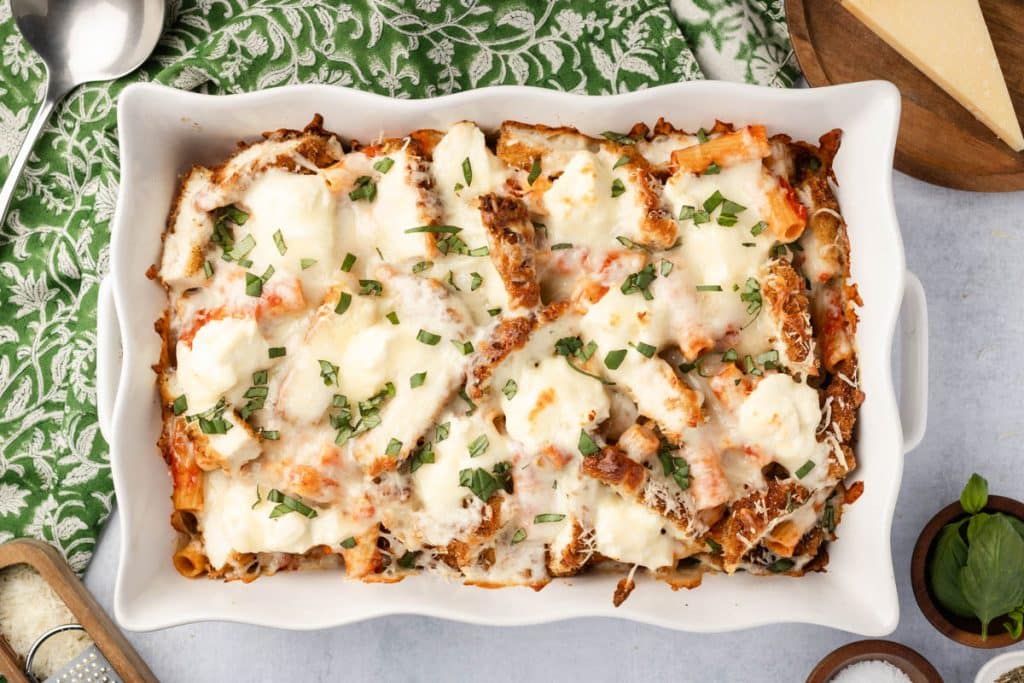
Table of Contents
Why You Will Want to Make this Chicken Parm Pasta Bake…again and again
✔️You want a main dish that serves eight without using multiple pans.
✔️You want something that tastes like you put effort into it but doesn’t require hours in the kitchen.
✔️Leftovers taste good the next day, and the cost per serving won’t break your budget.
This recipe does all of that. It’s also flexible if you need to work with what you have on hand!
Tips for Success with this Chicken Parmesan Pasta Bake
- Pat the chicken completely dry before breading it, or your crust won’t stick properly.
- Olive oil and butter together are what create the lovely brown color on the chicken cutlets
- Pound the chicken to an even thickness so everything cooks at the same rate and stays tender. Thin cutlets help create an even cooking thickness. Pounding the chicken breast also tenderizes the meat and prevents some parts from drying out before other parts are done.

- Sprinkle a bit of salt the chicken after it comes out of the pan, and add salt to taste to the marinara sauce before mixing it with the pasta. That’s what brings the whole thing into balance.
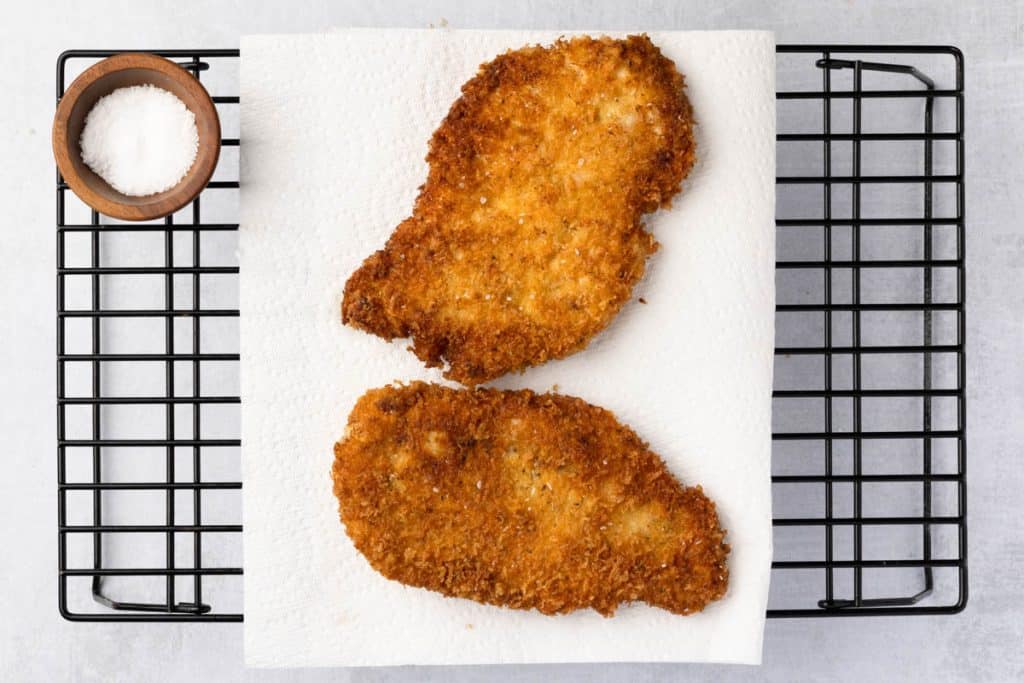
- The high heat and short cooking time result in a crispy exterior and juicy interior for the breaded chicken. But, watch the heat when you’re pan-frying the chicken. You want a deep golden color in about three minutes per side, not blackened edges and a raw center. If the chicken gets brown too quickly, lower the heat a touch. Especially if the chicken has been pounded it should not take more than 3 minutes per side to crisp and cook.
- If the chicken is cut in half without pounding, the heat may need to be turned down to medium so that the chicken crust doesn’t brown before the chicken is done cooking.
- Placing the chicken on a paper towel after pulling it from the oil will help absorb excess oil.
- Let the chicken finish cooking in the oven. Resist the urge to go longer in the pan.
- Cook the pasta for a full two minutes under al dente. It finishes cooking in the oven and will absorb the marina sauce.
- Place ricotta dollops directly on top of the pasta layer rather than spreading them around. Those little pockets of creaminess are what make people remember this dish.
Make It Your Own
The beauty of this Chicken Parmesan Pasta Bake is that it welcomes changes without falling apart. You can adjust it to match what you have on hand or what you’re craving without losing the fundamental appeal of that crispy chicken over creamy pasta.
Start with the cheeses. Mozzarella and parmesan are classic for a reason, but try mixing in fontina or provolone for something with more depth. You could do half mozzarella and half fontina and suddenly it’s a different dish. Ricotta is key to the creaminess, but if you want it even richer, a dollop of mascarpone tucked in there won’t hurt.
The chicken crust is another place to play around. Add fresh chopped parsley to the panko mixture for color and a little herbal note. A bit of lemon zest in there brings brightness that pairs well with the basil on top.
The Marinara sauce can be elevated without much fuss. Stir in roasted garlic. Add a splash of red wine. Chop roasted red peppers and fold them in. If you want heat, add a half teaspoon to a full teaspoon of red pepper flakes depending on how spicy you like things. Make your own Marinara Sauce with a can of San Marzano tomatoes and garlic. And if you want it a little ‘saucier,’ add a bit more Marinara! A little pesto drizzled over the top before you add the cheeses changes the whole flavor profile without requiring you to make anything from scratch.
For vegetables, layer in sauteed spinach, mushrooms, or sun-dried tomatoes under the top layer of chicken and cheeses. This adds nutrients and changes the texture in a way people actually notice. You’re not adding something nobody will eat. You’re adding something that makes the dish taste better and feel less heavy, even though it’s richer.
None of these changes requires you to rewrite the recipe or change the timing. They’re all swaps and additions that work within what’s already here. The chicken, the pasta, the baking time, and the basic structure stay the same.
What to Serve With Chicken Parmesan Pasta Bake

Serve this with a simple green salad dressed in vinaigrette to cut through the richness, like our Insalata Mista. And, of course, garlic bread or focaccia are great accompaniments. Roasted vegetables on the side work if you want to add color and nutrients without much extra work.
A light white wine like Pinot Grigio pairs nicely if you’re in that mood. If dessert is happening, keep it simple and bright, something like lemon sorbet or panna cotta.
Storing and Reheating
Allow the pasta bake to cool to room temperature before covering it. You can refrigerate it in the baking dish covered tightly, or transfer it to an airtight container; it keeps for 3 to 4 days in the refrigerator. You can also freeze it for up to 3 months in individual portions, which is helpful if you want to grab a serving when you need it.
The pasta will absorb the sauce as it sits, so add a little extra sauce or water before you reheat it. For the oven or air fryer, cover the dish with foil, heat to 350°F / 176°C, and cook for 5 to 20 minutes depending on the amount. Remove the foil for the last 5 to 10 minutes so the cheese warms through. If you want a crispier top, sprinkle breadcrumbs mixed with melted butter on top before reheating.
To microwave, add a couple of tablespoons of water or sauce, cover loosely, and heat in one-minute intervals, stirring halfway through.
If you’re reheating from frozen, thaw it overnight in the refrigerator if you have the time, then reheat as described above. If you’re reheating from frozen without thawing, cover the dish with foil and bake at 350°F / 176°C for 45 to 60 minutes, then uncover for the last 10 minutes.
Chicken Parmesan Pasta Bake
Ingredients
Chicken
- 1 ½ pounds chicken breasts approximately 2 chicken breasts.
- ½ cup flour
- 2 eggs
- 1 cup panko breadcrumbs
- ½ cup grated parmesan
- 1 teaspoon Italian seasoning
- ½ teaspoon of garlic powder
- 1 teaspoons kosher salt plus more for sprinkling
- ¼ teaspoon pepper
- ½ cup Olive oil
- 2 tablespoons of unsalted butter
Pasta Bake
- 16 ounces rigatoni or penne pasta
- 24 ounces marinara sauce
- ½ teaspoon of salt
- 1 cup shredded mozzarella
- ½ cup grated parmesan
- 1 cup ricotta
- 1 bunch fresh basil chopped for garnish
Instructions
- Cook the pasta in salted water according to the al dente directions minus 2 minutes. You want the pasta to be just shy of al-dente.
- Put the drained pasta in a bowl and mix with 24 ounces of marinara sauce and ½ teaspoon of salt and set aside.
Preparing the Chicken
- Cut the chicken breast into cutlets by slicing the chicken in half horizontally. Optional but recommended: Place the chicken pieces in between 2 pieces of plastic wrap and pound the chicken until the thickness is even, about ⅓ inch throughout.
- Pat the chicken dry with a paper towel (this part is important because it will help the crust to stick to the chicken).
Dredging and Crisping
- Set up 3 shallow bowls.
- In the first bowl, add ½ cup flour, 1 teaspoon of salt and ¼ teaspoon of pepper and mix.
- In the second bowl, add 2 beaten eggs.
- In the third bowl, create the panko mixture by mixing 1 cup of panko, ½ cup grated parmesan, 1 teaspoon of Italian seasoning and ½ teaspoon of garlic powder.
- Take a chicken cutlet and dip it into the flour until all sides are covered, shake off any excess flour.
- Next, dip the floured chicken into the egg until the egg coats both sides. Immediately after the egg, place the chicken into the panko mixture, making sure all sides are coated generously with the panko.
- Repeat the 3 step process until all the chicken is covered and coated with flour, egg and panko.
- In a frying pan, heat ½ cups of olive oil and 2 tablespoons of butter over medium high heat.
- Once the oil is hot, place the chicken into the oil/butter and pan fry each side until golden, about 3 minutes per side (if the chicken is ⅓ inch, may take longer if it's thicker). *Do not overcook since the chicken will be baked later. Be mindful as the oil may splatter when the chicken is placed into the oil.
- When the chicken is a deep golden brown, place each piece on a paper towel, over a wire rack and sprinkle each piece with a small pinch of salt. Allow the chicken to cool for at least 5 minutes
- Once the chicken has cooled for at least 5 minutes, slice it into strips or bite size pieces.
Assembly
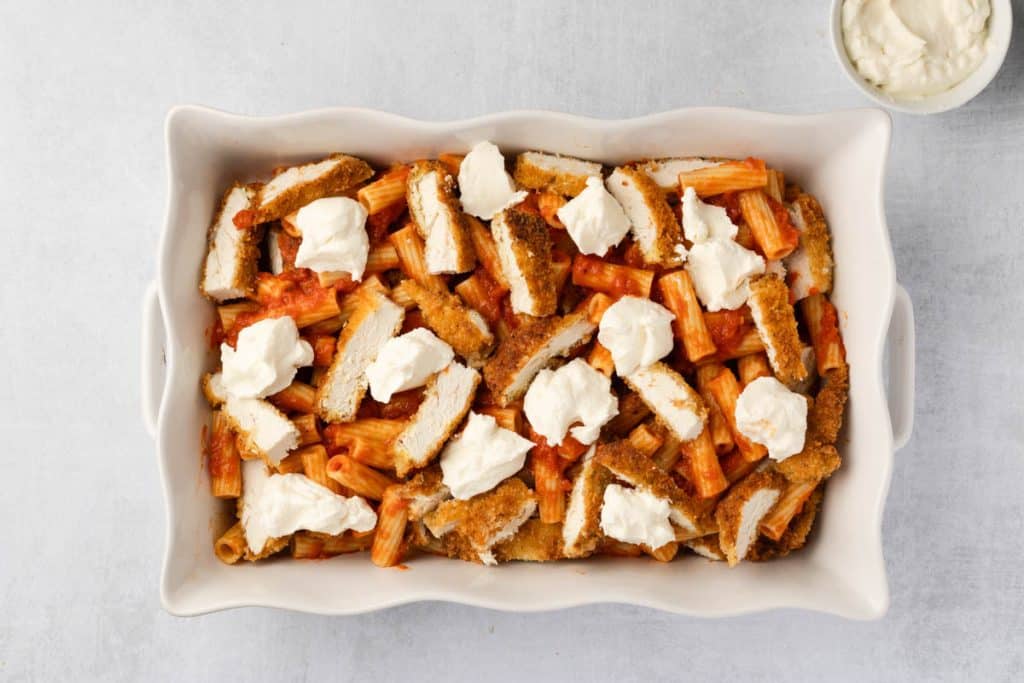
- In a 9×13 dish place half of the pasta evenly over the bottom of the dish. Place half of the chicken pieces over the pasta. Next layer the rest of the pasta and top with the remaining chicken.
- Nestle dollops of ricotta (1 cup total) over the top of the pasta. Finish by sprinkling ½ cup parmesan and 1 cup of shredded mozzarella evenly over the top.
Bake
- Bake covered with foil at 375 degrees F for 20 minutes. Remove the foil for the last 5-10 minutes or until it’s heated though and the cheese has melted.
- Optional: Increase the temp to 425 the last 5 minutes for an extra crispy brown top. Broiling also works to get a last minute crispy top of the cheese.
- Finish the dish with some chopped fresh basil.
Nutrition
Thanks so much for spending a few minutes of your busy day with me!
To ensure you don’t miss future content, pop your email in the pale green box on the right or click here. I usually send one email weekly, so I won’t inundate your inbox. I’m sensitive to an overflowing email inbox!
We will only use your email address to send you emails, no more than 1-2 weekly. In addition, you will have access to my growing library of knit & crochet patterns and other printables. Check back often as this library will continue to grow. You can unsubscribe anytime by emailing me or clicking on the “unsubscribe” link at the bottom of all emails.
And you can access many of the products I refer to on my Nourish and Nestle Amazon Page. You can access it here.
So, if you’d like to participate in the ‘subscriber benefit’ action, simply subscribe to Nourish and Nestle here or use the form on the right sidebar. It’s slightly towards the top.
I have sent all my subscribers the link to the Subscriber Benefits Library. If you missed it or misplaced it, let me know.
Until next time…