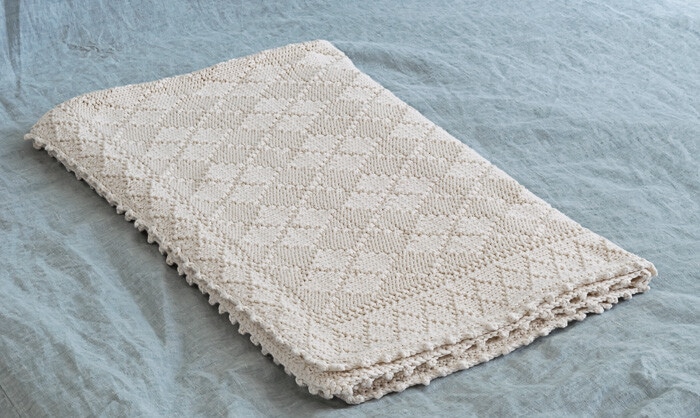
Easy Knit Baby Blanket Pattern – Tiny Trails
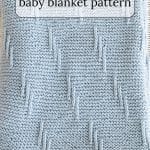
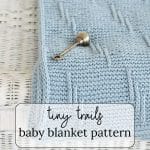
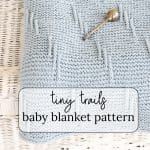
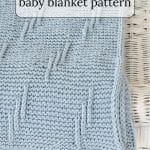
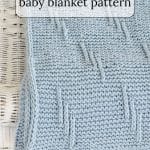
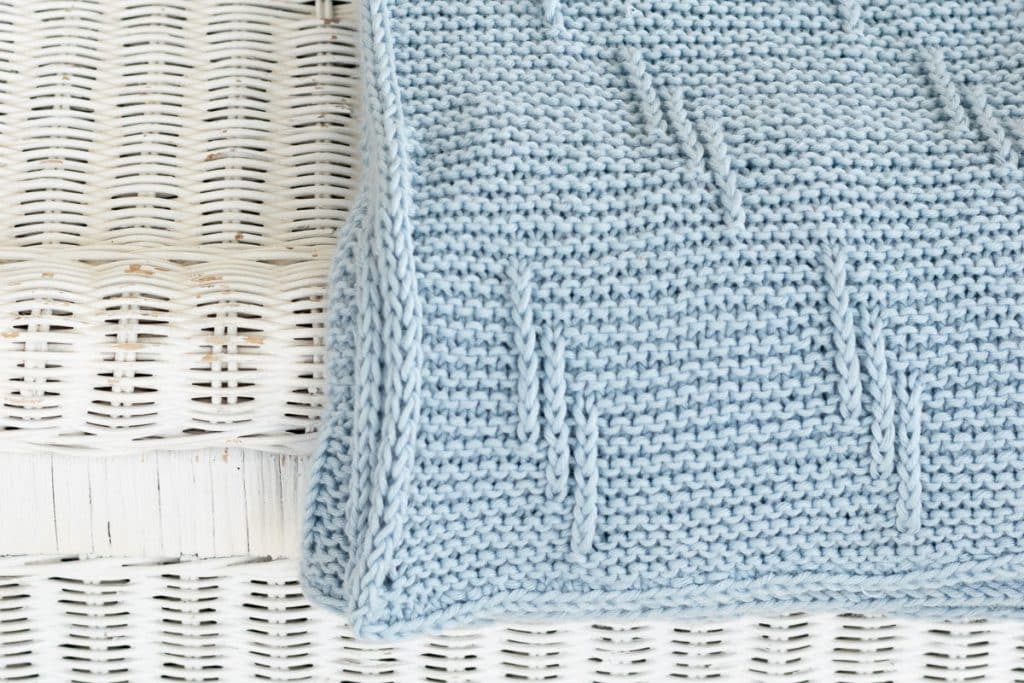
Tiny Trails is an easy knit baby blanket pattern that uses simple garter stitches and slip stitches to achieve a darling pattern.
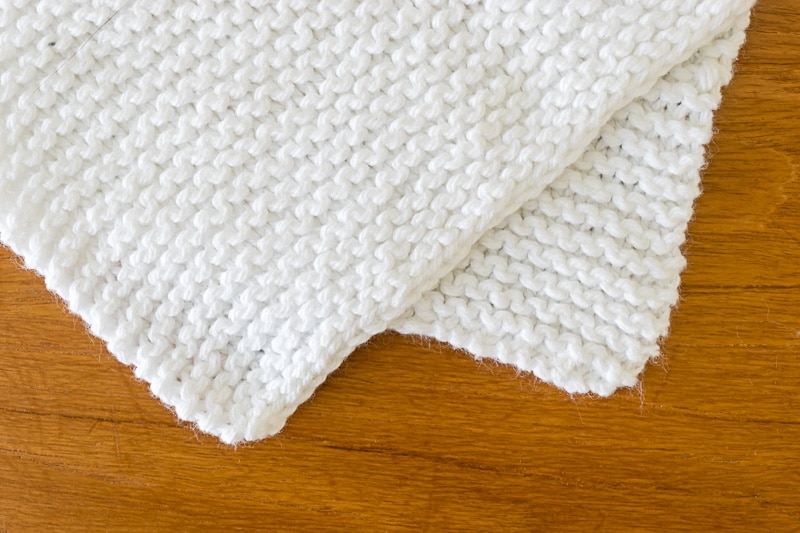
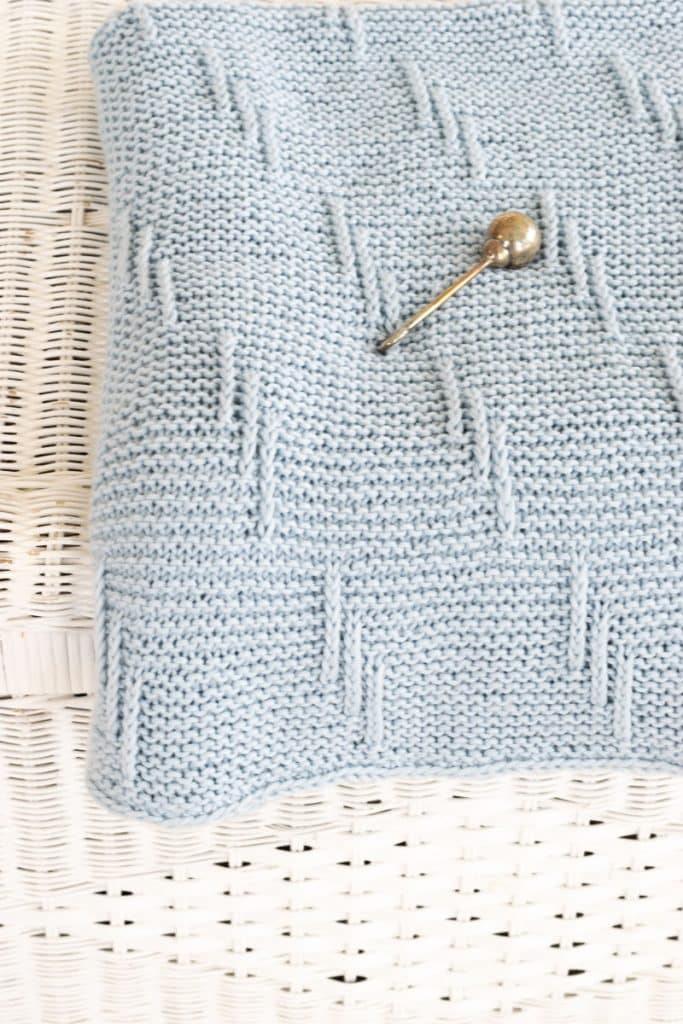
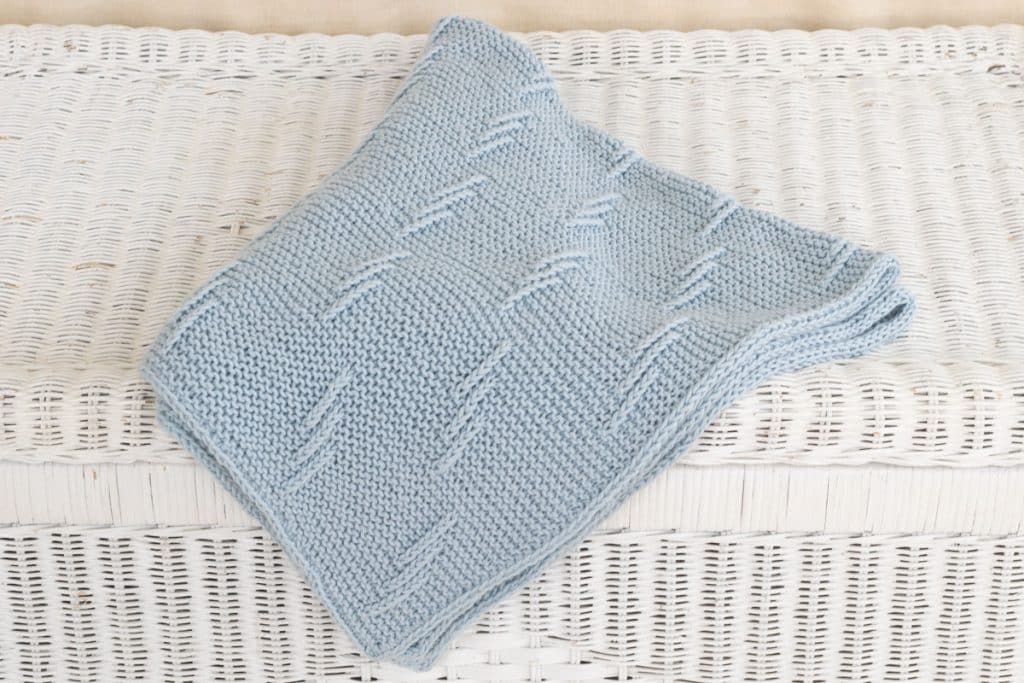
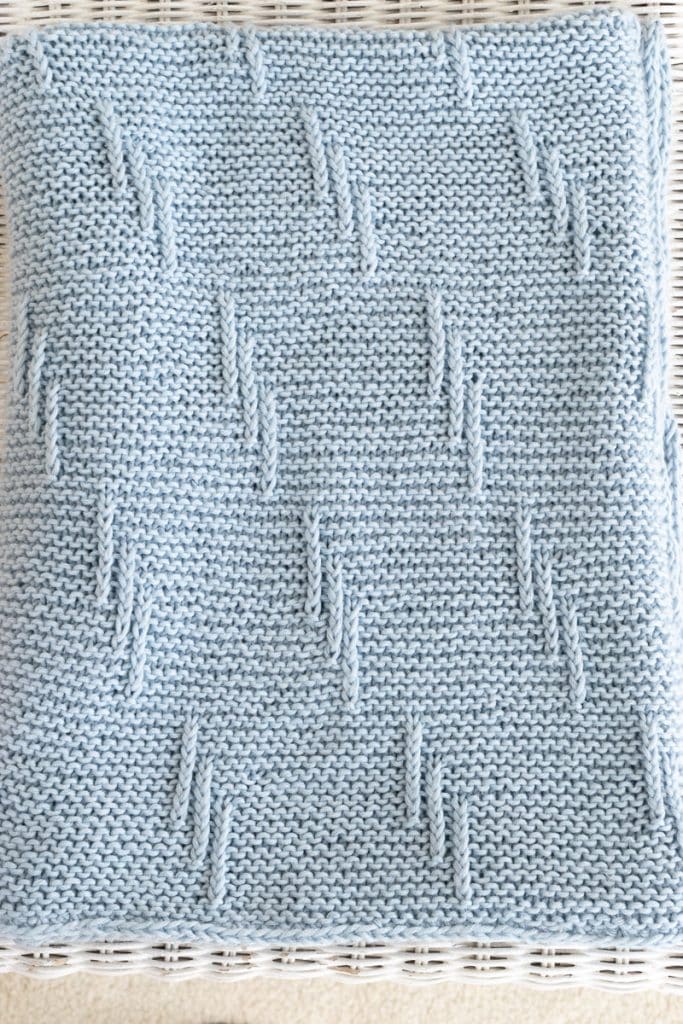
If you are looking for a baby blanket pattern that doesn’t require much attention, this may be it. It is primarily knit using garter stitch, which helps create a blanket fabric with some loft for an extra cushy baby blanket. The simple slip stitches create tiny trails throughout the blanket for a bit of interest.
This easy knit baby blanket pattern is finished with an applied i-cord for a clean, simple look. If you’ve never knit an applied i-cord, have no fear—I’ve got instructions and a video for that!
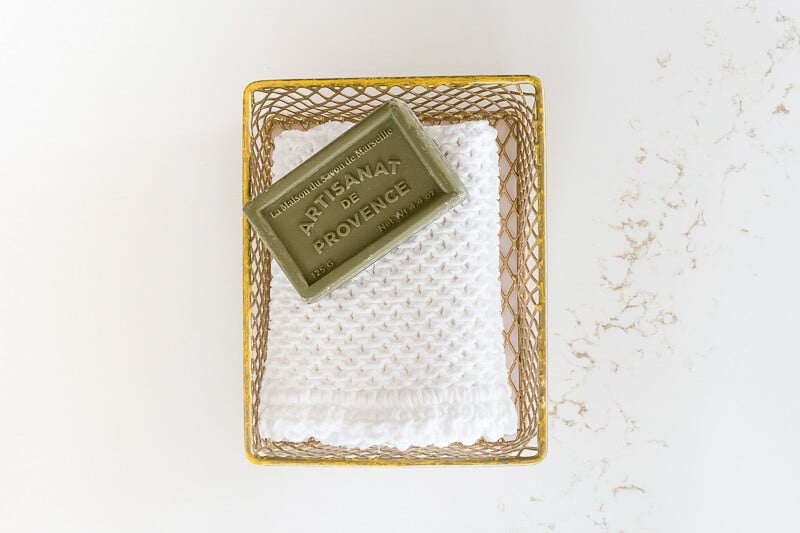
I used Berroco Comfort for this blanket. I’m typically a natural fiber knitter, but I’ve grown to appreciate the cotton feel and washability of Berroco Comfort, especially for baby blankets.
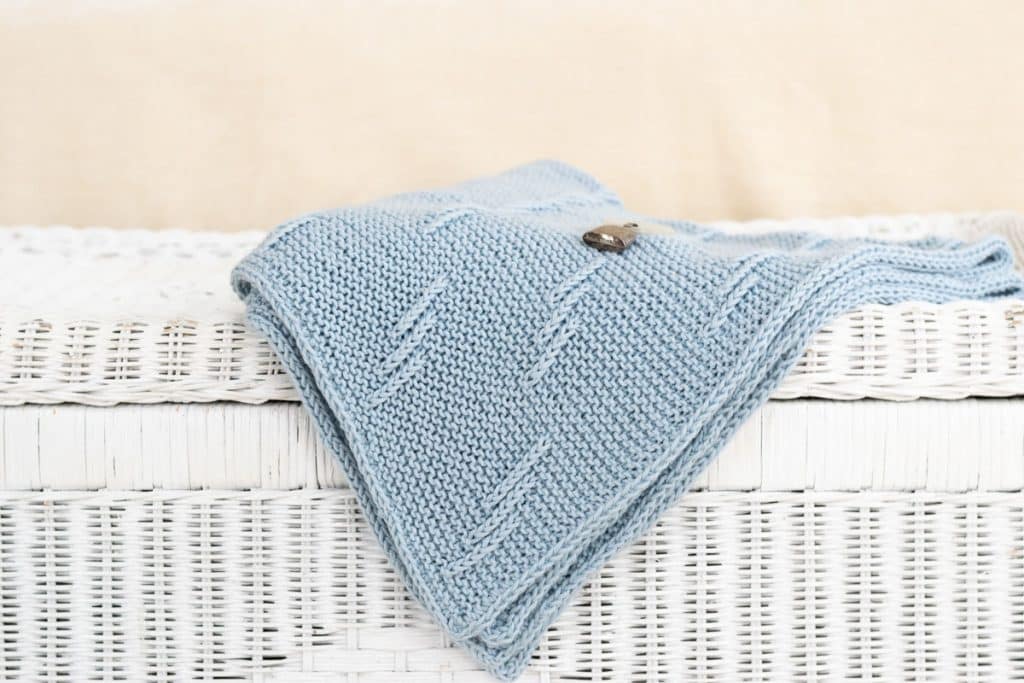
Table of Contents
Tips for Success with This Easy Knit Baby Blanket Pattern
Avoid Yarn Splitting: Berroco Comfort can sometimes split if the needle tip is too sharp. If you notice splitting, try switching to needles with a slightly blunter tip. This is my only complaint with this yarn.
Swatch First: Always knit a swatch before starting to ensure your gauge is correct. This ensures the blanket’s final size will match the pattern.
Use Stitch Markers: Place stitch markers at the beginning and end of each pattern repeat. This will help you spot mistakes early.
Keep Even Tension: Garter stitch can sometimes look uneven if your tension varies. Make sure to relax your hands and maintain consistent pressure on the yarn.
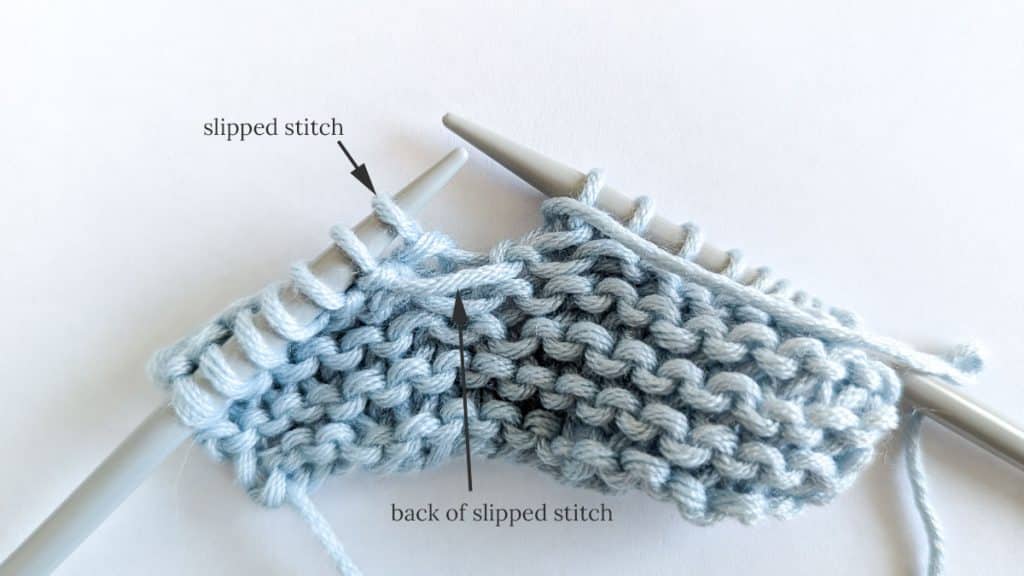
Identify the Back of the Slip Stitch: When you look at the back of the slip stitch on the next row, you’ll notice a loose stitch running horizontally. Once you purl that stitch, it tightens up, and you won’t notice it on the back anymore.
Count Stitches Regularly: Slip stitches can sometimes make losing or gaining stitches easy. To avoid surprises, count your stitches at the end of every couple of rows.
Use a Lifeline: Every 10–20 rows, run a piece of contrasting yarn through the stitches on your needle. If you make a big mistake, you can return to the lifeline without losing all your progress.
Relax with Garter Stitch: Since most of the pattern is garter stitch, it’s a great project to work on while watching TV or listening to music—just keep track of your slip-stitch rows!
Practice the Applied I-Cord: If you’ve never done an applied i-cord before, practice on a small swatch first to feel comfortable before attaching it to the blanket. Check out this post, which explains the process using images, or this video showing how to knit an applied i-cord.
Secure the Applied I-Cord
When you finish the i-cord, weave in the ends carefully to avoid it coming loose after washing.
Block your Finished Baby Blanket: After you’ve knit your lovely Tiny Trails blanket, take the time to block it. I washed my blanket on the gentle cycle in my washing machine, let it spin, and then took it out to block using my foam mats.
Materials Needed for This Easy Knit Baby Blanket Pattern
Some of these links may be Amazon affiliate links and I may earn a small commission from the sale of these products to help defray the costs of operating this site, but the price you are charged is not affected. You can see my full disclosure policy here.
The finished blanket is 40″ by 36″.
- 1200 yards of worsted weight yarn. I used six skeins of Berroco Comfort, color 97101, Cloud. Shop around for the best price; it’s available at LoveCrafts, on Amazon, and at Walmart.
- Size US9 (5mm) knitting needles
- Size US9 (5mm) double-pointed needles for applied i-cord border
- Subscribers have access to the free, printable PDF in the library. If you’ve forgotten your supersecret password, it is at the bottom of my email every Monday morning. If you still can’t find it, email me! If you aren’t a subscriber yet, we can fix that! Subscribing costs nothing; you can access our free patterns and other printables. Click here to subscribe and have this Tiny Trails pattern sent to your email inbox.
Knit Stitches Used
- g st – garter stitch: knit every row when working flat (right and wrong side). If working in the round, alternate knit and purl rows.
- sl1k – slip one knitwise with yarn in the back: transfer a stitch from the left needle to the right needle, holding the needle as if you were going to knit it, but without actually knitting it.
- k – knit
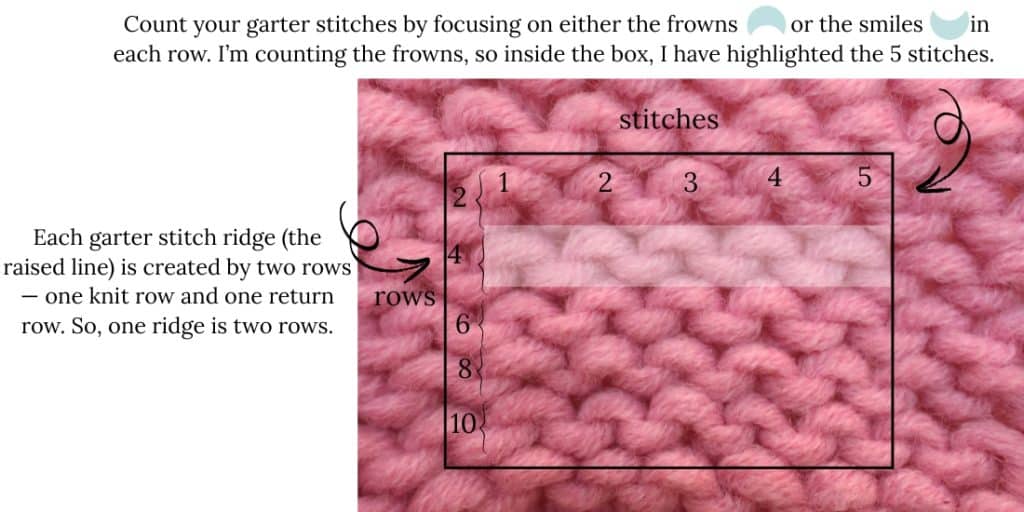
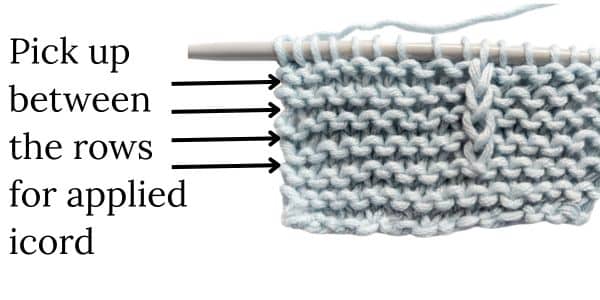
- P—the only purl stitch used is into the back of the slipped stitch. You will purl into the front loop/leg on the WS. See image
- k2t – knit two together (a decreasing stitch)
- ktbl – knit through the back loop
Tip
Join your balls of yarn at the sides of the blanket and then cover up the knots/joins and yarn tails with the applied i-cord.
Instructions For Easy Knit Baby Blanket
Gauge: 4 stitches and 6 rows to the inch on size US9 needles using worsted weight yarn in garter stitch
Cast on 170 stitches
- Rows 1-4: (sl1k), k169
- Row 5: (sl1k), k5, [(sl1k), k16] x 9, (sl1k), k10
- Row 6: (sl1k), k9, [P, k16] x 9, P, k6
- Row 7: (sl1k), k5, [(sl1k), k16] x 9, (sl1k), k10
- Row 8: (sl1k), k7, [P, k1, P, k14] x 9, P, k1, P, k6
- Row 9: (sl1k), k5, [(sl1k), k1, (sl1k), k14] x 9, (sl1k), k1, (sl1k), k8
- Row 10: (sl1k), k7, [P, k1, P, k14] x 9, P, k1, P, k6
- Row 11: (sl1k), k5, [(sl1k), k1] x 2, [(sl1k), k12, (sl1k), k1, (sl1k), k1] x 9, (sl1k), k6
- Row 12: (sl1k), k5, [P, k1] x 2, [P, k12, P, k1, P, k1] x 9, P, k6
- Row 13: (sl1k), k7, [(sl1k), k1, (sl1k), k14] x 9, (sl1k), k1, (sl1k), k6
- Row 14: (sl1k), k5, [P, k1, P, k14] x 9, P, k1, P, k8
- Row 15: (sl1k), k7, [(sl1k), k1, (sl1k), k14] x 9, (sl1k), k1, (sl1k), k6
- Row 16: (sl1k), k5, [P, k16] x 9, P, k10
- Row 17: (sl1k), k9, [(sl1k), k16] x 9, (sl1k), k6
- Row 18: (sl1k), k5, [P, k16] x 9, P, k10
- Row 19: (sl1k), k169
- Row 20: (sl1k), k169
- Row 21: (sl1k), k14, [(sl1k), k16] x 8, (sl1k), k18
- Row 22: (sl1k), k17, [P, k16] x 8, P, k15
- Row 23: (sl1k), k14, [(sl1k), k16] x 8, (sl1k), k18
- Row 24: (sl1k), k15, [P, k1, P, k14] x 8, P, k1, P, k15
- Row 25: [(sl1k), k14, (sl1k), k1] x 9, (sl1k), k16
- Row 26: (sl1k), k15, [P, k1, P, k14] x 8, P, k1, P, k15
- Row 27: (sl1k), k14, [(sl1k), k1] x 2, [(sl1k), k12, (sl1k), k1, (sl1k), k1] x 8, (sl1k), k14
- Row 28: (sl1k), k13, [P, k1] x 2, [P, k12, P, k1, P, k1] x 8, P, k15
- Row 29: (sl1k), k16, [(sl1k), k1, (sl1k), k14] x 9
- Row 30: (sl1k), k13, [P, k1, P, k14] x 8, P, k1, P, k17
- Row 31: (sl1k), k16, [(sl1k), k1, (sl1k), k14] x 9
- Row 32: (sl1k), k13, [P, k16] x 8, P, k19
- Row 33: (sl1k), k18, [(sl1k), k16] x 8, (sl1k), k14
- Row 34: (sl1k), k13, [P, k16] x 8, P, k19
- Rows 35—50: Repeat rows 3-18
- Rows 51—66: Repeat rows 19-34
- Rows 67—82: Repeat rows 3-18
- Rows 83—98: Repeat rows 19-34
- Rows 99—114: Repeat rows 3-18
- Rows 115—130: Repeat rows 19-34
- Rows 131– 146: Repeat rows 3-18
- Rows 147—150: (sl1k), k169
- Bind off
Add Applied I-Cord Edge to the Blanket
I made a video showing the applied i-cord for another project. You can see that video here. Bear in mind that the video shows a three-stitch i-cord, and this easy knit baby blanket pattern uses a four-stitch i-cord, but the process is the same.
- Using double-pointed needles, cast on four stitches on one needle.
- With the back of the blanket facing you, on either the cast-on or the bind-off edge, come in an inch or two from the corner and insert the needle, with the point closest to the last stitch you just cast on, into the edge of the blanket. Your tail and working yarn will be at the same end.
- Wrap the working end of the yarn, not the tail from the cast-on, around the needle and pull through the fabric, resulting in five stitches on the needle.
- Push those stitches to the opposite end of the needle.
- The working yarn will be at the end of the five stitches. By gently pulling this yarn up from the end of the row/needle to work the stitches at the beginning of the row/needle, you are forming the ‘tube’ of the i-cord.
- Knit the first three stitches, then knit the next two together through the back loop (k2t tbl), resulting in four stitches on your needle.
- Put your needle under the next stitch on your fabric, wrap your yarn around the needle, and pull the yarn through, resulting in five stitches again.
- Push the five stitches to the other end of the needle and repeat the process until you reach the corner.
Going Around Corners Using Applied I-cord
We will work the i-cord differently at the corner to get a crisp turn.
- Work up to and including the corner stitch as you have been, picking up one stitch at the corner so you have five stitches on your needle.
- Slide your stitches down and k3, k2t tbl, but don’t pick up the fifth stitch, leaving only four stitches on your needle.
- Knit those four stitches, slide them down, and knit them again, but this time, add the fifth stitch by pushing your needle through the fabric and picking up a stitch in the same place you did in step 1.
- Then work the next stitch, on the side, reducing one stitch before you pick up a stitch.
This will complete your corner stitches, and you can knit the rest of your i-cord similarly.
Frequently Asked Questions
Yes! While Berroco Comfort is recommended for its softness and washability, you can use any worsted-weight yarn. Just keep in mind that natural fibers may behave differently in terms of stretch and texture.
To adjust the size, increase or decrease the number of stitches you cast on in multiples of 16 (the pattern’s repeat). This will also change the amount of yarn you need.
Bookmark this page or pin the following image to return to this Easy Knit Baby Blanket Pattern in the future.
Thanks so much for spending a few minutes of your busy day with me!
To ensure you don’t miss future content, pop your email in the pale green box on the right or click here. I usually send one email weekly, so I won’t inundate your inbox. I’m sensitive to an overflowing email inbox!
We will only use your email address to send you emails, no more than 1-2 weekly. In addition, you will have access to my growing library of knit & crochet patterns and other printables. Check back often as this library will continue to grow. You can unsubscribe anytime by emailing me or clicking on the “unsubscribe” link at the bottom of all emails.
And you can access many of the products I refer to on my Nourish and Nestle Amazon Page. You can access it here.
So, if you’d like to participate in the ‘subscriber benefit’ action, simply subscribe to Nourish and Nestle here or use the form on the right sidebar. It’s slightly towards the top.
I have sent all my subscribers the link to the Subscriber Benefits Library. If you missed it or misplaced it, let me know.
Until next time…