
How to Make a Sourdough Starter

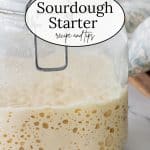
Learn how to make a sourdough starter from scratch with our easy-to-follow, step-by-step guide. It’s perfect for beginners and experienced bakers alike.
Sourdough starters have been a fundamental component of bread making for centuries, providing both flavor and leavening to baked goods. Unlike commercial yeast, a sourdough starter is a natural leavening agent made from just flour and water, harnessing wild yeast and beneficial bacteria from the environment. This simple mixture ferments over time, developing a complex flavor profile that gives sourdough bread its distinctive tangy taste and chewy texture.
The process of creating and maintaining a sourdough starter might seem daunting, but it is an incredibly rewarding and sustainable way to bake. By cultivating your own starter at home, you gain control over the ingredients, ensuring a healthier and more natural product. Additionally, the practice of maintaining a starter connects you to a long tradition of artisanal breadmaking, enriching your baking experience with a sense of history and craftsmanship.
In this guide, we will walk you through the step-by-step process of making your own sourdough starter, explaining its importance in bread making and providing tips to ensure your starter thrives. Whether you are an experienced baker or a novice, creating a sourdough starter is a fulfilling journey that enhances your understanding and appreciation of this timeless culinary art.

Table of Contents
What is a Sourdough Starter?
A sourdough starter is a mixture of flour and water that captures and cultivates wild yeast and beneficial bacteria from the environment. This combination forms a natural leavening agent that is essential for baking sourdough bread. Unlike commercial yeast, which is a single strain of yeast, a sourdough starter contains a diverse community of microorganisms that work together to ferment the dough.
The process of creating a sourdough starter involves allowing the flour and water mixture to sit at room temperature, where it attracts wild yeast and bacteria from the air and flour itself. Over time, these microorganisms feed on the sugars in the flour, producing carbon dioxide gas and lactic acid. The carbon dioxide helps the dough rise, while the lactic acid gives sourdough its characteristic tangy flavor.
Maintaining a sourdough starter requires regular feedings of flour and water to keep the microorganisms active and healthy. This ongoing process of feeding and discarding a portion of the starter ensures that it remains lively and potent, ready to leaven bread dough whenever needed.
A well-cared-for sourdough starter can last indefinitely and can be shared or passed down through generations, making it a treasured component of many baking traditions. Its unique blend of wild yeast and bacteria not only contributes to the flavor and texture of the bread but also adds a personal touch to each loaf, reflecting the local environment.
The local environment plays into the flavor of the bread baked from that starter. For instance, San Francisco’s unique climate and microbial population, including Lactobacillus sanfranciscensis, create a distinct flavor profile in sourdough bread that is difficult to replicate elsewhere.
French sourdough starters, or “levain,” benefit from the local wild yeasts and bacteria and the country’s rich tradition of artisanal baking, resulting in bread with unique textures and flavors. The local water in New York City is often cited as a key factor in the distinctive taste and texture of its bagels and bread, with its specific mineral composition influencing fermentation.
Why Make Your Own Sourdough Starter?
As previously mentioned, homemade sourdough starters develop a unique flavor profile influenced by the local environment and the specific strains of wild yeast and bacteria that populate it. This results in bread with a distinctive tangy taste and complex aromas that are unmatched by store-bought yeast. Further, sourdough bread made with a natural starter typically has the sought-after chewy crust, moist crumb, and airy structure, thanks to the natural fermentation process.
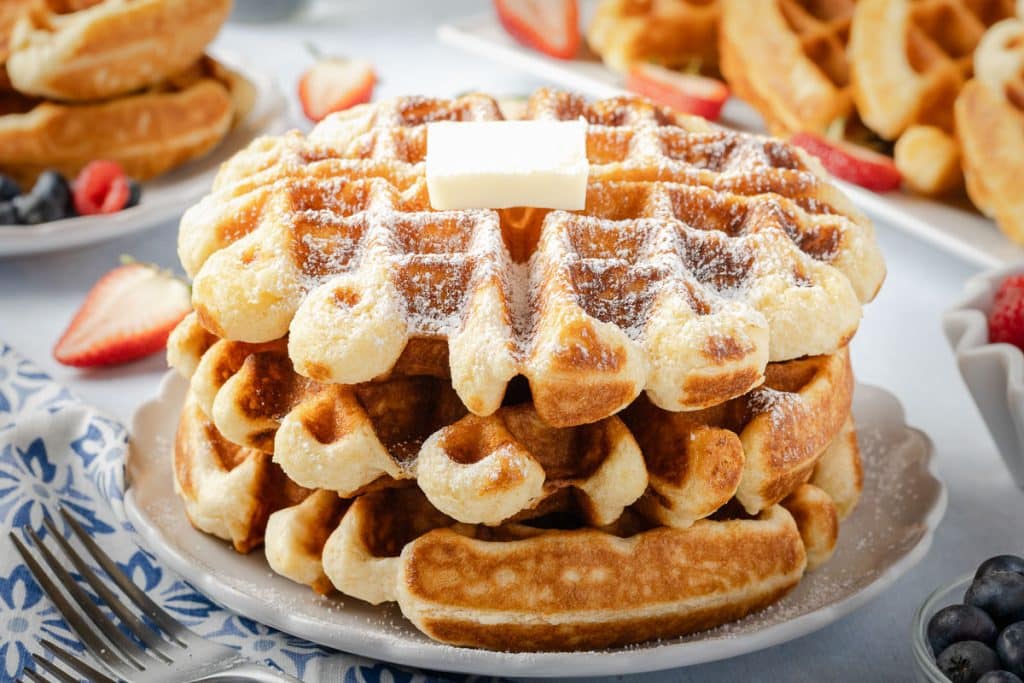
In terms of economics, making your own starter is inexpensive, requiring only flour and water. This can save you money in the long run, especially if you bake frequently. Maintaining a sourdough starter can also help you reduce food waste. The discard portion can be used in various recipes like pancakes, waffles, and crackers, minimizing waste.
What Can You Make With a Sourdough Starter?
Truly, the possibilities are endless! A sourdough starter is a form of leavening that relies on wild yeast and lactic acid bacteria naturally present in the environment and on the grains of the flour used. This combination creates a complex and robust flavor that is not available with commercial yeast, baking soda, or baking powder.
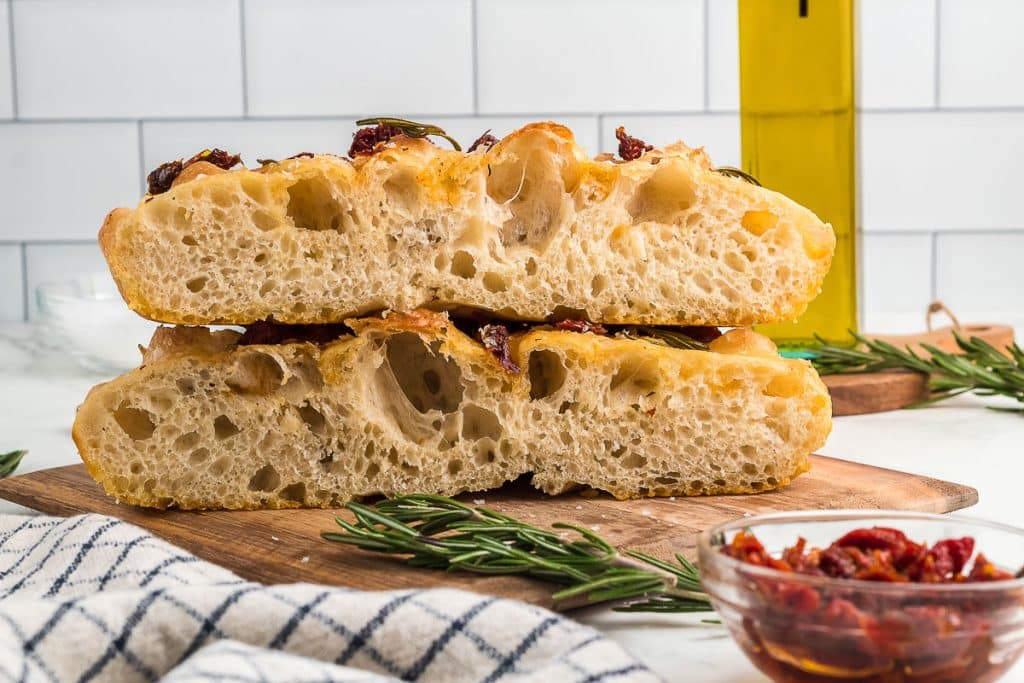
As such, it can be used for traditional sourdough bread recipes. However, you might also consider making Sourdough Focaccia.

Use the sourdough that you discard at every feeding for sourdough. Discard pizza dough, discard sourdough, discard tortillas, or discard cheese crackers. Using the discard not only adds flavor to these baked goods but also makes your kitchen even more economical!
These Sourdough Cinnamon Rolls are the perfect blend of tangy sourdough flavor and buttery cinnamon sugar’s sweet, comforting taste.
This flavorful yet easy sourdough flatbread recipe is a must-try to elevate your homemade bread game.
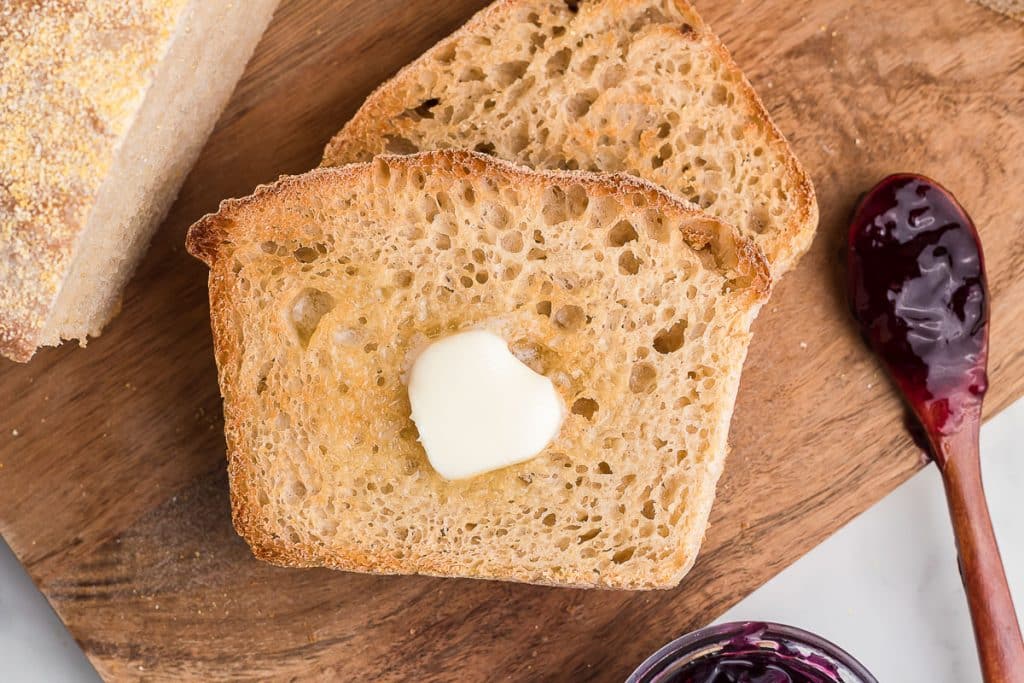
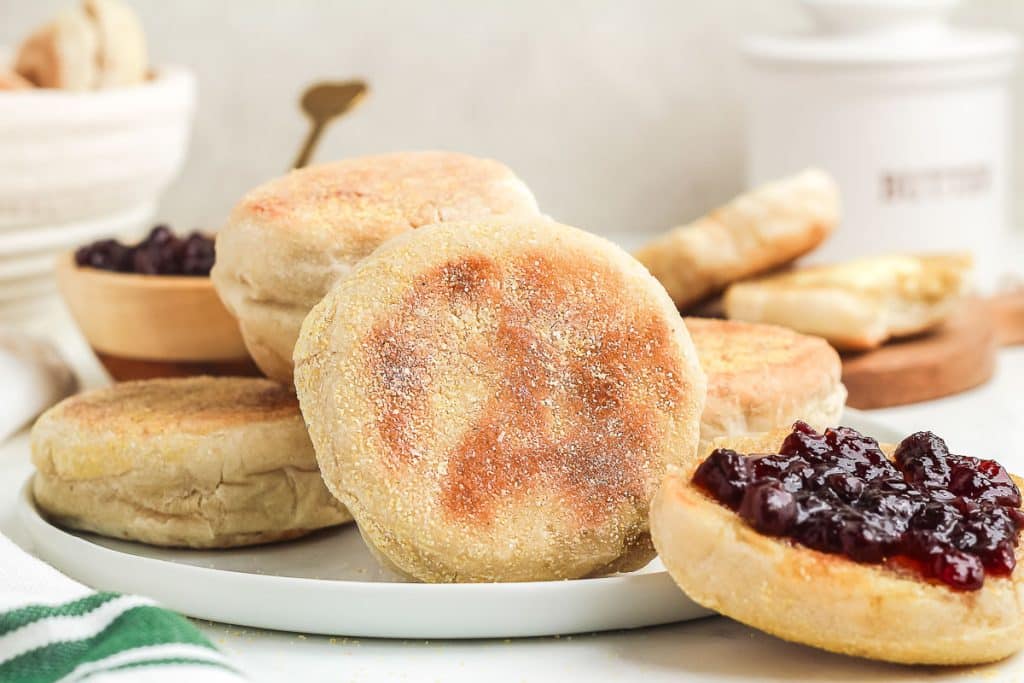
If you’re a fan of tangy sourdough bread and crave the soft, nooks-and-crannies texture of English muffins, this Sourdough English Muffin Bread is the perfect recipe.


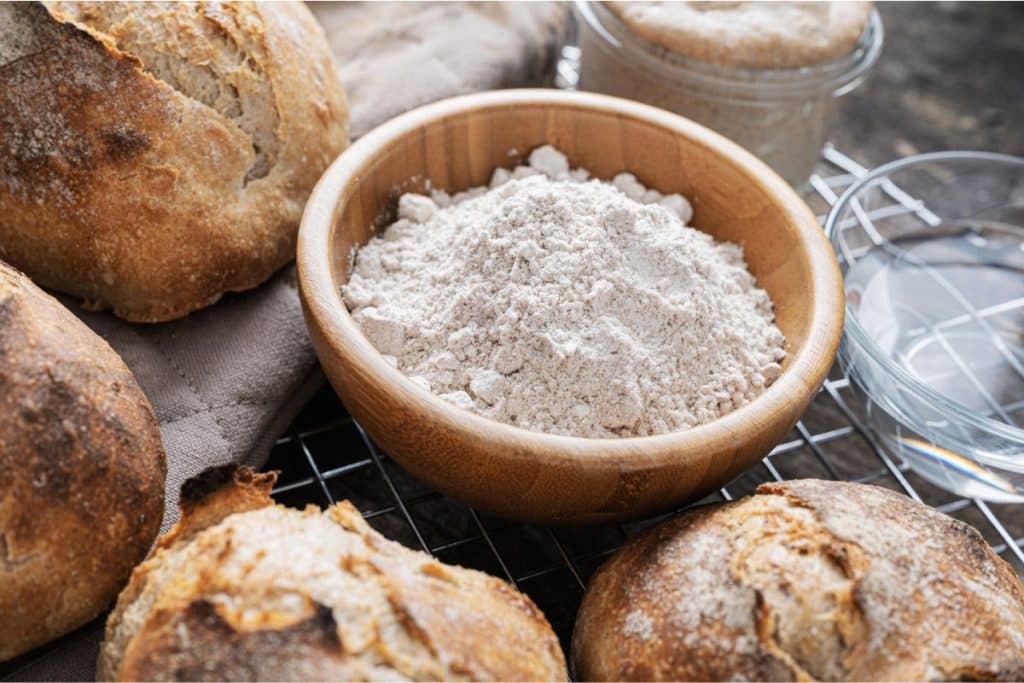
What Do You Need to Make a Sourdough Starter
Some of these links may be Amazon affiliate links and I may earn a small commission from the sale of these products to help defray the costs of operating this site, but the price you are charged is not affected. You can see my full disclosure policy here.
In terms of ingredients, it doesn’t get much easier!
- Flour and water are all that are needed to make a sourdough starter.
- Since we weigh the ingredients, a scale is also a necessity.
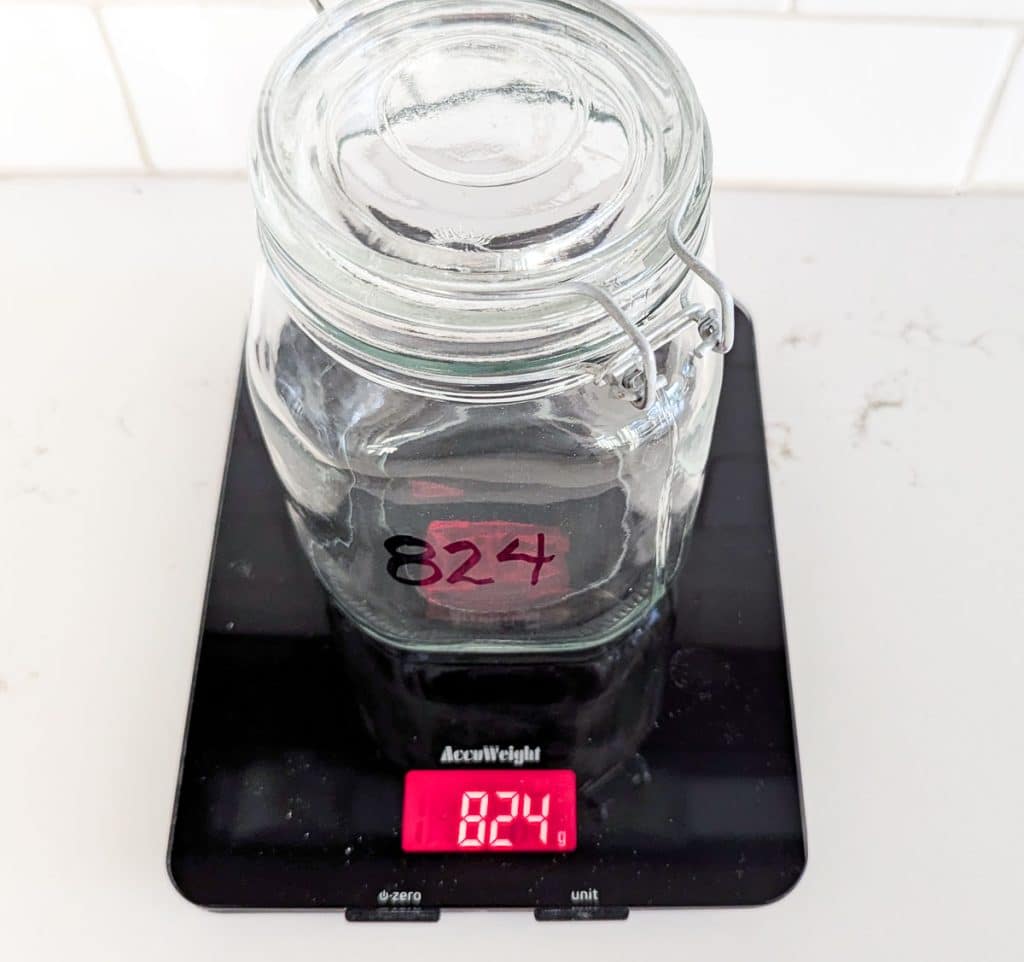
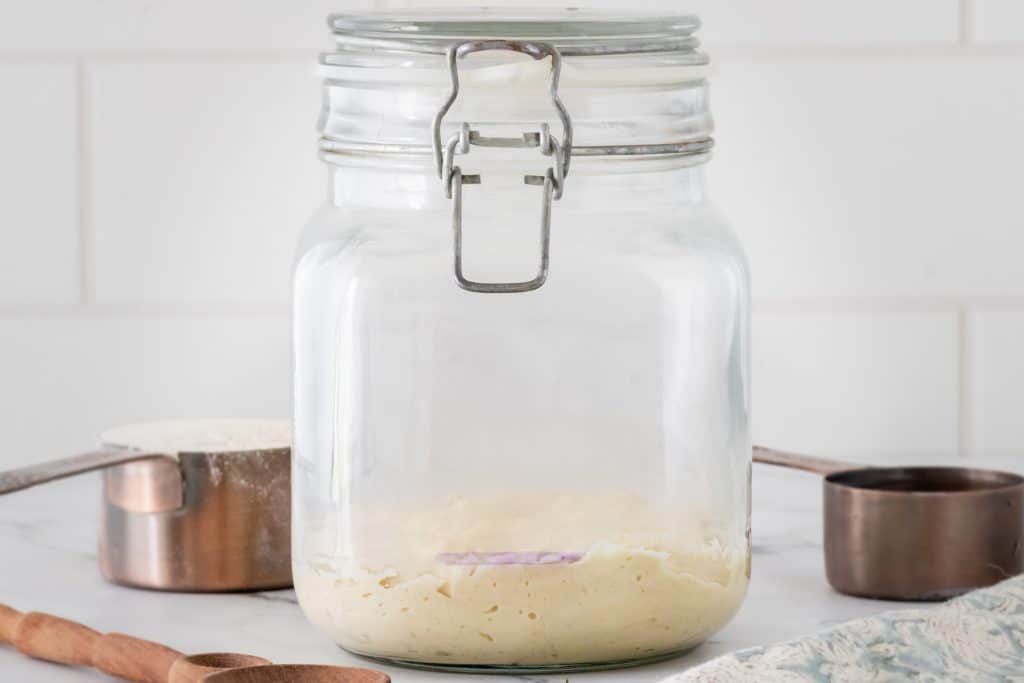
- A glass jar with a lid is also needed. I tend to use the same jar for months before I wash it. As I mentioned in the recipe, I write the weight (in grams) of the empty glass jar on the outside of the jar with a Sharpie. It eventually rubs off, which is my sign that it is time to wash the jar! I alternate between using this jar with a hinged lid and this Weck jar (but I don’t use the rubber gasket when I use either jars)
Different Flour Options for Sourdough Starter
Choosing the right type of flour for your sourdough starter can significantly impact its activity, flavor, and nutritional profile. You can choose any of the following, as well as a combination of two, as long as you choose unbleached. Here are some common and beneficial flour types to consider when creating and maintaining a sourdough starter:
- Unbleached All-Purpose Flour:
- Pros: Widely available, affordable, and consistent in quality. It has a balanced protein content that works well for maintaining a starter.
- Cons: All-purpose flour may lack some of the nutrients found in whole-grain flour, which can slow down the fermentation process.
- Whole Wheat Flour:
- Pros: It is high in nutrients, including fiber, vitamins, and minerals, which can promote vigorous microbial activity and a robust starter. It also adds a rich, nutty flavor to the starter.
- Cons: Can produce a denser starter, which might need more frequent feedings due to faster fermentation.
- Rye Flour:
- Pros: Rye is rich in nutrients and enzymes that facilitate fermentation, making it highly effective for developing an active starter. Rye starters often have a unique, complex flavor profile.
- Cons: Can create a sticky and dense starter, which some bakers find more challenging to manage.
- Bread Flour:
- Pros: It has a higher protein content than all-purpose flour, which can strengthen the starter and improve its rise. It is good for creating a robust and elastic dough.
- Cons: More expensive than all-purpose flour and may be less readily available.
Mixing Flours: Combining different types of flour can create a well-balanced starter with the desired characteristics of each flour. For example, mixing whole wheat or rye with all-purpose flour can provide both nutrients and a manageable texture. I use a mixture of 70% all-purpose (11.7% protein) and 30% rye flour for my sourdough starter.
Gradual Transition: If you decide to change the type of flour you use for your starter, do so gradually by mixing the new flour with the old flour over several feedings. This helps the microorganisms adapt to the new environment.
About Water Used for Sourdough Starter
The quality and type of water you use for your sourdough starter can significantly influence its activity, health, and overall performance. Here are some common water sources and their potential impacts:
Water Sources
- Tap Water:
- Pros: Readily available and convenient. Often contains minerals that can be beneficial for yeast and bacteria.
- Cons: It may contain chlorine or chloramines, which can inhibit microbial activity and negatively affect the starter’s health. If using tap water, it’s best to let it sit out for 24 hours to allow chlorine to dissipate, or use a water filter to remove these chemicals.
- Filtered Water:
- Pros: Removes chlorine, chloramines, and other potential contaminants while retaining beneficial minerals. Provides a balanced environment for the starter.
- Cons: Requires a water filter or purchasing filtered water, which can be an added expense.
- Bottled Spring Water:
- Pros: Typically free of chlorine and other harmful chemicals. Contains natural minerals that can support healthy fermentation.
- Cons: More expensive than tap or filtered water. Environmental impact due to plastic waste.
- Distilled Water:
- Pros: Free of impurities, chemicals, and minerals, providing a very neutral base for your starter.
- Cons: Lack of minerals can be detrimental to the starter’s health, potentially slowing down fermentation and weakening the microbial activity.
- Well Water:
- Pros: Often rich in minerals, which can be beneficial for the starter’s microbial community. Free of chlorine and chloramines.
- Cons: Depending on the well’s quality, it can contain high levels of other contaminants ( like heavy metals and bacteria). Testing may be necessary to ensure it’s safe for baking use.
In a nutshell, if your starter is sluggish with your chosen water source, try another. We have Reverse Osmosis water, which everyone will tell you is detrimental to a healthy starter. But I have been feeding my starter and baking my bread with that water for two years now. From time to time, I will add a pinch of sea salt to the RO water or purchase some spring water if it seems sluggish, but most of the time, I use the RO water.
I’ve read of some sourdough enthusiasts who bring back water from their travels, which introduces a variety of microorganisms to their starter. I’ve not done that yet, but don’t rule it out!
Water Temperature
Warm water ( 75°F – 85°F / 24°C – 29°C) is optimal for promoting yeast and bacterial activity, ensuring a healthy fermentation process. Using water within this range can help your starter become active and bubbly more quickly. Use a kitchen thermometer to check the temperature, or mix hot and cold water until you reach the desired warmth. Warm to the touch but not hot is a good rule of thumb.
Below that temperature, fermentation will occur more slowly. Water that is too hot, above 90°F (32°C), risks killing the necessary microorganisms required for fermentation.
Step-by-Step Instructions on How to Make a Sourdough Starter
Day One
- Weigh your empty glass jar (in grams) and note the weight. I wrote the weight in grams on the jar with a Sharpie.
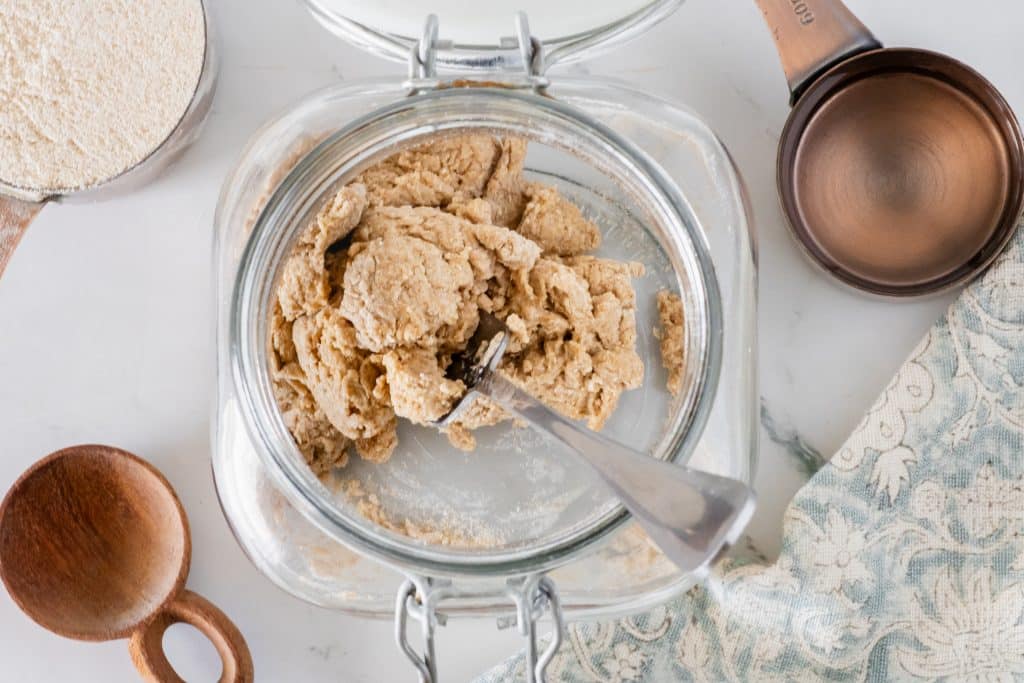
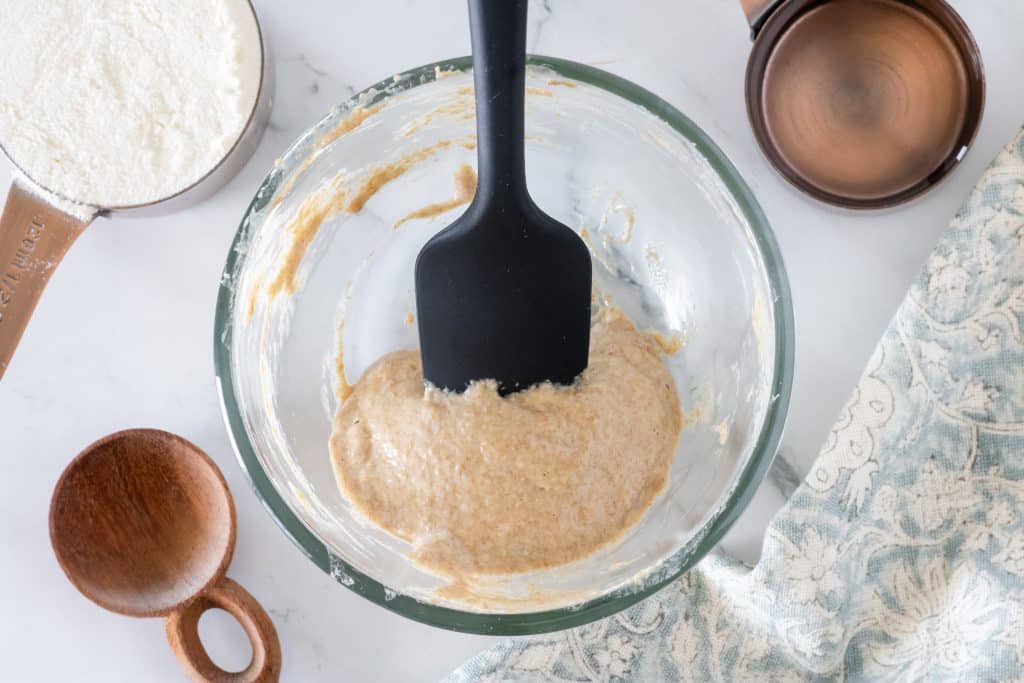
- Add 100 grams of flour (rye or whole wheat) and 125 grams of warm water to the jar and mix until combined.
- Cover the jar (not airtight) and let it sit for 24 hours in a warm spot (75°F+/24°C+).
Day Two
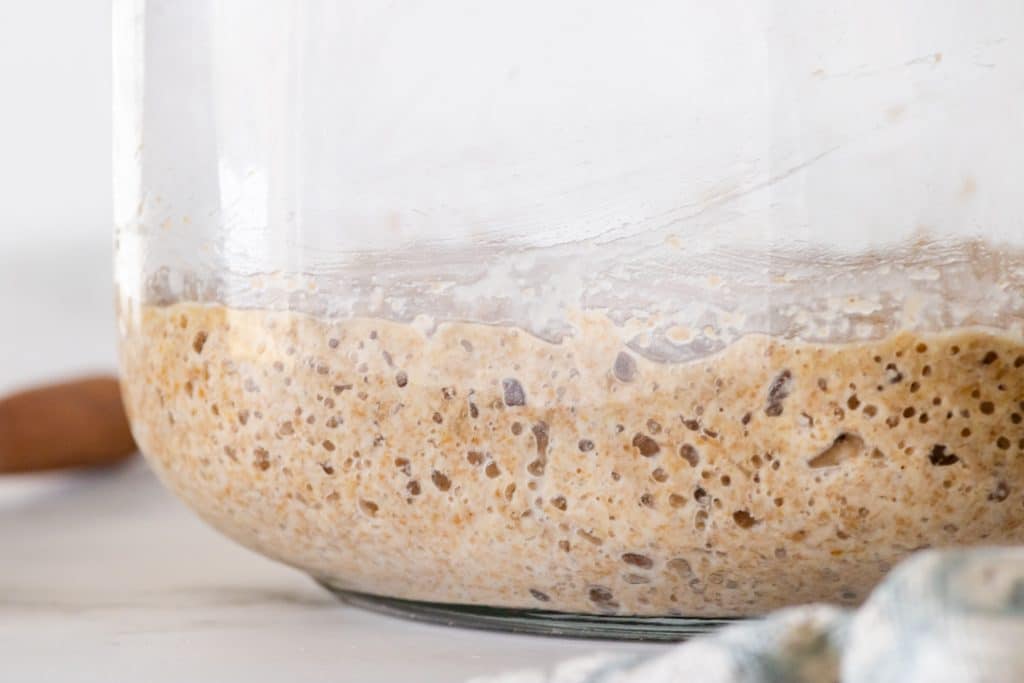
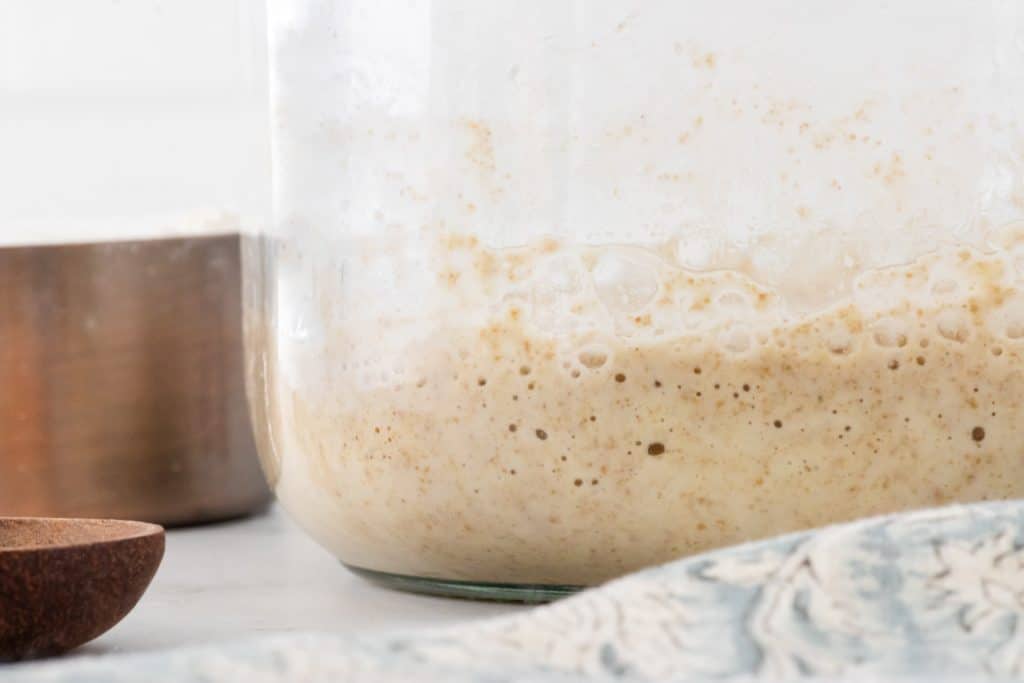
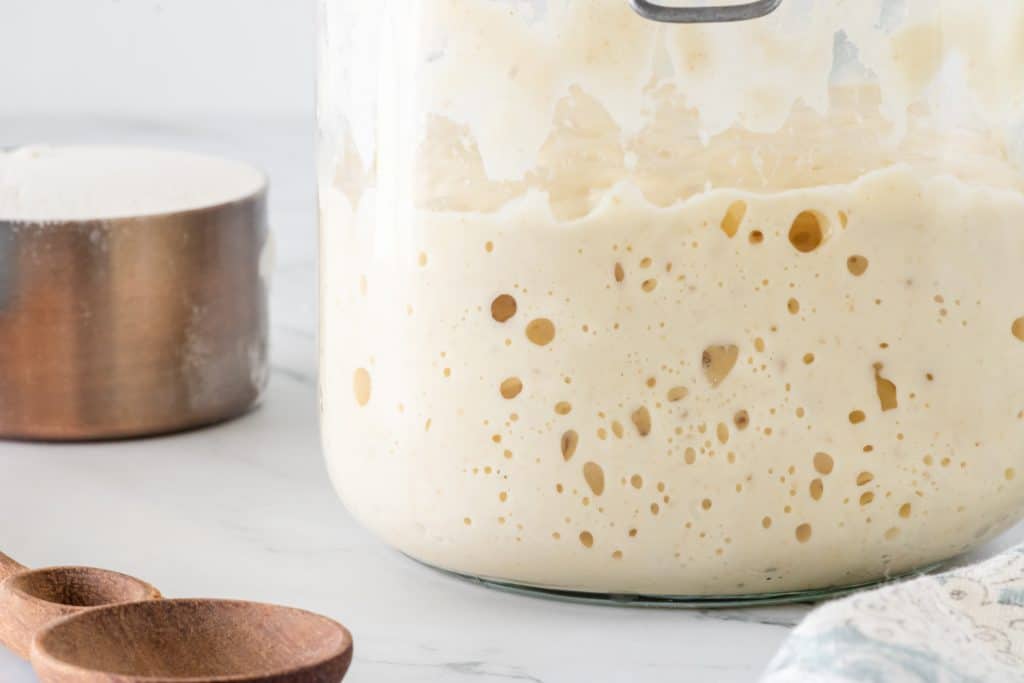
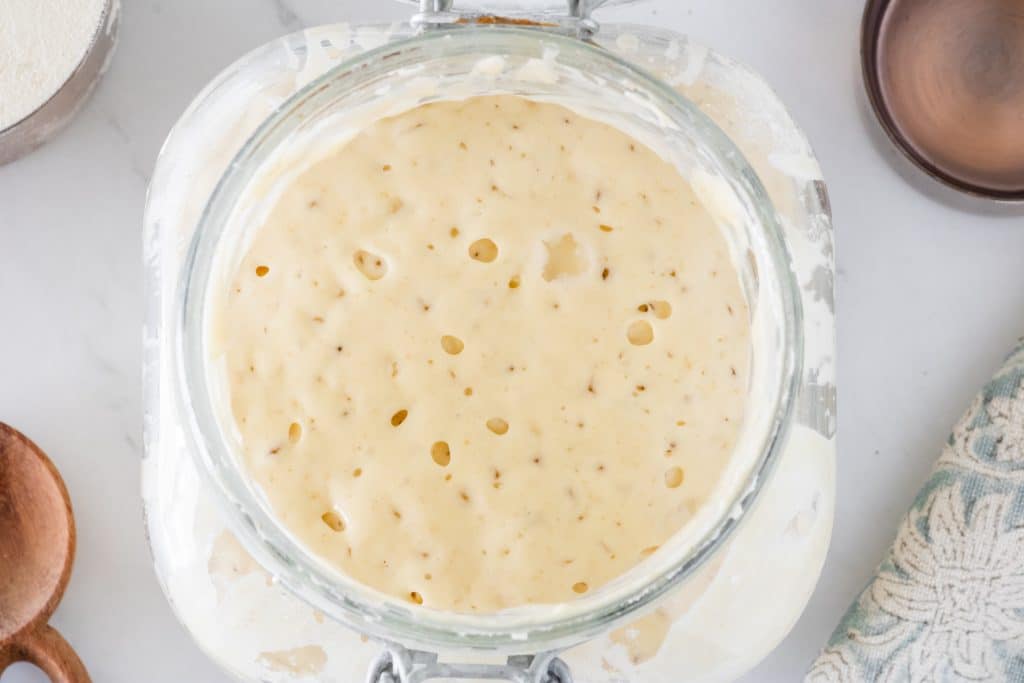
- On day two, there is no need to do anything but check on the starter. You should start to see some air bubbles forming.
Day Three
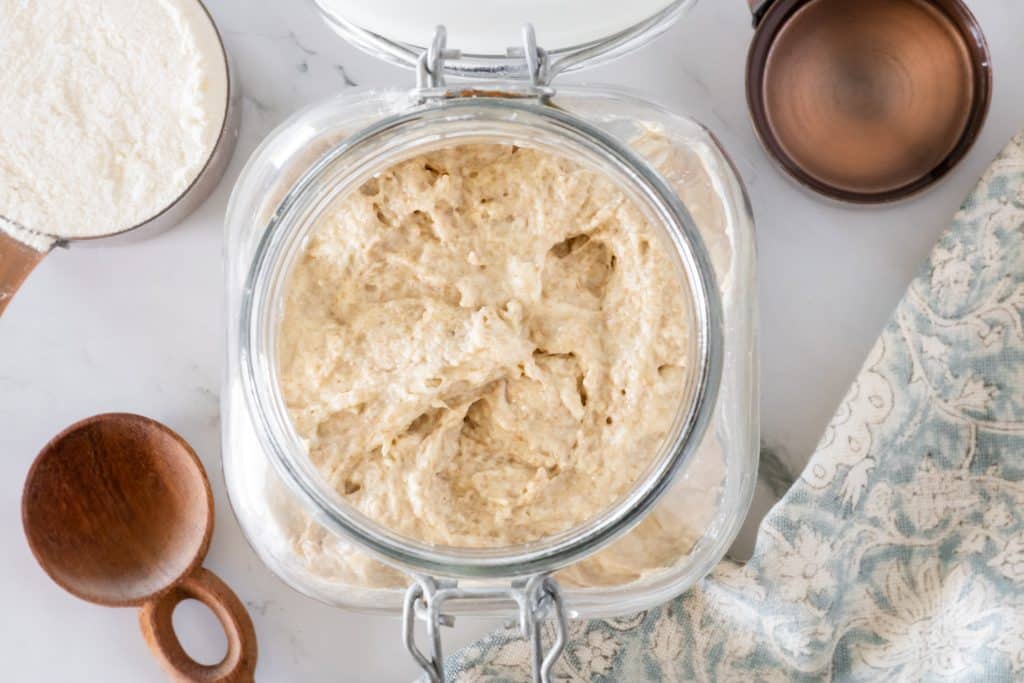
- Air bubbles should be throughout and present on top of the starter. If not, then let it continue to rest for one more day.
- If air bubbles are present, remove all but 75 grams of the starter and discard the rest.
- Add 100 grams of flour and 115 grams of warm water, mix, cover, and place in a warm spot for 24 hours. Note that at this point, we switch from all whole wheat to all-purpose or an all-purpose blend. As previously mentioned, I use 70% all-purpose and 30% rye which I mix up in bulk in advance.
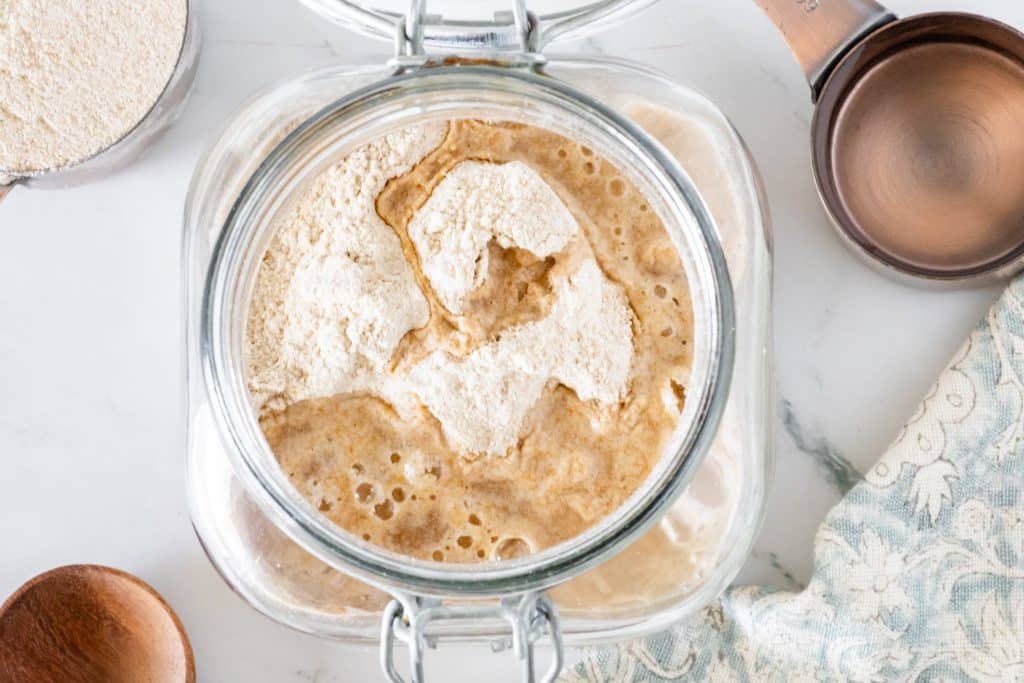
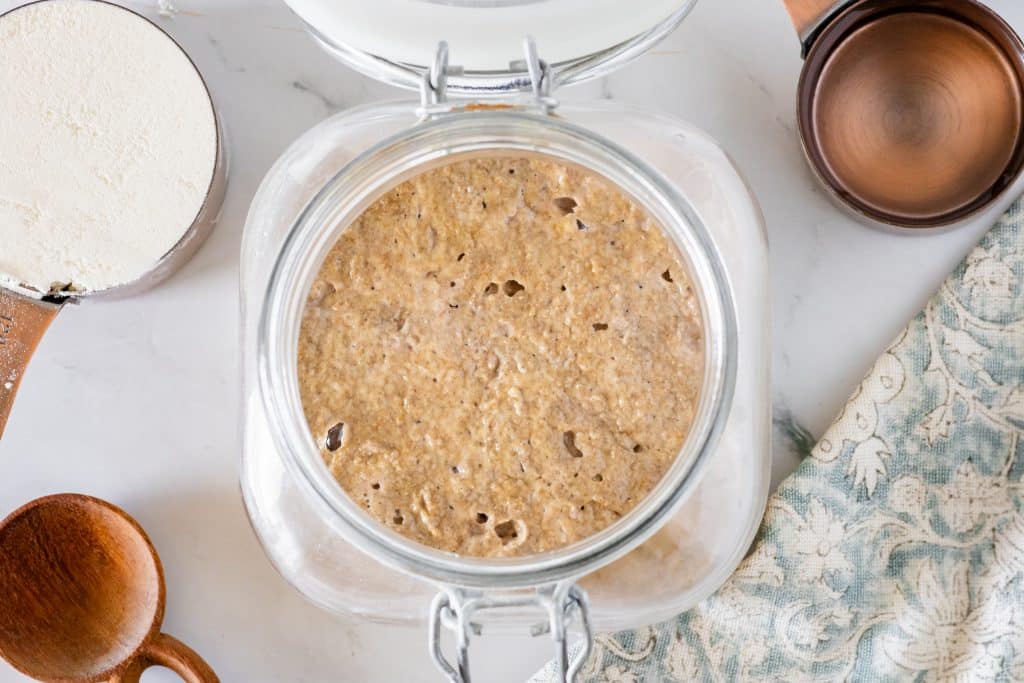
Days Four through Six (or up to day thirteen if possible or needed):
If you can wait for two weeks, you will have a more stable and stronger starter
which will help ensure better sourdough.
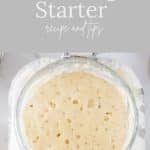
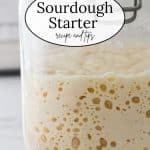
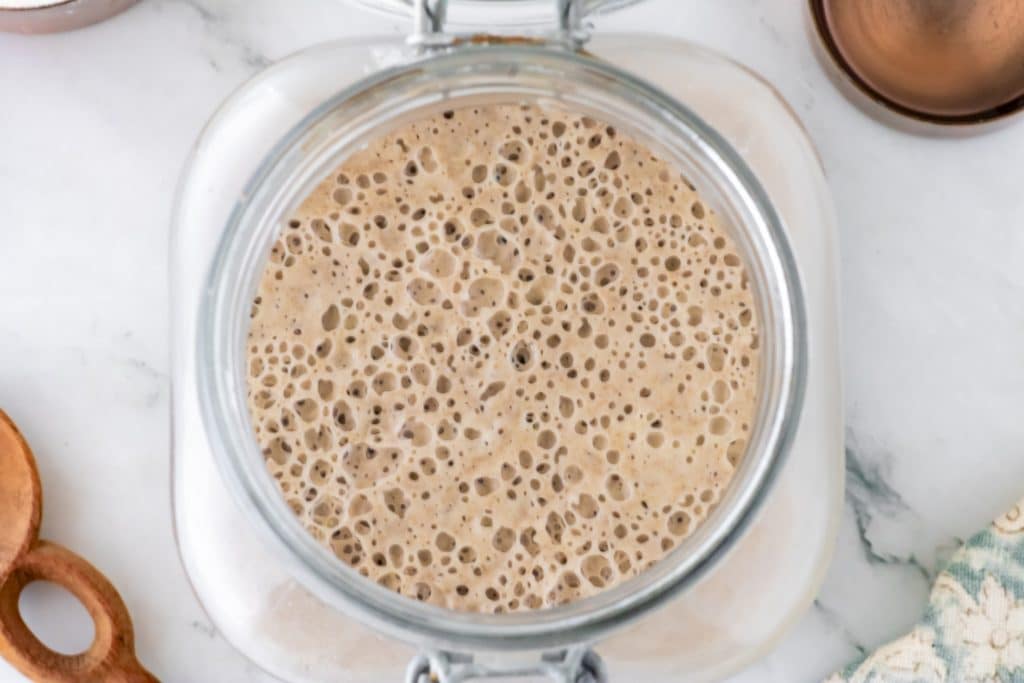
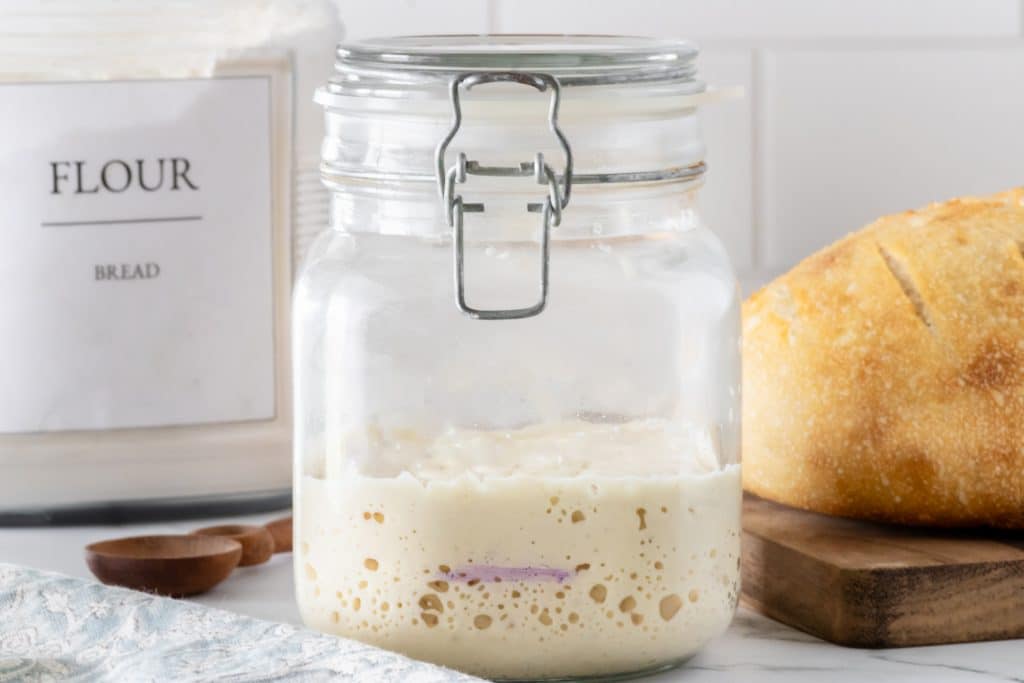
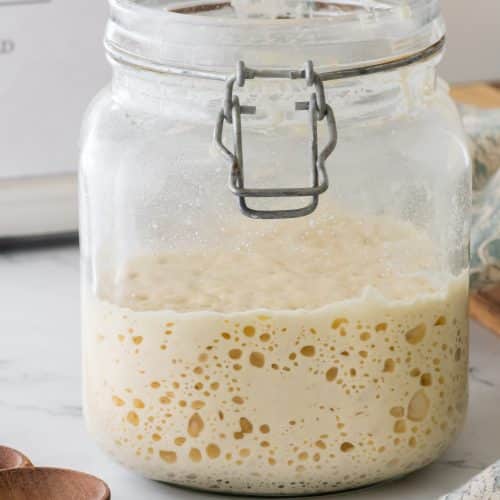
This is what you want to see on Day 4, twenty-four hours after you added the flour and water on Day 3. See all those gorgeous bubbles! 😍
- Repeat steps from Day 3 daily: remove all but 75 grams of the starter, discard the rest, add 100 grams of flour and 115 grams of water, mix, and cover.
- Stirring the starter 2-3 times a day to aerate it helps to speed up the fermentation process. This is especially helpful if you feel your starter becomes sluggish at any point in time.
Day 7 (or 14) and Going Forward – Starter Maintenance:
Feeding An Established Starter
Once your starter is established, if you plan to use it frequently, you must feed it with equal parts flour and water daily.
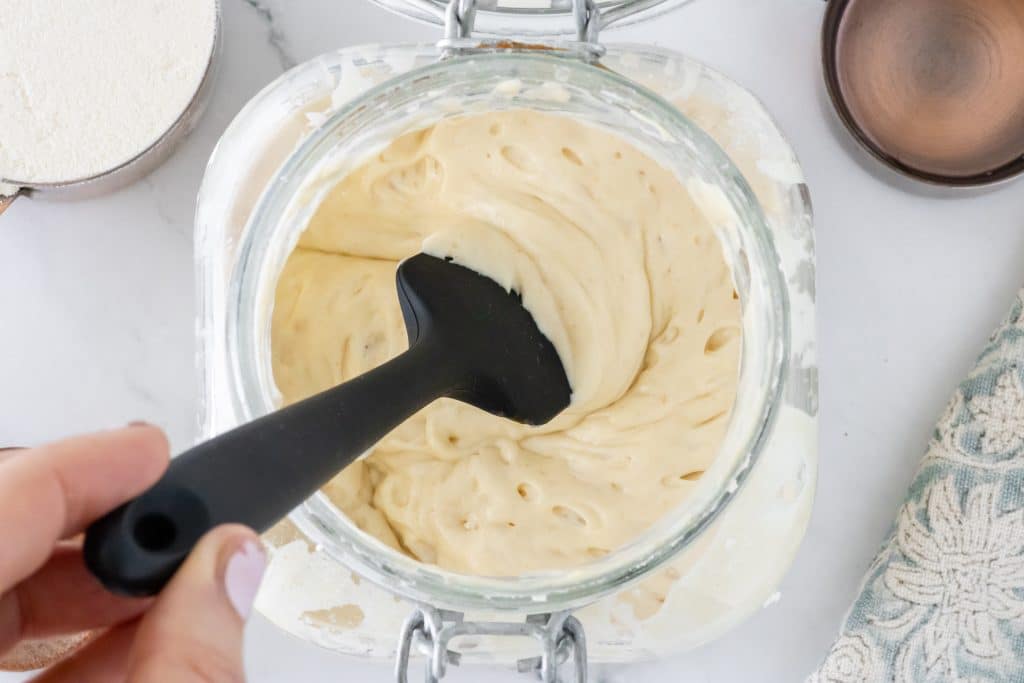
Feeding takes less than 5 minutes a day and helps keep your starter active and alive. To do this, remove a portion of the starter and discard it, then add flour and water equally.
My Starter Daily Feeding is this:
- I discard all but 10 grams of the starter
- Then, I add equal ratios of flour/rye mix and water based on the following chart.
- Mix until combined and repeat daily if frequently used.
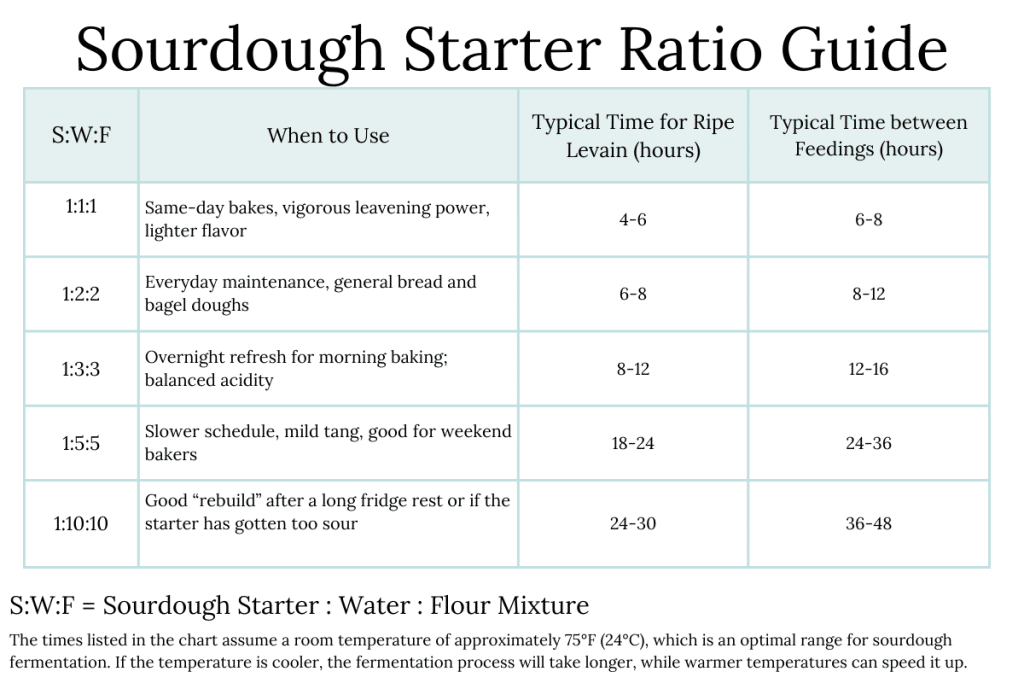
Click here for a printable PDF version of this Sourdough Starter Ratio Guide
Storing Your Starter in the Refrigerator
If you don’t want to or need to feed your starter regularly, or if you are going on vacation, you can also give it a bit of a vacation by popping it into the refrigerator!
You can refrigerate your starter for up to 3 weeks, but the longer it is refrigerated, the longer it will take to get back up to speed. Ideally, after refrigerating your starter, you should let it come to room temperature and feed it before making your dough.
Dehydrating Your Starter
You can also store sourdough by drying it out or dehydrating it. I keep dehydrated starters in my pantry in case of an emergency. While I’ve kept my starter going for two years, I fear the day something unfortunate happens. Having a dehydrated starter on hand is a bit of an insurance policy.
Dehydrating Sourdough Starter is done by spreading a thin layer of the starter on parchment and leaving it out to dry (this may take a day or two) or in a dehydrator set at 90°F/32°C or lower. The time it takes to dehydrate is very much dependent on the humidity. And be warned that dehydrating on the counter can attract fruitflies, as this is a fermenting product.
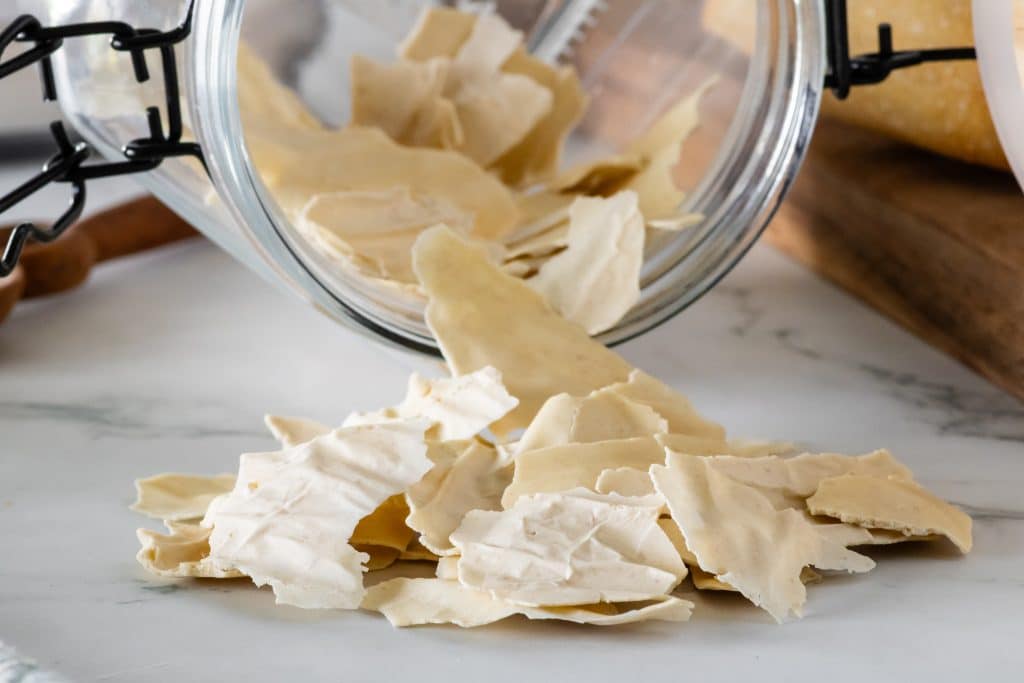
Once dried, break up the dried pieces and keep them in an airtight container. The container can be stored in your pantry or the freezer. Once you are ready to use the starter again rehydrate the dried pieces by dissolving them in warm water and feeding the starter in regular intervals as normal.
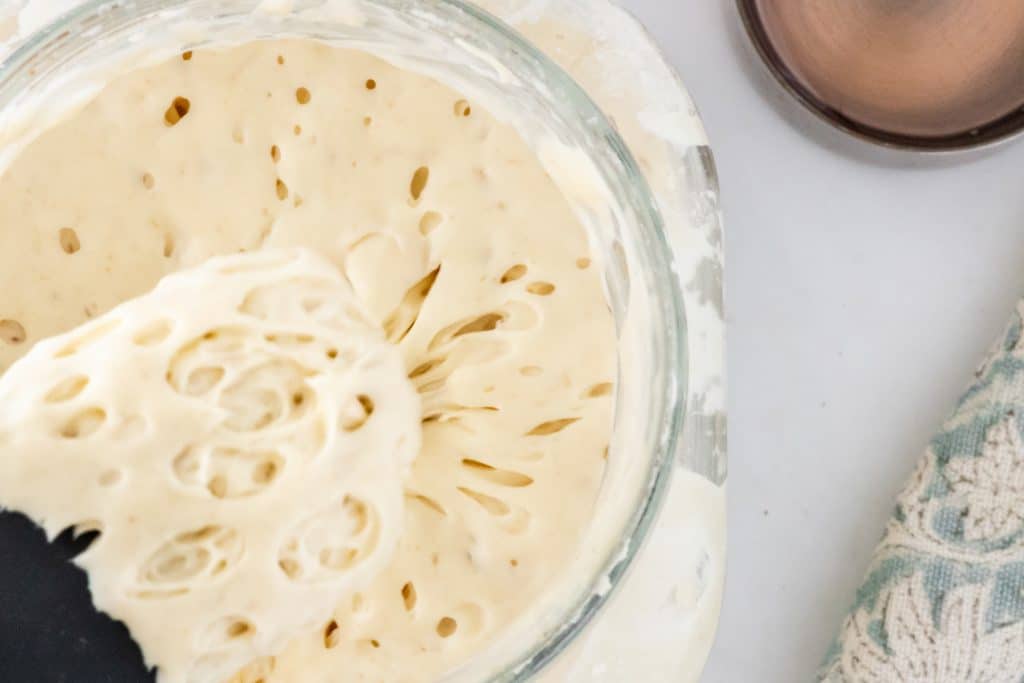
How to Tell When Your Starter is Ready to Use?
You can tell your starter is ready to use when it doubles within 4-8 hours. A well-fermented, ready-to-use starter will smell fermented, like yeast or bread, possibly tangy. It will be bubbly, make a pop and squish sound as you stir it, and feel fluffy and sticky.
You can track the amount doubled by using a dry-erase marker or a rubber band to mark the amount you have to begin with after stirring and feeding.
Common Sourdough Starter Issues and Solutions
Creating and maintaining a sourdough starter can sometimes present challenges. Here are some common issues you might encounter and their solutions:
Your Starter Is Not Bubbling or Rising
Problem: Your starter appears inactive with little to no bubbles or rise.
Solutions:
- Warm Environment: Ensure the starter is kept in a warm place (75°F – 85°F). Cooler temperatures can slow down activity.
- Feeding Schedule: Feed the starter regularly, at least once a day. If the starter is very sluggish, feed it twice a day.
- Quality of Ingredients: Use unbleached flour and filtered or spring water to avoid chemicals inhibiting microbial growth.
- Stir It: As mentioned earlier, stirring your sluggish starter several times a day can help aerate and encourage fermentation. I find that a good stir an hour after I’ve fed it seems to really jump-start the activity.
- Rye Flour: Rye is rich in nutrients and enzymes that facilitate fermentation. If you aren’t already using rye flour when feeding your starter, consider adding some rye flour to the flour you are using.
Hooch Formation (Liquid Layer on Top)
Problem: A layer of liquid, often grey or brown, forms on top of the starter.
Solutions:
- Stir and Feed: Stir the hooch back into the starter and feed it. Hooch forms when the starter is hungry, so increase the frequency of feedings.
- Consistent Hydration: Ensure you are using the correct water-to-flour ratio. Too little flour can cause excess liquid formation.
Starter Smells Unpleasant (like Acetone or Rot)
Problem: The starter has developed an off-putting smell.
Solutions:
- Regular Feeding: Feed the starter regularly. A neglected starter can develop unpleasant odors.
- Proper Hydration: Ensure a balanced hydration level. An overly wet starter can produce undesirable smells.
- Healthy Environment: Keep the starter in a clean jar and avoid contamination.
Mold or Discoloration
Problem: Mold appears on the starter, or it develops unusual colors (pink, orange, or black).
Solutions:
- Discard and Restart: If mold appears, it’s best to discard the starter and begin anew to avoid health risks.
- Cleanliness: Ensure all equipment and containers are thoroughly cleaned and sanitized.
Starter Is Too Thick or Too Runny
Problem: The starter has an inconsistent texture, either too thick or too runny.
Solutions:
- Adjust Hydration: For a thick starter, add a bit more water during feedings. For a runny starter, add more flour. Aim for a consistency similar to pancake batter.
- Measure Accurately: Use precise measurements for flour and water to maintain consistency.
Slow Fermentation or Rise in Dough
Problem: The dough made with the starter takes too long to rise or doesn’t rise enough.
Solutions:
- Active Starter: Ensure the starter is active and bubbly before using it in dough. Feed it a few hours before baking to ensure it’s at peak activity.
- Warm Environment: Proof the dough in a warm, draft-free place to encourage proper fermentation.
Starter Developing a Crust on Top
Problem: A hard crust forms on the surface of the starter.
Solutions:
- Cover Loosely: Cover the starter with a breathable lid (e.g., a cloth or loose-fitting lid) to prevent drying out while allowing gases to escape.
- Regular Stirring: Stir the starter occasionally to keep the surface moist.
Frequently Asked Questions about Keeping a Sourdough Starter
When you are just starting to build your starter, throwing out the discard each day is a good idea. After two weeks or longer, you can keep the discard to make discard recipes.
It’s best to wait until the sourdough starter is “ready,” even though it may look ready. Your days 1-7 starter includes good and bad bacteria, but you only want the good bacteria. After days 7-14, the bad bacteria die off and leave the good, wild yeast behind. The good bacteria allow the bread to rise properly, so if you use the starter before then, it will not rise properly.
Whole wheat and rye flour help sourdough become more active and ready for use faster because they contain more microorganisms that are good for sourdough, more so than white flour. The whole grains and higher protein content can help speed up the fermentation process of the bacteria and yeast.
*Keep this in mind for an older starter that may be struggling after being dormant in the fridge for a while. You can use whole wheat or rye to feed and boost a tired and struggling starter, especially if regular flour does not seem to be helping at the rate you would like.
*White flour is better for the majority of feedings because it helps produce a more consistent rise and a lighter-textured sourdough. Whole wheat is great for the microorganisms at first, but it will result in a denser-textured sourdough if used for a longer period.
Any glass or plastic container will work for your starter as long as it’s big enough for it to double in size. The only type of vessel you can NOT use is one that is “reactive”, as in it will react with the acids in the sourdough to cause an undesired effect. A reactive container would be aluminum, cast iron (without the enamel coating), copper iron, or anything metal. The result would be a negative change in flavor and or appearance.
I like a wide-mouth Weck jar or other wide-mouth jar for my starter, as it makes it easier to remove the discard and feed it regularly.
If the weather is cool or you can’t find somewhere in your home or garage that is 75 degrees or more, there are a couple of alternative ways to help your starter get to the right temperature.
Some oven lights are warm enough that when you put your starter in your oven with the light on, put your starter near it, and close the oven, your starter will be in a warm enough environment to reach the accelerated fermentation stage. Keep a notice on your oven controls so that you don’t accidentally preheat your oven with your starter in there, which would kill your starter.
Another way is with an instant pot. Place the grate at the bottom of the pot and place your starter in the container on top of it. Set your instant pot to low yogurt mode and place the instant pot lid on (you don’t need to close the lid of your jar since you will have the instant pot lid). The temperature of your instant pot will be around 110 degrees. The warmer the starter, the more often it would like to eat, so you may need to discard and feed twice a day instead of once every 24 hours.
A bread proofing box maintains a steady temperature ideal for fermentation.
DIY version: Place your starter inside a small insulated cooler with a jar of warm water or a heating pad set on low.
Wrapping your jar in a thick towel or placing it inside an insulated bag helps retain heat. Pair this with another heat source (like a warm water bottle) for extra warmth.
Keep the starter near a radiator, heating vent, or warm appliance (like the top of the refrigerator or near a slow cooker). Avoid direct heat that could overheat and kill the natural yeast.
A seedling heat mat (used for plant propagation) provides gentle warmth and can be placed under your starter jar. Use a thermostat to ensure the temperature doesn’t get too high.
Some cupboards near the stove or refrigerator tend to be slightly warmer than the rest of the house. This can help provide stable warmth without additional energy use.
Place the starter jar in a bowl of warm (not hot) water and replace the water as it cools. Be careful not to let water seep into the jar.
If you have a warmer part of your home (like a bathroom, laundry room, or pantry), keep your starter there. Avoid drafty or extremely cold spots.
Wrap your starter jar in a towel and place it on a heating pad set to the lowest setting. Check the temperature to avoid overheating.
I keep my starter jar right next to my stove, where it gets the residual heat from my tea kettle and whatever else I cook on my stovetop.
If you will bake daily or often, feed your starter at least once daily. If you plan on storing your starter for later use, place it in the refrigerator and feed it once weekly.
It’s not a worry; a sourdough starter is fairly hard to kill once established. You can leave it in the refrigerator longer and still have a perfectly good starter to work with, but it will just take longer to get it back up to a usable condition. It could possibly take a few days of leaving it at room temperature, discarding it, and feeding it twice a day to get it back to working condition, but it should end up good as new.
Tips for Sourdough Starter Success!
- If possible, continue up to day 14 to create a strong and stable starter. The longer you have your starter, the better your bread will be.
- Pick a set time to discard and add the flour and water each day. Consistent feeding times help contribute to starter success.
- After the starter is established, you can use tap water to feed your starter if you would like.
- Using unbleached flour helps because bleached flour does not have as much natural yeast, but if all you have on hand is all-purpose or bleached bread flour, either is an acceptable feeding substitute.
- Initially, using bottled or filtered water is best, but not necessary. Tap water may contain chlorine, which can weaken the yeast, so using filtered water will give your starter a better chance at success.
- If you can not stir the starter a few times a day, do not worry! It’s not necessary, it just helps to speed up the process so you can have a successful starter sooner.
Sourdough Starter Recipe
Equipment
- Scale
Ingredients
Day 1
- 100 grams whole wheat or rye flour
- 125 grams filtered tap or bottled spring water, warm (not hot)
Day 3 through 6
- 400 grams unbleached all-purpose flour, rye flour, whole wheat flour, or a mix, divided, 100 grams per day
- 460 grams filtered tap water or bottled spring water, divided, 115 grams per day, warm (not hot) Using water that is too hot can kill or ruin the starter.
Day 7 and going forward
- unbleached all-purpose flour, rye flour, whole wheat flour or a mix
- filtered tap water or bottled spring water
Instructions
Day 1
- Weigh your empty glass jar (in grams) and note the jar weight. I write it on my jar.
- In a glass jar add 100 grams flour and 125 grams of warm water and mix until combined.
- Cover the jar and let it sit for 24 hours in a warm spot (75°F+/24°C+). Don't cover the jar air-tight as you want gases to escape.
Day 2
- No need to do anything on Day 2 but check on the starter. You should start to see some air bubbles forming.
Day 3
- Air bubbles should be present throughout and on top of the starter. If not then let it continue to rest for one more day.
- If air bubbles are present, remove all but 75 grams of the starter and discard. By knowing the weight of your jar, you'll remove enough so that the jar with the starter on the scale weighs the gram weight of the jar plus 75 grams or set your tare to zero and remove until only 75 grams are left.
- Time for the first feeding! Note that we are using all-purpose flour or an all-purpose blend from here on out.Add 100 grams of flour and 115 grams of warm water, mix, replace the lid, and set it back into a warm spot for 24 hours.
Days 4-6 (or up to day 13 if possible or needed)
- Repeat steps 2 and 3 from Day 3. Every 24 hours, remove all but 75 grams of the starter, discard it, and add back 100 grams of flour and 115 grams of water.
- If you can, stir the starter 2-3 times a day for about 1 minute to aerate it. The natural yeast loves oxygen and this will help the starter to double faster. This aeration is only needed to get the starter established You shouldn't need to stir once the starter is established after about 1- 2 weeks unless your starter seems to be getting sluggish.
Day 7 (or 14) and Going Forward – Starter Maintenance
- Feeding An Established StarterOnce your starter is established, if you plan to use it frequently, you must feed it with equal parts flour and water daily.Feeding takes less than 5 minutes a day and helps to keep your starter active and alive. This is done by removing a portion of the starter and discarding it, then adding flour and water equally. My Starter's Daily Feeding is this:I discard all but 10 grams of the starter Then I add 50 grams each of a 30% rye/70% all-purpose flour mix and 50 grams of water.Mix until combined and repeat daily if using frequently
Storing your starter
- If you plan on baking daily, you must discard and feed your starter daily. In this case you can leave your starter out at room temperature. The amount you use in your recipe can be your discard.
- If you don’t plan on using your starter for a while you can store it in the fridge between feedings. When you are ready to use it, allow your starter to sit until it's at room temperature, then discard and feed it until it becomes bubbly and active again. Depending on the length of time in the fridge (such as more than a week) you may have to discard and feed it twice a day until it becomes active again.
Nutrition
Bookmark this page or pin the following image to refer back to these instructions for How to Make a Sourdough Starter in the future.
What Can You Make With Your Sourdough Starter?
Our sourdough recipes are divided between sourdough discard recipes and active starter sourdough recipes.
Sourdough Discard Recipes
Sourdough discard is the portion of sourdough starter removed during feeding to maintain a healthy and active culture. When you feed a sourdough starter, you typically add fresh flour and water, but before doing so, a portion of the existing starter is discarded to prevent it from growing too large and to maintain the right balance of yeast and bacteria.

- Sourdough Discard Pizza Dough
- Sourdough Discard Cheese Crackers
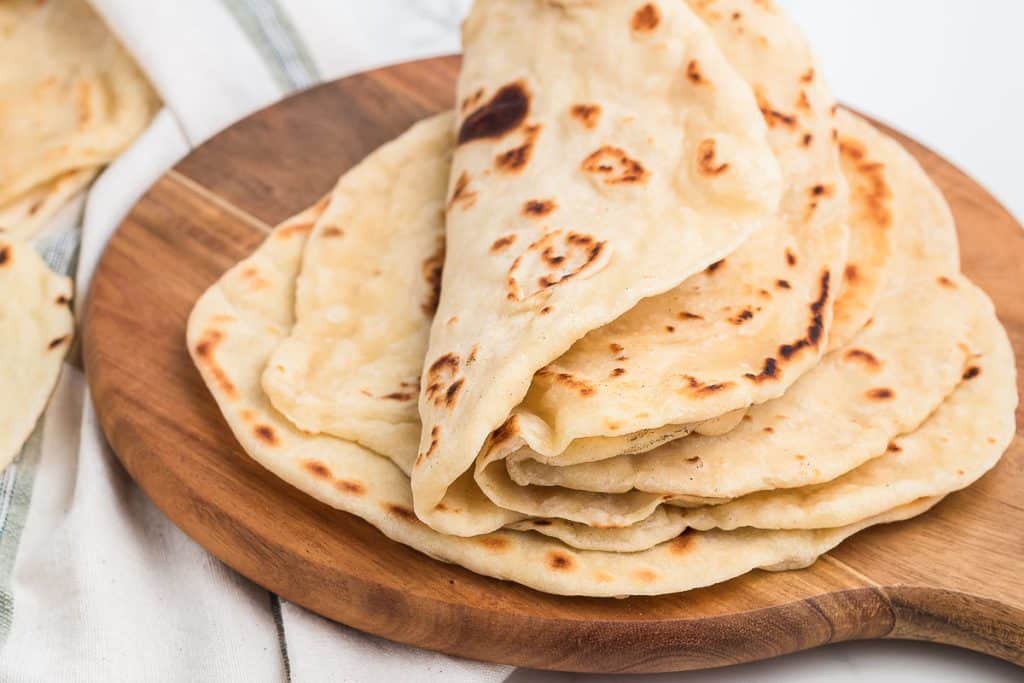
- Sourdough Discard Tortillas
- Sourdough Discard Pancakes
- Sourdough Discard Banana Muffins
- Sourdough Discard Waffles
Sourdough Recipes
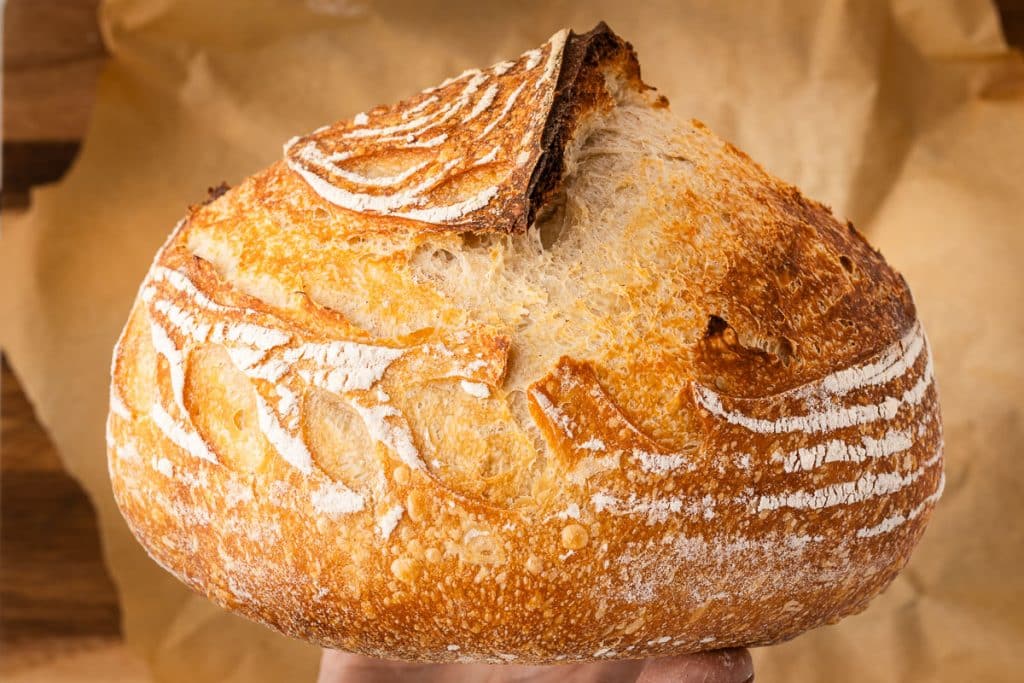


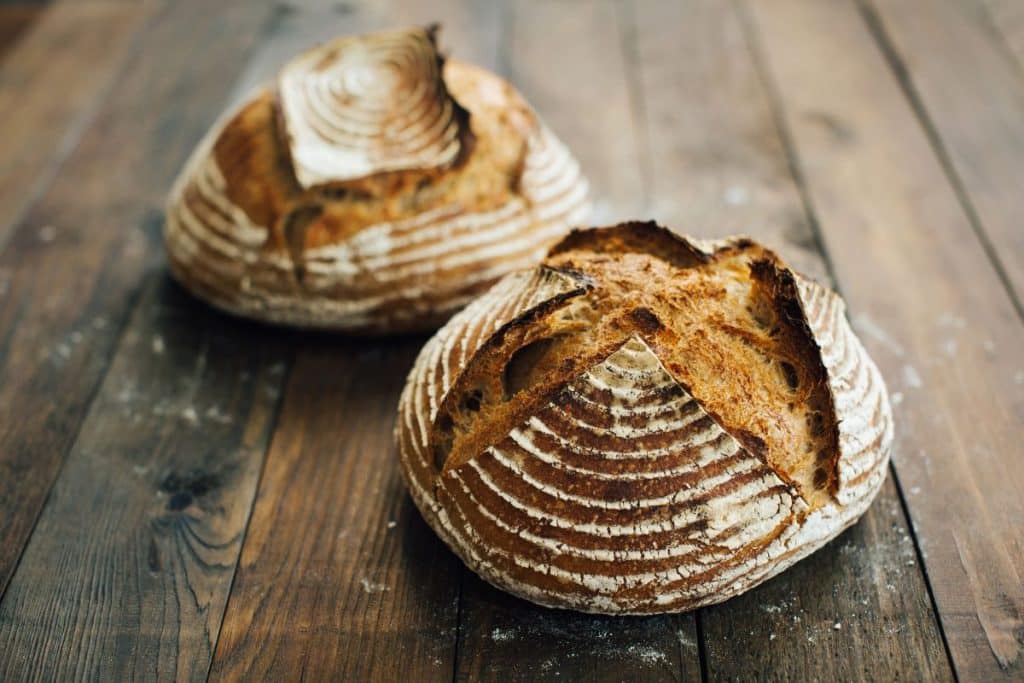
- Sourdough Bread Recipe
- Sourdough English Muffin Bread
- Sourdough Cinnamon Rolls
- Easy Sourdough Flatbread
- Sourdough Focaccia
- Sourdough English Muffins
Thanks so much for spending a few minutes of your busy day with me!
To ensure you don’t miss future content, pop your email in the pale green box on the right or click here. I usually send one email weekly, so I won’t inundate your inbox. I’m sensitive to an overflowing email inbox!
We will only use your email address to send you emails, no more than 1-2 weekly. In addition, you will have access to my growing library of knit & crochet patterns and other printables. Check back often as this library will continue to grow. You can unsubscribe anytime by emailing me or clicking on the “unsubscribe” link at the bottom of all emails.
And you can access many of the products I refer to on my Nourish and Nestle Amazon Page. You can access it here.
So, if you’d like to participate in the ‘subscriber benefit’ action, simply subscribe to Nourish and Nestle here or use the form on the right sidebar. It’s slightly towards the top.
I have sent all my subscribers the link to the Subscriber Benefits Library. If you missed it or misplaced it, let me know.
Until next time…


I am so excited! Day 8 and bubbling up very nicely. This recipe gave great details and I live being able to pop back into the site and review the process. Thanks for making the recipe so easy to follow. I can’t wait to taste a bread made with the starter but couldn’t find a recipe on the site? Please share if you have a favorite. With appreciation!!
Hi Eileen,
Yippee! There are few more satisfying kitchen endeavors! This is my go-to Sourdough Loaf. And he gives great directions as well. Once you’ve experimented with bread, pop back over here for Focaccia, cracker, pizza dough and other yummy sourdough treats.
Happy Baking!
Just started mine two days ago with flour I milled from wheat berries! Quick question though, for the starter maintenance, you discard all but 10 grams and add 50 grams each of flour and water?
yep! That’s it! I keep mine on the counter and remove all but 10g and add 50 g each of room temp water and flour.
Enjoy!
I just completed making a starter which took close to three weeks. Last night I fed it and refrigerated. It’s so confusing—when I want to make bread do I have to pull it out of fridge and let it come up to room temp before I feed it to get it bubbly and ready to use? And then feed it three times over three days before I can bake? I’ve looked and googled and can’t seem to find a clear answer. Also, I do have to waste a lot. I can only eat so much and to use all the discard would be overwhelming. Thank you for any enlightenment!!
Hi Susan,
I agreee, it is confusing at first! Let me see if I can help make it less confusing.
You do want your starter to be at room temperature and recently fed before you bake. What I typically do is feed it in the morning, leave it on the counter, and mix up dough late afternoon OR feed it right before bed, leave it on the counter, and mix dough when I wake up.
Have you been refrigerating it everyday? I only refrigerate if I can’t feed it each day, like when we are traveling or when I don’t plan to make bread. But, even in that case, I feed it once a week.
If you’ve been feeding it regularly, it is active, and you just put in fridge last night, I think you only need to feed it once before baking if yoou will be baking that day.
As it relates to the waste, yes, it can get wasteful. Of course there are quite a few discard recipes. But, what I typically do is keep only 10 g of starter and add water/flour in a 1:1 ratio to keep it going. I’ll ramp up the volume before I bake, as needed.
Following your questions, I went back in an updated/clarified some of the information. I also included a chart which may be helpful for you to determine the feeding ratios for your starter.
I hope I cleared up some of your questions and please don’t hesitate to reach out again.
Lynn
Lynn, I have been meaning to give this a go for a couple years. Have everything and I will start today! Your guide is so very thorough….thank you so much for breaking it down! Just what I needed. I’m a bit concerned our cooler house temp may be an issue . I’ll try one of your suggestions if needed.
Hi Anne,
Please do keep me posted on your progress! Another idea to keep your starter warm is with a heating pad.
Do you throw away the discard if you cannot use it right away or can you start a discard jar to use a few days later? And, can you use the discard within the predoubling days before the starter is ready?
Hi Tina,
If you think you’d like to try a Sourdough Discard recipe, then definitely start a jar in your fridge and add to it when you discard. Otherwise, you can toss it away or compost it; I add it to our compost bin. If I understand your second question, you won’t get the benefit of the fermentation if you use the discard before the actual starter is ready.
If I didn’t answer your question correctly, get back to me!
Lynn