How to Make Milk Kefir

This post shares how to make milk kefir, and you can jump right to that recipe by clicking the button above. But I encourage you to spend a few minutes reading through the preface here. Milk kefir is a fermented food with great health benefits and an interesting history! The more I learned about it, the more I appreciate this tangy fermented milk drink. This post goes into great detail, making your kefir journey even more successful and enjoyable!
It’s long been known that gut health is the foundation of overall health, and fermented foods are essential building blocks for it. To that end, over the past year or two, I’ve been fermenting all sorts of things in my kitchen towards the goal of improved health: water kefir, kombucha, tepache, sauerkraut, beets, celery, etc. I became comfortable with the routines, the timing, the equipment. But milk kefir? For some reason, I kept putting it off. For some reason, I thought it would be much more involved and wasn’t sure we would use it.
The truth is exactly the opposite. Milk kefir is hands-down the easiest fermented food to make. Easier than water kefir with its sugar water that needs mixing. Easier than kombucha with its temperature sensitivity and long brewing time. And, it’s even easier than tepache! You simply add kefir grains to milk, leave it on your counter for 12-24 hours, and strain. That’s it. The whole process takes maybe five minutes of actual hands-on time, and most of that is just pouring and straining.
And not for nothing, it is significantly healthier than any of the other ferments I was making.
As it relates to the economics, making milk kefir at home costs pennies compared to buying it at the store, where a small bottle can run you four or five dollars. Your initial investment is just the kefir grains themselves, and those keep multiplying, so you’ll have extras to share or keep as backup. Once you get into the rhythm of straining and starting a new batch every day or two, it becomes as automatic as making coffee.
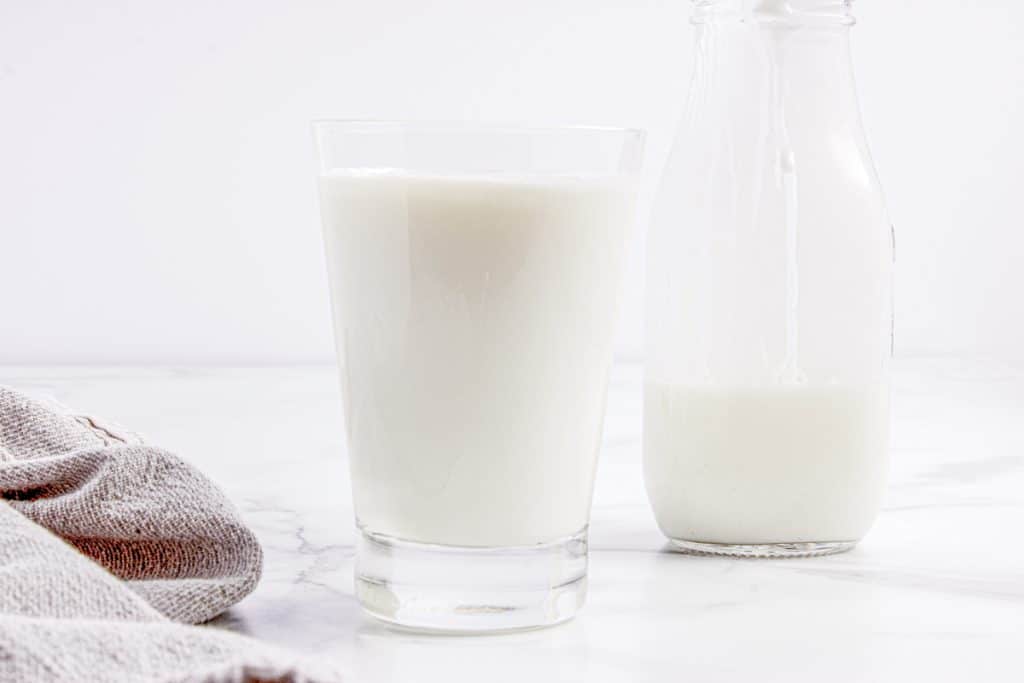
Table of Contents
What Is Milk Kefir?
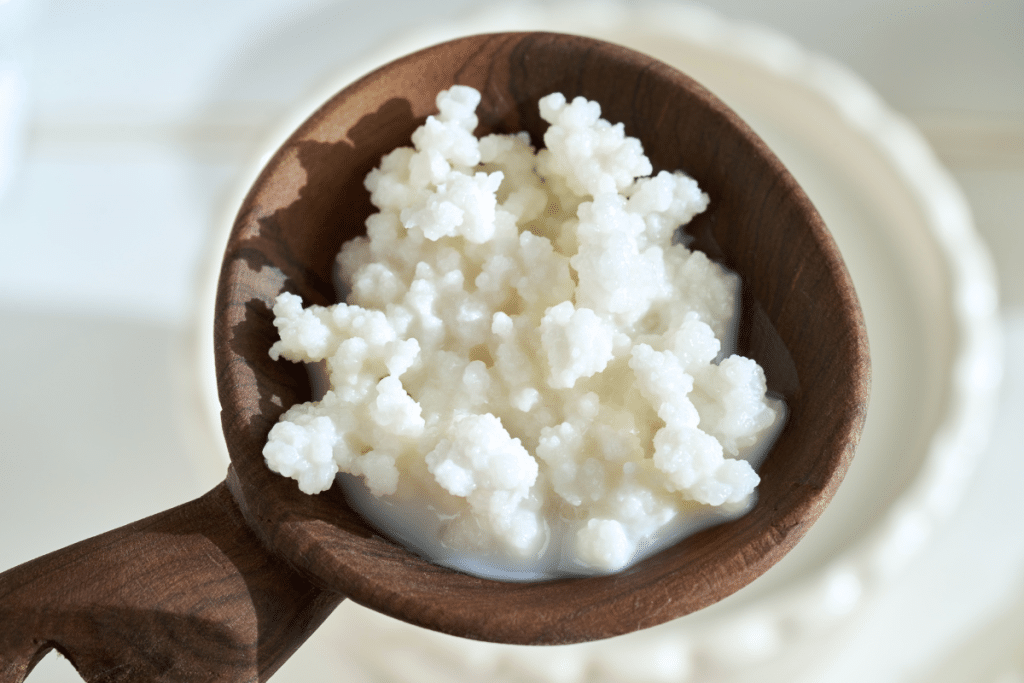
Milk kefir is a fermented milk drink that’s been made for thousands of years, originating in the Caucasus Mountains. Unlike yogurt, which is cultured with a few specific strains of bacteria, kefir is fermented with kefir grains. These aren’t actually grains like wheat or rice. They’re small, rubbery clusters of bacteria and yeast living together in a symbiotic relationship, held together by proteins and sugars they produce. If you’ve made Kombucha, you are familiar with the term SCOBY (Symbiotic Culture of Bacteria and Yeast); Kefir grains are also a SCOBY.
When you add these grains to milk, the bacteria and yeast get to work eating the lactose and producing lactic acid, which thickens and sours the milk. The result is a drinkable, slightly effervescent cultured milk that’s thinner than yogurt but packed with beneficial microorganisms that spin off from the initial grains. The grains themselves don’t dissolve or get consumed in the process. You strain them out and use them again and again, indefinitely.
The beauty of kefir is its simplicity. This isn’t a precise science requiring thermometers or special equipment. You need kefir grains, milk, a glass jar, a breathable cover, and a strainer. That’s it.
How Milk Kefir Benefits Your Body
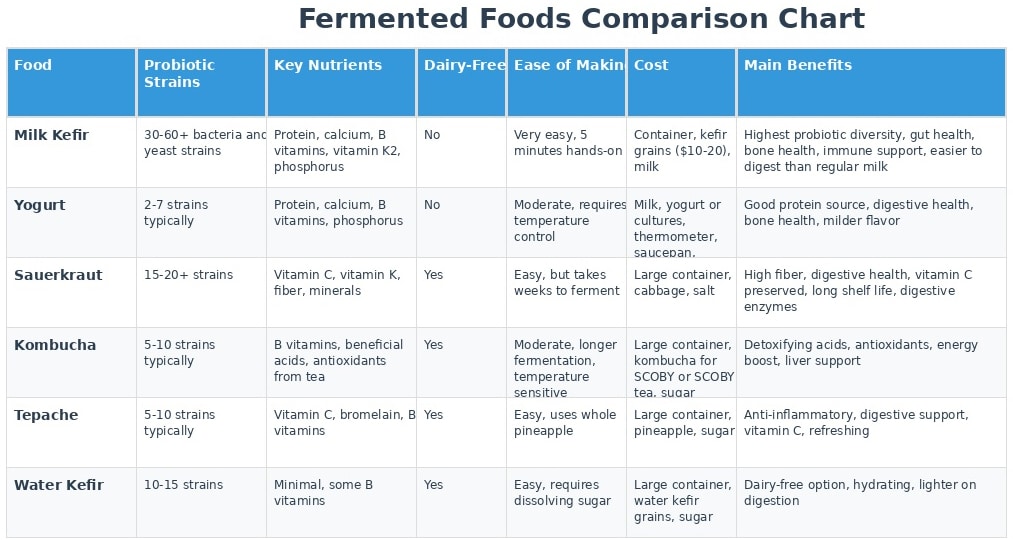
Milk kefir is one of the most probiotic-rich foods you can consume, containing dozens of beneficial bacteria and yeast strains. While yogurt typically has a handful of probiotic strains, milk kefir typically has 30-60 different strains. These microorganisms help populate your gut with beneficial bacteria, which affects everything from digestion to immune function to mood.
The fermentation process breaks down much of the lactose in milk, making kefir easier to digest than regular milk for many people with lactose sensitivity. Beneficial bacteria also produce vitamins, particularly B vitamins and vitamin K2, during fermentation. You’re essentially getting a food that’s more nutritious than what you started with.
Regular consumption of kefir has been linked to improved digestion, better immune response, and even support for bone health due to its calcium and K2 content. Some people notice improvements in seasonal allergies or skin conditions. The probiotics in kefir may help with everything from regularity to reducing inflammation, though individual results vary.
Don’t just take my word for Kefir’s health benefits. Here are two authoritative, unbiased articles I used for my research: one from Cambridge University Press and one from the NIH.
Where Do You Get Milk Kefir Grains?
Some of these links may be Amazon affiliate links and I may earn a small commission from the sale of these products to help defray the costs of operating this site, but the price you are charged is not affected. You can see my full disclosure policy here.
Unlike a kombucha scoby or a sourdough starter, you can’t grow your own milk kefir grains.
I find this part rather cool; no one knows for sure when or how kefir grains originated, but there is strong evidence that they originated in the Caucasus Mountains, where they are referenced for at least 4000 years. All kefir grains in existence today descend from these original grains!
That said, like a sourdough starter or a kombucha scoby, kefir grains multiply when healthy and fed regularly. So, if you know someone who makes kefir, ask them to set aside some grains for you. With one teaspoonful of grains, you can start your kefir journey and make one cup of kefir in 12-24 hours.
I purchased my grains from two Etsy sellers: Microbiota and Home Grown Health; I decided to combine the two sources, thinking that they would each have different strengths and, together, make healthier kefir. Whether my reasoning would stand up to scientific examination is unknown! 🤷🏼♀️ You can also buy hydrated grains on Amazon. I recommend hydrated grains over dehydrated ones. I tried the dehydrated route and wasted a bunch of milk trying to rehydrate the grains, but it never worked.
ALSO… make sure you are buying MILK kefir grains, NOT WATER kefir grains. Totally different!
What Do You Need to Make Milk Kefir?
- Jar
- Fine Mesh Sieve
- Breathable cover (coffee filter, paper towel, or cloth) and a rubber band
- Hydrated Milk Kefir Grains. If you need to purchase them, try Microbiota, Home Grown Health, or Fusion Teas. I recommend hydrated grains over dehydrated ones. And make sure you aren’t purchasing Water Kefir grains.
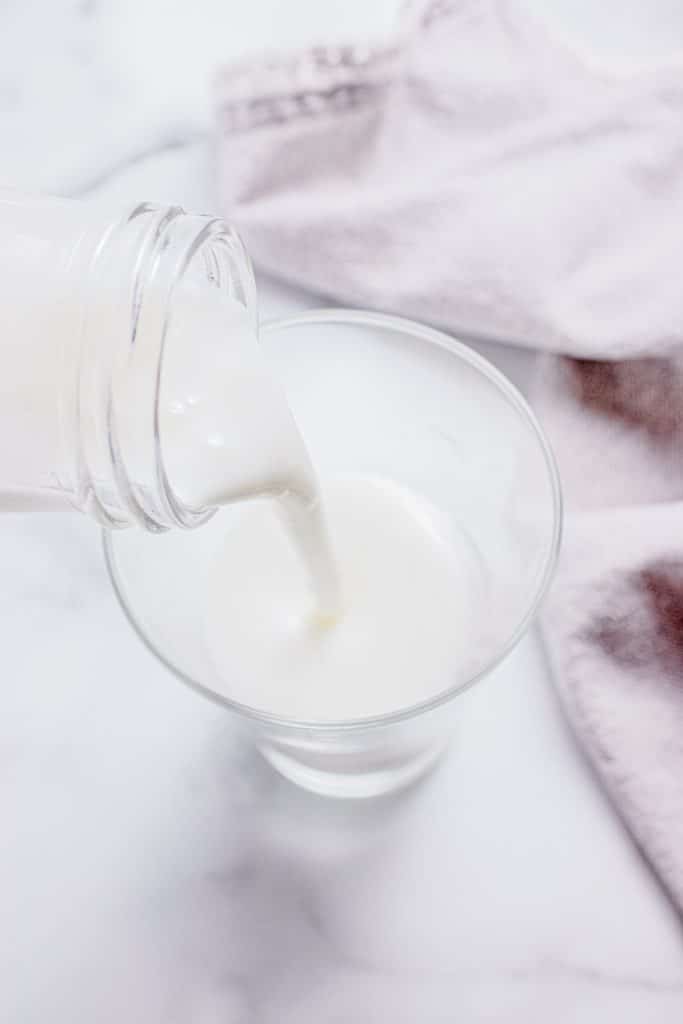
- Milk. When just starting out, I recommend using Pasteurized (Avoid Ultra-Pasteurized) Whole Milk. The grains thrive on the fat in whole milk. That said, once your grains are established and healthy, you can make kefir with lower-fat milk. With a lower fat content, they will eventually slow down a bit, but you can then feed them higher-fat milk to reinvigorate them. I prefer organic milk and had a hard time finding organic milk that wasn’t Ultra-Pasteurized. The only one I could find in my area was the Whole Foods 365 brand. I’ve used both their Whole Milk and 2% Milk with success.
Whole milk, with its higher fat content, will also produce a creamier, thicker kefir than skim milk will.
While I’ve not tried it, the higher heat of the Ultra-Pasteurization process is believed to kill off the proteins that the kefir grains use as food. At a minimum, it can be an unreliable medium to make kefir.
How to Make Milk Kefir
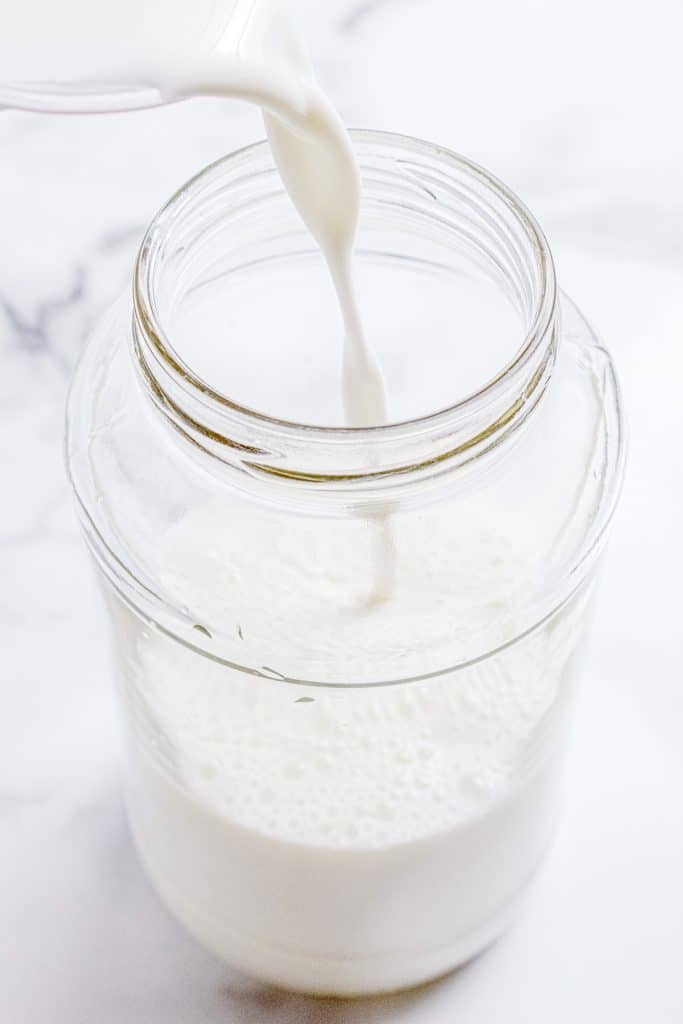
1.Add one tablespoon of kefir grains to your jar. Pour in four cups of milk and gently stir to distribute the grains. (I reuse the same jar over and over again, rarely washing between batches. I figure there are lots of good bacteria on that jar!)
Note: Using too many grains will cause overly fast fermentation; too few will result in slow or incomplete fermentation.
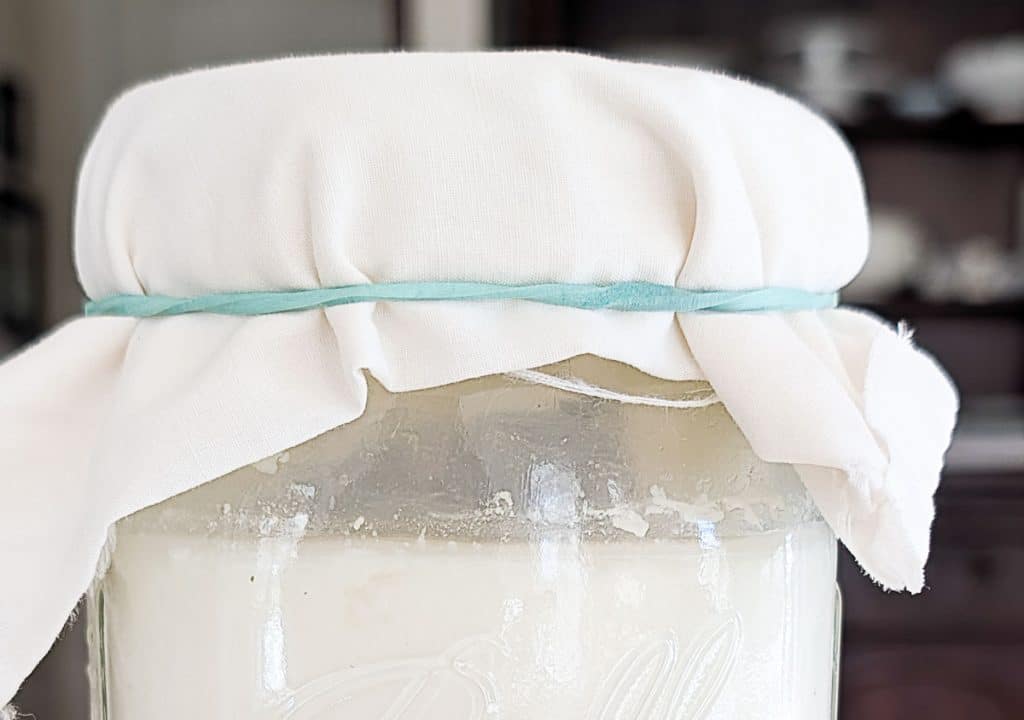
2. Cover the jar with a loose-fitting lid or a breathable material, like a coffee filter, paper towel, or cloth, and secure it with a rubber band. Avoid using an airtight lid, as the fermentation process releases gas that needs a way to escape.
3. Place the jar in a cool spot away from direct sunlight, ideally between 68-76°F (20-24°C), with cooler being better than warmer. Let it sit undisturbed for 12 to 48 hours.
Warmer temperatures (75–78°F) = faster fermentation (12–18 hours)
Cooler temperatures (68–72°F) = slower fermentation (24–48 hours)
Research shows that temperatures below 76°F produce the healthiest results. At this temperature range, you get the most diverse mix of beneficial bacteria and yeast, the grains grow more readily, and the kefir develops a thicker, creamier texture.
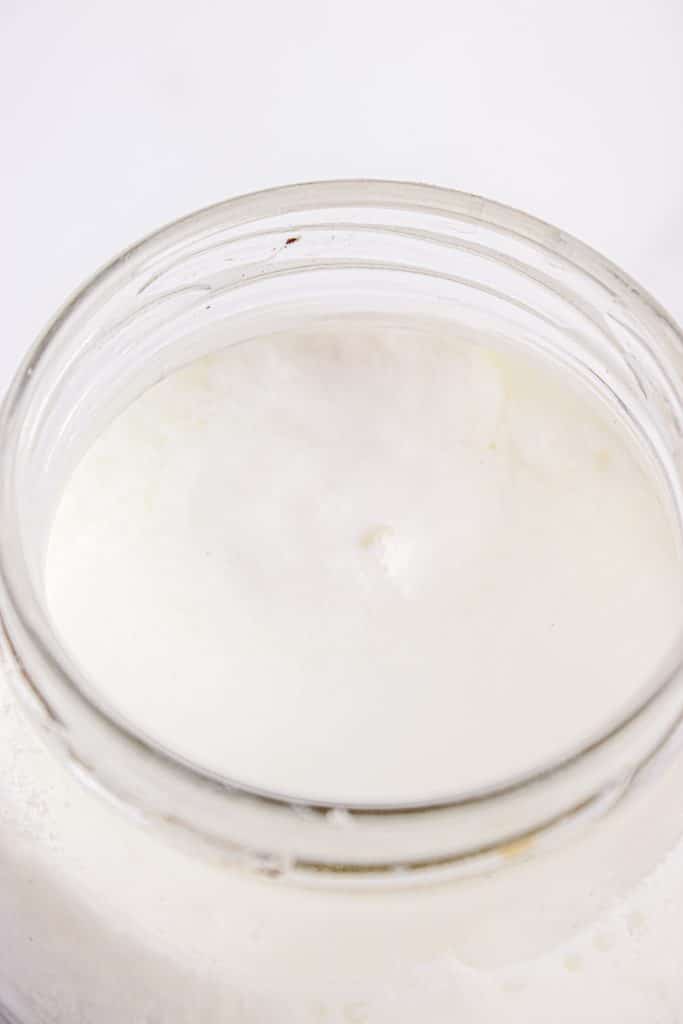
4. Your kefir is ready when you see these signs:
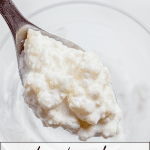
- Thickened texture that is noticeably thicker than regular milk; think thick buttermilk or drinkable yogurt.
- A tangy aroma that is pleasant and has a sour cream, yogurt-like smell.
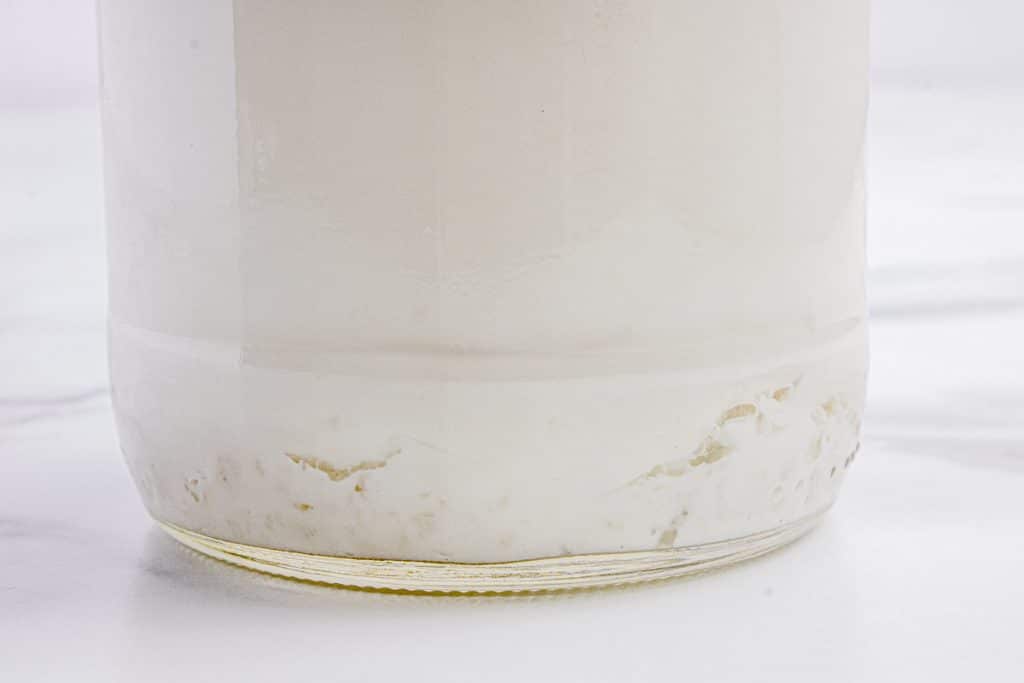
- When kefir is getting close to ready, you might see a bit of clear yellowish whey starting to separate at the bottom or around the grains. A small amount is normal, and it means it is ready to strain. If it fully separates into thick white curds on top and clear whey on the bottom, you’ve let it go too long, though it’s still perfectly safe to drink. It will just be thick.
- If you look closely, you may see small bubbles forming, especially around the grains. This comes from the yeast producing carbon dioxide during fermentation.
- Fresh grains often start at the bottom of the jar and rise to the top as fermentation progresses, producing gas.
- The most reliable test is taste. After 12-24 hours, taste a small amount. It should be tangy and slightly sour, but not so sour that it makes you pucker. If it still tastes like plain milk, give it more time.
Timing Tip: Start checking at 10-12 hours in warm weather, 18-24 hours in cooler conditions. Gently tilt the jar. If the milk has thickened and pulls away from the sides, it’s ready.
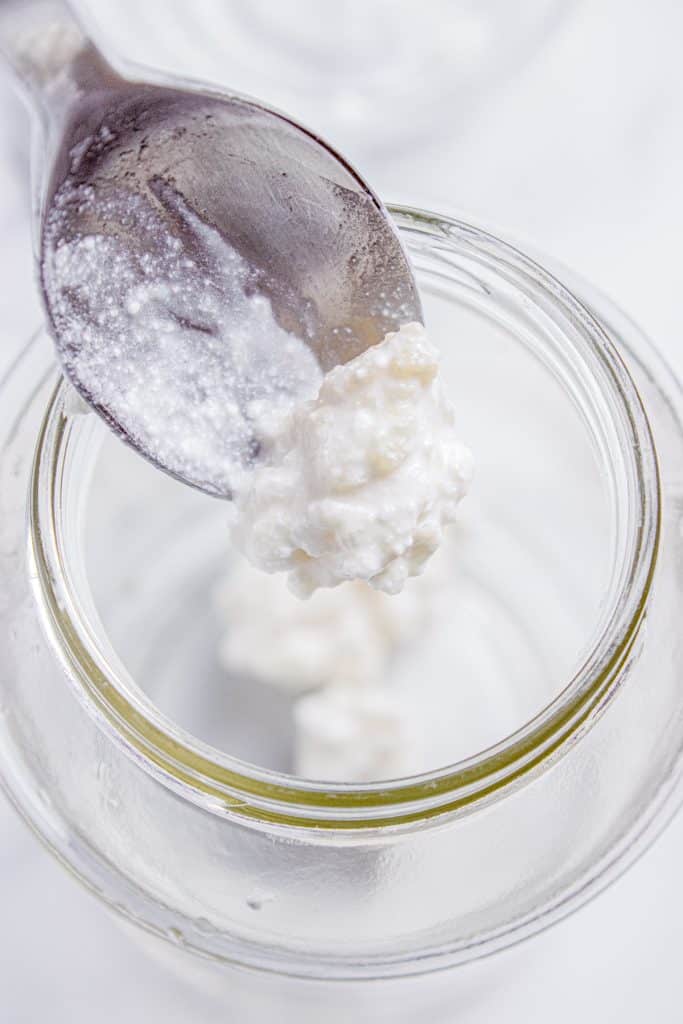
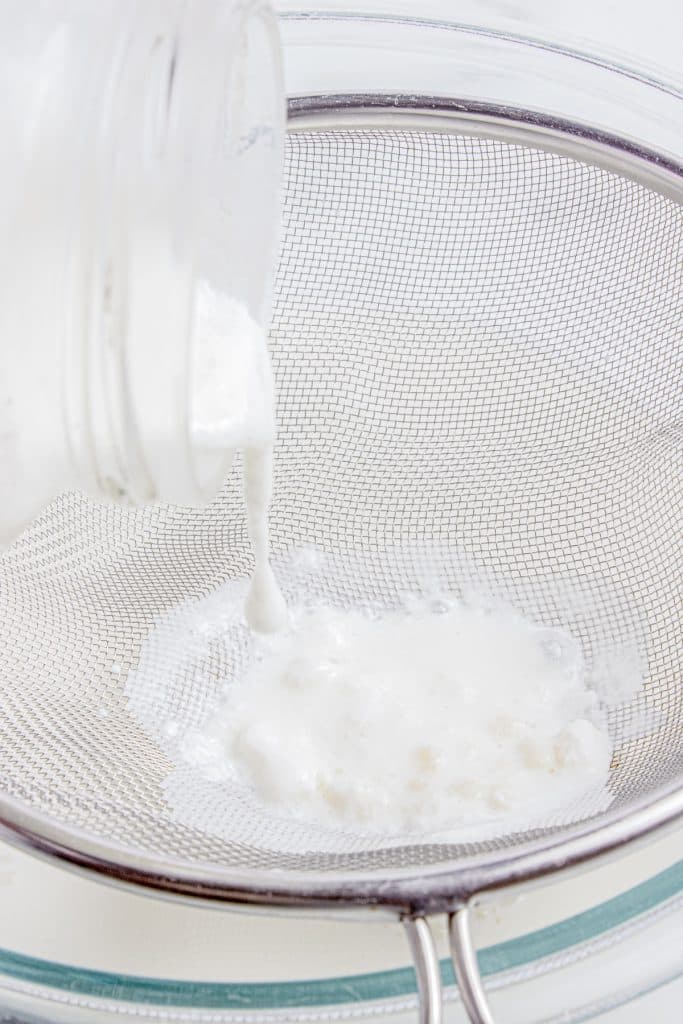
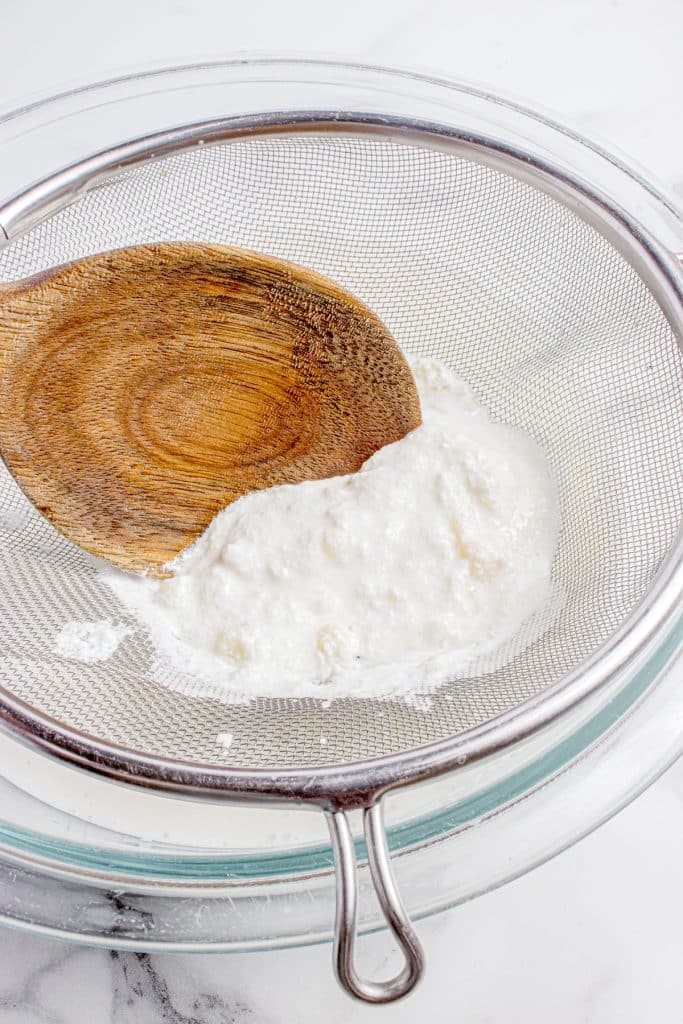
5. Set a fine-mesh strainer over a bowl or jar. Pour the kefir into the strainer, then use your spoon to gently move the grains in small circular motions. This encourages the liquid to flow through while the grains stay behind. Don’t worry about breaking apart the grains; they are surprisingly tough and resilient. And breaking large grains into smaller pieces increases the surface area exposed to the milk, giving them better access to nutrients. This can actually encourage the grains to grow and multiply more readily.
If the mixture has separated significantly, give the jar a gentle swirl before straining to recombine it slightly.
6. Move the strained kefir to a clean jar and cover it with an airtight lid. Refrigerate it immediately.
- Shelf life: 7–10 days refrigerated
- Texture: It will continue to thicken slightly in the refrigerator
- Flavor: It will become tangier over time
Optional, But Recommended, Second Ferment
A second fermentation is one of the best-kept secrets for making kefir taste better and boosting its nutritional benefits. It’s surprisingly simple to do, mellows out that sharp, sour, acidic bite, and gives the kefir a lighter, creamier flavor. If you’ve been struggling to drink plain kefir, then a second ferment has your name all over it.
In a nutshell, after you strain your kefir grains out of the first fermentation, instead of drinking the kefir right away, you add flavorings and let it ferment for a few more hours at room temperature.
Why You May Want to Ferment Your Kefir a Second Time
- Better taste: This is the main reason people do it. The second fermentation mellows out that sharp, sour, acidic bite and gives the kefir a lighter, creamier flavor.
- More probiotics: The kefir keeps fermenting after you remove the grains, which means the bacterial count continues to climb. You’re getting even more beneficial bacteria! SCORE
- Higher B vitamins: Additional fermentation increases B vitamin levels, especially folate.
- More bioavailable minerals: The calcium and magnesium become easier for your body to absorb and use immediately.
- Even less lactose: The bacteria keep eating the remaining milk sugars, making it even safer for people with lactose sensitivity.
- Carbonation: If you seal the jar tightly, you’ll get some natural fizz from the CO2 produced during fermentation. It becomes almost like a creamy probiotic soda.
- Added Flavor: Lemon or orange peel (just a 6-inch strip for a quart) is probably the most popular – it gives a bright, fresh flavor without being overpowering. Berries work beautifully, as does a split vanilla bean. Add a date for a bit of sweetness. The key is to use less rather than more – one strawberry or one slice of fruit is plenty. Too much can make the kefir separate or taste bitter.
Step-by-Step Second Ferment Process
- Make your regular kefir, then strain out the grains (put those back into fresh milk for your next batch).
- Pour the finished kefir into a clean jar.
- Add your flavoring – a strip of lemon peel, a vanilla bean, a few berries, a cinnamon stick, whatever sounds good.
- Put a lid on the jar (you can leave it slightly loose if you’re nervous about pressure buildup).
- Let it sit on your counter for 1-2 hours, up to 12 hours, depending on how strong you want the flavor and how warm your kitchen is.
- Taste it periodically to see when it’s reached the flavor you like.
- Refrigerate when it’s done. You can leave the fruit in or remove it.
Uses for Milk Kefir – Other Than Drinking It!
Kefir is incredibly versatile in the kitchen. If you’ve got more than you can drink, there are plenty of ways to put it to use. Once you start thinking about the health benefits and all the ways you can use milk kefir, it really doesn’t make sense not to make it!
In Baking
This is probably the most popular alternative use. Kefir works beautifully as a substitute for buttermilk in any recipe – pancakes, waffles, biscuits, muffins, cornbread, scones, quick breads, you name it. The acidity reacts with baking soda to give you a tender crumb and a nice rise. Your baked goods will be lighter and fluffier. The heat kills the probiotics, but you still get all the flavor and texture benefits. If a recipe calls for regular milk, you can swap in kefir for extra tang and tenderness. If your kefir is too thick, simply thin it with a bit of milk or water.
As a Marinade
The acidity in kefir works like buttermilk to tenderize meat, especially chicken. Dip chicken pieces in kefir before breading and frying for incredibly juicy fried chicken, or marinate tougher cuts of meat overnight to break down the fibers and make them more tender.
In Salad Dressings and Dips
Kefir makes a great base for creamy dressings – think ranch, herb dressings, or simple vinaigrettes with fresh herbs, lemon juice, and a bit of mustard. You can also use it in place of sour cream or yogurt in dips. It’s perfect for veggie dips or as a base for tzatziki-style sauces.
If you need a thicker base, just pour kefir into a coffee filter/muslin set in a strainer over a bowl and let it drain in the refrigerator for a few hours. The whey drips out, and what’s left is thick, creamy kefir that’s basically identical to sour cream in texture. You can even strain it longer to make kefir cream cheese.
For Soaking Grains and Flour
Use kefir to soak oats overnight for tangy overnight oats, or soak flour before baking to help break down phytic acid and make nutrients more available. This is a traditional technique that makes grains easier to digest.
In Frozen Treats:
Blend kefir with fruit, then freeze in popsicle molds for probiotic popsicles. Or use it in place of milk when making homemade ice cream for a tangy, frozen-yogurt-style treat.
Making Kefir Cheese:
Strain kefir through a cheesecloth overnight, letting the whey drip out. What’s left is a thick, spreadable cheese that’s similar to cream cheese or a thick yogurt. Mix in herbs for a savory spread, or add honey and fruit for a sweet version. Use it on toast, crackers, or in recipes that call for cream cheese.
Share it With Your Four-Legged Loves
Our Elsa gets a bit of kefir with her meals, and I mean just a small bit, like one tablespoon for a 50 lb pup. My goal is to slowly increase, but she’s got a delicate gut, so slow and steady it is. My hope is that gradually increasing her intake will improve her gut health. Now, I am not a vet, so please check with yours before you do.
How to Store Milk Kefir
Storing kefir properly keeps it fresh and maintains those beneficial probiotics. The good news is that kefir is naturally self-preserving to some extent. Acids and beneficial bacteria help protect it from harmful bacteria, which is why it lasts longer than regular milk. Just keep it cold, sealed, and you’ll have fresh kefir ready whenever you need it. Here’s what you need to know:
- Always store finished kefir in the refrigerator at around 37-40°F. The cold temperature slows down fermentation and keeps the kefir from getting too sour or separating. Store it toward the back of the fridge, where the temperature is most consistent – not in the door, where it gets warmed up every time you open the refrigerator.
- Keep your kefir in a jar or container with a tight-fitting lid. This prevents it from absorbing odors from other foods in your fridge and protects it from contamination. Glass jars work great.
- Homemade kefir will stay fresh in the refrigerator for 2-3 weeks. The probiotic content is most potent in the first week, but it’s still perfectly safe and beneficial to drink for several weeks. Over time, it will continue to get more sour and may separate a bit – that’s normal. Just give it a good stir or shake before using.
- While kefir naturally has a tangy, slightly sour smell, you’ll know it’s spoiled if it smells rotten or has an unpleasant odor that’s different from its usual tang. Visible mold (pink, orange, or black spots) means it should be tossed immediately. Excessive curdling or extreme separation can also indicate spoilage, though mild separation is fine – just stir it back together
- Never leave kefir sitting at room temperature for extended periods. If you’re using it in the kitchen, put it back in the fridge right away. At room temperature, it will continue fermenting rapidly and can spoil within a few days.
Freezing for longer storage
If you’ve got more kefir than you can use in a few weeks, you can freeze it for up to 2-3 months. The texture will change when you thaw it (it’ll separate and look grainy), but it’s still perfectly good for smoothies, baking, and cooking. Pour it into ice cube trays for easy portioning, or freeze in containers with some headspace for expansion.
How To Take Care of Those Precious Kefir Grains
Kefir grains can last indefinitely when properly cared for. They’ve been passed down through families for generations – some of the grains people use today are descendants of grains thousands of years old! With proper care, yours can keep making kefir for as long as you want. Here’s how to keep yours going, to infinity and beyond!
- Feed them regularly. The most important thing is consistency. Give your grains fresh milk every 24 hours when you’re actively making kefir. Don’t let them sit in the same milk for more than 48 hours, or they’ll start to starve and weaken.
- Use quality milk. Whole milk keeps grains healthier because they need the fat. Avoid ultra-pasteurized milk – the extreme heat damages the proteins and makes fermentation unreliable. Regular pasteurized milk works great.
- Keep the temperature steady. Room temperature between 68-76°F is ideal. Cooler than that, and they’ll slow down; warmer, and they’ll ferment too fast and get stressed. A consistent spot on your counter away from direct sunlight works perfectly.
- Avoid metal contact. Stainless steel is fine for brief contact when straining, but don’t store grains in metal containers or use metal utensils for prolonged stirring. Stick with glass, plastic, or wooden tools.
- Don’t over-refrigerate. While the fridge is great for short breaks, constantly switching between room temperature and refrigeration can stress the grains and affect their vitality. If you’re making kefir regularly, keep it at room temperature.
- Handle them gently. You don’t need to baby them – they’re surprisingly hardy – but avoid rough handling or extreme temperature changes. No need to rinse them between batches unless they get overly yeasty.
- Watch for signs of health. Healthy grains are creamy white to light yellow, have a cauliflower-like texture, and produce consistent kefir. If they start smelling overly yeasty, aren’t thickening the milk well, or stop multiplying, they might need a rest or a refresh with some fresh milk.
When You Need to Travel or Take a Break
If you’re heading out of town or just need a break from daily kefir-making, your grains will be fine with a little planning.
For a short break of one to two weeks, simply place your grains in a clean jar, cover them with fresh milk (use a bit more than usual to give them extra food), put a tight lid on the jar, and stick it in the refrigerator. The cold significantly slows their activity, so they’ll be in a sort of hibernation mode.
When you get back, strain off the over-fermented milk, give them fresh milk, and let them sit at room temperature. They might need a batch or two to get back up to speed, but they’ll be just fine.
For longer breaks – a month or more – you’ll want to either freeze them (rinse gently, pat dry, and store in a freezer bag with a bit of milk or powdered milk) or dry them (spread on a clean surface and air-dry for several days until completely dry, then store in an airtight container).
Both methods can preserve grains for six months to a year. When you’re ready to start again, frozen grains just need to thaw in the fridge and then get fed fresh milk for a few days to reactivate. Dried grains take a bit longer to wake up – sometimes a week or two of regular feeding – but they’ll eventually get back to normal. The key is not to stress about it; kefir grains are remarkably resilient and forgiving.
Milk Kefir Recipe
Equipment
- Glass Jar - quart size or larger
- Breathable cover - coffee filter, papertowel, or cloth
- Rubber band
- Fine mesh strainer
- Storage jar with tight-fitting lid
Ingredients
- 1 tablespoon kefir grains
- 4 cups whole milk pasteurized or raw; avoid ultra-pasteurized
Instructions
- Add 1 tablespoon of kefir grains to your clean jar. Pour in 4 cups of milk and give it a gentle stir to distribute the grains. Note: Using too many grains will cause overly fast fermentation; too few will result in slow or incomplete fermentation.
- Cover the jar with a loose-fitting lid or a breathable material like a coffee filter, paper towel, or cloth, and secure it with a rubber band. Avoid using an airtight lid, as the fermentation process releases gas that needs a way to escape.
- Place the jar in a warm spot away from direct sunlight ideally between 68–78°F (20–26°C). Let it sit undisturbed for 12 to 48 hours.
- Your kefir is ready when you see these signs: a texture noticeably thicker than regular milk, a pleasant, yogurt-like aroma, slight separation into thick curds and thin yellowish whey, a tangy taste, and the grains may rise to the top.Start checking at 12 hours in warm weather, 24 hours in cooler conditions. Gently tilt the jar. If the milk has thickened and pulls away from the sides, it's ready.
- Set a fine-mesh strainer over a bowl or jar. Pour the kefir into the strainer then use your spoon to gently move the grains in small circular motions. This encourages the liquid to flow through while the grains stay behind.If the mixture has separated significantly, give the jar a gentle swirl before straining to recombine it slightly.
- Move the kefir you strained to a clean jar and cover it with an airtight lid. Refrigerate it immediately.Shelf life: 7–10 days refrigeratedTexture: It will continue to thicken slightly in the refrigeratorFlavor: It will become tangier over time
- Optional Second Fermentation for Fizz: Before refrigerating, seal the kefir you strained in an airtight jar and leave at room temperature for 2–6 hours, then refrigerate. This creates a fizzier, more effervescent kefir. Burp the jar (open briefly to release pressure) every few hours to prevent over-pressurization.
- Immediately after straining, return the kefir grains to your fermentation jar. Do not rinse them unless they smell off. The residual kefir helps jumpstart the next batch.
- Add 4 cups of fresh milk, stir it gently, cover it with a loose lid or breathable material, and repeat the process. Your grains will multiply over time and continue producing kefir indefinitely.
Nutrition
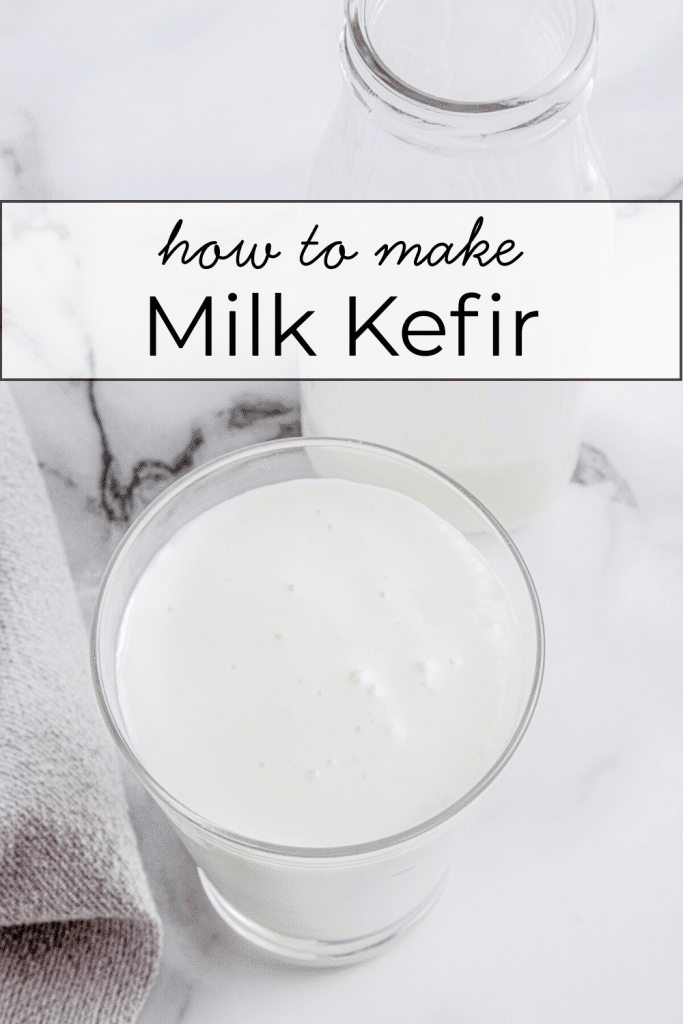
Bookmark this page or pin the following image to refer back to this post on how to make milk kefir when you need it.
Thanks so much for spending a few minutes of your busy day with me!
To ensure you don’t miss future content, pop your email in the pale green box on the right or click here. I usually send one email weekly, so I won’t inundate your inbox. I’m sensitive to an overflowing email inbox!
We will only use your email address to send you emails, no more than 1-2 weekly. In addition, you will have access to my growing library of knit & crochet patterns and other printables. Check back often as this library will continue to grow. You can unsubscribe anytime by emailing me or clicking on the “unsubscribe” link at the bottom of all emails.
And you can access many of the products I refer to on my Nourish and Nestle Amazon Page. You can access it here.
So, if you’d like to participate in the ‘subscriber benefit’ action, simply subscribe to Nourish and Nestle here or use the form on the right sidebar. It’s slightly towards the top.
I have sent all my subscribers the link to the Subscriber Benefits Library. If you missed it or misplaced it, let me know.
Until next time…