
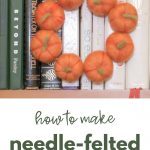
Needle Felted Pumpkins: easy Fall DIY
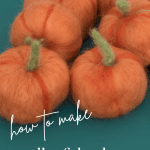
Hey there friend! I am here today to show you how to whip up a batch, bevy, flock (what do you call a bunch of pumpkins?) of these ‘oh so darn cute’ DIY needle felted pumpkins.
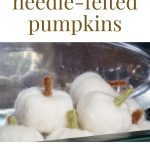
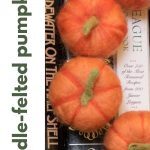
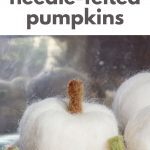
I initially planned to make a whole bunch of wee orange needle felted pumpkins, but after I made 8 of the orange ones I realized that I really wanted white ones. I’m decisive that way.
So…I set the orange ones aside and started making white ones…lucky for me we had some great binge-watching to do. (Have you watched Ozark on Netflix? If you liked Breaking Bad you’ll like Ozark.)

Table of Contents
While I was very happy that I made the bevy of white pumpkins, I still had 8 of the orange that I wanted to do something with. Seems 8 is just the magic number to fit around a 7″ embroidery hoop…
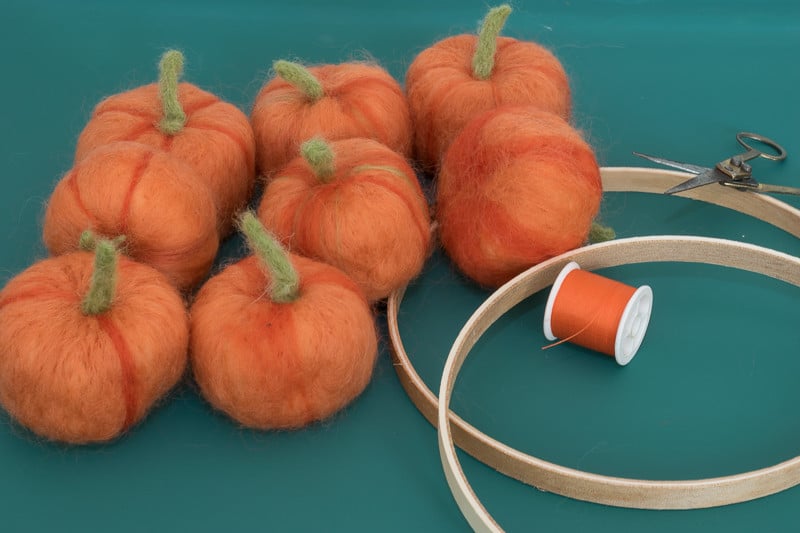
I attached the pumpkins with the thread as opposed to glue because I thought I might want to use them for something else in the future.
What you need to make these Mini Needle Felted Pumpkins:
Some of these are affiliate links and I will earn a small commission off of the sale of these products, but the price you are charged is not affected. You can see my full disclosure policy here.
- Wool Roving in the colors you want. Here’s what I used:
- 2 shades of Orange: light and dark
- White
- Moss Green
- I already had some Brown from a previous project, but this would work.
- Coarse Felting Needles
- Foam Pad. I went to my local fabric/upholstery store and purchased a scrap piece of dense foam. But this would work if you don’t have access to foam where you live.
- Finger Protection.
- Scrap wool yarn, 7 yards
If you can’t find what you need, Michaels will have supplies for most every crafting need under the sun. You can order online here and have it shipped or you can pick it up at your convenience.
How to Make Mini Needle Felted Pumpkins:
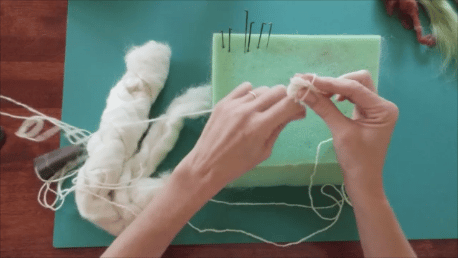
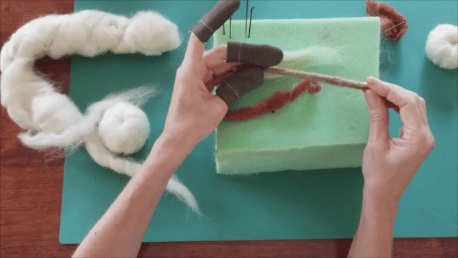
- Wrap your scrap yarn around two fingers several times, then remove the wrap from your fingers and wrap the yarn perpendicular to the yarn you wrapped first.

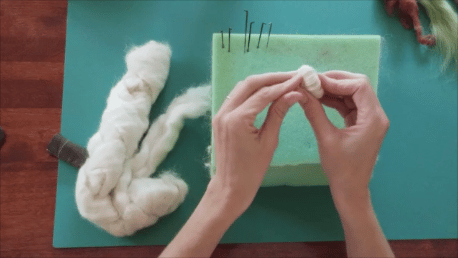
- You are trying to form a fat disk. Keep turning your disc while you wrap a couple of times to get your disk.
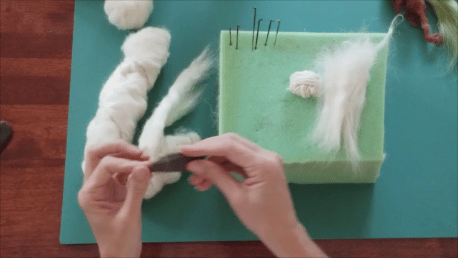
- Rip off a couple of chunks of yarn, about 4-5 inches long, and wrap your yarn disk, using your needles to secure the roving to your disk.
- Once your base is 1/2 to 3/4 what you want for your finished pumpkin size, you can start attaching the segments to get the contours for your pumpkin.
- Use your needles to make a good indentation where your stem will go. Attach your ‘sections’ just outside of your indentation.
- The roving should be about twice as long as the length from the indentation to the bottom of your pumpkin. You will fold the roving underneath and attach it with the needle where it is bent in half to the bottom of the pumpkin.
- I prepared a video to show you how to make these pumpkins from start to finish because some things are just better explained that way! You can see that video towards the bottom of the post.
- Once your pumpkin is the size you want, start to work on your stem.
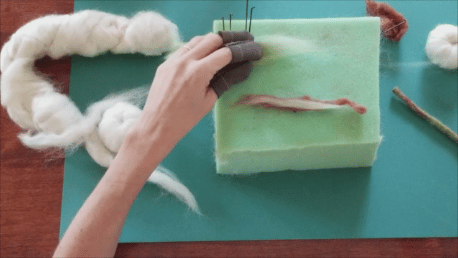
Make the stems for your pumpkins
- Rip off a chunk of brown or green or a combination of both.
- If you are working with 2 colors, give it a twist to blend the colors.
- Then work your needles up and down the ‘stem’ compacting the fibers. You will notice that the fibers will stick to the foam, especially when you first start out. As you continue to work the fibers will compact and won’t stick to the foam as much.
- Continue to turn the stem so that you needle all sides until it is well compacted, stiff, and cylindrical. Cut off a wee bit for the stem length that you want.
- Use one needle to hold your stem to your pumpkin while you use another needle to attach the stem with a couple of good jabs.
- This video will show you the process from start to finish.
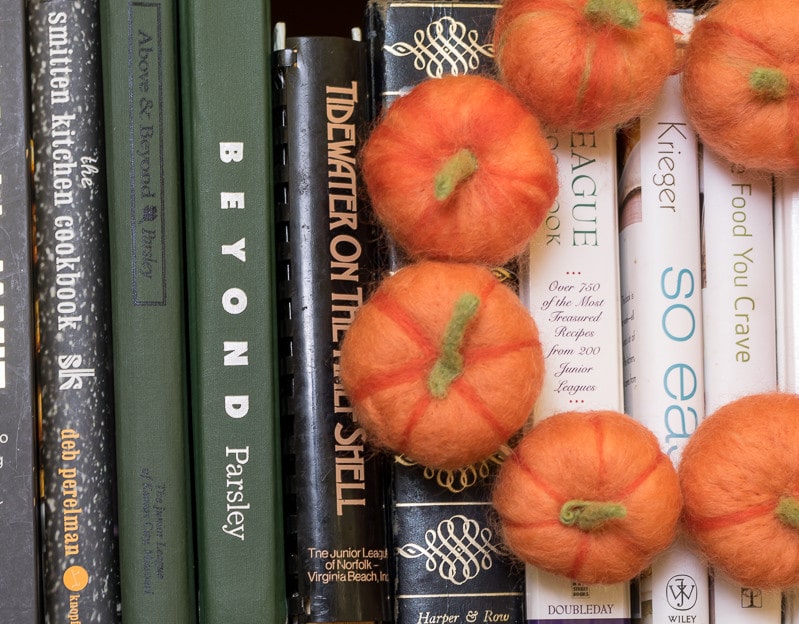
- For the orange ones…just add a strip of the darker orange between each of the segments, with lighter strips on top of the segments sometimes as well…I just mixed it up. You could even added a few strips of green here and there as well.


If you think you’d like to give these mini needle felted pumpkins a try, bookmark this page or pin it for your future reference.
If you still need more fall decor ideas, check out my fall ‘open house’ with natural decor for more inspiration!
Thanks again for spending a few minutes of your busy day with me today.
Please know that I welcome each and every comment that comes my way. If you want to make sure you don’t miss future content, pop your email in the beige box up on the right or click here. I usually send out 2-3 emails a week, so I won’t inundate your inbox…believe me, I’m sensitive to an overflowing email inbox!
By subscribing to Nourish and Nestle, we will only use your email address to send you emails (no more than 2-3 per week) that will keep you up to date with the latest news and content on the site. In addition, you will have access to my growing library of knit & crochet patterns, as well as other printables. This library will continue to grow, so check back often.
And please know that you can unsubscribe at any time by emailing me or clicking on the “unsubscribe” link at the bottom of all of our emails.
You can access many of the products I refer to in all of my posts on my Nourish and Nestle Amazon Page. You can access it here.
So, if you’d like to get in on the ‘subscriber benefit’ action, simply subscribe to Nourish and Nestle here or using the form on the right sidebar. It’s towards the top a bit. I have sent all my subscribers the link to the Subscriber Benefits Library. If you missed it or misplaced it, drop me a line.
Until next time…
Hugs,


Ahhh…I can’t wait to make these! They are so stinkin’ cute!
Getting ready to send you some happy mail!
Hi Lynn,
I am in love with these little pumpkins. Thank you for the great video. I am a visual learner so it was just what I needed. Thank you for sharing!
I am so glad you are going to give these a whirl. They are quick and fun…just be sure to protect your fingers! Happy Wednesday my friend.
Hugs, Lynn
Oh my goodness!! I so wish I had the talent & patience to make these! I saw them on your blog & just fell in love. They are so adorable! Maybe someday I will give it a try. I would love to have a whole basket of the white ones & the acorns!!
Michelle, I’ve seen your skills…there is no doubt in my mind that you could easily whip up a batch of these little cuties. Seriously, very easy. Give them a whirl.
Thanks for swinging by my friend.
Hugs, Lynn
Thank you, Lynn, for taking time to show us how to make the cute, cute felted pumpkins! The video was perfect!
Hi Sherry…I am so glad you found that video helpful…some tasks are just too hard to explain when a video will do the trick much more efficiently. Thanks so much for visiting today my friend.
Wishing you a fantastic weekend.
Hugs, Lynn
Lynn, You make these look so easy and I can’t wait to start making some! Thank you for the video, it really helps!
Truly, very easy Carol. I put your ‘happy package’ in the mail today so you’ll be able to give them a whirl yourself soon.
Have a great day my friend.
Thank you, my friend! Hugs!
Oh, my hat Lynn!! These are just the cutest!! I can’t wait to try making some of these cuties!!
So fun Sam…and so very easy. You’ll have plenty of time to get them prepared for your fall!
Have a great weekend my friend.
Hugs, Lynn
Oh my goodness, I was mesmerized by your video! I have always wanted to know how to make these! Your video is awesome and the pumpkins are so cute!
Aw thanks Janine…So very easy and fun to have for the season. Wishing you and your family a lovely weekend my friend.
Hugs, Lynn
These mini pumpkins are so cute. I can think of all kinds of uses for them. I have the felt and the needles but have never tried to play with the supplies yet. Thanks for sharing. Pinning.
Hey Leanna…you could whip out quite a few this weekend! Have fun and thanks for stopping by.
Many hugs, LYnn
Oh my goodness! These are just adorable!
Thanks Amanda!
Have a great weekend
I love this project SO much! I have never done something like this (felting) but I have arm knit with that same beautiful wool and I have some left over! I really want to make these! I just finished watching your video and it was so helpful! Thank you for your great idea and the wonderful tutorial!
xoxo
Jodie & Julie
Hey Jodie and Julie,
First off…so nice to ‘meet’ you and join you in this little blog hop.
These little punkins come together so quickly, since you have the roving you could find the needles at Michaels or JoAnn’s and have quite a bunch before the weekend is over. And I’m so glad that video was helpful…much easier to understand than if I had tried to write it all out.
Wishing you both a lovely weekend.
Hugs, Lynn
Wow Lynn, these are so adorable. Thank you so much for the video, I was having a hard time picturing the process from the pictures. I’ve never seen this before but I love it!
Hey Toni..so glad you found the video helpful. I know I am a visual learner…you must be too. Makes it so much easier to see it being done.
Wishing you and yours a wonderful weekend.
Hugs, Lynn
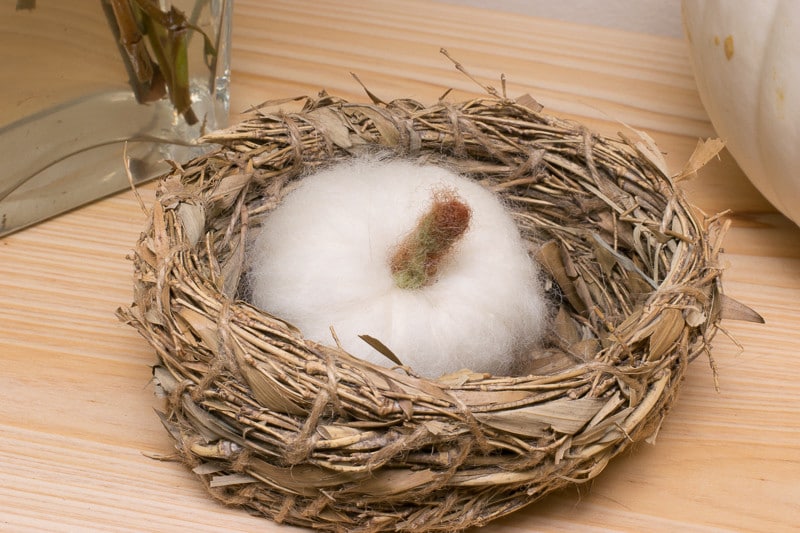
Lynn, these mini pumpkins are absolutely fantastic! When I saw the little white one in the nest on your fall tour I had no idea that you made it. What a fabulous job you did creating them. Pinning and def want to try and make some for our home 🙂
Hey Tara…So glad you are going to try to make them. Really so easy…just be sure to protect your fingers! Those needles are sharp and have barbs on them.
Thanks for stopping by and leaving your kind comment.
Have a great weekend.
Hugs, Lynn
These are the most beautiful little pumpkins, they are so sweet Lynn! I don´t know if I´d get them looking like this, but I´d love to give it a try! Thanks for the great tutorial!
Aw thanks Katrin, they will surely fit in with your Scandinavian decor! And there is no doubt in my mind that you can do it…really so easy.
Wishing you a lovely weekend.
Hugs, Lynn
Oh Lynn these are absolutely the most adorable little pumpkins. I have always wondered how to felt. I always thought that you started with a piece of felt, and wondered how in the world something so cute was made from felt sheets. Lol. It wasn’t. I would love to try felting someday, now that I know what it is and it really looks pretty simple. Thanks so much for the video without it I would of still been confused, but it’s really clear on the technique.
Linda, it is seriously easy! No doubt with your skills you would have no problem. Hope you have fun whipping out a bunch of them.
Have a great weekend.
Hugs, Lynn
I love felted wool anything and these pumpkins are darling! Can I just pay you to make me some! Haha! Seriously the video makes it such a simple project!
I love them too! I knew I liked you!!! And you can do this now that you have all this extra time on your hands with your empty nest!😉
Thank you! I have used your video to create my cute little pumpkins. Thank you VERY MUCH for posting this, without fees. Very grateful. I’m new at learning needling felting, but with help like yours, it’s getting easier!
Yay Jannabeth! I’m thrilled the video helped! If you get a chance, I’d love to see a photo of your wee pumpkins! Aren’t they just darling?