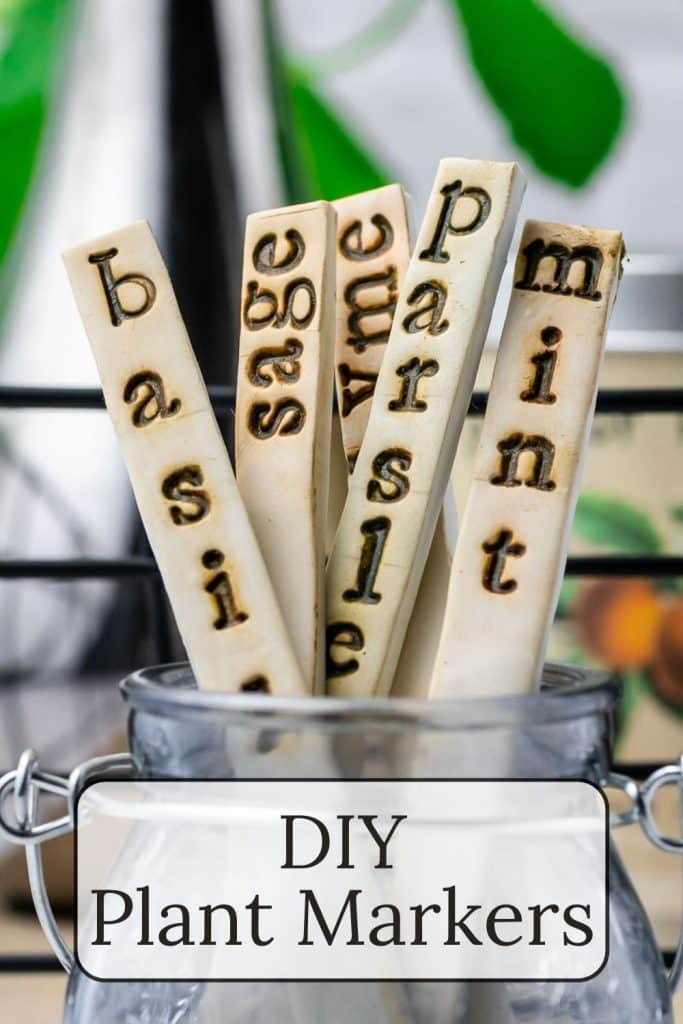
DIY Garden Markers
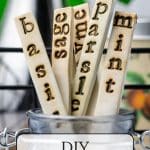

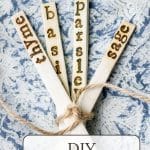

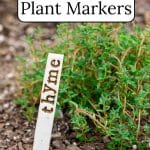
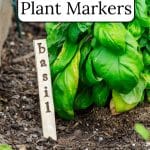

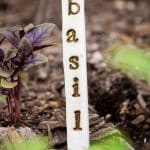
These DIY Garden Markers are not only easy to make but are useful and make great gifts for your favorite gardener.
Crafting garden markers with polymer clay offers a delightful opportunity to create something functional and attractive. Following these simple steps, you can create custom markers that identify your herbs and vegetables and reflect your unique style and personality.
And if you are looking for a great gift, a bundle of garden markers, with or without the plants, will always be appreciated by any gardener.
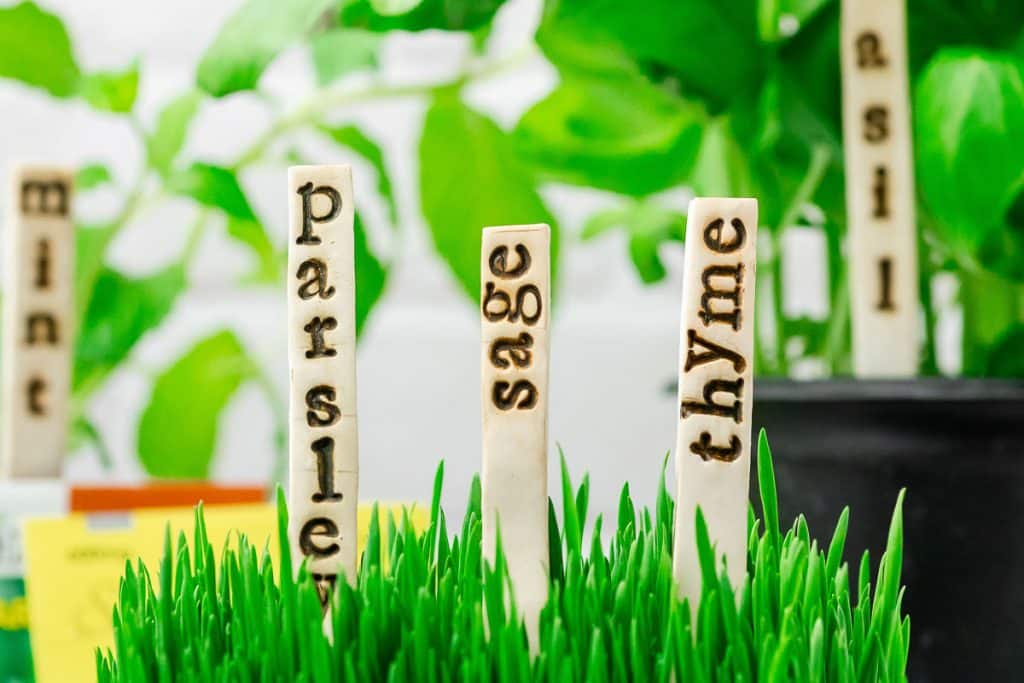
Table of Contents
Why You Will Love This DIY Garden Markers Project
- Personalization: This project allows you to personalize your garden in a way impossible with store-bought markers. You can choose the names, the colors, and even the lettering style to match your garden’s theme or your personality.
- Get Creative! Working with polymer clay is like having a mini art studio at your fingertips. It’s a chance to play with colors, textures, and shapes. The process of stamping, painting, and baking these markers can be a relaxing and creatively fulfilling experience.
- Functional Aesthetics: Functional Aesthetics are my kind of thing! They do a job and look good doing it! These markers serve the practical purpose of identifying plants and adding a decorative touch to your garden.
- Eco-friendly Option: By making durable, reusable garden markers, you’re choosing an environmentally friendly option compared to plastic tags. Polymer clay markers can last for years, reducing waste.
- Gift-Giving Joy: Giving handmade gifts is a special pleasure, and these garden markers can be a thoughtful present for gardening enthusiasts. Bundling them with plants or presenting them on their own shows a level of care and personal touch that can’t be bought.
- Craft Night Project: Sharing this project with a friend, family member, or gardening group is a fun and useful idea for a craft night.
- Cost-Effective: Making your own garden markers can save money without sacrificing style or quality. The materials needed are relatively inexpensive, especially considering the quantity and customization you can achieve.
Materials Needed for DIY Garden Markers
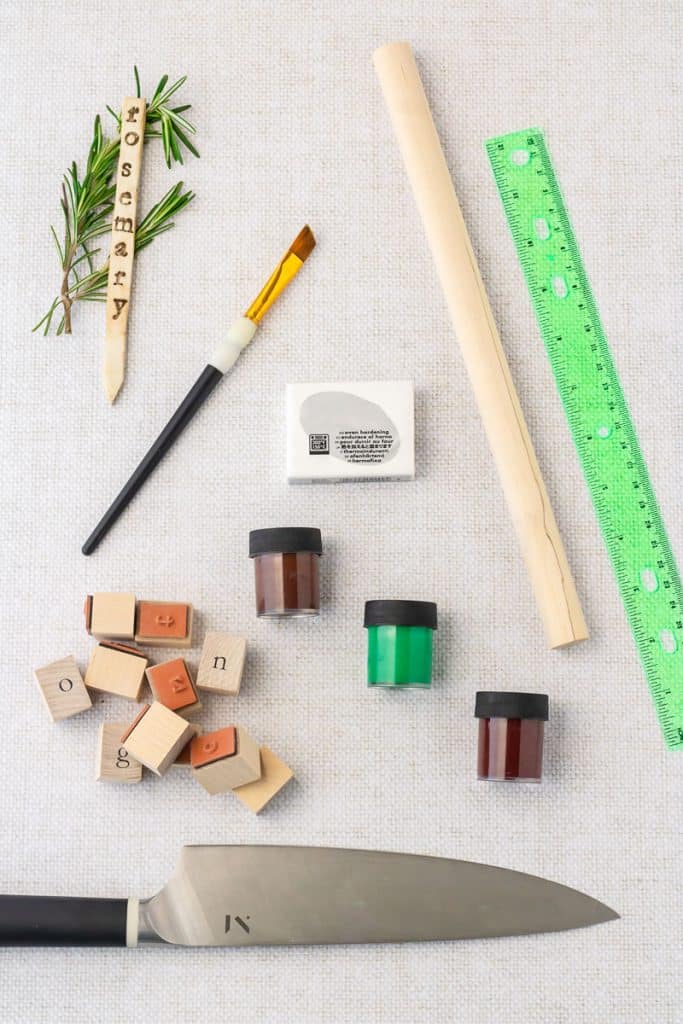
- Letter stamps ¼ inch, rubber or metal
- Oven-bake white clay (polymer clay). One-fourth pound (four ounces) will make approximately six plant markers.
- Acrylic paint, brown or reddish-brown and green (green paint deepens a reddish-brown paint)
- Small art paintbrush
- Roller or Rolling pin
- Straight edge like a ruler
- Knife or pizza cutter
- Silicone mat or parchment paper
What is Polymer Clay?
Polymer clay is a modeling clay based on the polymer polyvinyl chloride (PVC). It typically contains a mixture of the polymer, plasticizers to keep it flexible, and various pigments for color. Unlike traditional earthen clays that must be fired in a kiln, polymer clay can be cured (hardened) in a regular home oven. This ease of use and the versatility of the finished product make it a popular choice for many crafting projects, including jewelry, figurines, and home decor items like garden markers.
Once properly cured, polymer clay becomes water-resistant and more robust against breakage. This makes it suitable for making outdoor items like garden markers, although additional protection like a sealant might be recommended for long-term exposure to the elements.
While modern polymer clays are generally considered safe to bake at recommended temperatures, keeping the area airy is a good practice to avoid potential fumes.
You can use any polymer clay for this DIY Garden Marker project. Some brand names of polymer or oven-bake clay are Sculpey, Craft Store, Fimo, Premo, and Kato. They can be found in most craft stores, such as Michaels, big box stores like Walmart, and online at Amazon.
Polymer clay comes in an endless variety of colors. I used white, but I’m also drawn to metallic copper and silver.
How to Make Polymer Clay Garden Markers
Step 1: Preheat the oven to 275°F or the temperature recommended on your polymer clay package.
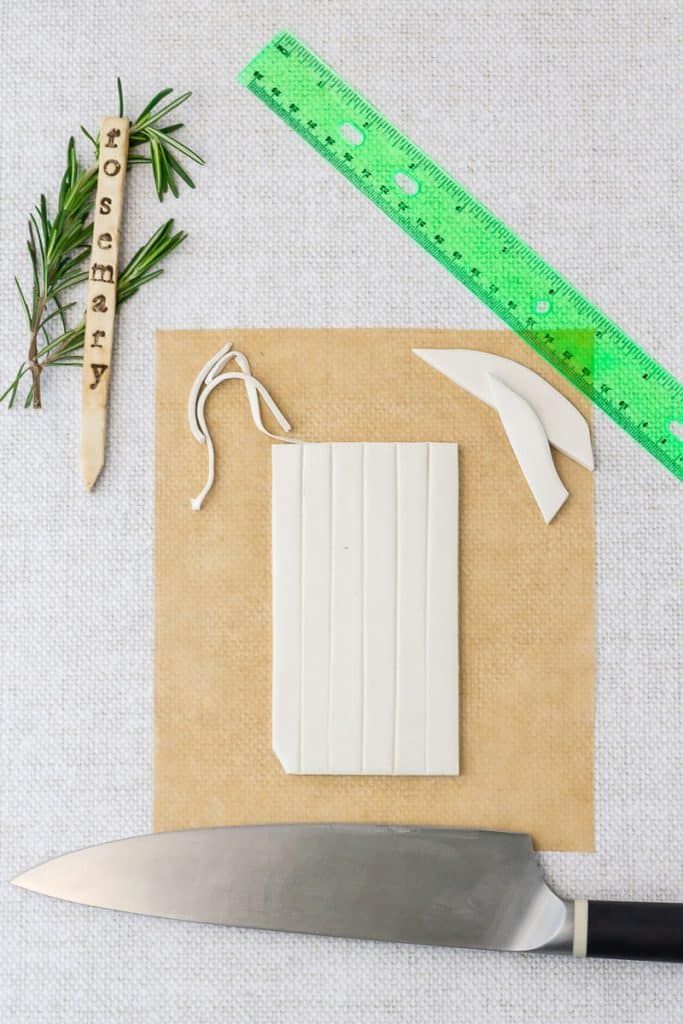
Step 2: Knead the clay into a ball and roll it out until it is approximately ¼ inches thick; it does not have to be exact.
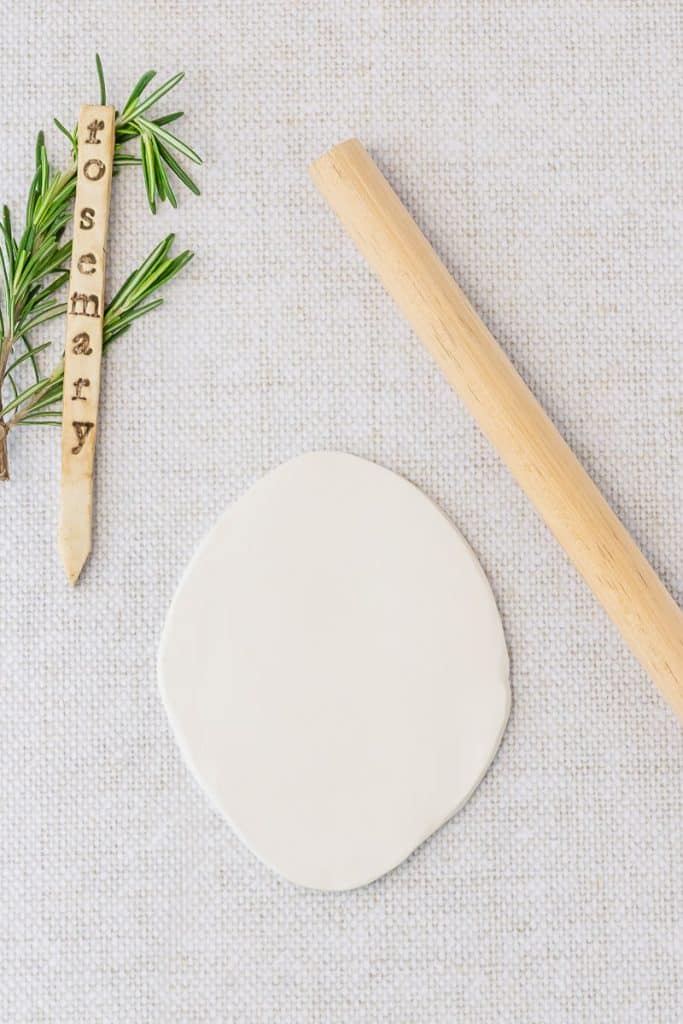
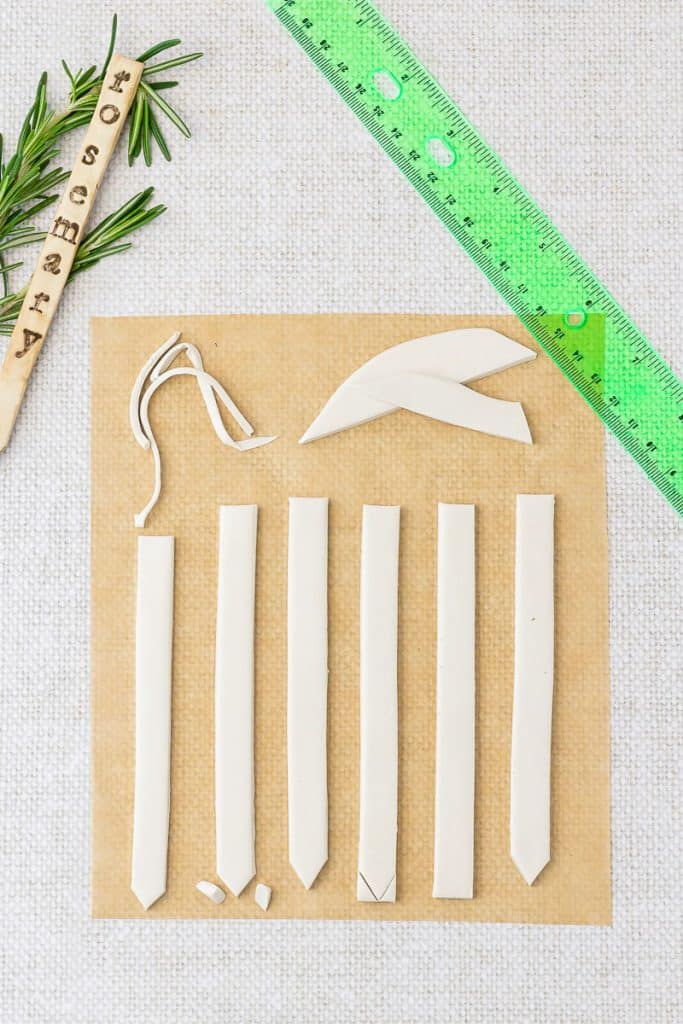
Step 3: Form clay into a long rectangle, approximately 6 inches long by 3 inches wide. Cut off any excess. Then, use a ruler or straight edge to cut six long strips. Each strip should be about ½ inch wide.
Next, gauge the center of the bottom of each strip. From there, cut the two bottom corners off of each rectangle on the left and right side of your center point, leaving one point at the bottom. This will make it easier to push into the dirt later on.
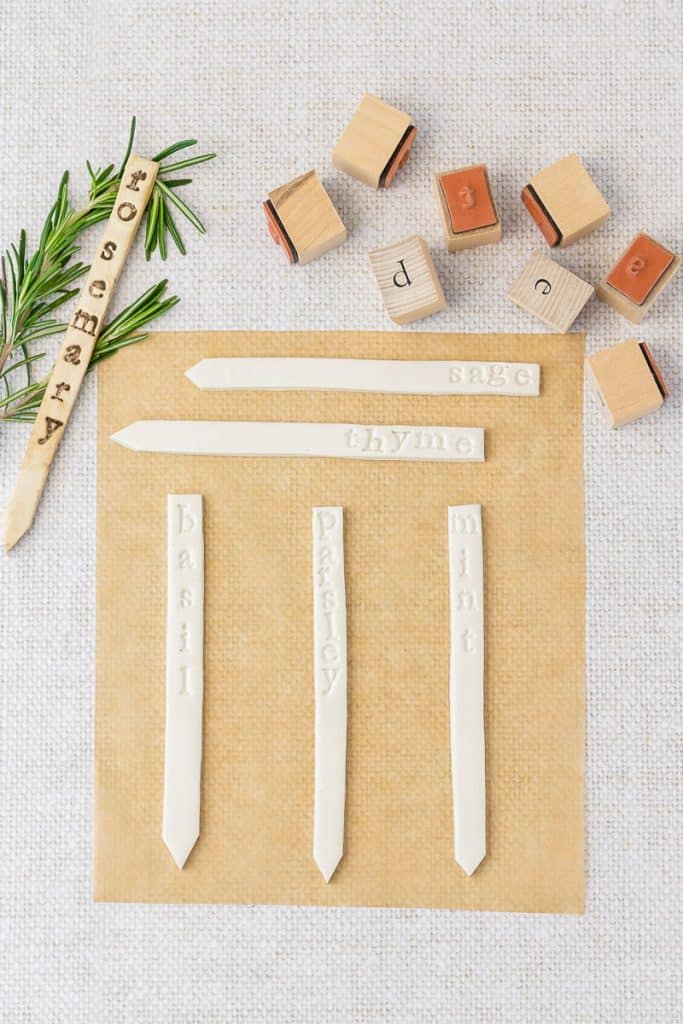
Step 4: Stamp the name of the herb or vegetable with the letter stamps from the top going down the clay strip. You might want to practice on leftover clay to get a feel for the depth of the stamp. This will ensure you are not going too deep or too shallow.
Step 5: Place the stamped clay markers on a baking sheet lined with parchment or a silicone mat and bake for 15 min.
Step 6: Allow to cool for about 10 minutes.
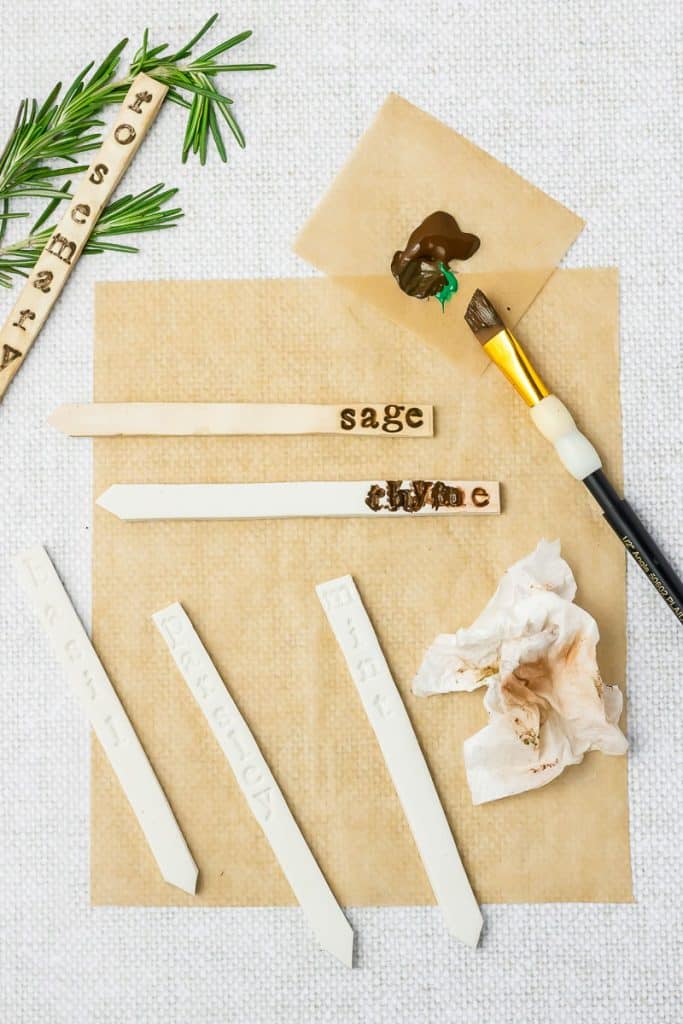
Step 7: Dab some of the brown paint into the letters on the clay with your paintbrush. (If using reddish-brown and green, add a small amount of green to your reddish-brown and mix to darken).
Use a paper towel or soft cloth to wipe the excess paint down the length of the clay to add effect and uniformity. Note: If you accidentally add more paint than you wanted and it has more color than you would like, dampen the cloth (making sure it is not too wet) and wipe until you reach your desired effect.
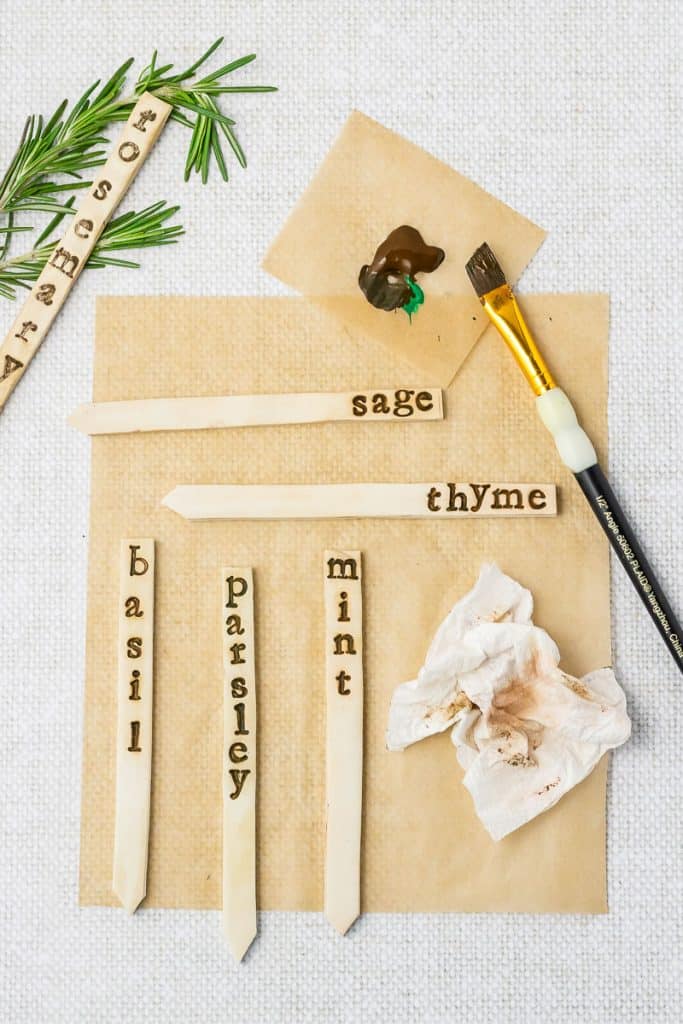
Step 8: Place the garden markers back into the oven for 5 min to set the paint.
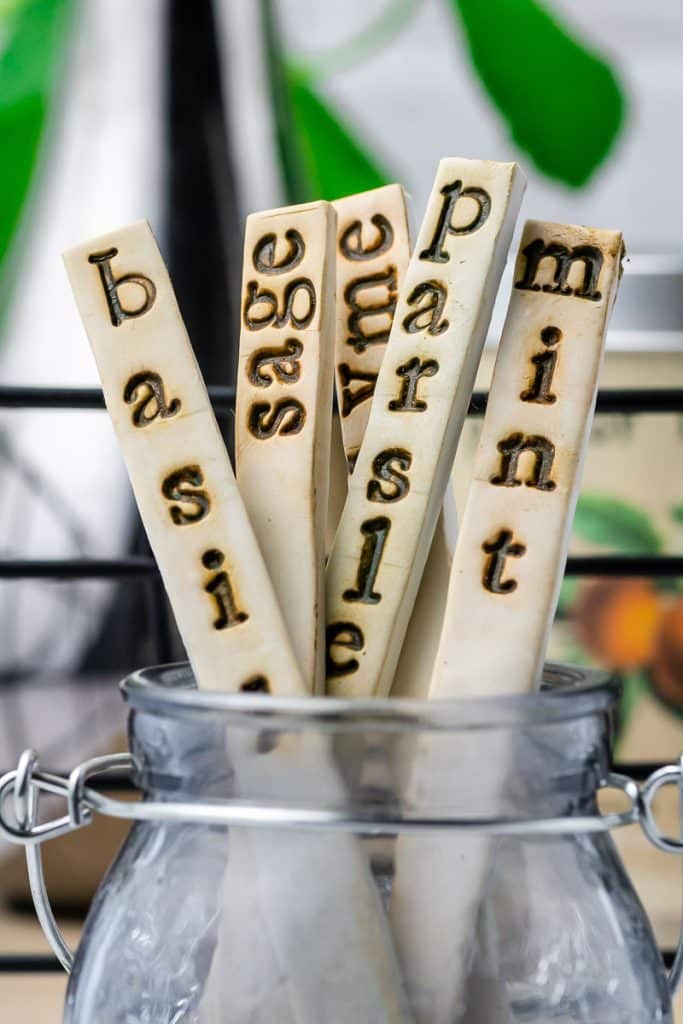
Once cooled, your DIY garden markers will be ready for gifting or gardening!
Frequently Asked Questions
While air-dry clay can be used for making garden markers, it’s not as durable as polymer clay when exposed to the elements. Polymer clay, once baked, is water-resistant and more suited to outdoor conditions.
It’s optional. Polymer clay is durable once baked, and acrylic paint should adhere well and withstand outdoor conditions. However, applying a clear sealant can offer extra protection against wear and UV exposure, especially if the markers are in a very sunny spot.
The depth of the stamp should be enough to clearly imprint the lettering into the clay without cutting through it. Practicing on a scrap piece of clay before starting on your markers can help you get a feel for the right pressure to apply.
If you don’t have letter stamps,hand-write the names on the clay before baking with a toothpick or a small stick. The result will be more rustic but equally charming.
Polymer clay markers can last for several years outdoors. Their longevity will depend on the conditions they’re exposed to, such as extreme temperatures, moisture, and direct sunlight.
For those seeking more environmentally friendly options, look for brands that offer clay made from natural and sustainable materials. However, consider these alternatives might not offer the same durability as traditional polymer clay.
Baking polymer clay in a home oven is generally safe following the manufacturer’s instructions. Ensure the area is well-ventilated to avoid inhaling any fumes. Some crafters use a dedicated toaster oven to separate their crafting and cooking.
The maximum recommended number of letters for this size garden marker is eight. For example, Rosemary has eight letters and two inches will still be left at the bottom. Most common herbs have eight or fewer letters. If you are worried, they can always be cut longer to accommodate more letters.
You can use any polymer clay. Some brand names of polymer or oven-bake clay are Sculpey, Craft Store, Fimo, Premo, and Kato. They can be found in most craft stores, such as Michaels or Hobby Lobby, big box stores like Walmart, and online on Amazon.
Additional Notes and Tips for These DIY Garden Markers
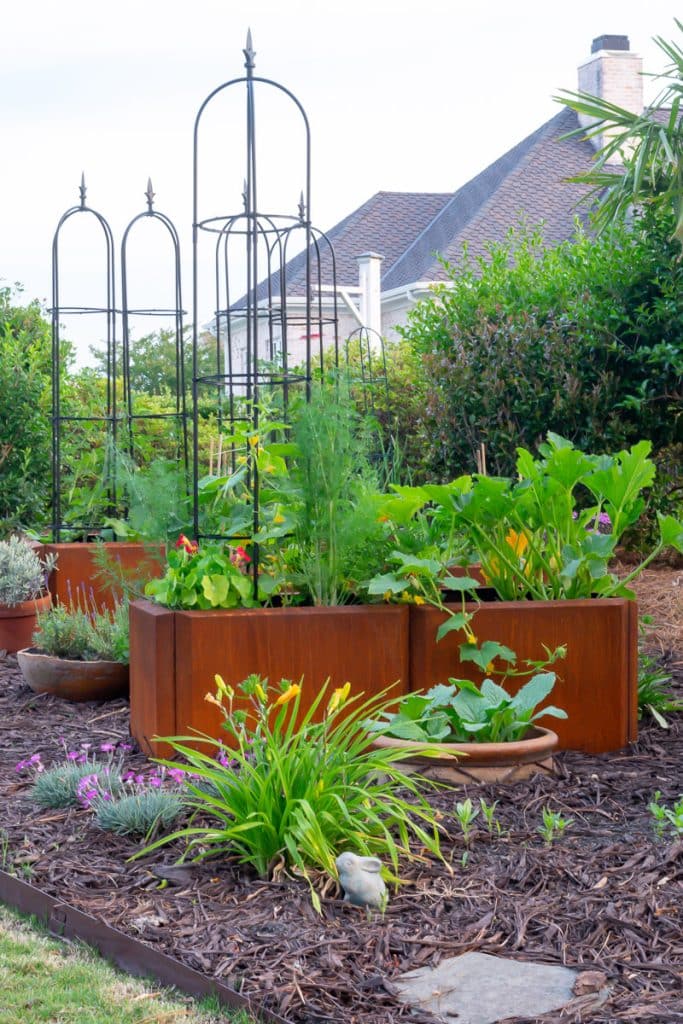
- Given their size, these DIY plant stakes are best for pots or herb gardens.
- You can make them thicker and taller, but thicknesses over 1.25″ is more likely to crack.
- Depending on the thickness of your markers, you may need to bake them in the oven longer. They should be firm and hold their shape. Most polymer clay directions state that it should be baked for 15-30 min per ¼ in of clay thickness.
- Polymer clay is a type of plastic, so you don’t have to worry about sealing it.
- Polymer clay does not shrink and keeps its shape, and once cured in the oven, it also becomes water-resistant.
- Red and green make brown, as do Yellow, Red, and Blue. You can play around with mixing colors to get the brown color you desire or use the color combinations if you don’t have or run out of brown paint.
Other Gardening Posts That Might Interest You
- Homemade Weed Killer
- How to Attract Beneficial Insects to Your Garden
- Vegetables for Raised Bed Gardens
- How to Make Concrete Garden Balls
Bookmark this page or pin the following image to refer back to this article on DIY Garden Markers in the future.
Thanks so much for spending a few minutes of your busy day with me!
To ensure you don’t miss future content, pop your email in the pale green box on the right or click here. I usually send one email weekly, so I won’t inundate your inbox. I’m sensitive to an overflowing email inbox!
We will only use your email address to send you emails, no more than 1-2 weekly. In addition, you will have access to my growing library of knit & crochet patterns and other printables. Check back often as this library will continue to grow. You can unsubscribe anytime by emailing me or clicking on the “unsubscribe” link at the bottom of all emails.
And you can access many of the products I refer to on my Nourish and Nestle Amazon Page. You can access it here.
So, if you’d like to participate in the ‘subscriber benefit’ action, simply subscribe to Nourish and Nestle here or use the form on the right sidebar. It’s slightly towards the top.
I have sent all my subscribers the link to the Subscriber Benefits Library. If you missed it or misplaced it, let me know.
Until next time…