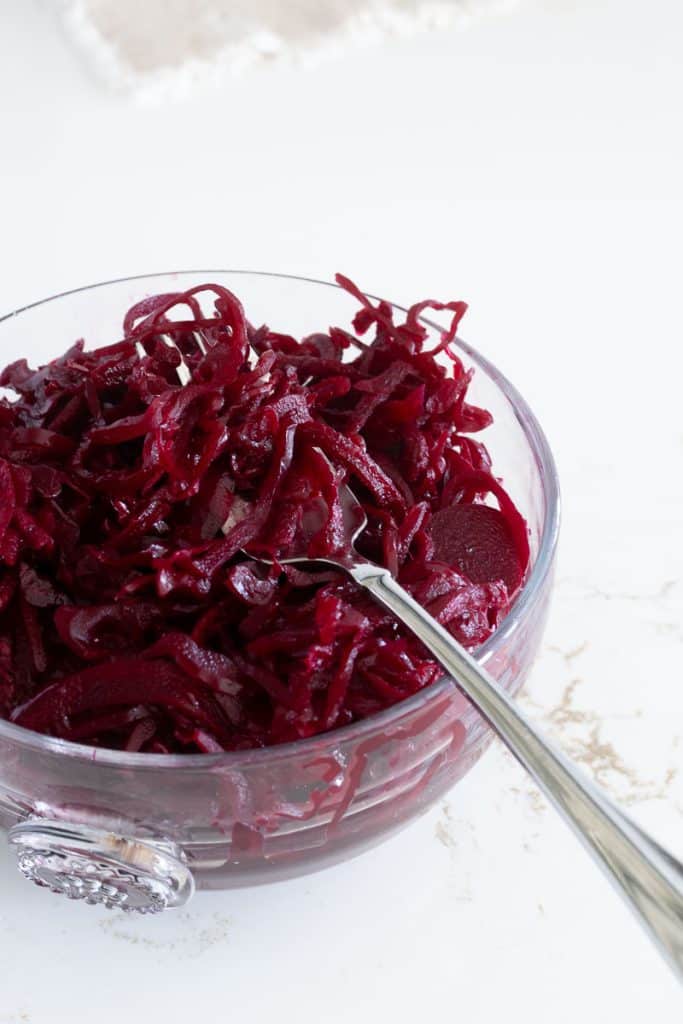
Beet Sauerkraut Recipe
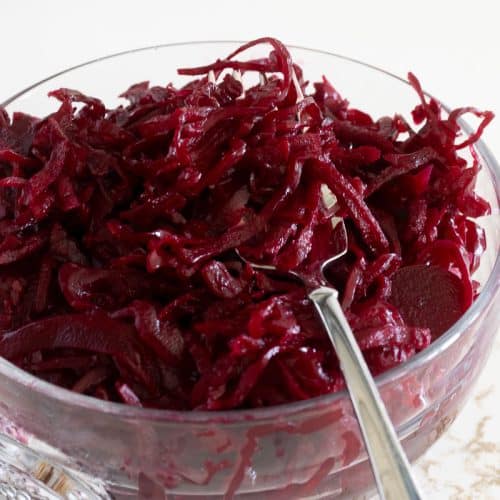
This beet sauerkraut is one of those ferments that will earn a permanent spot in your fermenting/refrigerator rotation. The combination of red cabbage and beets produces a kraut that is tangy and earthy with just enough natural sweetness to keep it interesting. The deep magenta color tells you it is jam-packed with antioxidants. Use this recipe as a jumping-off place to create a kraut that speaks to you by adding other spices and flavors.
I have been fermenting for about two years now, and this is one of my favorites to make. Even my husband, an avowed Beet Loather, enjoys this Beet Sauerkraut! HUGE praise! It is a straightforward, forgiving ferment that is a great starting point if you have never tried lacto-fermentation before. The ingredients are simple, the process is easier than you might expect, and the result is a living, probiotic-rich condiment that blows anything you can buy at the store clean out of the water.
And not for nothing, fermentation actually increases the bioavailability of many of a vegetable’s nutrients. This means your body can absorb and use them more efficiently from fermented vegetables than from raw or cooked ones.
This is an involved post; feel free to jump straight to the recipe by clicking the link above or in the table of contents below. However, everything in the post is included for your benefit, to help you understand fermentation and to make your experience with this Beet Sauerkraut recipe hugely successful.
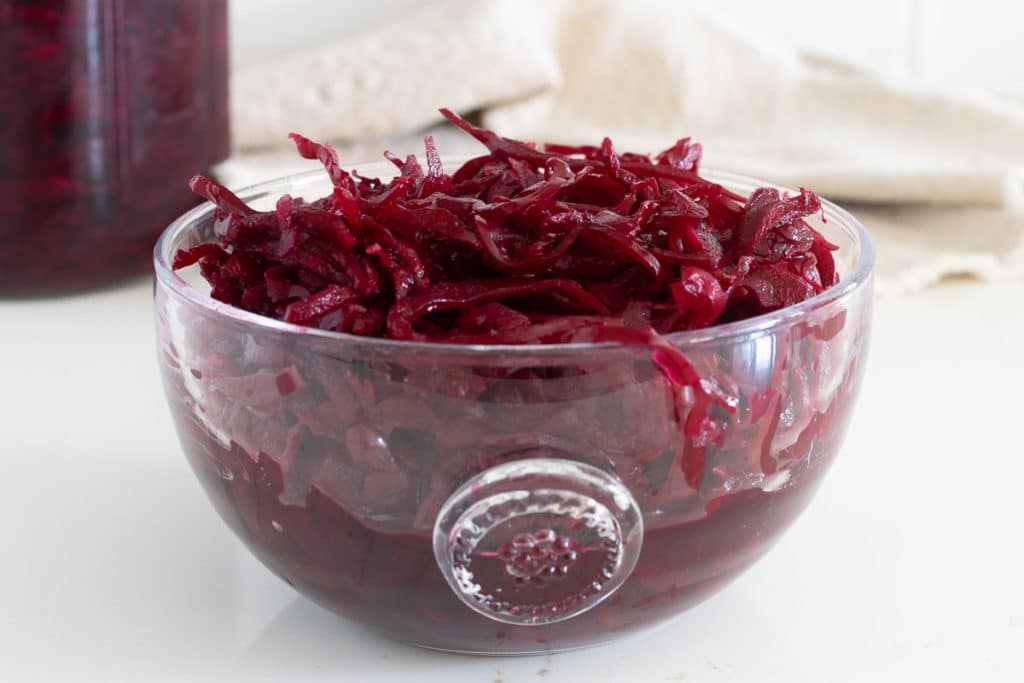
Table of Contents
Demystifying Fermentation
If the word “fermentation” makes you picture complicated equipment, precise laboratory conditions, or a very real possibility of making your family sick, I want to put your mind at ease. Humans have been fermenting vegetables for thousands of years, long before anyone had a thermometer, a pH meter, or even a reliable way to sterilize a jar. It is one of the oldest food preservation methods in the world, and it is genuinely hard to get wrong.
Here is what is actually happening in that jar. The surface of raw vegetables — cabbage, especially — is naturally covered in beneficial bacteria called Lactobacillus. When you add salt and press those vegetables into a jar, you create an environment where good bacteria thrive, and bad bacteria cannot survive. The salt draws out liquid, the vegetables stay submerged in their own brine, oxygen is excluded, and the Lactobacillus bacteria get to work converting the natural sugars in the vegetables into lactic acid. That lactic acid is what gives sauerkraut its tangy flavor and what preserves it.
No starter culture needed. No special equipment beyond a jar and something to weigh the vegetables down. The bacteria are already there, just waiting for the right conditions.
The only real enemy in fermentation is air. Keep your vegetables under the brine, and you have done the hard part. The rest is just time and patience. Checking on your jars once a day feels less like a chore and more like watching something come alive on your kitchen counter.
This beet sauerkraut is a wonderful first ferment if you have never tried it before. The red cabbage and beets provide plenty of natural liquid, the color is absolutely gorgeous, and the flavor is delightful— earthy, tangy, and just a little sweet. Once you make it once and see how straightforward the process is, you will wonder why you waited so long.
Beet Sauerkraut Variations: Herbs and Spices to Make It Your Own
Once you have made this recipe once and have a feel for the process, it becomes a natural jumping-off point for experimenting with flavors that speak to your own taste. The base ratio stays the same — 2% salt to total vegetable weight — and everything else is fair game. Here are some variations worth exploring:
- Caraway seeds: the classic addition to traditional German sauerkraut, caraway brings a slightly anise-like, earthy warmth that pairs beautifully with both cabbage and beets.
- Fresh ginger: adds a bright, spicy heat that plays well against the earthiness of the beets. Start with a tablespoon of freshly grated ginger per quart jar.
- Horseradish: a natural pairing with beets, fresh horseradish adds a sharp, peppery bite that mellows considerably during fermentation, leaving a pleasant heat in the background. Don’t use prepared; the vinegar in the preparation will mess with fermentation. Grab a root and slice it into matchsticks. A piece roughly the size of your thumb — about 1 to 2 tablespoons grated — per quart jar is a good starting point. It is potent, so start on the conservative side your first time and adjust from there. And mind your eyes when you are cutting it!
- Juniper berries: lightly crush a small handful and add them to the jar for a subtle piney, gin-like note that is unexpected and genuinely delicious.
- Orange or lemon zest: a strip or two of citrus zest brightens the whole ferment and adds a floral undertone that complements the sweetness of the beets.
- Fennel seeds: mild and slightly sweet, fennel seeds add a gentle anise flavor without overpowering the other ingredients.
- Fresh dill: Dill brings a familiar, bright herbaceous note that works especially well if you plan to use the kraut on fish or grain dishes.
- Black pepper: a few whole black peppercorns add a subtle heat and depth that builds slowly over the fermentation period.
- Turmeric: a small amount of freshly grated or ground turmeric adds an earthy warmth and turns the brine a remarkable color. It also brings its own well-documented anti-inflammatory properties to the jar.
Tips for Success
Some of these links may be Amazon affiliate links and I may earn a small commission from the sale of these products to help defray the costs of operating this site, but the price you are charged is not affected. You can see my full disclosure policy here.
- The single most important thing you can do to make sauerkraut successful is keep your vegetables submerged in the brine at all times. Exposure to air is what leads to mold. Check your jars daily and press everything back down if it has floated up. This takes about 10 seconds and makes a real difference.
- Don’t use pre-shredded vegetables! They tend to be dry, and you need the moisture from freshly grated/shredded veggies.
- Salt is your friend here, but the type matters. Always use non-iodized salt with no additives — kosher salt or fine sea salt are both perfect. Iodized table salt contains additives that can interfere with beneficial bacteria and give the finished product an off flavor.
- Temperature plays a bigger role than most people expect. Fermentation is most active and produces the best flavor somewhere between 65 and 75 degrees F (18 to 24 degrees C). A cooler kitchen will slow things down and produce a milder kraut. A warmer kitchen speeds things up, but can sometimes make the texture softer than you’d like. If your house runs warm in summer, check the kraut more frequently and taste it earlier.
- Use a kitchen scale rather than volume measurements. Fermentation is a ratio game — your salt needs to be 2% of your total vegetable weight. Volume measurements for salt are unreliable because grind size varies widely across brands. A basic digital kitchen scale takes the guesswork out completely.
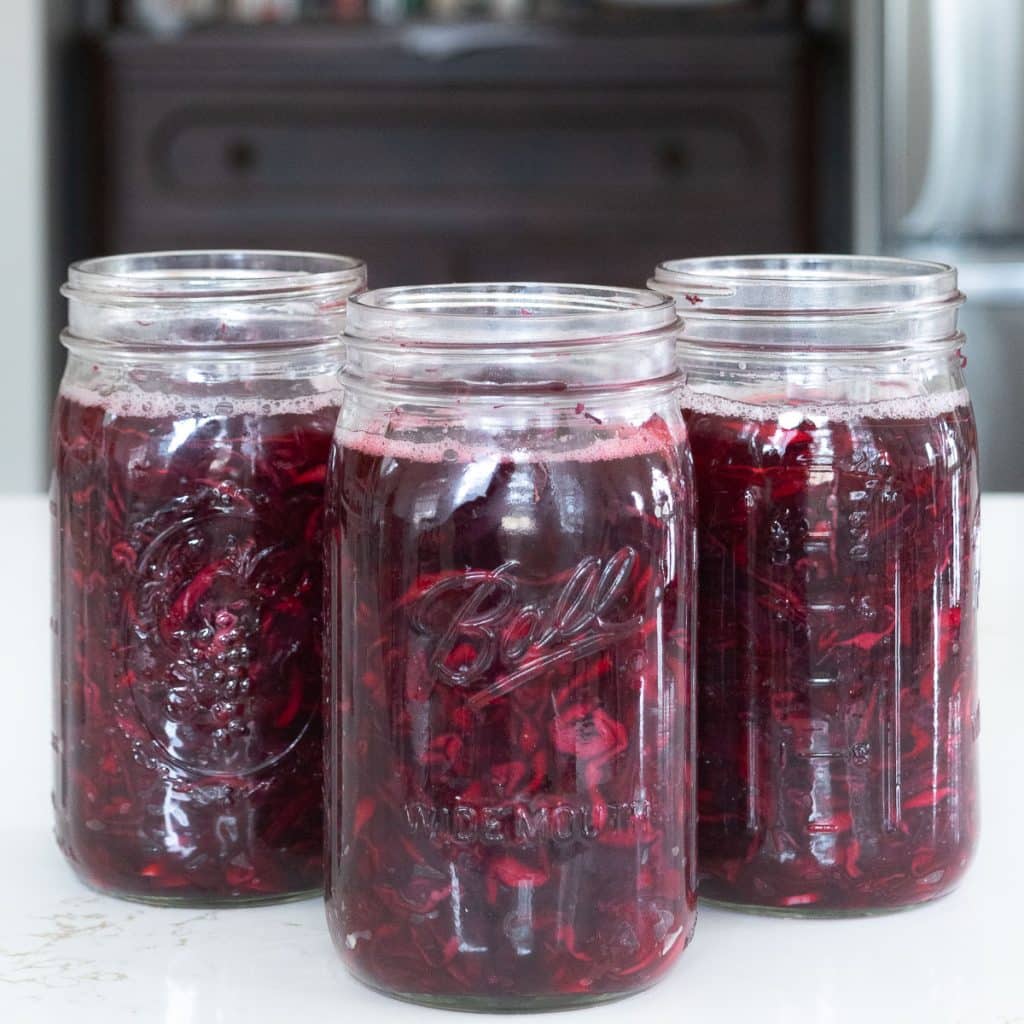
- Wide-mouth mason jars are ideal for this recipe. They make packing and pressing easy, and they accommodate most fermentation weights without any fuss. A quart jar holds roughly a third of this batch, so plan for three quart jars or the equivalent.
- Wear an apron when you work with red beets. The color is stunning in the jar, but deeply stubborn on fabric.
- It’s optional, but I highly recommend glass weights. I fiddled around with homemade versions for a while, but at $13 for 4 glass weights, these have paid for themselves multiple times.
- Go Organic if at all possible. Unlike cooking, which uses heat, fermentation is a living process where everything on the surface of your vegetables goes directly into the jar and stays there. Conventional produce is often treated with synthetic pesticides and fungicides, some of which are specifically designed to inhibit microbial activity. This is the opposite of what you need for a successful ferment. Even a thorough scrub will not remove residues that have been absorbed into the outer layers of the vegetable, and those residues can slow fermentation, produce off-flavors, or prevent beneficial bacteria from establishing themselves altogether. Organic produce arrives with its natural microbial community intact, which gives your ferment the best possible start.
Making Beet Sauerkraut: Step-by-Step Instructions
Step 1: Wash Your Vegetables
Start with clean vegetables. For the cabbage, remove and discard the outermost leaves, then rinse the head briefly under cool running water and pat dry. Set aside one or two of the large inner leaves for later use (optional). For the beets, scrub them thoroughly under cool running water with a vegetable brush to remove any dirt clinging to the surface. Rinse well and pat dry. Do not use soap or produce wash on vegetables you plan to ferment, as any residue can interfere with the beneficial bacteria that drive fermentation.
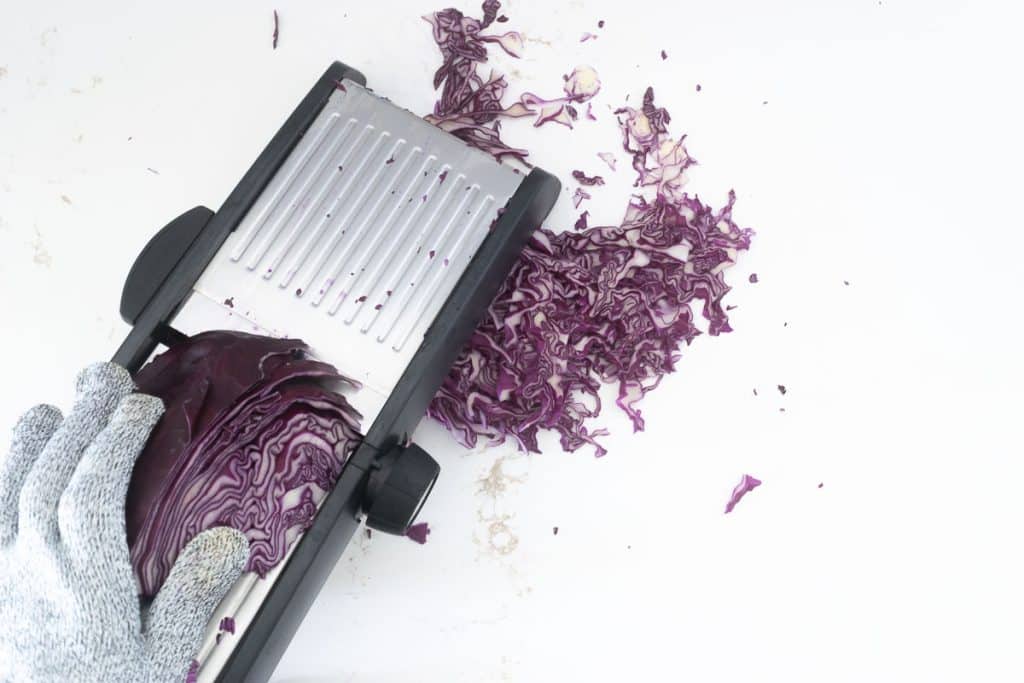
Step 2: Prep Your Vegetables
Shred the red cabbage and red beets using a box grater, food processor, or mandoline. Aim for thin, even shreds about 1/8 inch thick. Thin shreds ferment more evenly and give you a better texture in the finished kraut. Whether or not you peel your beets, especially if they are organic, is entirely up to you. I don’t bother peeling mine — a good scrub is all they need.
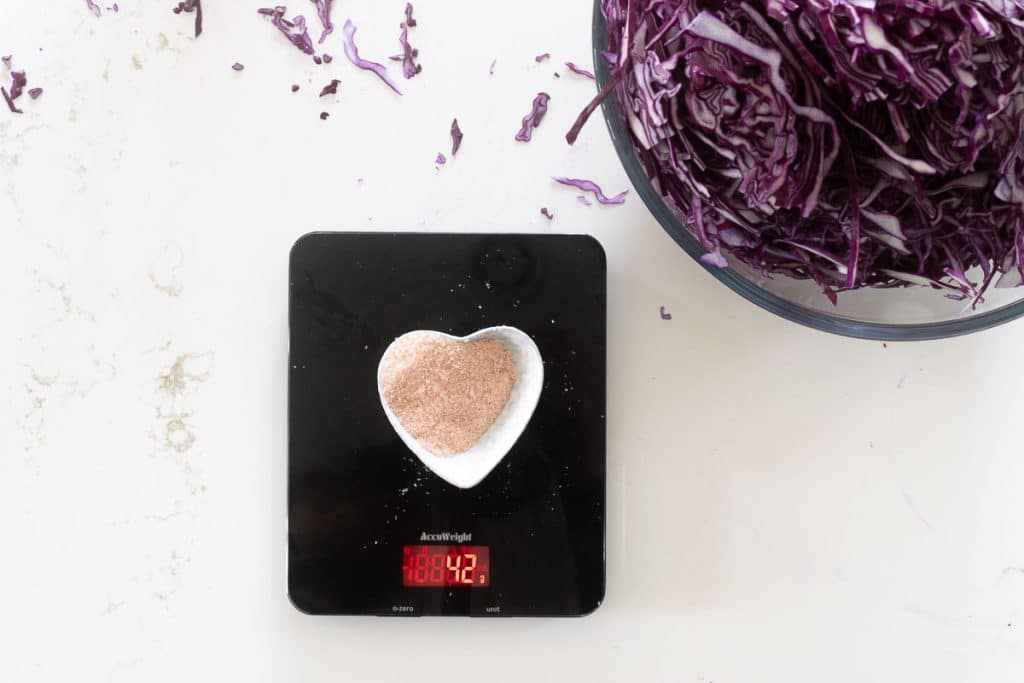
Step 3: Weigh Your Vegetables and Calculate Salt
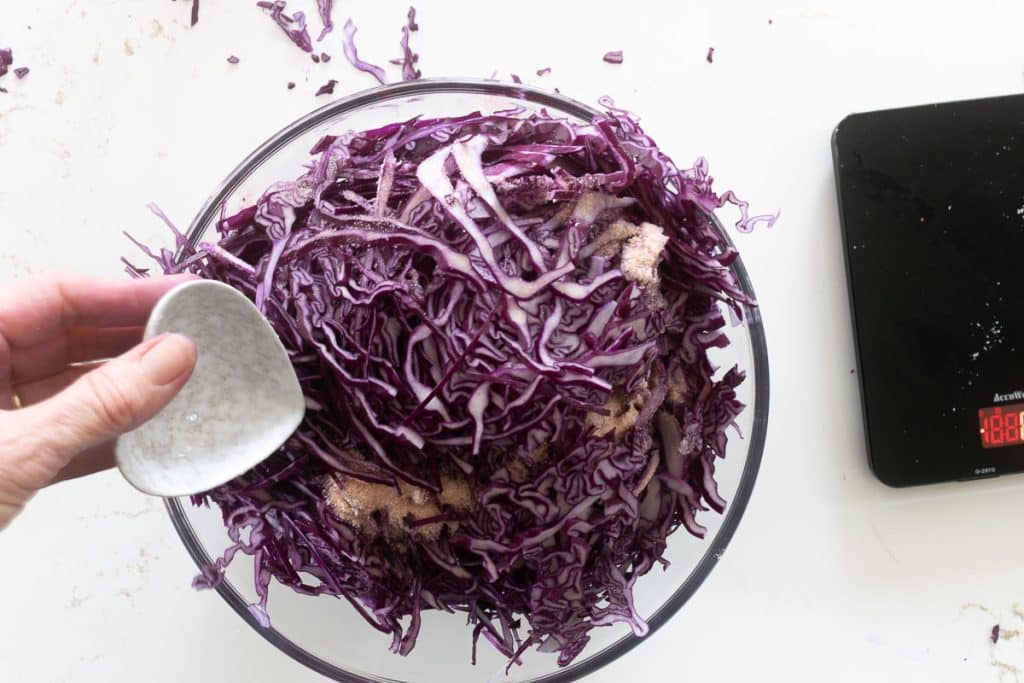
Once your cabbage and beets are shredded, place a large bowl on the kitchen scale and press the tare button to zero it out. Add the shredded cabbage and beets to the bowl, and make sure your units are set to grams. Note the combined weight, then multiply it by 0.02; the result is exactly how much salt you need. For example, if your combined vegetable weight is 2,100 grams, you need 42 grams of salt (2,100 X .02 = 42).
Weigh your salt out separately in a small bowl — tare the scale to zero again before weighing — so you know you have the right amount before you start massaging. This 2% ratio is what makes lacto-fermentation reliable and consistent, and it works regardless of how much cabbage or how many beets you started with.
Step 4: Massaging the Veggies
Combine the shredded cabbage and beets in a large bowl and sprinkle the salt evenly over the top. Using clean hands, massage and squeeze the mixture firmly for 3 to 5 minutes. You are breaking down the cell walls to draw out the natural liquid, which becomes your brine. Don’t rush this step — the more liquid you draw out now, the less likely you are to need a supplemental brine later. The mixture will shrink down significantly and turn a deep magenta color.
Step 4: Rest and Check Your Brine
Let the massaged mixture rest for 30 minutes, then check the liquid at the bottom of the bowl. You want a good pool of brine — at least a quarter cup. If the liquid seems scant, let it rest another 10 minutes before deciding whether you need to make a supplemental brine.
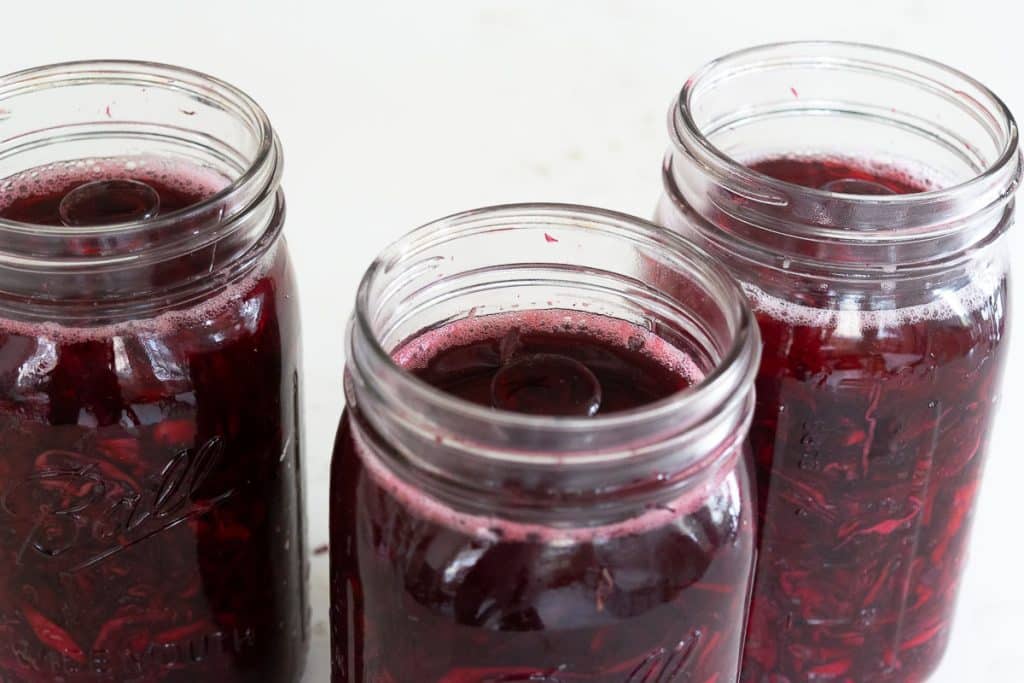
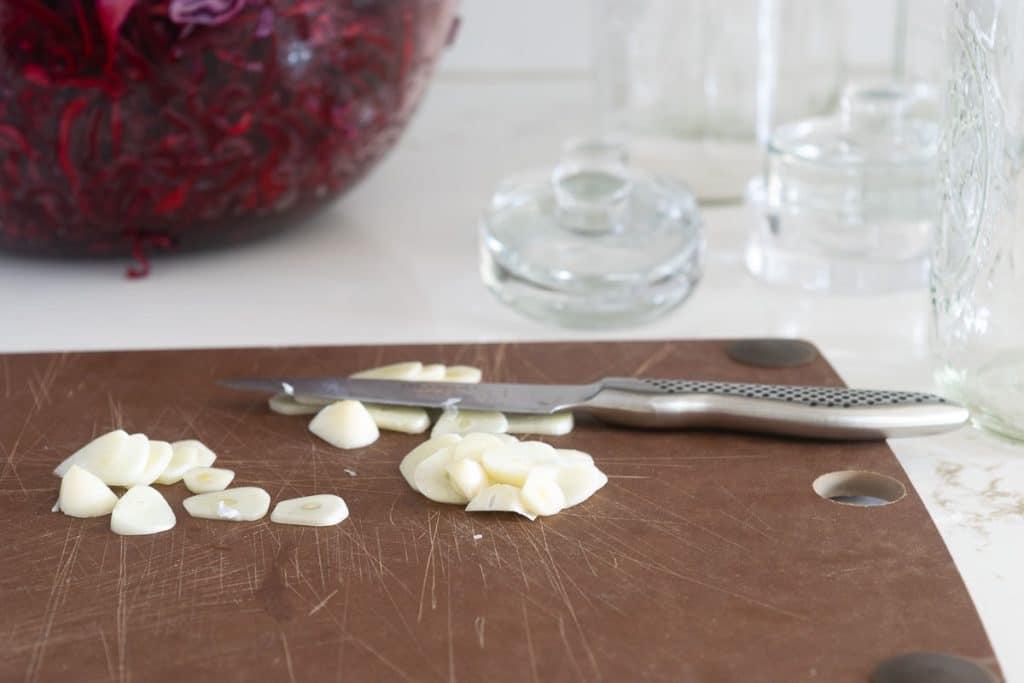
Step 5: Pack Your Jars
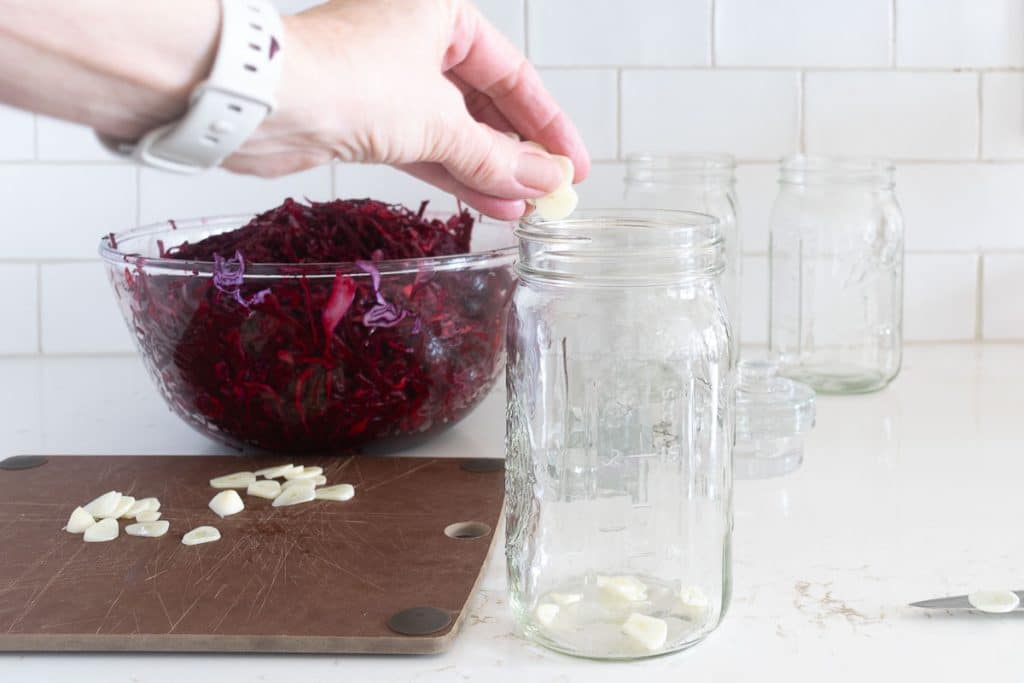
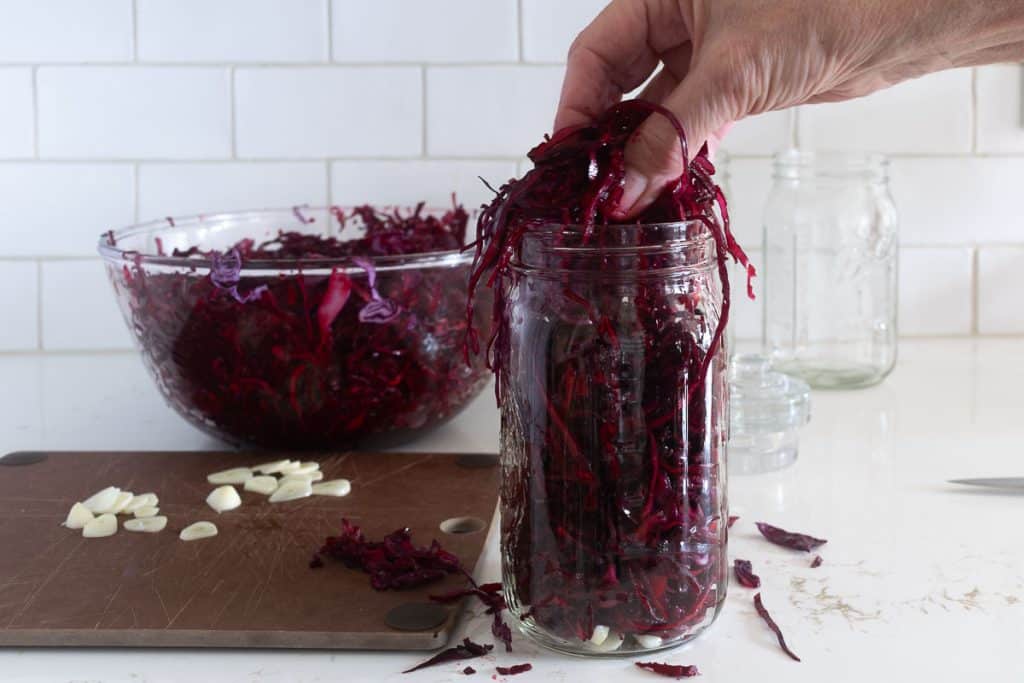
Place your sliced garlic in the bottom of clean, wide-mouth quart jars, dividing it evenly between jars. Add the cabbage-and-beet mixture on top of the garlic, packing it down firmly with your fist or a kraut pounder as you go. The goal is to eliminate air pockets and encourage the brine to rise above the vegetables. Pour any remaining brine from the bowl into the jars.
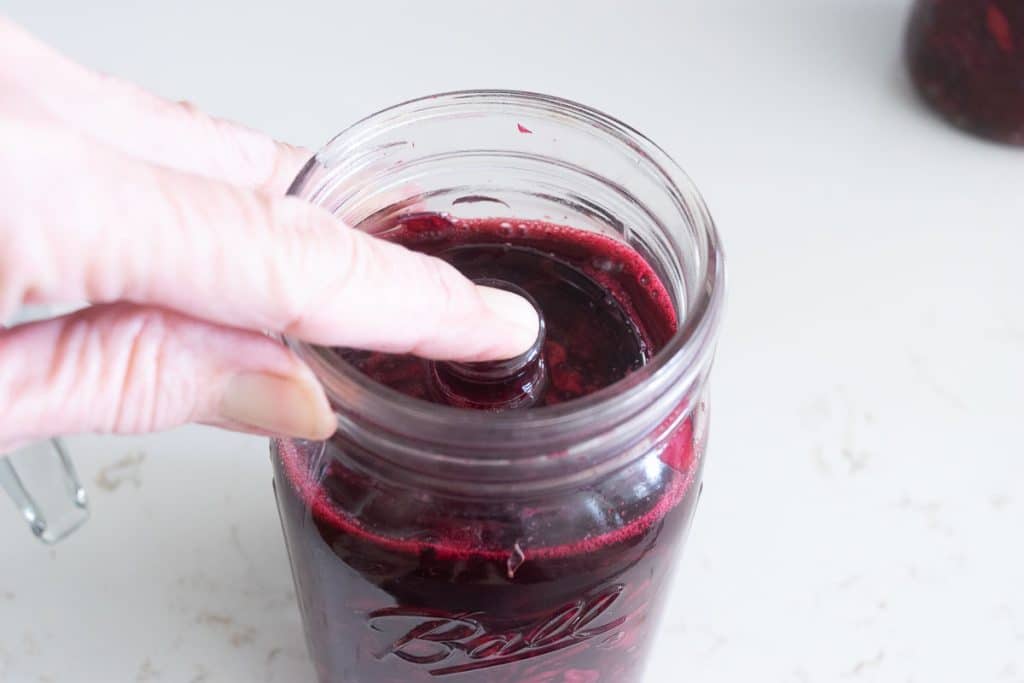
Step 6: Add Your Weight and Check the Brine Level
Lay one of the reserved cabbage leaves over the top of the packed vegetables if you’d like, tucking it down around the edges. This helps keep any small shreds from floating up above the brine. Pick or scoop out any random shreds of cabbage or beets (or spices if you add any) that float to the top, as they will mold.
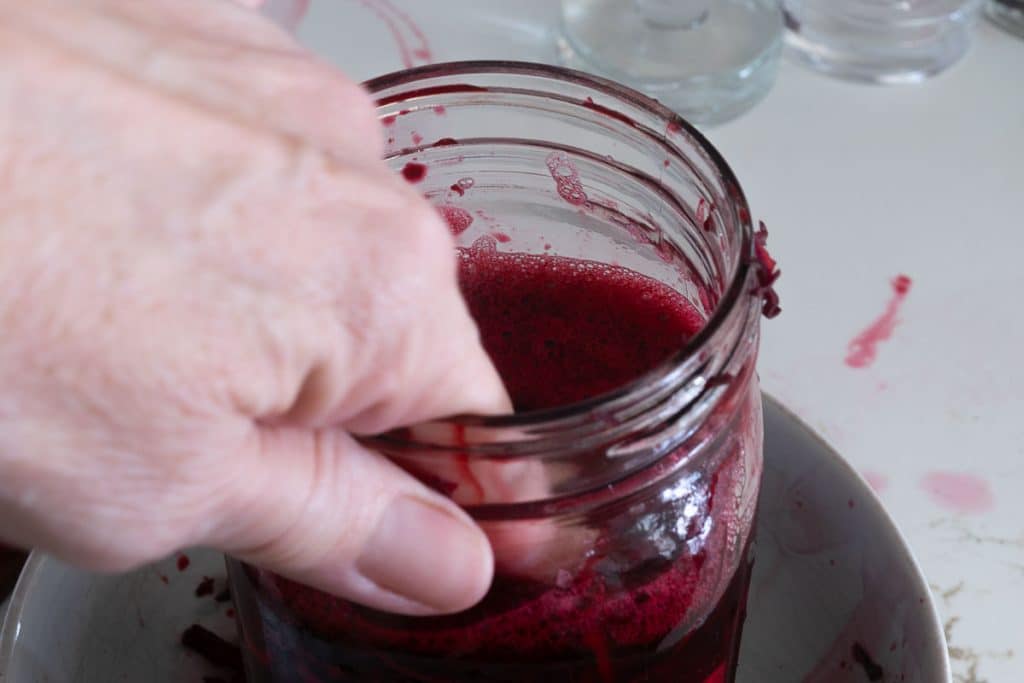
Press a fermentation weight onto the cabbage leaf to hold everything down. The weight itself does not need to be fully submerged, though in a well-packed jar with plenty of brine it often will be. It just needs to sit on top of the vegetables and hold them down below the liquid. Leave 2 inches of headspace between the brine surface and the top of the jar to allow for bubbling and expansion during fermentation.
If the vegetables are not fully covered after packing, make a quick 2% brine: dissolve 1 tsp of salt in 1 cup of non-chlorinated water (filtered or left to sit overnight) and add just enough to submerge the vegetables completely. Wipe down the outside of the jars and make sure there’s nothing clinging to the sides of the interior of the jars.
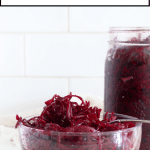
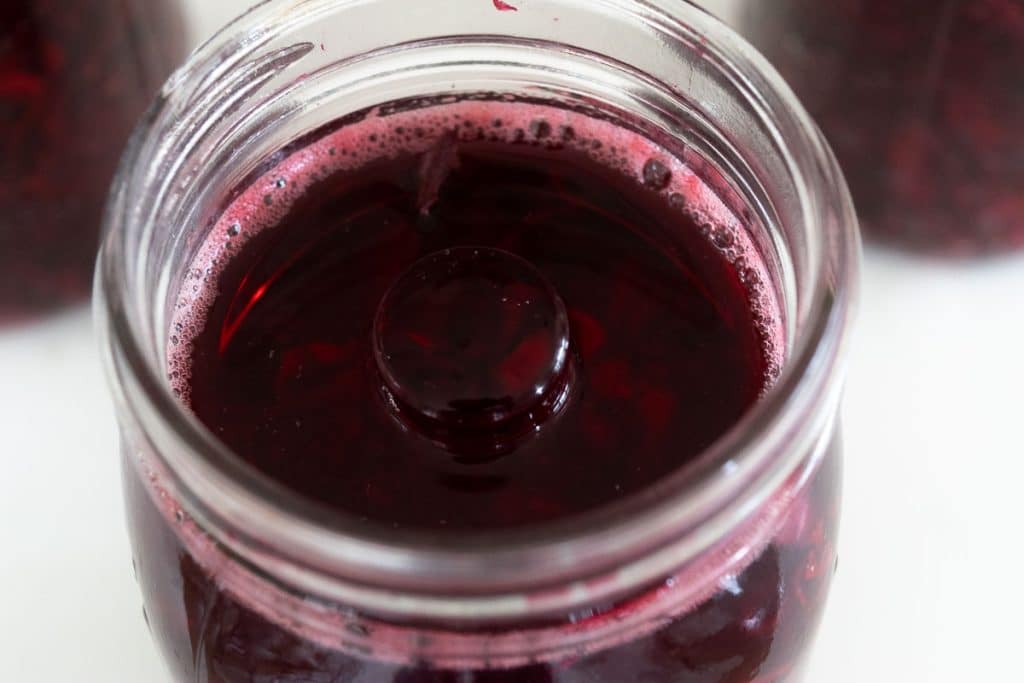
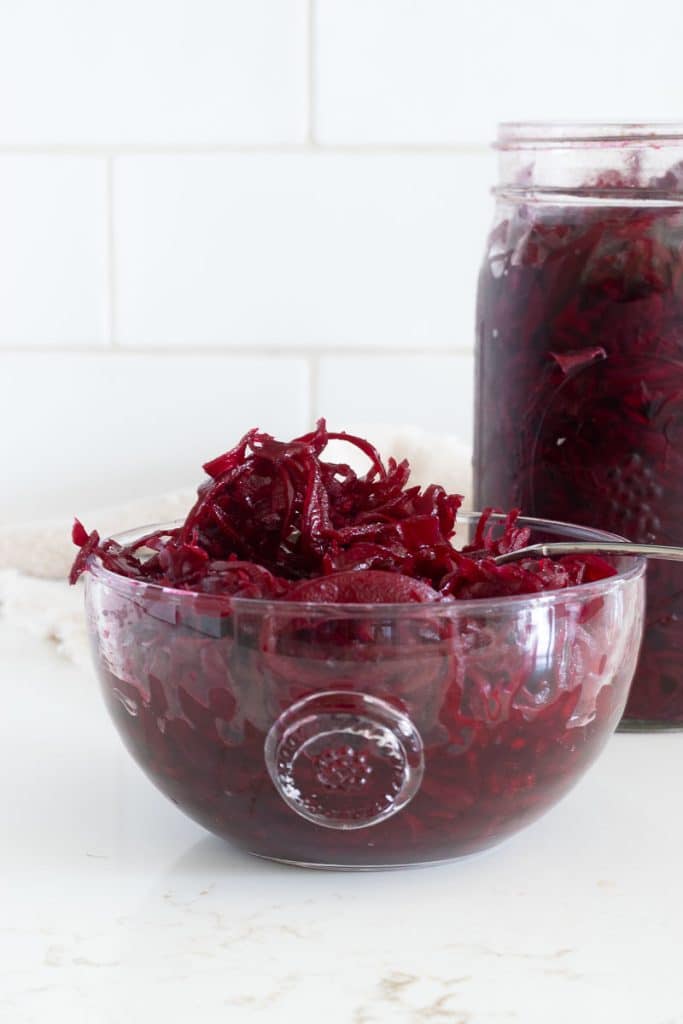
Do you see that little shred at right about 12 o’clock in the image on the far right? It was picked out before I finished.
Step 7: Cover Your Beet Sauerkraut and Begin Fermentation
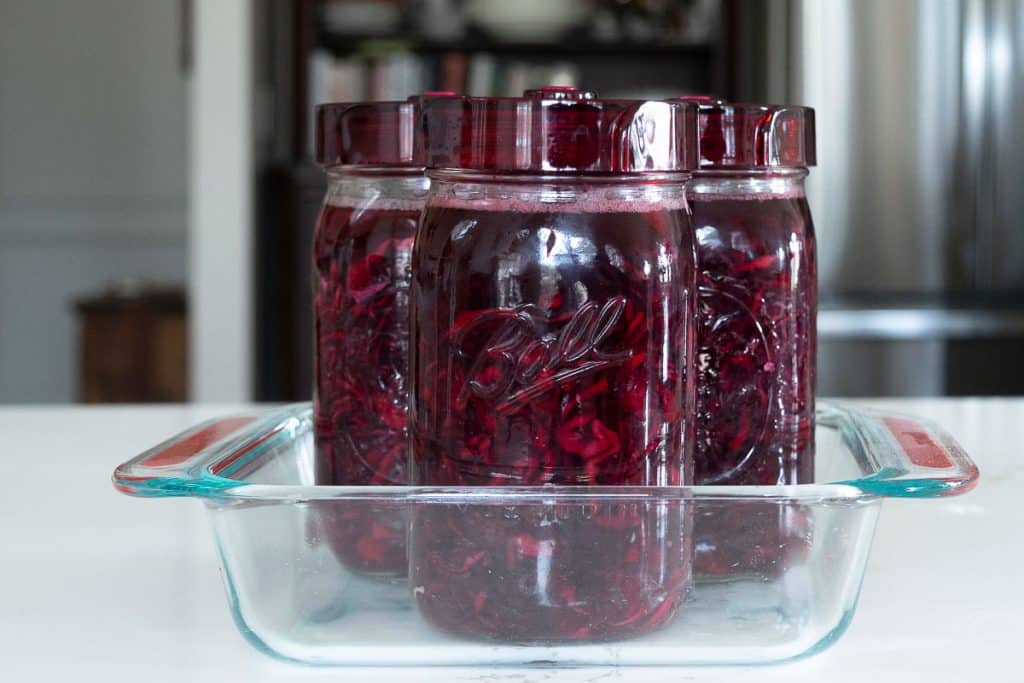
Leave 2 inches of headspace between the brine surface and the top of the jar to allow for bubbling and expansion during fermentation. Cover the jar loosely with a cloth, a coffee filter secured with a rubber band, a specially designed fermentation lid, or a loose lid. Do not seal it airtight — the fermentation process produces carbon dioxide that needs to escape. Set the jars on a small plate or tray to catch any overflow and keep them at room temperature, ideally between 18 and 24 degrees C (65 to 75 degrees F), out of direct sunlight.
Step 8: Ferment and Taste Daily
Check your beet sauerkraut every day. Press the vegetables down if they have risen above the brine, and skim off any white foam that appears on the surface. This is normal and harmless, but you want your vegetables under the brine at all times.
Do not be alarmed if you do not see dramatic bubbling activity. Some ferments are quiet, particularly in a cooler kitchen, and produce little visible liquid movement. Others in a warmer kitchen can bubble actively and push liquid right up and out of the jar, which is exactly why you have that plate or tray underneath. Both are normal. If at any point during fermentation you notice the liquid level has dropped, and the vegetables are no longer fully submerged, top the jar off with 2% brine — 1 rounded teaspoon of salt dissolved in 1 cup of non-chlorinated water — adding just enough to cover the vegetables completely. Do not wait to see if the liquid comes back up on its own. Keeping the vegetables submerged is the one rule in fermentation you do not want to bend.
The presence or absence of vigorous bubbling is not a reliable indicator of whether your ferment is working — your nose and your taste buds are. You should begin to notice a tangy, pleasantly funky smell within the first few days, and that is your real sign that fermentation is underway.
Taste it starting on day 3. It will be mildly tangy early on and develop more complexity and sourness over time. Most people find their sweet spot somewhere between 5 and 14 days, depending on temperature and personal preference.
See the discussion below on what to expect each day over the Fermentation Period.
Step 9: Refrigerate When It’s Ready
Once your beet sauerkraut has reached a flavor you love — tangy, slightly earthy from the beets, with a hint of garlic — remove the weight and the cabbage leaf, press the vegetables down below the brine one final time, and seal with a tight lid. Transfer to the refrigerator. The kraut will keep well in the fridge for 2 to 3 months, and the flavor will continue to mellow and deepen slightly over time.
What’s Happening in Your Jars? Fermentation Timeline
One of the most satisfying things about making sauerkraut is that once you understand what is happening inside the jar day by day, the whole process stops feeling mysterious and starts feeling like magic you are in on.
A note on temperature: all of the following assumes a kitchen temperature in the range of 18 to 24 degrees C (65-75 degrees F). A cooler kitchen will push each of these stages back by a day or two. A warmer kitchen will accelerate them. When in doubt, taste it and let your palate be your guide.
Days 1 and 2: Things look pretty still at this point, and you may wonder if anything is happening at all. It is. The salt continues to draw moisture from the vegetables, and the naturally present Lactobacillus bacteria on the cabbage and beets are beginning to multiply. The brine may look slightly cloudy, which is a good sign. The color will deepen to a vivid magenta as the beet pigment continues to bleed into the brine.
Days 3 and 4: First signs of life. You will likely start to see small bubbles forming around the edges of the jar or rising slowly through the brine. This is carbon dioxide being produced as the bacteria consume the natural sugars in the vegetables. You may also notice the brine getting a little frothy at the top. Press the vegetables down if they have crept up toward the surface, and skim off any white foam if you see it. Give it your first taste on day 3. It will be lightly tangy and still fairly mild, with the sweetness of the beets still prominent.
If at any point during fermentation you notice the liquid level has dropped, and the vegetables are no longer fully submerged, top the jar off with 2% brine — 1 rounded teaspoon of salt dissolved in 1 cup non-chlorinated water — adding just enough to cover the vegetables completely. Do not wait to see if the liquid comes back up on its own. Keeping the vegetables submerged is the one rule in fermentation you do not want to bend.
Days 5 and 6: Fermentation hits its stride. The bubbling is more active now, and the smell is noticeably tangy and funky in the best possible way. The brine has likely turned a deep, jewel-toned pink or purple. The flavor is developing real character — more sour, more complex, with the garlic starting to make itself known. Keep pressing the vegetables down daily.
Days 7 and 8: The flavor of your beet sauerkraut deepens. The most active phase of fermentation is starting to wind down. Bubbling slows noticeably. The kraut tastes pleasantly sour, and the sweetness of the beets has mellowed into a subtle earthiness. The garlic is fully integrated. Many people find this is their sweet spot and move the jars to the refrigerator right around now.
Days 9 and 10: Fermentation activity is minimal at this point. The brine is clear and deep in color. The flavor is bold, tangy, and well-rounded. The texture of the cabbage has softened slightly from the fresh shred, but still has a satisfying bite. If you prefer a more assertive, deeply sour kraut, let it go a few more days.
Days 11 through 14: By the end of two weeks, your beet sauerkraut is fully fermented and shelf-stable in the refrigerator for months. The flavor at this stage is robustly sour with deep, earthy undertones from the beets. Some people love it here. Others prefer the brighter, fresher flavor of an earlier pull. Neither is wrong — this is entirely a matter of personal taste, and that is one of the great pleasures of making your own fermented foods.
Beet Sauerkraut
Ingredients
- 1 head red cabbage
- 2 pounds red beets
- mineral or sea salt Note 1
- 3-4 cloves of garlic, sliced thin
As needed
- 1 tsp mineral or sea salt
- 1 cup non-chlorinated water
Instructions
- Prep your vegetables: Wash your veggies in water, but avoid using a vegetable cleaner. Shred red cabbage and red beets using a box grater, food processor, or mandoline. Aim for thin, even shreds — about 1/8 inch. Thin shreds ferment more evenly and give you a better texture in the finished kraut. See Note 2 about washing vegetables.
- Weigh your vegetables: Place a large bowl on your kitchen scale, set the tare to zero,and grams as the unit. Add the shredded cabbage and beets to the bowl and weigh. Write down that number. Multiply that number by .02 to determine how many grams of salt you need. (In my case, the combined weight of my shredded beets and cabbage was 2,148 grams. 2,148 X .02 equals 42.96 (43) grams of salt. Weigh out your salt and sprinkle it over the cabbage/beet mixture. Using clean hands, massage and squeeze the mixture firmly for 3 to 5 minutes. By massaging the cabbage and beets with the salt, you are breaking down the cell walls to draw out the natural liquid, which becomes your brine. Don't rush this step — the more liquid you draw out now, the less likely you are to need a supplemental brine. The mixture will shrink down significantly and turn a deep magenta color.
- Rest and check your brine: Let the massaged mixture rest for 30 minutes, then check the liquid at the bottom of the bowl. You want a good pool of brine — at least a quarter cup. If you have it, you're in great shape. If the liquid seems scant, let it rest another 10 minutes before deciding whether you need supplemental brine.
- Pack your jars: Distribute your thinly sliced garlic in the bottom of clean wide-mouth quart jars — roughly 1 clove per jar. Add the cabbage-and-beet mixture on top of the garlic, packing it down firmly with your fist or a kraut pounder as you go. The goal is to eliminate air pockets and encourage the brine to rise above the vegetables. Pour any remaining brine from the bowl into the jars.
- Add your weight and check the brine level: Press a weight — a small zip-lock bag filled with brine, a dedicated fermentation weight, or even a zip-lock bag filled with water — onto the packed vegetables. The vegetables must be fully submerged under the brine — that is the non-negotiable part. The weight itself does not need to be fully submerged, though in a well-packed jar with plenty of brine it often will be. It just needs to sit on top of the vegetables and hold them down below the liquid. Leave 2 inches of headspace between the brine surface and the top of the jar to allow for bubbling and expansion during fermentation. If the vegetables are not fully covered after packing, make a quick 2% brine: dissolve 1 tsp of salt in 1 cup of non-chlorinated water (filtered or left to sit overnight) and add just enough to submerge the vegetables completely.
- Cover and begin fermentation: Lay one of the reserved cabbage leaves over the fermented veggies before placing your weight, if you like — this helps keep any small shreds from floating above the brine. Pick or scoop out any random shreds of cabbage or beets that float to the top, as they will mold. Cover the jar loosely with a cloth, a coffee filter secured with a rubber band, or a loose lid. Do not seal it airtight, as the fermentation process produces CO2 that needs to escape. Set the jars on a small plate or tray to catch any overflow, and keep them at room temperature, ideally between 65℉ and 75℉ (18℃ to 24℃) and out of direct sunlight.
- Ferment and taste daily: Check your kraut every day. Press the vegetables down if they have risen above the brine, and skim off any white foam that forms on the surface — this is normal and harmless, but you want your vegetables under the brine at all times. You may see small bubbles, which is a sign that fermentation is active. Taste it starting on day 3. It will be mildly tangy early on, then develop more complexity and sourness over time. Most people find their sweet spot somewhere between 5 and 14 days, depending on temperature and personal preference. See the blog post for a Fermenting Timeline.
- Refrigerate when it's ready: Once the kraut has reached a flavor you love — tangy, slightly earthy from the beets, with a hint of garlic — remove the weight and any outer cabbage leaf, press the vegetables down below the brine one final time, and seal with a tight lid. Transfer to the refrigerator. Cold temperatures slow fermentation to nearly a halt, and the kraut will keep well in the fridge for 2 to 3 months. The flavor will continue to mellow and deepen slightly over time.
Notes
Nutrition
Troubleshooting Beet Sauerkraut
- There is white foam or a white film on top of my beet sauerkraut. This is kahm yeast, and it is harmless. It looks alarming, but it is a normal part of the fermentation process. Simply skim it off, make sure your vegetables are under the brine, and carry on. It tends to appear more often in warmer temperatures or when the salt percentage is on the lower end.
- My kraut smells off. Sauerkraut in active fermentation smells tangy, funky, and sour — in a good way. Trust your nose on this one. If something smells genuinely rotten or putrid rather than just pungent, discard the batch and start fresh. A slimy texture on the vegetables is also a sign to discard. That said, the overwhelming majority of home ferments are perfectly fine, and most beginners are surprised by how forgiving the process actually is.
- I didn’t get enough liquid after massaging. Let the mixture rest longer before reaching for the supplemental brine. Sometimes the liquid takes a full 20 to 30 minutes to fully release, especially if your beets were very firm. If, after 30 minutes, you still don’t have enough liquid to cover the vegetables, mix up a small amount of 2% brine (1 rounded teaspoon of brine to 1 cup non-chlorinated water) and add just enough to submerge everything.
- My ferment doesn’t seem to be doing anything. If you don’t see bubbles or smell any tanginess after a few days, your ferment may just be moving slowly due to cool temperatures. Move the jars somewhere slightly warmer and give them another day or two. If your kitchen is very cold, fermentation can take up to three weeks to really get going.
- My beet sauerkraut got soft and mushy. This usually happens when the temperature is too warm during fermentation, or the kraut is fermented for too long before going into the fridge. It’s still safe to eat — the flavor will be there — but the texture won’t be as satisfying. For future batches, taste starting on day three and refrigerate as soon as it hits the flavor you like.
Bookmark this page or pin the following image to refer back to this Beet Sauerkraut recipe in the future.
Thanks so much for spending a few minutes of your busy day with me!
To ensure you don’t miss future content, pop your email in the pale green box on the right or click here. I usually send one email weekly, so I won’t inundate your inbox. I’m sensitive to an overflowing email inbox!
We will only use your email address to send you emails, no more than 1-2 weekly. In addition, you will have access to my growing library of knit & crochet patterns and other printables. Check back often as this library will continue to grow. You can unsubscribe anytime by emailing me or clicking on the “unsubscribe” link at the bottom of all emails.
And you can access many of the products I refer to on my Nourish and Nestle Amazon Page. You can access it here.
So, if you’d like to participate in the ‘subscriber benefit’ action, simply subscribe to Nourish and Nestle here or use the form on the right sidebar. It’s slightly towards the top.
I have sent all my subscribers the link to the Subscriber Benefits Library. If you missed it or misplaced it, let me know.
Until next time…