
Grommeted Counter Skirt DIY


Learn how to make a grommeted counter skirt to dress up a counter or table and, possibly more importantly, hide the storage space underneath!
Transform your space with a stylish and practical DIY solution: the grommeted counter skirt. Perfect for dressing up any counter or table, this innovative project not only enhances the aesthetic appeal of your room but also cleverly conceals storage areas beneath.
Inspired by the elegant designs of high-end furniture and the durability of everyday materials, this DIY counter skirt marries form and function in an unexpected way. Whether you’re looking to upgrade a worn-out workspace or inject a touch of sophistication into a mundane area, this guide will walk you through creating a counter skirt that’s both beautiful and resilient.
From selecting the perfect fabric to the final installation, you’ll discover how simple it is to transform your space with just a few materials and some creativity.
I spied this Barclay Storage Table from Ballard Designs right about while trying to figure out what to do with the Formica countertop in my office.
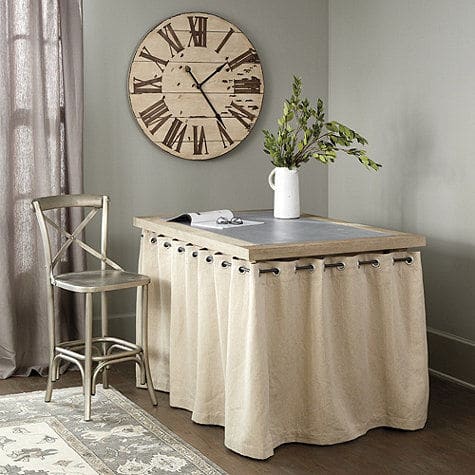
I had considered swapping out the Formica for a different surface, but given the regular wear and tear, the Formica, which can handle bleach and abrasive cleaning, makes the most sense. So when I saw this…I thought that a counter skirt might be all I needed to update and improve the look.
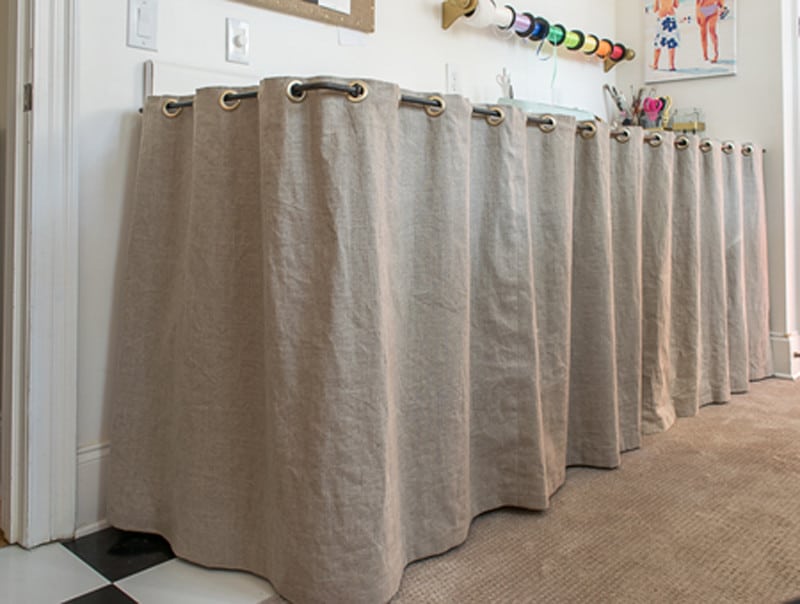
I have many ‘favorites’ from my office redo, but this skirted counter is one of them. It transformed my ho-hum, even a little ‘ugh’ but useful counter into something that looks great and is wonderfully functional.
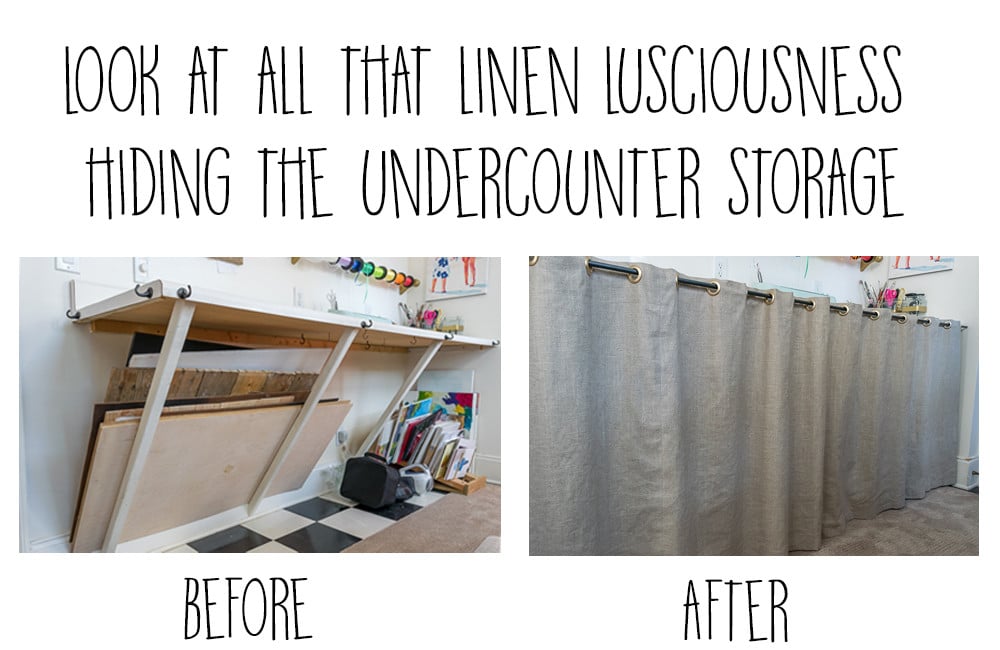
It finishes this space, and the skirt covers the underneath storage that this counter affords.
And after I figured out ‘how’ to make this counter skirt, the actual ‘doing’ was really quite easy.
Here’s what I used and how I made the counter skirt:
- Fabric
I purchased 3.5 yards of linen. I calculated my yardage like this:

There is a 36″ drop from my counter top and I knew I wanted a substantial 4-inch hem at the top and a 1-inch hem at the bottom, so I added an additional 7″ for those, resulting in 43″ in vertical length.
The fabric is 58″ wide, so I just needed to know how many sections of 43″ high fabric I would need to go the horizontal length of my counter. As it is I needed 2 1/2 sections of 58″ wide fabric. With this linen I may have been able to get away with less fabric since there really isn’t a pattern and I could have pieced the shorter section on the end, but the last thing I wanted was for it to look all wonky so I bit the bullet and got the 3.5 yards. And I just wasn’t sure how thick I wanted the pleats, so I got the extra just to be sure. I can always use spare linen for something!
If you like the thickness of my pleats, then multiple the length of your surface by 1.15. The linear length of my counter is 119″, and my counter skirt is 138″.
I sewed the sides together so that I had the 3- 54″ wide panels side by side and put a 4 inch hem on the top and an 1 inch hem on the bottom.
Then it was time for the Grommets.
For your convenience, this post contains affiliate links to products I use, love and highly recommend. If you purchase any product through this site, I may be compensated, but you do not pay one penny more. You can see my full disclosure policy here.
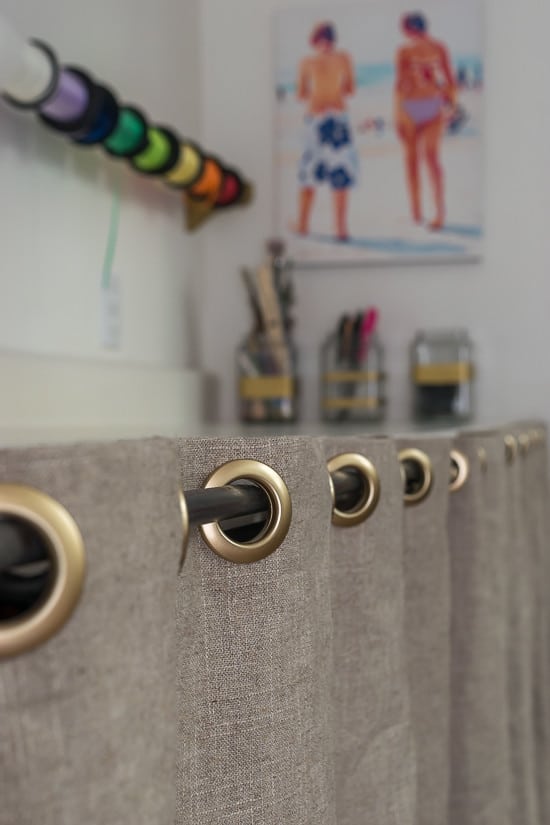
- Grommets
I used these grommets. Once again, not knowing how many pleats I was going to have, I purchased more than I needed. But by using the factor of 1.15 for the pleat thickness, I needed 28 grommets, spacing them 5″ apart. They come in packs of 8, so I only needed 4 packs.
I marked every 5 inches on the top of the skirt. Do a little math to make sure you aren’t going to have one end with 3.5″ at the end…know what I mean?
I placed the circle shape that came with the grommets so that the center of it was on top of the marks I made, traced the circle and then cut them out.
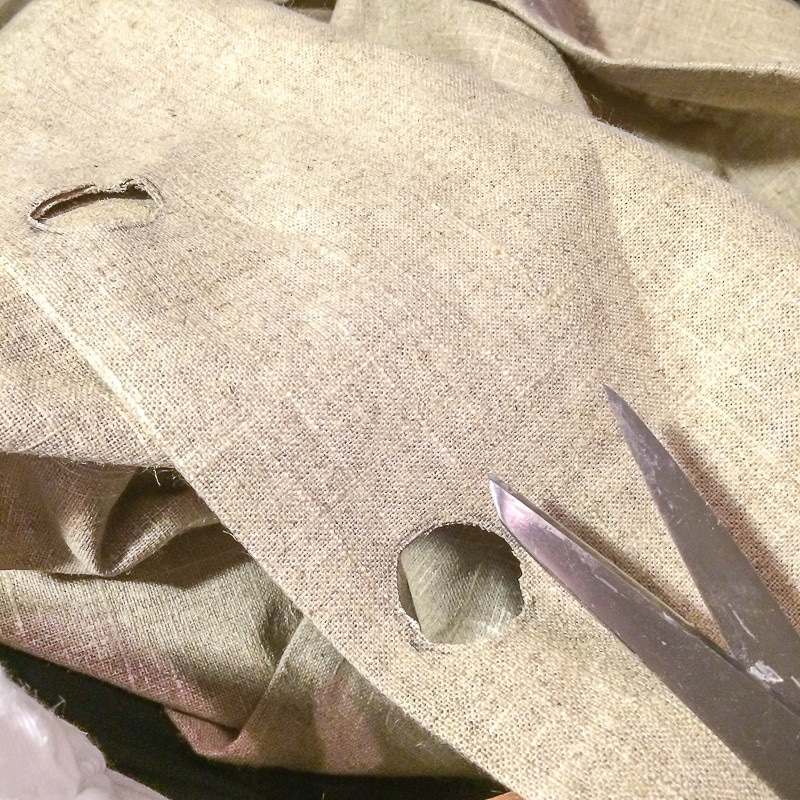
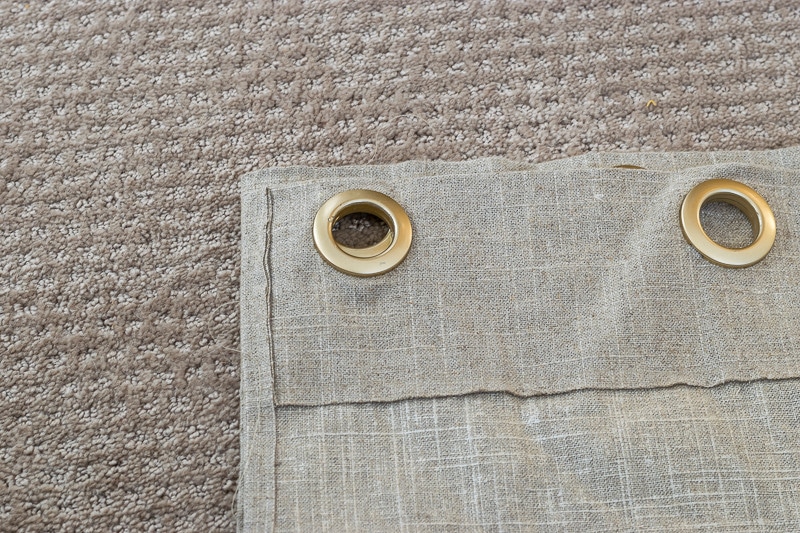
Then it was just a matter of placing the grommets (which come in 2 pieces) on both sides of the hole you cut. We placed the fabric with the 2 grommet pieces in place between 2 books and then gently tapped with a hammer to push the 2 halves of the grommet together.
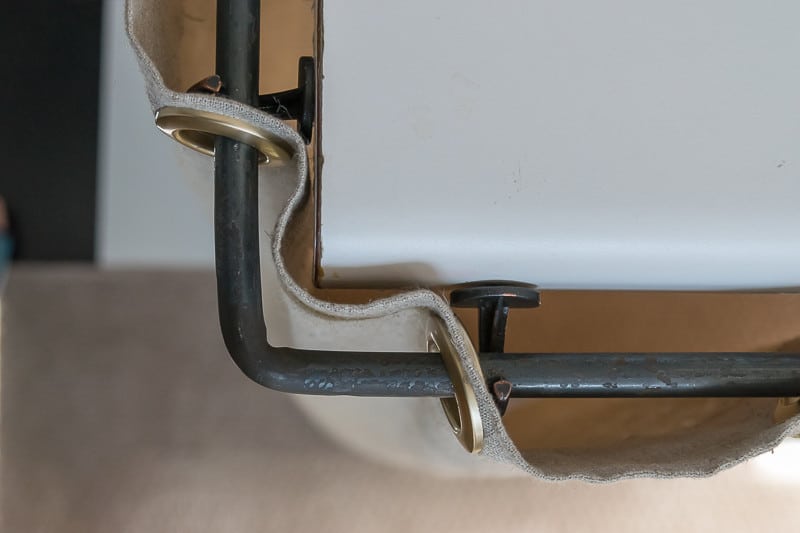
Now we were ready to put the hooks on the counter.
- Hooks
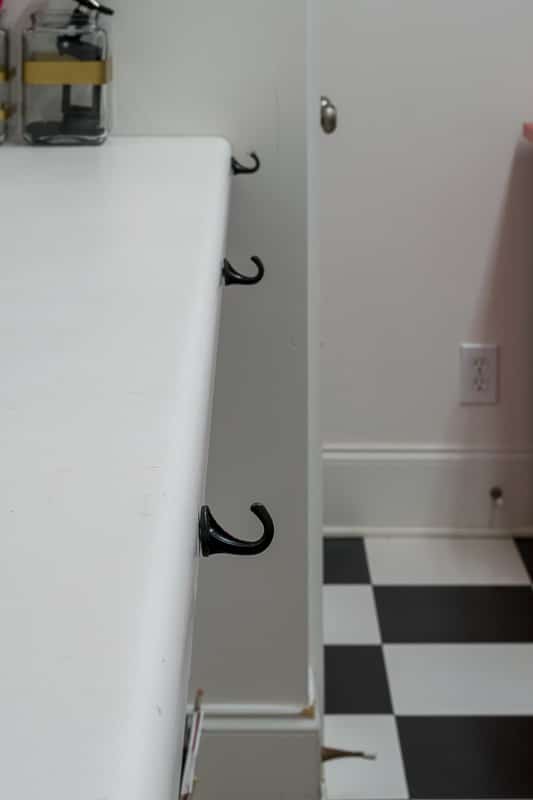
I used these hooks which I found at Home Depot. They come in packs of 2 and I needed 6 total, so 3 packs. They were originally bronze, but I spray-painted them black. This size worked perfectly for my 1/2″ thick rod.
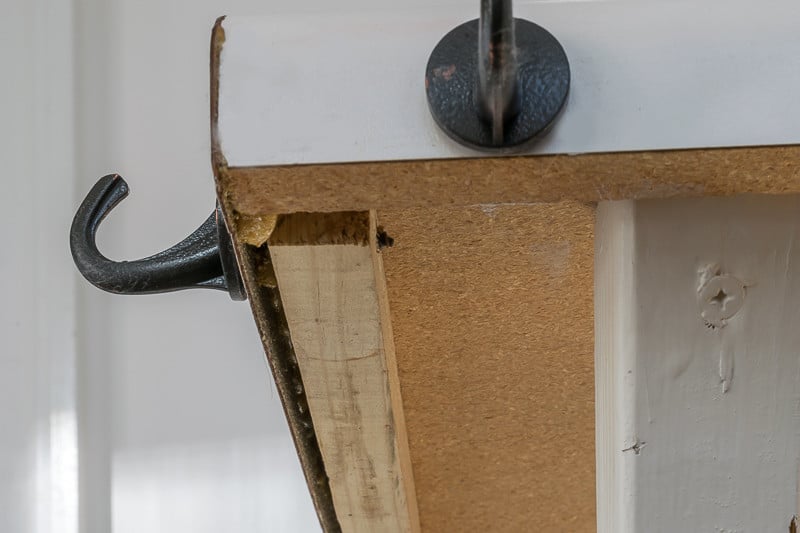
We drilled starter holes into the counter and then screwed the hooks in. On the rounded edge of the counter, there is a good 1/2″ of wood for the screw to embed in, but on the side, there was no wood. We (once again, Terry) glued a piece of wood to the underside so that the screw would have something to grab onto.
- Metal Rod
Because my counter has a corner that I needed to go around, this rod was the one element that took me the longest to noodle. I spent countless hours at Home Depot looking at all sorts of options, and there are many if you don’t need a bend in your rod. Ultimately, I called a local welding shop and had them bend a 1/2″ thick solid metal rod at a 90° angle.
(In case you’re wondering, I did figure in the weight of that rod as it relates to the hooks. Each hook can handle 95 lbs in wood and the rod was under 10 lbs)
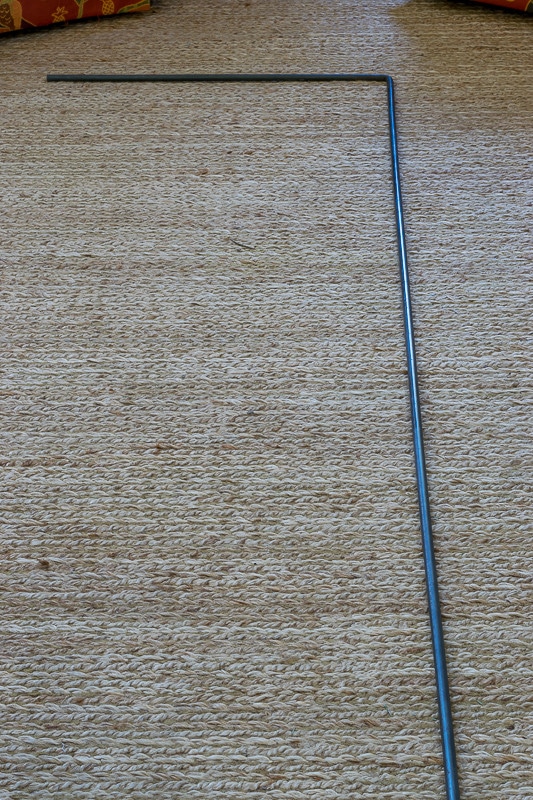
I needed the end product to be 8′ by 2′, but since the rod came in a 12′ section, I just had them bend it at 9′. This gave us some wiggle room to cut it exactly as we needed it when we got it home and lined up on the counter.
When measuring, bear in mind that your rod will not be right up against the counter, so figure in some space for the hooks and your corner.
Once all the pieces were in place, it was just a matter of threading the curtain on to the rod and placing it on my hooks. This counter skirt turned out better than I had hoped and was really easy, once I figured the rod part out.

Thanks so much for spending a few minutes of your busy day with me!
To ensure you don’t miss future content, pop your email in the pale green box on the right or click here. I usually send one email weekly, so I won’t inundate your inbox. I’m sensitive to an overflowing email inbox!
We will only use your email address to send you emails, no more than 1-2 weekly. In addition, you will have access to my growing library of knit & crochet patterns and other printables. Check back often as this library will continue to grow. You can unsubscribe anytime by emailing me or clicking on the “unsubscribe” link at the bottom of all emails.
And you can access many of the products I refer to on my Nourish and Nestle Amazon Page. You can access it here.
So, if you’d like to participate in the ‘subscriber benefit’ action, simply subscribe to Nourish and Nestle here or use the form on the right sidebar. It’s slightly towards the top.
I have sent all my subscribers the link to the Subscriber Benefits Library. If you missed it or misplaced it, let me know.
Until next time…


Seriously my friend! You are talented! I love the way your skirt turned out. It was sure brilliance to have a local metal shop bend the rod as you needed it. Perfect!
Aw thanks friend! I enjoyed making ‘friends’ with these old welders…two brothers…in their 60s-70s…overalls…the whole deal. But they did exactly what I needed.
Hope you are enjoying a great weekend.
Hugs, Lynn
This turned out so great, my friend! You think like Joanna Gaines about going to a welder to get the work done the right way. Love it!
What a compliment! Thanks my friend. It was a joy to work with these old guys!
Thanks for stopping to visit.
Hugs, LYnn
Looks amazing, Lynn! I love the texture of the linen.
Thanks Robin! I really love this skirt…especially that it makes all the stuff under the counter magically disappear!
These are a perfect solution for you! Also, I would love to see you write a post about all of those backdrops you have hiding behind there, I am dying to see them and know more!
I think so too! I love it…the way it looks and the way it covers everything!
Thanks for coming by my friend.
Hugs, Lynn
Lynn I am so glad you published this one. I was really curious to see how you got that look. It is really very glamorous with the grommets. Thank goodness for Terri’s help. But you came up with the idea.
That’s right! He is quite justly proud of his contribution, but I do have to reign him in and remind he that it was my idea afterall!?
This seriously looks so good! Love it!
Thanks Sara…it was one of those times when the finished product was actually as good as or better than what I had hoped it would look like. That doesn’t always happen. ?
This is a beautiful project, I am so inspired to do something similar in my craft room. I store all kinds of “junk” under my table that needs to be hidden.
Thanks Sarah…I am thrilled with it. And the hiding of ‘stuff’ is just the icing on the cake.
Wishing you a fantastic Valentine’s Day.
Hugs, Lynn
What a fabulous idea Lynn! I love the fabric that you used!! Perfect to hide all the goodies under your craft table!
Thanks Sam…I do love my skirt! It does the job so perfectly for me. I love when a project comes to fruition as I had hoped.
Wishing you a fantastic day.
Hugs, Lynn
Great idea! I am always looking for ways to hide my “stuff”!
Right?! Hiding stuff is a critical component of this skirt!
Thanks for swinging by Leanne!
Hugs, Lynn
This looks great! Love the grommets. What a genius way to hide the clutter underneath and dress up a plain old counter.
Thanks Emily! I pinch myself everytime I see it…And that it covers up stuff? Makes it all the more fantastic!
So glad you stopped by.
Hugs, Lynn
Beautiful linen skirt to hide your storage area! Where did you procure your linen fabric? Inquiring minds just have to know.
Hi Richard, I found the linen at our Fabric Solutions store here in Wilmington. Most of their fabrics are in the $10-15 per yard range. Do you have one in Charlotte?