As much as I do enjoy decorating seasonally and for the holidays, I also strive to make my decor work as long and as hard as possible. I’m not really keen on getting my house ready for fall, only to have to turn around and get it ready for Thanksgiving. What I do in the middle of September needs to work up until I take it down and decorate for Christmas.
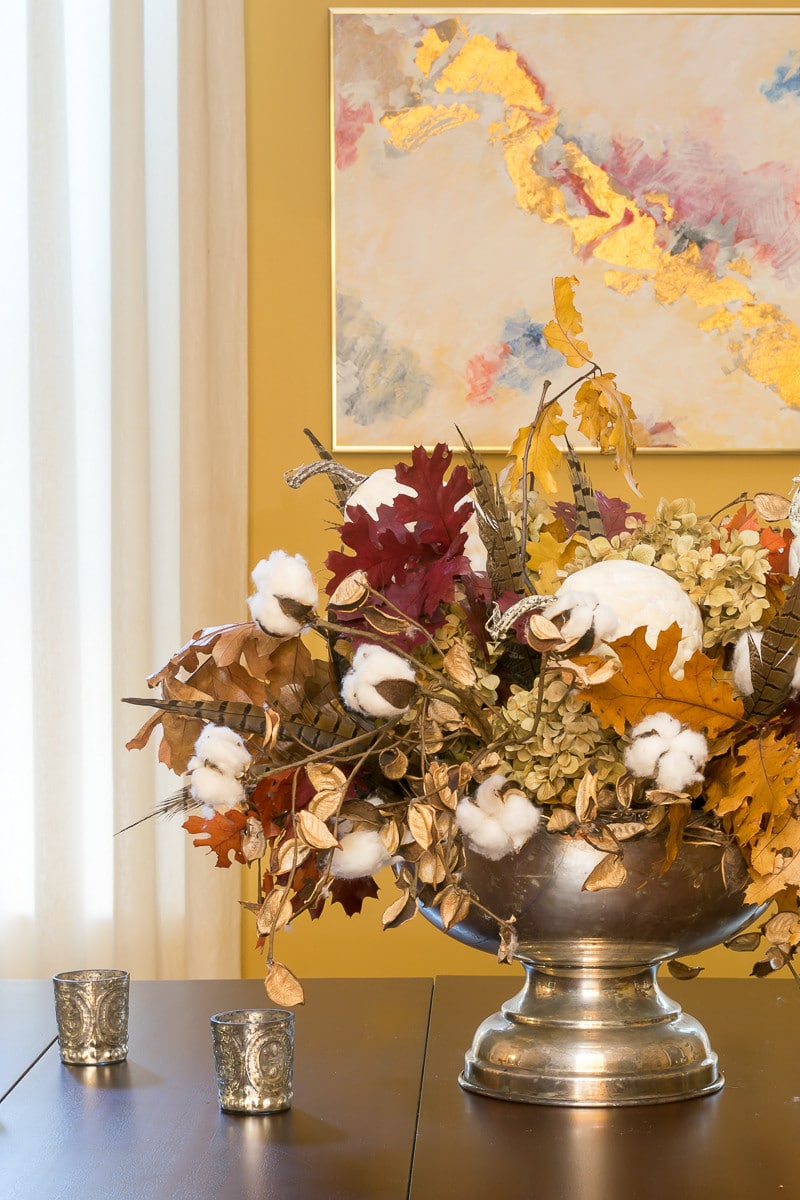
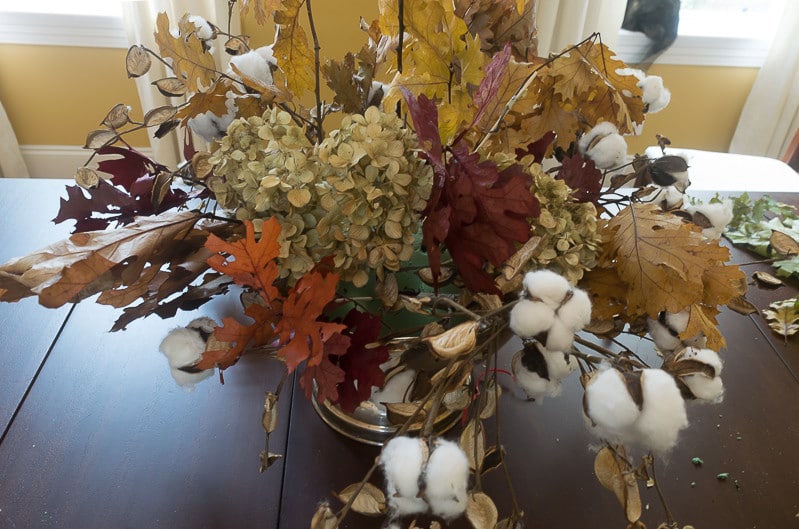
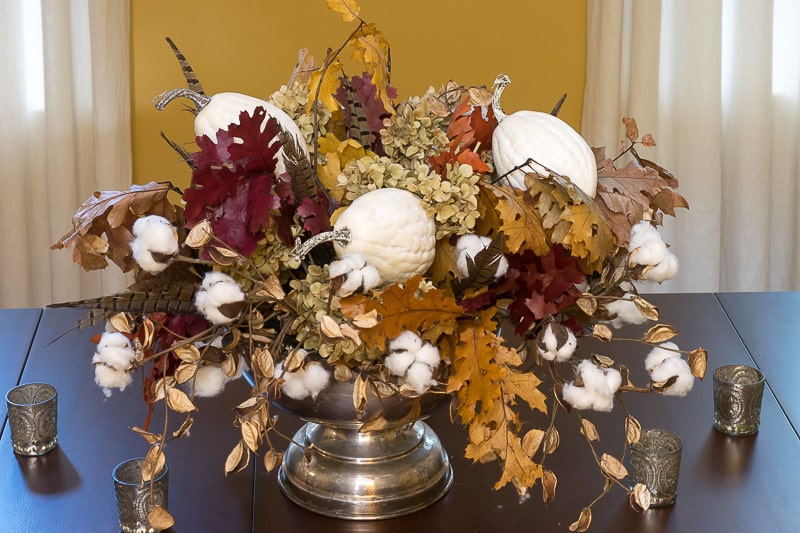
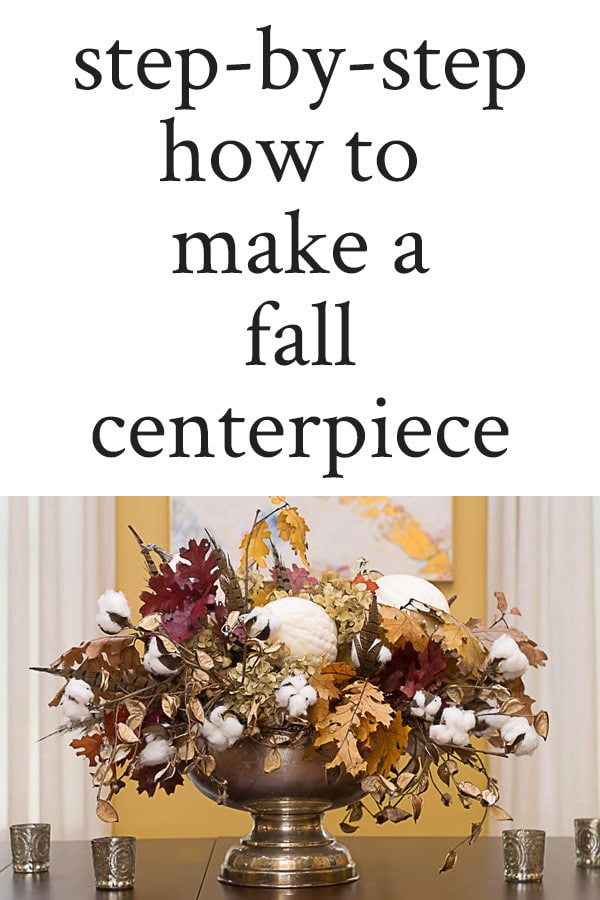
When it came time to put together a long-lasting fall centerpiece for my dining room table, I fell back to the ‘neutral and natural’ feel that I was channeling in the rest of our home. I picked up some more cotton branches and white gourds and was able to use some branches, dried hydrangea, and feathers that were already up in my attic.
Table of Contents
This loose and free-flowing fall centerpiece came together easily…here’s the step by step process I used.
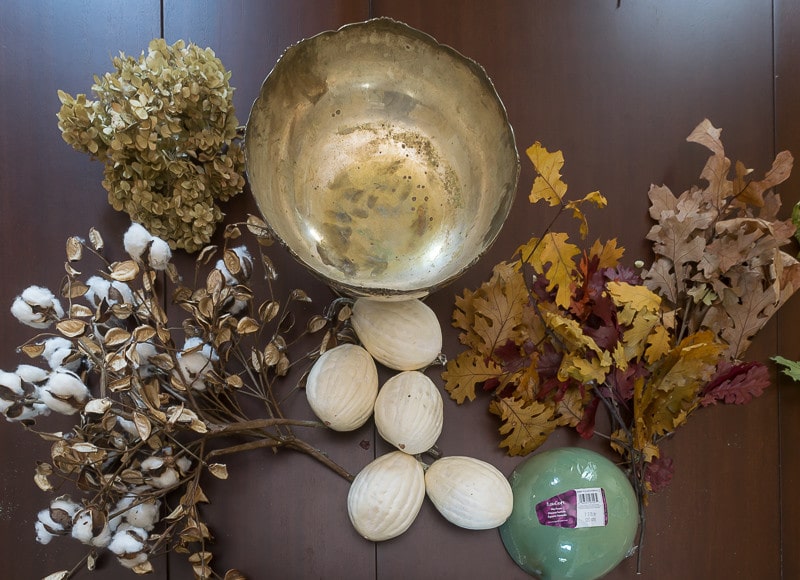
What I Used for my Fall Centerpiece
My mom’s silver plate punch bowl, circa 1950 (it’s one of my most favorite things!)
If you can’t find what you need, Michaels will have supplies for most every crafting need under the sun. You can order online here and have it shipped or you can pick it up at your convenience.
How I Made my Fall Centerpiece:
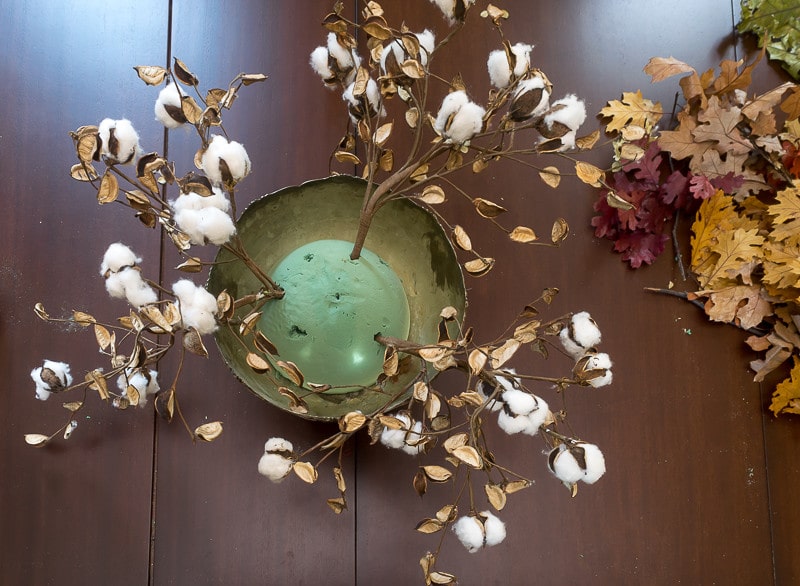
After placing the foam dome in the punchbowl, I began with what I consider the ‘bones’ of the centerpiece…the biggest structural elements. In this case that would be the cotton branches. I placed them equally spaced around the base of the foam and separated and adjusted the branches such that they reached different heights around the base.
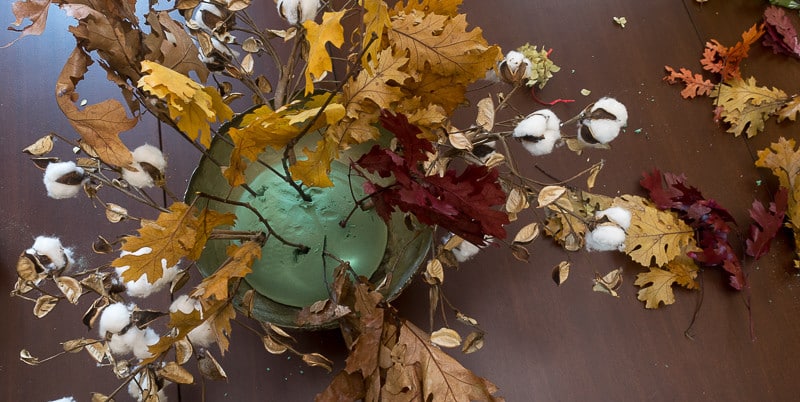
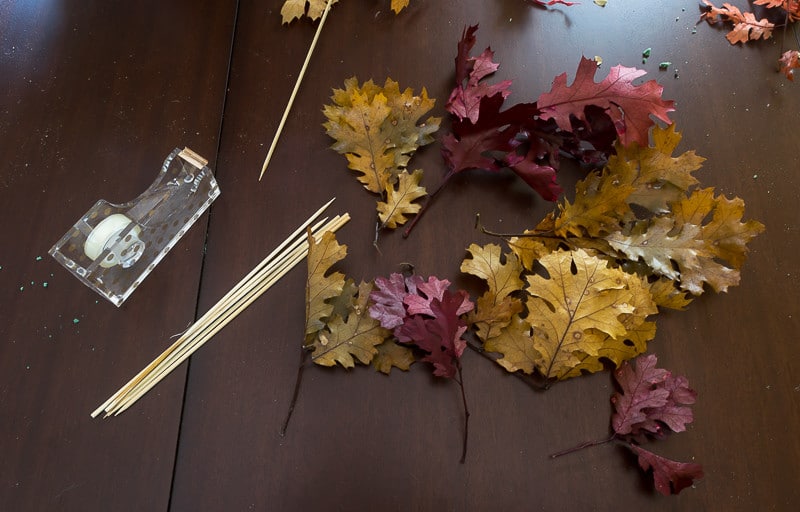
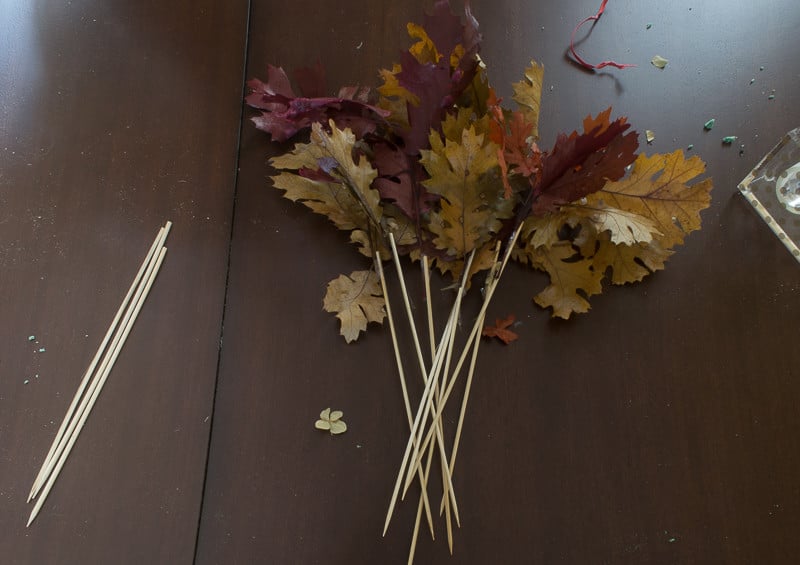
Next, I placed the branches of leaves…the next biggest structural element. I filled in the spaces between the cotton branches. In trimming the branches, I ended up with quite a few shorter ‘sprigs’. I taped those sprigs to the bamboo skewers to give them some of the height I needed.
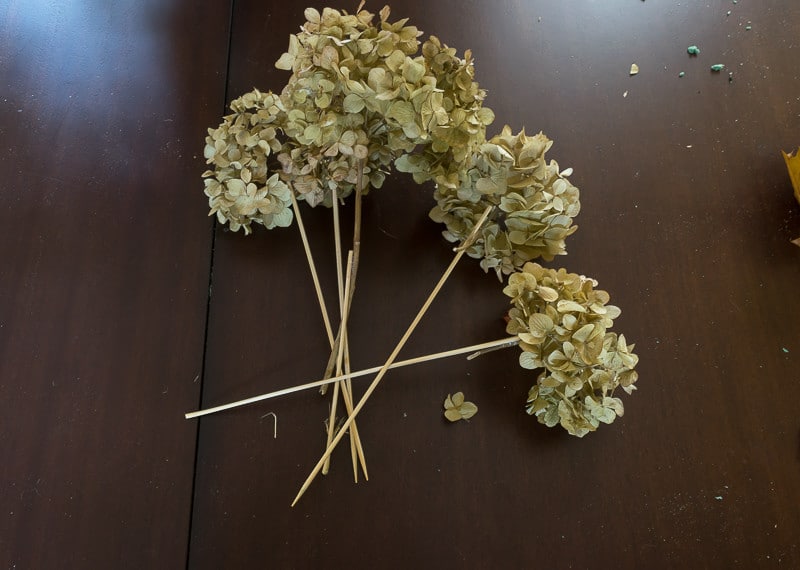
Then it was time for the ‘fluff’ of the hydrangeas. Once again, I extended the height of some of my hydrangea bunches by taping them onto the bamboo skewers.
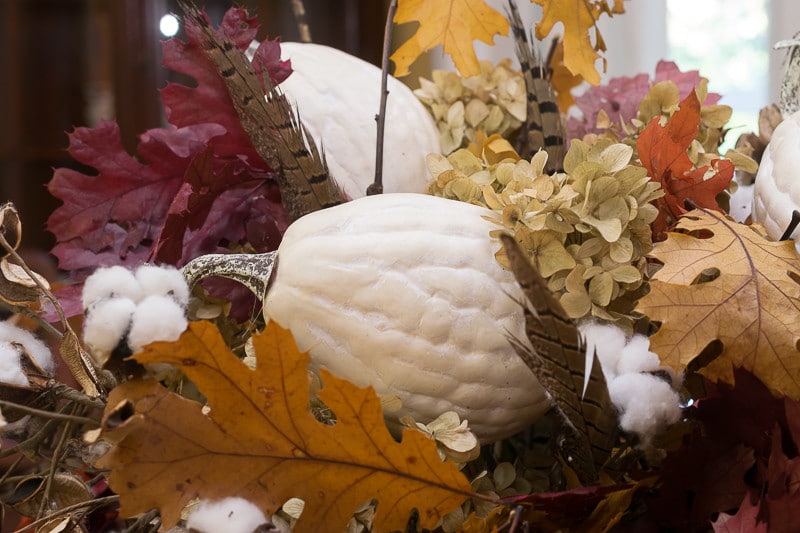
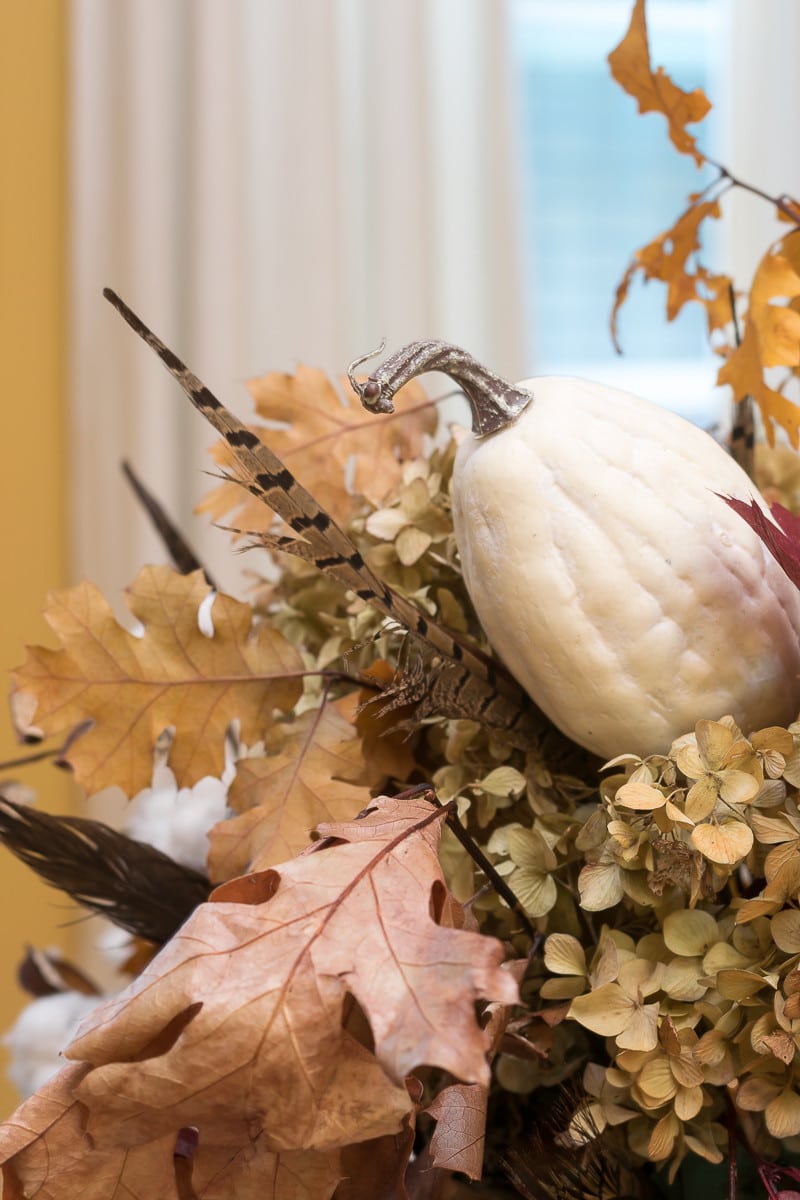
The next element, the focal point, are the white gourds. I poked the skewers in random places around the gourds so that they presented at different angles.
These gourds are foam, but I would imagine that with smaller vegetables you could do the same thing with fresh ones.
At the last minute, I decided to poke a few feathers that I had in my closet into this fall arrangement. They just add just some subtle texture.
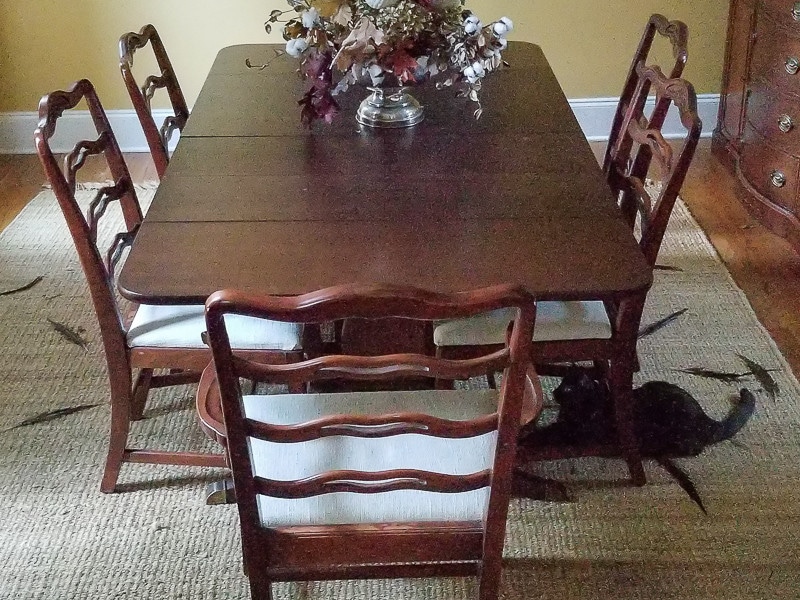
So I put this together last week before I headed out of town for girl’s weekend. When I came home yesterday, this is what I saw when I walked through the dining room.
In my absence, Peep the kitten had gone through and removed every single feather in the arrangement and scattered them across the floor. I will put them back in and I’m tempted to set up a video camera to watch her process of removing them!
Bookmark this page or pin this image for your future reference.
Thanks again for spending a few minutes of your busy day with me today. Know that you are appreciated and that I welcome each and every comment that comes my way. If you want to make sure you don’t miss future content, pop your email in the beige box up on the right or click here. I usually send out 2-3 emails a week, so I won’t inundate your inbox…believe me, I’m sensitive to an overflowing email inbox!
Printables and knit patterns are available to all of my subscribers in the Subscriber Benefits Library. I will continue to add patterns and printables to this page as we go along.
So, if you’d like to get in on the ‘subscriber benefit’ action, simply subscribe to Nourish and Nestle using the form on the right sidebar. It’s towards the top a bit. I have sent all my subscribers the link to the Subscriber Benefits Library, but if you missed it or misplaced it, drop me a line.
So Pretty – I love how you made the picks, very outside the box thinking. Pick machines are expensive!! We have cotton fields around our land and I just love it, thinking about asking for a few stems before this one field gets harvests to I can make a wreath. Or maybe I’ll just wait till after they harvest and clean up the edges. You nailed this one, love bringing the outdoors inside… Very inviting!
That is so funny what peep did!! Our cat would do the same for sure!!
A beautiful centrepiece Lynn with lovely Fall tones! Your mum’s punch bowl is outta this world cool too!!
I remember when I first saw something like this in my uncles home. I was drawn to it by the splendid scent and now with this tutorial, I think I can make mine.
Thanks so much for making this centerpiece Lynn. I’ll like to ask just one question. You listed tape as part of the materials you used, is it any tape? Can I use painter’s tape?
Also, you didn’t provide a link to the others aside from the dried fall leaves and the Florist Foam dome. Thanks
Charlice, please forgive me for being so tardy in responding! Somehow you got sent to the dreaded ‘spam’ folder.
I did just go in and add links for everything, not sure why I didn’t do that before. I don’t think I’d use painter’s tape as it will most likely show in your finished arrangement.
And there is no doubt that you could do this! Have fun and come back and share your finished arrangement.


So Pretty – I love how you made the picks, very outside the box thinking. Pick machines are expensive!! We have cotton fields around our land and I just love it, thinking about asking for a few stems before this one field gets harvests to I can make a wreath. Or maybe I’ll just wait till after they harvest and clean up the edges. You nailed this one, love bringing the outdoors inside… Very inviting!
This turned out so pretty! I love the natural look with cotton and gourds.
Our cat is about 6 years old and she totally would have shredded that arrangement. When we have fresh flowers I put them in the pantry at night. 🙂
That is so funny what peep did!! Our cat would do the same for sure!!
A beautiful centrepiece Lynn with lovely Fall tones! Your mum’s punch bowl is outta this world cool too!!
I remember when I first saw something like this in my uncles home. I was drawn to it by the splendid scent and now with this tutorial, I think I can make mine.
Thanks so much for making this centerpiece Lynn. I’ll like to ask just one question. You listed tape as part of the materials you used, is it any tape? Can I use painter’s tape?
Also, you didn’t provide a link to the others aside from the dried fall leaves and the Florist Foam dome. Thanks
Charlice, please forgive me for being so tardy in responding! Somehow you got sent to the dreaded ‘spam’ folder.
I did just go in and add links for everything, not sure why I didn’t do that before. I don’t think I’d use painter’s tape as it will most likely show in your finished arrangement.
And there is no doubt that you could do this! Have fun and come back and share your finished arrangement.
Many hugs my friend and have a great day.
Lynn