DIY Macramé Wire Votive Holder


Written and illustrated instructions and a video showing how to make a lovely beaded DIY macramé wire votive holder. If you are new to square knots, don’t let that deter you! I show step by step how to tie a square knot.
Now, this was a fun little project! I haven’t macraméd in…well, let’s just say it’s been a while! But the little creative angel who sits on my shoulder whispered this idea into my head, and I am so glad she did!
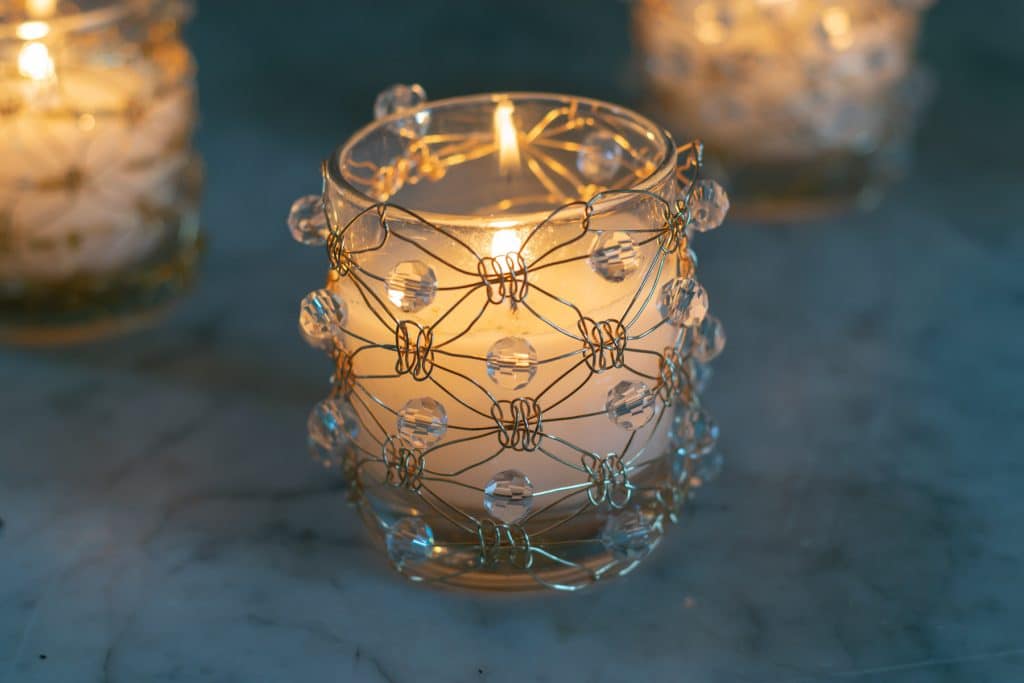
Surely you could macramé some of these festive and sparkly votive holders for your own use; I think they’ll be especially lovely adorning a Christmas mantel or as an element of a shimmery dining room table setting. But, what a splendid little gift they would make as well! This DIY macramé wire votive holder is a handmade gift that doesn’t scream ‘DIY.’

Table of Contents
(p.s. If you want to see some other Handmade Gifts that Don’t Scream ‘DIY!!!’, I’ve got quite an assortment for you. Pop on Over!)
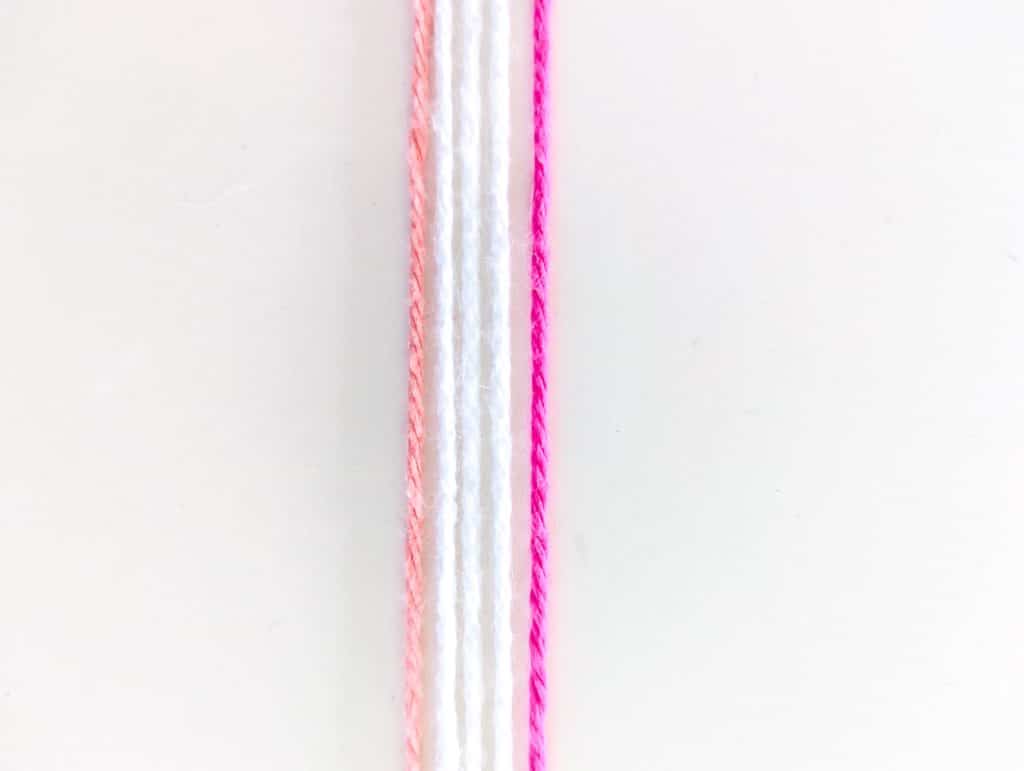
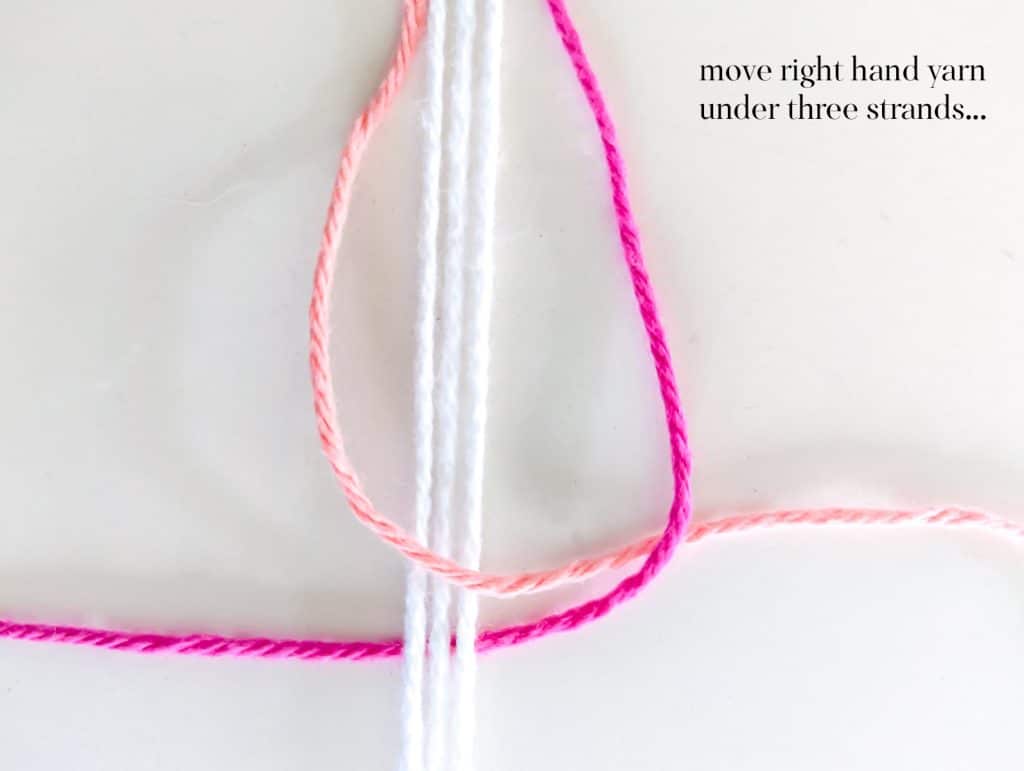
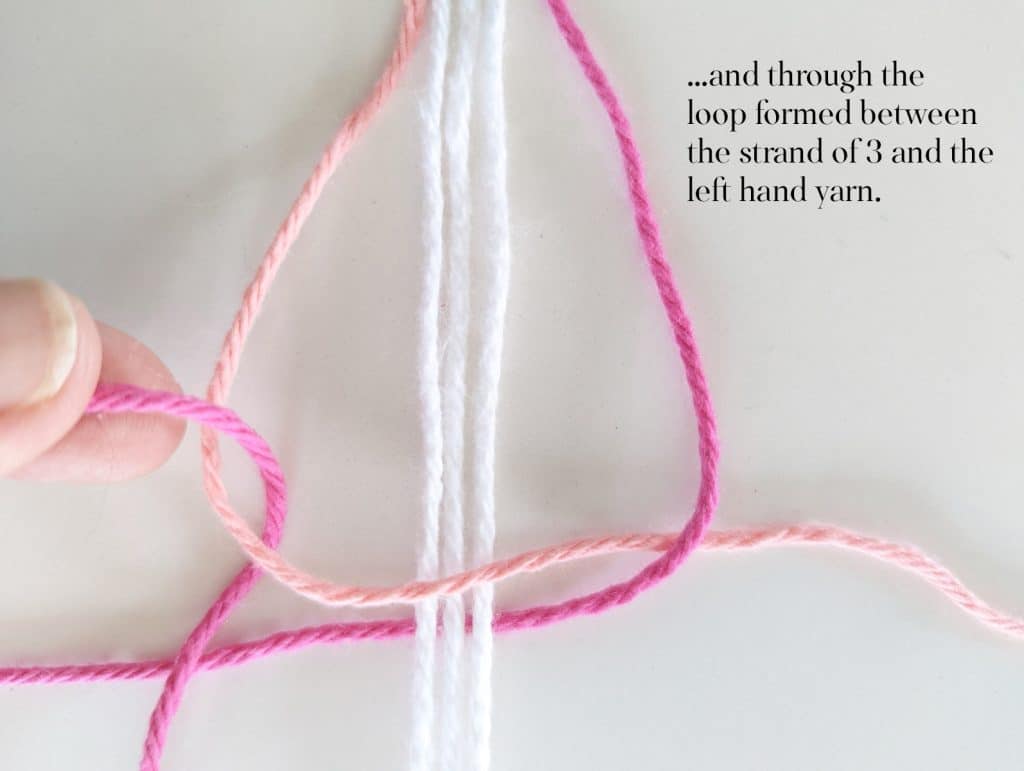
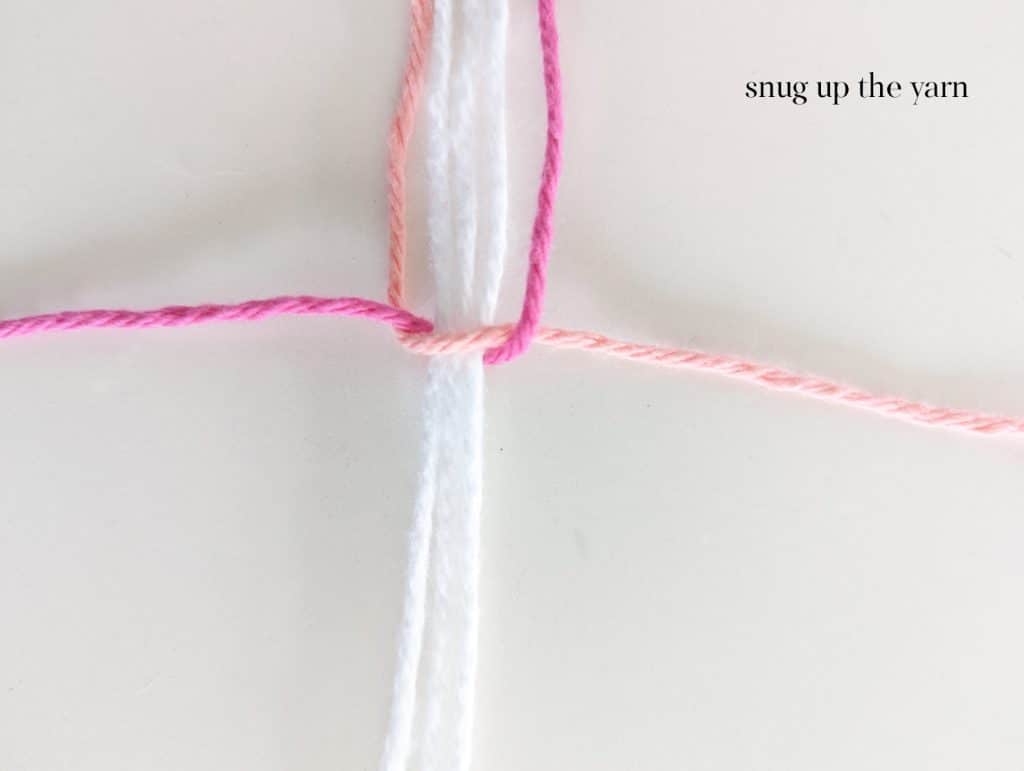
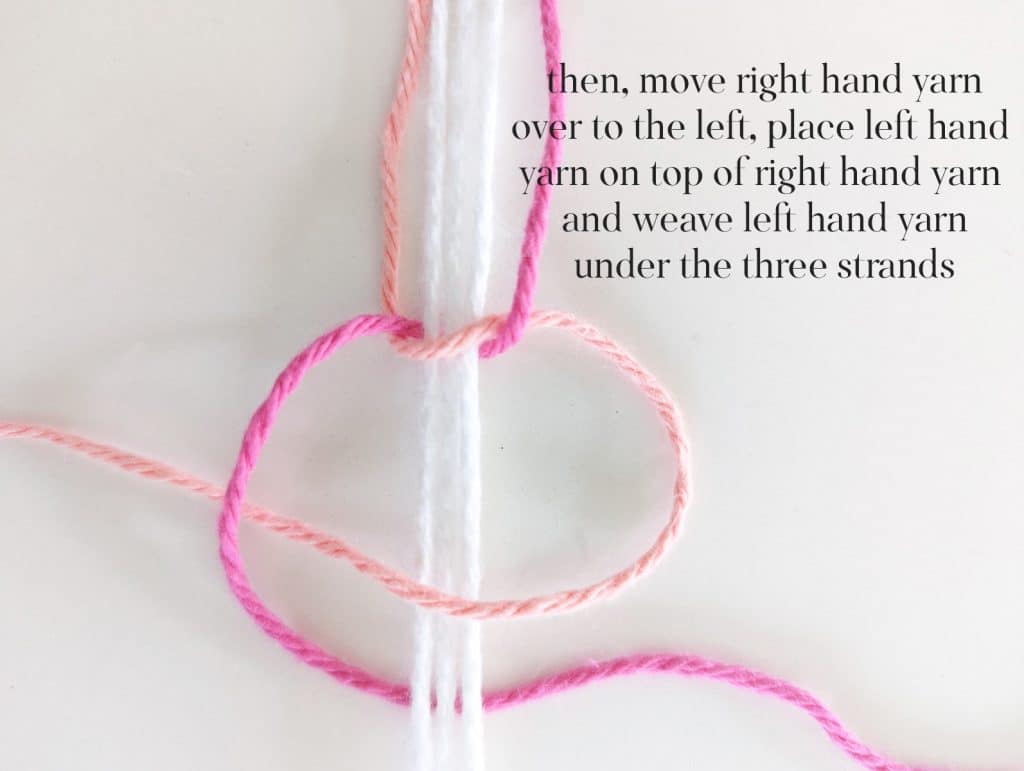
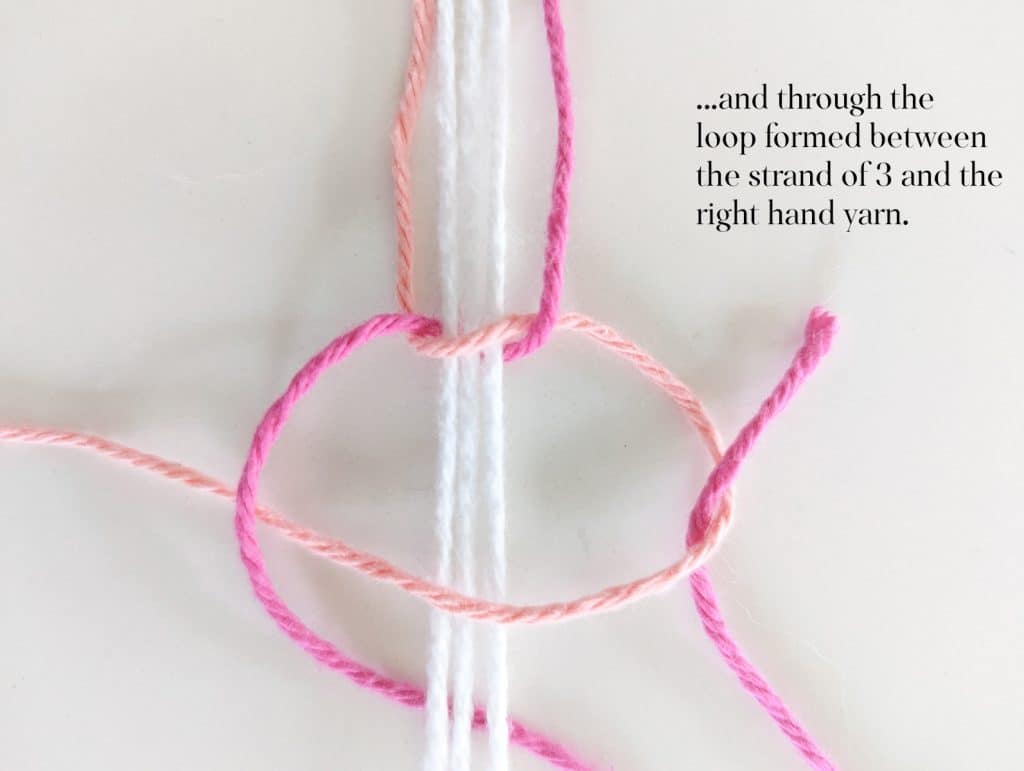
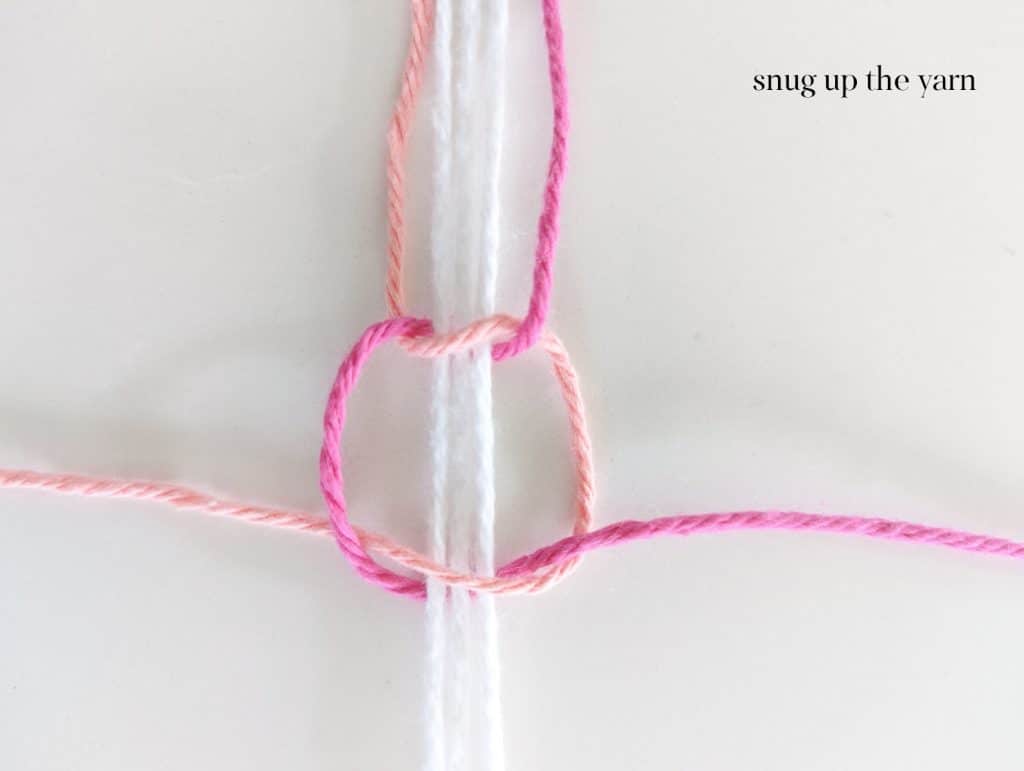
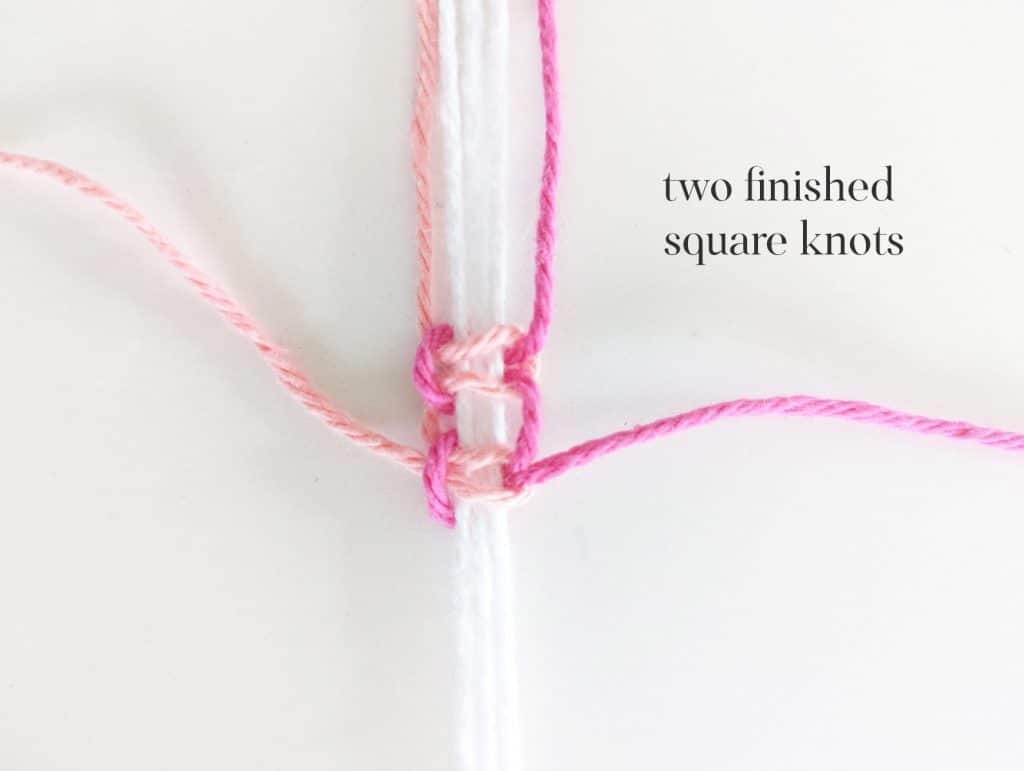
If it’s been forever and a year since you were a scout tying square knots, not to worry! I’ve got you covered with this illustrated step-by-step. I show three strands of white in the middle to mirror what we will do with the macramé wires when we start working on them.
How to Tie a Square Knot
You will tie many square knots to make this DIY Macramé Wire Votive Holder; you want to be comfortable with tying this knot.
If you are unfamiliar with tying square knots, here’s an illustration. I show the process in the video and images below, but it is easier to see with two different colors of yarn than with the wire.


are you a visual learner?
I gotcha! Watch this video to see all the steps. You can pin it to your Pinterest Board to be able to easily refer to it in the future.
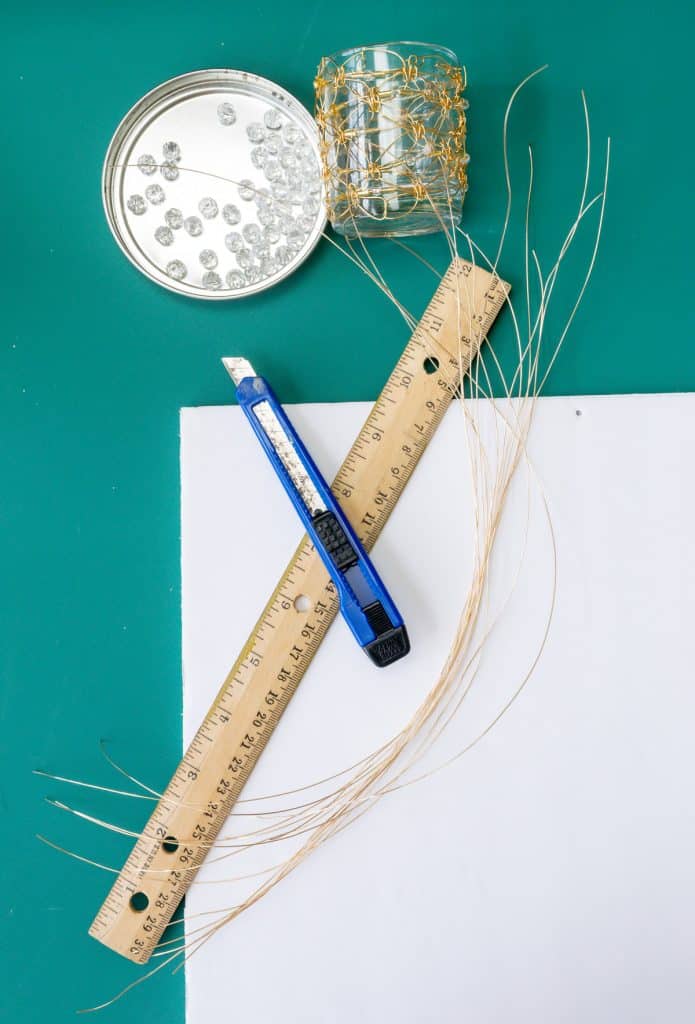
Supplies and Materials Needed to Make a DIY Macramé Wire Votive Holder
Some of these links may be Amazon affiliate links and I may earn a small commission from the sale of these products to help defray the costs of operating this site, but the price you are charged is not affected. You can see my full disclosure policy here.
The material and sizes here will produce a wire votive holder that is approximately 2.75″ high and 7″ to 7.5″ long. This will cover a 2.5″ high votive with a circumference of 6.5″.
- Glass votive (2.5″ high votive with a 2″ diameter)
- 24-gauge wire (28.3 feet of wire) Seventeen pieces, cut into 20″ lengths. This specific spool of wire would create three Macramé Wire Votive Holders.
- Beads – approximately 30 for this size votive. My beads are approximately 8mm, but use whatever size you want. You get a sense of what the 8mm look like in my pictures.
- Macramé board or foam core
- Scissors
- Ruler
- Tape
- Razor to slice into foam core (if you will be making your macramé board)
- Painters tape or masking tape and something stronger, like packing tape
- Tweezers
If you don’t have a macramé board, you can make your own with a piece of foam core. For ease of use, make the foam core several inches shorter than the length of the wire. In this case, my foam core is 11″ long, while my wire is 20″ long.
Cut seven slits at the top of your piece of foam core, in the middle. The slits should be 1/2″ apart from each other and 1/2″ long. Place a piece of tape under the 1/2″ cuts so that the wire doesn’t cut into the foam core.
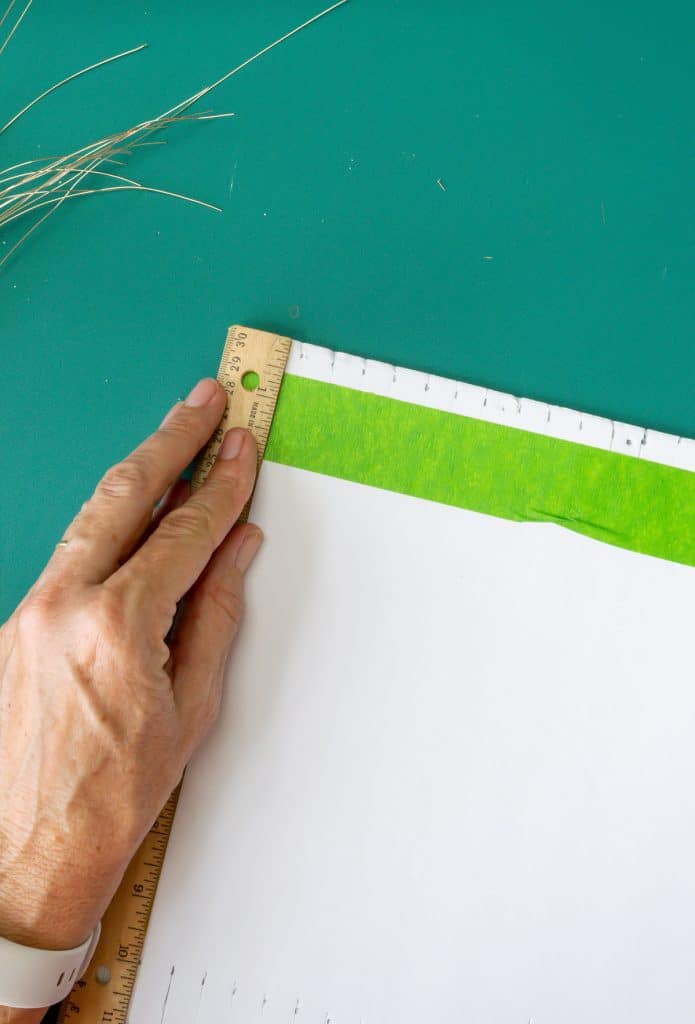
Cut similar slits at the bottom so that you can ‘tuck’ the wire in to keep it out of the way as necessary.
How to Make the DIY Macramé Wire Votive Holder
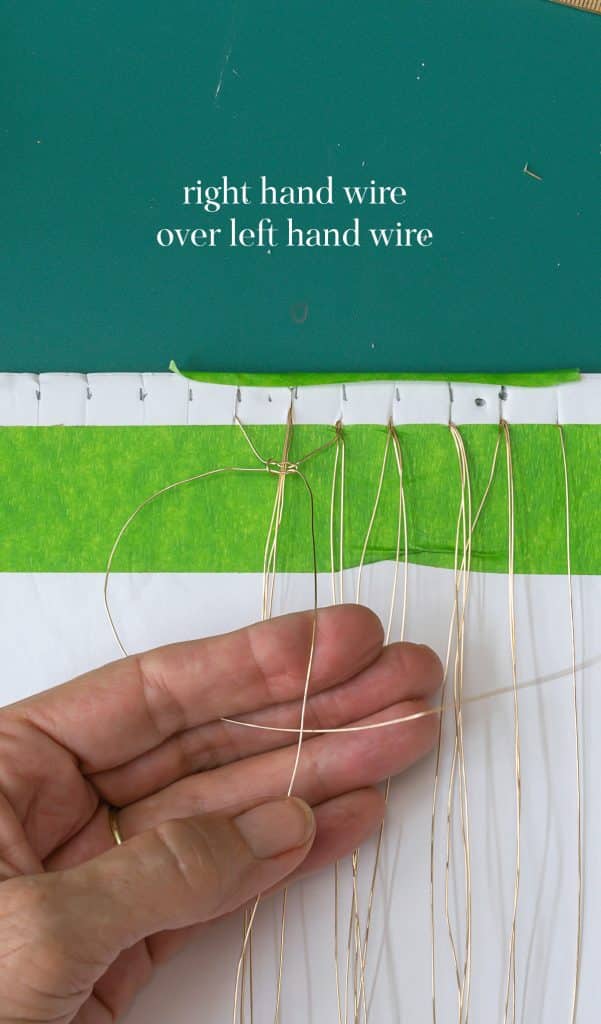
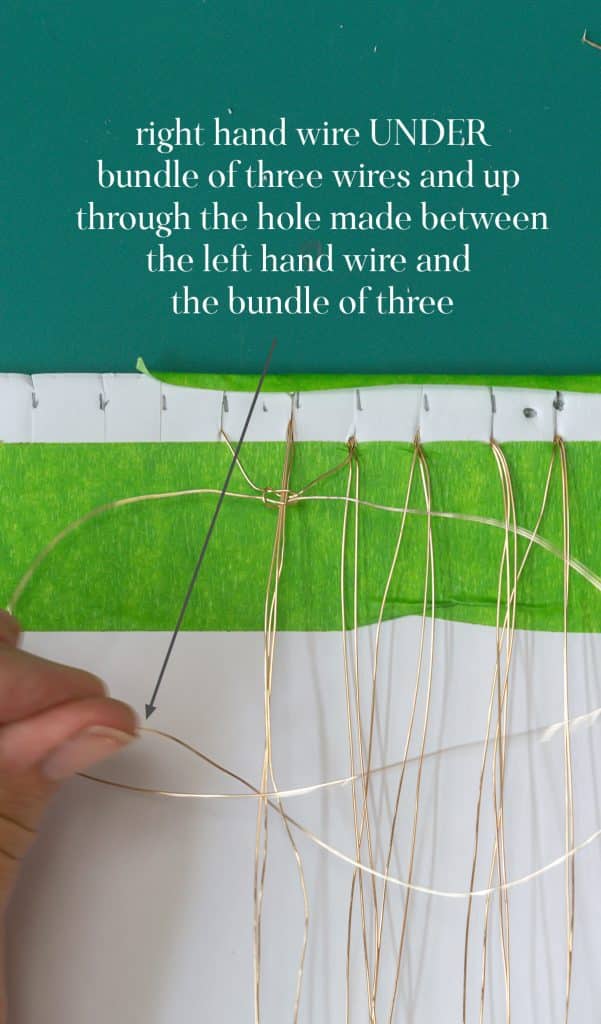
Work three sets of square knots
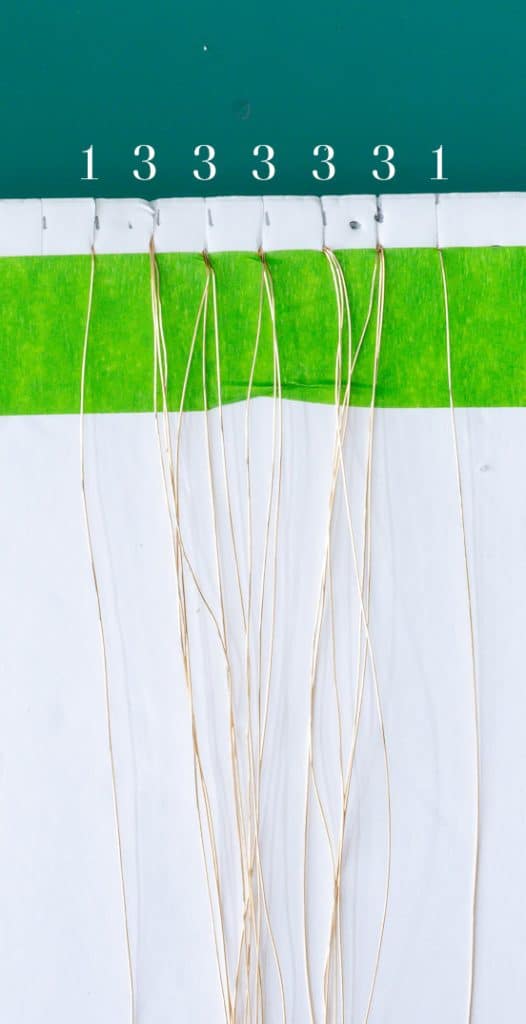
Place one wire in the first of the seven slots, three wires in the next five slots, then one more wire in the last slot…a total of seventeen wires.


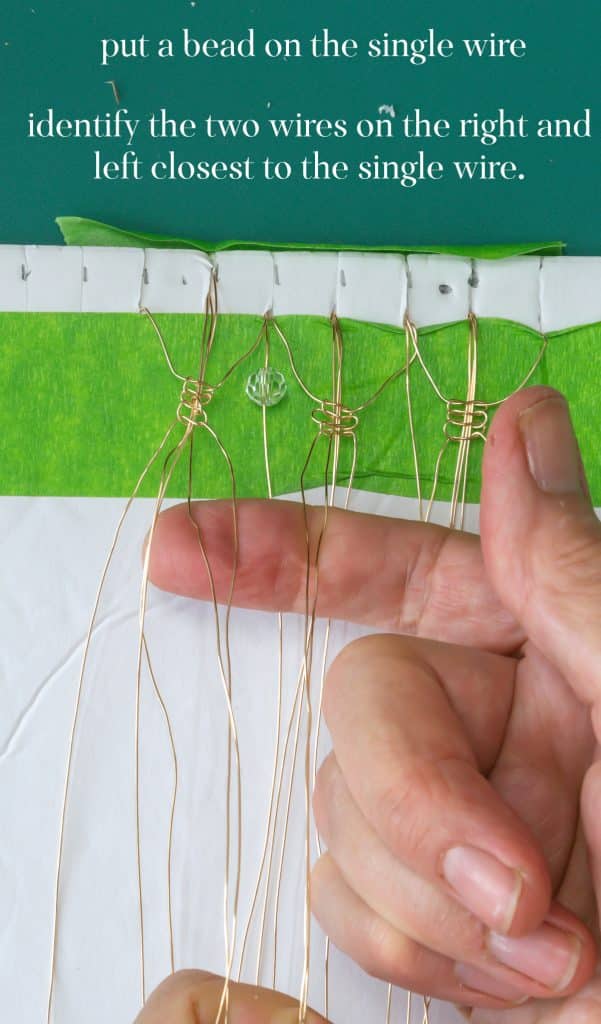
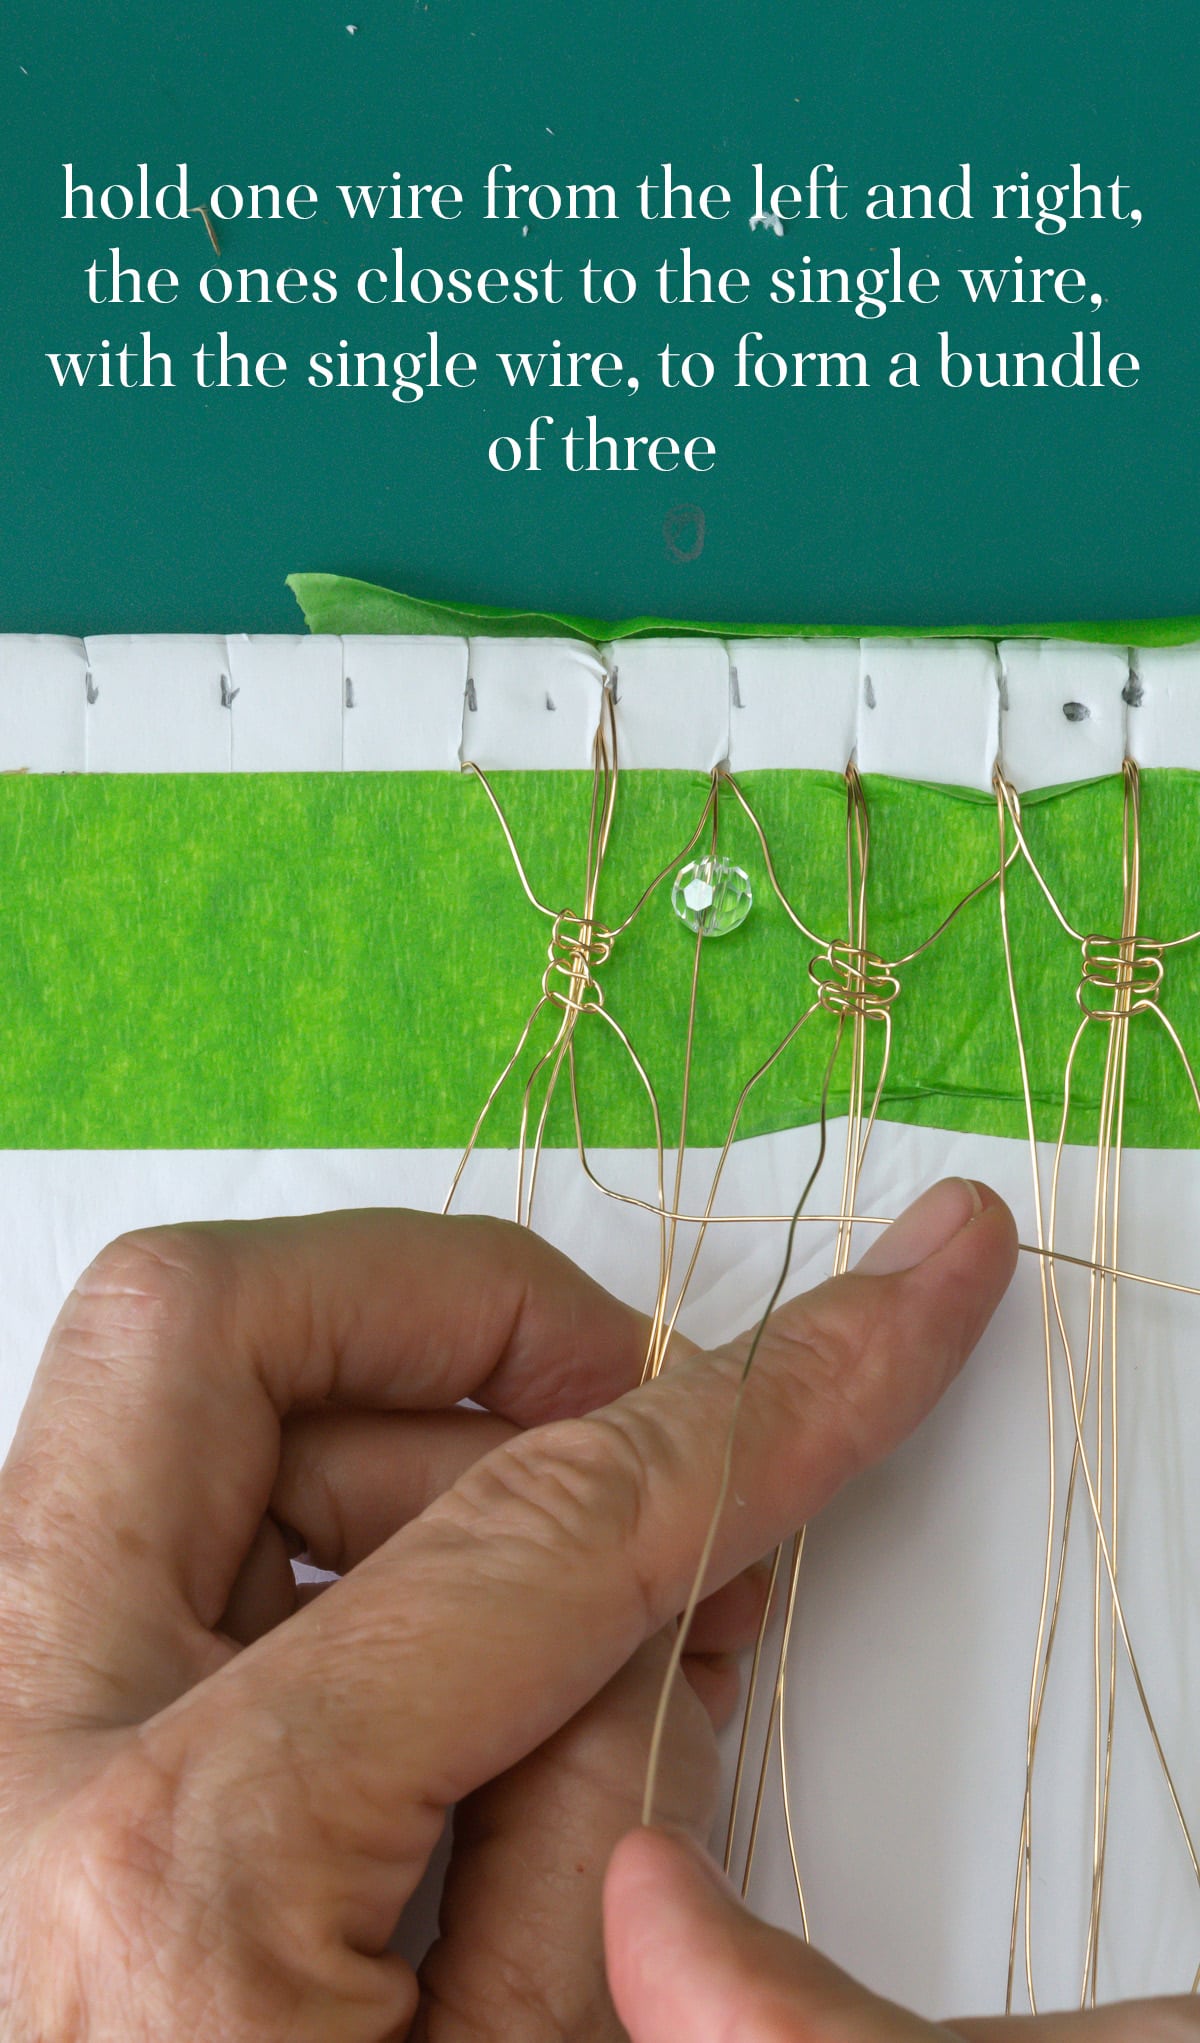
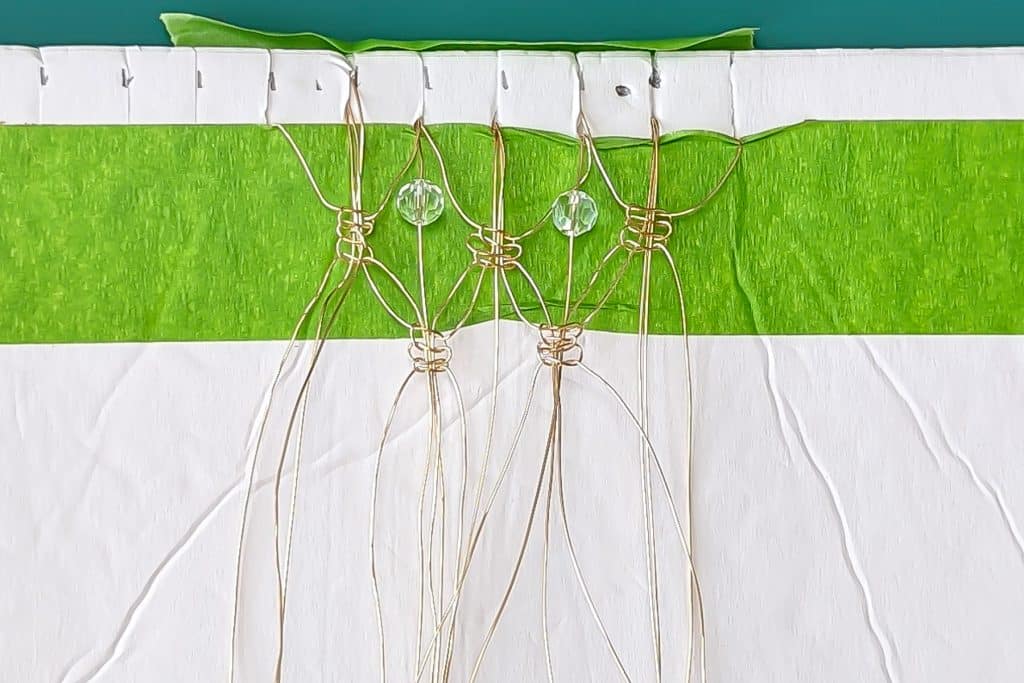
Then Add the Beads to the Single Wires
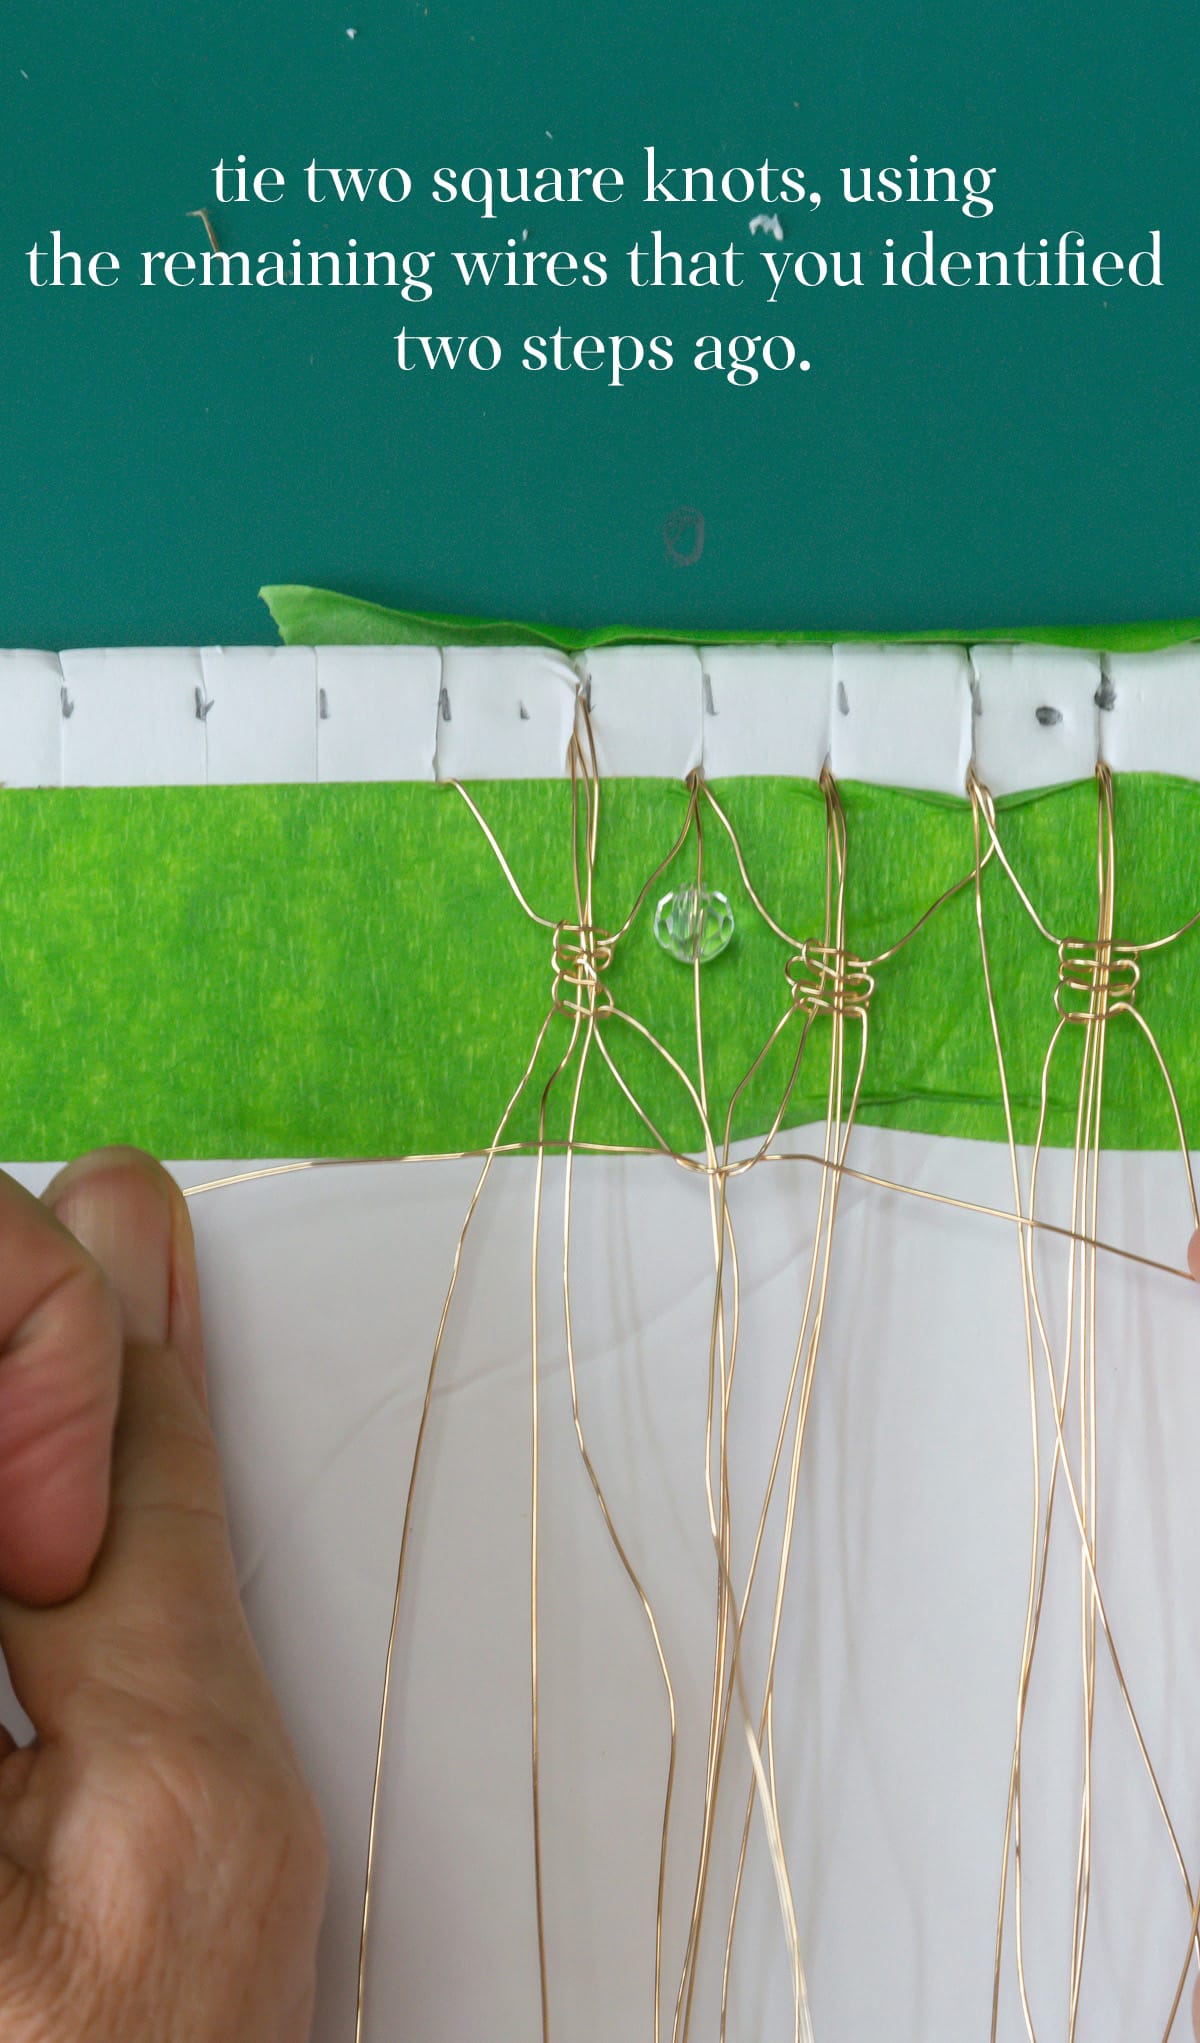
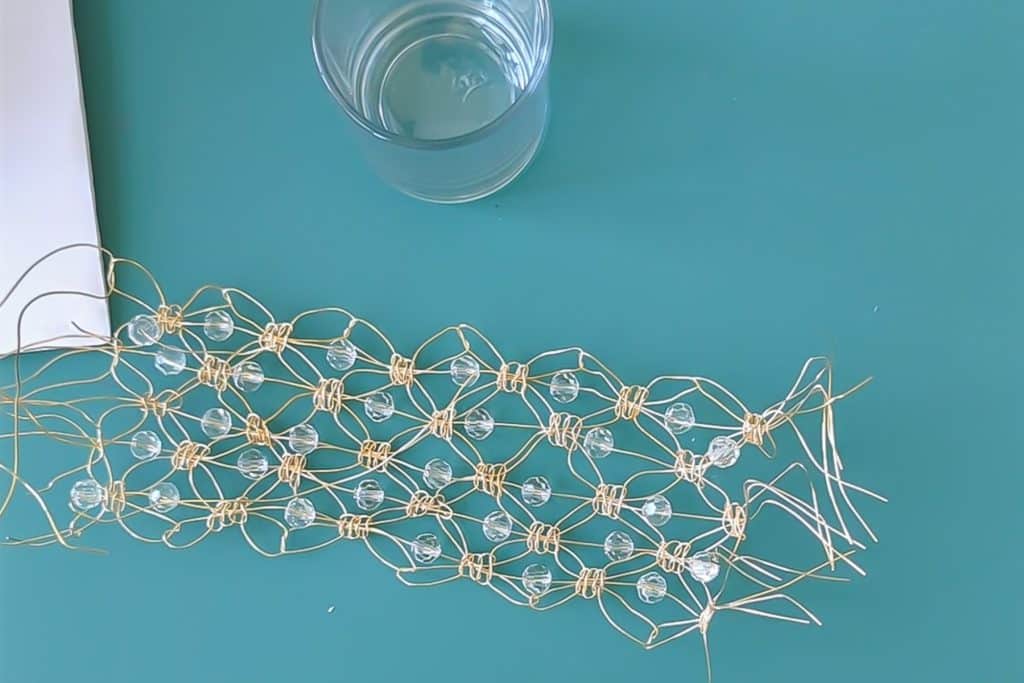
After tying the square knots under your beads, your wire macramé should look like this ⬇
On this row, we will tie half-hitches on the outside and more square knots inside

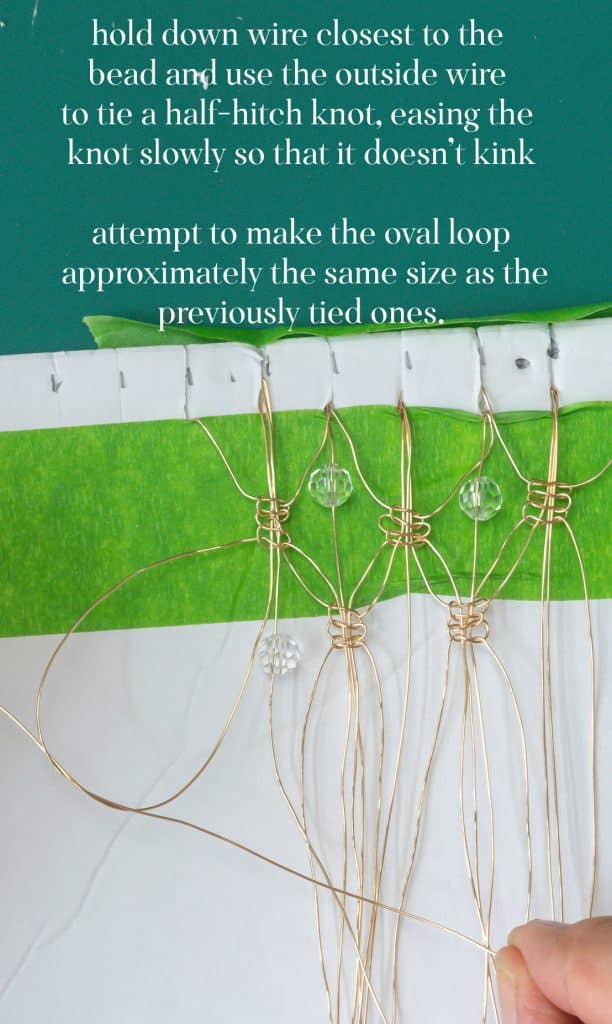

At the end of this row, your beaded wire macramé should look like this ⬇
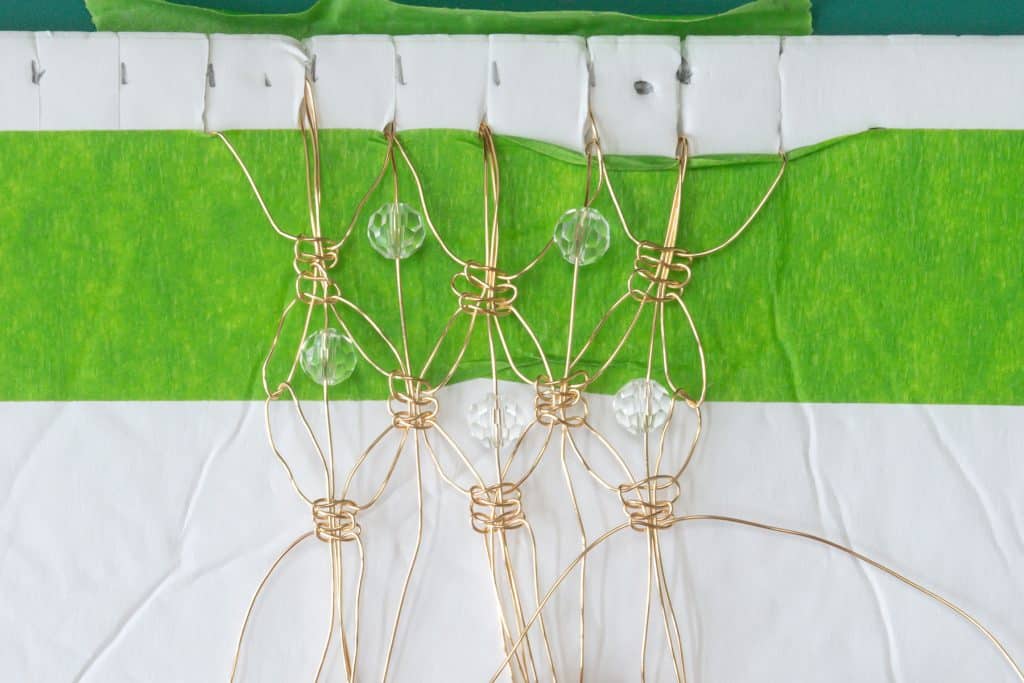
Stay in this pattern
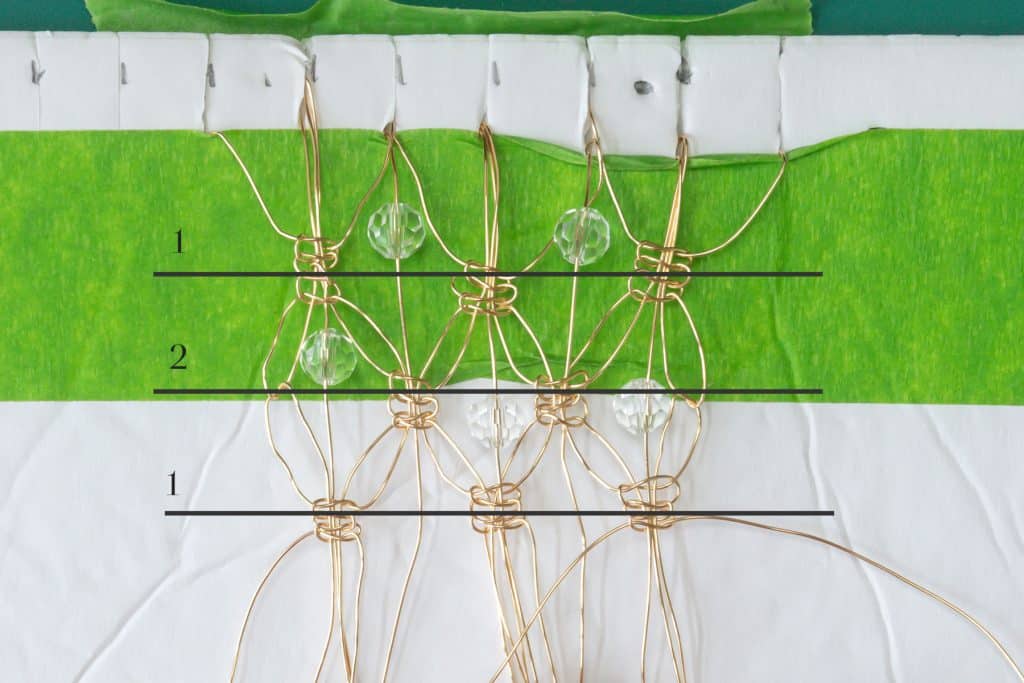
You will continue working your beaded wire macramé, alternating rows 1 and 2 until your work measures between 7″ and 7.5″.
Take your beaded wire macramé off of your board
Tape the macramé to the glass votive
I used two pieces of sturdy packing tape to secure the wire macramé to the votive.
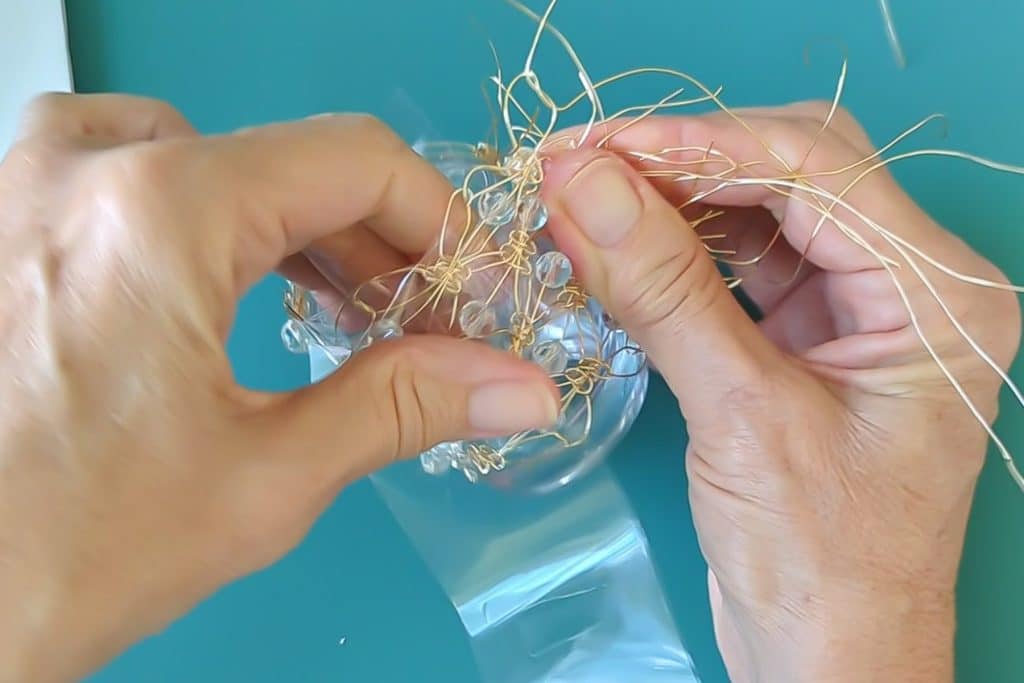
Twist the ends to close the beaded wire macramé snugly around the votive
You will have the same number of ‘loose ends’ on each side of your macramé. Line them up as much as possible and twist them to close your work. Feel free to add a bead where needed.
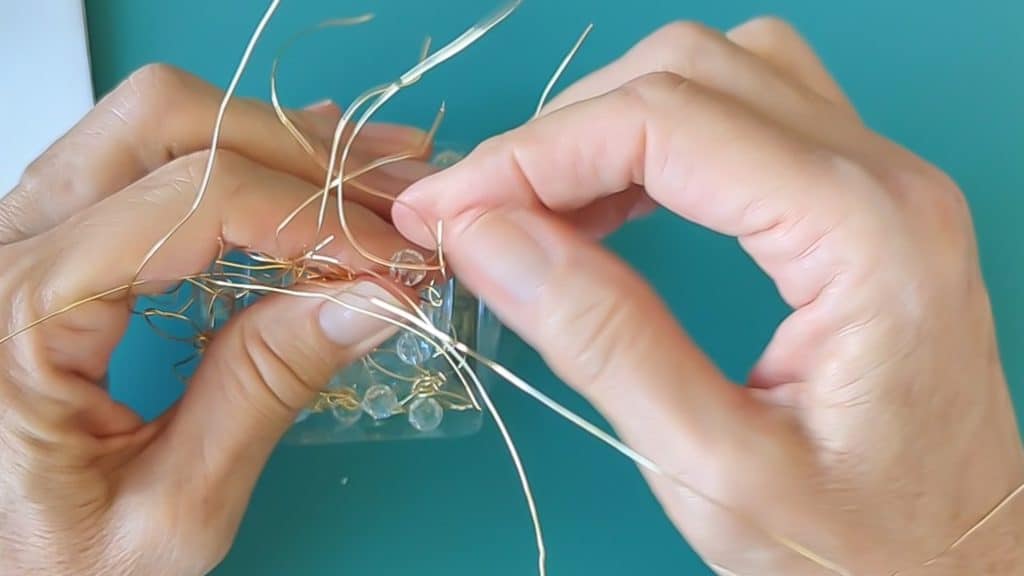
Snip any long ends with your scissors.
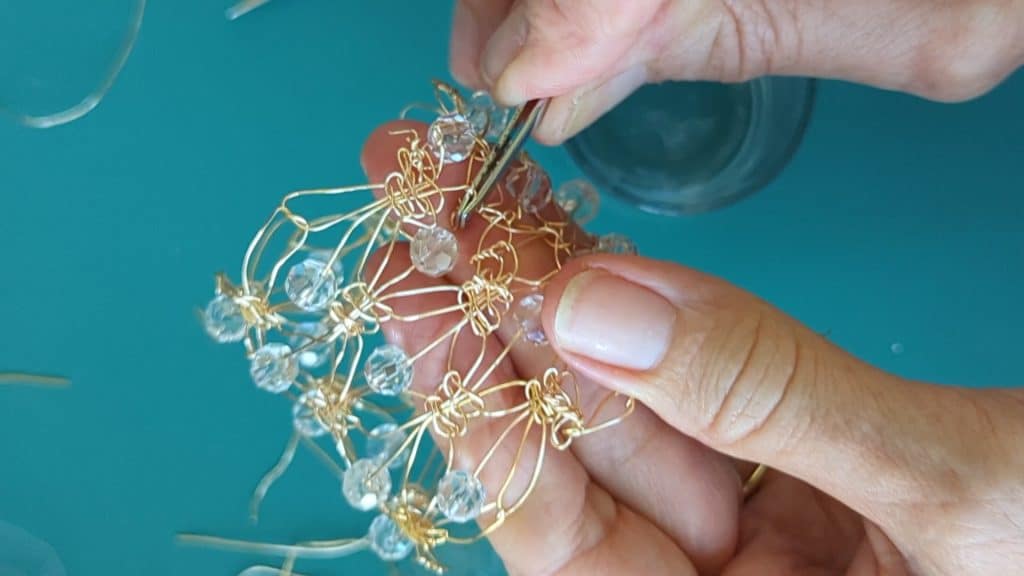
Use your tweezers to bend wire ends
Remove the wire macramé from the glass votive and use your tweezers to bend and secure your loose and pokey wires.
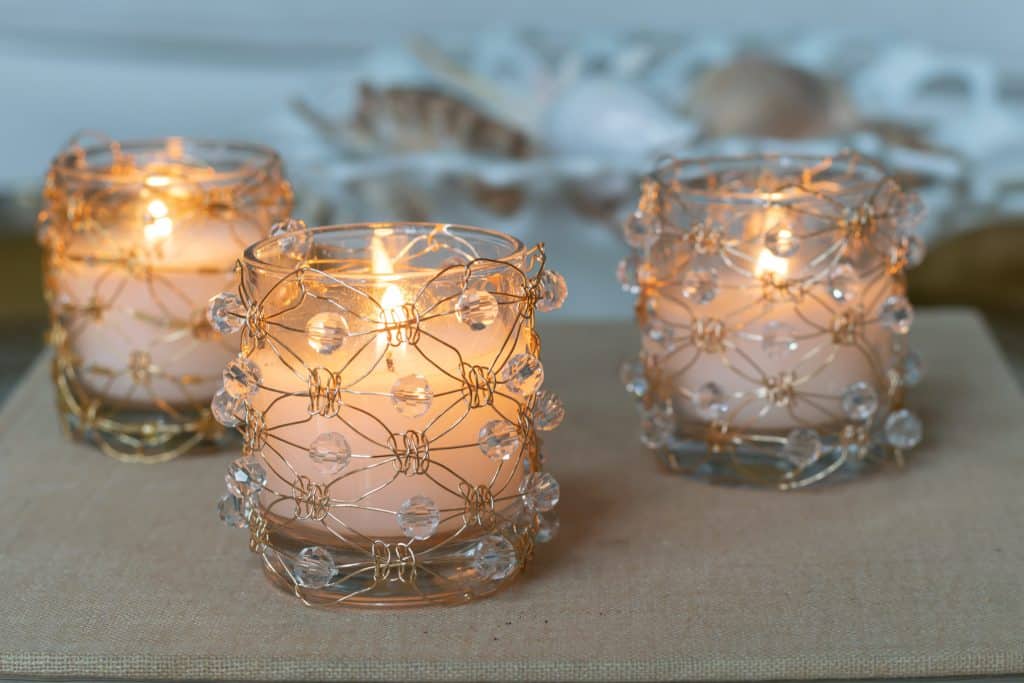
Put the glass votive back in your DIY Macramé Wire Votive Holder
Grab a little candle and matches
Light the little beauty and enjoy your handiwork!
Bookmark this page or pin the following image to refer back to this tutorial for DIY Macramé Wire Votive Holders.
Thanks so much for spending a few minutes of your busy day with me!
To ensure you don’t miss future content, pop your email in the pale green box on the right or click here. I usually send one email weekly, so I won’t inundate your inbox. I’m sensitive to an overflowing email inbox!
We will only use your email address to send you emails, no more than 1-2 weekly. In addition, you will have access to my growing library of knit & crochet patterns and other printables. Check back often as this library will continue to grow. You can unsubscribe anytime by emailing me or clicking on the “unsubscribe” link at the bottom of all emails.
And you can access many of the products I refer to on my Nourish and Nestle Amazon Page. You can access it here.
So, if you’d like to participate in the ‘subscriber benefit’ action, simply subscribe to Nourish and Nestle here or use the form on the right sidebar. It’s slightly towards the top.
I have sent all my subscribers the link to the Subscriber Benefits Library. If you missed it or misplaced it, let me know.
Until next time…