Easiest DIY Bed Skirt with Box Pleats
Detailed instructions on how to make the easiest DIY bed skirt with inverted box pleats. If you can sew a straight line and read a ruler, you’ll have no problem with this easy DIY. Not only is this an easy project, but this bed skirt is very practical and functional.
This is the second post detailing how I gave our guest room a badly needed makeover. When I say ‘makeover’, it is my version of a makeover. I am loathe to get rid of or buy furniture. Most of what we own was passed down to us through our families and so has special meaning to us.
The bed in our guest room was my bed growing up. The hope chest was given to me by my parents when I turned 18 and the dresser was an antique we purchased when Kate graduated to a ‘big girl’ room. While I can’t tell you the specific genesis of the nightstands, I can say that we’ve had them for 30+ years.
All this to say, when I ‘makeover’ a room I focus on paint and fabric.
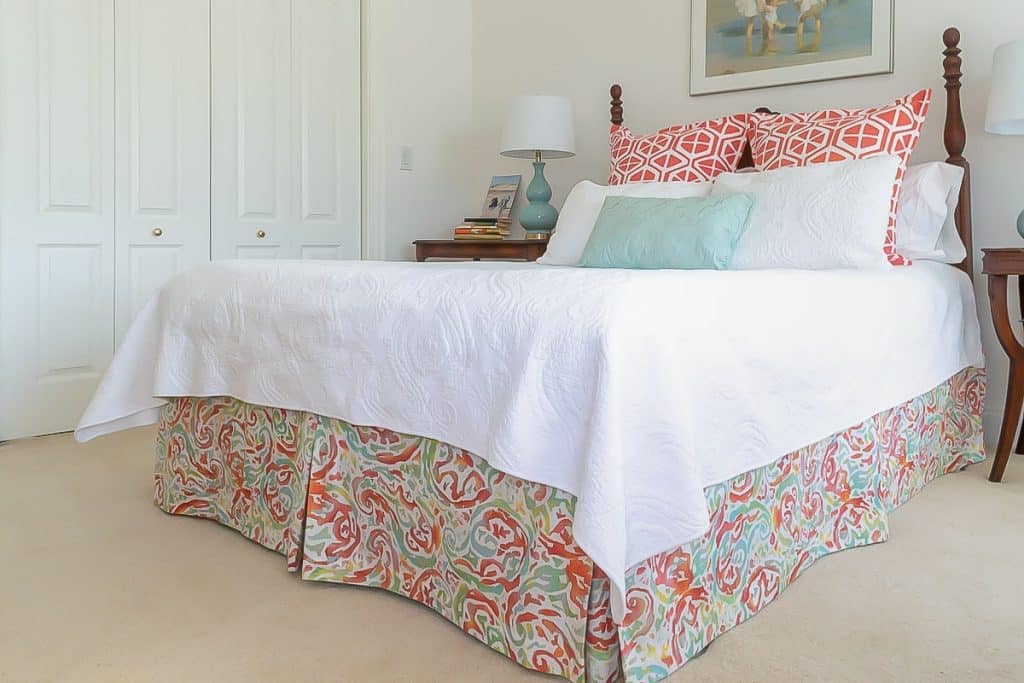
Table of Contents
We gave the room a coat of a nice white, which is such a great palate to jump from. I made these Euro Sham pillows and you can find the tutorial for them here.
Next up was a bed skirt. This fabric was a bit of a splurge for me, but I loved all the colors in it. The many colors make it easy to pull from as I continue to decorate the room.
And I said this when I made the Euro Shams, but it bears repeating here…no special sewing skills are required to make this DIY bed skirt. If you can sew a mostly straight line and read a yardstick, you’ll knock it out of the park!
Here’s Why I Really Like This Bedskirt and Will NEVER Go Back to the ‘Traditonal’ One.
This DIY bed skirt is unlike every other bed skirt I’ve ever had in that each section is separate from the others…there is not a large piece of fabric to which each piece is attached to.
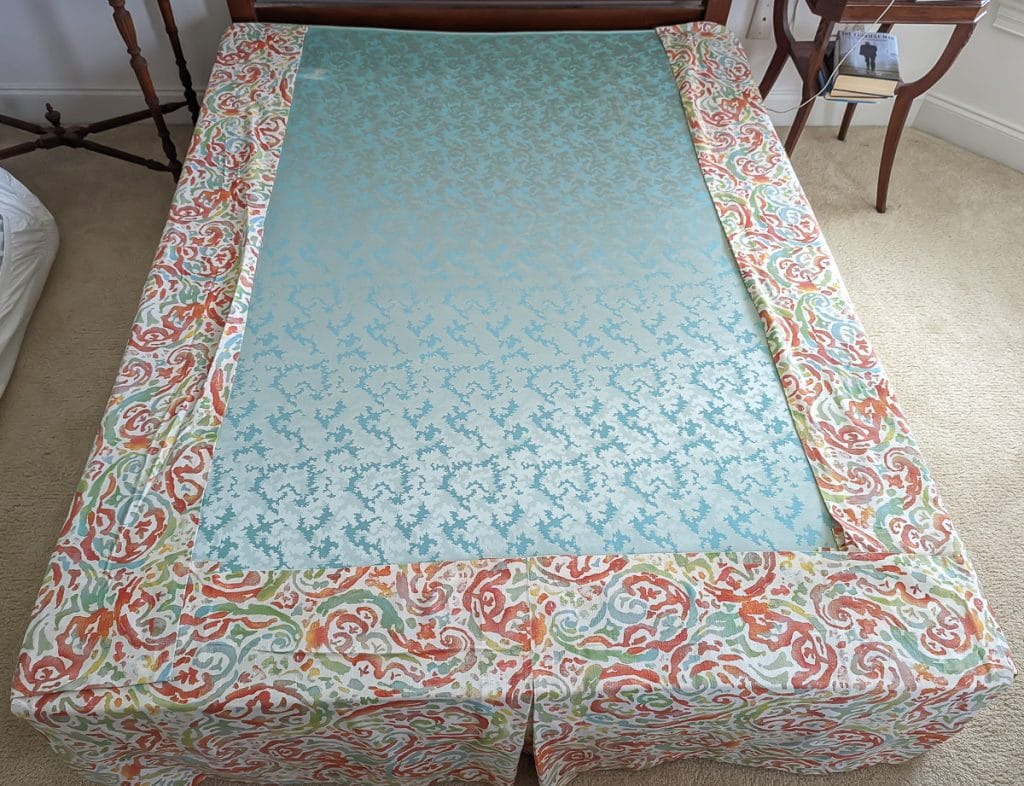
The benefits are:
- It stays in place! No more shifting bed skirt!
- If you spill something, just wash that section. Lift the mattress and detach it to clean and to reattach. No more having to take the whole mattress off, wash the whole skirt and then have to lay the mattress back on top just so to avoid the skirt shifting…you know what I mean!
- It is SUPER easy to make.
- If we get a new bed or bed frame that is taller than the one now, no problemo! It’s completely adjustable!
What Material Do You Need for Bed Skirt
Some of these links may be Amazon affiliate links and I may earn a small commission from the sale of these products to help defray the costs of operating this site, but the price you are charged is not affected. You can see my full disclosure policy here.
- Fabric (discussion of how much below)
- Sewing Machine
- Thread and Straight Pins
- Velcro Tape. This is what I used. It is machine washable. This is a 10 foot roll and I had a wee bit left over.
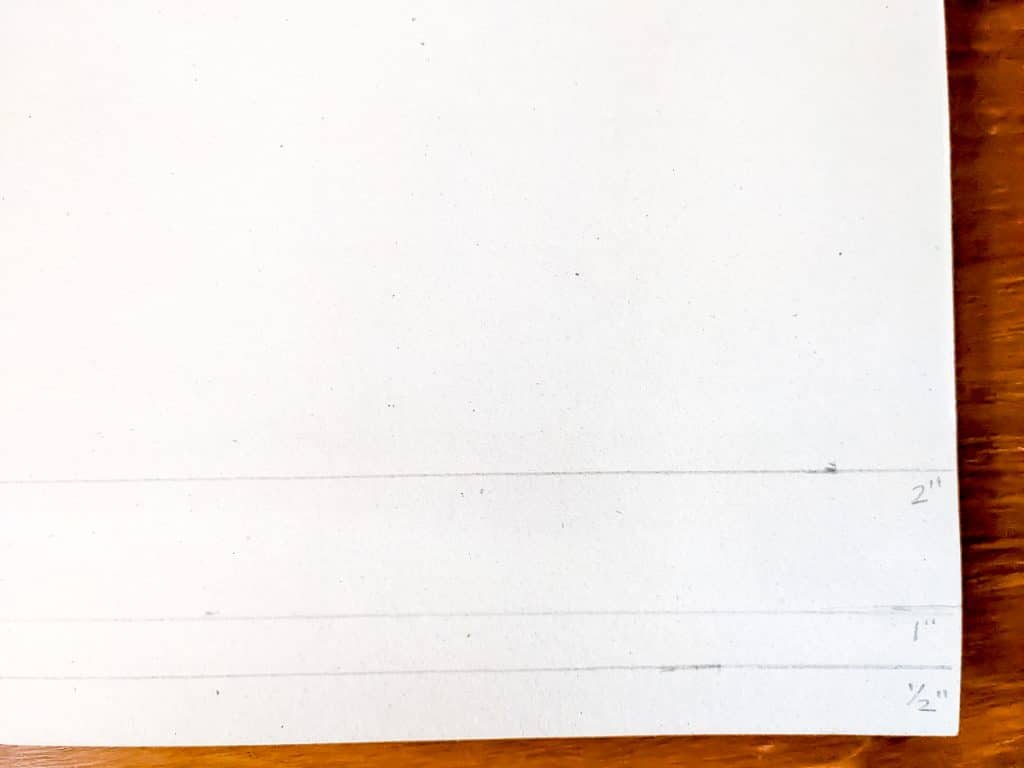
- Yardstick and Measuring Cardboard. I use a stiff piece of cardboard that I marked measurements of 1/2″, 1″ and 2″. Folding along the lines when ironing makes it so very easy to get the right fold.
- Water soluble fabric marker
- Iron and ironing board
If you’d like the PDF of this pattern, you can print it off in the Library. Don’t know the password? If you are a subscriber, it is at the bottom of the email you receive each Monday. Not a subscriber? You can subscribe, at no cost, here and have the pattern sent directly to your inbox.
How Much Fabric Do You Need For A Tailored DIY Bed Skirt:
Generally, for a tailored bed skirt with a box pleat on each of the 3 sides, you need 4 yards of fabric for a Twin, Full, and Queen bed. A King-sized bed requires 5 yards.
But if you want to double-check, here’s how I do it:
First, you need to know how big your box spring is. Here are the sizes for the 4 common mattress sizes
- Twin 75″ X 38″
- Full 75″ X 53″
- Queen 80″ X 60″
- King 80″ X 76″
Then you need to the ‘drop’, which is the distance between the top of the box spring and the floor.
Then, pull out your pen and paper because we are going to get math-y! I’ll use my bed as an example.
- Queen Bed (80″ x 60″)with a 16″ drop
- 2″ hem at bottom and 4″ allowance for the top, which will be under the top mattress. With a wide fabric, you could increase that 4″ allowance to 10″ if you have no other need for the fabric, as you will have plenty of room.
- 2″ at each side for hem
- 12″ for each box pleat
I need two pieces (for both sides of the mattress) of fabric with a LENGTH of 96″ (80″ + 12″ + 4″) and a WIDTH of 22″ (16″ + 6″). Shown as a and b below.
The width of the mattress requires a piece of fabric with a LENGTH of 76″ (60″ + 12″ + 4″) and a WIDTH of 22″ (16″ + 6″). In order to make our fabric go further, this piece will be comprised of two pieces that will be seamed in the middle (inside the pleat), so we need two pieces with a LENGTH of 38″ and WIDTH of 22″. Shown as c and d below.
And then we need the two corner pieces that will be 18″ long by 22 wide”. The length measurement can be anywhere between 10″ – 20″ and really depends on the width of your bed and the fabric as it is cut from whatever is leftover, as shown in the diagram below. Shown as e and f below.
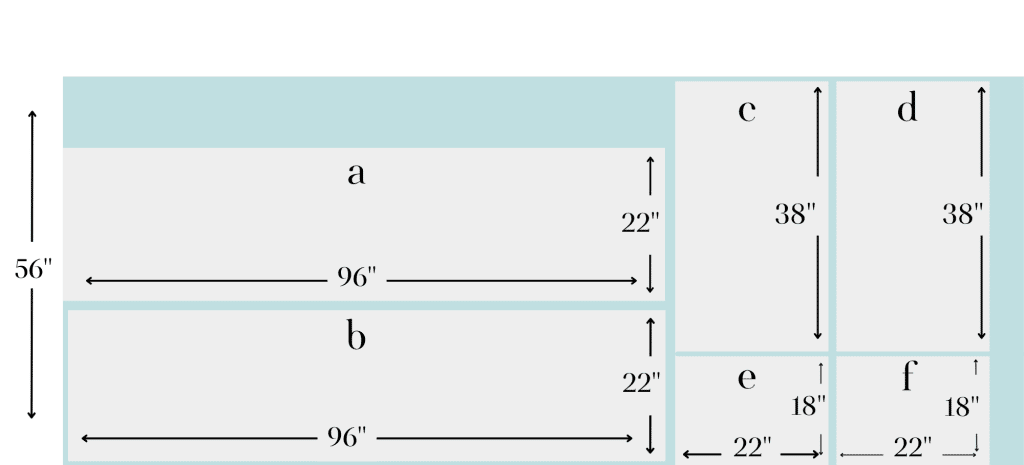
According to my diagram, I need 96″ + 22″ + 22″ = 140″/36″ = 3.9 yards for a Queen Size Tailored Bed Skirt. This layout to determine how much fabric I need is also how I lay the pieces to cut them.
How to Make a Tailored DIY Bed Skirt with Inverted Box Pleats
- If you plan to wash your bedskirt down the road, then go ahead and wash the fabric now. If you are afraid of it fraying, then run a quick seam around it. In fact, before I buy all the fabric I need, I typically buy a small piece, like 1/8″ of a yard and run a seam around it. Then, I measure and wash it. I look for two things; did it shrink and did it hold up well through washing?
- Lay your fabric out and cut it similar to my diagram above. If you have a King size bed, your c and d pieces will run the whole width.
- Sew pieces c and d together at one of the short edges, making sure your pattern lines up if you have a pattern in your fabric. A 1/2″ seam is sufficient. We will call this long, 76″ piece, cd.
- On one of the long edges (the edge that will be against the floor, if you have a pattern that matters) of a, b, and cd, fold 1/2″ and press. Then fold another 2″ and press it down. This is where my handy cardboard measuring thing comes in very handy!
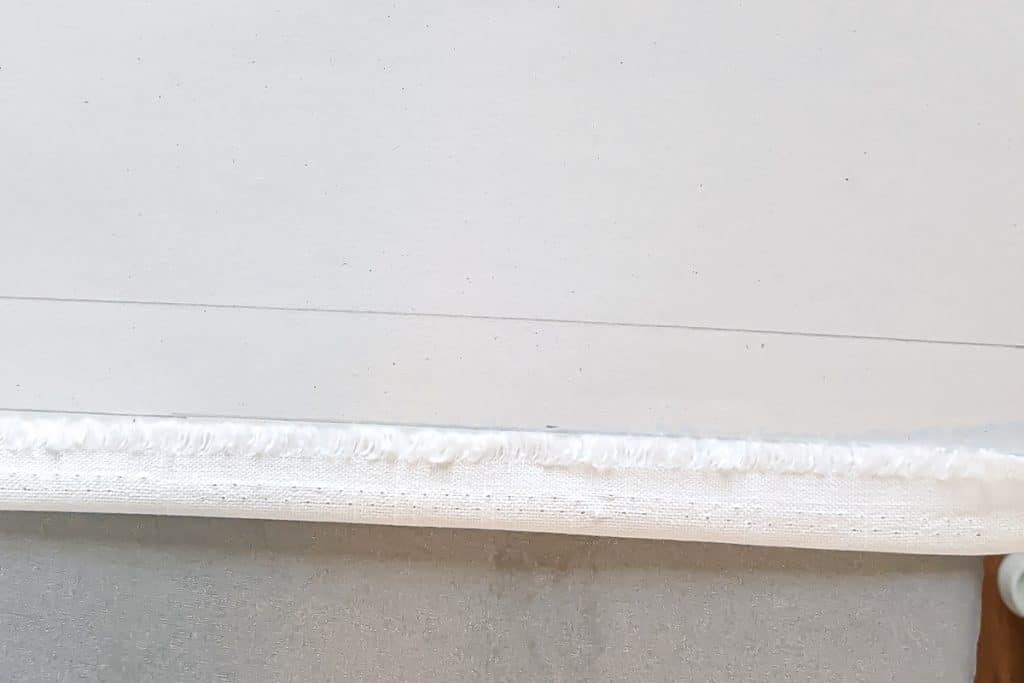
- Sew a seam on the inside edge of that hem.
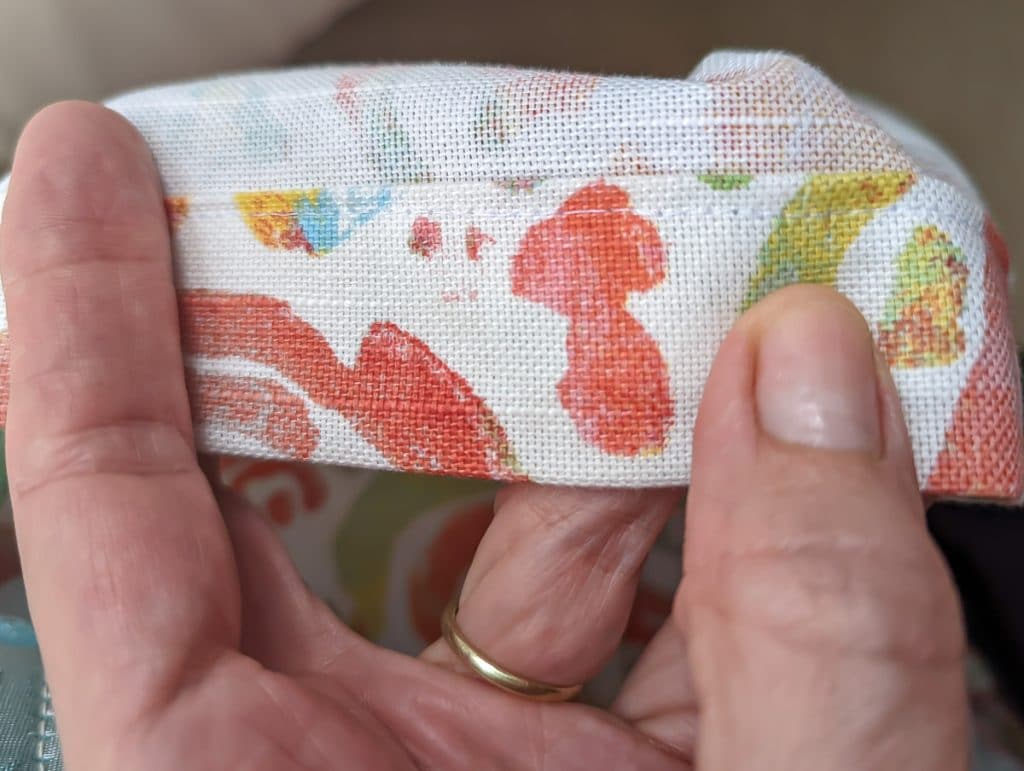
- Then on the other long edge of a, b, and cd fold over a small 1/4 – 1/2″ and run a seam along that edge. This will be the edge that is under your mattress, so won’t be seen.
- For pieces a, b, and cd, on each short edge fold over 1″ and press it down and then fold over another 1″ and press it down
- Sew a seam on the inside edge of that hem.
- For your last two pieces, e and f; you’ll want to do similarly, but don’t get confused. Refer to the image below. Run the 1/4 – 1/2″ seam on side b. On side d, fold over and press 1/2″ and then another 2″ and run the seam. For sides a and c, fold over 1″ and press it down and then fold over another 1″ and press it down. Then run a seam along those sides.

Let’s Make the Box Pleats!
- Set aside the two small pieces; we are now going to make the inverted box pleats on the 3 longer pieces.
- Let’s start with the piece that was seamed together, cd.
- Measure out 6″ from both sides of the seam along the whole drop length. If you have a fabric marker, this a good place to mark a line 6″ out on both sides of the seam. Press that line well with an iron so that it is a nice crisp edge.
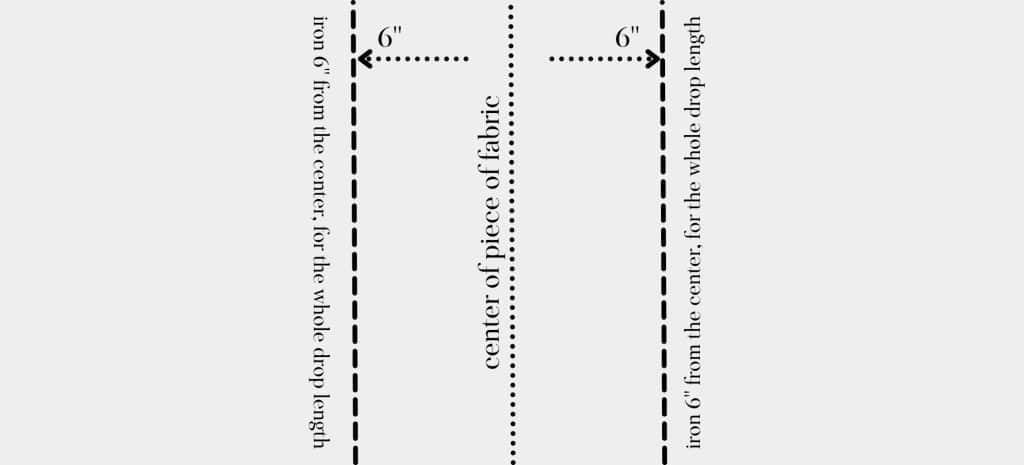
- Then you are going to bring the crisp ironed edges to the center. In this case they will line up with the seam.
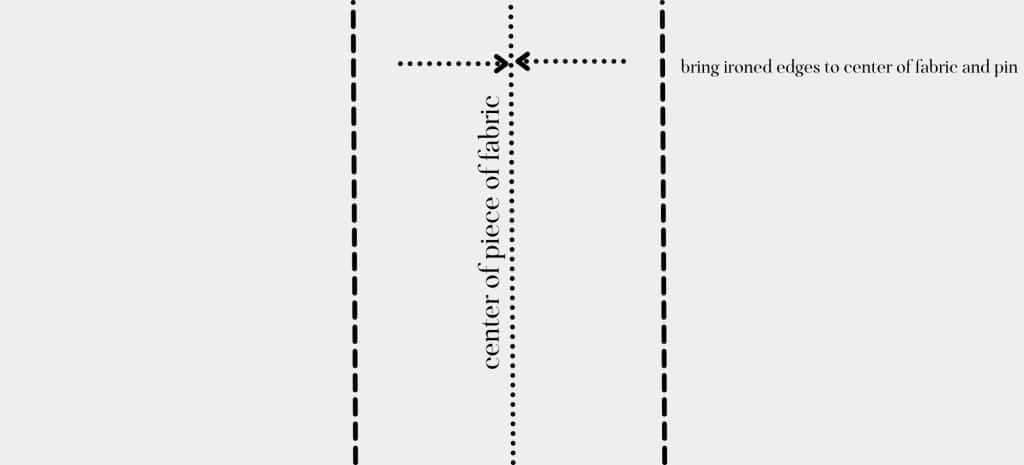
- Pin all along the crisp edges to keep them lined up with the center seam.

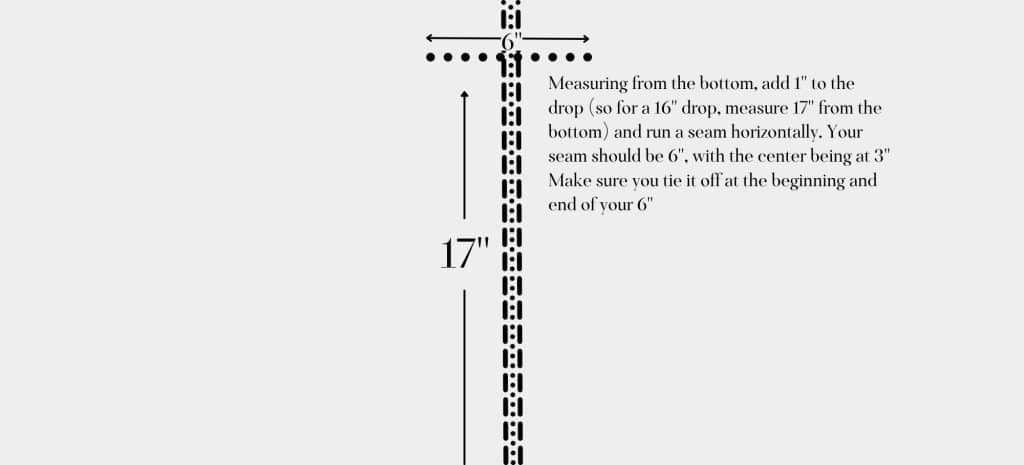
- There’s a little math required here, but it’s real easy math. Take your drop (in my case it is 16″) and add 1″. So, in my case it is 17″. Measure up from the bottom of your skirt and mark it. At this mark you are going to run a horizontal seam that will hold the folds of your pleat in place. Make sure it begins at the outer edge of one fold and ends at the outer edge of the other fold. It should be 6″, with the halfway mark (3″) right at the middle.
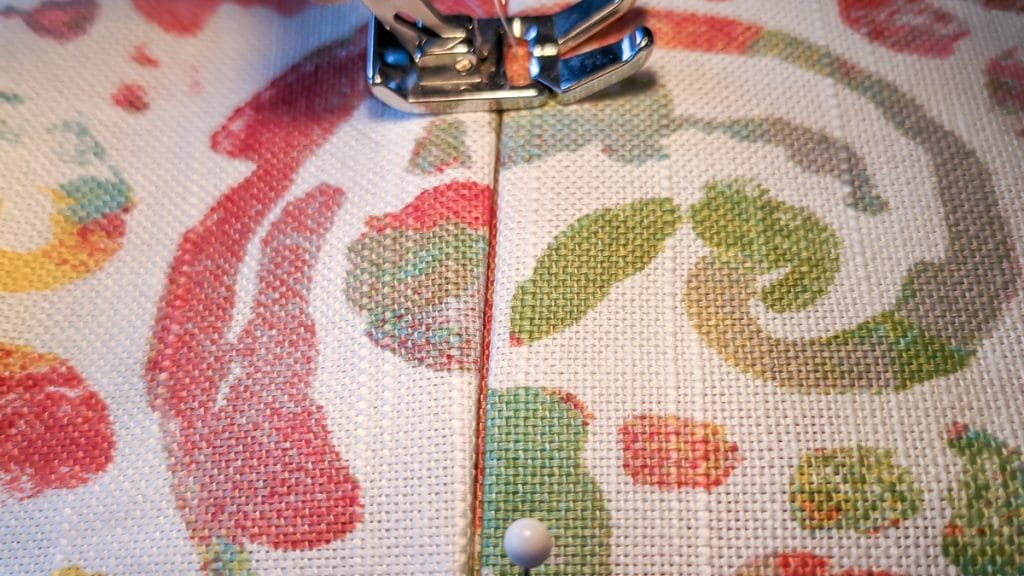
- Press the pleat down again and set this piece of fabric aside. You will now repeat the same process on the other two pieces. The only difference is that you won’t have the seam to guide you, so use your water soluble fabric marker to mark the middle of your 96″ pieces (48″ is the middle) and have at it!
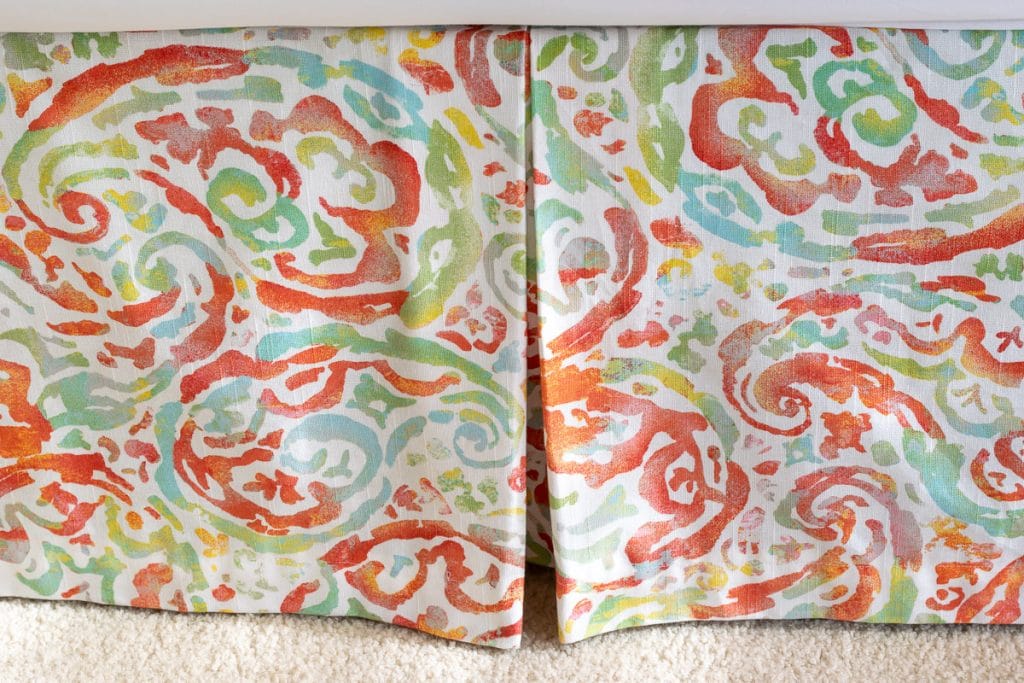
- Once all your pleats are done, it’s time to put your DIY bed skirt together…this is the fun part.
- Remove the top mattress from your bed and place the pieces where you want them, in my case I want them just grazing the floor. You may need to temporarily pin them or lay a book on them to keep them where you want as you line up the whole length.

- Once they are where you want them, grab your velcro tape.
A note here…the first time I did this I used those screw pins made specifically for upholstery and bed skirts. From the get-go I was underwhelmed; several of the plastic heads broke as I ‘screwed’ them into the box frame the first time, leaving the screw pins in the box spring frame. Then a couple of times my fingers caught them while I was making the bed and they popped out. I had this huge fear of someone stepping on these barbaric screw pins and decided I needed another option.
It seems the options are A) those screw pins or B) Velcro tape. So I moved to plan B and so far so good. The package claims that the tape will stay on even in the washing machine; my experience is that it will…with an admonition. As you know, Velcro has two sides. If there is anything else in the washing machine that the prickly side of the Velcro can catch on, it will and can pull off.
- Whether you use the pins or the Velcro tape, it is just a matter of lining the pieces on your bed frame and securing them where you want them. The Velcro tape comes separated, so I stuck it together, removed both sides of the tape and adhered it to the box spring first. Then I laid the fabric down where I wanted it and pushed down to adhere it to the tape. Put the coarse side of the Velcro on the mattress pad so that the soft side is on fabric. This will help ensure it stays attached if you need to wash the bed skirt as the coarse side is more likely to catch on other fabric. Running a seam through the velcro on the actual bed skirt will also ensure that it doesn’t come off in the wash.
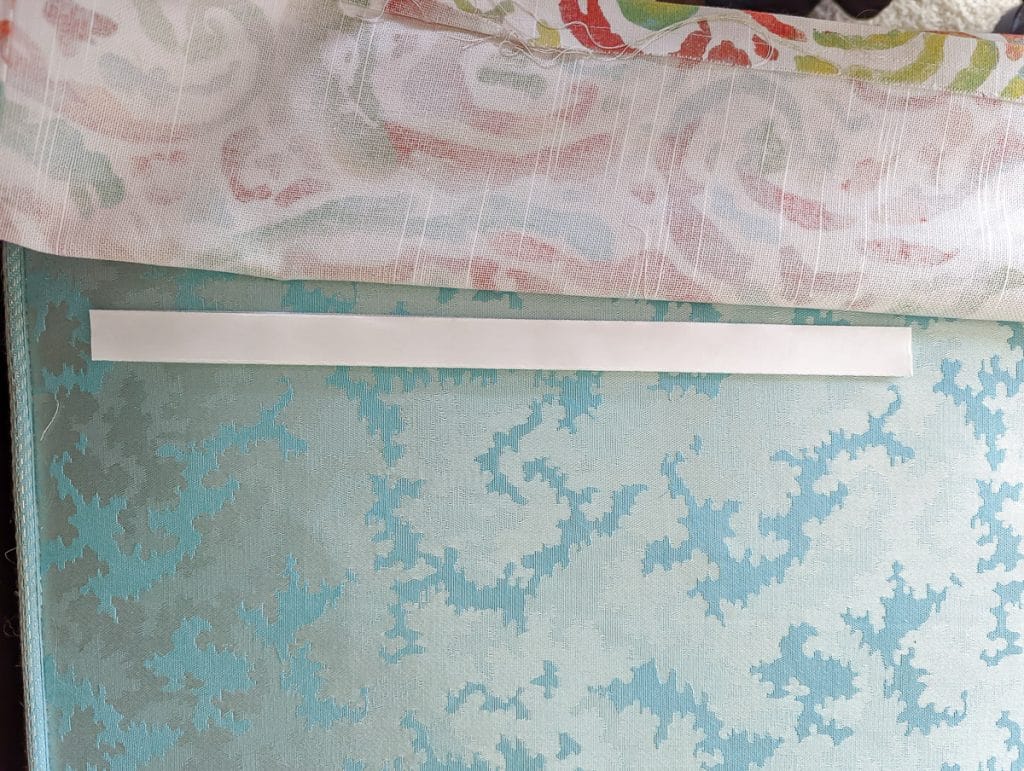
- The 2 little fabric pieces get attached on both corners at the foot of the bed, right under where the other longer pieces meet. Velcro the under piece first and then the long pieces.
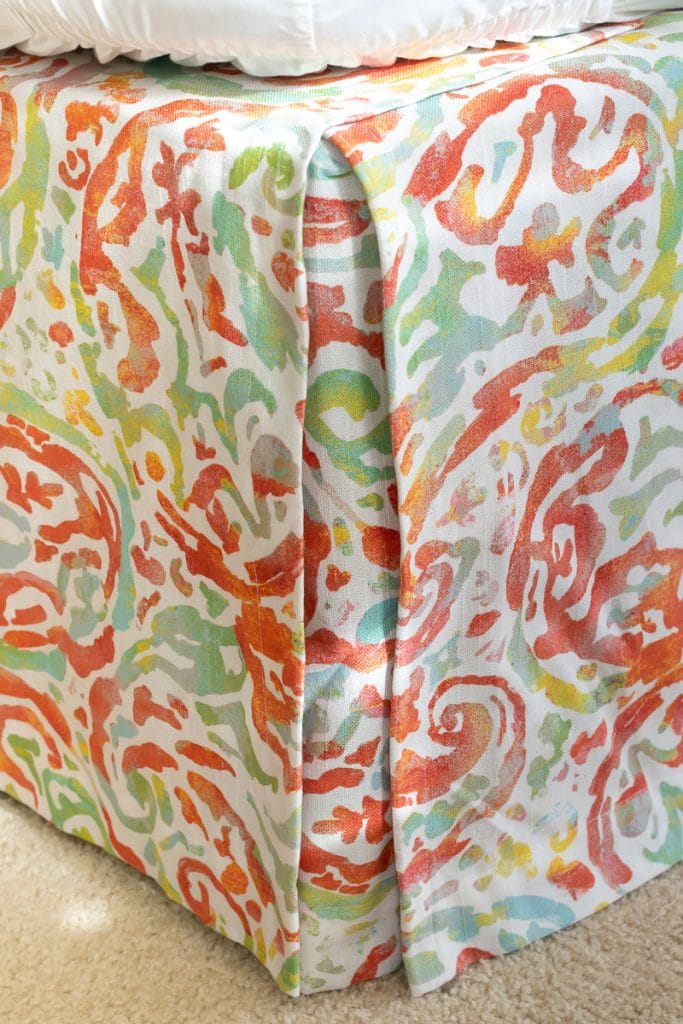
I haven’t had to wash my bed skirt yet, but it will be easy to line up both sides of the velcro when I need to reattach it.
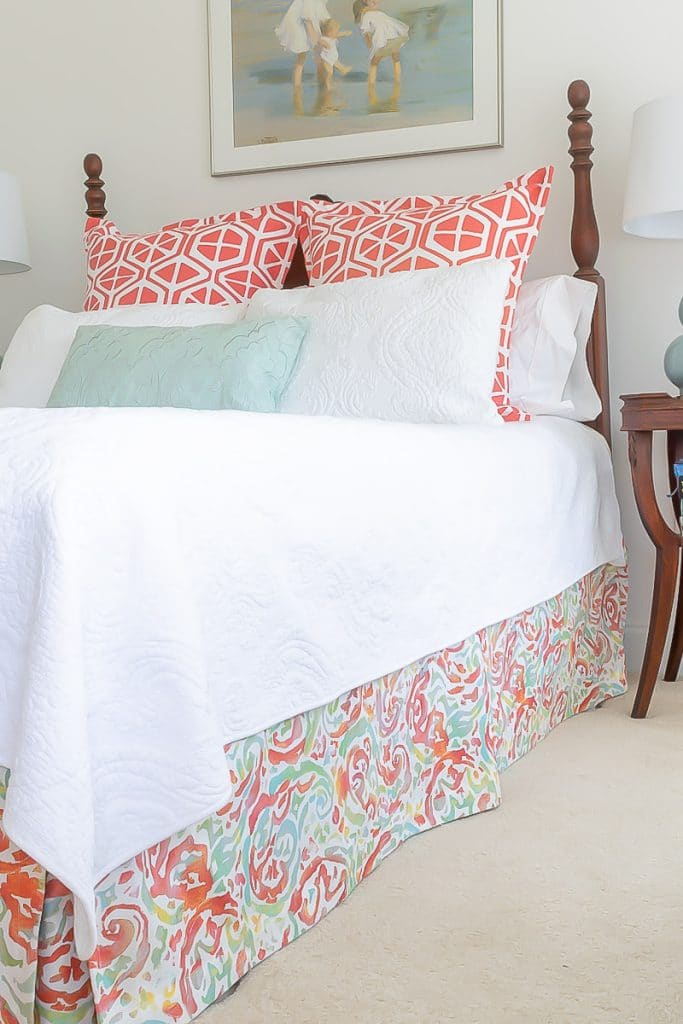
I sure hope this was helpful! If you have any questions, don’t hesitate to ask. It seems like a lot, but it is really very simple once you start. I’m getting ready to make another one for our Master Bedroom. I’m sold!
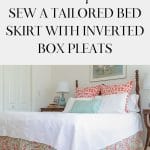
Bookmark this page or pin the following image to refer back to the instructions for this easy DIY Bed Skirt.
Thanks so much for spending a few minutes of your busy day with me!
To ensure you don’t miss future content, pop your email in the pale green box on the right or click here. I usually send one email weekly, so I won’t inundate your inbox. I’m sensitive to an overflowing email inbox!
We will only use your email address to send you emails, no more than 1-2 weekly. In addition, you will have access to my growing library of knit & crochet patterns and other printables. Check back often as this library will continue to grow. You can unsubscribe anytime by emailing me or clicking on the “unsubscribe” link at the bottom of all emails.
And you can access many of the products I refer to on my Nourish and Nestle Amazon Page. You can access it here.
So, if you’d like to participate in the ‘subscriber benefit’ action, simply subscribe to Nourish and Nestle here or use the form on the right sidebar. It’s slightly towards the top.
I have sent all my subscribers the link to the Subscriber Benefits Library. If you missed it or misplaced it, let me know.
Until next time…








What a great tutorial! I love box pleated bedskirts, but I like the idea of making my own so I can customize the fabric to my liking!
Thanks Maureen! With your skills you will have no problem making the skirt.
Hi Maureen,
I am a visual learner and was wondering…do you have a video of the pleated bedskirt? I’m ready to start, but if there is a video also-that would be my safety net!
thanks,
suzanne
Hi Suzanne,
I don’t have a video…I’m sorry about that! But, I truly tried to make the step-by-step really clear and hope the images help. I consider myself a visual learner as well, so I understand.
Let me know how it works for you and I’m here for any questions.
Lynn
I would love to be able to print these directions, as I do not have all the technology. I am in the library and there doesn’t seem to be anyway to print it. Any suggestions?
Hi Nancy, could you pop over to a UPS Store or a print shop? You could print them from there. Or…if you have a friend with a printer you could email the PDFs to them.
Wow. Brilliant design for see (😉) many reasons! Exactly what I needed today! Yay!
Hi Anna,
Yay! I’m excited to see your finished bedskirt. Please send a photo!
Lynn
This is brilliant!
Hi Marti, I’m so glad you think so! I need to add to the post, but I’ll share with you here, that depending on how often you wash your bedskirt, you MAY need to stitch down the velcro tape on the fabric. I just ran a seam right down the middle of the tape.
I’d love to see your finished bedskirt!
Lynn
What is the fabric width in your measurements? If my fabric is 56″ wide, so I only need 2.5 yards? Making it this weekend!
Thank you,
Michele
Hi Michelle, my fabric was 54″ wide. I’m not sure what size your bed is or the rest of your measurements. The post walks through how to measure the fabric, but if you still need guidance, I’m glad to help!
Hi Lynn – thanks for posting your instructions. For the most part – they worked well. All “learning opportunities” were my own. However – maybe these observations might help others. I have not sewn in “a really long time” … so first stressful part for me was wondering about how the pattern/weft&weave of the fabric would work for pieces “e” and “f”. Finally I told myself that you were skilled/I didn’t have a patterned fabric – and so I should just have faith that it would all “work out”. (which it did). I did take scotch tape on all my pieces and tape an arrow in the same direction on each piece so that I knew the original orientation of the fabric and the “right sides” from the “insides” (it was really difficult to tell the difference with the fabric I selected). This was super helpful to me as I started sewing. The other thing I realized as I was pinning out my newspaper pattern – was that in this instance we would not be folding the fabric in 1/2 and only cutting out 1/2 of each shape. (I wonder if that’s why Michele is asking about 56 vs 54 inches). For those of us who are near beginners (or just trying to remember) this might be a helpful call out. When it came time to make the box pleats – it took me a few minutes to figure out if I should start the first fold on the “right side” or the seam side. That might also be a helpful notation for those with less experience. The final challenge I ran into (but didn’t realize it until I was all done (and I was sewing at someone else’s house – so was disinclined to run back and forth double-checking measurements) was that on pieces “a” and “b” I should have made my pleats only 3 inches deep (or maybe even 2) because my skirt is about 3 inches short. But OVER ALL – I love how it turned out. Thank you thank you.
I posted 2 pics on my old blog – if you want to see the outcome
THanks so much for the input Mit! I need that kind of feedback. I will go back in and make my explanations more clear, based on your input. Thanks again. I’m going to pop ove rand see it now!
Hello, do you have a PDF file with these instructions? Thank you !
HI June,
I don’t! But I don’t have a good reason why I don’t. I need to get those instructions into a PDF, which I promise I put on my to-do list. But, that’s not going to help you right now. I’m sorry.
Lynn
One more question, I am making bed skirt for a king bed. Is the end piece still in 2 pieces? and I’m a little confused about making the box pleats…..
Hi June,
Yes, you would still have two pieces for the skirt of the foot of bed. BAsically, the seam of of the two pieces is where you will have the box pleat.
I need some guidance as to what would be the best fabric for a crisp bedskirt. We have moved to an apartment from a large house and are using the area under the bed for storage. I need to use a solid color bedskirt. I have bought and returned several premade skirts and they are flimsy and don’t look neat.
Hi Marlene,
The fabric I used was 100% cotton, probably upholstery grade. I think if you stick with upholstery grade cotton, you’d be in good shape. Keep me posted!
My daughter has been asking for a bed skirt for TWO sides of her twin size bunk bed. Complicating is a ladder on one of the long sides, and no box spring to velcro pieces to (I love that hack, though). What do you think about splitting the long side at the point of the ladder, but keeping the pleat at the midpoint of the total length (talk about some tricky math…)? And re: the no box spring problem–I could velcro to the underside of the mattress? but that wouldn’t allow a fitted sheet. Thoughts?
Oh, she threw you a doozie!
OK, Can you tack the or velcro to the bed frame?
As it relates to the ladder split, I don’t think I’d have both on the same panel. Maybe don’t do the box pleat? I feel both would be very busy.