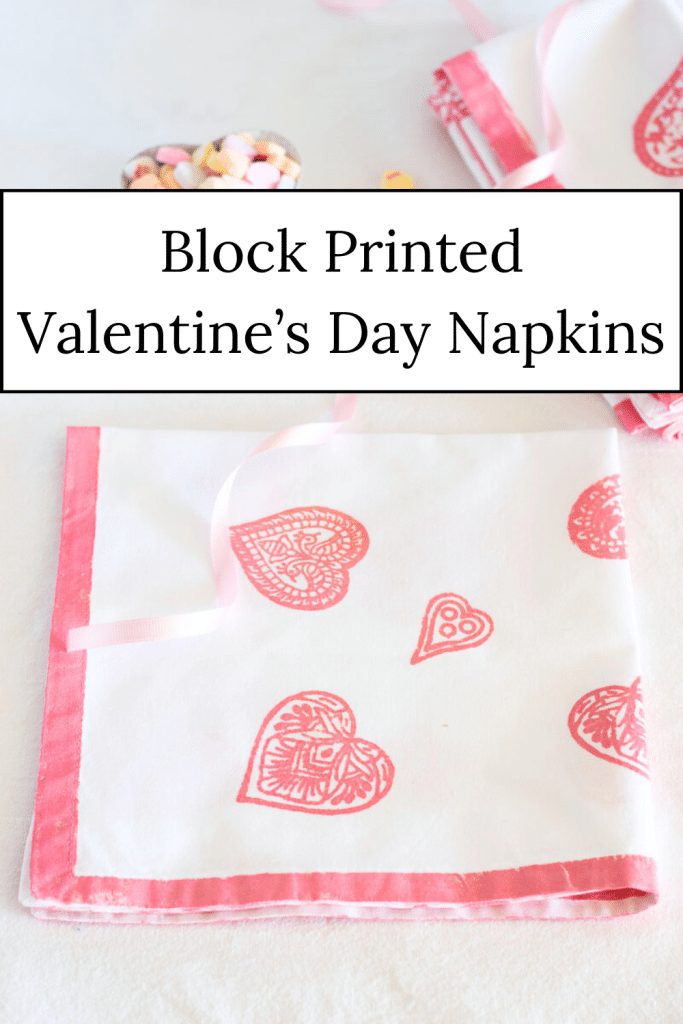
Block Printing on Fabric: Valentine’s Day Napkins
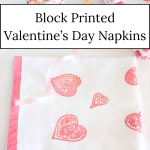
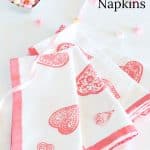
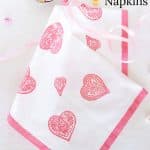
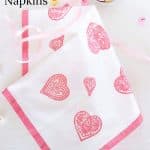
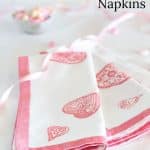
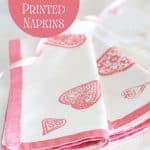
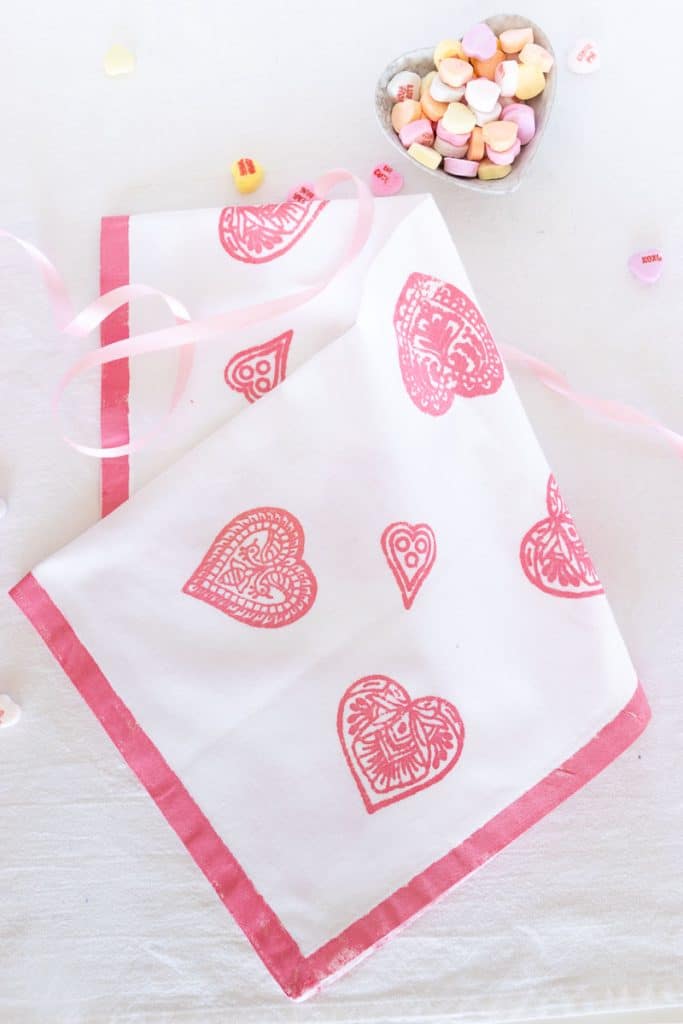
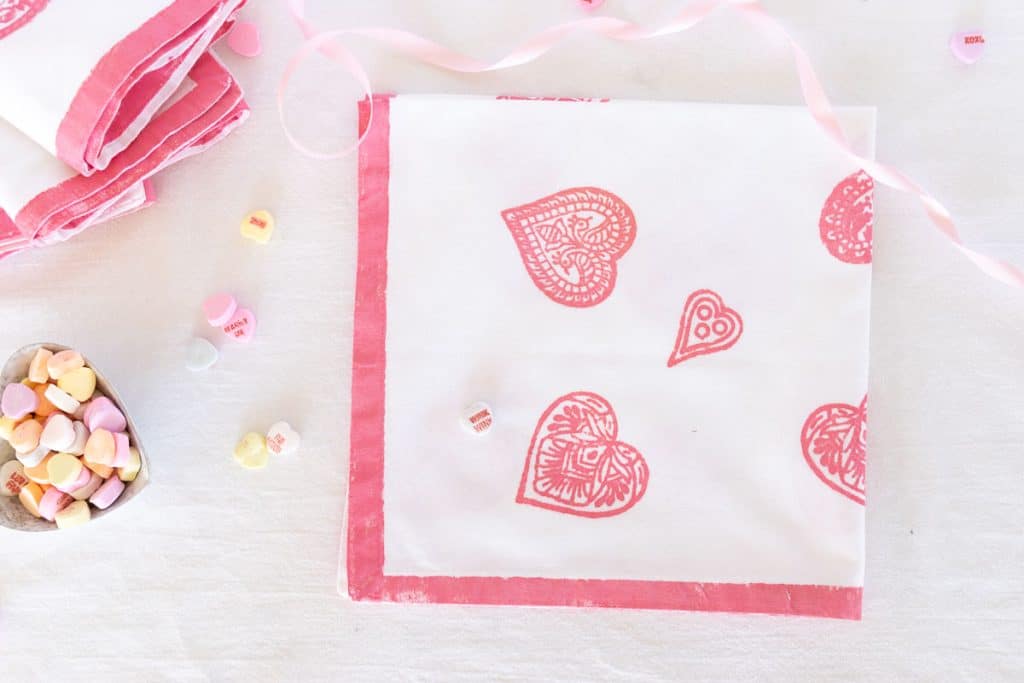
Looking for a sweet Valentine’s Day project as a gift for someone special or your home decor? These Valentine’s Day Napkins were made by block printing on fabric napkins. It was an easy and fun project, which would also be a perfect idea for a craft night gathering with a few of your favorite friends!
And while I made these with a Valentine’s Day theme, there is an incredible assortment and variety of stamps to suit all tastes. But dang, these heart napkins sure are darling!
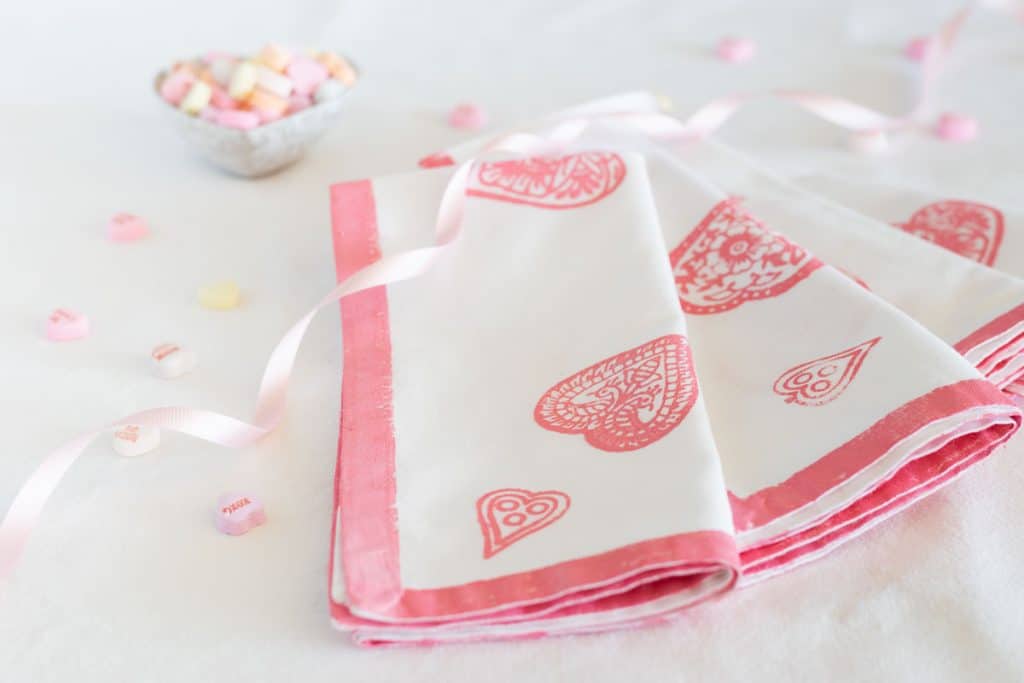
Table of Contents
Indian Block Printing
Indian block printing is a traditional form of textile art that has been practiced in India for centuries. This intricate and time-honored process involves manually printing patterns on fabric using hand-carved wooden blocks. Indian block prints exhibit intricate designs that feature floral motifs, geometric patterns, and depictions of animals and birds, making them renowned for their artistic and cultural significance.
Traditionally, block printing used natural dyes derived from plants, minerals, and even some insects. Indigo, turmeric, and pomegranate are some common sources. Today, synthetic dyes have become more common due to their wide range of colors and consistency.
All that said, I will not be carving my blocks or making my dyes from cockroaches! I’ll show you a super simple, dare I say ‘cheaters’, way of block printing on fabric! C’mon!
What You Need for Block Printing on Fabric
Some of these links may be Amazon affiliate links and I may earn a small commission from the sale of these products to help defray the costs of operating this site, but the price you are charged is not affected. You can see my full disclosure policy here.
Luckily for us, no insects will be sacrificed in making our napkins!
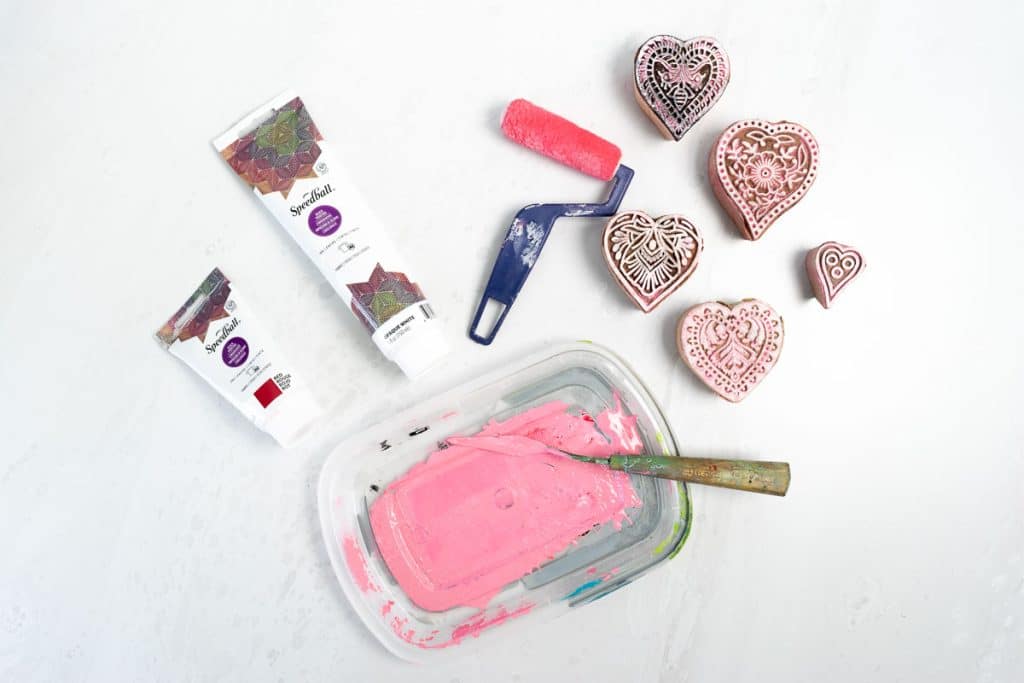
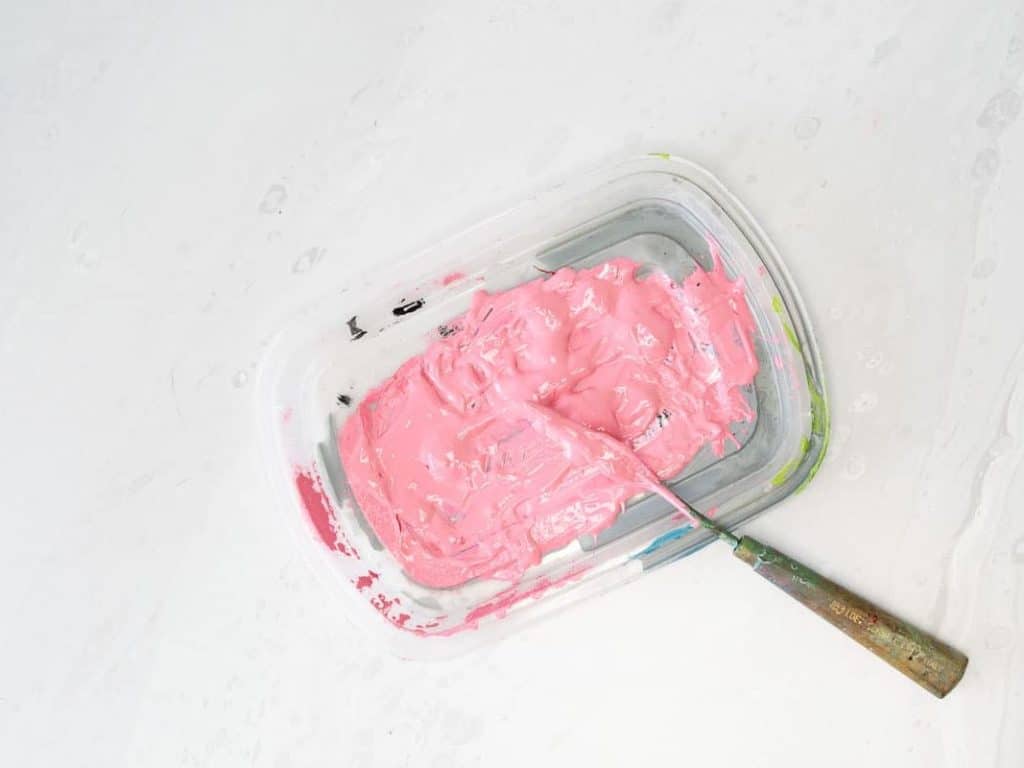
- Speedball Fabric Block Printing Ink. I used Red and White to make the pink.
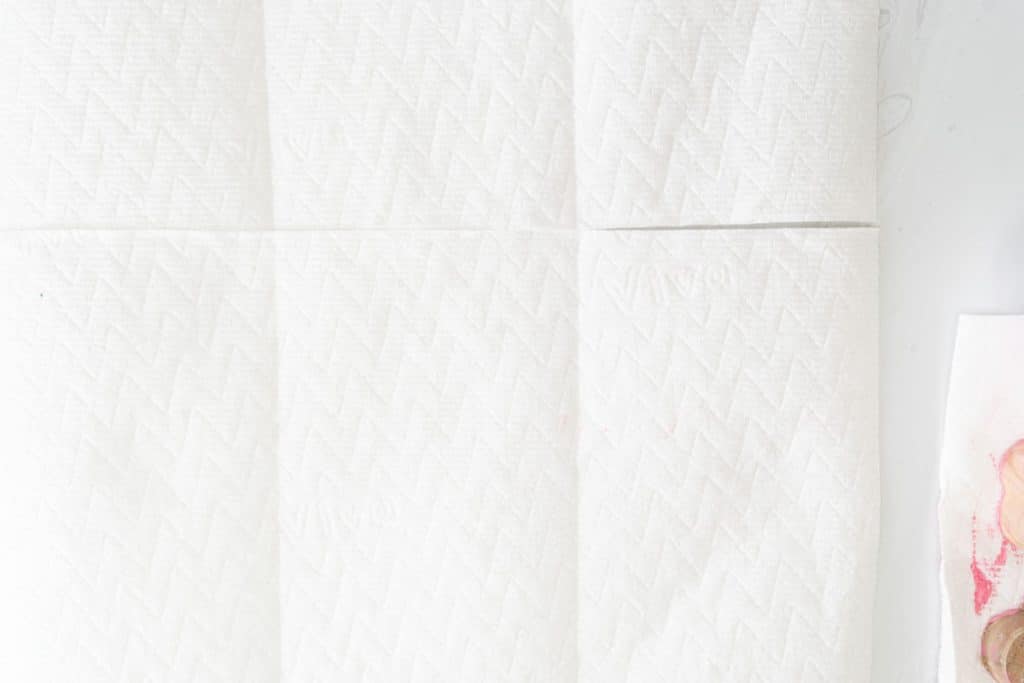
- Cloth napkins or other fabric.
- Soft Rubber brayer or foam roller. I prefer the rubber brayer, but don’t buy one if you have a foam roller.
- Hard Brayer (optional)
- Paintbrush, if you will be painting the border
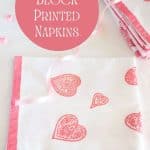
- Wood printing block
- Paper towels or rags
- A Scrap piece of fabric to test your stamp, preferably of the same material you will use for your final block printing.
- Dish soap
- Painters tape
- Palette or dish to mix paint
- If needed, another palette or dish to roll brayer to remove excess paint.
Block Printing Inks
Don’t confuse Block Printing ink with Screen Printing ink. Block printing ink is much thicker than screen printing ink, so it is less likely to bleed. As such, you’ll get crisper detail with the block printing ink. Also, note that there are different types of block printing ink…for use on fabric or paper. The ink I used is specifically for fabric.
I enjoyed working with this Speedball Fabric Block Printing Ink. The thickness was appreciated for the block printing, and clean-up was a breeze. It is a water-washable oil, so you get the benefits of a permanent print with easy clean-up!
What are Good Block Printing Fabrics?
To achieve optimal results with Speedball’s Fabric Block Printing Inks, it is advisable to utilize smooth fabrics that possess neither heavy texture nor stretch. Cotton, linen, broadcloth, and denim constitute the ideal fabrics for use. Speedball’s Fabric Block Printing Inks don’t work well with nylon and canvas.
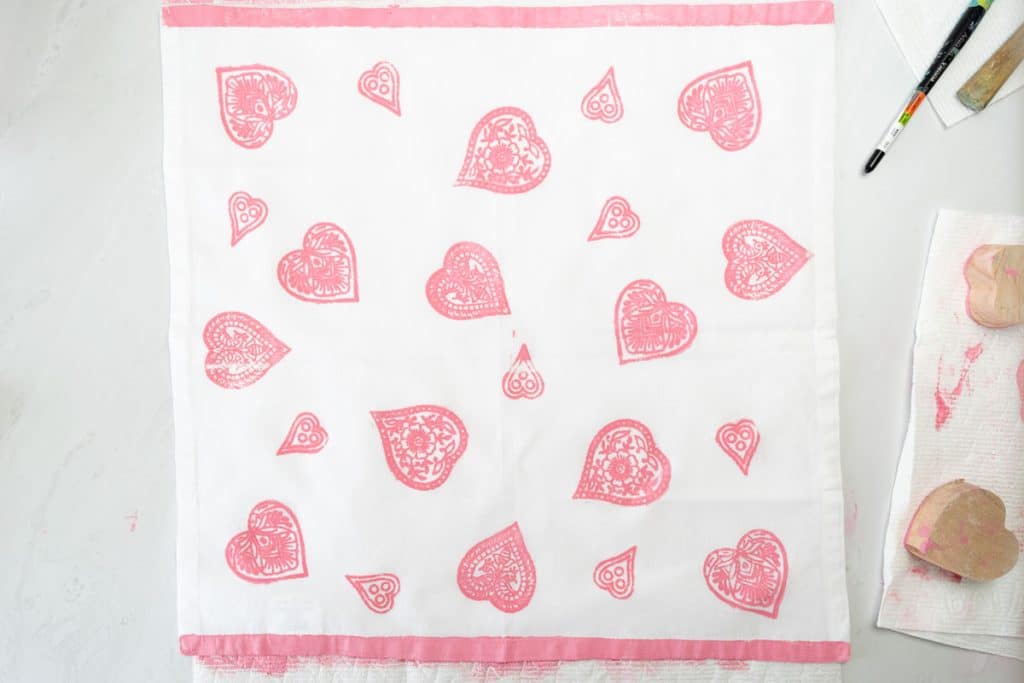
How to Block Print on Fabric
- Wash, dry, and iron the fabric you will be block printing. Don’t use starch.
- Cover your work surface with paper towels, newspaper, or other protective material.
- If you will be mixing colors, go ahead and do that. Squeeze the paint you will be using onto a dish, palette, or other container.
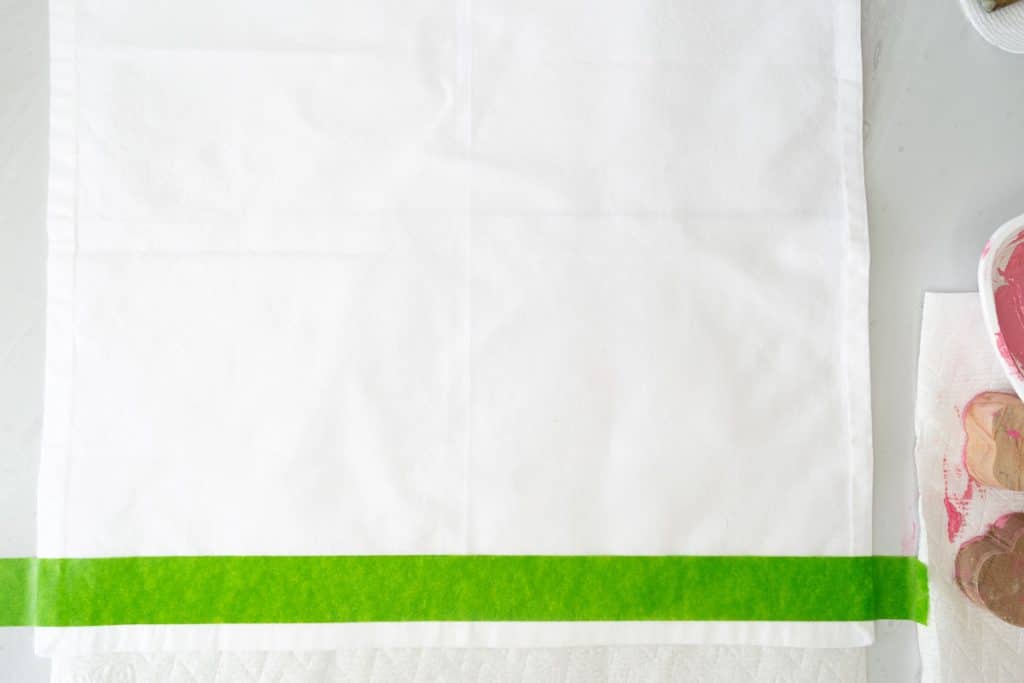
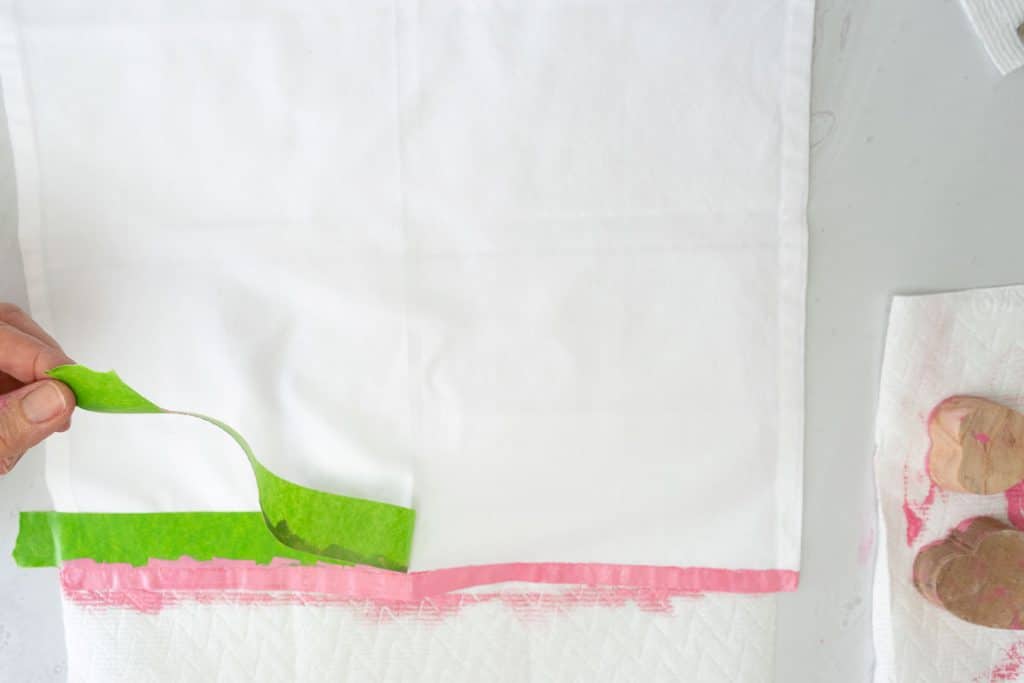
- If you will be painting the edge of the fabric, use painter’s tape to define the clean edge.
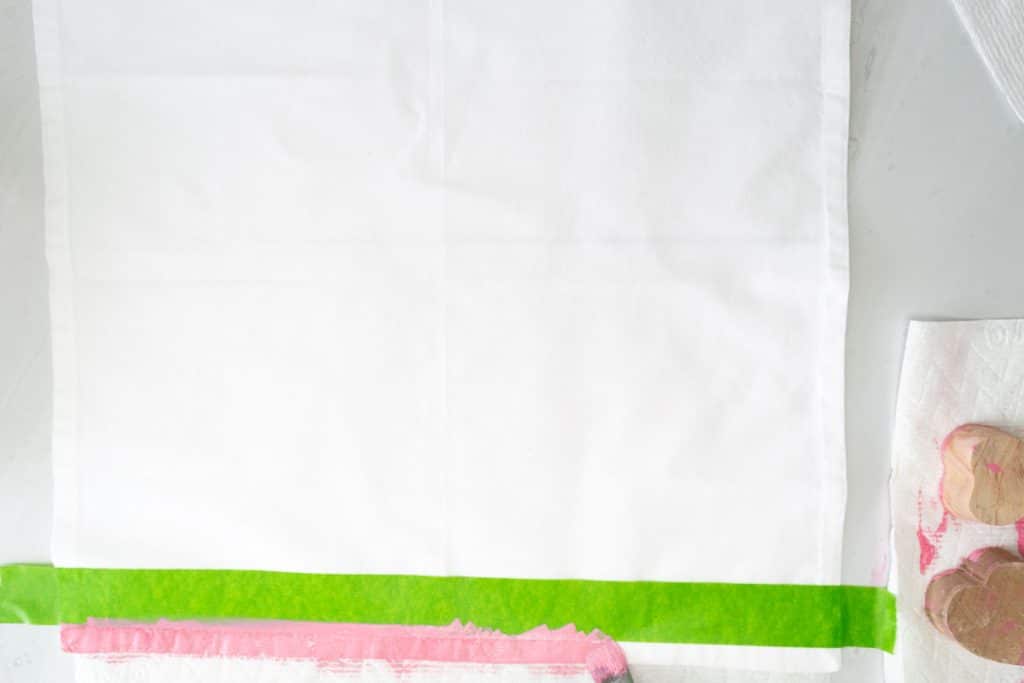
- Paint the border on two opposite sides. Depending on the humidity, you will do the other two sides after your work today dries, tomorrow, or the next day.
- Carefully remove the tape and set it aside.
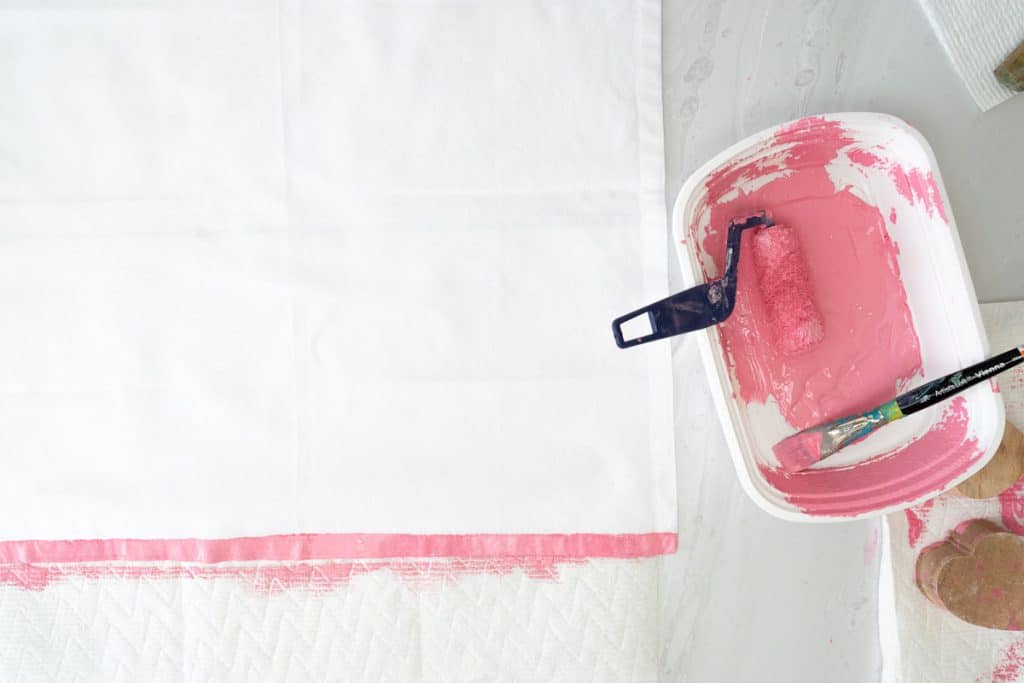
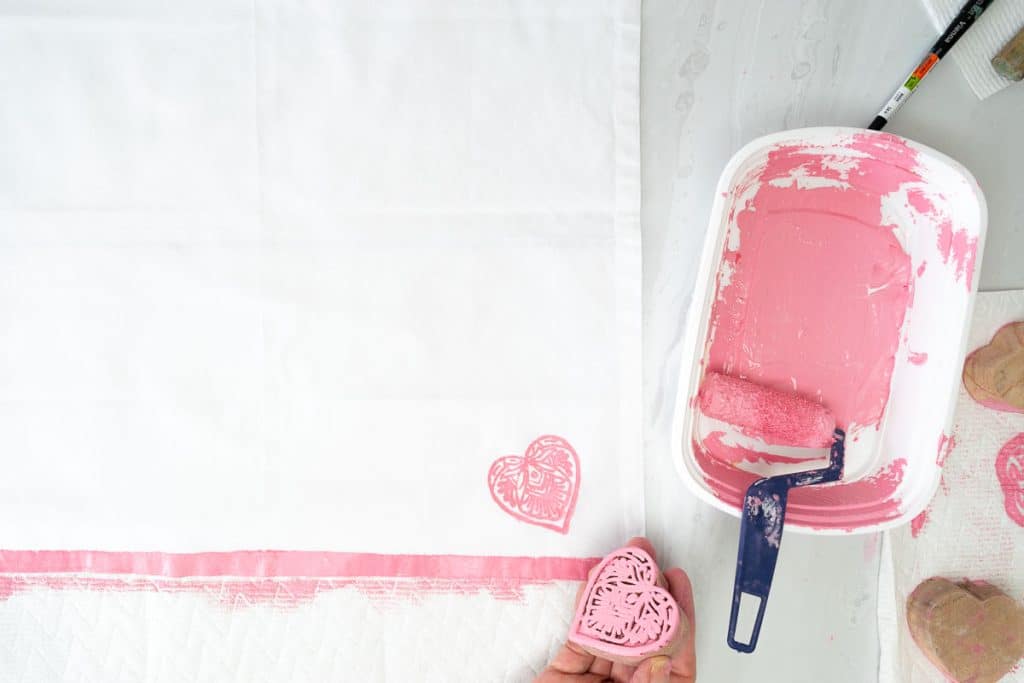
- Roll your brayer or roller through the paint, distributing it evenly.
- Once the brayer/roller is coated, roll it on a clean part of your palette or another palette/dish to remove a little paint. Your ears will tell you if you have too much or the right amount of paint. If it is the right amount, it will sound sticky. If it’s too much paint, it will sound slick.
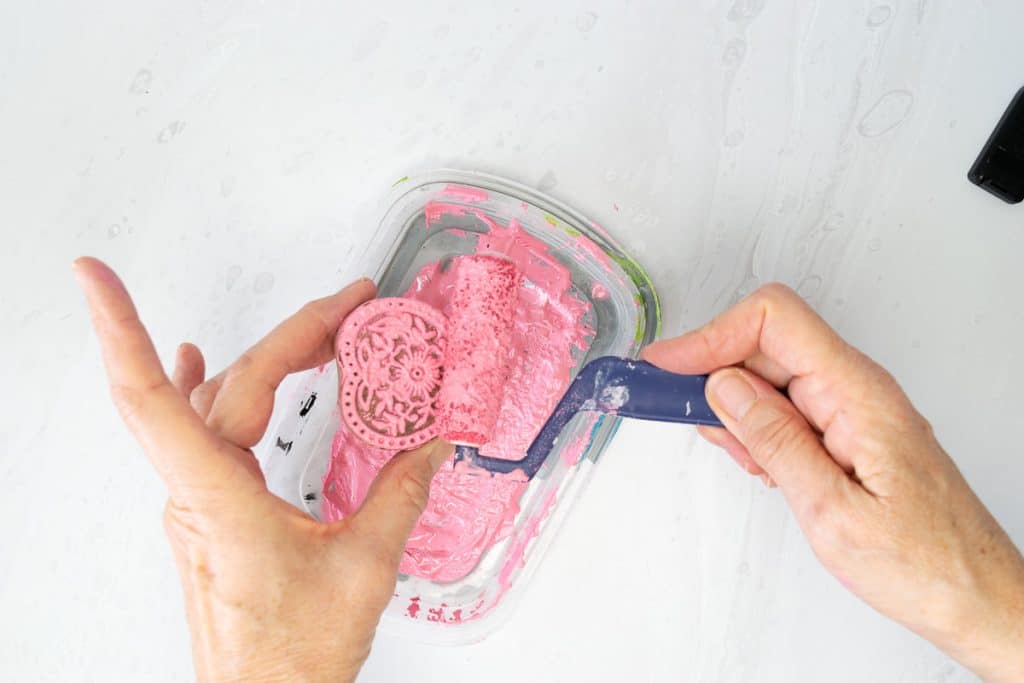
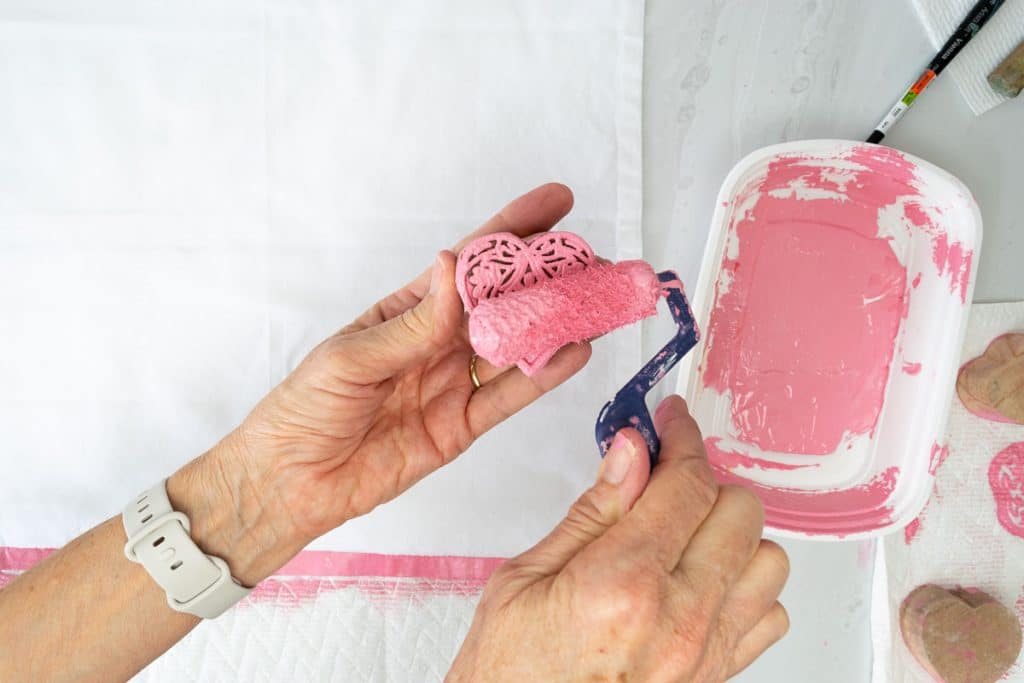
- Roll the brayer/roller over the stamp, making sure you evenly coat the stamp. I rolled one way and then rotated the stamp 90° and rolled. I repeated the 90° rotation for the four sides of the stamp.
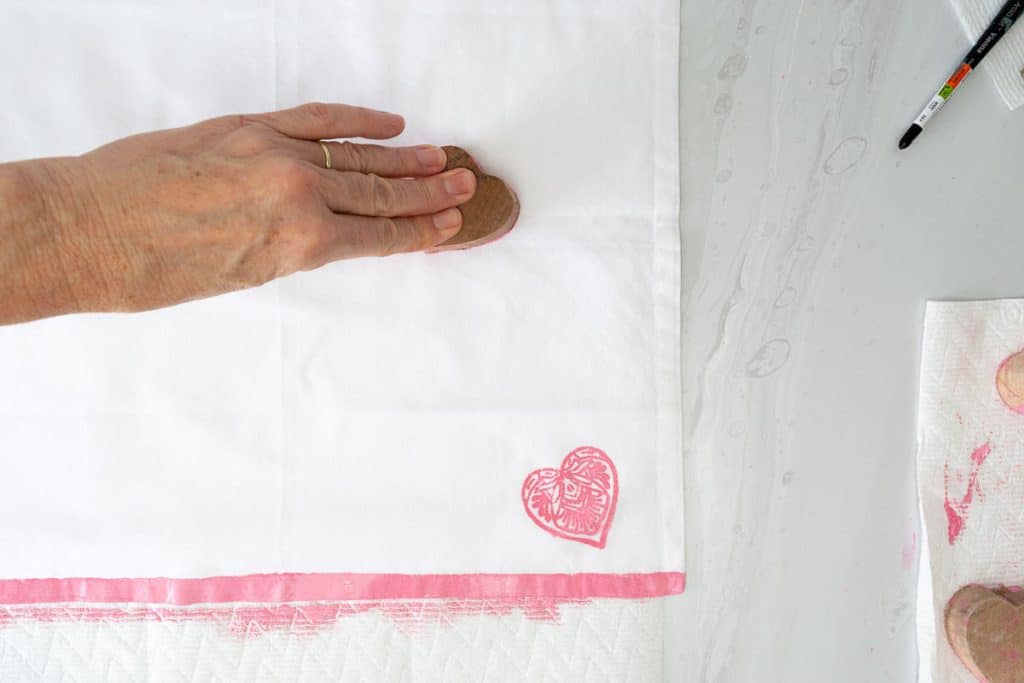
- Test your stamp on a scrap piece of fabric for the first time. Don’t wiggle the stamp on the fabric, but push down on all sides to ensure even contact.
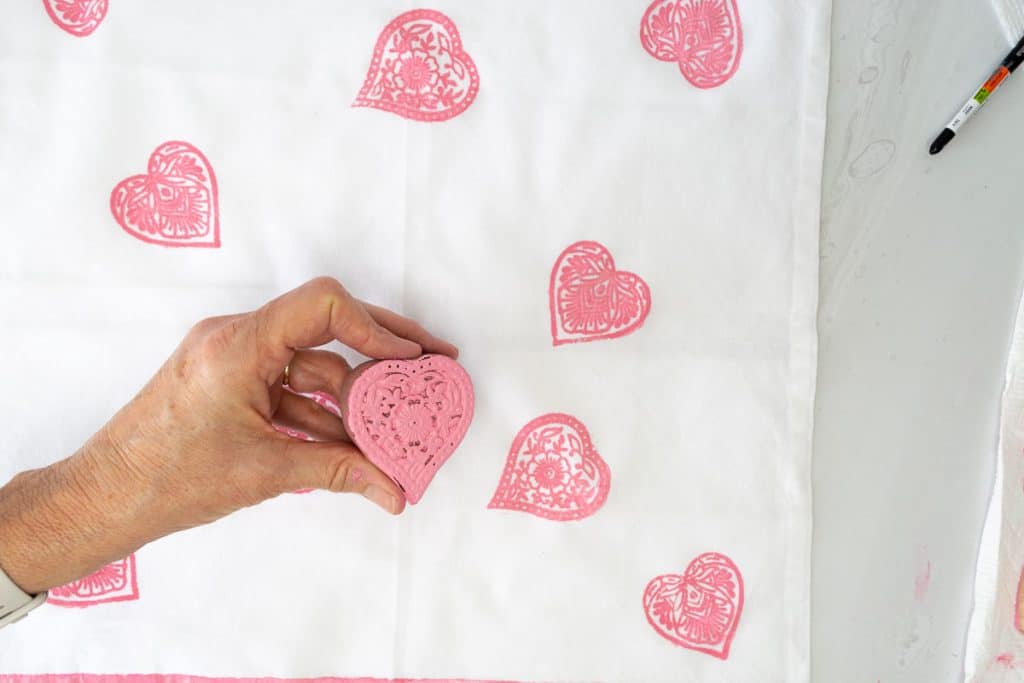
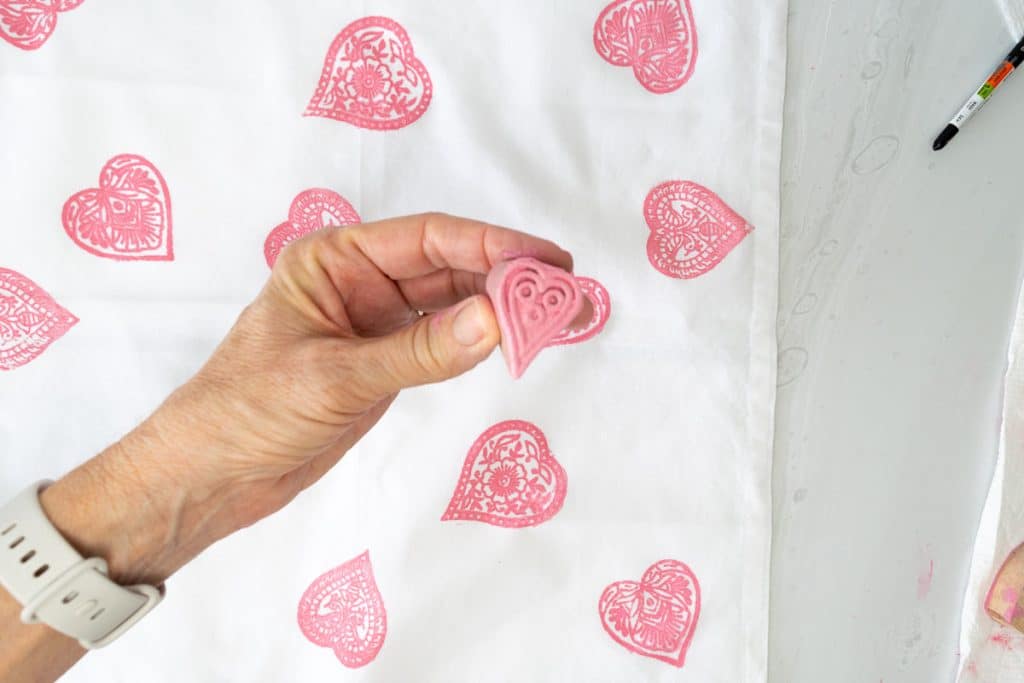
- Once you are comfortable with stamping, place the stamp on your fabric and push it down on all sides of the stamp for even contact and design. If you have a hard brayer, putting pressure on the stamp evenly is helpful.
- You’ll only be able to get one stamp for each coat of paint, so repeat the process.
- Once you are done stamping, set your work aside so it won’t be disturbed. It will need at least 24 hours to dry before you can repeat the border process of taping and painting for the two other edges.
- The paint will be dry to the touch after 24-48 hours, but don’t wash it for a week, after which time you can machine wash the fabric.
- Clean the stamps well after you are done stamping. Ensure that you get the paint out of the crevices. I used the sprayer on my kitchen faucet to get in the nooks and crannies.


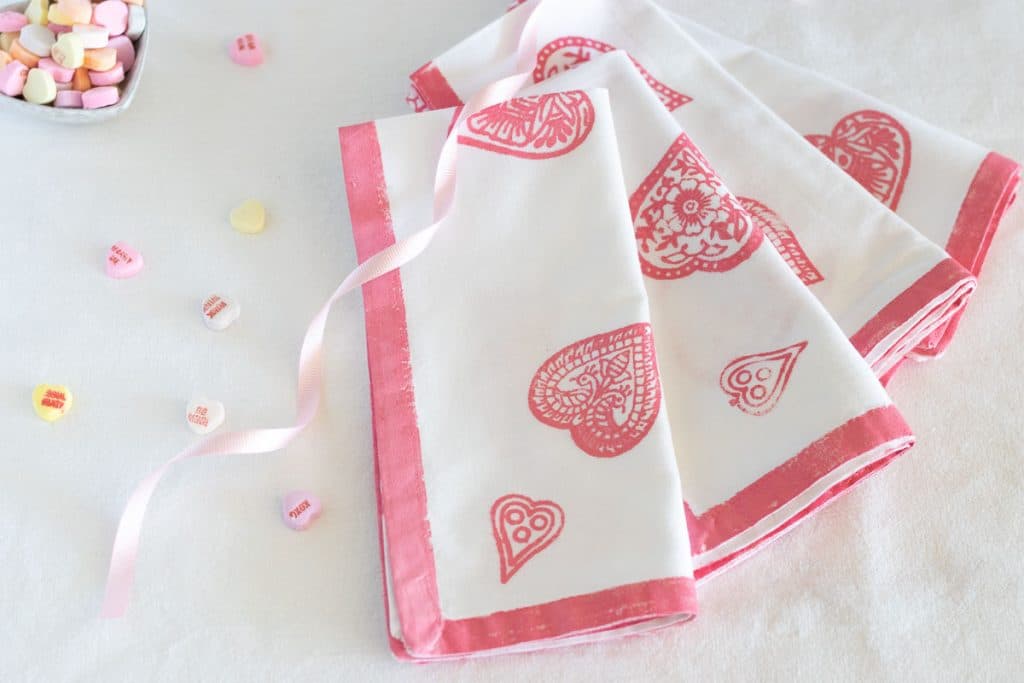
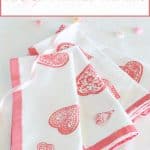
These heart napkins would be a great craft to do with a group of your besties for Galentine’s Day craft night. Here are some other ideas for a Galentine’s Day craft night. 💗
Bookmark this page or pin the following image to refer back to this post about Block Printing on Fabric Napkins in the future.
Thanks so much for spending a few minutes of your busy day with me!
To ensure you don’t miss future content, pop your email in the pale green box on the right or click here. I usually send one email weekly, so I won’t inundate your inbox. I’m sensitive to an overflowing email inbox!
We will only use your email address to send you emails, no more than 1-2 weekly. In addition, you will have access to my growing library of knit & crochet patterns and other printables. Check back often as this library will continue to grow. You can unsubscribe anytime by emailing me or clicking on the “unsubscribe” link at the bottom of all emails.
And you can access many of the products I refer to on my Nourish and Nestle Amazon Page. You can access it here.
So, if you’d like to participate in the ‘subscriber benefit’ action, simply subscribe to Nourish and Nestle here or use the form on the right sidebar. It’s slightly towards the top.
I have sent all my subscribers the link to the Subscriber Benefits Library. If you missed it or misplaced it, let me know.
Until next time…