
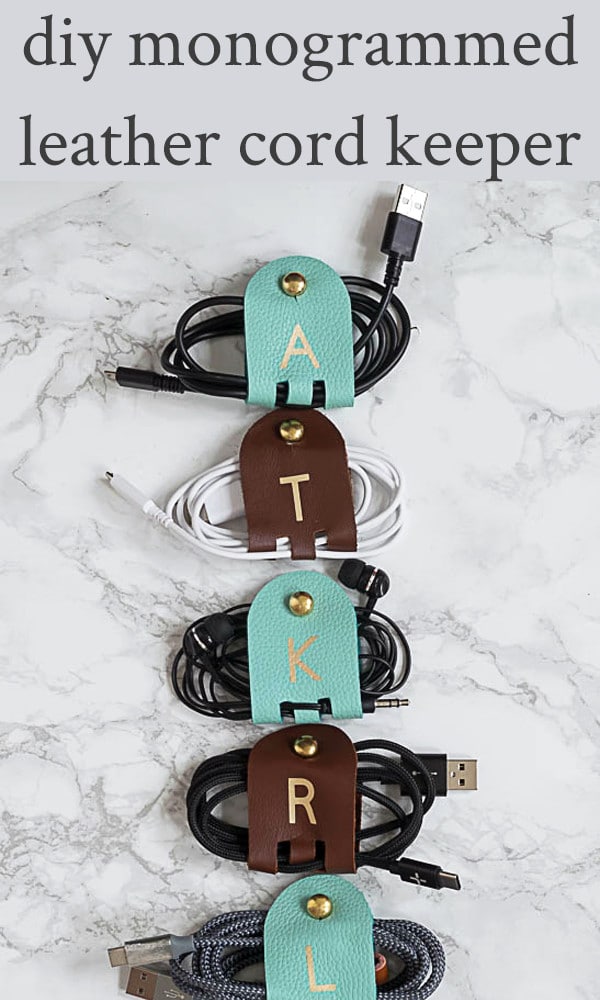
How To Make Leather Cord Keepers
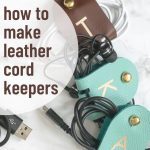
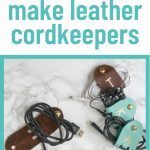
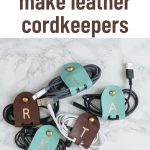
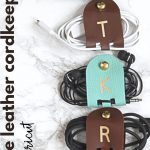
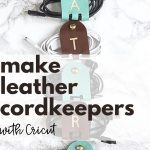
So, this is a fun little project! These Leather Cord Keepers are fairly quick to make and very useful! We use them to help identify each other’s charging cables and earbuds and corral the tangled wires that inevitably settle at the bottom of your bag or purse.
Not only are they pretty darn functional, but they make a perfect gift! In a couple of hours, you could whip out a whole passel of these fun and functional DIY cord keepers.
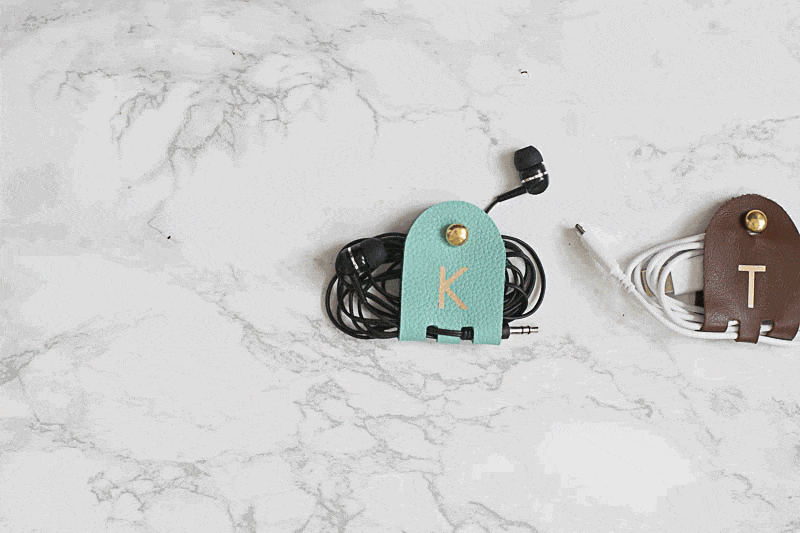
Table of Contents
Materials and Equipment Needed for Leather Cord Keepers:
Some of these links may be affiliate links and I may earn a small commission off of the sale of these products, but the price you are charged is not affected. You can see my full disclosure policy here.
- Cricut (I have the Cricut Explore Air 2)
- DIY Monogrammed Cord Keeper Template
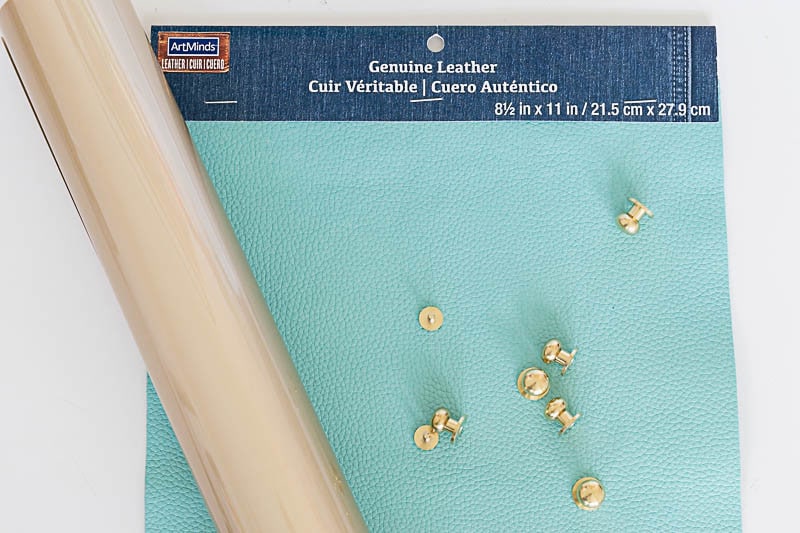
- Leather, from Etsy or Michaels. I used the Turquoise and Brown Leather that I purchased at Michaels.
- Brass Round Head Screw Studs (10 mm)
- Cricut StrongBond Everyday Vinyl in Gold
- Regular and StrongGrip Cricut Mat
- Cricut Deep Point Blade and Fine Point Blade.
How to Make Monogrammed Leather Cord Keepers:
A video showing all of the steps to make these DIY Cord Keepers is available at the end of the post.
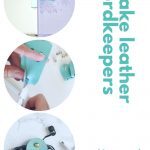
- Adhere leather to a StrongGrip mat, smooth side down. Use your brayer or similar tool to make sure your leather is fully ‘stuck’ to the mat. If you adhere to the backside of the leather, all the little thready leather pieces will be stuck all over your mat and you will not be happy. PLUS…the smooth side of the leather adheres much better to the mat.
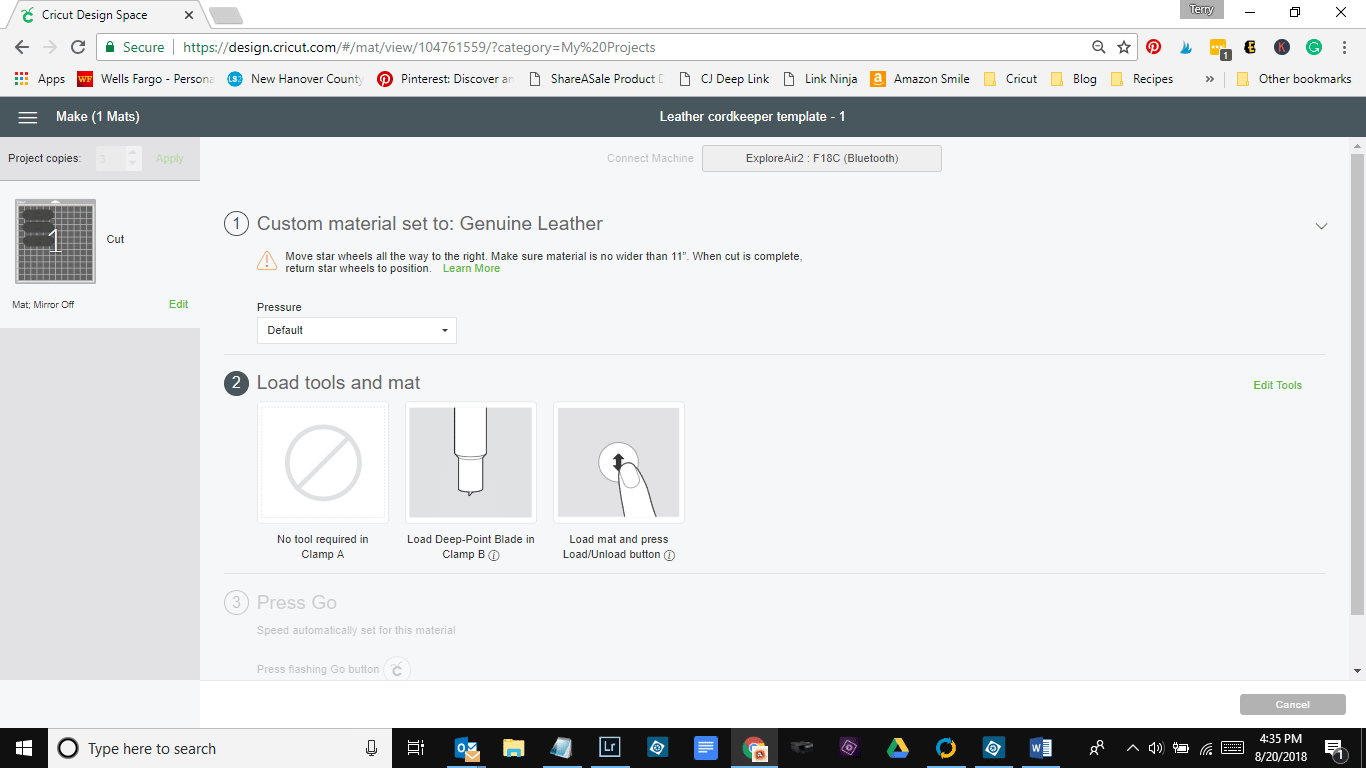
- Download the Template and open Cricut Design Space. Set the material to leather, insert a deep point blade and cut your leather cord keepers.

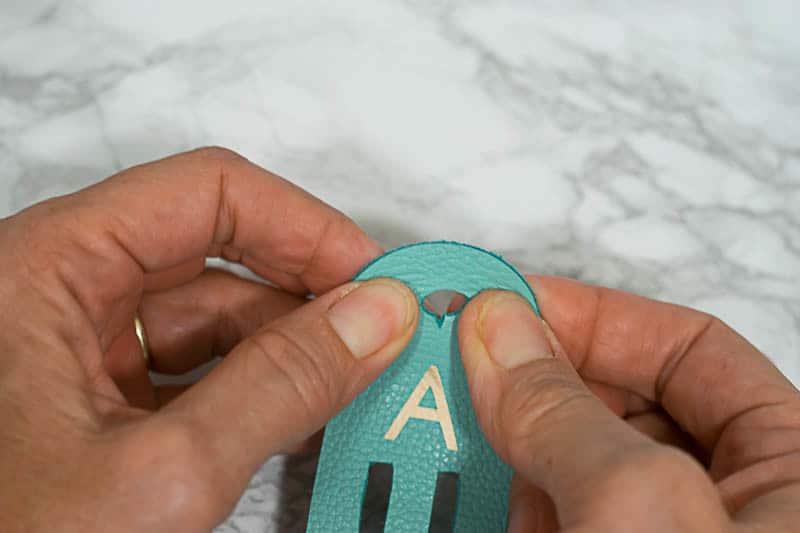
- Make the tiniest clip on the bottom of the big round cut to enable the button to get through the hole without having to make the hole too big.
(in other news…can we all agree that I am in dire need of a manicure! But the truth is…that’s just not high on my list of things to do)
- Screw the studs into the smaller hole. You may need to enlarge the hole to get the screw in…I used the weeding tool to make the hole just a wee bit bigger.
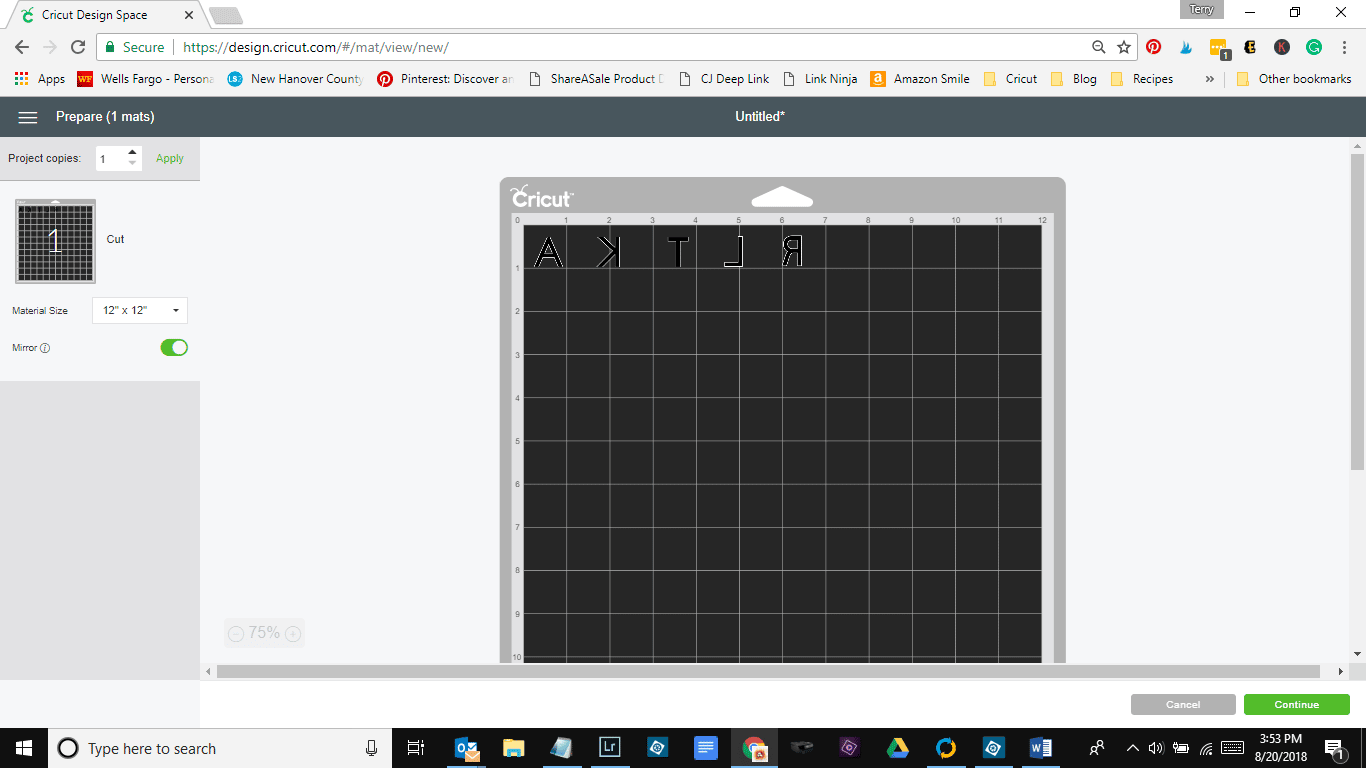
- Set your leather cord keepers aside while you cut the gold initials out of the gold vinyl iron-on.
- Make sure you mirror your initials before you cut them.
- Cut apart the initials and weed the letters.
- Measure to make certain that your letters are centered and placed where you want them.
- Iron your letters on to your leather cord keepers. Make sure you place a thin towel between the leather and the iron. Set your iron to ‘high’ and turn off any steam function.
- Set the iron over the letters for about 15-20 seconds…carefully test to make sure that the letters have adhered before you pull off the clear cover.
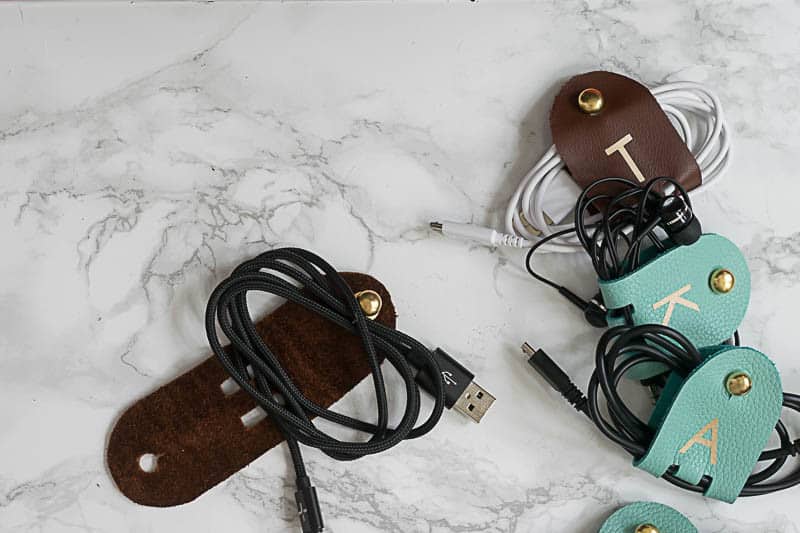
- Tidy up all your cords with your handy and quite spiffy leather cord keepers!
Here’s the video:

With all the traveling we did this summer, we were constantly mixing up each other’s charging cables. Now that I’ve whipped up these babies, we are using them to keep everyone’s cords and earbuds separate.
Plus, if your earbuds always end up in a tangle in your purse, this simple cord keeper will keep them contained.
And these DIY Leather Cord Keepers are my kind of stocking stuffer! They put the FUN in Functional!
So, if you are inclined to organize your electronics cords with these Leather Cord Keepers or need to get started on Christmas gifts, bookmark this page or pin the following image.
Check out these Gingerbread Man Candles which use empty Starbucks Frappuccino bottles or these Embellished Market Bags which also use Cricut Iron-On Vinyl for more Cricut projects.
Thanks so much for spending a few minutes of your busy day with me!
To ensure you don’t miss future content, pop your email in the pale green box on the right or click here. I usually send one email weekly, so I won’t inundate your inbox. I’m sensitive to an overflowing email inbox!
We will only use your email address to send you emails, no more than 1-2 weekly. In addition, you will have access to my growing library of knit & crochet patterns and other printables. Check back often as this library will continue to grow. You can unsubscribe anytime by emailing me or clicking on the “unsubscribe” link at the bottom of all emails.
And you can access many of the products I refer to on my Nourish and Nestle Amazon Page. You can access it here.
So, if you’d like to participate in the ‘subscriber benefit’ action, simply subscribe to Nourish and Nestle here or use the form on the right sidebar. It’s slightly towards the top.
I have sent all my subscribers the link to the Subscriber Benefits Library. If you missed it or misplaced it, let me know.
Until next time…


I just love this idea, I will be making some for Christmas gifts and will not be very expensive or time consuming…Thank you
Oh good Lou Ann! Not expensive at all and fun to make, in addition to relatively quick to make! Once you have that template set up, you can get your Cricut cutting while you put them together.
Happy making my friend.
Hugs, Lynn
Just made these, only instead of monograms I used images to identify them uniquely so I could give them to co-workers. They are so cute! Thanks so much.
What a brilliant idea! What images did you use? Were they from Cricut or something else? I’d love to share a picture on the post to give everyone else ideas.
I can’t get the template/design to download. when I hit it screen goes directly to cricut design space. thanks
Belinda
Hi Belinda, Try this link.
link https://design.cricut.com/#/design/105335866
Any link that is connected to the template, does not work. Can you please kindly help me?
Thanks
Kristine
So sorry for any convenience Kristine! I’ve corrected the link in the post. I don’t know why, but in the several years that the post has been published, the link becomes unattached a couple of times now! I appreciate you letting me know.
Have a great day, my friend.
Hugs,
Lynn
Hi, I’ve tried to download the template. It goes to cricut window and when I click on open app it doesn’t work. I have app on my phone already.
Hi Karyn,
I hope you received the link and that it works for you! Let me know if it doesn’t.
Hugs, Lynn
These are so adorable!! It seems the template link isn’t functioning, could you possibly reset it again? I would love to make these.
Thanks so m much!
Gina
For the life of me, I can’t figure out why that dang link won’t work! ARGH!
Anyway, I am so happy to give it to you, but please let me know if it still doesn’t work.
https://design.cricut.com/#/landing/project-detail/5da0a94b3d12f205e275ee79
Hugs!
Lynn
How do I get the circles to cut where they are supposed to? The are cutting outside the design. Thanks! These are so cute!
Hi Brenda, thanks for the heads up! Not sure what happened there. Here’s a link that should work better. https://design.cricut.com/landing/project-detail/61d30a0d501e612d12d74eaf
Hugs, Lynn