Sourdough Discard Biscuits
If you keep a sourdough starter, you already know the ‘discard struggle.’ ‘You hate to throw it away, but it piles up fast. I’ve been tucking mine into all kinds of recipes lately, and these sourdough discard biscuits have become our absolute favorite way to use it.
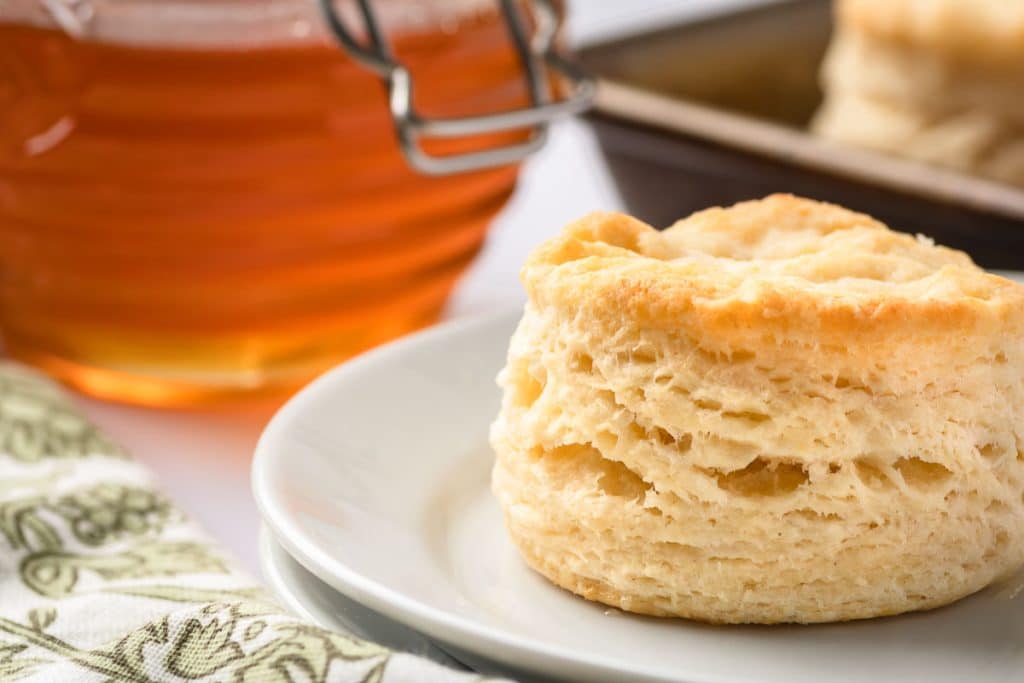
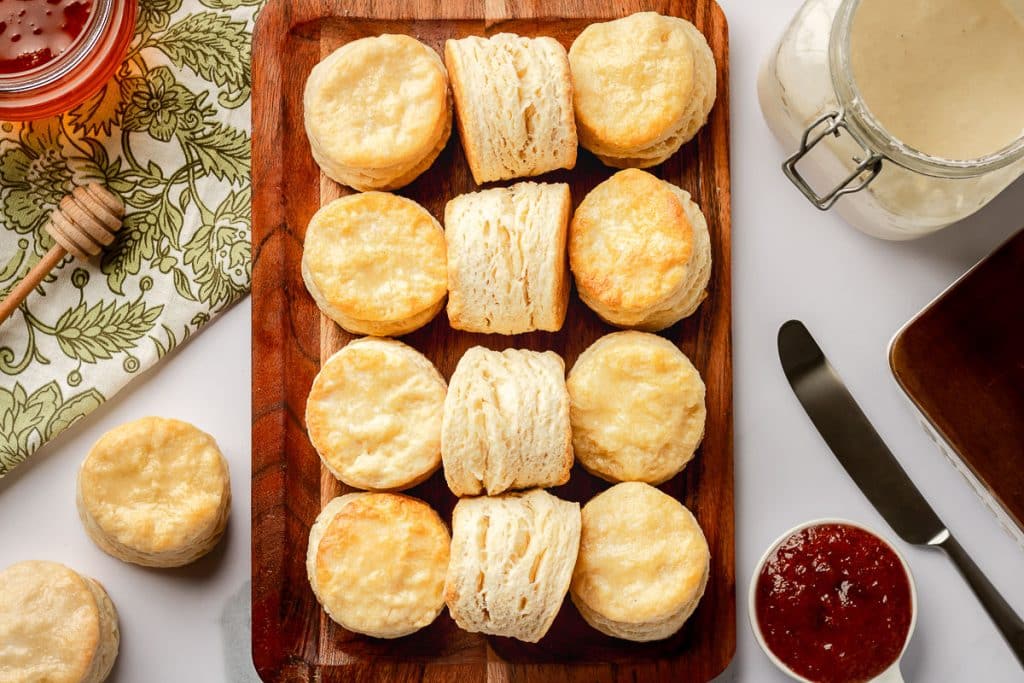
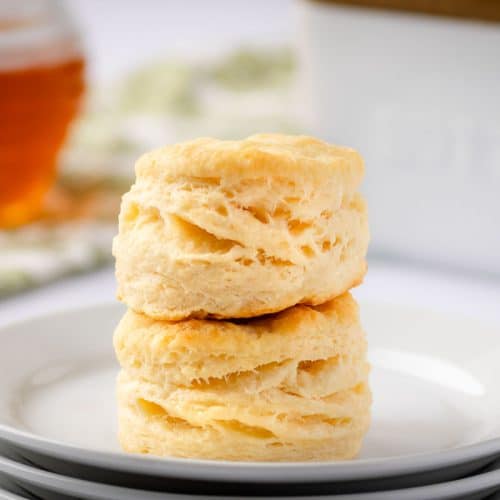
These sourdough discard biscuits have tall, flaky layers, a crispy, golden exterior, and a soft, tender interior that pulls apart beautifully. The layers are visible from the side, the tops turn that perfect shade of golden brown, and when you brush melted butter on them straight out of the oven, they look like something you’d find at a really good Southern breakfast spot.
A small amount of sourdough discard adds a subtle tang that makes them taste more interesting than a standard biscuit without being overpowering. They come together in about five minutes of active work, cost pennies per biscuit, and freeze beautifully — which means you can have fresh-baked biscuits on the table any morning of the week with almost no effort.

Table of Contents
Why Use Sourdough Discard
Sourdough discard is the portion of your starter you remove before each feeding. It’s not dead or unusable — it just isn’t active enough to leaven bread on its own. But it’s full of flavor, and in a biscuit recipe where baking powder does the heavy lifting, it’s perfect. It adds a subtle tang that balances beautifully with any sweet jam or honey on the biscuit, and it adds a little extra moisture to the dough without making it gummy. You’re essentially turning kitchen scraps into something people will ask you to make again and again. The discard can be straight from the fridge — no need to bring it to room temperature.
How Good Are These Biscuits?
They are so good that we now keep a stick of butter in the freezer, so we don’t have to plan too far ahead if we decide to make them!
Tips for the Very Best Sourdough Discard Biscuits
- Keep everything cold. The heat from your hands can soften the butter faster than you’d think, so work quickly and don’t over-handle the dough.
- Don’t skip the freeze. Freezing for 30 minutes before baking makes a noticeable difference in how tall these biscuits rise. It can be skipped in a pinch, but you’ll get a better result if you plan for it.
- Don’t over-mix. As soon as the dough comes together, stop. Too much mixing develops the gluten and turns tender biscuits into hockey pucks.
- If the dough seems too dry, add liquid one small splash at a time. The dough should hold together without being sticky or tacky.
- If you don’t have a biscuit cutter, a sharp knife works fine. Cut squares instead of rounds to eliminate scraps entirely.
- Bake on the middle rack. Too low and the bottoms will burn before the tops brown.
- If you’re using a larger cutter, like a 3-inch, add a few minutes to the bake time and know that very large biscuits won’t rise quite as dramatically. The 2 to 2.5-inch cutter gives the most impressive height.
- Freeze unbaked biscuits for up to three months and bake them straight from the freezer whenever you need them. Add a few extra minutes to the bake time.
How to Make Sourdough Discard Biscuits
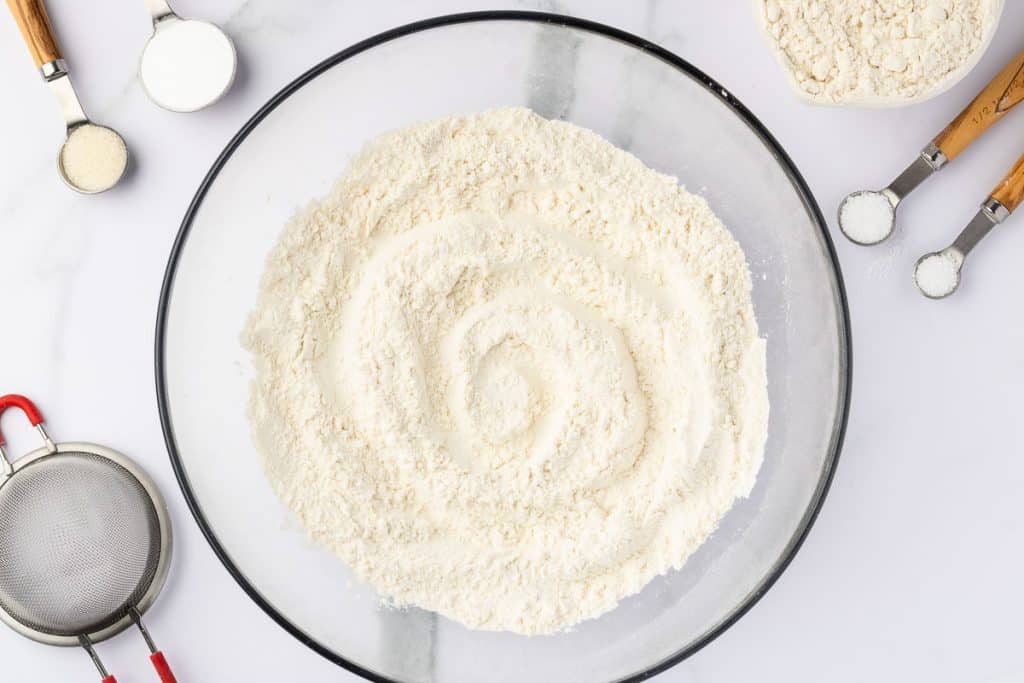
Start by sifting 2 cups of all-purpose flour into a mixing bowl, then add 1 tablespoon of baking powder, 1 teaspoon of salt, and 1 teaspoon of sugar. Stir to combine.
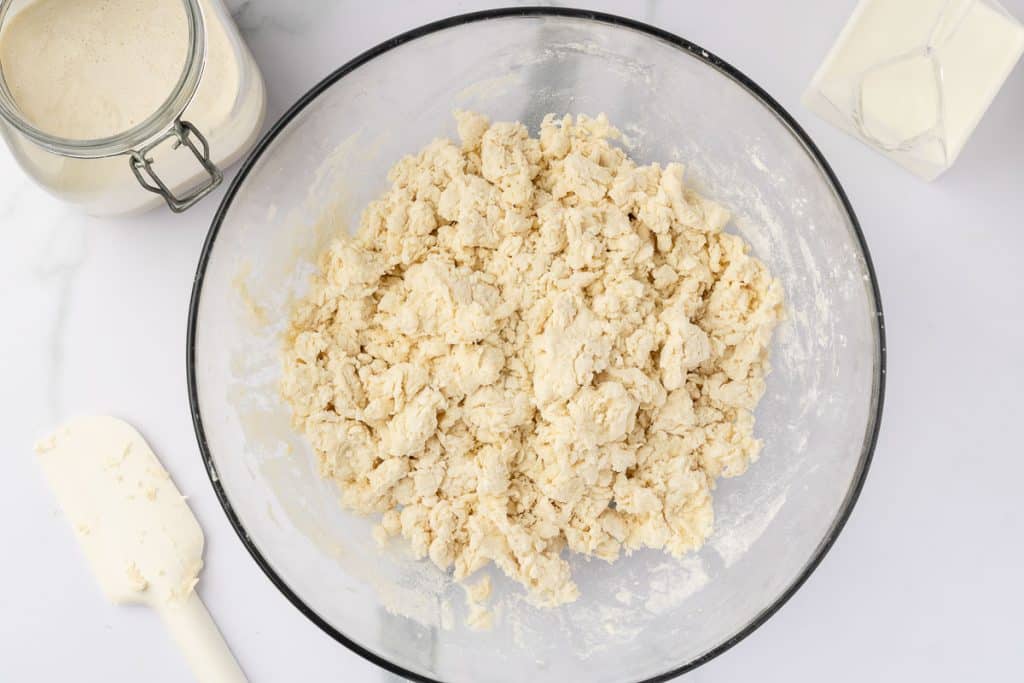
Grate half a cup of frozen butter directly into the flour mixture and fold it in gently. You want the butter coated in flour but not fully blended in — small pieces are exactly what you’re after.

Pour in three-quarters of a cup of whole milk and half a cup of sourdough discard. Fold everything together until the dough just comes together. It will look a little rough and crumbly, and that’s fine. Stop mixing the moment it holds together.
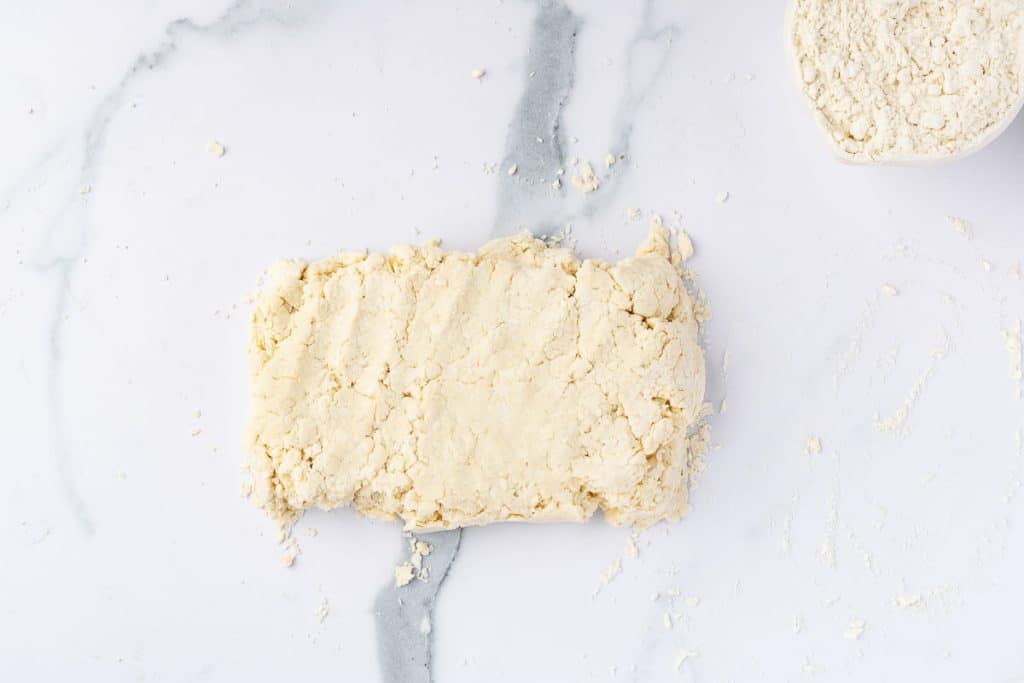
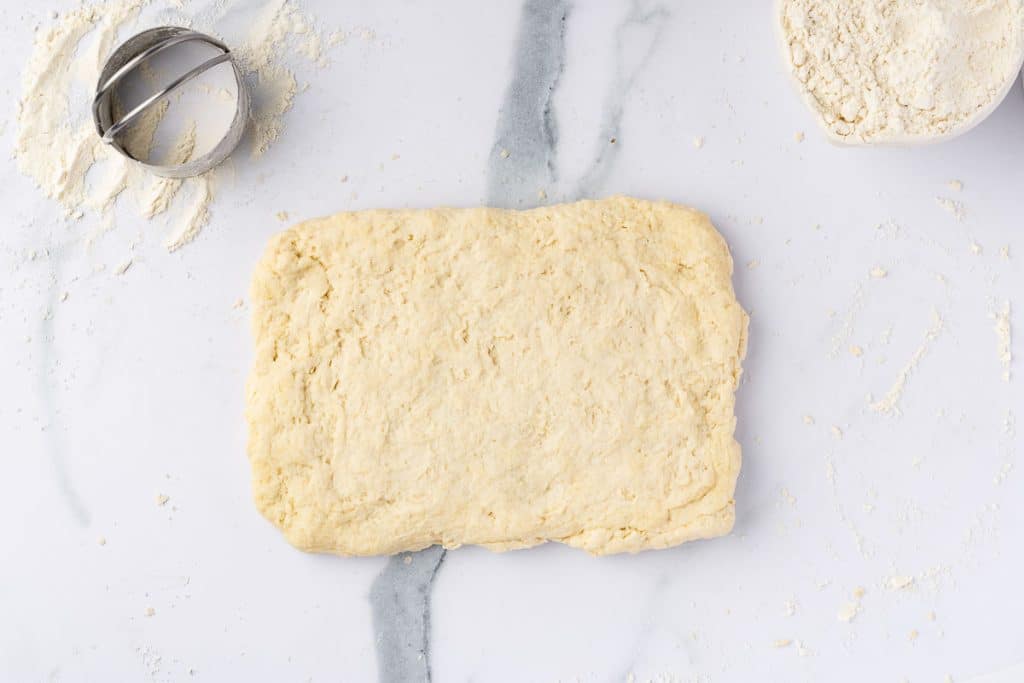
Turn the dough out onto a lightly floured surface and pat it into a rough rectangle. Fold it like a letter — right side to the middle, left side over that — then gently press it back out. Give it a quarter turn and repeat. Do this three or four times total. This folding is what builds the layers.
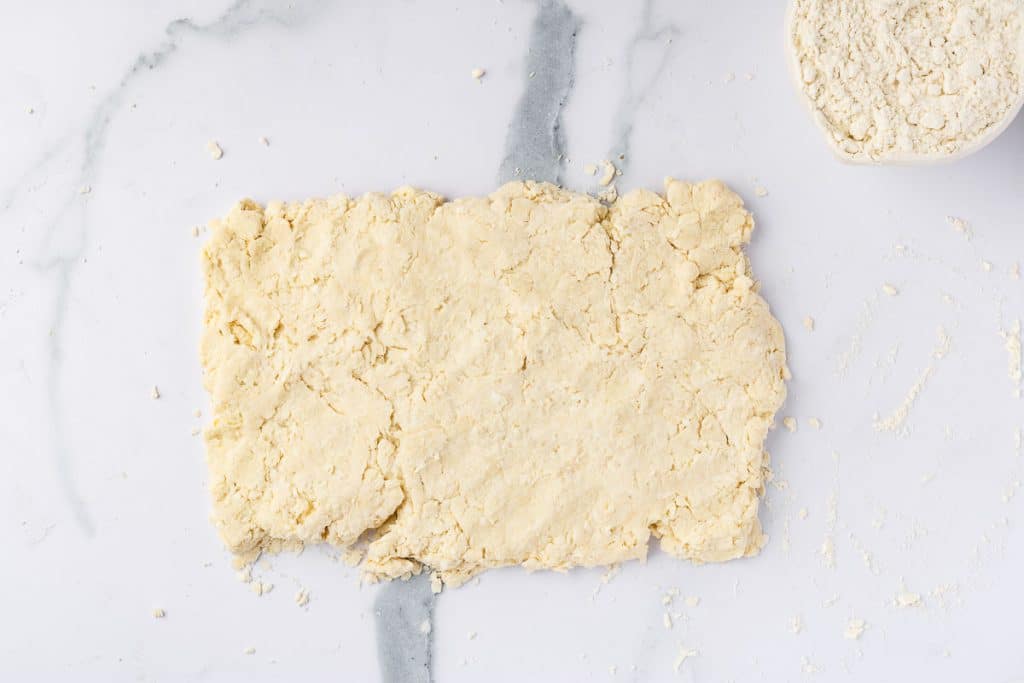
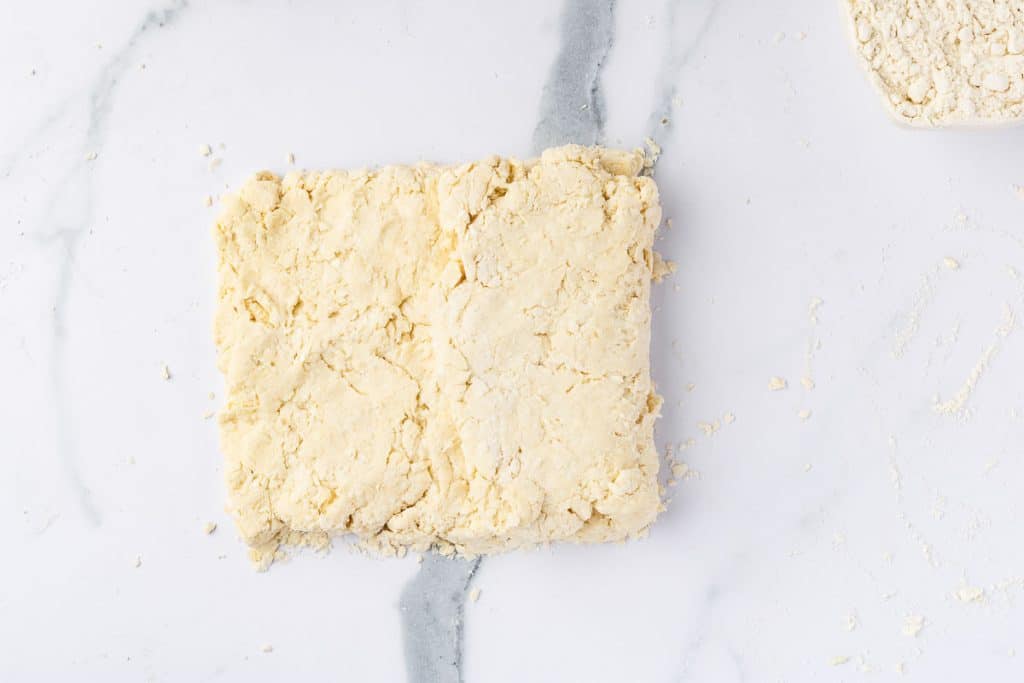
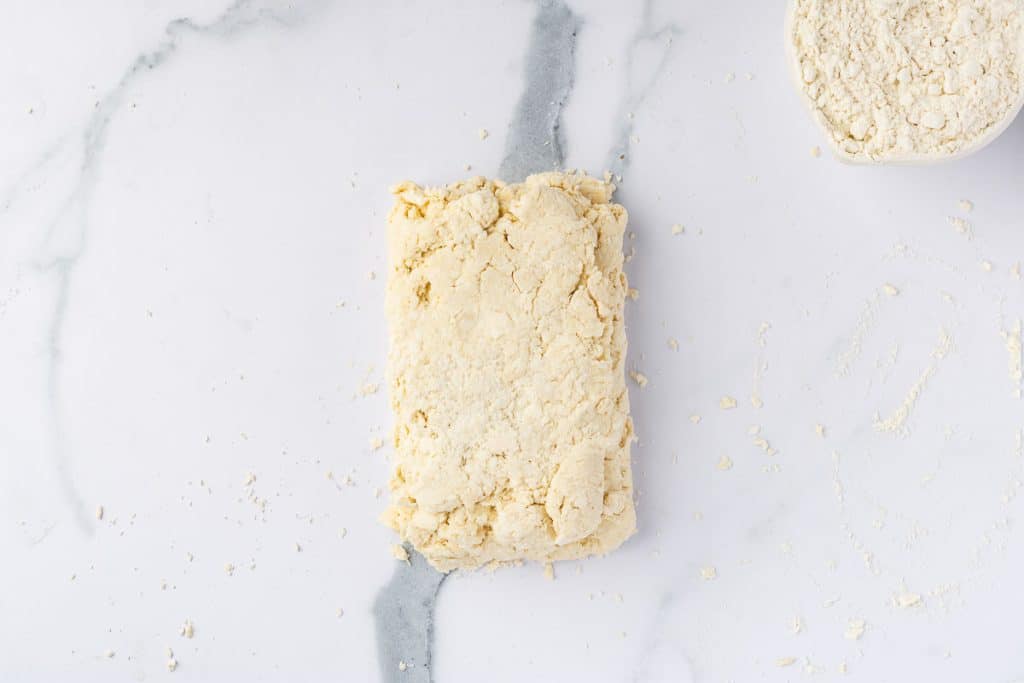
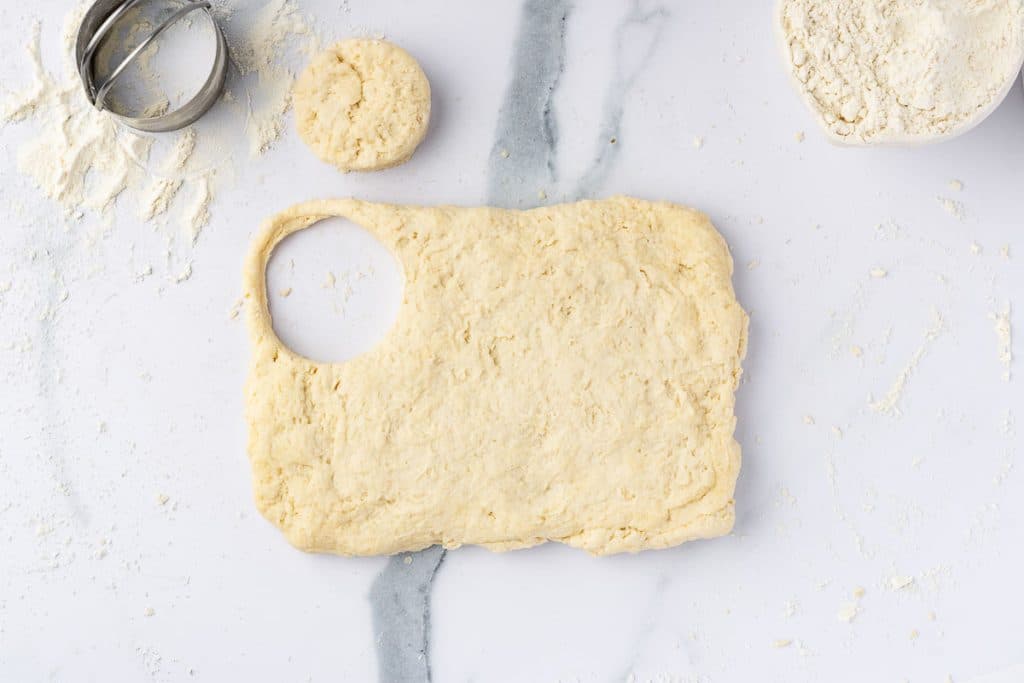
Press or roll the dough to about half an inch thick. Cut with a floured 2 or 2.5-inch biscuit cutter, pressing straight down without twisting. Twisting seals the edges and prevents the biscuits from rising properly. Re-stack and press the scraps together to cut a few more rounds.
Place the biscuits on a parchment-lined baking sheet and set them in the freezer for 30 minutes. This step is worth it — the cold butter going into a hot oven is what gives you that dramatic rise.

Preheat your oven to 425℉ (218℃). Bake the biscuits straight from the freezer for 15 to 20 minutes, until the tops are lightly golden. Brush with melted butter the moment they come out. Eat them while they’re hot.

Add-ins and Variations
These biscuits take well to mix-ins. After you fold the butter into the flour, stir in any of these combinations before adding the liquids:
- Sharp cheddar and chives for a savory everyday biscuit.
- Cheddar and bacon bits, if you want something a little more indulgent.
- Parmesan and garlic powder, or gruyere with cracked black pepper if you’re going for something a wee bit fancier.
- Rosemary and sea salt, thyme and cracked pepper, or chives and dill if you want something herby.
- Blueberries and lemon zest, or cinnamon and brown sugar for a sweeter variation.
- Chocolate chips work too, if you’re feeding someone with a sweet tooth.
Frequently Asked Questions
Store them in an airtight container in the fridge for up to two days. Reheat in a low oven or a toaster oven rather than the microwave — they’ll stay flakier that way.
Yes, and it’s highly recommended. Freeze unbaked biscuit rounds on a sheet pan, then transfer to a freezer bag. Bake from frozen at 425℉ (218℃), adding a few extra minutes to the cook time. Baked biscuits can also be frozen, but the texture won’t be quite as good as baking them fresh.
It’s subtle rather than pronounced. The more active and recently fed your starter, the more tang you’ll notice. Discard that’s been sitting in the fridge for a while will give a milder flavor.
You can, but reduce the added salt by about half so the biscuits don’t end up too salty
It’s a worthwhile step. Sifting aerates the flour, resulting in a lighter, more tender biscuit and making it easier to mix without overworking the dough.
Sourdough Discard Biscuits
Ingredients
- 2 cups all purpose flour sifted
- 1 tablespoon baking powder
- 1 teaspoon kosher salt
- 1 teaspoons sugar
- ½ cup unsalted butter, frozen or cold, grated 1 stick
- ¾ cups whole milk
- ½ cup sourdough discard
- Optional 2 tablespoons of melted butter for brushing
Instructions
- In a mixing bowl add 2 cups of flour sifted, 1 tablespoon of baking powder, 1 teaspoon of sugar and 1 teaspoon of salt and combine.
- Add the grated, frozen or cold, butter (½ cup) and fold into the flour mixture.
- Pour ¾ cup milk and ½ cup sourdough discard into the bowl and fold into the dry ingredients until moist, do not over mix, it will still be a bit crumbly (but not dry).
- Turn the dough out onto a lightly floured surface and shape into a flat rectangle.
- Fold the right side of the dough just over the middle. Fold the left side over the right to the opposite edge of the dough, like folding a letter and gently press or roll into another rectangle. Turn the dough so the rectangle is horizontal, fold in the same way and repeat the folding process 2-3 times more.
- Flatten the dough with hands or a rolling pin until it’s an even thickness, approximately a ½ inch thick rectangle.
- Cut the biscuits with a 2 or 2 ½-inch biscuit cutter. Flour the biscuit cutter before each cut and press down. Do not twist the cutter, just press down. Twisting will seal the edges and prevent rising
- Layer the leftover cut dough, press or roll, then continue cutting rounds.
- Place the biscuit rounds on a baking sheet lined with a baking mat or parchment. Place the biscuits in the freezer for 30 minutes before baking.
- Preheat the oven to 425℉ (218℃). Place the tray from the freezer straight into the oven and bake for 15-20 minutes or until the biscuits are lightly browned.
- Brush melted butter on the tops of the biscuits and serve hot.
Nutrition
Bookmark this page or pin the following image to return to this Sourdough Discard Biscuit recipe in the future.

Thanks so much for spending a few minutes of your busy day with me!
To ensure you don’t miss future content, pop your email in the pale green box on the right or click here. I usually send one email weekly, so I won’t inundate your inbox. I’m sensitive to an overflowing email inbox!
We will only use your email address to send you emails, no more than 1-2 weekly. In addition, you will have access to my growing library of knit & crochet patterns and other printables. Check back often as this library will continue to grow. You can unsubscribe anytime by emailing me or clicking on the “unsubscribe” link at the bottom of all emails.
And you can access many of the products I refer to on my Nourish and Nestle Amazon Page. You can access it here.
So, if you’d like to participate in the ‘subscriber benefit’ action, simply subscribe to Nourish and Nestle here or use the form on the right sidebar. It’s slightly towards the top.
I have sent all my subscribers the link to the Subscriber Benefits Library. If you missed it or misplaced it, let me know.
Until next time…