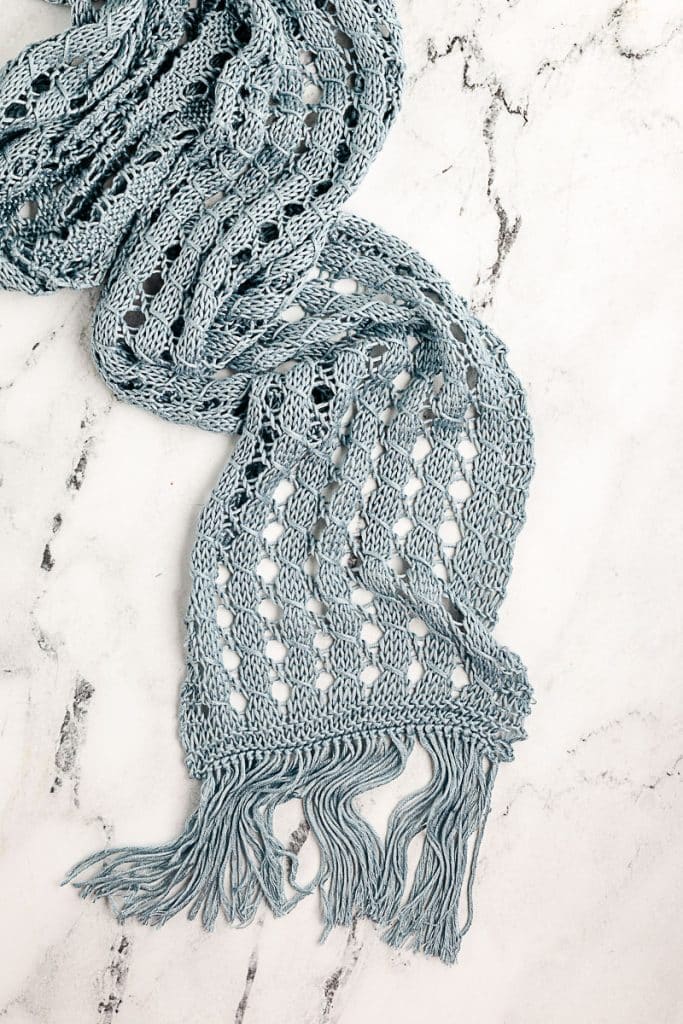
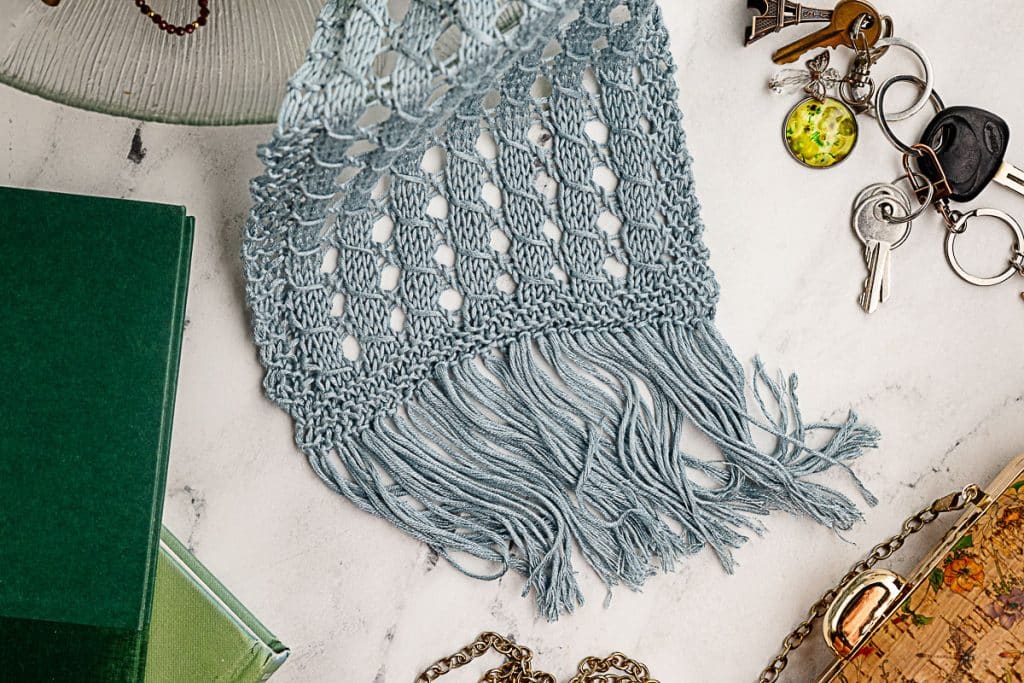
Knit Scarf Pattern – Easy Lace Pattern
This Knit Scarf Pattern is the perfect introduction to lace knitting for anyone who’s mastered basic knit and purl stitches. The easy lace ladder pattern of the scarf creates an elegant drape while remaining simple enough for adventurous beginners. With just a four-row repeat, you’ll quickly find your rhythm and watch this scarf grow surprisingly fast on your needles.
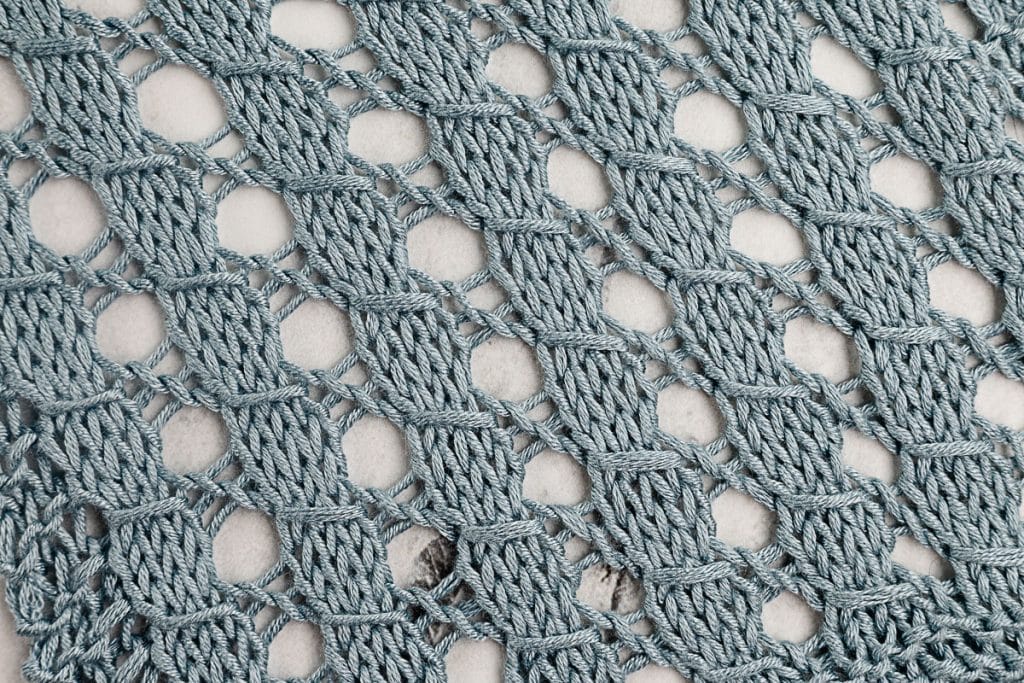
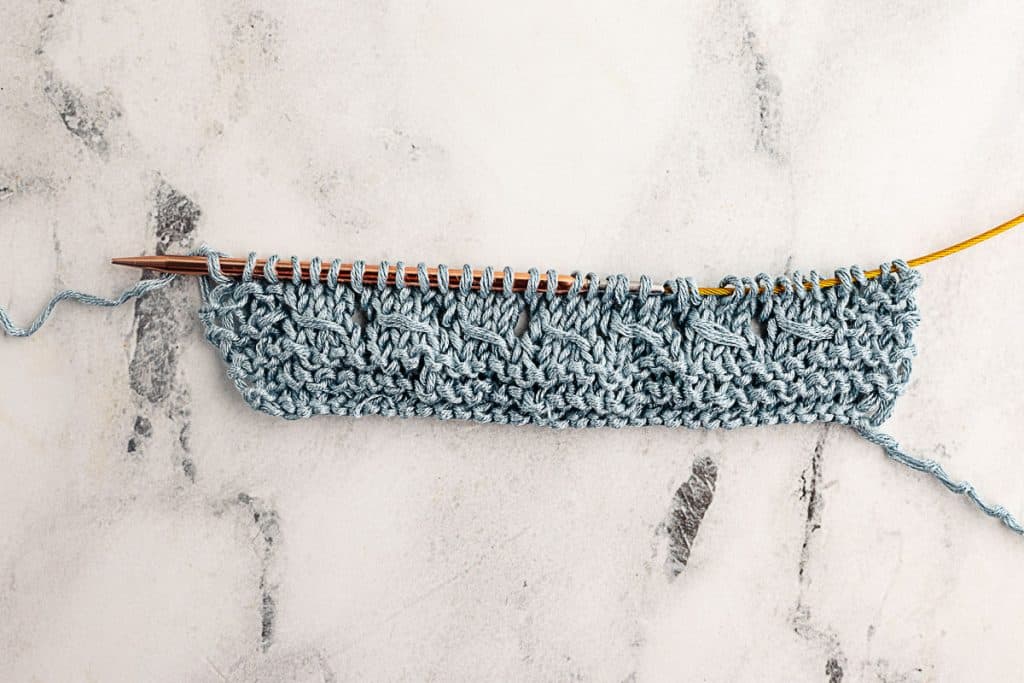
Slipped and (intentionally) dropped stitches create the distinctive vertical columns you see running through the fabric. Don’t let the yarn overs and passed stitches intimidate you – once you’ve completed the first few repeats, the pattern becomes second nature. The garter stitch borders keep the edges neat and prevent curling, though you’ll still want to block your finished piece to show off the lace work properly.
I chose a soft, drapey yarn for this lacey knit scarf pattern, but you can easily adapt it to your yarn stash. Just remember that lace patterns shine brightest in solid or semi-solid colors that let the stitch definition take center stage. The fringe adds a classic finishing touch and uses up leftover yarn, so nothing goes to waste.
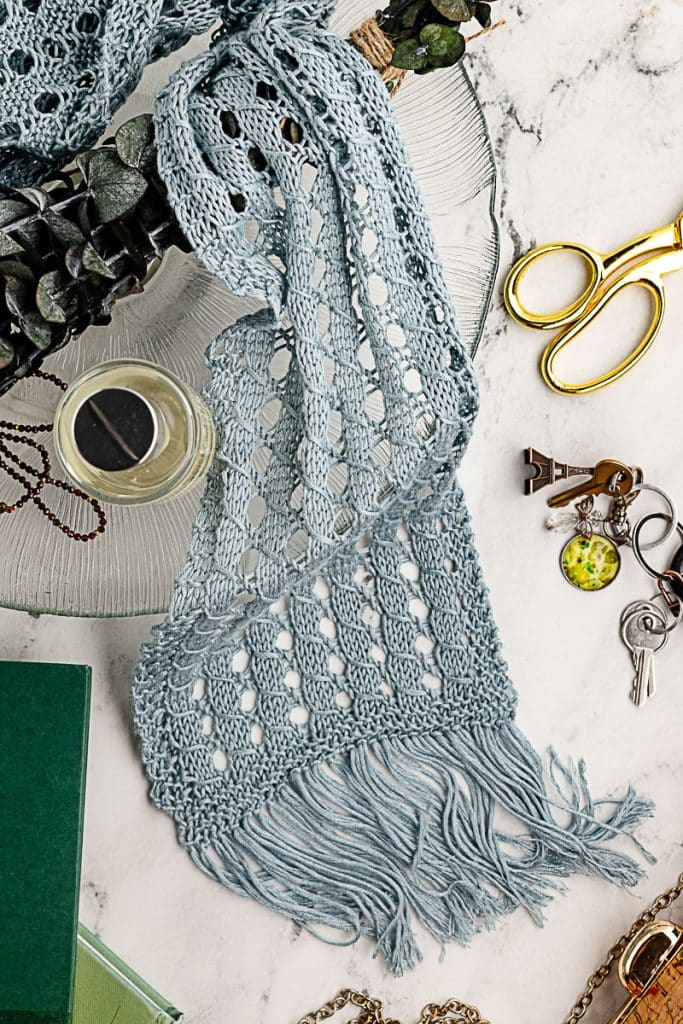
Table of Contents
Tips for Success with this Knit Scarf Pattern
- Use stitch markers to track your progress. Place one on the right side of your work so you always know which row you’re on in the pattern repeat. This simple trick prevents confusion and helps you catch mistakes early.
- Count your stitches regularly, especially when you’re learning the pattern. You should have exactly 34 stitches at the end of every row. If your count is off, it’s much easier to fix the problem immediately than several rows later.
- Don’t judge your work until after blocking. Lace knitting looks crumpled and unimpressive on the needles, and even worse when you first cast off. The magic happens during blocking when the fabric opens up, and the pattern reveals itself.
- Keep even tension on your yarn overs. They should be loose enough to work easily on the next row, but not so loose that they create giant holes. Consistency matters more than perfection – your blocking will even out minor tension variations.
- Steam block gently rather than aggressively. You want to relax the fibers and set the stitches, not stretch the scarf beyond its natural drape. Let the steam do the work while your pins hold the shape.
- Take your time with the fringe. Rushing this final step can result in uneven or poorly attached fringe that detracts from your beautiful knitting. Work methodically across each end and save the trimming for last to achieve a perfectly even finish.
Material Needed for this Lace Knit Scarf Pattern
Some of these links may be Amazon affiliate links and I may earn a small commission from the sale of these products to help defray the costs of operating this site, but the price you are charged is not affected. You can see my full disclosure policy here.
- 1 skein Silky Soft by Loops & Threads ( I used the Mineral Blue color) or similar DK or Light Worsted yarn. Lion Brand Truboo would be a suitable substitute.
- One pair US 6 (4mm) knitting needles
- This free Easy Lace Knit Scarf Pattern is available in this post below and as an ad-free printable PDF for subscribers. You can find the pattern in the Miscellaneous section of the Library (your super secret password is included at the bottom of every Monday’s Newsletter email) or email me, and I’ll send it to you. Not a subscriber? C’mon—we’d love to have you. A subscription costs nothing and gives you access to all our printables and pattern PDFs. Click here to have the Easy Lace Knit Scarf pattern directly emailed to you.
Gauge
26 stitches and 26 rows in the lace pattern, including a 3-row garter stitch edge at the top and bottom and a 3-stitch garter edge on each side, measures 6 inches wide and 4.5 inches tall after pinning and steam blocking.
Finished Size
Approximately 23 inches long and 8 inches wide after pinning and steam blocking.

Terms Used in this Knit Scarf Pattern
- Garter stitch: Knitting every row, creating a reversible, ridged fabric
- Right Side (RS): The front or public-facing side of your work
- Wrong Side (WS): The back side of your work
- Yarn over (yo): Wrapping yarn around the needle to create a new stitch and a decorative hole
- Slip 1 stitch knitwise (sl1k): Moving one stitch from the left needle to the right without knitting it
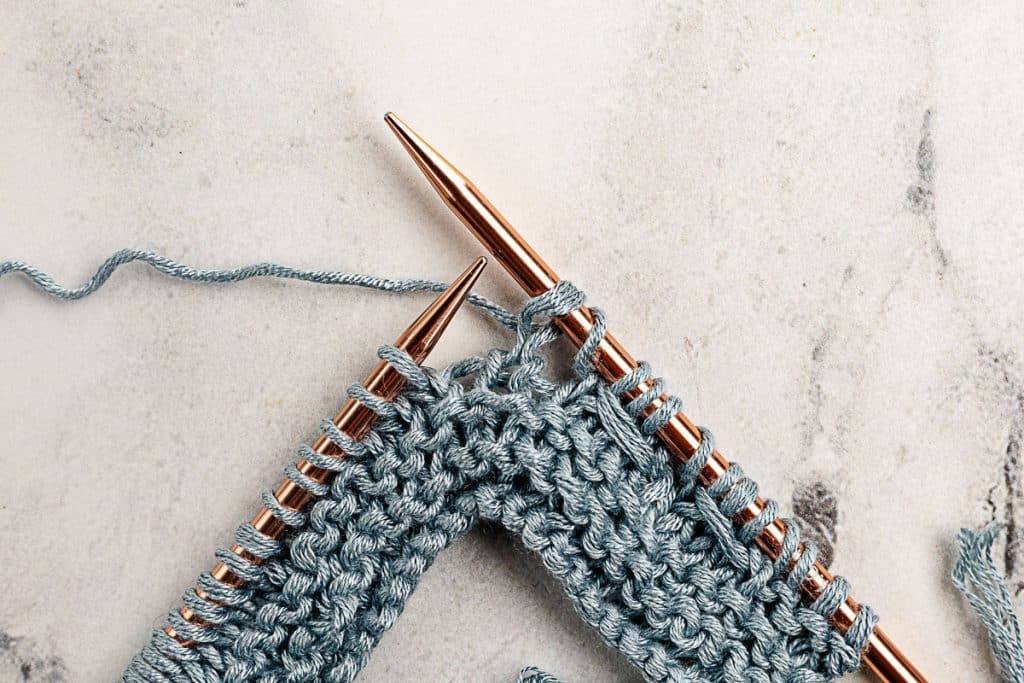
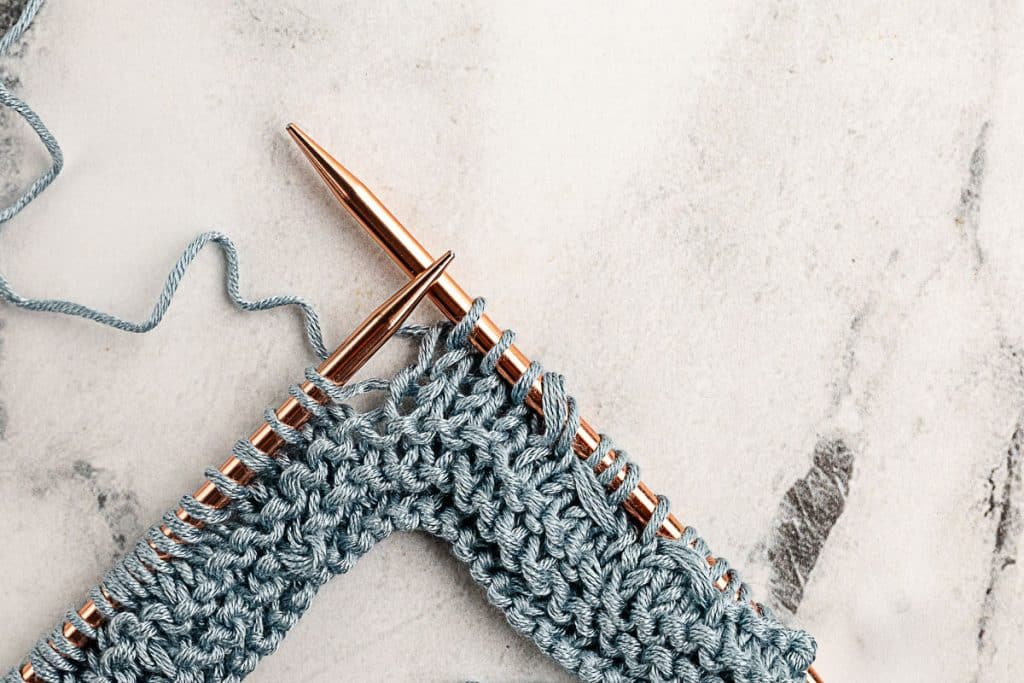
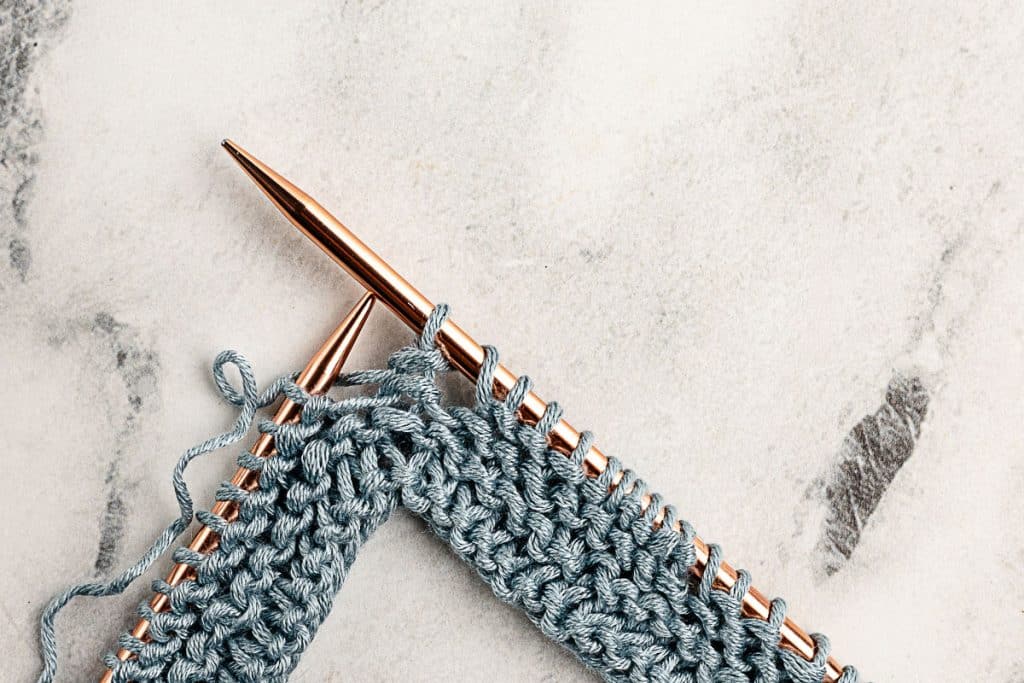
- Pass the slipped stitch over (psso): Lifting a previously slipped stitch over other stitches and off the needle. Slipping this stitch over the 3 knitted stitches creates the horizontal bar.
- Drop the yarn over: Allowing the previous row’s yarn over to fall off the needle, creating an elongated vertical stitch
Knit Scarf Pattern Instructions
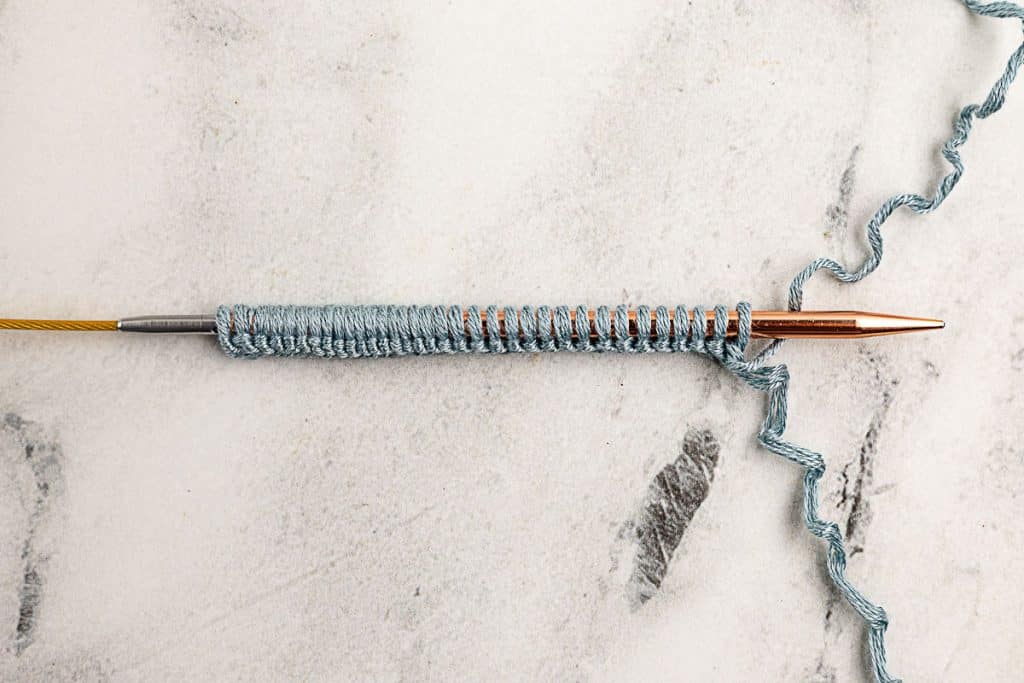
Cast on 34 stitches.
Rows 1–4: Knit all stitches (garter stitch edge).
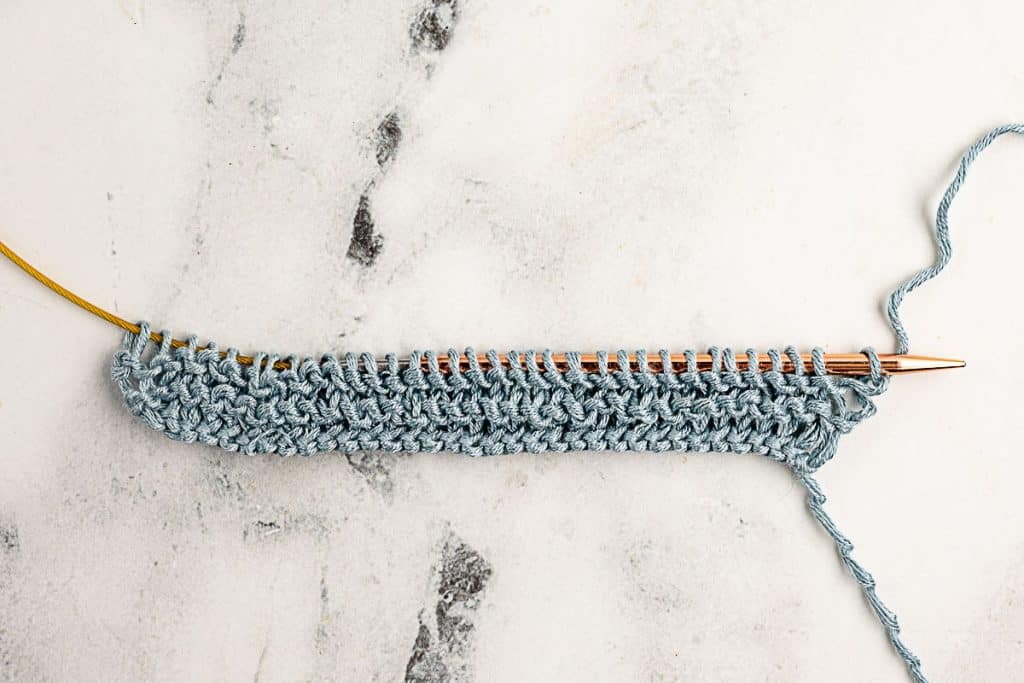
Row 5 (RS): Begin lace pattern. Knit all stitches.
Row 6 (WS):K3, *purl 4, yo*. Repeat from * to the last 3 stitches. Knit the last 3 stitches.
Row 7 (RS): K3, *drop the yarn over, yo, sl1k, knit 3, psso the 3 knitted stitches. Repeat from * to the last 3 stitches. Knit the last 3 stitches.

Row 8 (WS): K3, purl all stitches until the last 3 stitches, knit 3.
Repeat Rows 5–8 a total of 70 times, ending with a purl row.
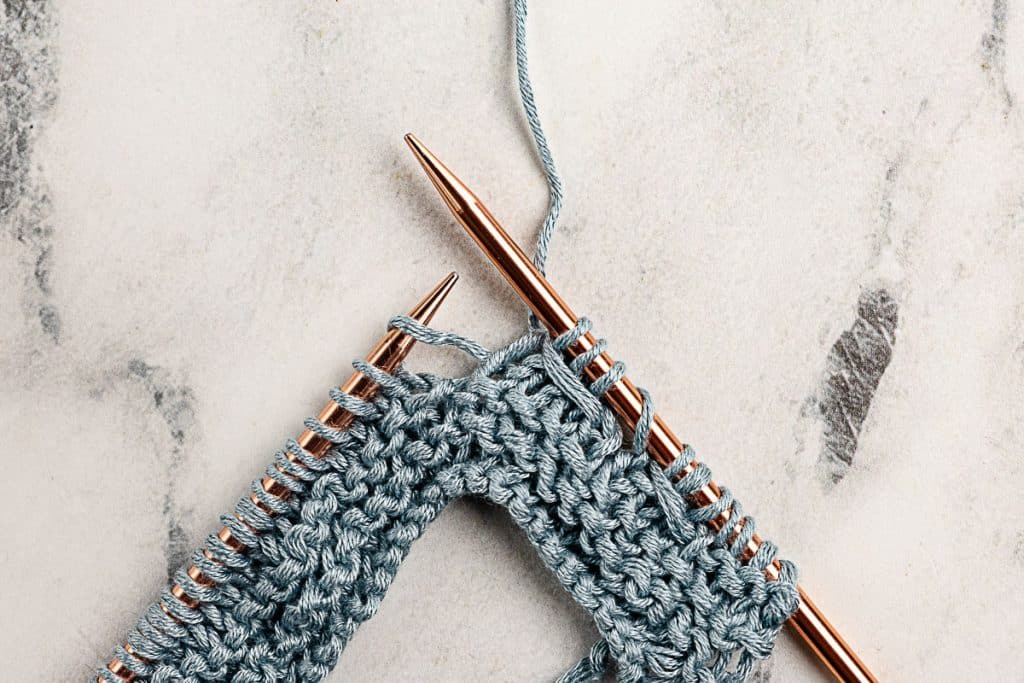
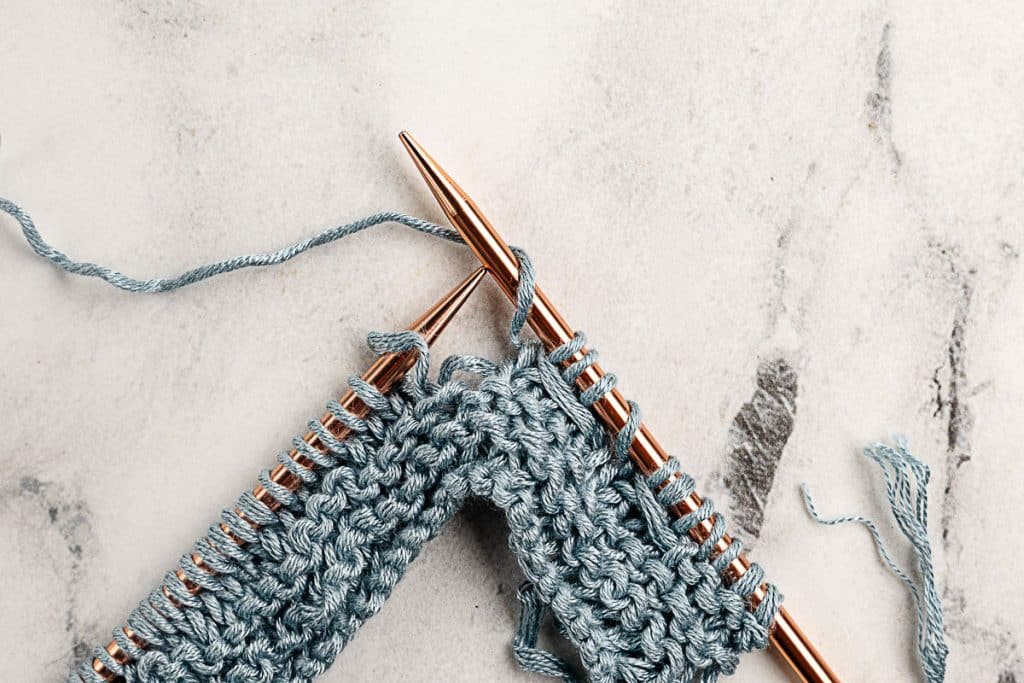
Knit the final 4 rows in garter stitch.
Cast off.
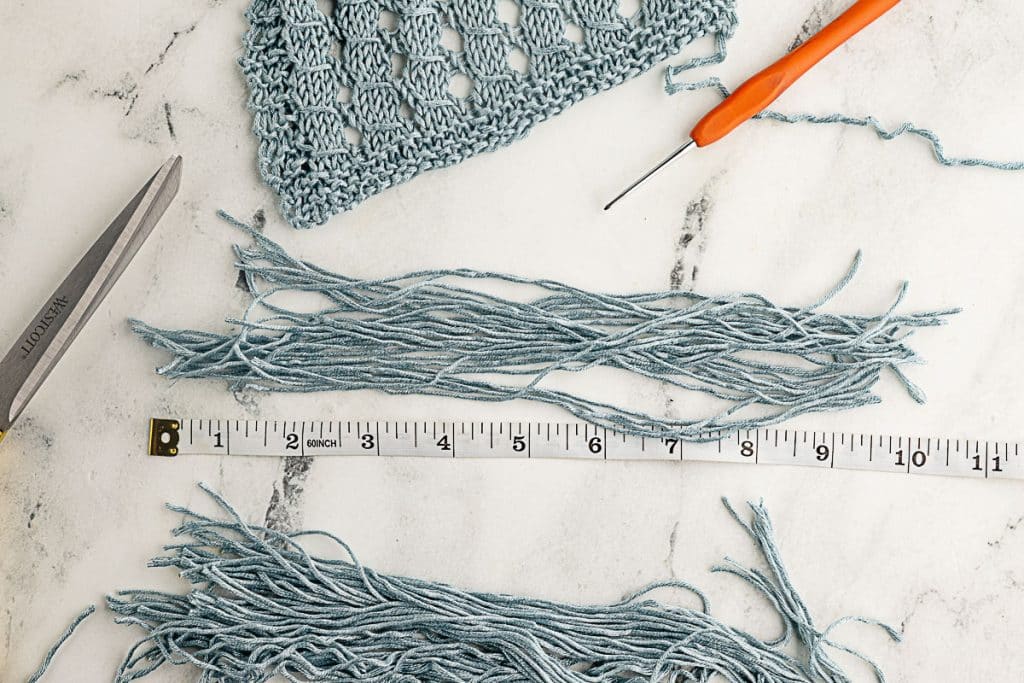
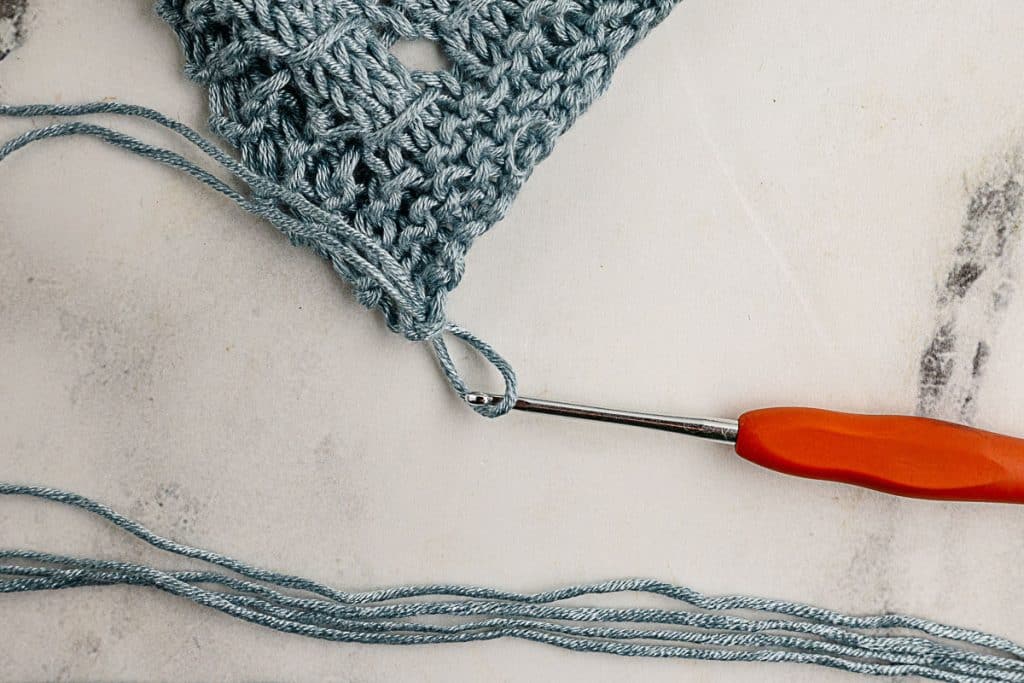
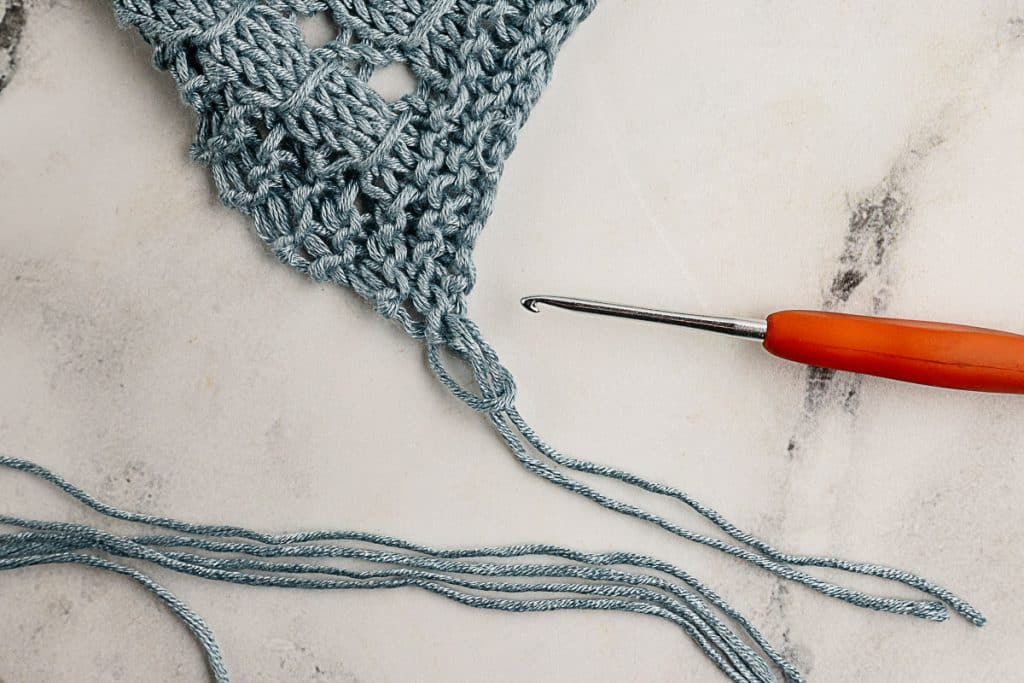
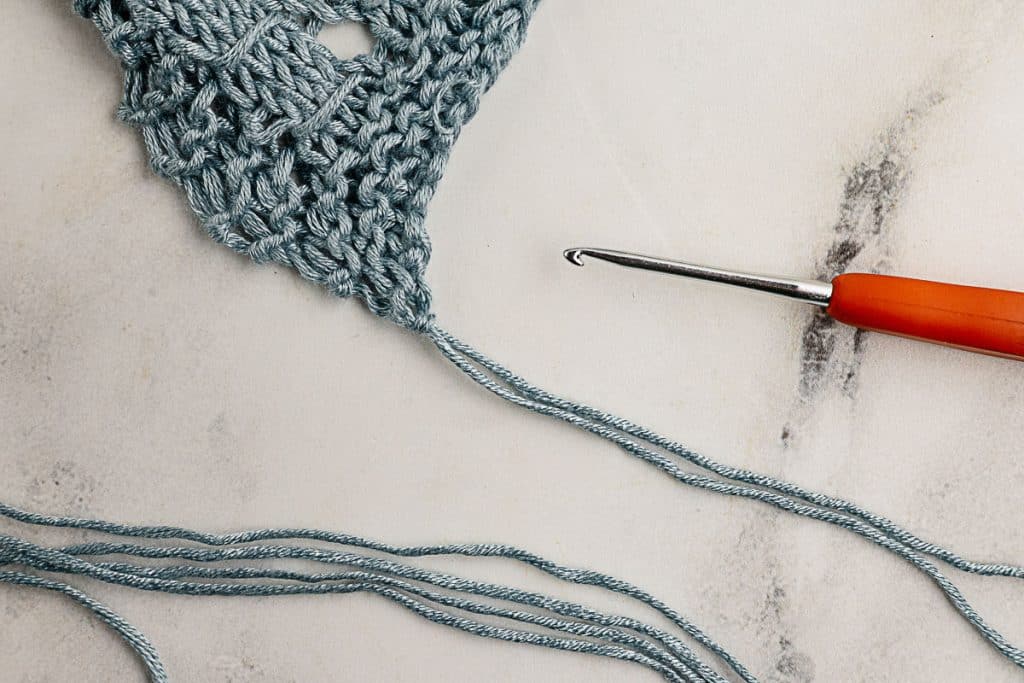
Add Fringe to Your Finished Scarf
Cut the remaining yarn into 10-inch strands. You will need approximately 34 strands for each end of the scarf (68 strands total)
To attach the fringe:
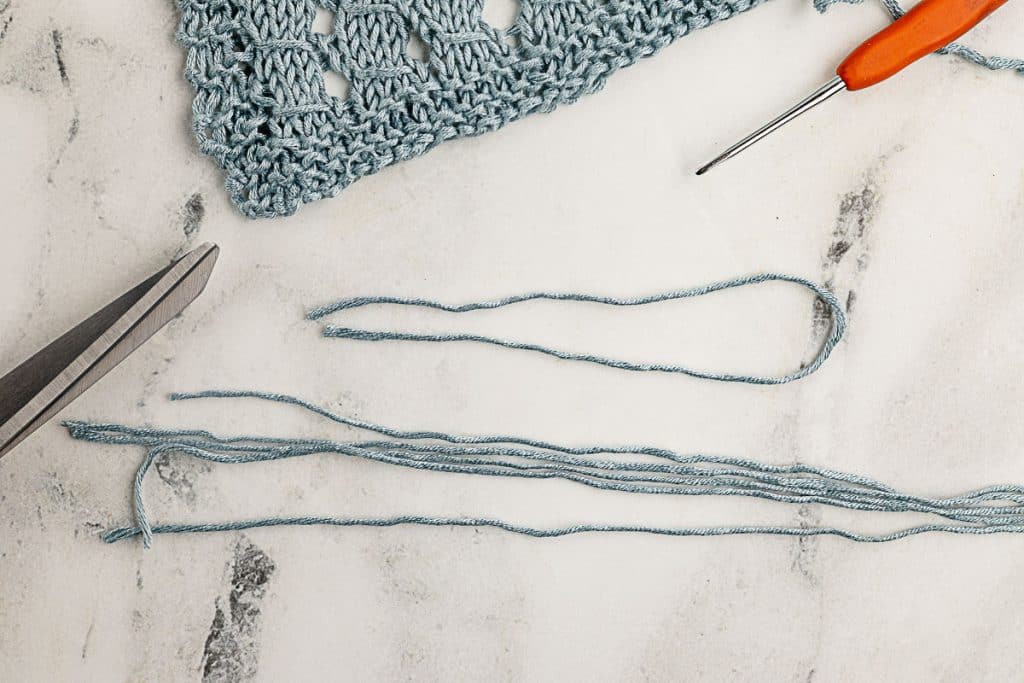
- Fold one strand in half to form a loop.
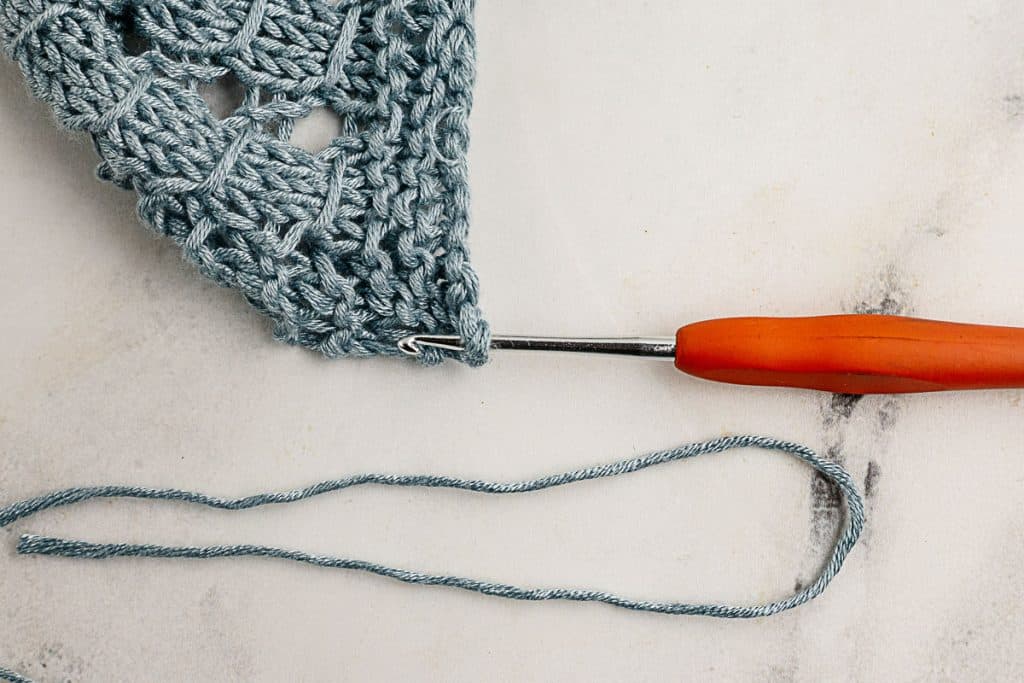
- Using a crochet hook, pull the loop through one stitch along the edge of the scarf.
- Pull the two loose ends through the loop and tighten to secure.
- Repeat along every stitch on each end of the scarf.
- Trim the fringe evenly with scissors.
Blocking
How to Steam Block Your Knit Scarf
You’ll need a blocking mat or clean towel on a flat surface, rust-proof T-pins or blocking pins, a tape measure, and a steam iron or garment steamer.
Lay your scarf flat on the blocking surface. Gently stretch it to the approximate finished measurements (8 inches wide and 23 inches long), being careful not to pull too hard. The fabric should look relaxed, not strained.
Pin the scarf at each corner first, then work your way along the edges, placing pins every inch or two. Pay special attention to the lace pattern; ensure the ladder columns run straight and the openwork is evenly distributed. Don’t be afraid to adjust pins as you go to ensure the fabric lies flat and is symmetrical.
Set your iron to the steam setting appropriate for your yarn fiber. Hold the iron 1-2 inches above the surface of the scarf – you’re not pressing it like you would a shirt. Let the steam penetrate the fibers for a few seconds at a time, working in sections across the entire scarf. You’ll see the fabric relax and the stitches settle into place.
Continue steaming until you’ve covered the entire piece, spending a bit of extra time on any areas that seem particularly stubborn about lying flat. The entire process should take only a few minutes.
Let the scarf cool and dry completely before removing any pins. This usually takes at least an hour, though leaving it overnight ensures the fibers are fully set. Once you unpin it, the scarf will retain its shape, and the lace pattern will be clearly defined.
Steam-Blocking v Wet-Blocking
Steam blocking works best for animal fibers such as wool and alpaca, and for blends that respond well to heat and moisture. It’s faster than wet blocking and gives you greater control by allowing you to target specific areas that need attention. For the bamboo yarn used in this lace ladder scarf, steam blocking is gentler and less likely to stretch the fabric beyond your desired length.
Wet blocking involves soaking your entire piece in water, gently squeezing out excess moisture, and then pinning it to shape while damp. This method is ideal for natural fibers such as wool and cotton, especially when you’re working with heavily textured patterns that require aggressive blocking. Wet blocking also works well for pieces that are significantly smaller than their intended measurements or have uneven tension throughout.
Use steam blocking when you need a quick result, when your piece is close to the right size and just needs the stitches set in place, or when you’re working with delicate fibers that might felt or distort with too much handling. It’s perfect for scarves, shawls, and lightweight items.
Choose wet blocking for items that need serious reshaping, for superwash or plant-based fibers that don’t respond well to heat, or when you’re working with lace that needs to open up dramatically. Wet blocking is also safer if you’re uncertain about how your yarn will react to direct steam.
For this scarf pattern, I recommend steam blocking because it provides enough shaping to showcase the lace without overstretching the fabric or requiring hours to dry.
Yarn Memory
Blocking isn’t permanent, but it’s not entirely temporary either. How long your knitted pieced retains its block shape depends on the fiber content and your care.
Natural animal fibers like wool and alpaca have the best blocking memory. Once you’ve steamed or wet-blocked wool, it will hold that shape through normal wear and even light washing. The fibers actually restructure themselves when exposed to heat and moisture, so your blocking can last for months or even years with proper care.
Plant fibers like cotton and linen also block well and hold their shape reasonably long, though they’re more prone to relaxing over time compared to wool. They’ll maintain their blocked dimensions through several wears but may need re-blocking after washing.
Synthetic fibers and blends have the least blocking memory. Acrylic and other synthetic fibers don’t respond to blocking the same way natural fibers do. They’ll look great immediately after steam blocking, but the effects fade more quickly with wear and washing. For the Silky Soft bamboo yarn in this pattern, you can expect the blocking to last through several wears, but the scarf will gradually relax back toward its pre-blocked state.
Daily wear will gradually soften the blocked shape as the fabric moves and drapes around your neck. The lace pattern won’t completely revert to that pre-blocked curl, but it may lose some of its crisp definition over time.
The good news is that you can re-block whenever needed. After washing your scarf or if it starts looking a bit relaxed, simply block it again using the same method. Most knitters find they need to re-block lace items after every few washes to keep them looking their best.