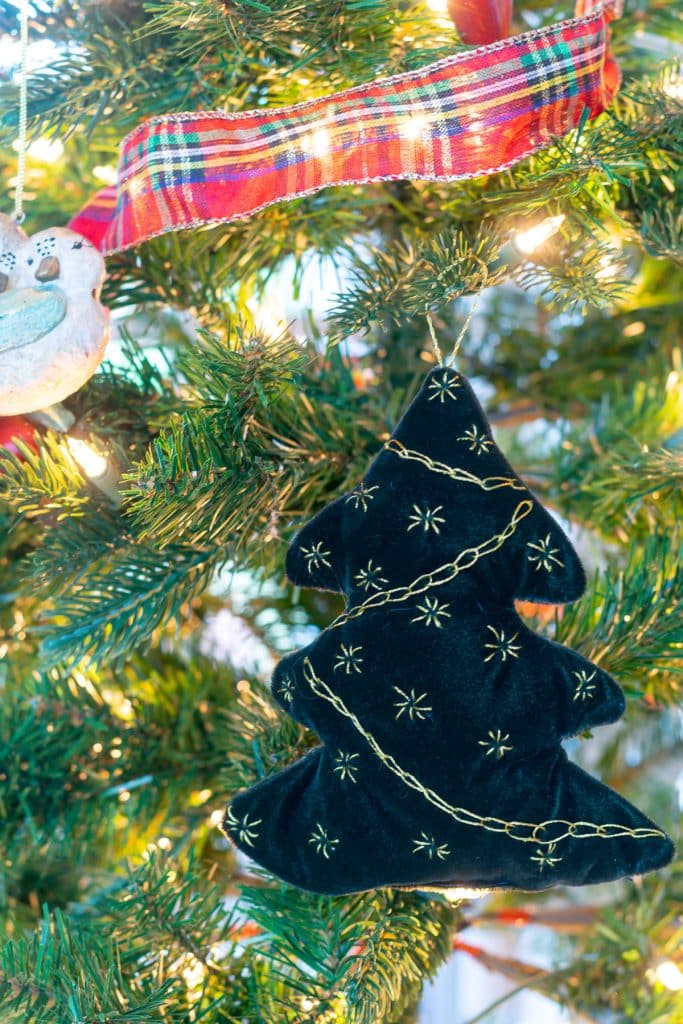
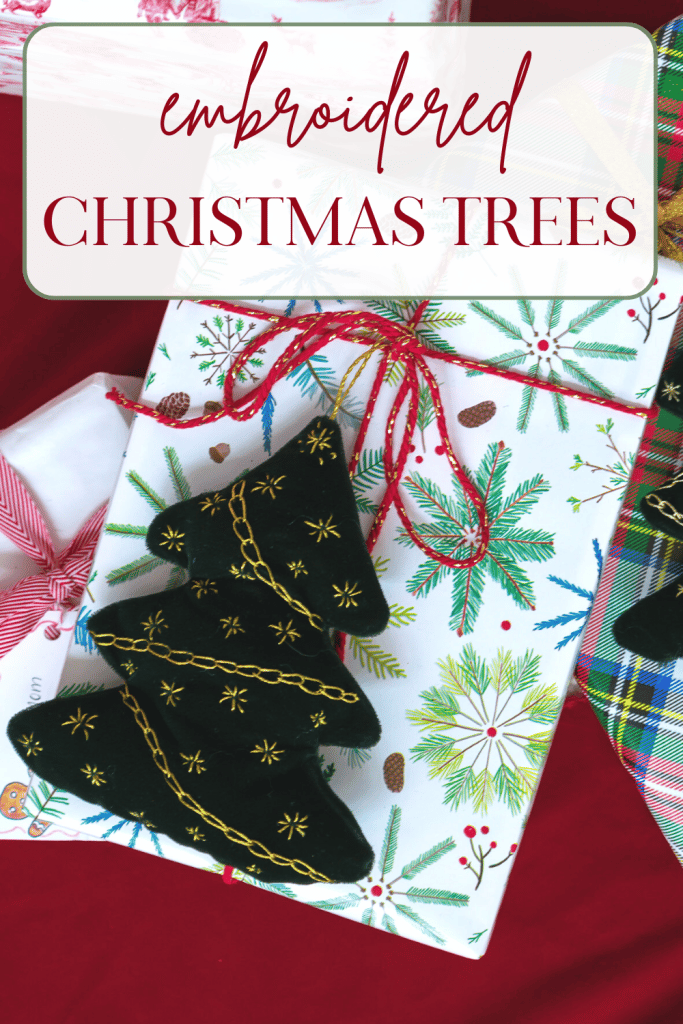
Embroidered Christmas Trees
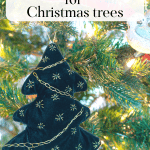
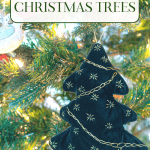
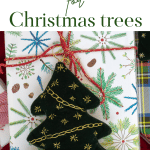
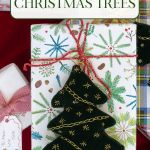

You can make these embroidered Christmas trees as fancy or as simple as you like. I could start and finish one in about 90 minutes with the simple embroidery design I used, but feel free to ‘bling’ them up a bit with fancier stitches and beads. You can use these little trees as holiday gift adornments, tree ornaments, or to hang from garland.
You know I love knitting, but recently I found myself itching to do something different…and quick. I couldn’t tell you exactly what inspired these little embroidered Christmas trees, but I’m glad it did! I enjoyed the quick hand embroidery and simple sewing required to finish them, and now have a collection of them to use to adorn packages and hang from the garland on my mantel.
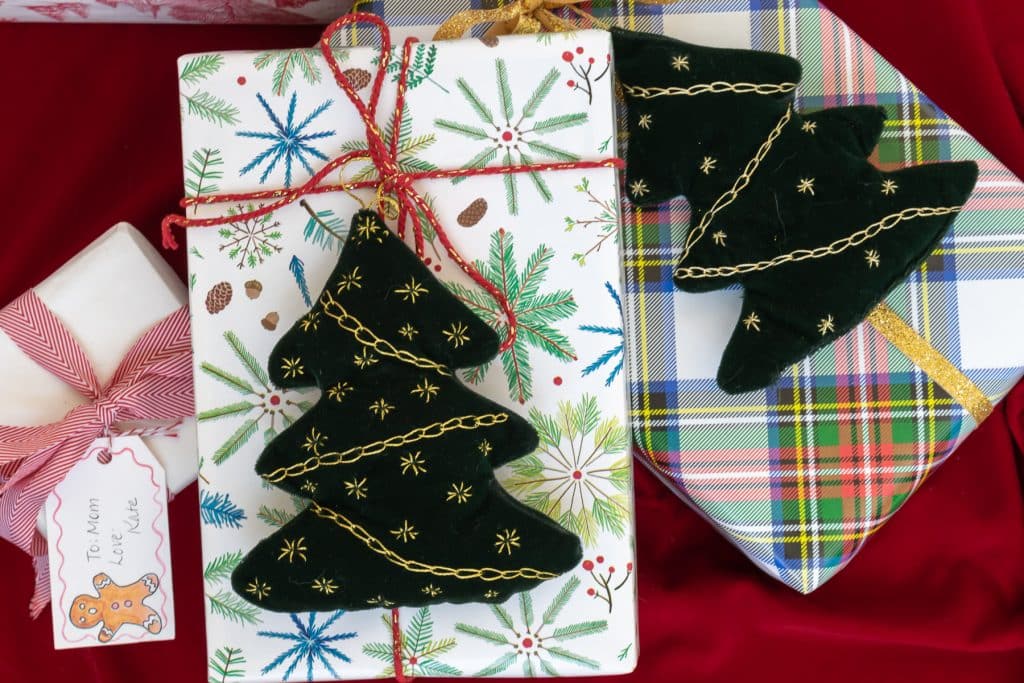
Table of Contents
Some of these links may be Amazon affiliate links and I may earn a small commission from the sale of these products to help defray the costs of operating this site, but the price you are charged is not affected. You can see my full disclosure policy here.
what you need to make these embroidered Christmas trees
- Your choice of fabric. I used deep, green velvet. Each tree requires a piece of fabric approximately 16″ by 11″. So with 1/3 of a yard of 54″ wide fabric, you could make 3 trees.
- Christmas Tree Pattern
- A marker to trace the pattern. I used a silver Sharpie.
- Metallic gold embroidery thread
- Needle
- Sewing Machine
- Fiber Fill
- Christmas Tree Essential Oil (if you want your trees to be scented)
- Cord to hang your tree (I braided the embroidery thread that I used to embroider the trees. I found that if the cord was much thicker, it was hard to get it right at the top of the tree)
how to make embroidered Christmas trees
- Print off the tree pattern and then copy it onto a thin piece of cardboard. Cut the cardboard tree out.
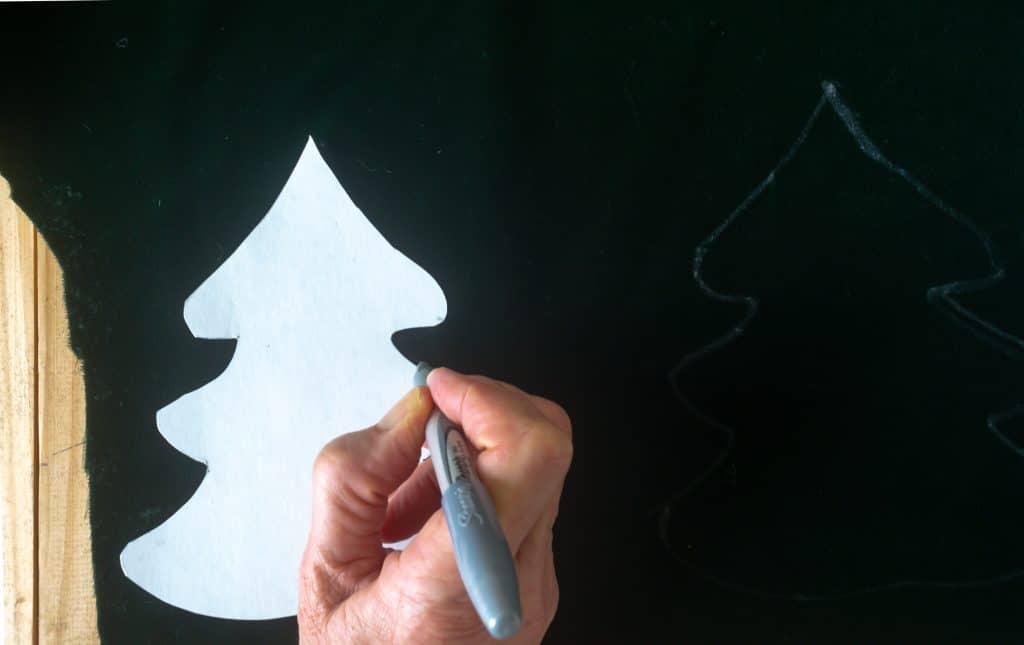
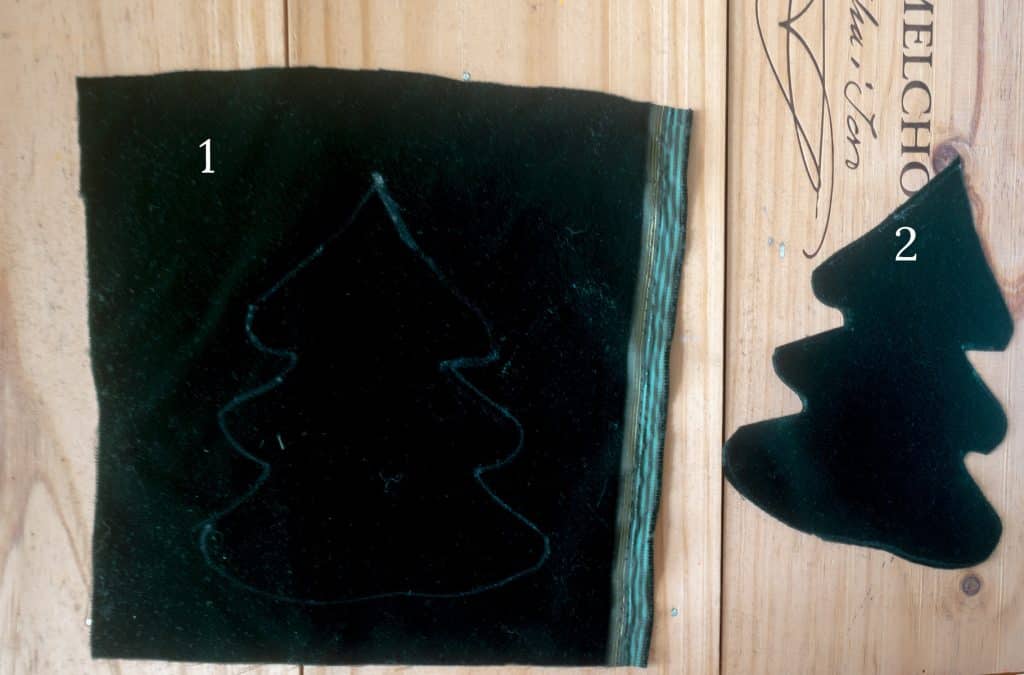
- For each tree, you will trace the pattern twice. For one, you will trace the tree, but just cut a square around it so that you can easily put it in an embroidery hoop. For the second, you will cut along the edges of the tree and set it aside. This will be the back of the tree. Don’t worry if your tracing goes awry in places; you can ‘erase’ the sharpie ink with a little bit of rubbing alcohol. I had to do that for every one of my Christmas trees.
- Put piece 1 in an embroidery hoop.
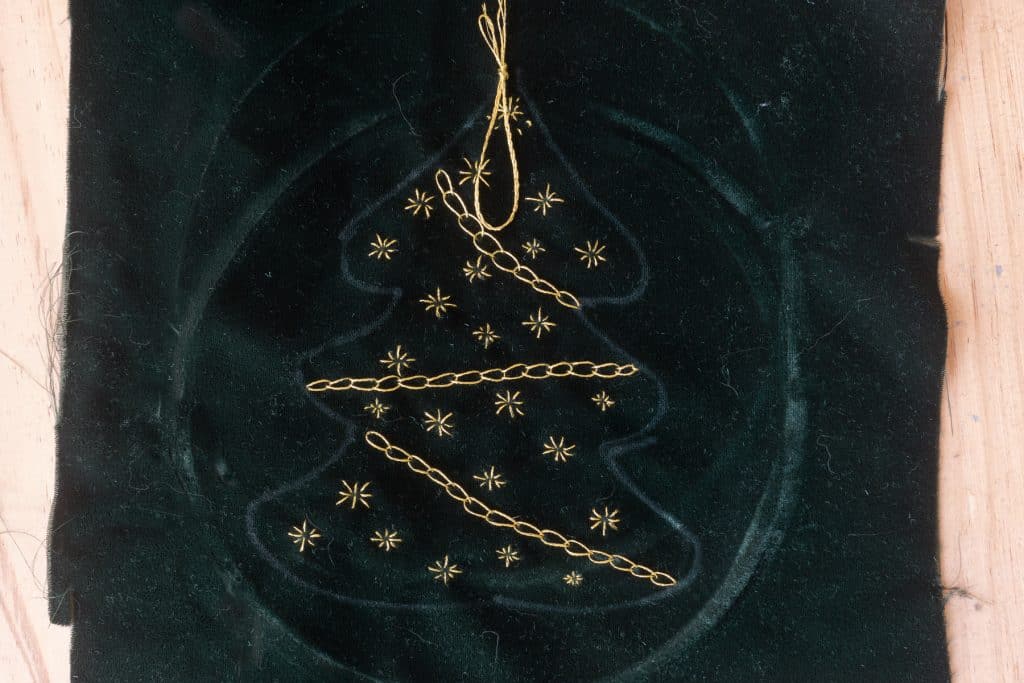
tree embroidery design
Feel free to design your own embroidery pattern! I just used a simple chain stitch for myt garland and simple stitches for the stars.
- Start at the bottom, right-hand corner of the tree, and work a chain stitch slowly up on a diagonal.
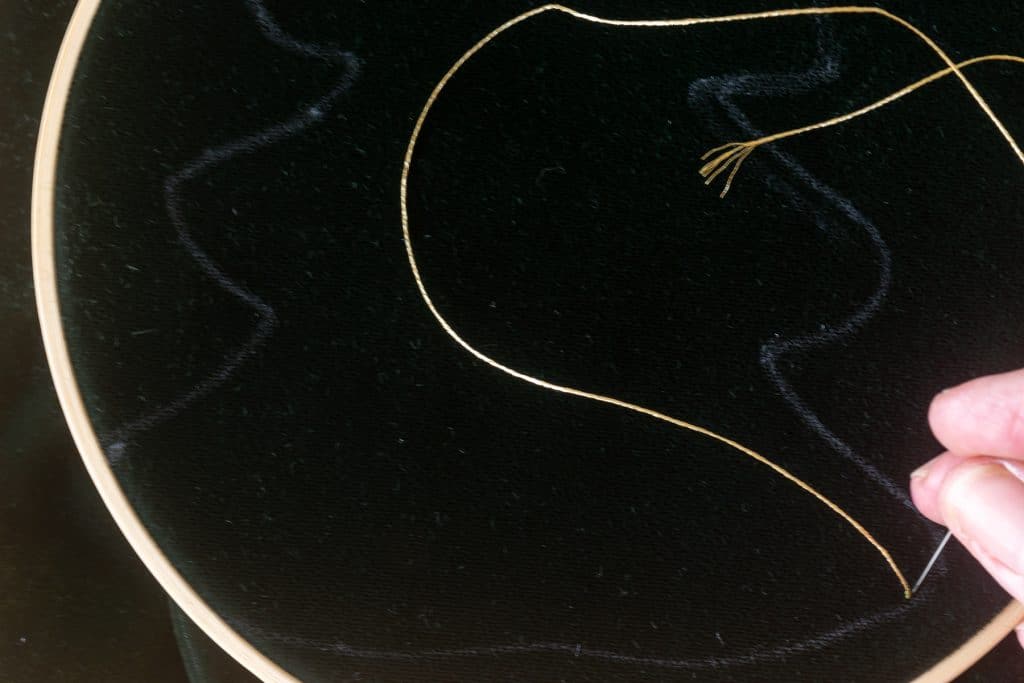
chain stitch
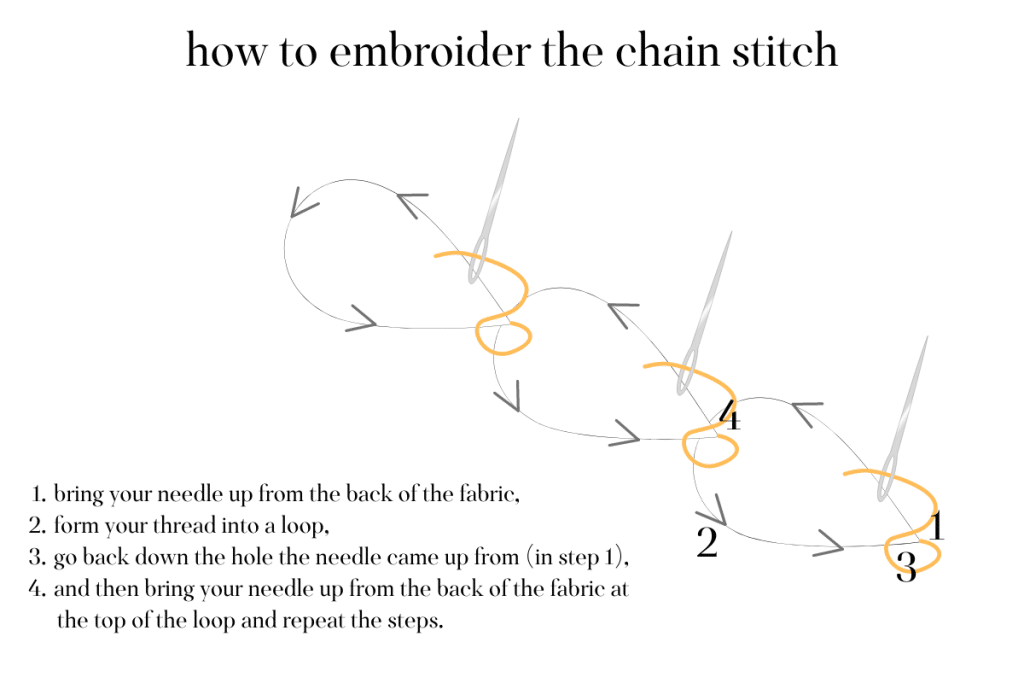
- You can zig-zag your chain stitch garland or have it going in one direction; completely up to you!
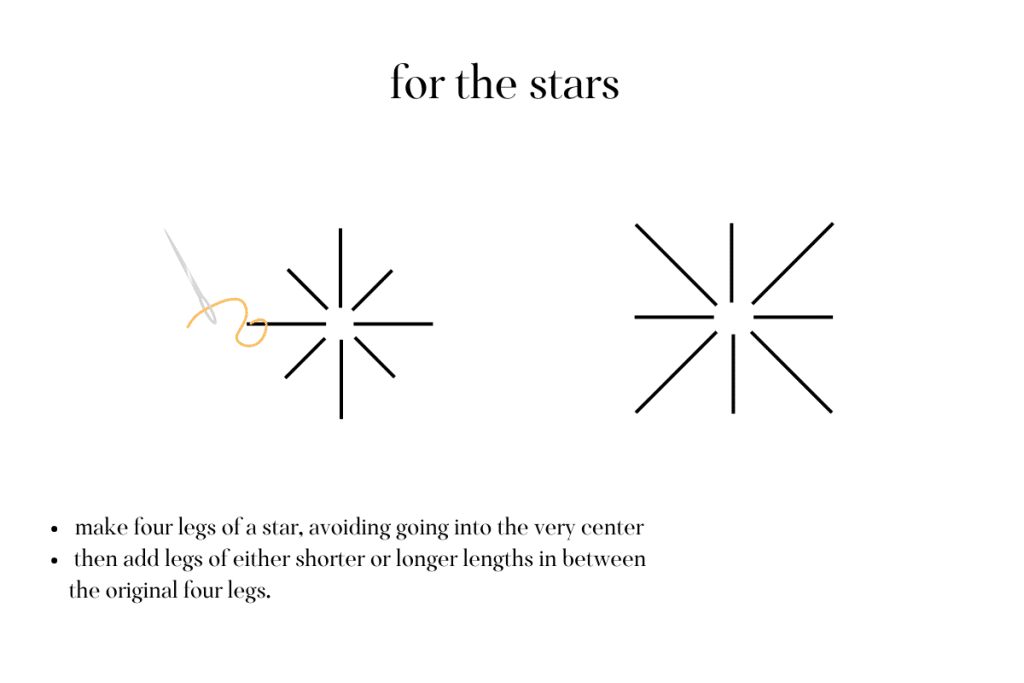
- Then, add some stars. The stars are very simple; just scatter them throughout the tree. You might consider adding a bigger one at the top. You could also add beads as well but keep the beads away from the edge of the tree. My sewing machine foot had a hard time going over the beads (but then my machine is pushing 50 years old, so there’s that!)
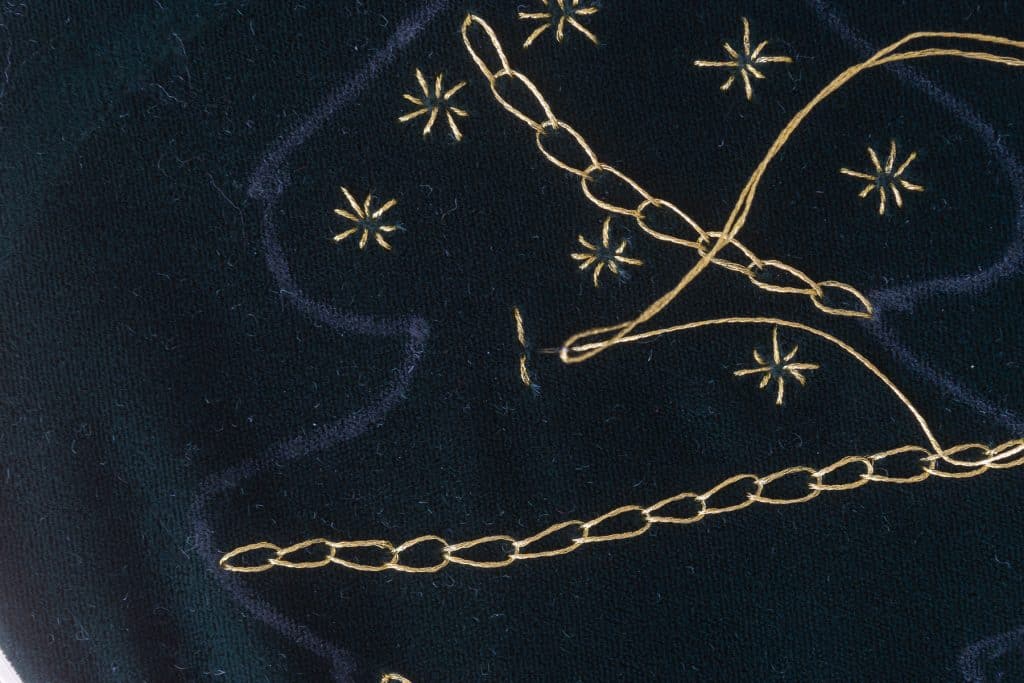
stars
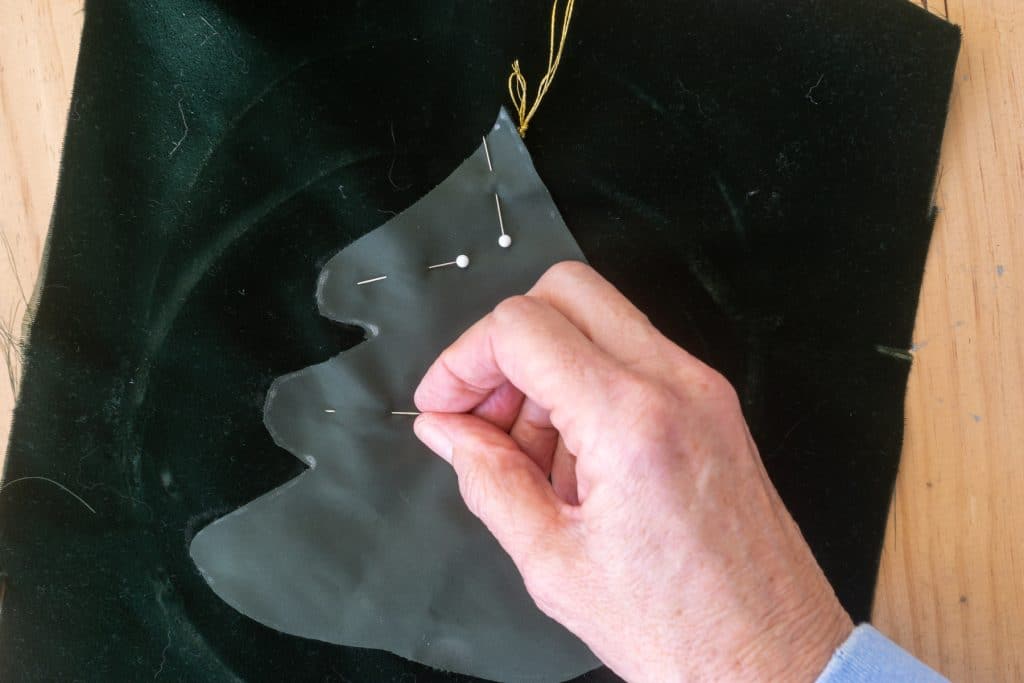
- When you are done embroidering your Christmas tree, lay your cord on the tree, with the hanging loop end pointing towards the bottom of the tree.
- Then, lay the back side face down on the front of the tree and pin it in place. Ensure that you have secured the cord so that it is right at the tree point. You will most likely have to adjust this before you stitch it.
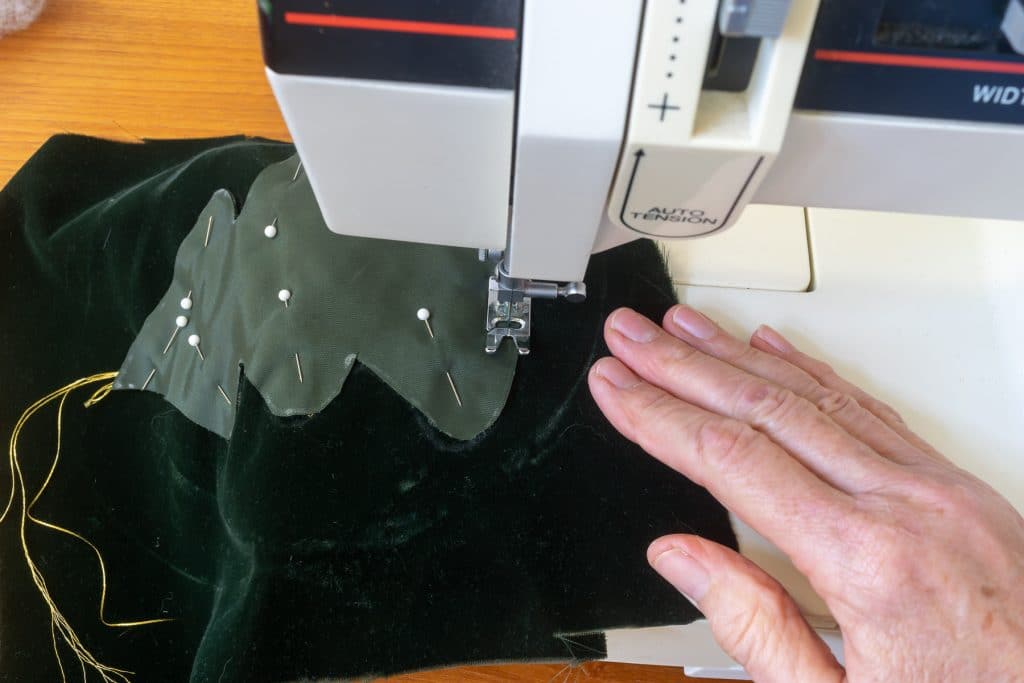
- Using your sewing machine, stitch along the edge of the back side of the tree. Even with the pins, you will need to adjust the alignment of the two pieces at times. Start at one side of the bottom of the tree and finish on the other side, leaving several inches open at the bottom to be able to turn and stuff the trees.
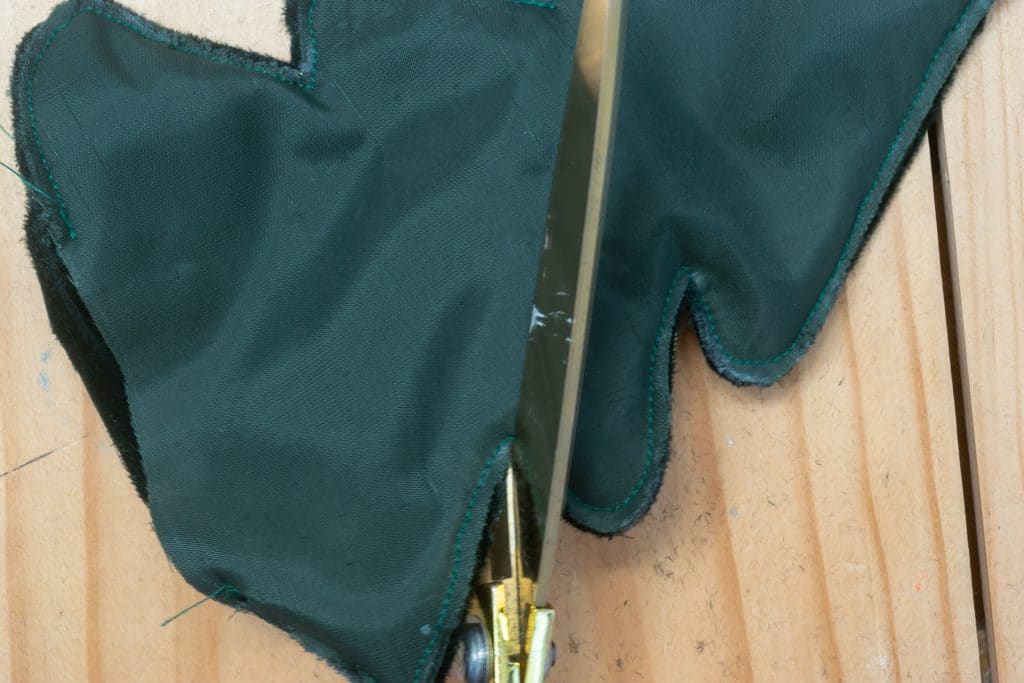
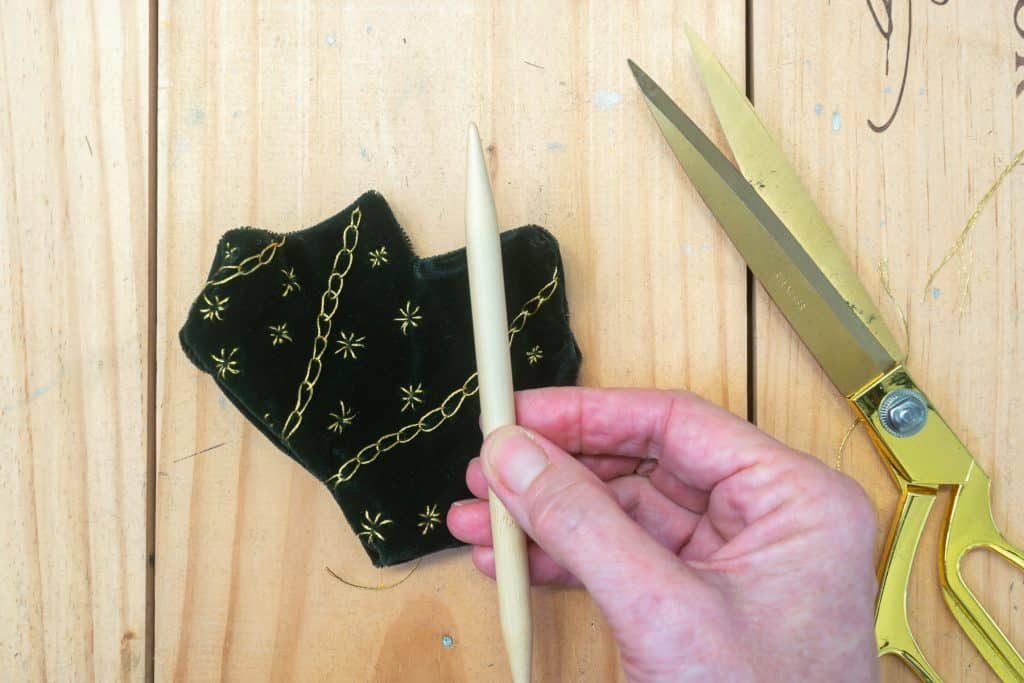
- When you finish sewing, cut away the fabric. Use your scissors to snip even closer to the seam at the corners between the ‘branches’.
- Then, use a blunt edge tool to help turn the tree inside out and push out the ‘branches.’
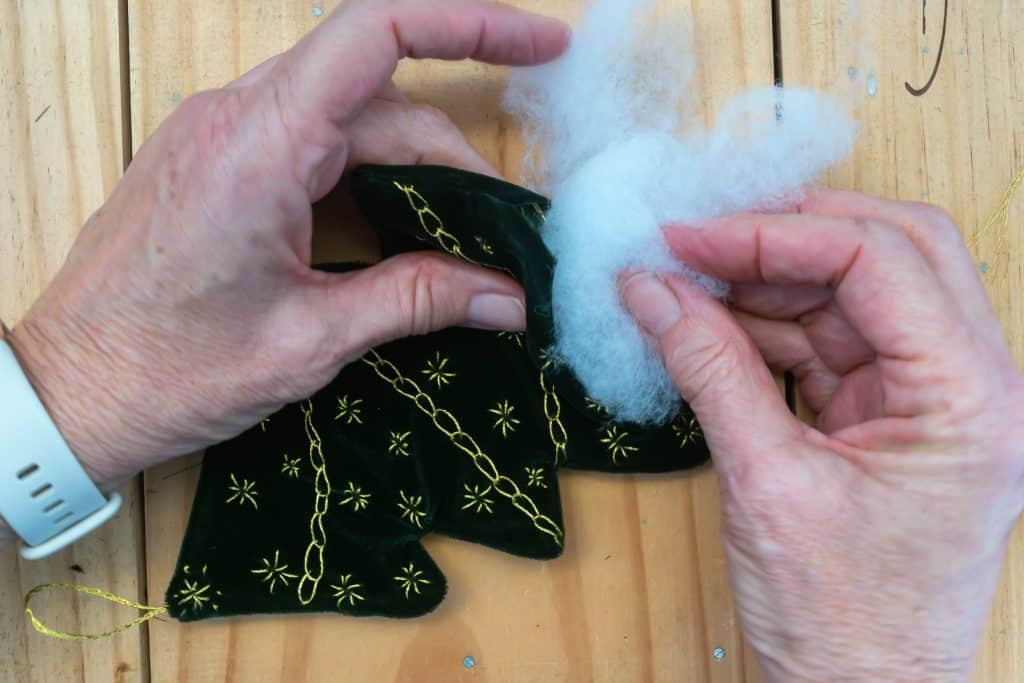
- When your embroidered Christmas tree is turned out, it is time to stuff it! I stuffed the trees with fiberfill.
If you see a bit of the light-colored Sharpie ink when you turn your tree out, just rub a bit of rubbing alcohol over the Sharpie ink. The alcohol will remove it.
Bookmark this page or pin the following image to return to this Embroidered Christmas Tree post in the future.
Thanks so much for spending a few minutes of your busy day with me!
To ensure you don’t miss future content, pop your email in the pale green box on the right or click here. I usually send one email weekly, so I won’t inundate your inbox. I’m sensitive to an overflowing email inbox!
We will only use your email address to send you emails, no more than 1-2 weekly. In addition, you will have access to my growing library of knit & crochet patterns and other printables. Check back often as this library will continue to grow. You can unsubscribe anytime by emailing me or clicking on the “unsubscribe” link at the bottom of all emails.
And you can access many of the products I refer to on my Nourish and Nestle Amazon Page. You can access it here.
So, if you’d like to participate in the ‘subscriber benefit’ action, simply subscribe to Nourish and Nestle here or use the form on the right sidebar. It’s slightly towards the top.
I have sent all my subscribers the link to the Subscriber Benefits Library. If you missed it or misplaced it, let me know.
Until next time…