
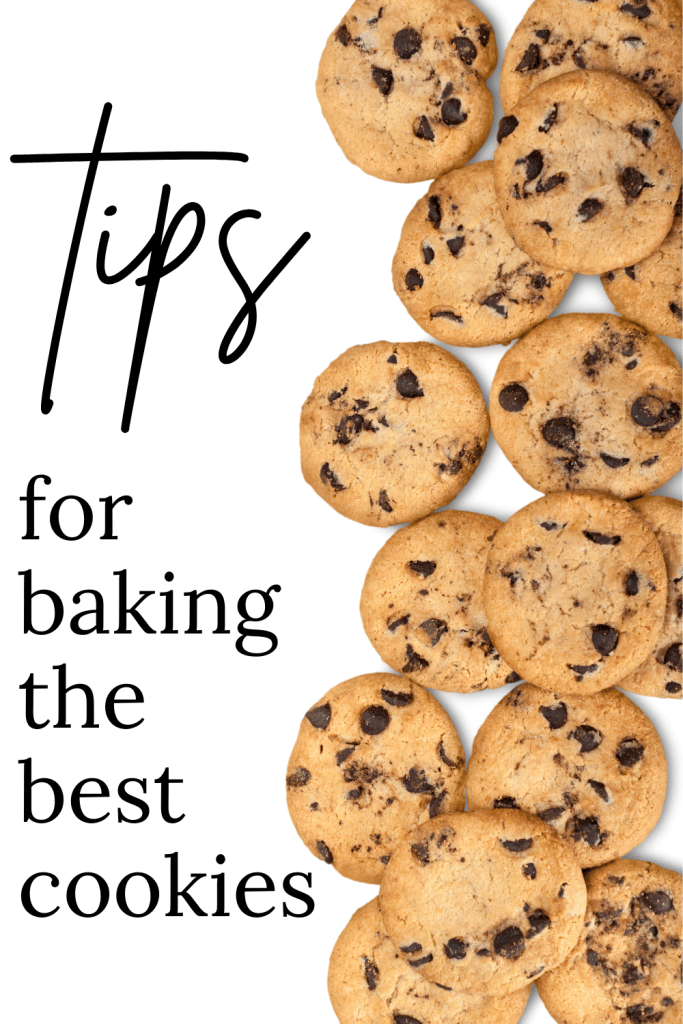
Baking Tips for the Best Cookies


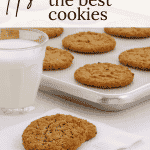


Take a few minutes to read these baking tips to make the best cookies. You may know some of these handy tips, but there may be a few new ones to help make your baking easier, more efficient, more enjoyable, and result in the very best baked goods!
Tips When Baking Cookies: Before you Start Baking
Read the entire recipe before you begin baking
I know recipe developers make every attempt to write their instructions chronologically, but there will be times when you need to know something written later in the recipe. For instance, you may not have considered the need to chill the batter or dough, to soften an ingredient, or to split ingredients for different parts of the recipe.
Table of Contents
Have your ingredients at room temperature
According to the USDA, it is safe to keep butter at room temperature for one to two days, so you could safely put it out the night before if needed. But, back to the ‘read the entire recipe before’ admonition, some recipes will want your butter to be ice cold.
On the other hand, eggs should not be left at room temperature for longer than two hours in the U.S., Japan, New Zealand, and Australia. This is because of our egg-washing protocol that removes the protective cuticle from the egg’s shell. In France and the U.K., eggs can remain at room temperature for two to three weeks.
If you store your grains, oils, or any other ingredients in the fridge, ensure you get those to room temperature.
A BIG EXCEPTION TO THIS RULE! When making pie crusts, chill ALL THE INGREDIENTS, even the flour, and the utensils. You can see all my tips for pie crust success here.
Batch prepare your ingredients
If you have a day set aside for baking, you can get a head start the night before by measuring out the ingredients and having them ready for the morning.
If you will be baking different cookie recipes, you could set up an assembly line to batch-prep those ingredients.
- Have containers ready for the dry ingredients, with the recipes in front of each bowl.
- Measure out the flour, baking soda, salt, baking powder, and spices for each recipe and place them in the designated bowl.
- Do the same for the wet ingredients, bearing in mind that they will mostly need to be at room temperature before you proceed in the morning. So, refrigerate if necessary.
Some of these links may be Amazon affiliate links and I may earn a small commission from the sale of these products to help defray the costs of operating this site, but the price you are charged is not affected. You can see my full disclosure policy here.
Check the freshness of your leaveners
Yeast, baking powder, and baking soda have limited shelf lives. Take a few minutes before you head to the grocery store to check their viability. Here’s a deep dive into baking soda and baking powder, how to get the best results from them, and how to test for their freshness.
Tips for Baking Cookies: When Mixing and Forming
A few baking substitutions
- Oils: Vegetable oil, canola oil, and corn oil can all be substituted for each other. Melted butter can also be used instead of oil.
- Unsalted butter: if you only have salted, but your recipe calls for unsalted butter, you can use the salted, but remove 1/2 teaspoon of salt in the recipe for each stick of butter.
- Buttermilk: substitute 1 cup yogurt (not Greek) or 1 cup milk plus 1 tablespoon vinegar or lemon juice; let the mixture sit until curdled before using, about 10 minutes for each cup of buttermilk.
- Cake Flour: 1 cup less 2 tablespoons all-purpose flour plus 2 tablespoons cornstarch for each cup of cake flour called for.
- Self-Rising Flour: 1 cup all-purpose flour plus 1 1/2 teaspoons baking powder plus 1/4 teaspoon salt for each cup of self-rising flour called for.
- Dutch Process Cocoa Powder: Use natural cocoa and replace the baking powder in the recipe with half the amount of baking soda.
- Natural Cocoa Powder: Use Dutch process cocoa and replace the baking soda in the recipe with twice the amount of baking powder
- Semisweet Chocolate: For each ounce of semisweet chocolate called for, use 3 tablespoons of cocoa powder plus 3 tablespoons of granulated sugar plus 1 tablespoon of oil or melted butter
- Half-and-Half: Use 1/2 cup of whole milk plus 1/2 cup of heavy cream for each cup of half-and-half needed.
- Heavy Cream: 1 cup whole milk plus 1 tablespoon melted butter will equal 1 cup of heavy cream.
- Iodized Salt: For each 1/2 teaspoon, you can use 3/4 teaspoon of kosher salt
- Kosher Salt: For each 1/2 teaspoon, you can use1/4 teaspoon iodized salt
- Dark Brown Sugar: For each cup of dark brown sugar, use 1 cup granulated sugar plus 2 tablespoons molasses or 1 cup light brown sugar
- Light Brown Sugar: For each cup of light brown sugar, use 1 cup granulated sugar plus 1 tablespoon molasses or 1 cup dark brown sugar
- Lemon Juice: Use apple cider vinegar at one-half the amount of lemon juice called for.
- Sour Cream: Substitute with the same amount of plain yogurt or plain Greek yogurt
- Plain Greek Yogurt or Plain Yogurt: Substitute with the same amount of sour cream
- Vanilla Extract: Use an equal amount of bourbon or rum
- Whole Milk: Use 1 cup skim or low-fat milk plus 2 tablespoons of melted butter for each cup of whole milk needed.
Not all baking pans or cookie sheets should be greased before baking
Once again, read the directions. Extra grease on the cookie sheet may cause your cookies to spread more than you want.
And consider parchment paper or a silicon mat instead of greasing cookie sheets and baking pans. You can transfer all the cookies at once using parchment paper or a silicon mat, and your pans will not become discolored by the grease.
Does your parchment paper want to curl and roll?
Lightly mist it with water or crumple the parchment before you lay it out. You could also cut the parchment paper in advance and stack it inside your baking sheets. This will flatten it. Another option would be to put something heavy and smallish (magnets, spice jars, etc…) on the paper while you’re placing your dough. Remove the weights before you put the sheets in the oven. Paper clips will also work to keep your parchment paper under control.
Not all cookie sheets are created equally!
The best cookie sheet for baking is a heavy aluminum sheet. The Nordic Ware Half-Sheet Baking Pan has garnered many positive reviews and recommendations.
- Thin cookie sheets or baking pans warp easily, causing uneven baking
- Dark cookie sheets or baking pans absorb extra heat, causing burning or over-browning
- Shiny cookie sheets or baking pans reflect heat, preventing even browning
- Insulated cookie sheets and baking pans may cause thin edges as the dough will spread before it is set.
Avoid flying flour when using a mixer!
I purchased a shield for my Kitchen-Aid Stand Mixer. It helps pour in ingredients and keep those lighter ingredients from flying out of the bowl instead. In a pinch, wrap a clean kitchen towel around the mixer when you turn it on to prevent flying flour. Try to dump back into the batter what the towel catches.

My Kitchen Workhorse
- 7-quart capacity
- 10 speeds range from very slow stirring to very high beating.
- Makes up to 14 dozen cookies or 8 lb. of dough.
- Works with all KitchenAid attachments.
To chill or not to chill
If your recipe instructs you to chill the dough, don’t skip this step. There are several reasons why this is critical to the final outcome of your cookies:
- Chilling cookie dough before baking will solidify the fat in the dough. Once in the oven, the fat in the chilled cookie dough takes longer to melt than room-temperature fat. Logically, the longer the fat remains solid, the less your cookies will spread.
- While being refrigerated, the sugar in the dough will gradually absorb liquids. Baking the dough before the sugar has a chance to absorb liquid results in a more spread and a thinner cookie. Allowing the sugar in the dough to absorb the moisture encourages the cookie to brown and caramelize.
- As the dough chills, it gradually dries out, concentrating the flavors of all the ingredients.
- And the dough gradually drying out also results in a texture change. The drier the dough, the more concentrated the sugar, which creates cookies with a chewy/crisp texture. (aka cookie bliss!)
So, how long should you refrigerate your cookie dough? Follow the directions.
Typically, a minimum of 30 minutes is necessary. But there have been some ‘studies’ showing that 2 hours is the ‘sweet spot.’ Remember, though, not all cookie dough should be refrigerated. Cookies that you want to be thin and crispy are most likely not refrigerated.
You can keep cookie dough in the refrigerator, in an airtight container, safely for about 3 days. For more extended periods, freeze it! Frozen cookie dough will still be good for 2 months.
I store ziplock bags filled with the already sugar-coated balls of our family’s favorite Molasses Crinkles in the freezer for fresh-from-the-oven treats.
Baking tips for nice, round slice-and-bake cookies
Roll your dough into a cylinder, then place it inside a paper towel tube, cut down the side. Clearly, your dough needs to be a smaller diameter than the paper towel tube. Then, roll the dough a couple of times across your counter inside the tube. You could store it in the fridge that way as well.
Use the thinnest knife you have and dip the knife blade in flour for clean, non-jagged cuts. Or rinse it in water. Also, gently ‘saw’ back and forth instead of pushing down to keep your log cylindrical.
After each cut, turn the log a quarter turn to help it retain its cylindrical shape.
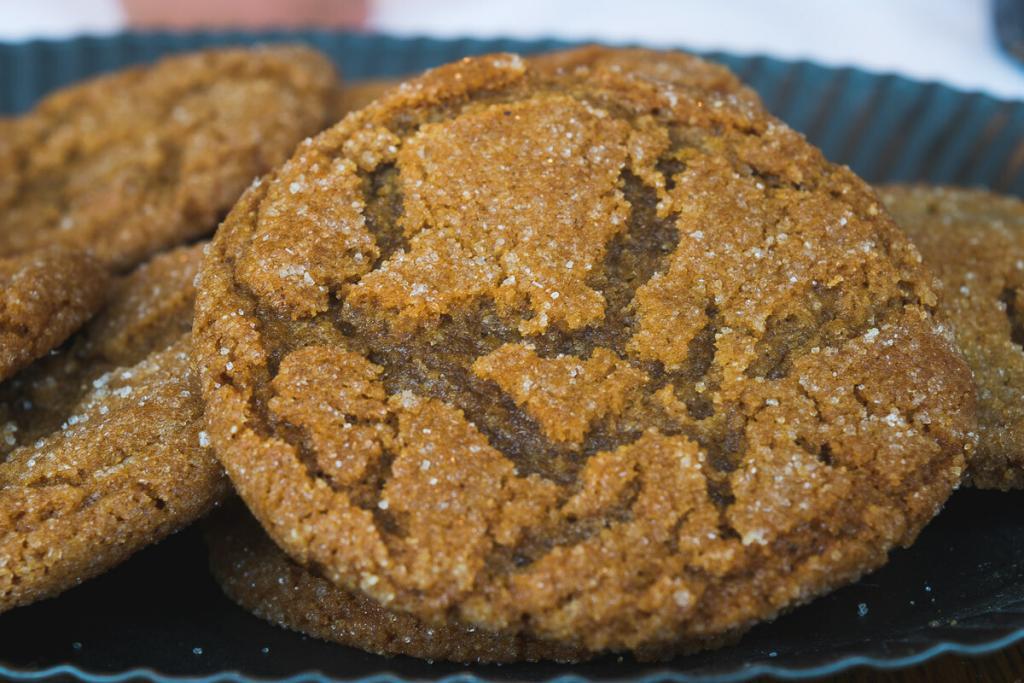
Baking tips for drop cookies
Use cookie scoops for uniform size and shape. I have this set and use it often!
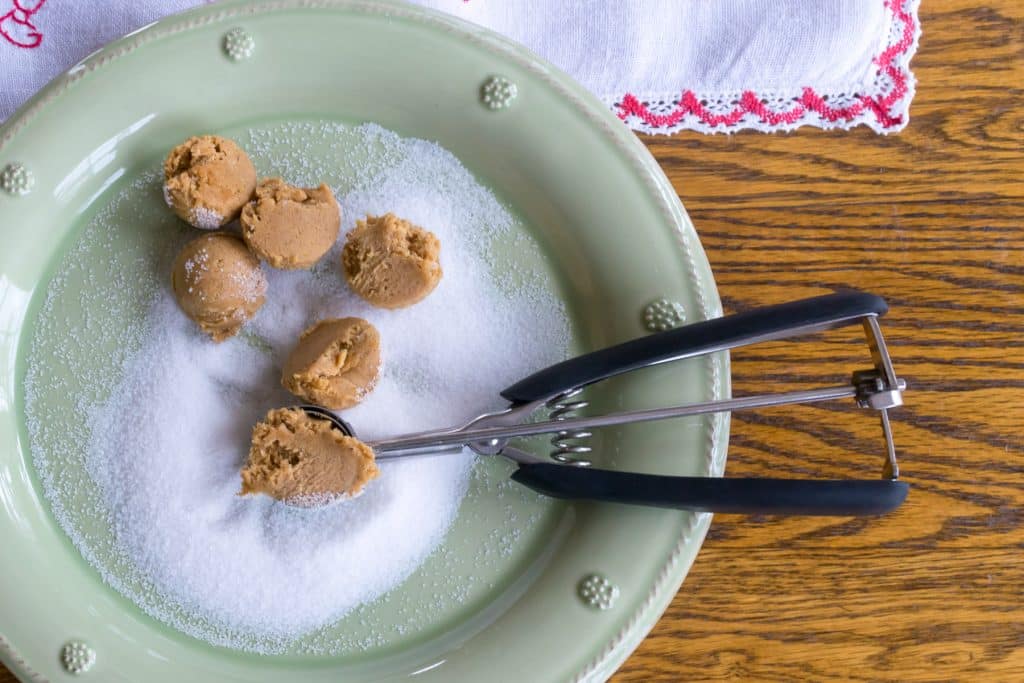
If the cookies need to be rolled in sugar, nuts, or another topping. Place the topping on a plate or tray and roll them back and forth to coat.
Once rolled, the cookie dough balls are easily frozen for future baking!
If you need a well in your cookie dough to fill with jam for a thumbprint cookie, a wine cork makes a great ‘well maker.’
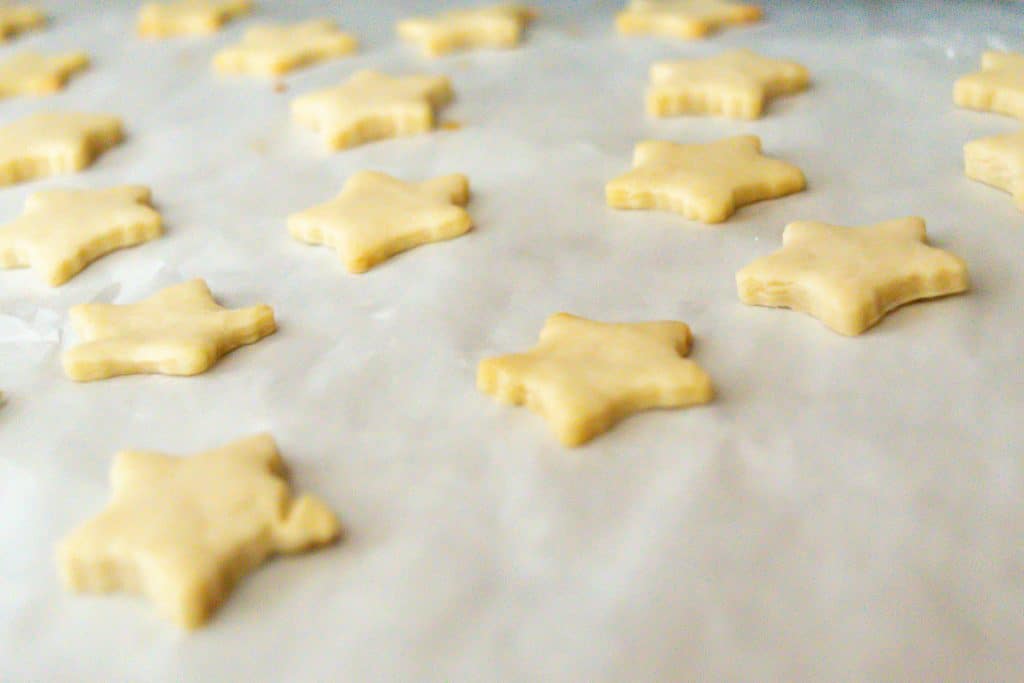
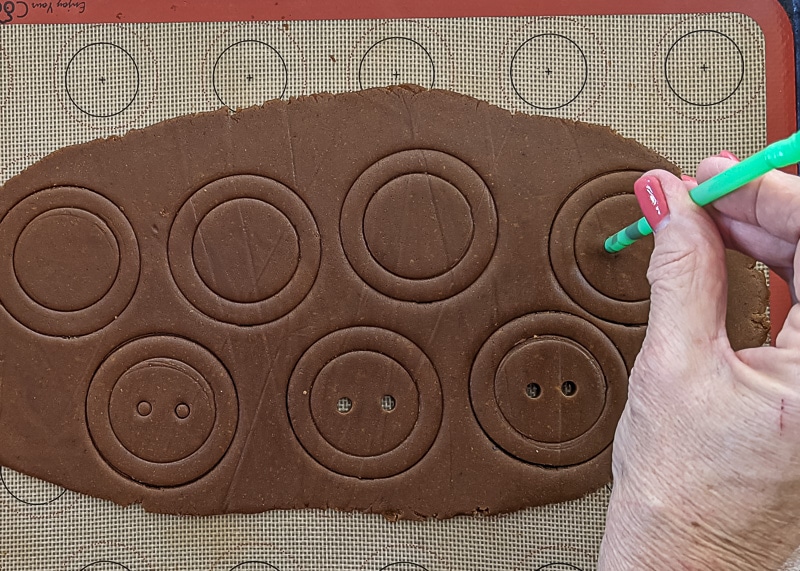
Baking tips for rolled and cut cookies
Divide the dough into several portions before chilling. Ideally, you would remove it from the fridge and roll out one portion at a time for each cookie sheet.
Using a lightly floured rolling pin and lightly floured surface, roll the dough to an even thickness from the center out to each edge.
Cut shapes out as close to each other as possible, you want to minimize the leftover dough.
Use a pancake turner or wide spatula to transfer the cut cookies to the baking sheet.
Conversely, roll the dough onto parchment paper or Silpat and cut it out. Then just remove the dough scraps, leaving the shapes on the parchment. This works best with dough that doesn’t spread too much, or you must leave adequate space between cuts. I used this technique with my Gingerbread Button Cookies.
Baking Tips for the Best Cookies – In the Oven
An inexpensive, $7 oven thermometer is helpful to determine if your oven is actually heating to what it says it is and to adjust if necessary. A temperature of just 25º can significantly alter the shape and texture of your baked goods.
Most cookies should bake on the middle rack for the evenest baking. If you can fit two sheets on the middle rack, go for it. Trying to bake two sheets on different oven racks and rotating them rarely yields good results. You are usually better served by waiting for each tray to bake on the middle rack.
Let your cookie sheets cool down before putting the next batch of cookie dough on them.
You can prep your dough and keep the formed cookies in the fridge until you are ready to put the next batch in the oven. Having multiple cookie sheets/baking pans makes this easier.
So, what are your baking tips for making the best cookies?
Let’s crowd-source and share ideas here.
Bookmark this post or pin the following image to refer back to this post on baking tips to make the best cookies when you need them.
Thanks so much for spending a few minutes of your busy day with me!
To ensure you don’t miss future content, pop your email in the pale green box on the right or click here. I usually send one email weekly, so I won’t inundate your inbox. I’m sensitive to an overflowing email inbox!
We will only use your email address to send you emails, no more than 1-2 weekly. In addition, you will have access to my growing library of knit & crochet patterns and other printables. Check back often as this library will continue to grow. You can unsubscribe anytime by emailing me or clicking on the “unsubscribe” link at the bottom of all emails.
And you can access many of the products I refer to on my Nourish and Nestle Amazon Page. You can access it here.
So, if you’d like to participate in the ‘subscriber benefit’ action, simply subscribe to Nourish and Nestle here or use the form on the right sidebar. It’s slightly towards the top.
I have sent all my subscribers the link to the Subscriber Benefits Library. If you missed it or misplaced it, let me know.
Until next time…


What a fabulous post Lynn! I found this when I was searching for replacements for buttermilk, I had previously used just milk and lemon juice, but was out of milk too, and found that you can use yogurt! Game changer! Bookmarking because it has so much great info!
Thanks Kathleen! I learned a great deal writing this post, as well. So glad you found some useful information.
Happy Baking!
Hugs, Lynn
This is an amazing tutorial. You answered every question I had for my cookie baking. Thank you!