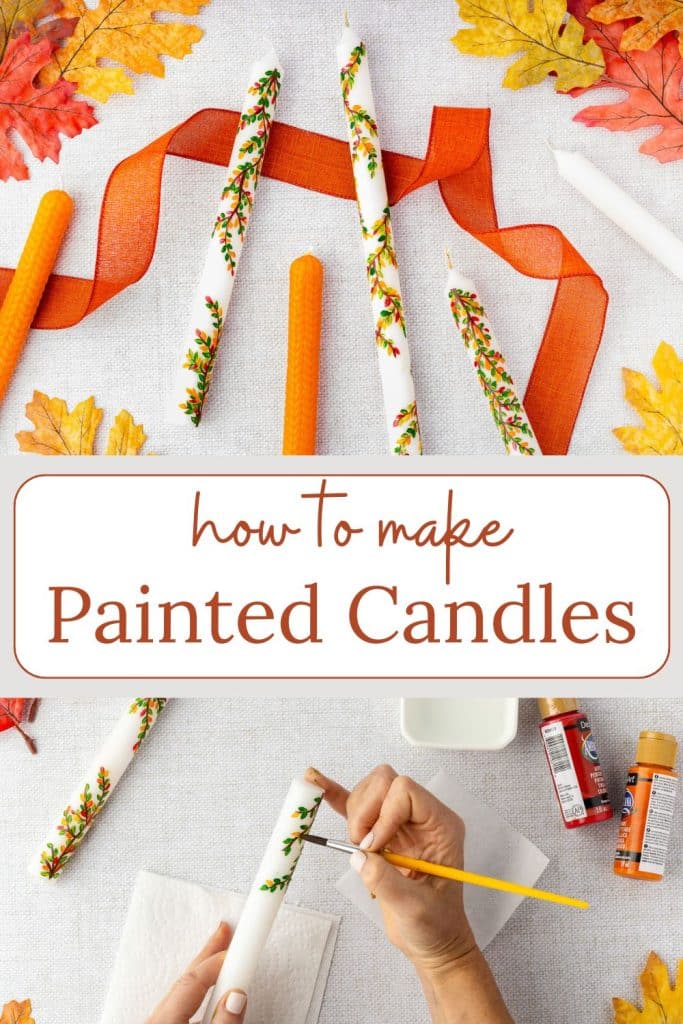
DIY Painted Candles


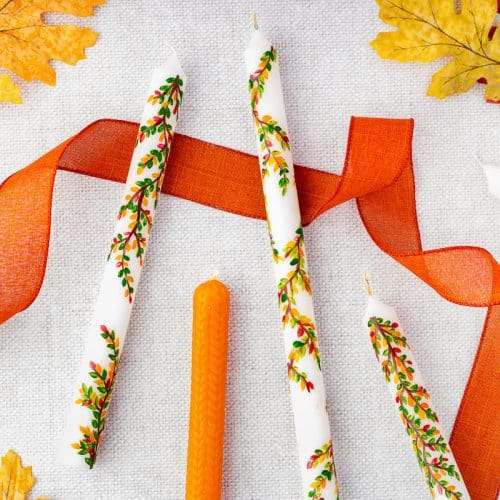
These painted candles are the perfect touch for adding a seasonal fall flair to your home.
You can transform plain white candles into beautiful, hand-painted art with just a few supplies and some easy-to-follow instructions. Whether you’re crafting for a cozy dinner table or giving them as a unique gift, this project will bring a fall/seasonable vibe to any setting.
Let’s dive into how to make these stunning candles that capture the essence of autumn!
While the supplies and drawing instructions are specific to fall leaves candles, you can use the general guidelines and material suggestions for any painted candle design.
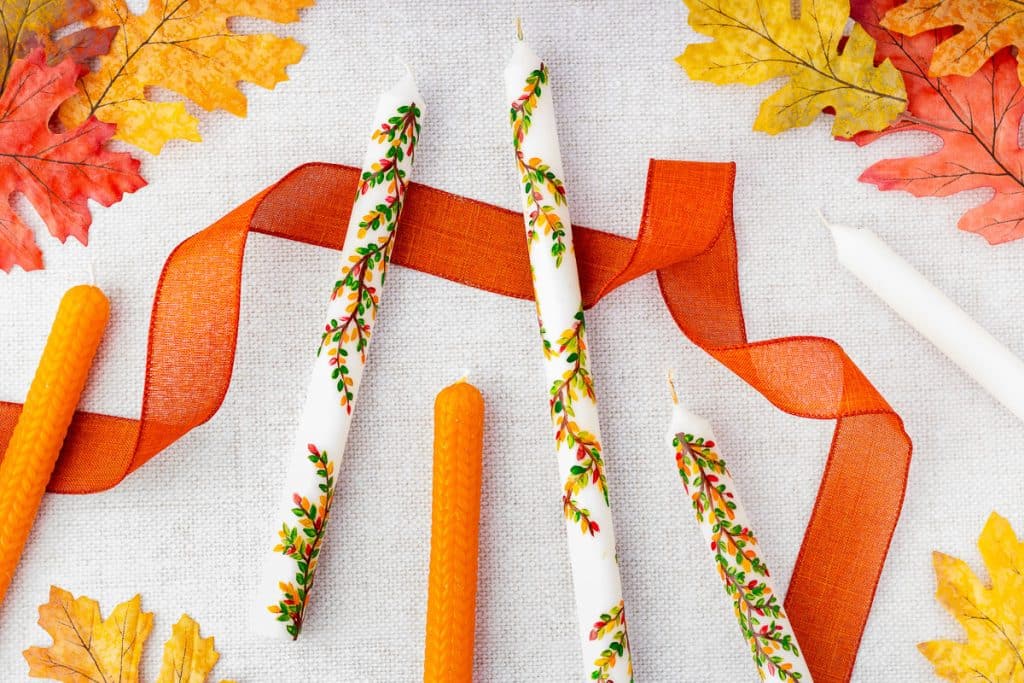
Table of Contents
Supplies Needed for DIY Painted Candles
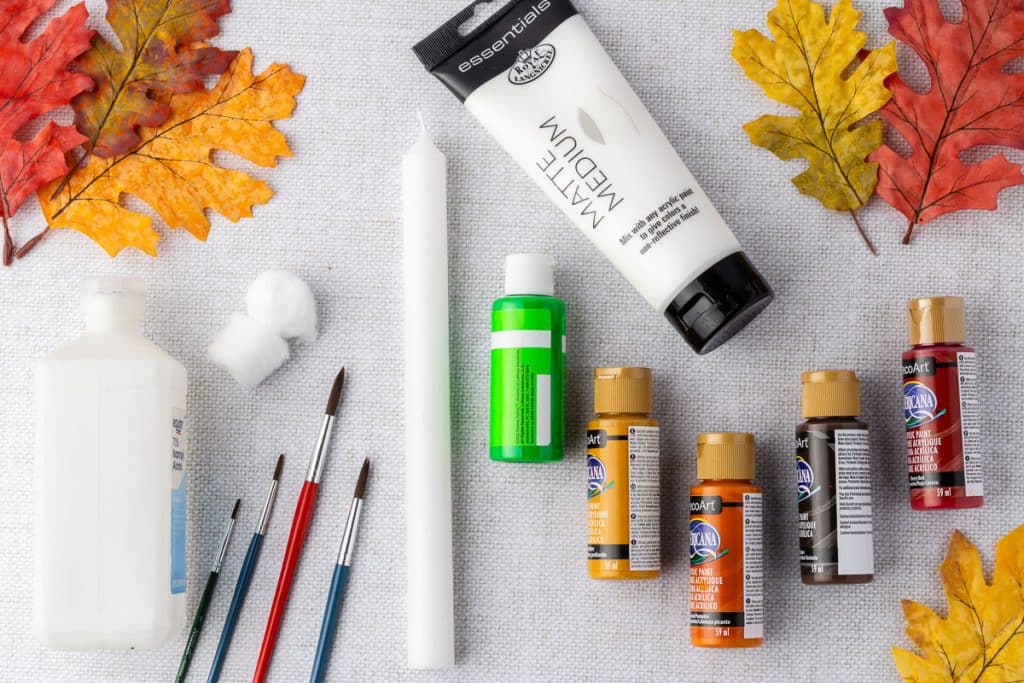
- White dripless tapered candles, 8 inches
- Rubbing Alcohol
- Cotton balls
- Acrylic Matte Medium
- Non-toxic and water-based acrylic paints in fall colors such as:
- Yellow Ochre
- Burnt Umber (brown)
- Spiced Pumpkin (orange)
- Cherry Red
- Light green
- Acrylic paint brushes
- Water
- Paper towel or napkin

Instructions for Painting Candles
This step-by-step tutorial for painting candles is also available as a printable below.
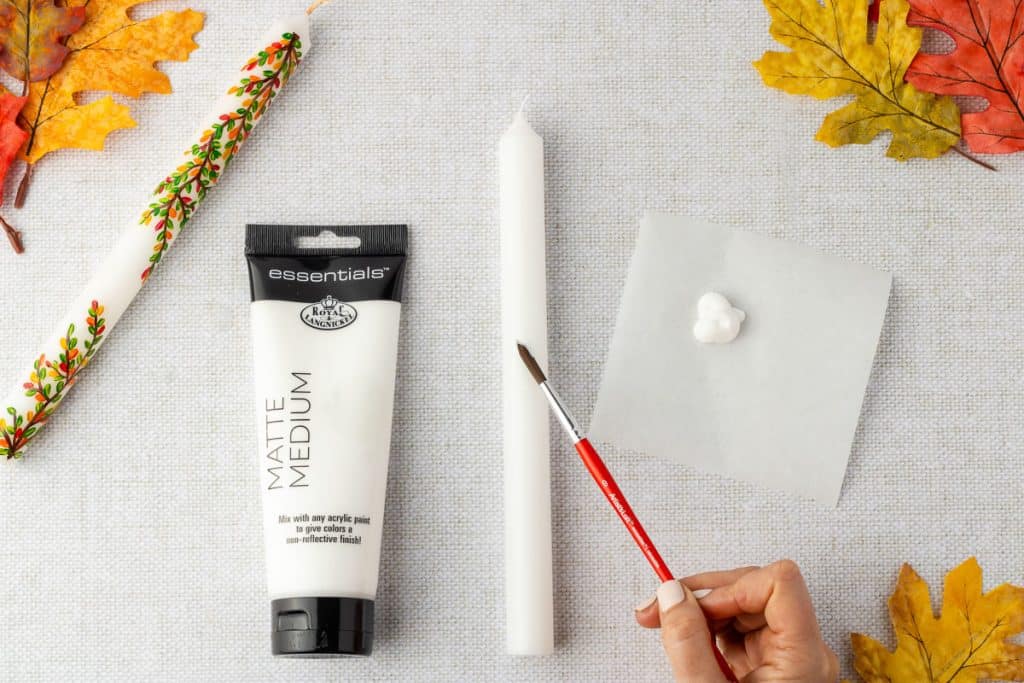
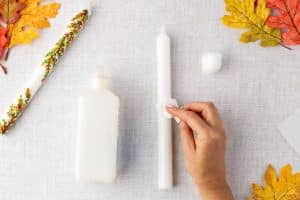
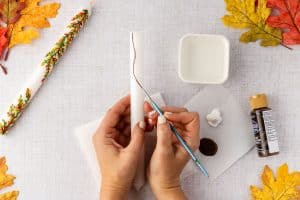
- Wipe the candle with rubbing alcohol on a cotton ball to remove anything on the surface that will keep the paint from sticking.

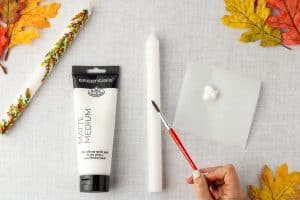
- Apply a thin layer of the matte medium to help the paint adhere to the wax surface. If the layer is nice and thin, it will only take a few minutes to dry.
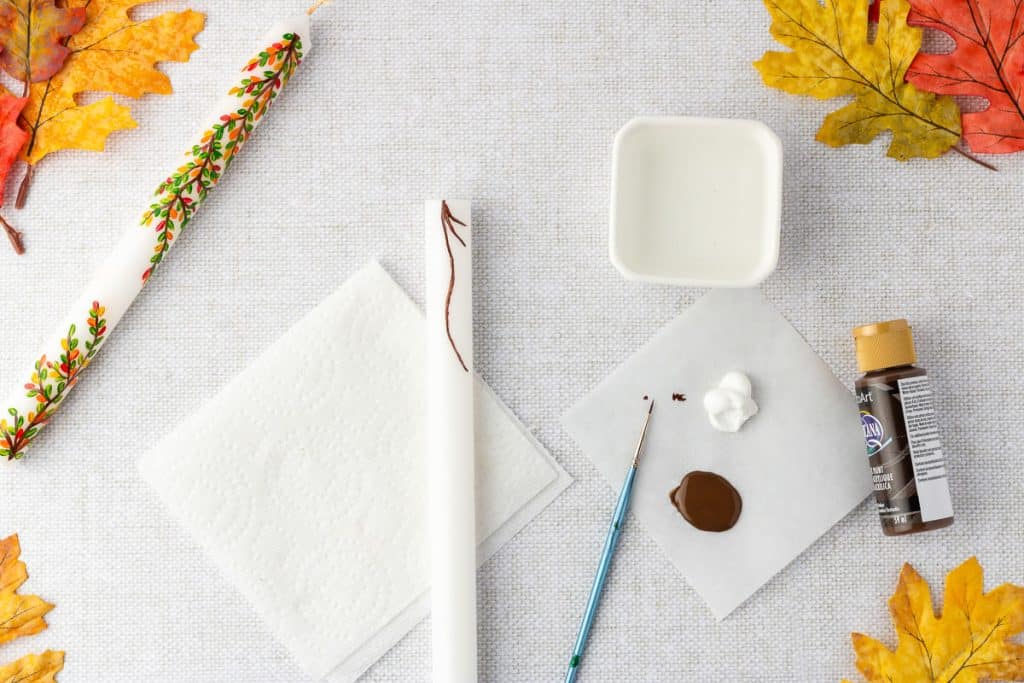
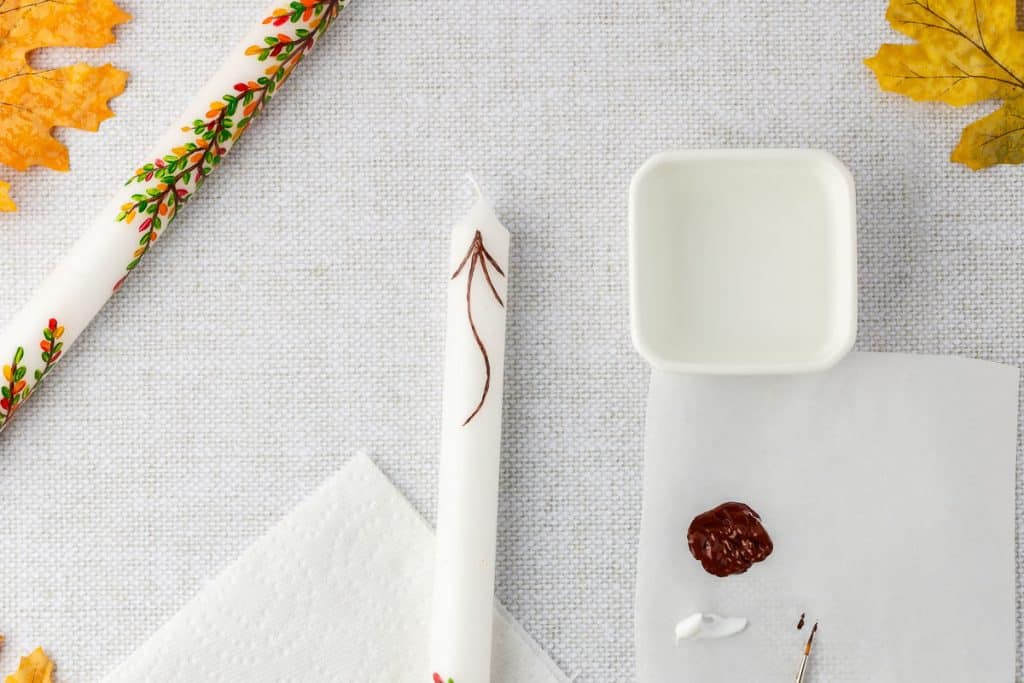
- Add a pea-sized dollop of the matte medium to a quarter-size amount of the brown paint (burnt umber) and mix well.
*Note: The matte medium helps the paint adhere to the wax, but the paint will become more translucent if you use too much.
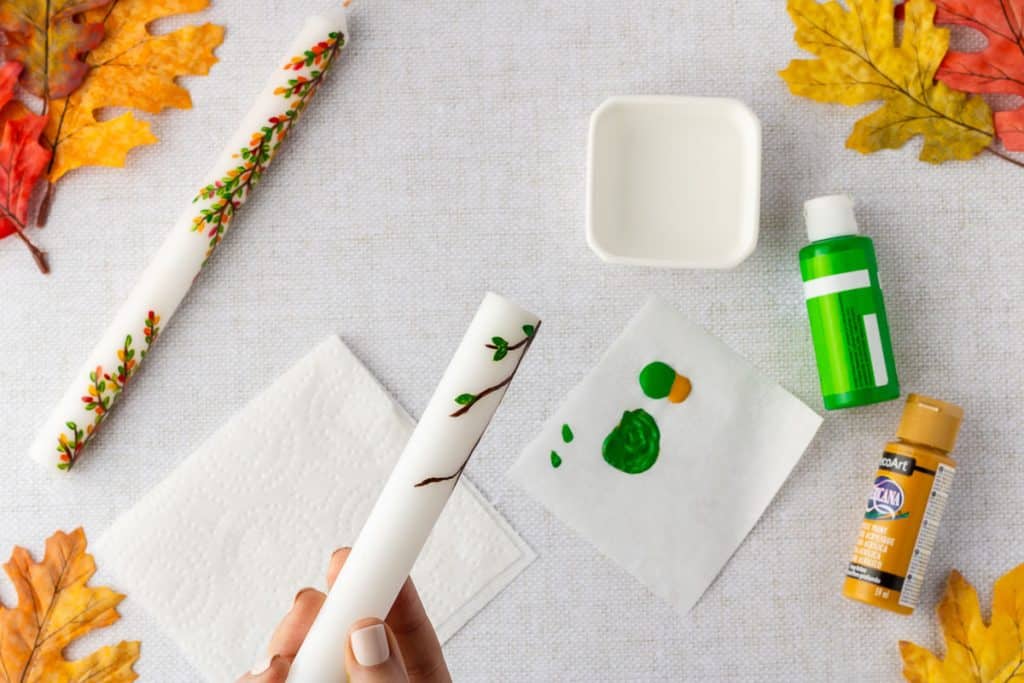
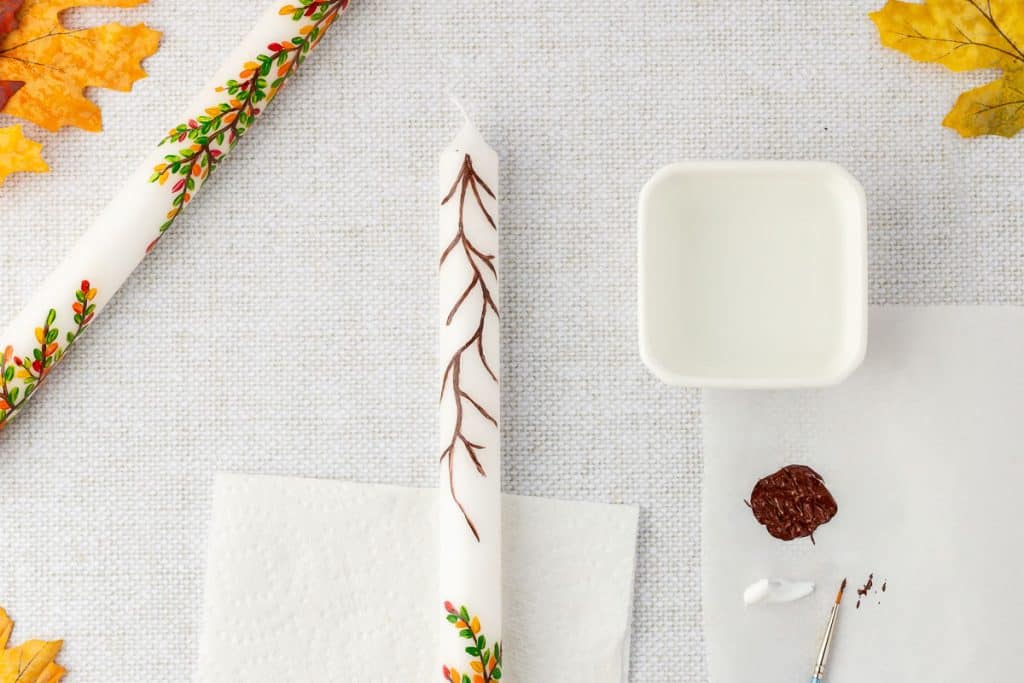
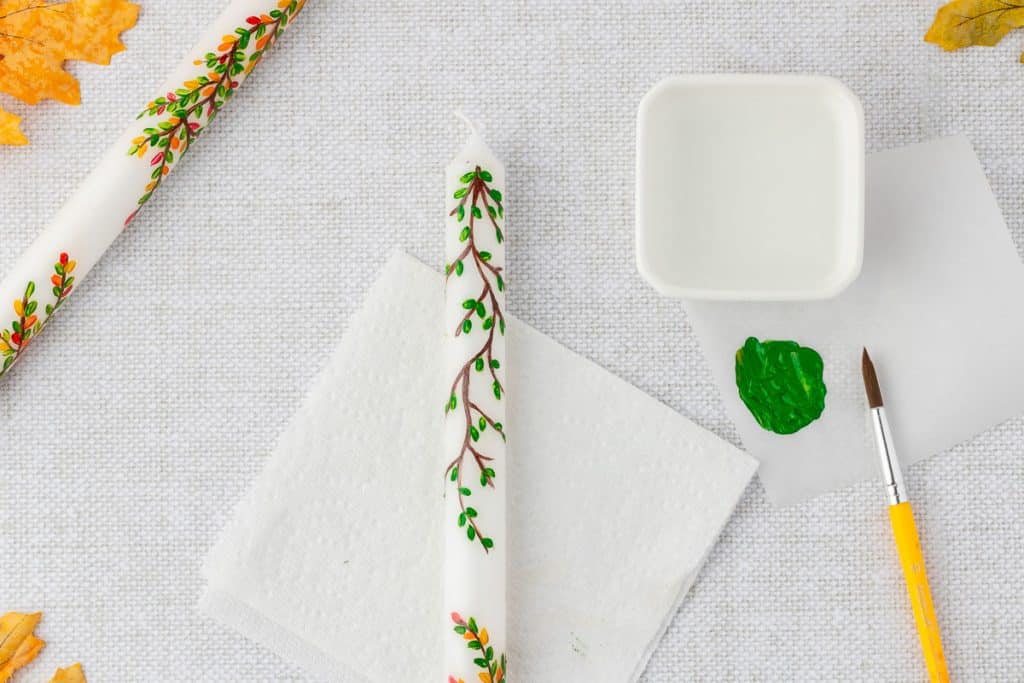
- Paint thin lines with the very thin brush starting at the candle’s bottom to create “branches.” The main branch should go up the candle about ¼-⅓ of the way. The paint dries quickly, so you can go back over your lines to darken them or fill in any spots before working on the leaves.
*Note: the rule of odds can be used by adding three main branches on one side and five on the other. Odd numbers tend to be more visually appealing.
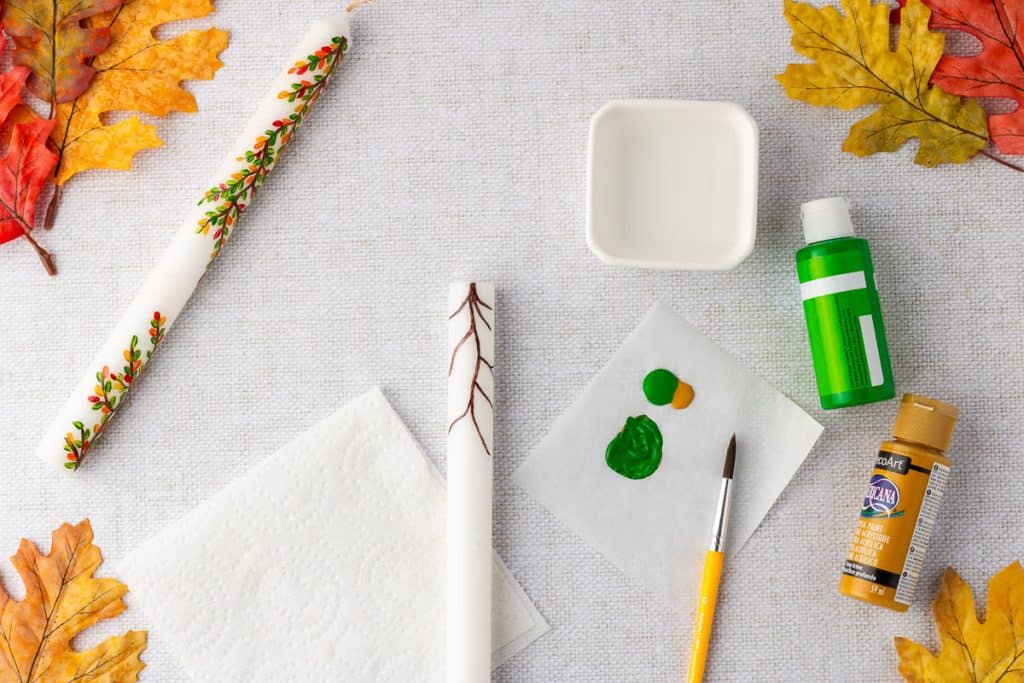
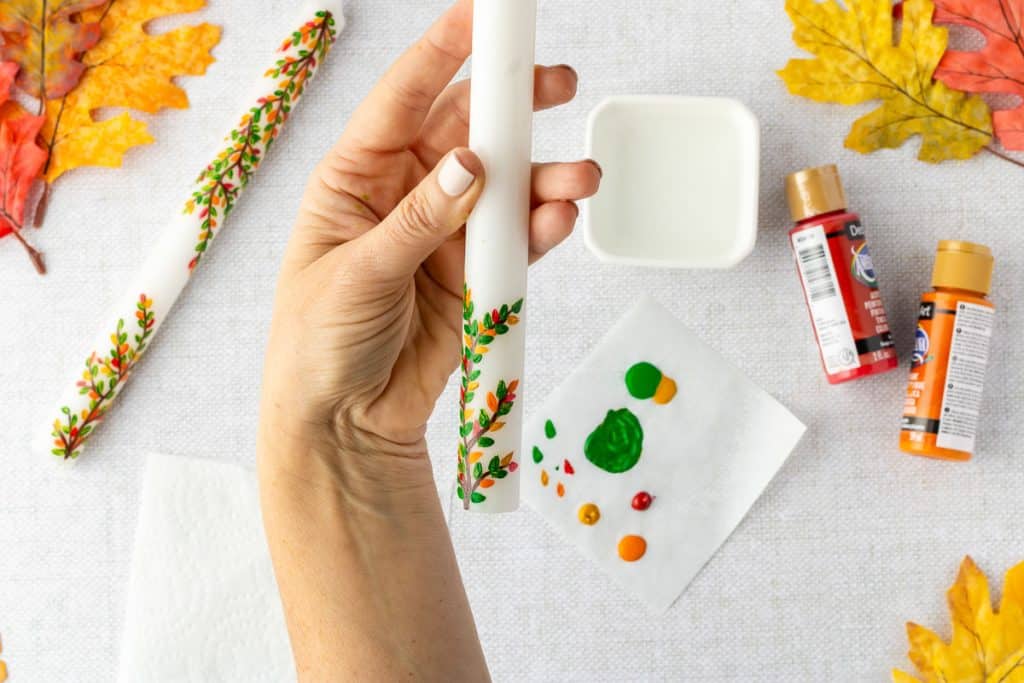
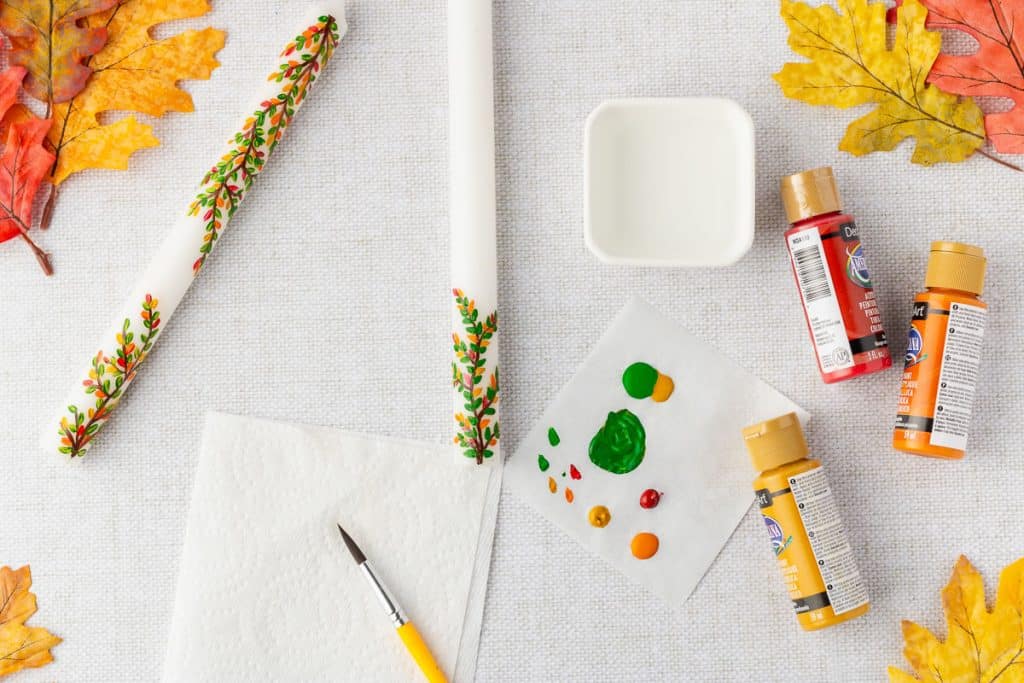
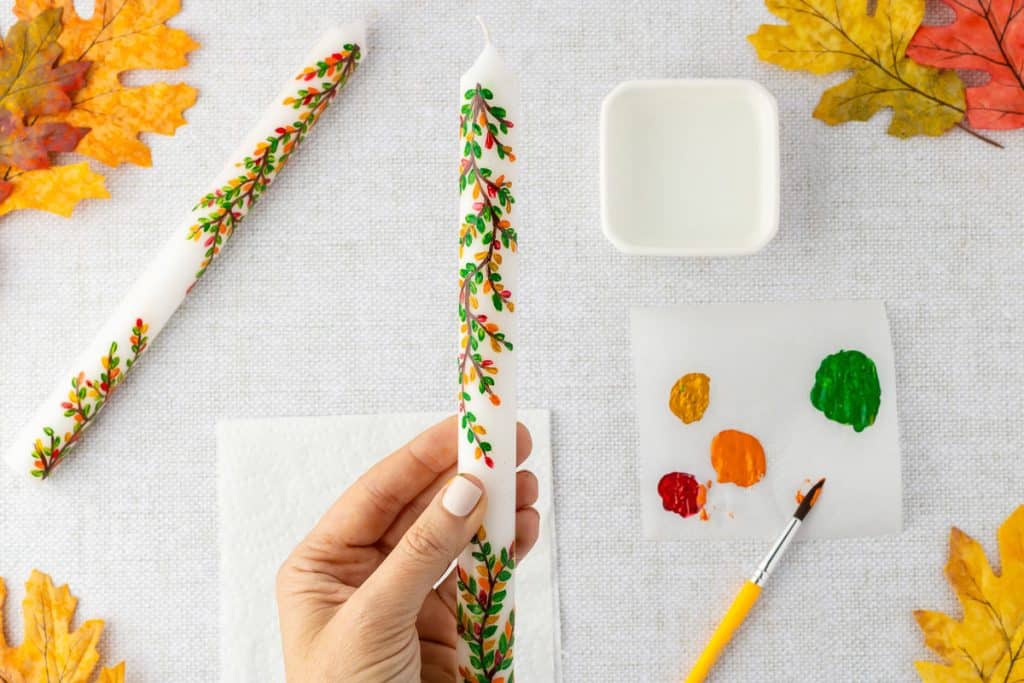
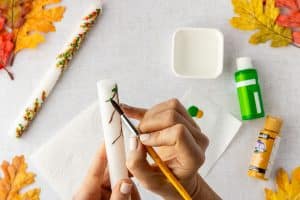
- Next, mix some green and yellow ochre (about two parts green and one part yellow) to make a more earthy green. Add a small dot of the matte medium and blend. Start painting on the leaves with your medium round brush and the green paint mixture. Start with a small amount of paint on the tip of the brush and dot or brush leaves onto the branches. Add the green leaves sporadically, alternating and leaving space for the other colored leaves.

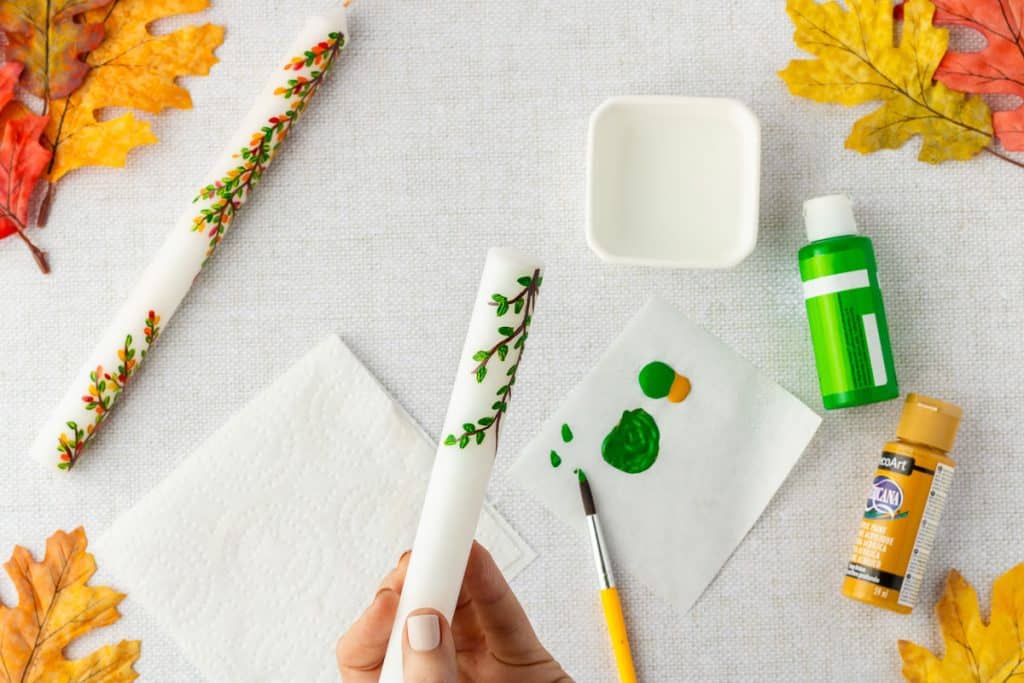
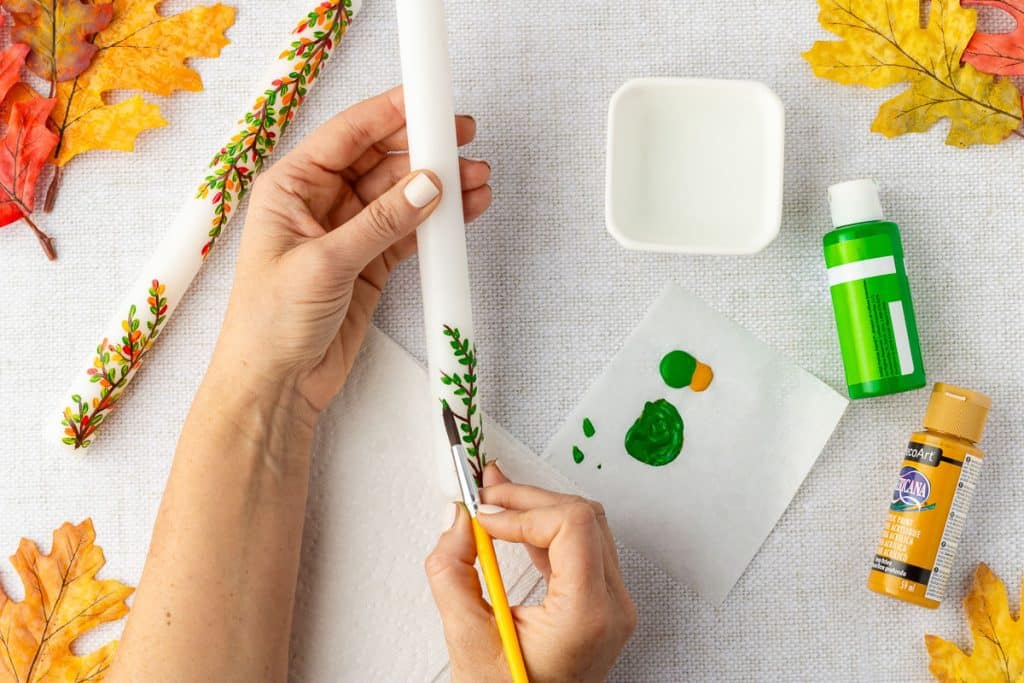
*Tip: Angle the leaves toward the tip of the branches instead of perpendicular to the branch for a more cohesive look.
*Practice the leaf strokes on scrap paper beforehand to get the feel and look before painting them onto the candle
*Note: if you do not like the look of something you painted or accidentally get paint in an area where it was not meant to go, use a cotton ball or q-tip to “erase” the paint with the rubbing alcohol. If the paint has already dried completely, use nail polish remover to “erase” the paint.
- Use a clean brush or rinse it with water and dry it with a paper towel or napkin.
*Note: Water will prevent the paint from adhering to the wax, so make sure the brush is dry before adding more color.
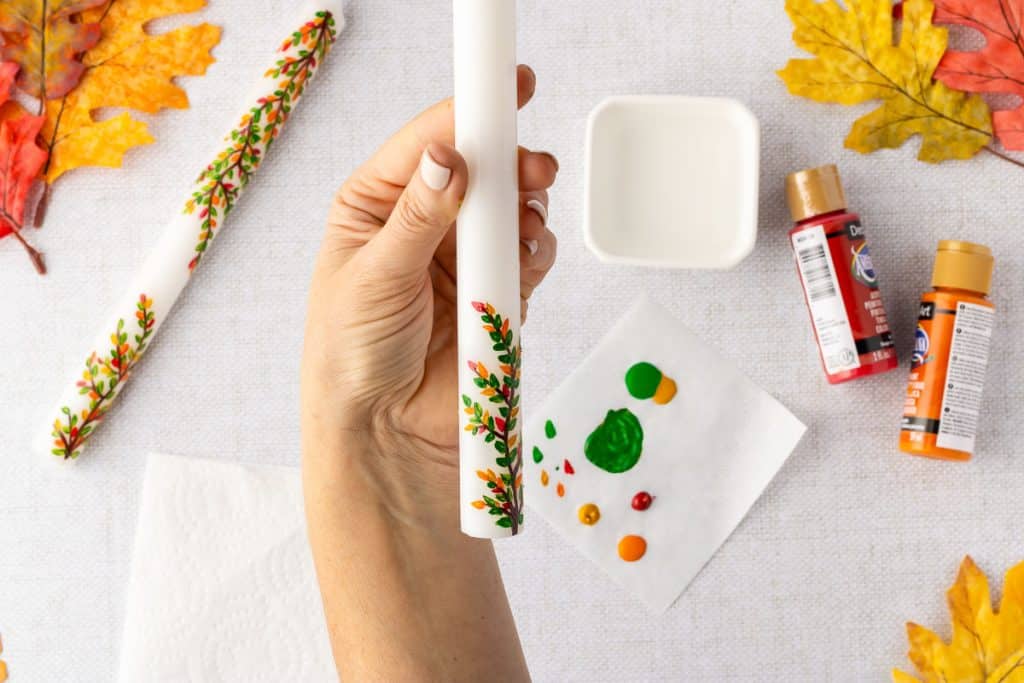
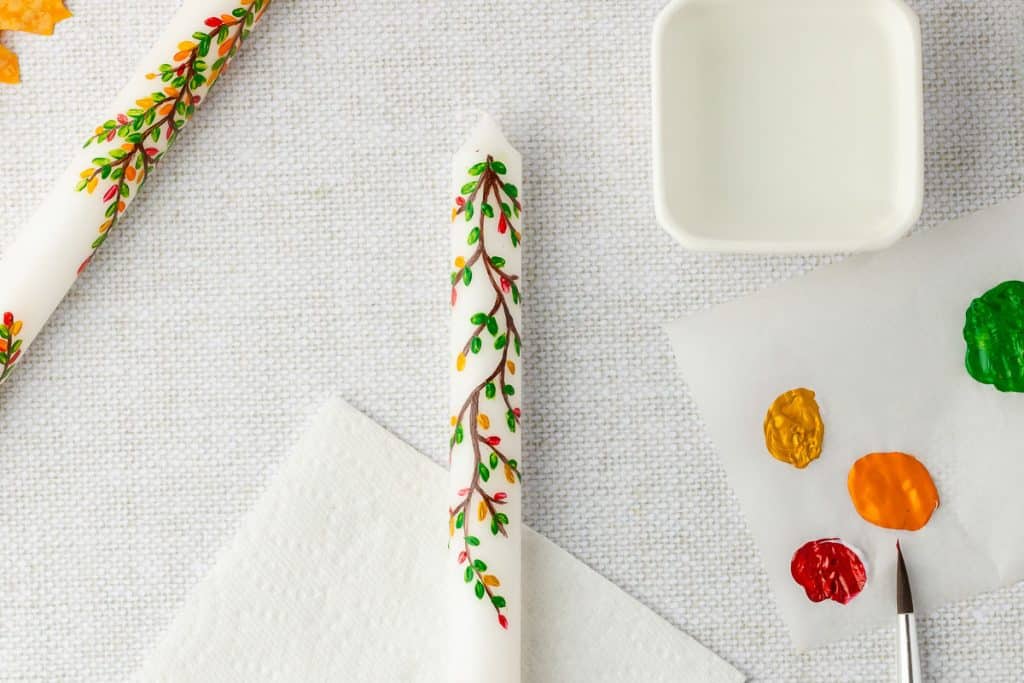
- Repeat the leaf pattern with the other three colors (red, yellow, and orange, adding the dot of matte medium to each beforehand)
*Note: One or two colored leaves per branch is sufficient first to ensure you have enough room for the other colors. You can always go back and add more of any color once all the colors are dispersed evenly
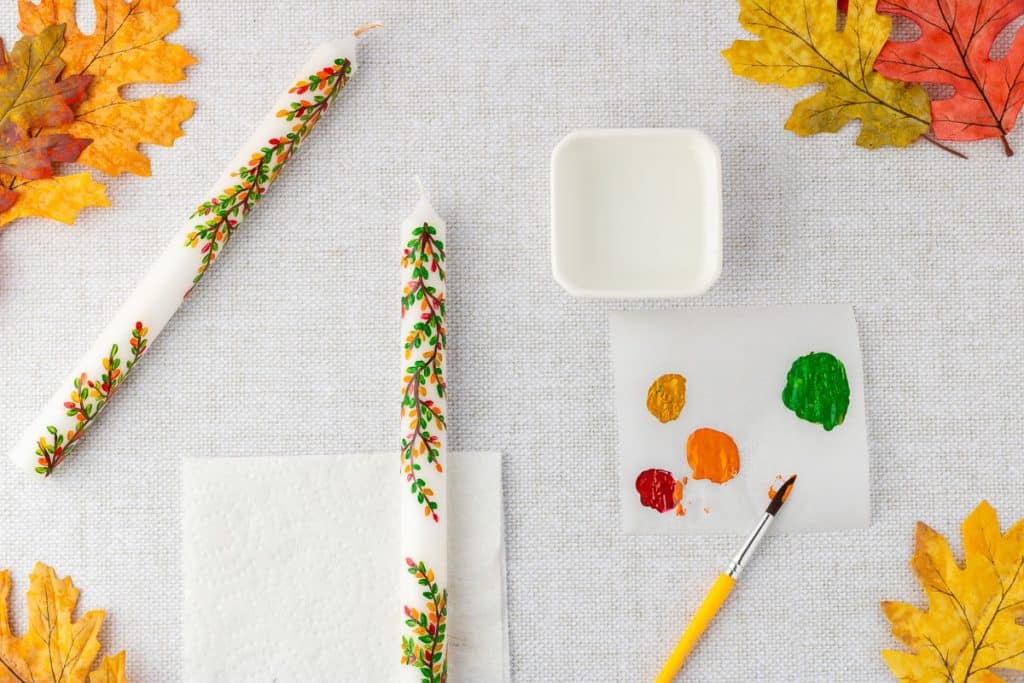
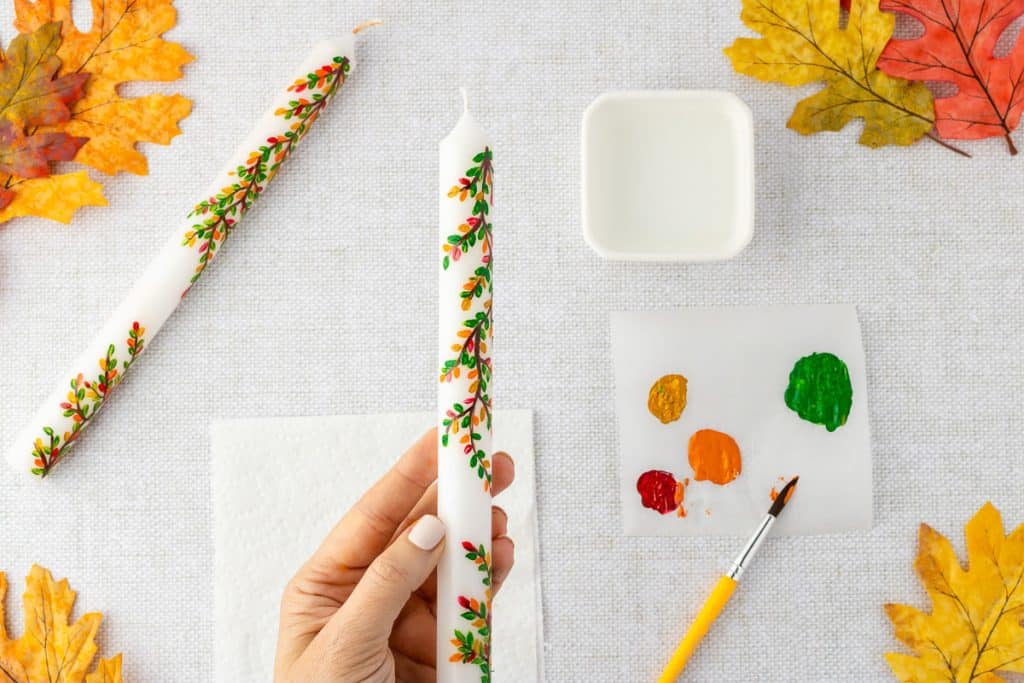
- Allow the paint to dry, and repeat the branch and leaf pattern starting at the top of the candle and going down toward the middle. Use the same process you did for the branches and leaves you painted starting at the bottom of the candle, but you will be adding more branches than the bottom. Continue adding them until they reach just past the middle of the candle.
Tips for Success!
- Burnt umber has a red hue that contrasts nicely with the fall colors, but any brown will do if you don’t have it. A small amount of red can always be added to any brown to make a reddish brown as well.
- Painting one leaf color at a time is recommended because acrylic paint can dry rather quickly. Fresh paint also goes on smoother.
- If you find that the paint is not gliding on, it may be that it is starting to dry out, and you might need some fresh paint.
- If you can, mix the paint with a different brush/utensil than the one you will paint with. If you are going to use the same brush, rinse and dry it to make it easier to paint. Most of the work done on the candle is with the tip of the brush, and if you have too much paint on the brush from mixing, it will be harder to get the desired look.
- Test your brushstrokes and color blends on scrap paper before working on the candle itself. This will help you become comfortable with the technique.
- Use long-burning, dripless candles.

Frequently Asked Questions
Much of this is going to come down to your comfort. I can only tell you that I am comfortable with it because I am using non-toxic paint, the candles are being burned in an open space, and I don’t leave them unattended while burning. The paint closer to the wick may cause the candle to burn differently, so monitor it.
A light dusting will keep your candles clean. Avoid water.
The painted design can last for years if the candles are used for decoration and handled gently. However, painted designs may fade or peel over time, especially in high humidity or if the candles are exposed to sunlight.
I wouldn’t.
DIY Painted Candles
Ingredients
- White taper candles
- RubbingAlcohol
- Cottonballs
- Acrylic Matte Medium
- Yellow Ochre acrylic paint
- Pumpkin Spice (orange) acrylic paint
- Crimson (red) acrylic paint
- Burnt Umber (brown) acrylic paint
- Light Green acrylic paint
- Small, skinny paint brush for small lines (size 0)
- "Round” medium-sized paint brush (size 9)
- Water
- Paper towels
Instructions
- Wipe down the candle with rubbing alcohol on a cotton ball to remove anything that may be on the surface that will keep the paint from sticking.

- Apply a thin layer of the acrylic matte medium to help the paint adhere to the wax surface. This will only take a few minutes to dry if the layer is nice and thin.
- To the brown (burnt umber) add a pea sized dollop of the matte medium and blend into the brown.*Note: the matte medium will help the paint adhere to the wax but if you use too much the paint will become more translucent.
- Using a thin brush and starting at the bottom of the candle, brush on thin lines to create “branches”. The main branch should go about ¼-⅓ up the candle.*Use the rule of odds by adding three main branches on one side and five on the other. Odd numbers tend to be more visually appealing.
- The paint dries quickly so you can go back over your lines and darken them up or fill in any spots before working on the leaves.
- Next, mix some green and yellow ochre (about two parts green and one part yellow). This makes a more earthtoned green. Add a small dot of the matte medium and blend together.
- With the medium round brush and the green paint mixture, start painting on leaves. Start with a small amount of paint on the tip of the brush, dot on or brush leaves on to thebranches. Add the green leaves sporadically, alternating and leaving space forthe other colored leaves. *Practice the leaf strokes on scrap paper beforehand to get the feel and look before painting them onto the candle*Tip: Angle the leaves toward the tip of the branche sinstead of perpendicular to the branch for a more natural and cohesive look.*Note: if at any time you do not like the look of something you painted or accidentally get paint in an area where it was not meant to go, use a cotton ball or q-tip to “erase” the paint with the rubbing alcohol. If the paint has already dried completely then use nail polish removerto “erase” the paint as well.
- Rinse your brush with water and dry with a paper towel or napkin. Water will prevent the paint from adhering tothe wax so ensure the brush is dried before adding more color.
- Repeat the leaf pattern with the other three colors (red, yellow and orange adding a dot of the matte medium to each before hand) *Note:One or two colored leaves per branch is sufficient at first to make sure you have enough room for the other colors. You can always go back and add more of any color once all the colors are dispersed evenly.
- Allow the paint to dry and repeat the branch and leaf pattern starting at the top of the candle going down toward the middle. Use the same process that you did for the branches and leaves you painting starting at the bottom of the candle and you will be adding more branches than the bottom. Continue adding them until they reach just past the middle of the candle.


Bookmark this post or pin the following image to refer back to this Painted Candle project down the road!
Thanks so much for spending a few minutes of your busy day with me!
To ensure you don’t miss future content, pop your email in the pale green box on the right or click here. I usually send one email weekly, so I won’t inundate your inbox. I’m sensitive to an overflowing email inbox!
We will only use your email address to send you emails, no more than 1-2 weekly. In addition, you will have access to my growing library of knit & crochet patterns and other printables. Check back often as this library will continue to grow. You can unsubscribe anytime by emailing me or clicking on the “unsubscribe” link at the bottom of all emails.
And you can access many of the products I refer to on my Nourish and Nestle Amazon Page. You can access it here.
So, if you’d like to participate in the ‘subscriber benefit’ action, simply subscribe to Nourish and Nestle here or use the form on the right sidebar. It’s slightly towards the top.
I have sent all my subscribers the link to the Subscriber Benefits Library. If you missed it or misplaced it, let me know.
Until next time…