
Purl Stitch: How to Purl, Illustrated
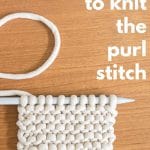
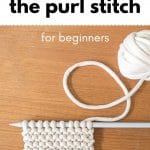
Learn how to knit the purl stitch with this informative post. The basic purl stitch and the knit stitch are the cornerstone stitches in knitting and comprise every knit stitch pattern. Master these two stitches, and you can knit anything! Still photos, written directions, and a video explain every step of this basic purl stitch.
This post is part of the ‘All About Knitting’ series. You can find all the links to the rest of the series in the pale green box at the end of this post. But, if nothing else, make sure to visit the How to Long-Tail Cast-On and How to Knit the Knit Stitch posts.
terms to know when knitting the purl stitch
cast on row (abbreviated co)
The cast-on row is the row of stitches (or loops) that you put on one of your needles. Your knitting pattern will tell you how many stitches to cast on. The cast-on row DOES NOT count as a row of knitting. Pop on over here to learn all about Casting On.
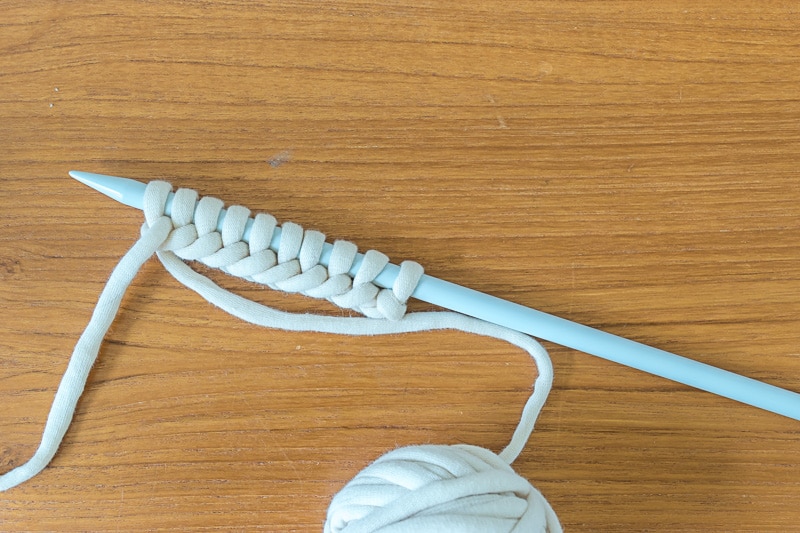
Table of Contents
stitches (abbreviated st(s))
The individual stitch made by pulling yarn through a previously made stitch.
working yarn v tail end
Your yarn will have two ends; the one that is still in the ball or skein of yarn is called the working end of the yarn (working end). The end opposite the ball of yarn is the tail end. The tail end is the end that you don’t work, that is handing from your needles leftover from when you cast on.
purl stitch (abbreviated p)
Along with the knit stitch, the purl stitch is one of the two basic knitting stitches you must know to knit. The finished purl stitch will look like a bump, pearl, or small horizontal row and is made by pulling the yarn from the front of the needles through a previously made stitch. When you turn a purl stitch over, it will be a knit stitch on the other side of the fabric.
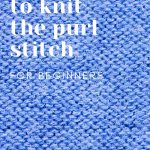
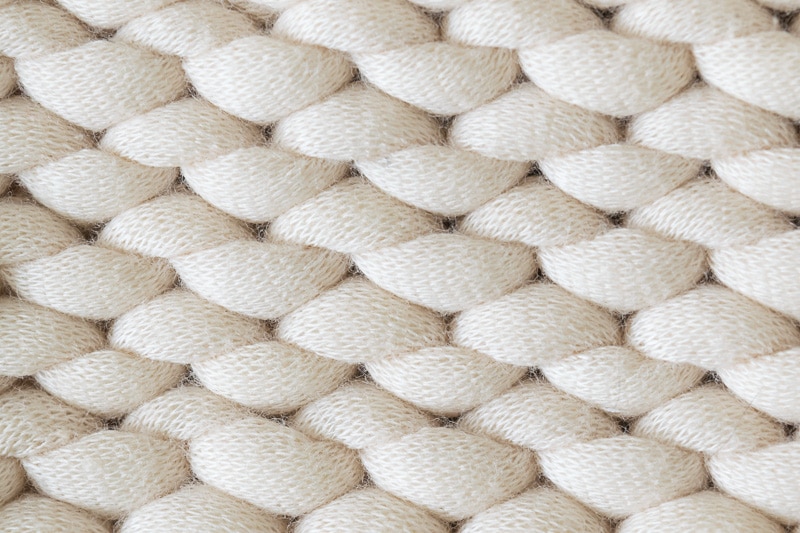
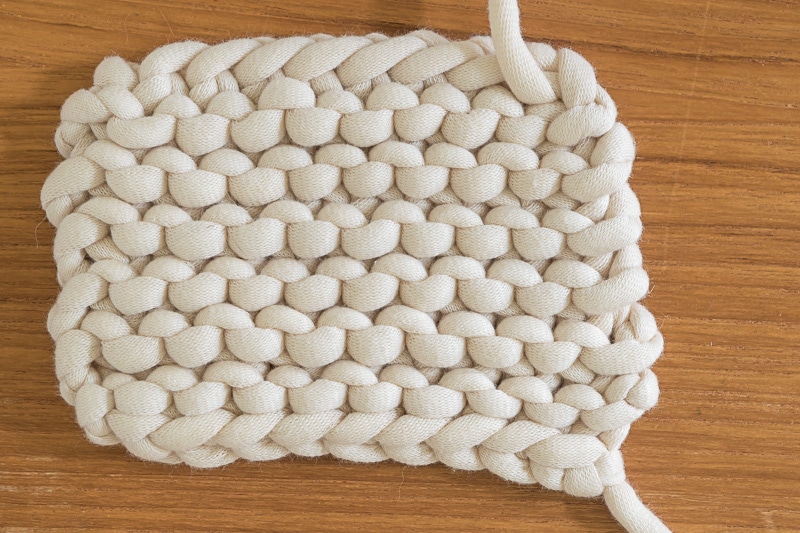
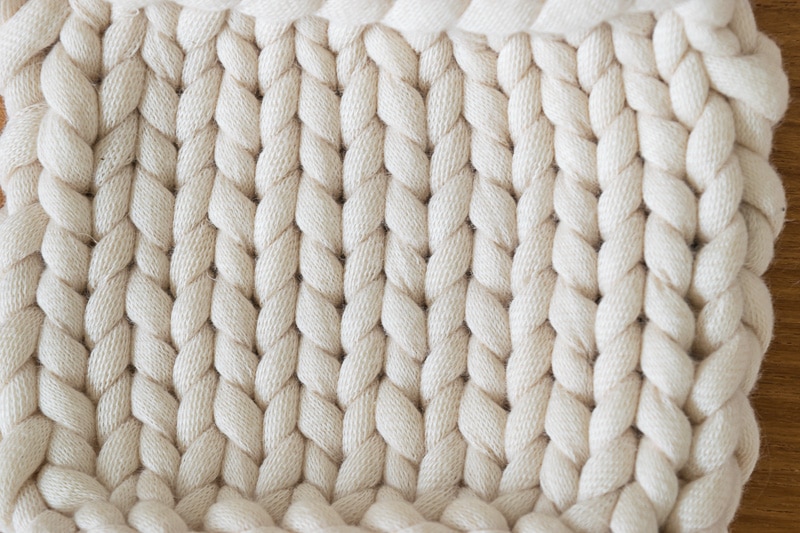
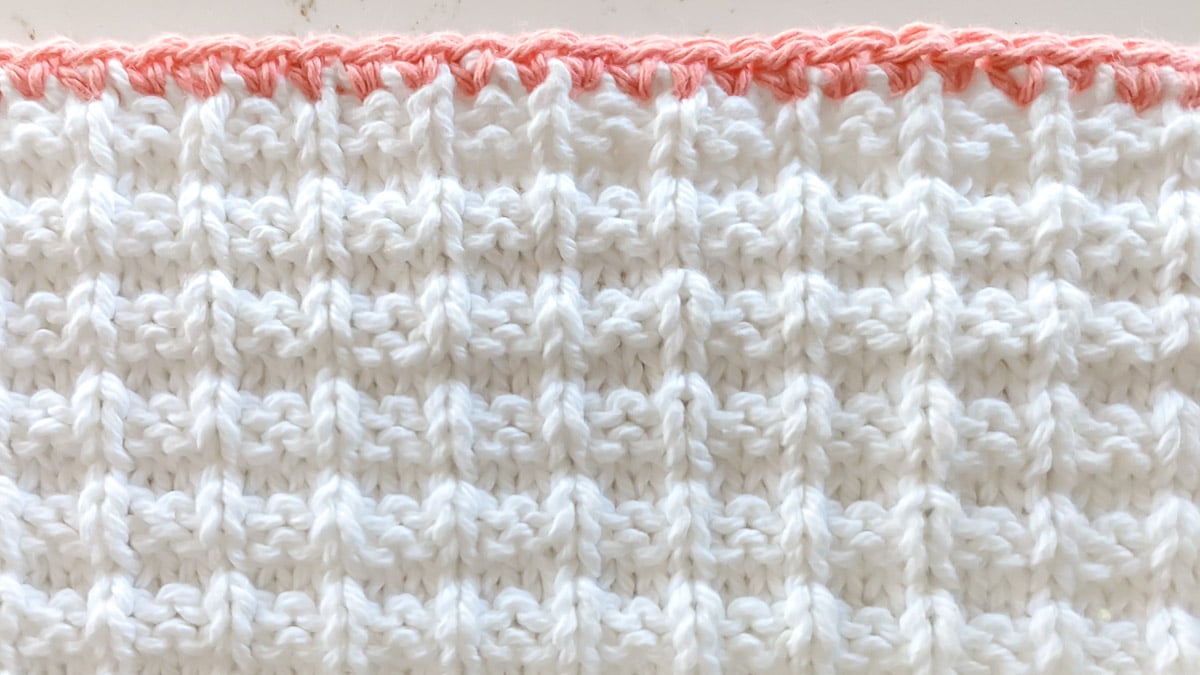
what should a purl stitch look like?
This is what rows of purl stitches look like.
knit stitch (abbreviated k)
Along with the Purl Stitch, the Knit Stitch is the basic stitch to know when knitting. The finished knit stitch will look like a V and is made by pulling the yarn from the back of the needles through a previously made stitch. When you turn a knit stitch over, it will be a purl stitch on the other side of the fabric.
tension
Knit tension is how tightly or loosely you pull your stitches when knitting.
Beginning knitters often pull the yarn much too tight, making it difficult to knit the next row as it’s difficult to slide the stitches up and down the needle. Additionally, it is also hard to get the point of the needle into a stitch. Knitting too tightly will also affect how the finished project looks: it will not lay flat and will most likely be smaller than you want.
Loose knitters produce a loose and saggy fabric. Like Goldilocks, you don’t want your tension to be too tight or loose; at minimum, you need to keep your tension consistent throughout your work.
purling vs knitting
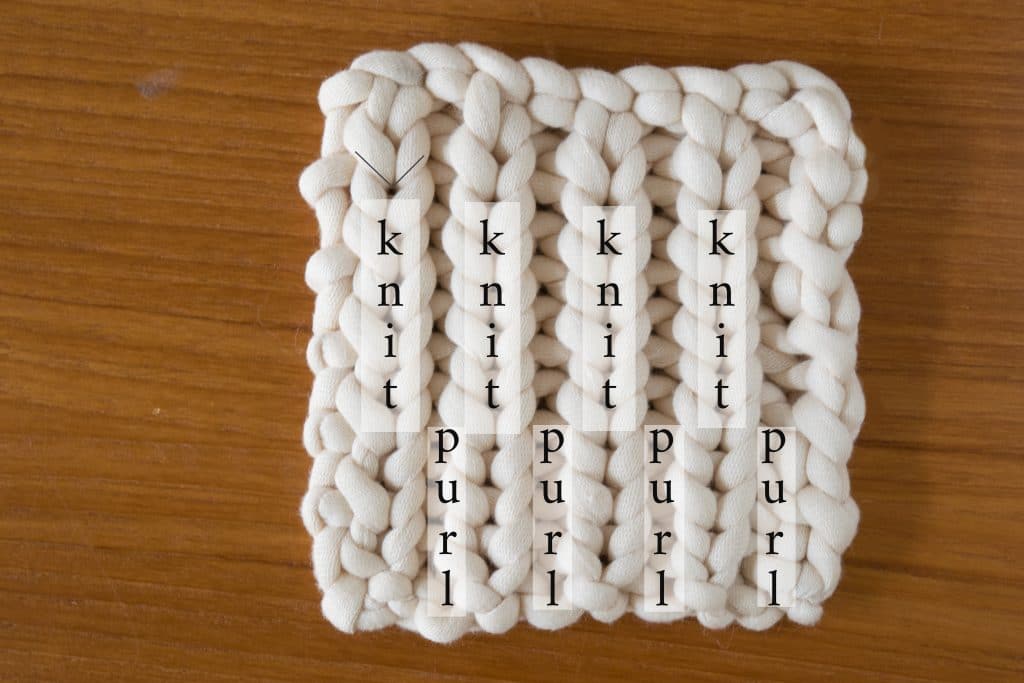
The knit stitch and the purl stitch are the same stitch, just the front, and back of the stitch. When you knit, the V will face you and the purl bump will be in the back. When you purl, the purl bump will face you, and the V will be in the back.
what’s the difference between knit and purl stitches?
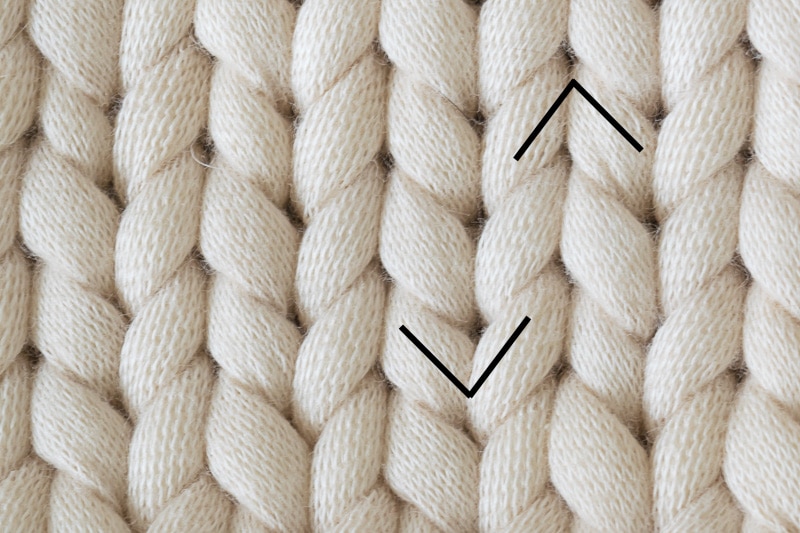
Essentially, they are the same stitch but work opposite from each other. When you knit, you keep the working yarn in the back and create the V in the front (the side of the fabric facing you) and the purl in the back. The purl is formed because the yarn is on that side, in this case, the backside.
When you purl, the yarn will be on the side facing you so that you will form the little purl facing you. But if you turn your work over and look at the stitch you just purled, you will see that the back of that stitch shows the V of a knit stitch.
If this is confusing, then do this. Grab your needles and some yarn and cast on a few stitches…like 10. Then knit a row. You will see that the side facing you is all Vs. Turn your work over, and you will notice that you have 5 purls.
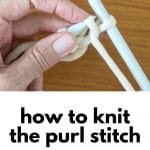
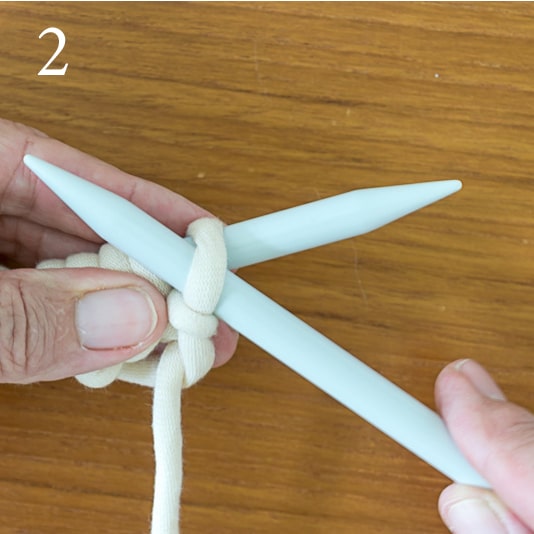
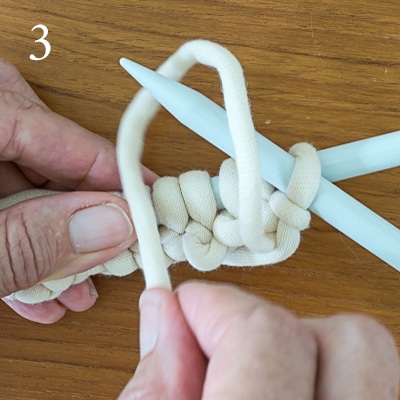
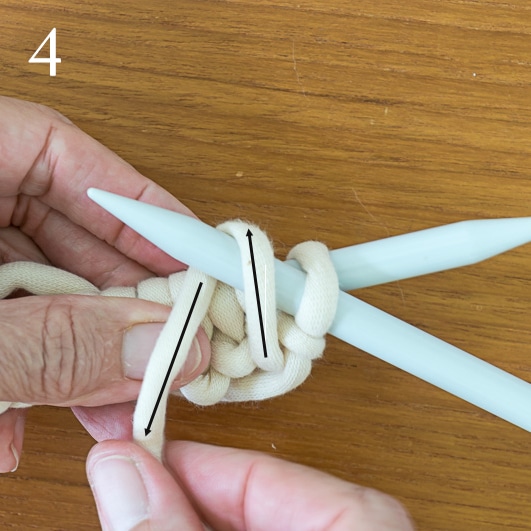
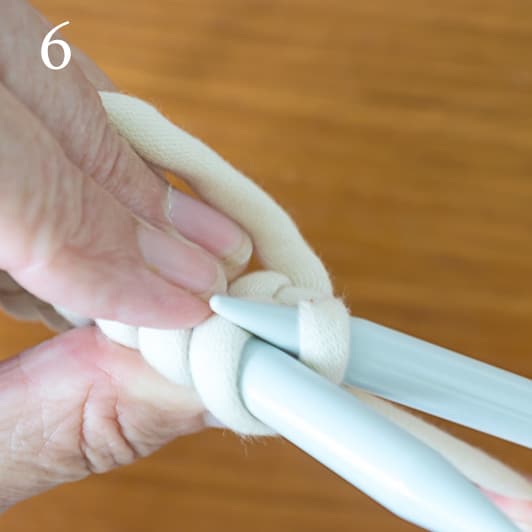
How to Knit the Purl Stitch, Step-by-Step
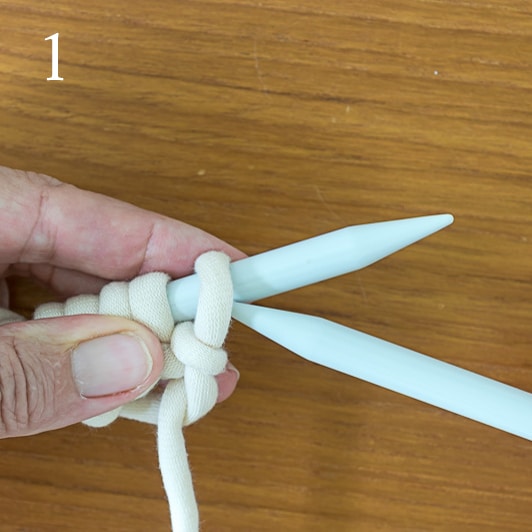
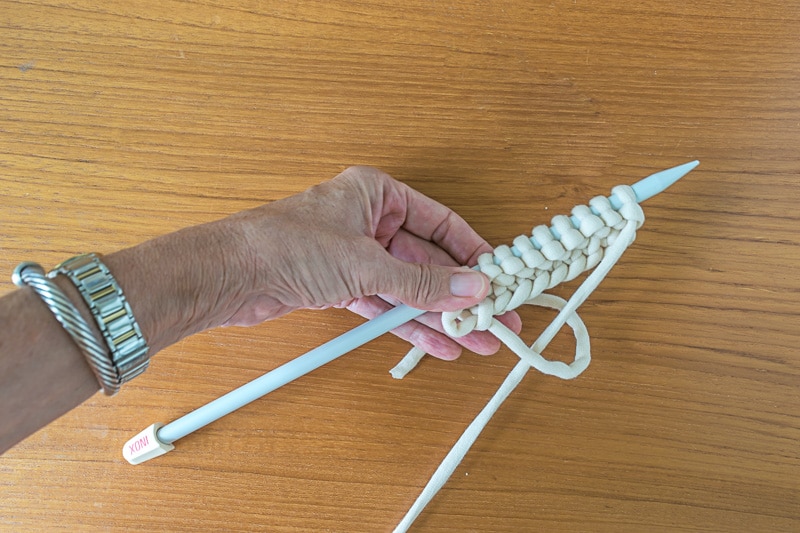
Hold the needle with the stitches in your left hand and the empty needle in your right hand
Slide the right needle into the first stitch on the left-hand needle, from right to left, on top of the left-hand needle. Your right-hand needle will be in front of the left-hand needle.
With the yarn starting in front of your work, move the yarn counterclockwise around the point of the right needle.

With your right hand holding the needle and the working yarn, pull down gently
Slide the right needle slowly under the left-hand needle and towards the back. Use the right-hand needle to
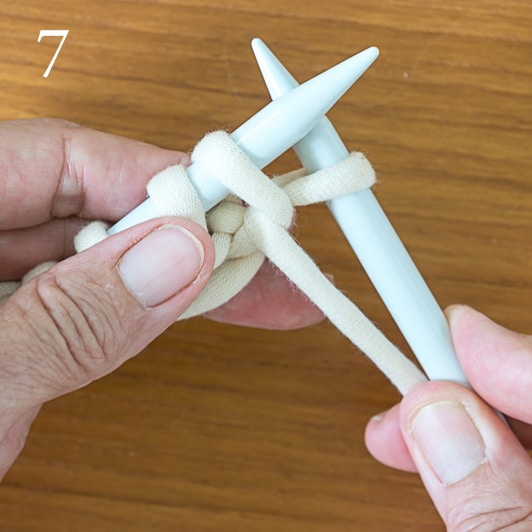
pull out the new loop, which is the new stitch.

Gently push up the old stitch on the left hand needle with a finger on your left hand and let it fall off the needle.
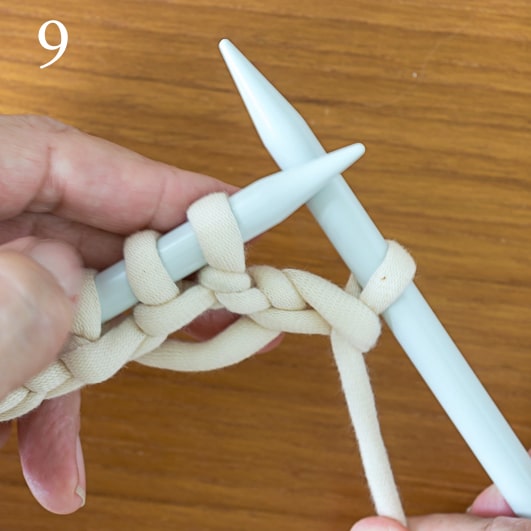
Snug up the new stitch by gently tugging on the working yarn. Tug also on the tail-end yarn if it is the first row of stitches.
how to purl tutorial video
now that you know how to purl!
garter stitch (abbreviated gst)
The garter stitch is the knit pattern made by knitting or purling every row.
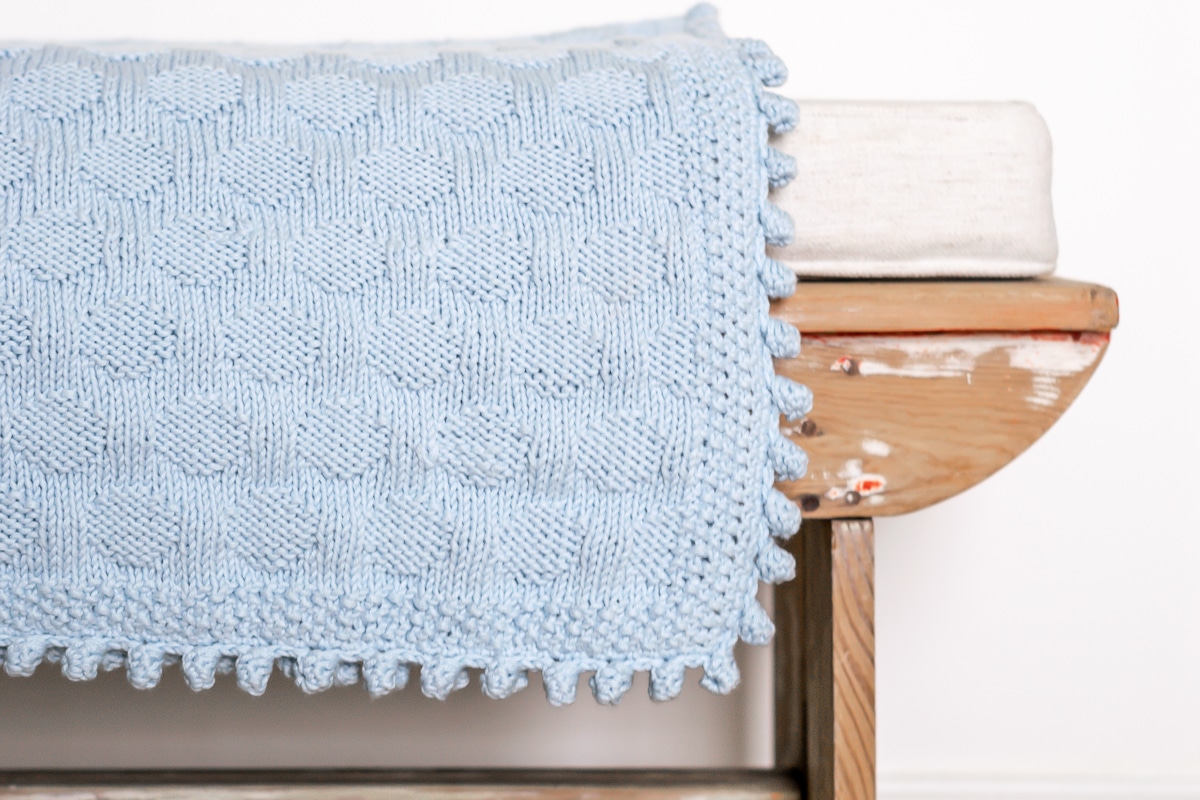
stocking stitch or stockinette stitch (abbreviated st st)
The stocking stitch is the pattern made by alternating knit and purl rows. You would knit every stitch on one row, turn your work, and purl every stitch don’t the next row. By repeating this sequence, you will create the stocking stitch pattern.
ribbing or rib stitch (abbreviated 1×1 rib, 2×2 rib)
Rib stitch is most commonly used around cuffs, necks, and hems of sweaters to create a more elastic piece of fabric. Alternating knit stitches and purl stitches on the SAME SIDE OF THE FABRIC produce ribbing. You will often see it referred to as 1×1 ribbing or 2×2 ribbing, and so on. For a 1×1 ribbing, you would alternate a Knit, Purl pattern while Knit, Knit, Purl, Purl pattern would produce a 2×2 ribbing.
Things to Remember About the Purl Stitch
- It is the back side of the knit stitch.
- The working yarn should always be in front when working a purl stitch.
- If you are working the stocking stitch and you forget what side of your work you are on, if you see the purls, then you should be purling, and if you see Vs, you should be knitting.
- When pushing your needle through the stitches on your needle, make sure you don’t split the yarn.
- Always count the number of stitches after each row. If you have more than the number your cast on or specified by your knitting patterns, you added some somewhere. If you have fewer stitches than you should, you either dropped some or knit some together. It is better to find those sooner rather than later.
- When you finish each row, all new stitches will be on the right-hand needle, and the left-hand needle will be empty. Turn the right-hand needle, place it in your left hand and repeat the process.
- When you begin each new row, the yarn should be on the right side of the stitches on the left-hand needle.
- There are several different knitting styles; this post shows how to knit the English or American Style.
- Like any craft, it takes practice to master. Set aside some time to practice casting on and knitting, but don’t get frustrated. Each time you practice a stitch, you will get better.
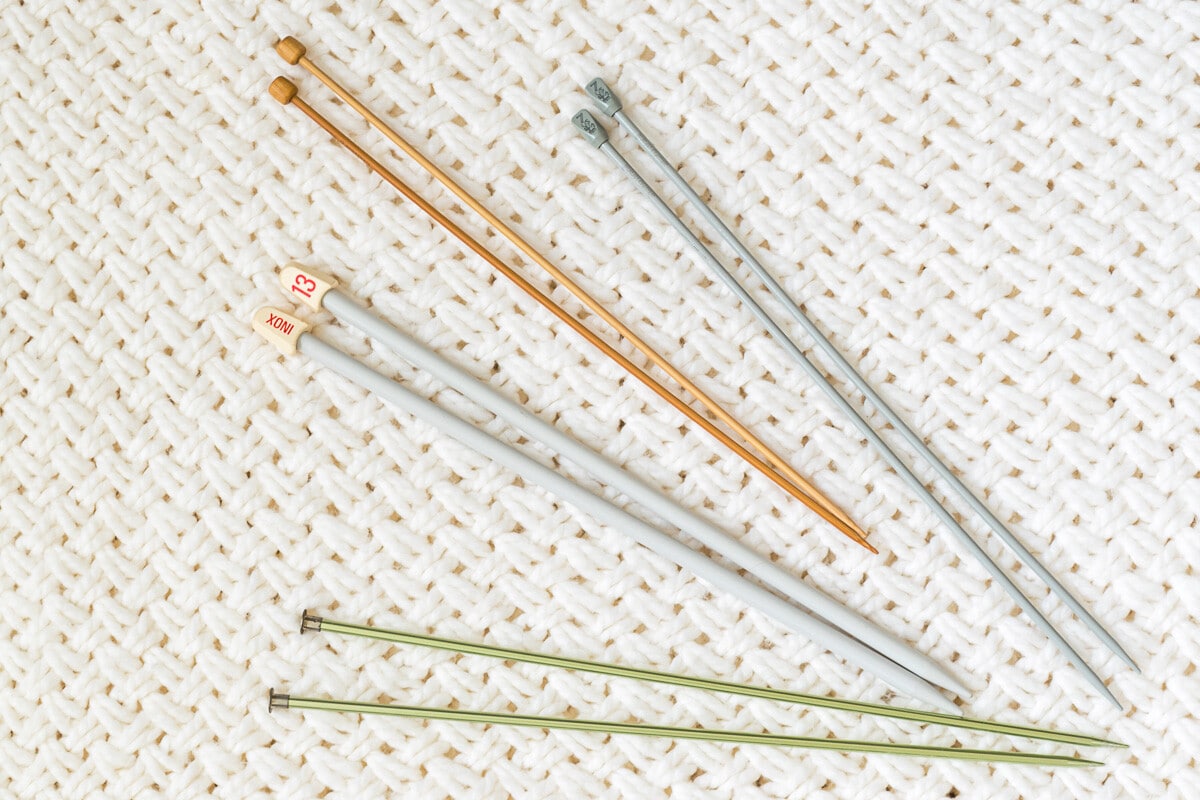
- I recommend a needle smaller than US7/5mm for beginner knitting and a suitable yarn weight. If you haven’t already, make sure to read about knitting needles and nab the Needle Conversion Chart here.
- And read about yarns and nab the Yarn Weights Guide here.
frequently asked questions about the purl stitch
why are my purl stitches loose
You need to adjust your tension. If your purl stitches (or your knit stitches) are loose, try holding the needles at a right angle to each other. Loose stitches often result from needles being held parallel to each other, horizontally.
why are my purl stitches too tight?
Once again, it is all about tension. Make sure you aren’t just knitting at the tip of your needle. Instead, ensure your new stitch is pushed down to the wider part of the needle.
You can read more about tension problems in knitting in this post.
If you want to learn how to knit or are looking to brush up on your knitting skills and knowledge, pop over to the How to Knit page, which houses all of the posts that teach knitting skills. Or, you could go ahead and visit each one by clicking the links below.
All About Knitting
- All About Yarn, including different fibers and weights, how to read a yarn label, and a Yarn Weights Chart
- All About Knitting Needles, including material, sizes, styles, and a Needle Conversion Chart.
- How to Cast On Using the Long-Tail Method, including calculating how much yarn is needed to cast on and how to make a slip knot.
- How to Knit the Knit Stitch
- How to Knit the Purl Stitch
- How to Knit the Seed Stitch
- How to Bind Off, including how to weave in your loose ends.
- How to Read a Knit Pattern, including a Common Knitting Abbreviations Chart.
- This simple Garter Knit Dishcloth will let you put all your new skills to good use!
- How to Block Your Knitting.
- Common Knit Errors; How to Prevent or Diagnose and Fix Them
- Join yarn using the Russian Join
- How to seam pieces of knit fabric with the Mattress Stitch (for sweaters, tops, pillows, etc…)
- How to Knit in the Round with Circular Needles
- How to Knit in the Round with Double-Pointed Needles
- How to Knit in the Round using the Magic Loop Technique.
- Organize Your Knitting with these free printables.
- Check out our Gift Ideas for Knitters.
To refer back to this post discussing how to knit the purl stitch, bookmark this page or pin the following image.
Thanks so much for spending a few minutes of your busy day with me!
To ensure you don’t miss future content, pop your email in the pale green box on the right or click here. I usually send one email weekly, so I won’t inundate your inbox. I’m sensitive to an overflowing email inbox!
We will only use your email address to send you emails, no more than 1-2 weekly. In addition, you will have access to my growing library of knit & crochet patterns and other printables. Check back often as this library will continue to grow. You can unsubscribe anytime by emailing me or clicking on the “unsubscribe” link at the bottom of all emails.
And you can access many of the products I refer to on my Nourish and Nestle Amazon Page. You can access it here.
So, if you’d like to participate in the ‘subscriber benefit’ action, simply subscribe to Nourish and Nestle here or use the form on the right sidebar. It’s slightly towards the top.
I have sent all my subscribers the link to the Subscriber Benefits Library. If you missed it or misplaced it, let me know.
Until next time…

Hi, I like you post and I would like to know if it is possible to have in a pdf file?
Hi Myriam, I dont have a PDF of the purl stitch, yet, I will add it to my to-do list.