Knit Lace Bandana – Free Pattern
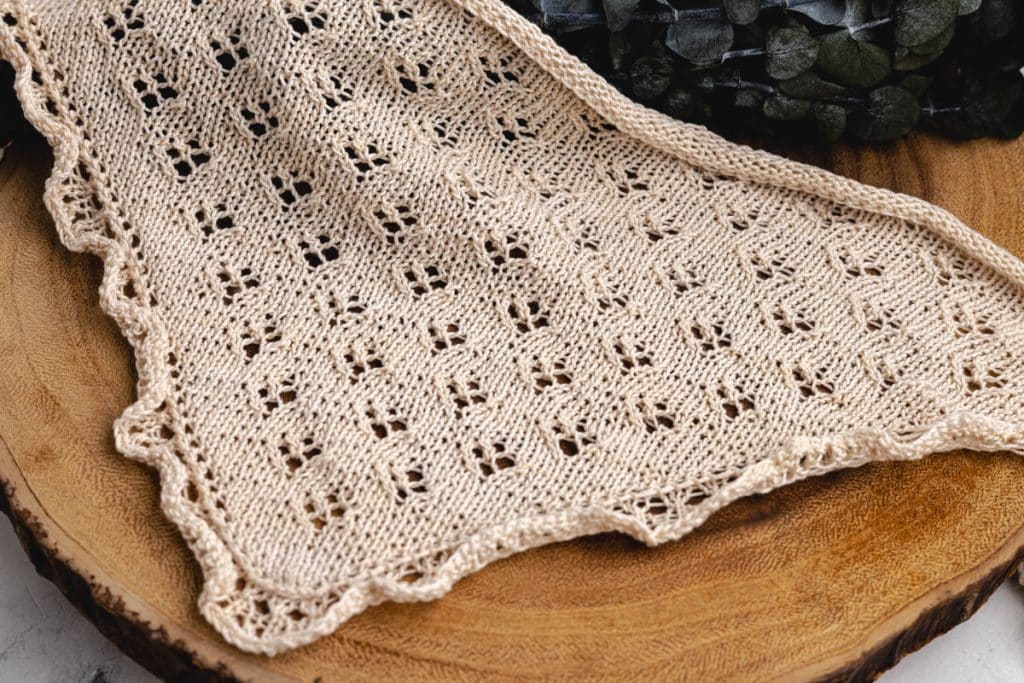
A handmade knit lace bandana feels both practical and a little bit fancy. This one is lightweight enough to wear on a summer walk, pretty enough to tie on for an evening out, and interesting enough to keep your hands busy through a long movie. The lace bandana checks all three boxes, and it works up faster than you’d expect once you get into the rhythm of the pattern.
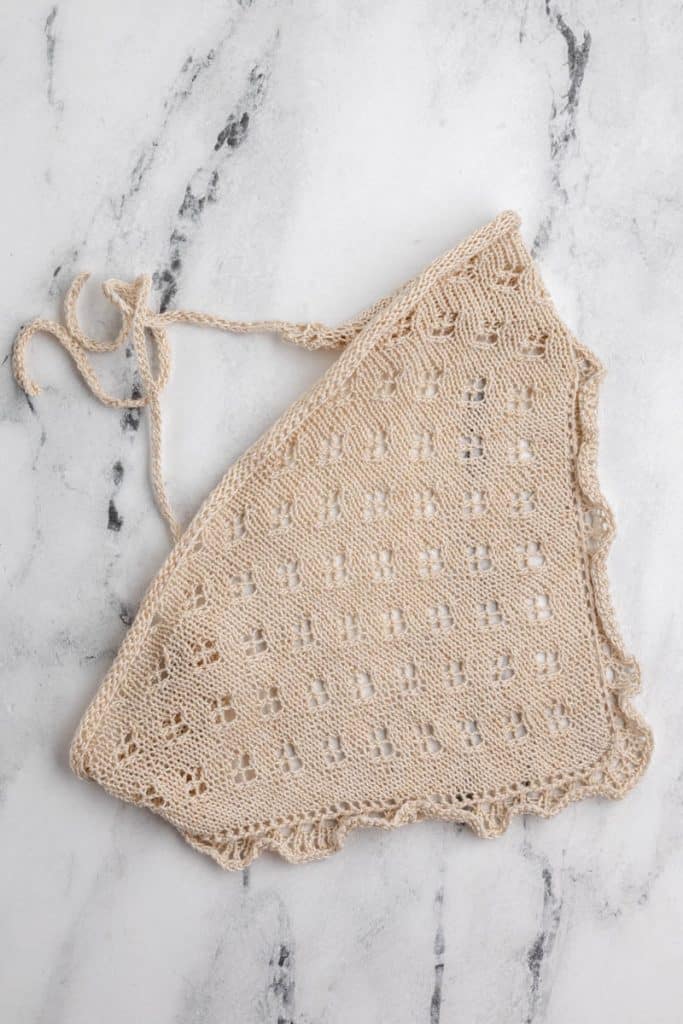
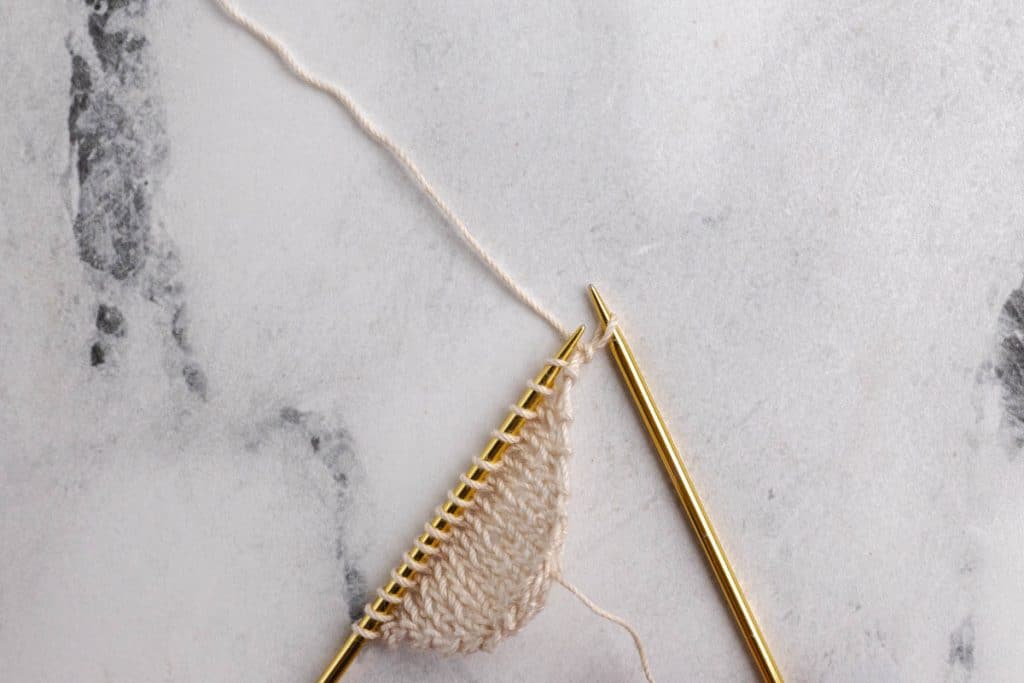
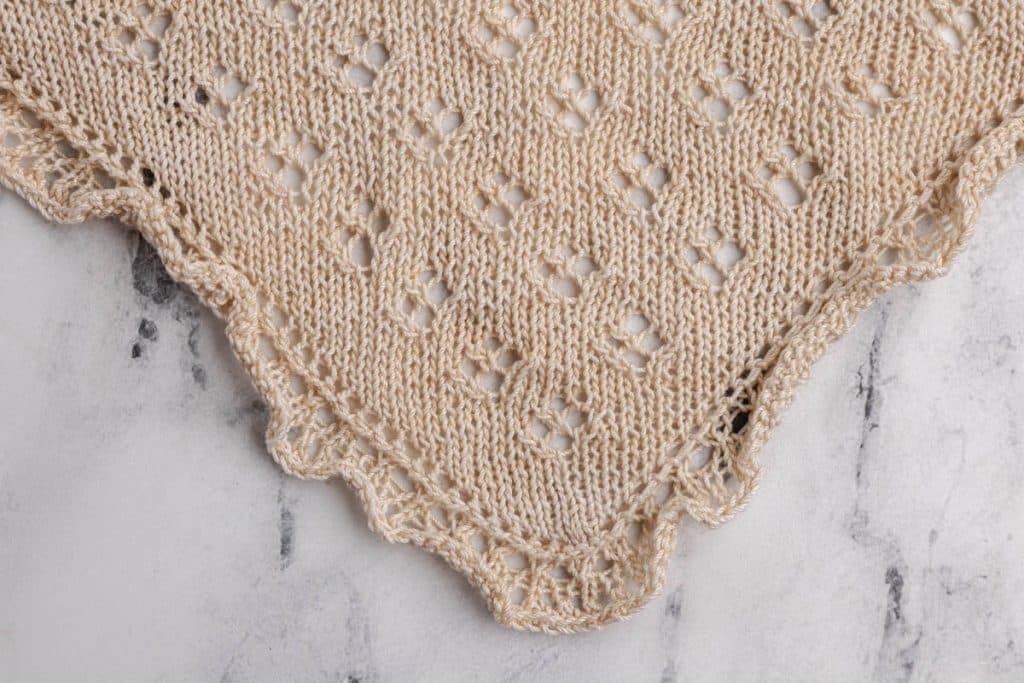
The bandana is worked flat, starting from the bottom point and increasing outward on every right-side row. The lace motif falls into place naturally as the stitch count grows, so you’re not juggling a complicated chart — the pattern essentially builds itself. That said, this is thread-weight knitting, which means your results will be delicate and beautiful, but it does ask for a little patience. A simple lace ruffle finishes the edges.
Blocking makes this project. I say that about a lot of lace knitting, but I really mean it here. Straight off the needles, the bandana looks bunched and the eyelets are barely visible. After a good steam block, it opens up into something that looks like you worked much harder than you did. Don’t skip it.
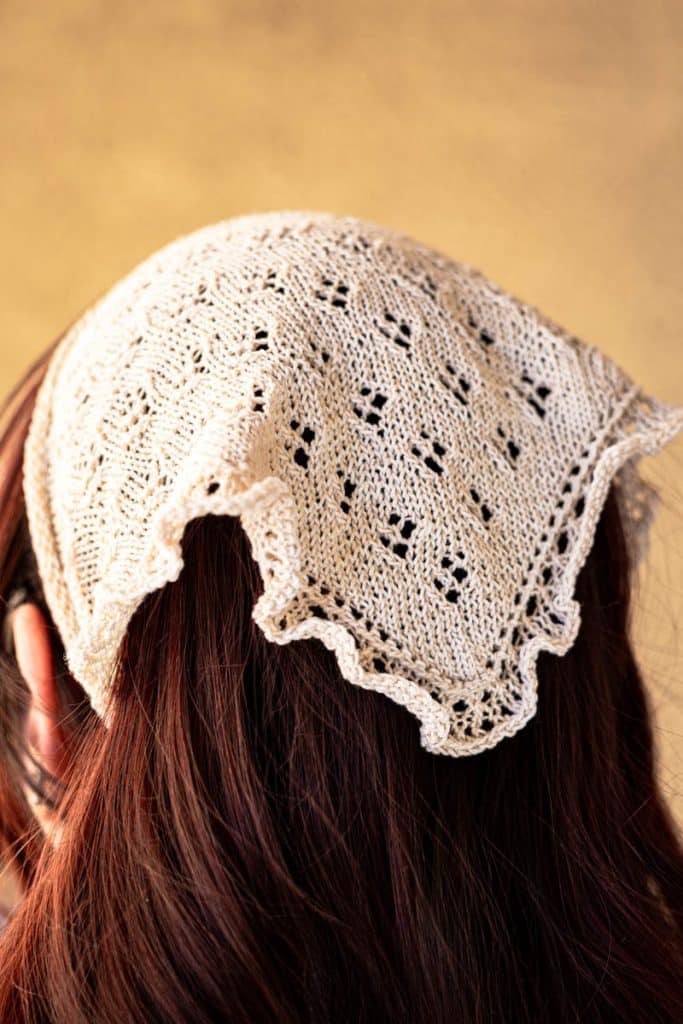
Table of Contents
Materials
Some of these links may be Amazon affiliate links and I may earn a small commission from the sale of these products to help defray the costs of operating this site, but the price you are charged is not affected. You can see my full disclosure policy here.
- Aunt Lydia’s thread, approximately 200 yards
- 2.25 mm straight knitting needles or 2.25 mm circular knitting needles.
- Tapestry needle
- Stitch markers (optional)
- This free Knit Lace Bandana Pattern is available in this post below and as an ad-free printable PDF for subscribers. You can find the pattern in the Miscellaneous section of the Library (your super secret password is included at the bottom of every Monday’s Newsletter email) or email me, and I’ll send it to you. Not a subscriber? C’mon—we’d love to have you. A subscription costs nothing and gives you access to all our printables and pattern PDFs. Click here to have the Lace Bandana pattern directly emailed to you.
Other Yarn/Thread Options
This pattern is written for size 10 crochet thread, which gives you the fine, crisp drape that makes the lace look its best. Aunt Lydia’s Classic Size 10 is easy to find and comes in a great range of colors, including some variegated options that add interest without disrupting the lace.
Other thread options that work well: Lizbeth Size 10 (beautiful color selection, slightly softer hand), DMC Petra Size 5 (a step up in weight, gives a slightly sturdier bandana), and Omega Sinfonia (widely available if you shop international craft suppliers).
If you want a softer, drapier bandana — more scarf-like — you could substitute a fingering weight yarn like Cascade Ultra Pima or Malabrigo Sock. Keep in mind your finished measurements will be larger and your gauge will shift, so work a swatch first. The lace will also look bolder and more open.
Finished Measurements
Measured after blocking:
- Bandana width (top edge, excluding ties): approximately 17 in (43 cm)
- Bandana height (bottom point to top edge): approximately 8.5 in (22 cm)
- Tie length: approximately 12 in (30 cm) each
Gauge
7 sts x 12 rows = 1 x 1 in, measured after blocking.
Abbreviations
- k: knit
- p: purl
- yo: yarn over
- ssk: slip, slip, knit
- k2tog: knit 2 together
- EI: eyelet increase
- RS: right side
- WS: wrong side
- st(s): stitch(es)
Special Stitch
Eyelet Increase (EI): Lift the horizontal strand between two stitches from back to front and knit into it through the front leg, creating one new stitch and a small decorative eyelet.
Eyelet Increase on the Sides:
Special Techniques
Stretchy Bind-Off
- Knit 2 stitches.
- Then, knit the 2 stitches on the right needle together. (1 stitch remains on the right needle.)
- Knit 1 stitch.
- Then, knit the 2 stitches on the right needle together.
- Repeat Steps 3–4 until all stitches have been bound off.
This method creates a flexible edge with excellent stretch and drape.


Tips for Success with this Knit Lace Bandana
- Place a stitch marker after the first stitch and before the last stitch on every row. Your increases happen just inside those markers, and keeping track of them will save you from a lot of counting. I also recommend placing markers between each lace repeat once you’re into the Main Lace section — it makes it easy to catch a mistake before it travels very far.
- Count your stitches at the end of every RS row, especially in the early sections. It’s much easier to fix an error one row back than to hunt for it three repeats later.
- The slipped edge stitch is worth the extra second it takes. That edge gives you a clean, even ladder of loops along the long sides of the bandana, and it makes picking up for the border significantly easier. Don’t skip it, even when you’re tired and just want to get to the end of the row.
- Crochet thread can be slippery, especially on metal needles. If you find yourself fighting the yarn, try wood or bamboo needles — they give the thread just enough grip to stay where you put it.
Notes
- This bandana is worked flat from the bottom point upward.
- The first stitch of every RS row is purled, and the final stitch of every row is slipped purlwise with yarn in front to create a clean decorative edge.
- Increase 1 stitch at each edge on every RS row, for a total of 2 stitches increased per RS row. The first increase is worked immediately after the first purl stitch, and the second increase is worked immediately before the final slipped edge stitch.
- The lace pattern grows naturally as the bandana increases. After each full 8-row lace repeat, you will have enough stitches to add one more lace motif repeat.
How to Knit this Lace Bandana
Cast on 5 sts.
Row 1 (RS): K4, sl last st pwise wyif.
Row 2 (WS): P4, sl last st pwise wyif.
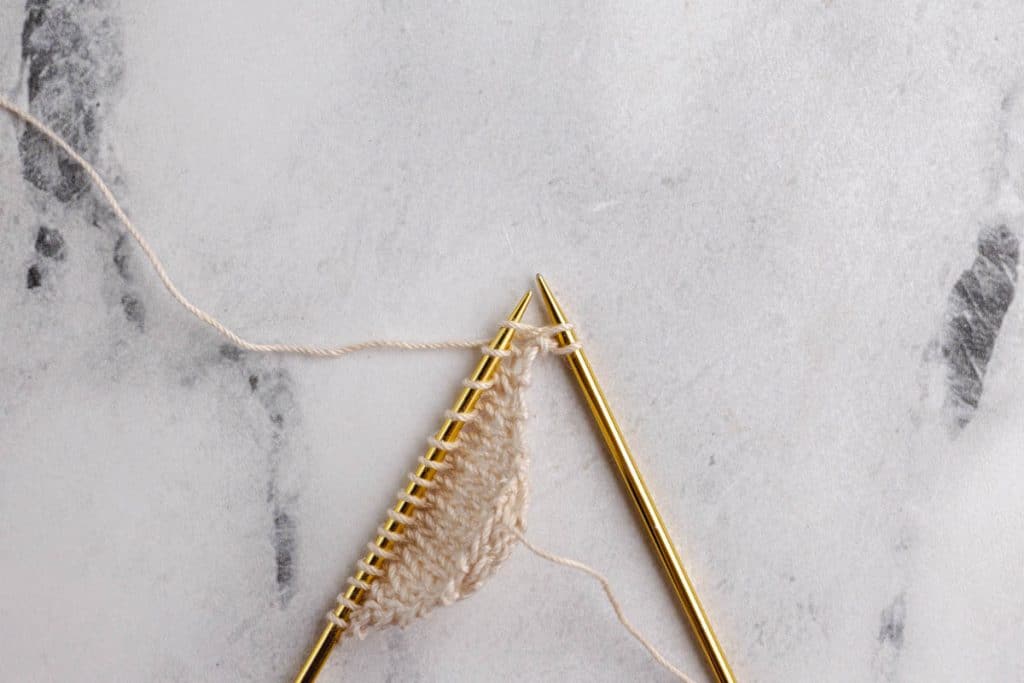
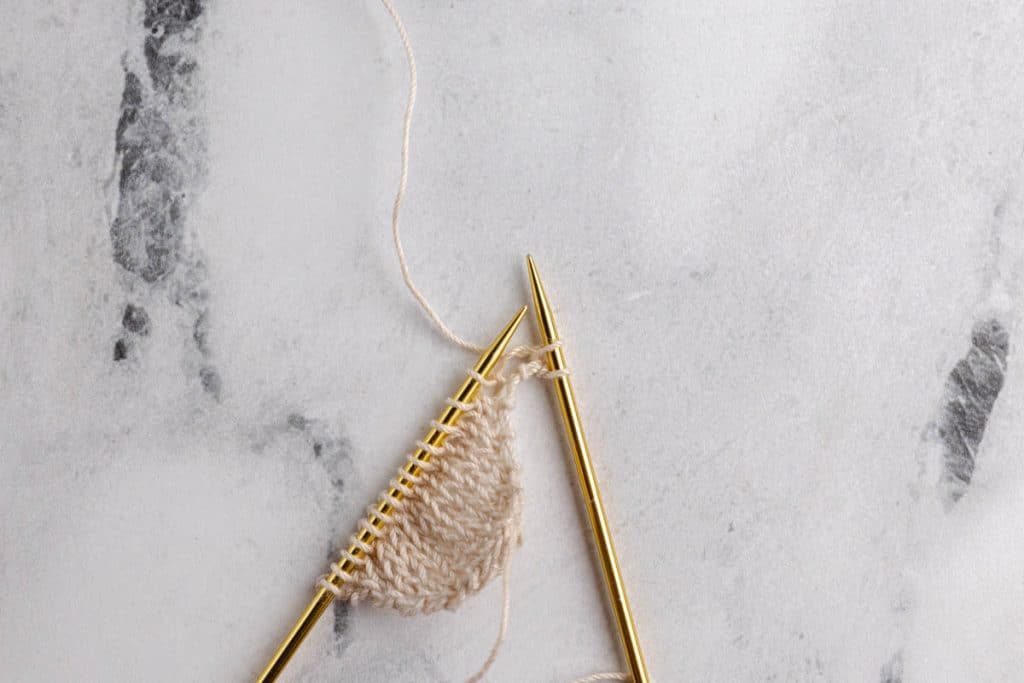
Row 3 (RS): P1, EI, knit to last st, EI, sl last st pwise wyif.
Row 4 (WS): Purl to last st, sl last st pwise wyif.
Repeat Rows 3–4 until you have 15 sts, ending with a WS row.
Lace Section
Begin lace pattern on the next RS row.
Lace Setup
Row 1 (RS): P1, EI, k6, yo, ssk, k5, EI, sl last st pwise wyif. (17 sts)
Row 2 (WS): Purl to last st, sl last st pwise wyif.
Row 3 (RS): P1, EI, k5, k2tog, yo, k1, yo, ssk, k5, EI, sl last st pwise wyif. (19 sts)
Row 4 (WS): Purl to last st, sl last st pwise wyif.
Row 5 (RS): P1, EI, k8, yo, ssk, k7, EI, sl last st pwise wyif.
Row 6 (WS): Purl to last st, sl last st pwise wyif.
Row 7 (RS): P1, EI, knit to last st, EI, sl last st pwise wyif.
Row 8 (WS): Purl to last st, sl last st pwise wyif.
Main Lace Repeat
Row 1 (RS): P1, EI, k6, *yo, ssk, k6; rep from * until 6 sts remain, k5, EI, sl last st pwise wyif.
Row 2 (WS): Purl to last st, sl last st pwise wyif.
Row 3 (RS): P1, EI, k5, *k2tog, yo, k1, yo, ssk, k3; rep from * until 6 sts remain, k5, EI, sl last st pwise wyif.
Row 4 (WS): Purl to last st, sl last st pwise wyif.
Row 5 (RS): P1, EI, k8, *yo, ssk, k6; rep from * until 8 sts remain, k7, EI, sl last st pwise wyif.
Row 6 (WS): Purl to last st, sl last st pwise wyif.
Row 7 (RS): P1, EI, knit to last st, EI, sl last st pwise wyif.
Row 8 (WS): Purl to last st, sl last st pwise wyif.
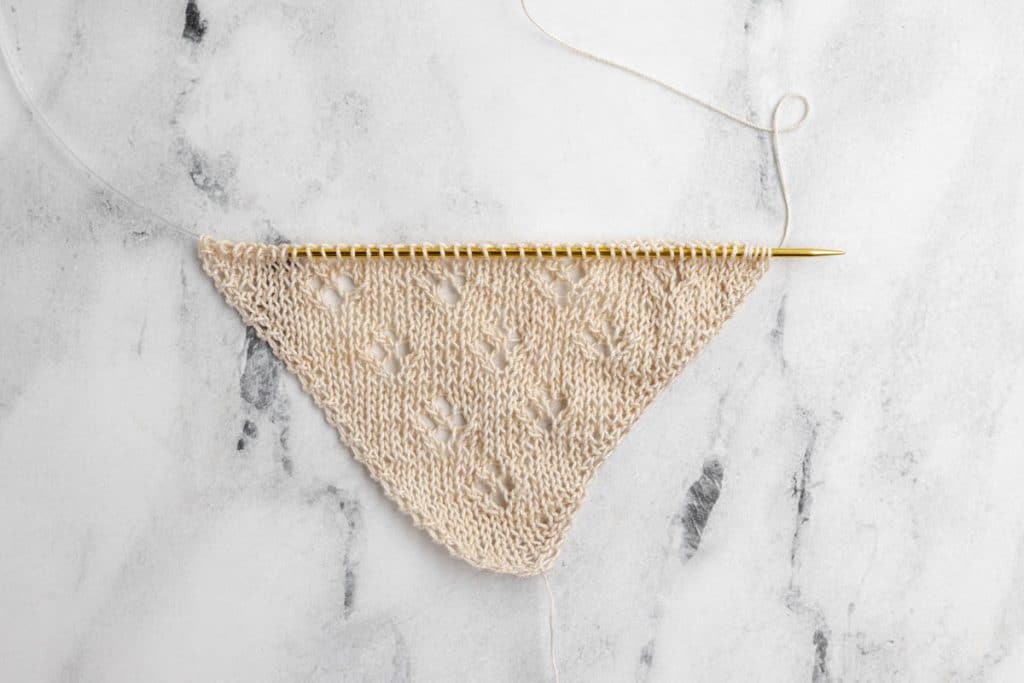
Repeat these 8 rows until you have 111 sts. End with a WS row. Do not cut yarn.
The number of lace motifs will increase naturally as the bandana grows. A total of 12 lace repeats will be completed when the bandana reaches 111 stitches.
Ties
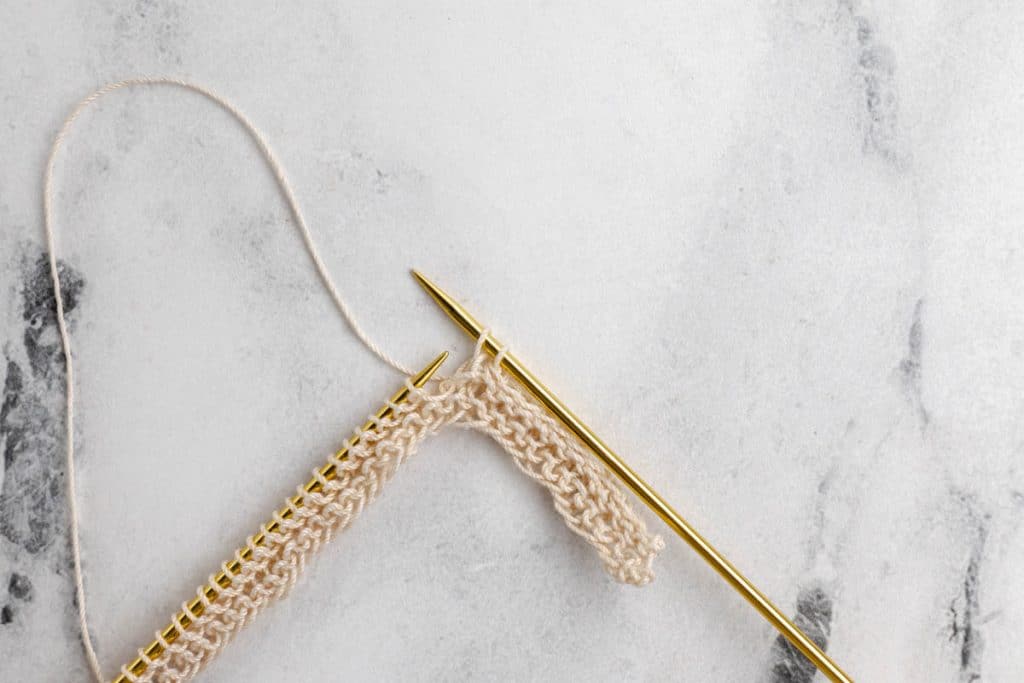
Using the backwards-loop cast on, CO 65 sts at the beginning of the next row.
Knit across the 65 cast-on sts and all live bandana sts.
Using the backwards-loop cast on, CO 65 sts at the beginning of the next row.
Knit across all stitches.
Bind off using the Stretchy Bind-Off described above.
Ruffle Border
Pick up approximately 112 sts evenly around the triangular edge of the bandana, not including the ties. Because of the eyelet edge, your stitch count should be close to this number.
Row 1: Knit.
Row 2: Purl.
Row 3: *K2, yo; rep from * to end.
Row 4: Purl.
Row 5: Knit.
Row 6: Purl.
Row 7: *K1, yo; rep from * to end.
Row 8: Purl.
Bind off using the Stretchy Bind-Off described above.
Finishing
Weave in all ends.
Steam block to open the lace and even out the fabric. Pin to shape if desired and allow to cool completely before unpinning.
Troubleshooting
- My stitch count is off. The most common culprit is a missed yarn over or an accidental extra one. If you’re off by one stitch on a RS row, check the area just inside your edge stitches first — that’s where the eyelet increases live, and it’s easy to work one when you meant to knit plain. If you’re off by two, look at your lace repeat section and compare it to the written row.
- My eyelets aren’t visible. This is almost always a tension issue, and blocking will solve it. If the eyelets still don’t open up after blocking, your tension may be running tight. Try going up half a needle size.
- My edges are curling. A little curl before blocking is completely normal with thread-weight knitting. The slipped edge stitch helps, but blocking is what actually sets the edge flat. If it’s still curling after blocking, try pinning the edges more aggressively while it dries. The ruffle edge will naturally curl a little.
- The bind-off is too tight. Work the Stretchy Bind-Off looser than feels comfortable — thread has very little give, and a tight bind-off will pucker the top edge and make the ties difficult to use. If it’s still pulling, go up a needle size just for the bind-off row.
Caring For Your Knit Lace Bandana
Cotton thread is one of the most forgiving fibers you’ll work with, and this bandana is no exception. Machine wash on a gentle cycle in cool water and lay flat to dry. Avoid the dryer — heat can shrink cotton and distort the lace over time.
If the bandana loses its shape after washing, a light steam and a few minutes of pinning back into shape will bring it right back. This is one of those projects that actually improves with washing as the cotton softens and the fabric relaxes.
Store it flat or loosely rolled rather than folded to keep the lace from developing permanent creases.