
how to fix moth holes


These illustrated, Step-by-Step Instructions show how to fix moth holes in sweaters and other knit items. Familiarity with moth hole repair will help you extend the life of your fine knits.
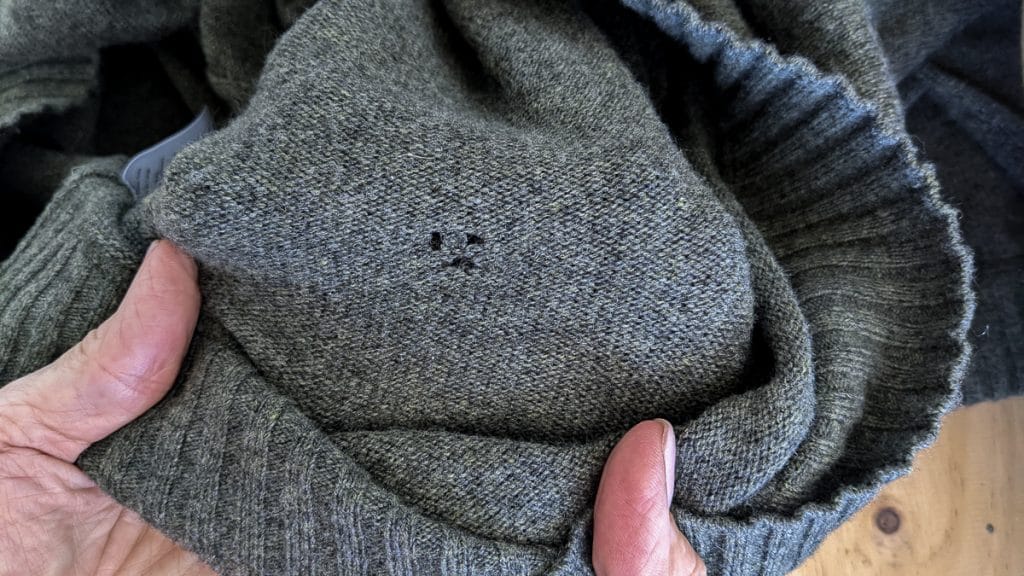
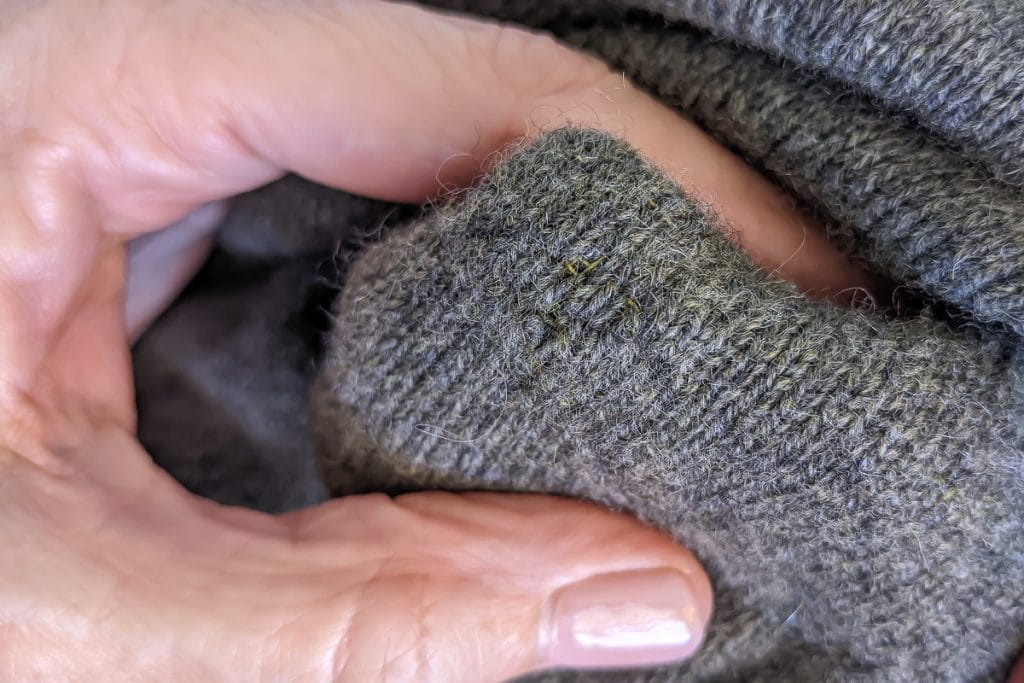
When my brother asked me if I could fix moth holes in his cashmere sweaters, I said, ‘Sure! ‘ even though I had never repaired moth damage before. I’ve previously repaired holes in knit fabrics but usually dealt with bulkier fabric that hid repairs well.
These cashmere sweaters were a different story. The fabric was knit with fine thread and needles, so I wanted to make sure I could repair the moth holes without making the repair visible.
And I’ve got to say, I’m pretty tickled with the moth hole repair. Check out the before-and-after.
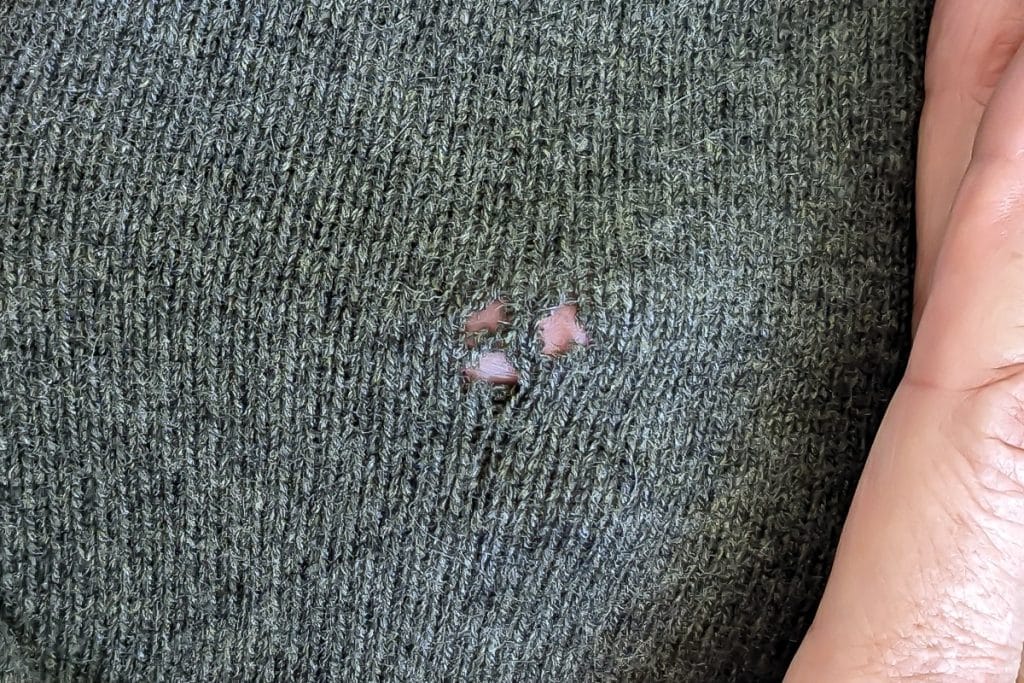
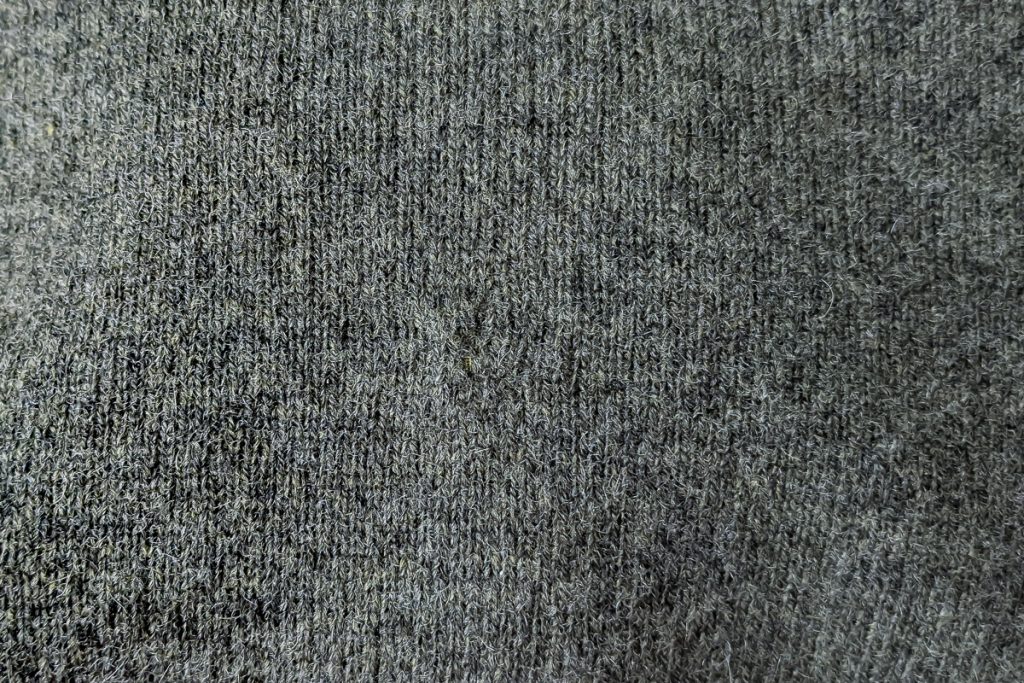
Table of Contents
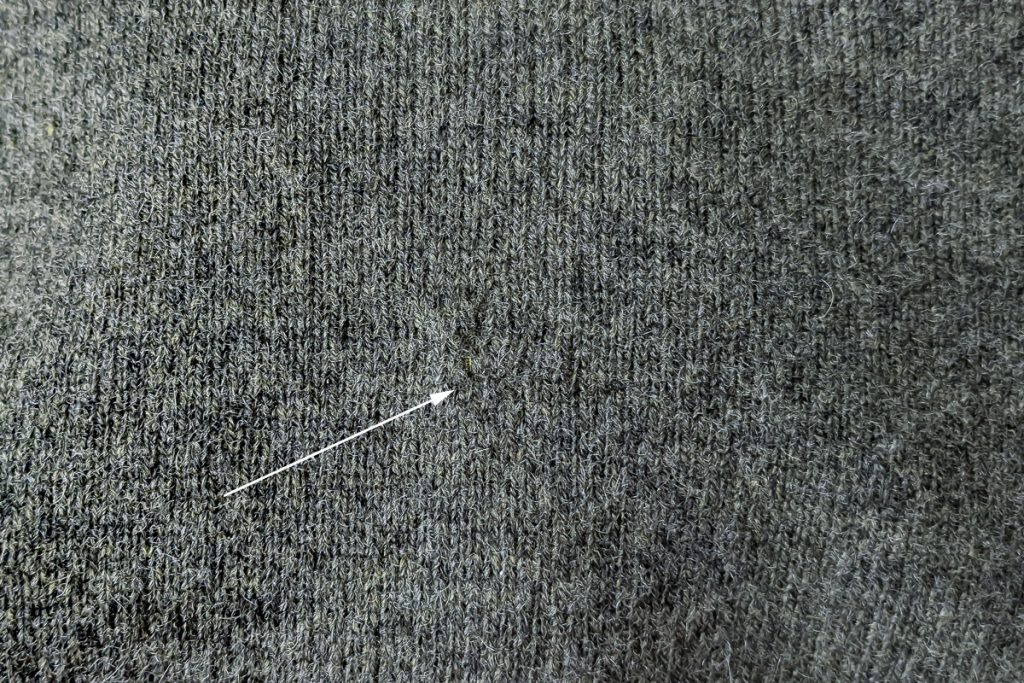
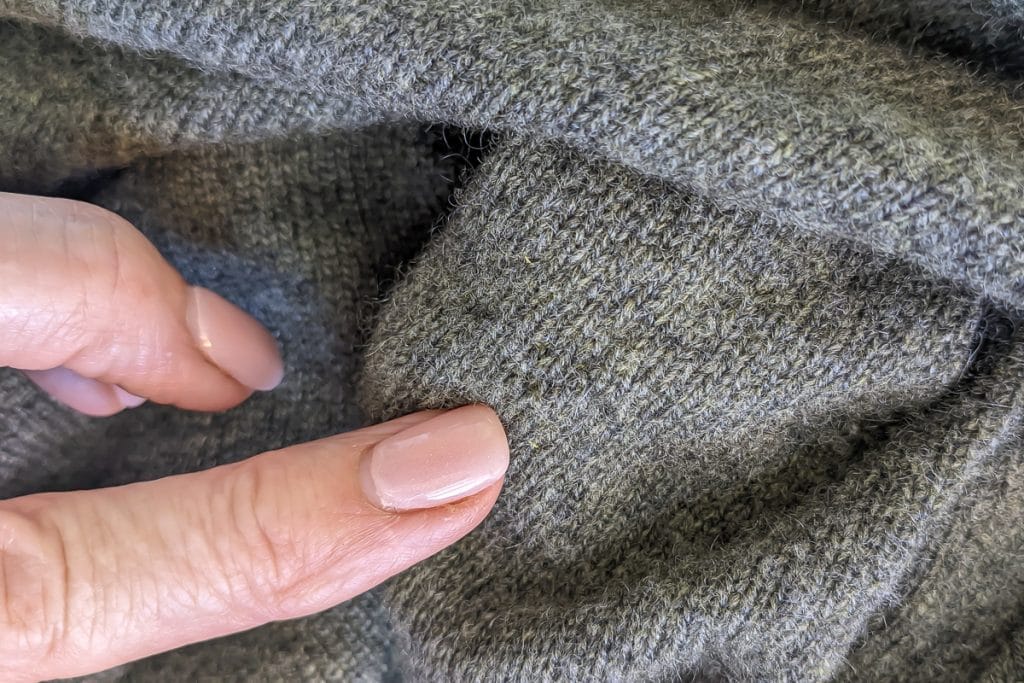
If you look closely, you can see where the repair is. But bear in mind that three moth holes like this will create a repair that is much more visible than a single hole. And even with three holes mended, you have to look closely. Can you spot it?
Featured Comment
“Thank you for the great tutorial and pictures! I got a small hole in my favorite fine-knit sweater. I’ve been too scared to fix it for fear I would ruin it. With your instructions, I was able to fix it and save it!! <3″
Michelle
Frequently Asked Questions About How to Fix Moth Holes
Only work on the backside of the fabric loops to keep the mend nearly invisible from the front.
The same technique applies, but careful needle and thread selection is crucial to maintain the fabric’s appearance.
You can read how to prevent moths here. It’s clear evidence that an ounce of prevention is worth a pound of cure.
What Do You Need For Moth Hole Repair?
The short answer, ‘not much!’
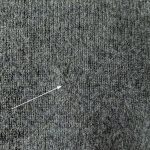
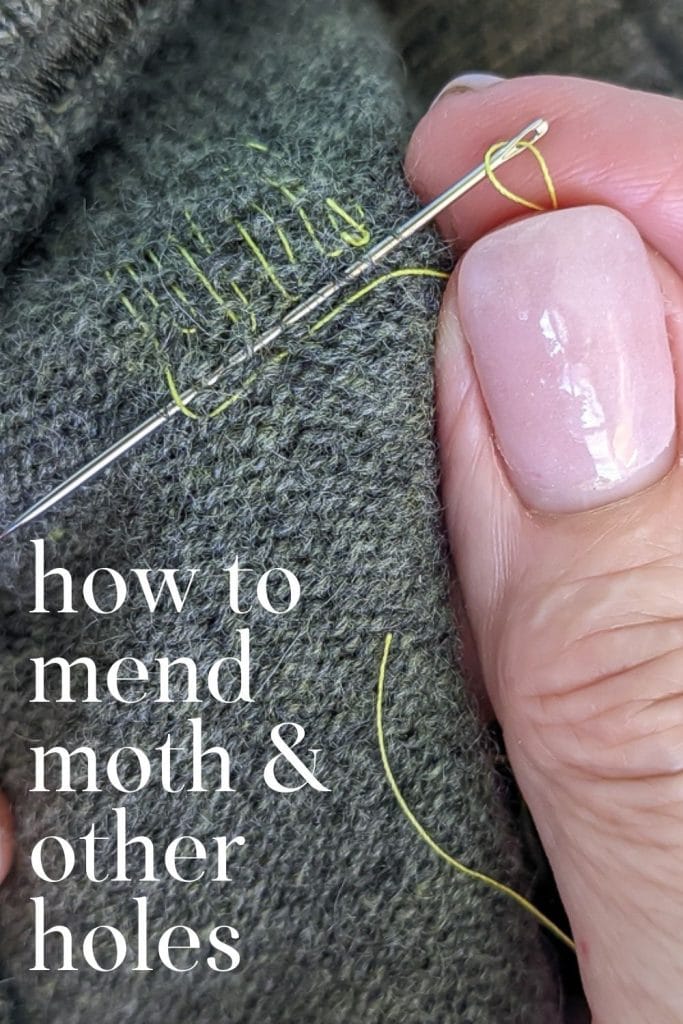
You need just a needle and thread. For finer knits, use a thin sewing needle. I would have used a darning needle if this had been thicker yarn.
I just used sewing thread—in this case, a bright yellow—to make it easier for you to see. The mend you see above was created using this yellow thread.
How To Repair Moth Holes In Sweaters?
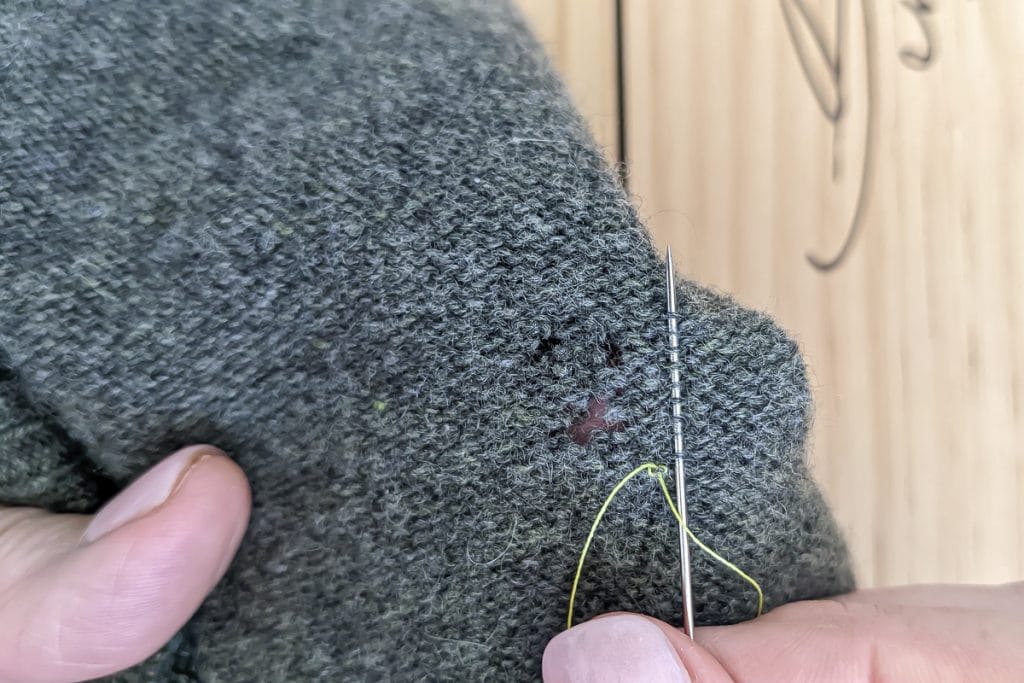
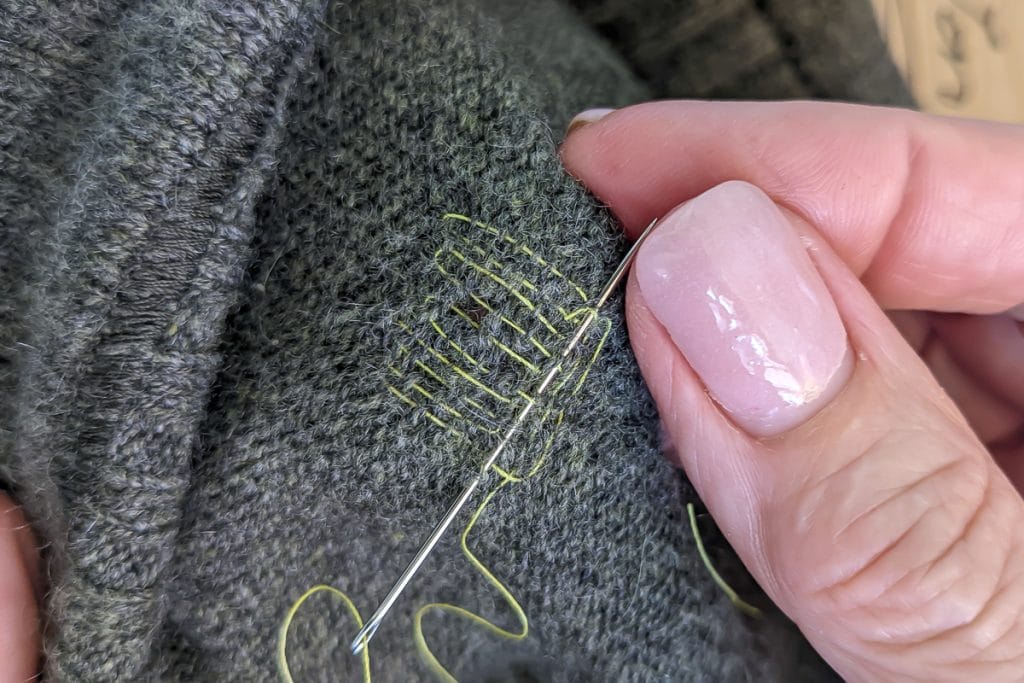
Turn the work over, as we will be working on the back.
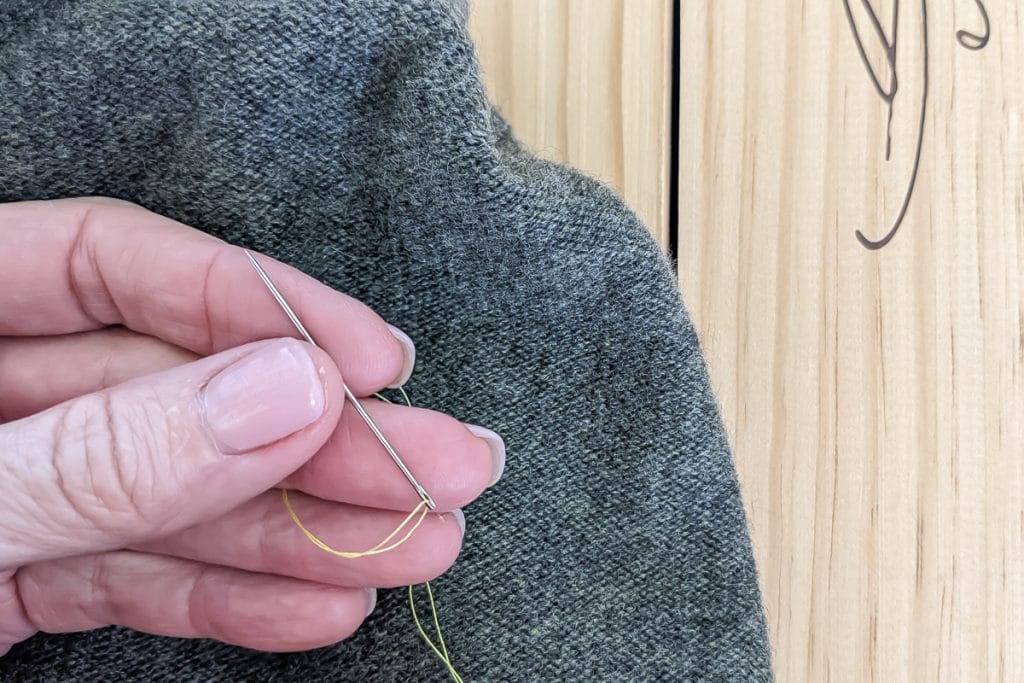
Thread your needle. I chose yellow to make it more visible for illustration purposes, but normally, I would choose a color closer to the color of the sweater.
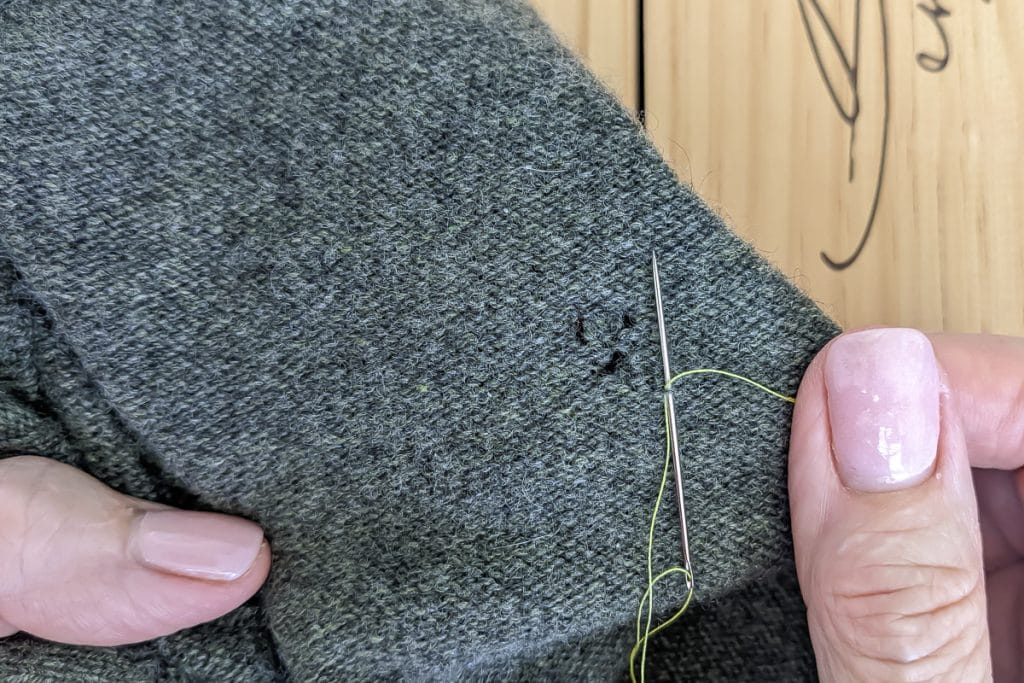
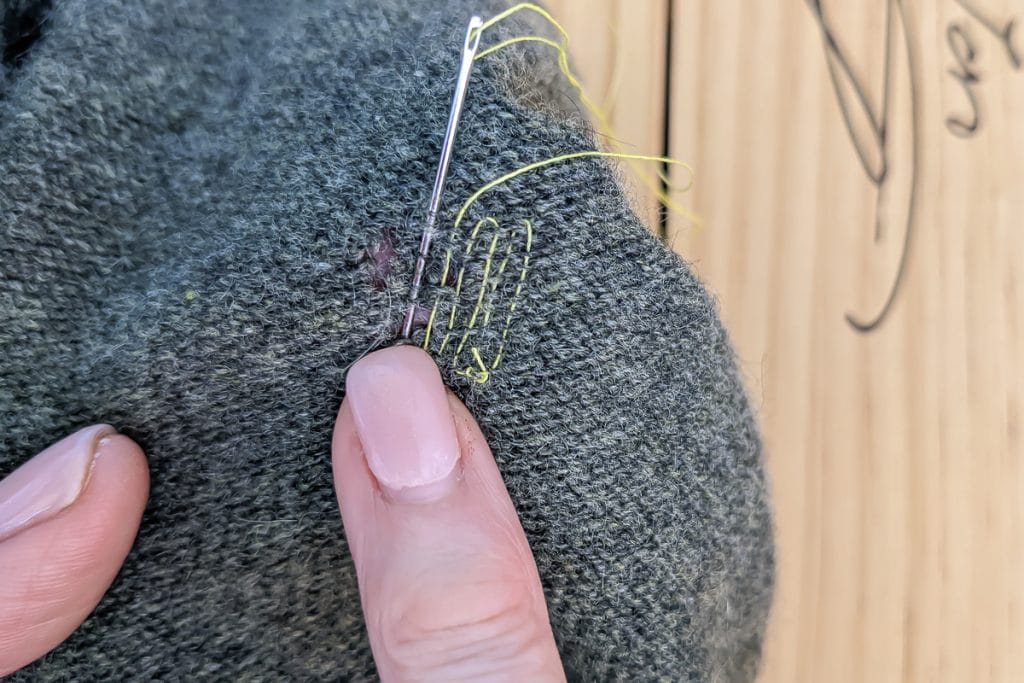
We will be working with the columns and rows on the back. Find a column to the right of the moth hole and a row or two below the hole. Secure your needle in a loop there.
THIS IS VERY IMPORTANT! You will only be working on the backside of the loops. Don’t push your needle to the front of your fabric. By staying on the loops on the back, you will make your work almost invisible.
After securing your thread, go up the column to the right of the hole by a column or two.
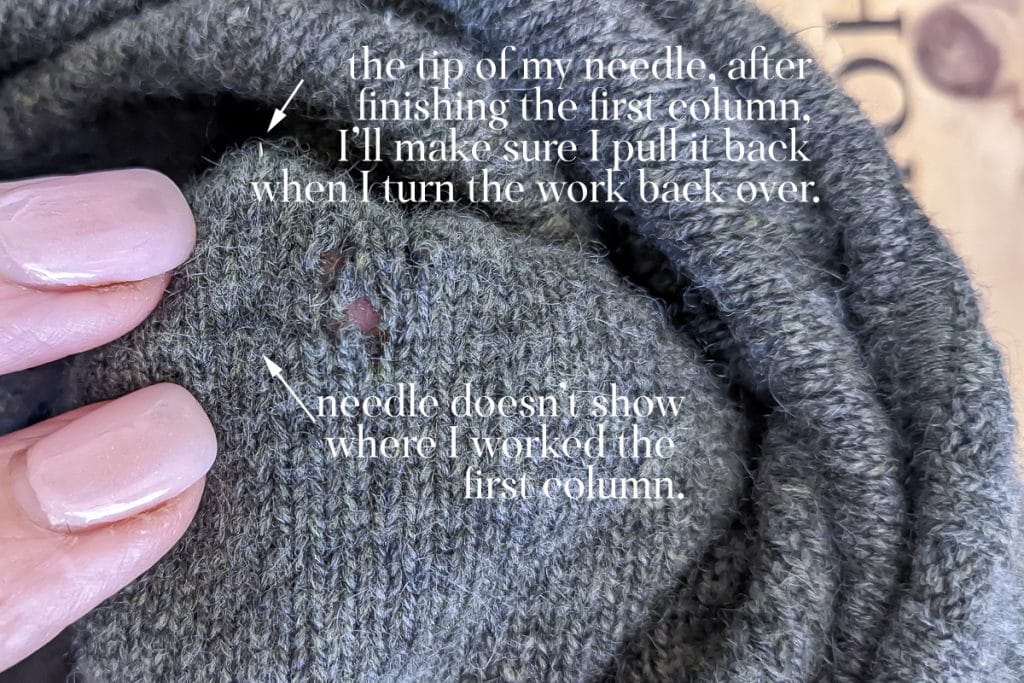
Turn your work over to ensure your needle didn’t come through to the front of your work.
Pop over to the next column and thread your needle down that one.

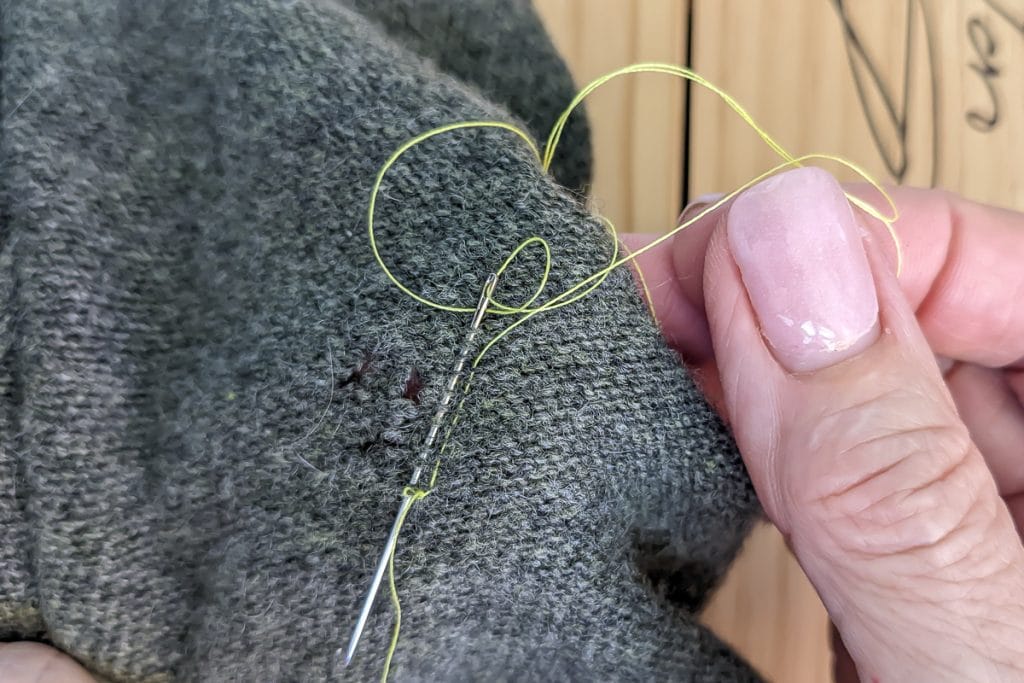
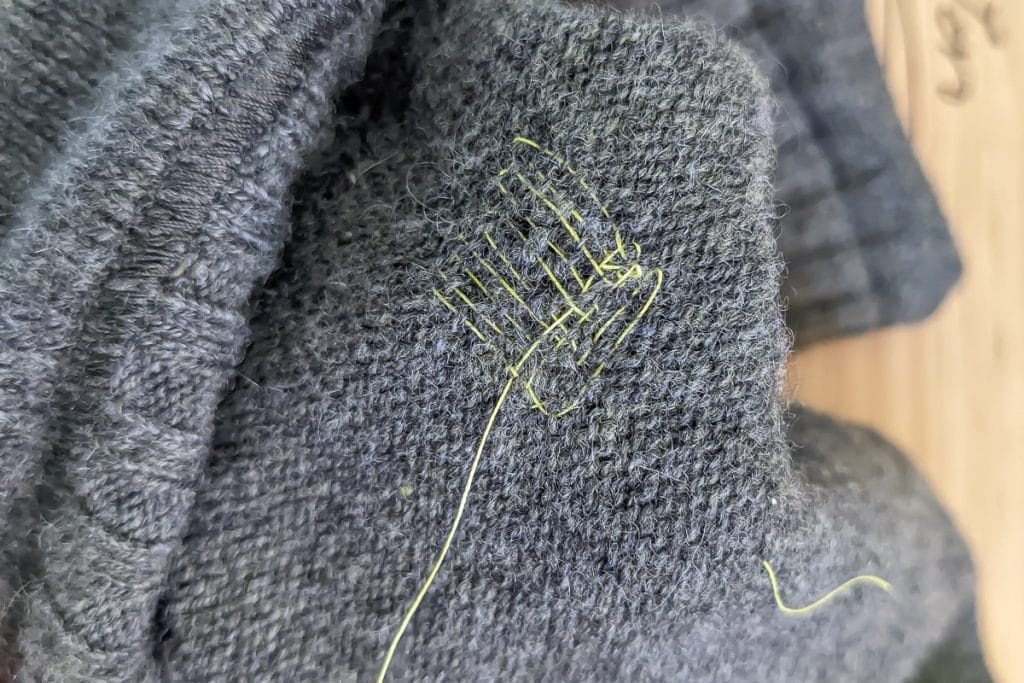
Continue working up and down, grabbing the loops at the side of the moth hole as much as possible.
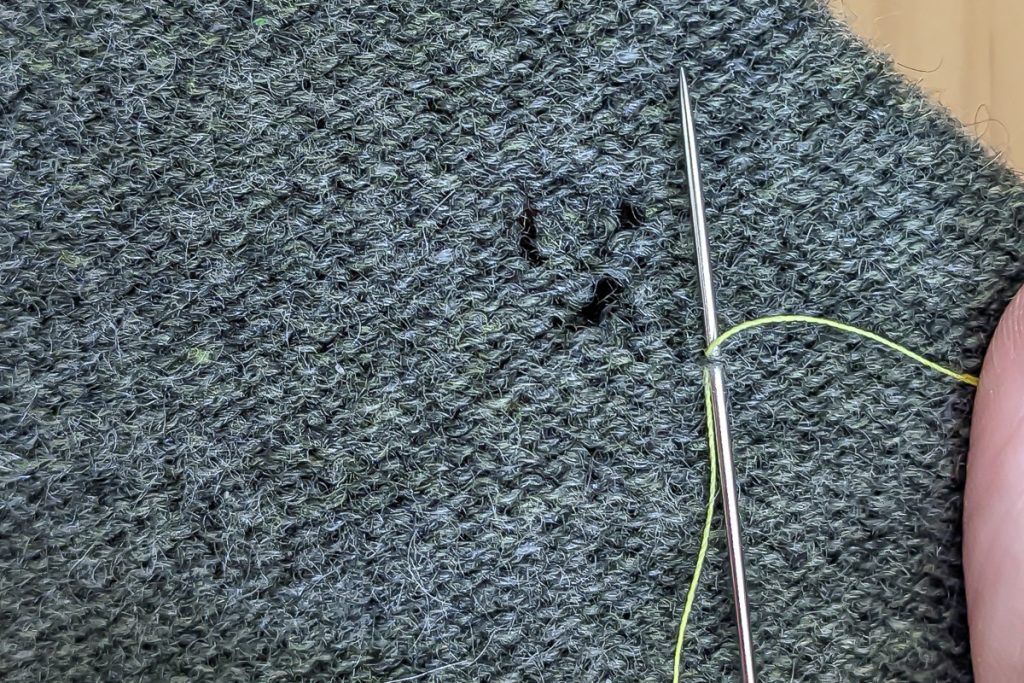
You can see where the holes are, where there aren’t threads to grab.
Continue working up and down.
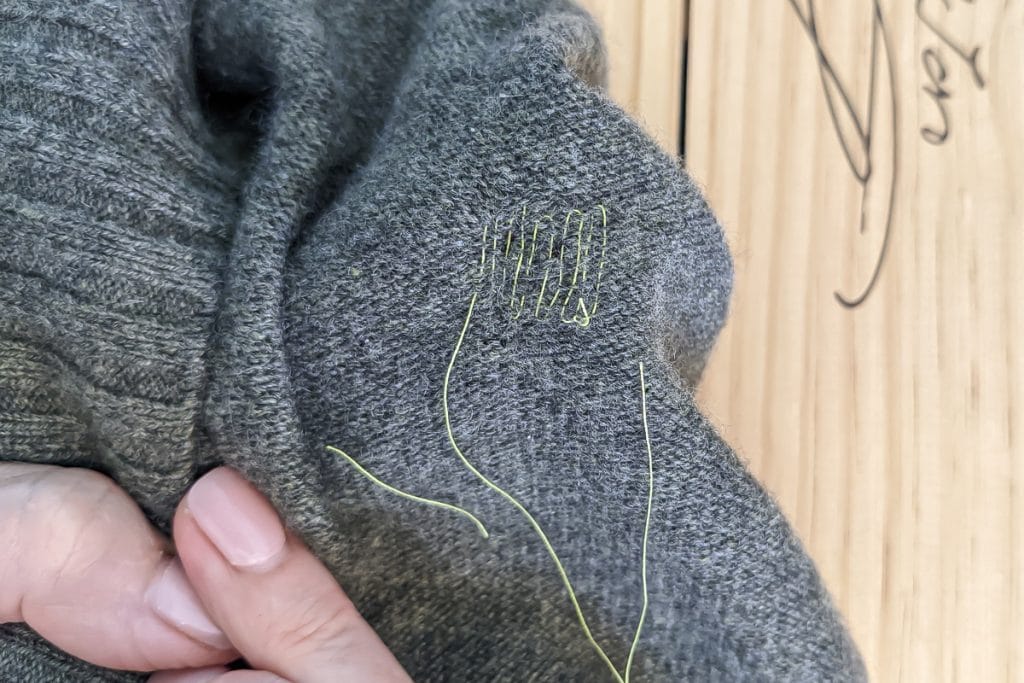
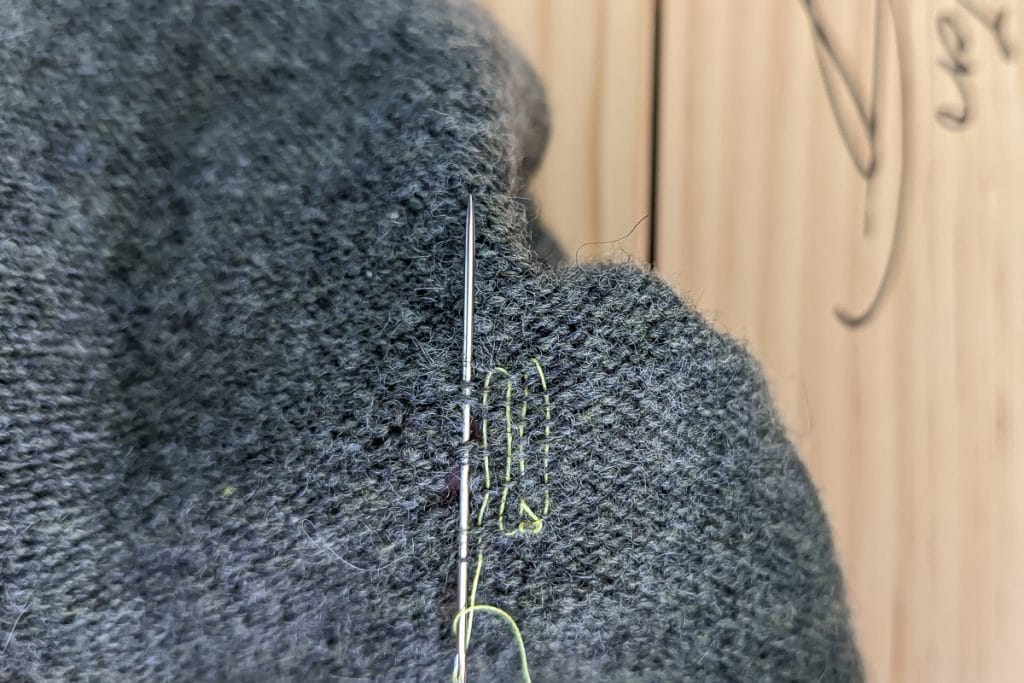
What your mending looks like after the columns have been worked.
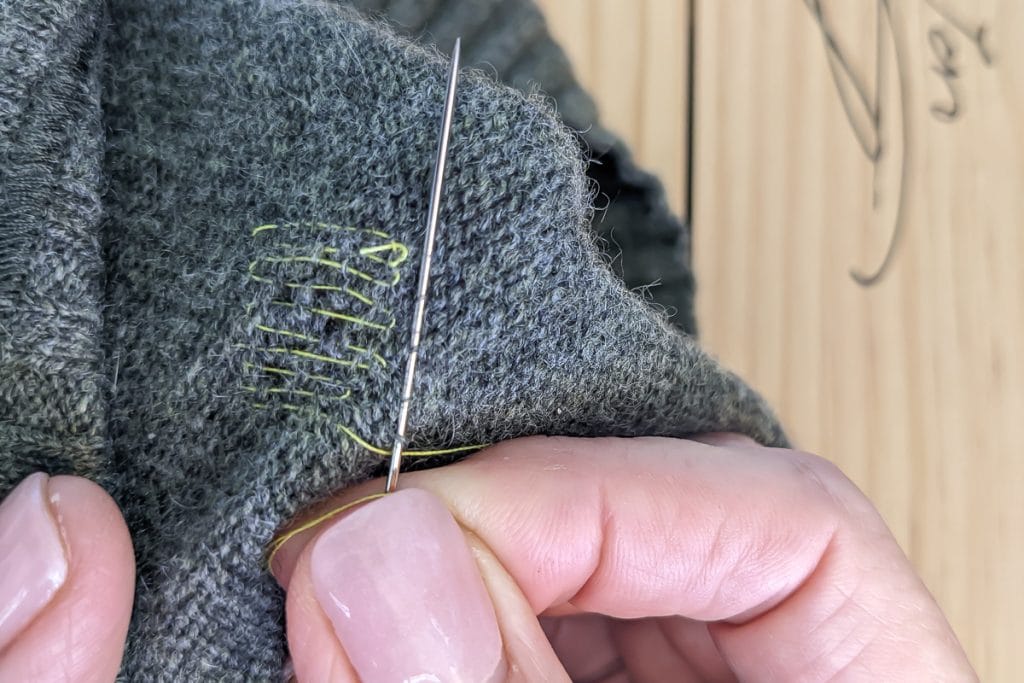
Now, turn your work 90°, and work your needle across the row.
Continuing in an up and down pattern.
Again, remember that your needle stays on the back half of the stitches.
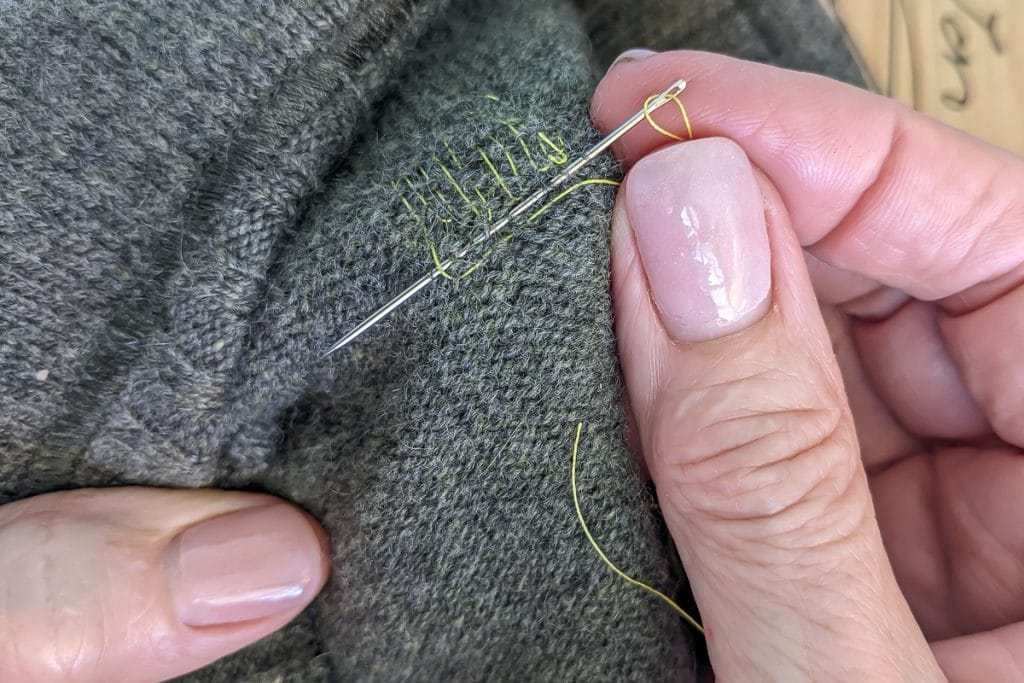
When you hit the places where the moth holes are, weave your needle up and over the threads to create a mesh.
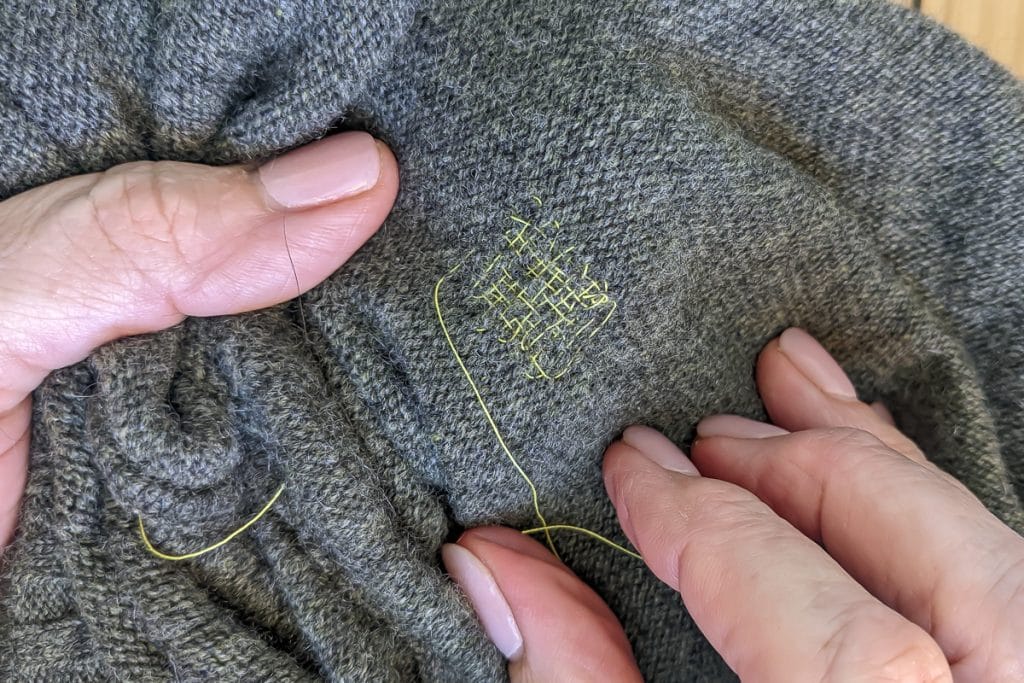
Tie off your thread and turn it over!
Finished!
You have to look very closely to see the yellow thread.
To see the full video showing how to repair moth holes in sweaters and other knits, from start to finish, pop on over here.
Preventing Moth Holes in the First Place
I found the process of mending these moth holes oddly rewarding. That said, I’m not anxious to go into the moth repair business. To that end, when I sent these back to my brother, I also sent a bottle of Eucalan. Eucalan is a rinse-free wool wash containing Eucalyptus and Lavender, which repel moths.
I’ve also made this Natural Moth Repellent Potpourri, which I have tucked into our closet and armoire.

I also took a deep, rather creepy-crawly dive into the moths that eat clothes and how to prevent them. Pop over to read how to prevent moths here. It’s clear evidence that an ounce of prevention is worth a pound of cure.
Bookmark this page or pin the following image to refer to this post on how to repair moth holes in sweaters in the future.
Thanks so much for spending a few minutes of your busy day with me!
To ensure you don’t miss future content, pop your email in the pale green box on the right or click here. I usually send one email weekly, so I won’t inundate your inbox. I’m sensitive to an overflowing email inbox!
We will only use your email address to send you emails, no more than 1-2 weekly. In addition, you will have access to my growing library of knit & crochet patterns and other printables. Check back often as this library will continue to grow. You can unsubscribe anytime by emailing me or clicking on the “unsubscribe” link at the bottom of all emails.
And you can access many of the products I refer to on my Nourish and Nestle Amazon Page. You can access it here.
So, if you’d like to participate in the ‘subscriber benefit’ action, simply subscribe to Nourish and Nestle here or use the form on the right sidebar. It’s slightly towards the top.
I have sent all my subscribers the link to the Subscriber Benefits Library. If you missed it or misplaced it, let me know.
Until next time…


Thank you. I had this problem once. Now I stock my draws and closet with Yardley’s lavender soap and I’ve never had the problem since. We have Dollar stores here in Canada that seem to stock this soap for a dollar or two.
Astrid
That’s great to know Astrid! I’m going to check out our dollar store this week! I’m going to do ‘all the things!’ so that we don’t have them take up residence in our closet.
Thanks for the tip.
Hugs,
Lynn
65 years ago men’s socks were not as cheap as they are now. As a newlywed from “the old country” I mended my husband’s socks. The first time he saw me work on one he told me That he didn’t want to walk on LUMPS. I told him that I don’t make lumps and he happily wore his invisible mended socks!
Great work Lynn and thanks for sharing. Unfortunately, I don’t have a picture handy, but there is a special mending tool for darning. It is shaped like a mushroom and called a “stoppeæg”, darning egg in Danish
Hi Tove,
I’ve seen that egg/mushroom!It looks very handy and I’m sure it makes the process easier. Luckily (fingers crossed), I haven’t had to mend any more holes since I fixed my brother’s. But, if I do find myself mending more often, I will definitely look into a darning egg.
Thanks for the suggestion and have a great day!
Lynn
I use an old light bulb as a darning egg when I work on socks. Most often it is my light weight merino base layers that need help and I use a small embroidery hoop to stabilize the area while I work as you have described. I like silk thread for my light weight merino mends. For slightly heavier garments I sometimes use tapestry wool or special mending wool. I wear merino daily at least 9 months of the year and love keeping pieces usable for years.
Hi Josephine,
What a great idea, but have you ever had a lightbulb break while working with it? I’m so clumsy sometimes, I’d surely break it! 😲 And silk thread is another great idea for light merinos…thanks so much for all your great suggestions. That’s what makes this site so helpful to all!
Have a wonderful day!
Thank you so much for posting about the moth holes on fine knits. I have three fine merino sweaters to work on now that I know how. What a relief to know they can be fixed. I store my woollens in a zip up creature proof fabric bag with small cloth bags of cloves, cinnamon, lavender, bay leaves and other strong smelling herbs.
Good Morning Carol,
You know, I actually find the process rewarding and somewhat enjoyable. It is like working a bit of magic! Let me know how you do. And I’ve got it on my to-do list to share my Moth Repelling Sachets…you prompted me to get busy on it!
Have a wonderful day.
Lynn
Thank you for the great tutorial and pictures! I got a small hole in my favorite fine knit sweater. I’ve been too scared to fix it for fear I would ruin it. With your instructions I was able to fix it and save it!! <3
Hi Michelle,
I’m so thrilled that this tutorial was helpful to you! I know what it is like to find a nasty hole in your fav sweater! Thanks for sharing your experience!
Hugs, Lynn
Hi,
Thank you profusely for this helpful guide to repair my precious cashmere sweaters, all of whom succumbed to a massive moth attack this year.
Hi Nancy, you are so very welcome! It is a huge relief to know that we can fix what those little nasties try to destroy!
Have a great day.
I looove cashmere and have quite a few sweaters. I store them in super size ziplock bags inside plastic garment bags— in the chest freezer in the basement. It seems to kill the larvae. I leave them in there for several months. Seems crazy, but no more moth holes!☺️
Janet,
If it works, it isn’t crazy! And freezing temperatures will kill the larvae.
You take good care of your cashmere! And you’ll have it forever!
Thanks for sharing what works for you.
Thank you so much for the tutorial. I have a cashmere sweater with a very small hole right in the front. I stupidly thought I if I put some glue to hold it together it would be better than trying to sew it, by the way I had no idea how to sew until today, THANK YOU. The thing is I used crazy glue and it seeped through the fabric and it’s on the front of the sweater. Do you have any idea if I can remove the glue without totally destroying the sweater completely?
Ugh, Irene
I’m so sorry! I found this site with a couple of recommendations. Ultimately, I wonder if you should just take it to the dry cleaners.
Please do email me and let me know what worked for you! I’d love to know.
Good luck,my friend.