Reupholster a Chair
Sharing the techniques I used to reupholster a chair.
Yippee Yi Yo Kiyah! I did it! I finished reupholstering the chair for my office.
This is something I’ve been wanting to try my hand at for several years and finally, the planets aligned and it happened! I will not sugar coat it, it wasn’t what I would call ‘easy’, but I will say without hesitation that it wasn’t as bad as I thought and that it wasn’t worth all the anxiety I had over it.
There is a little sewing involved (cushions and deck) but other than that it’s really a matter of cutting, fitting, and stapling. I am tickled pink to show you the final product and to share some tips to successfully reupholster a chair.
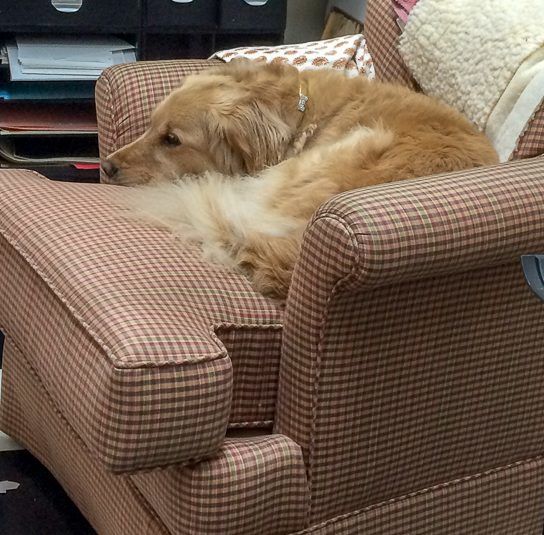
Table of Contents
So, before I get too far down the road chatting about my reupholstered chair, let’s take a quick look at where we started. And wouldn’t you know it, I didn’t take a full-on photo of the chair before I started but this should suffice to give you a sense of what we started with.
The chair was in good shape, it just wasn’t my style and wasn’t going to work with my new office. I found simple beige linen that would work better with my plans.
Before I started my project I watched this video produced by Sailrite fabrics. It’s rather long, but I did watch it from start to finish and then watched parts again during the process.
They do a great job explaining the step-by-step process. I highly recommend watching this video. They also have one for making box cushions which came in handy as well.
(This post contains affiliate links for your convenience and I will earn a small commission if these products are purchased. However, please know that I won’t recommend a product I don’t or wouldn’t use. Also, the price you are charged does not increase through the use of these links. Any income we earn from this affiliate revenue helps defray the costs associated with running this blog. See here for my full disclosure policy.)
I also purchased the book Spruce by Amanda Brown. Not only is it a beautiful book to look at and be inspired by, but Amanda provides detailed photos and directions for a variety of different chair/sofa/ottoman styles.
You might not have a piece of furniture that exactly matches one of hers, but you could easily use her directions for an element of your piece of furniture…kind of a mix-and-match thing.
With all that said, I am not going to give you a step-by-step on how to reupholster a chair. That wheel has already been invented and it’s working just fine. But, I will give you some of my takeaways and suggestions to increase the chance of success when you tackle your project.
Tips to Successfully Reupholster a Chair:
- Before you do anything watch a video. There are many videos on YouTube, but I found this one particularly helpful. I am not affiliated with or compensated by Sailrite in any way, they just produced a great, very informative, and instructive video
- If it’s your very first time reupholstering, I’d start with a solid fabric. Matching patterns so that they aligned on my chair/sofa is just one more element that I was so glad I didn’t have to deal with.
- Before you start taking your chair apart, write on each piece of fabric where it came from. The Spruce book was helpful in suggesting labels for those parts as well as calculating the yardage.
- The Sailrite video suggests an order to take the fabric off and put it back on…that was very helpful.
- Get a staple and tack remover. I did not have a staple puller and it took forever to pull out the 1,897,534 staples that were originally in that chair. I used a small screwdriver and a pair of pliers to pry up each staple and then pull it out. UGH. My fingers ached for days. Very much worth the $10 to get both of these.
- Save each piece of fabric, trying very hard not to rip them as you remove them from the chair. You will want those pieces to be intact as patterns to cut your new fabric from.
- I also took many pictures as I deconstructed the chair showing how certain areas were attached, folded, or pleated.
- Taking the fabric off and deconstructing the cushions easily took as long as putting it back together.
- When you start cutting your new fabric, note with a piece of chalk any notches or cuts in the original fabric.
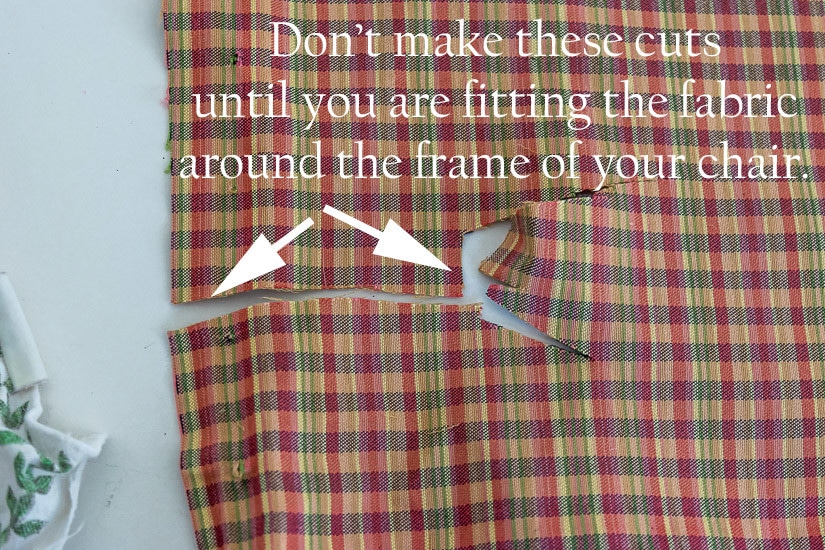
- You want to cut the outline of your fabric, not the random cuts that go into the fabric. You will make these cuts bit by bit as you fit the fabric around the frame of your chair. In the image below, I just cut the outline, not the cuts that came in from the side.

- You’ll need a sewing machine for the cushions and the deck (the part of the chair underneath the bottom cushion), but everything else it just cut and staple.
- I did use some special needles and think that they are probably worth the minimal investment you would make. I used a Curved Needle and a long Upholstery Needle to attach the decking. I think it’d be pretty darn difficult to do it without these needles.
- Use a rubber mallet. I did not have a rubber mallet and thought I could get by with my hammer. I did put a piece of moleskin over the hammer, but that wasn’t enough as I did put a hole in my fabric when I hammered the tack strip.
- As it relates to putting a hole in your fabric…I was able to mend mine with an iron-on patch.
- Also…duck tape came in handy to soften the edges of the tack strip so that they wouldn’t put a hole in the fabric.
- And I might have used a wee bit of glue here and there…whatever it took to get the job done.
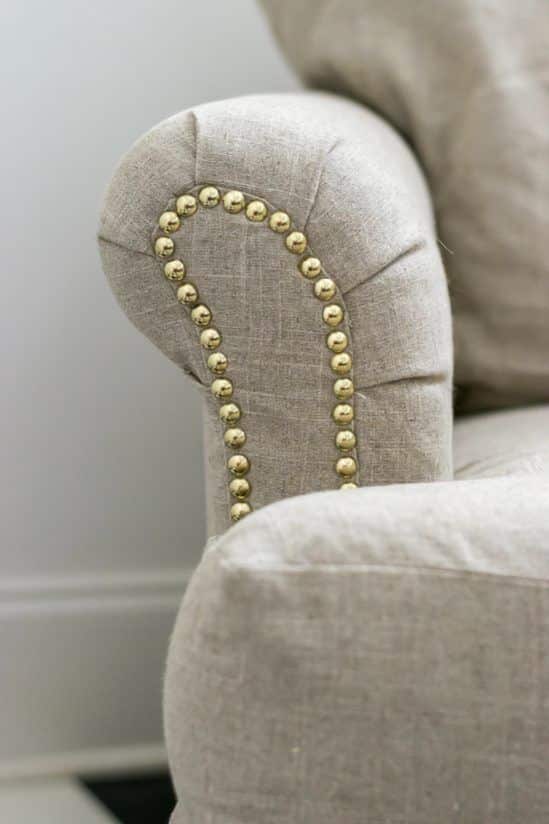
My favorite part was adding the nailhead and I have a couple of suggestions about that too:
- Use quality nailhead. I don’t want to name names, but…my experience is that it is worth paying a wee bit more. I’ve used both and the cheaper brand really bends easily. This is what I bought for this chair and would definitely use it again.
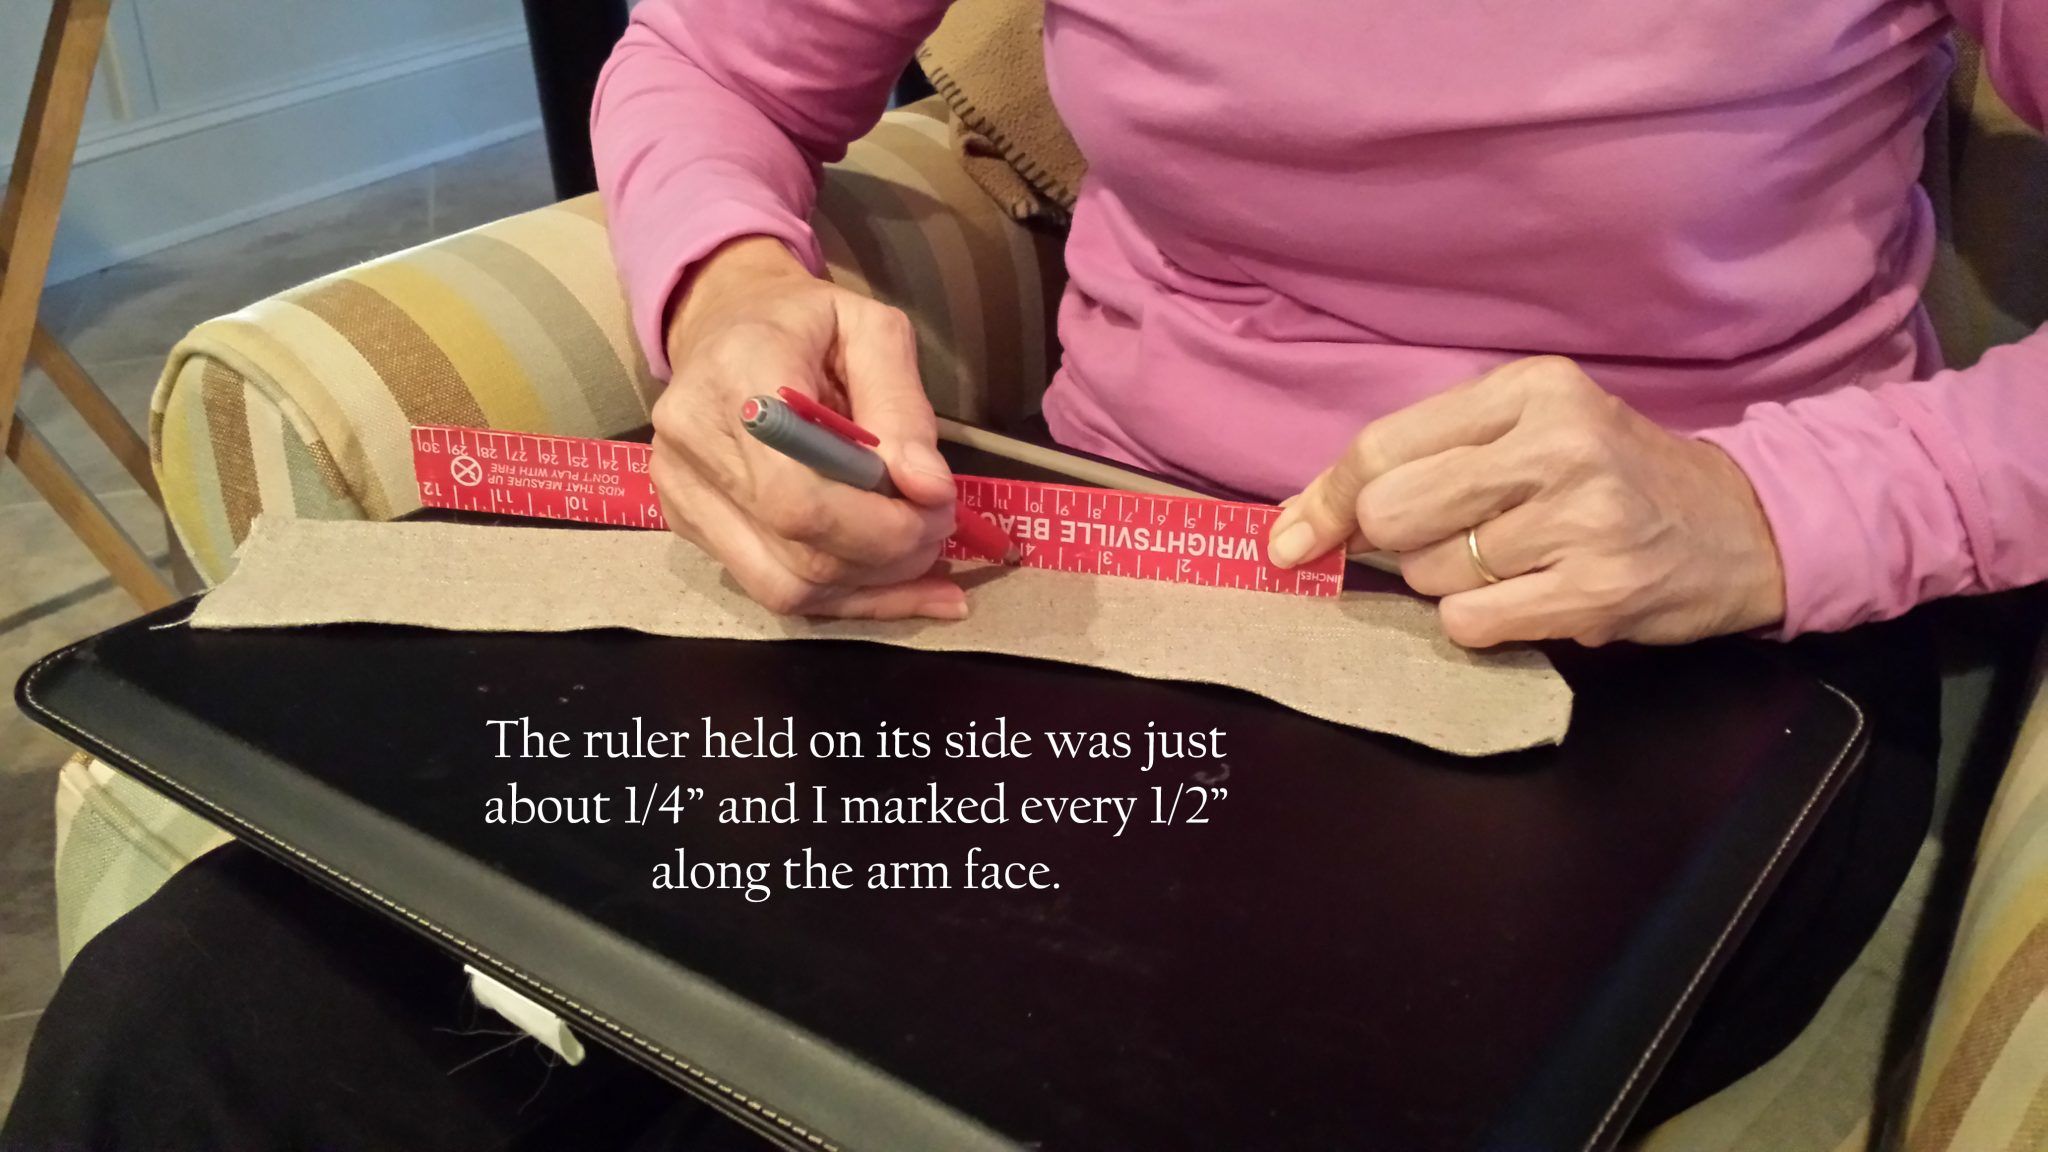
- Those little pieces of fabric on the end of the arms need to be formed and ironed bit by bit. Once you’re done with that, measure and make small marks on your fabric so you know exactly where to put your nail head so that it’s in a straight line and not all wonky.
- Mine were 7/16″ inch wide, which is pretty darn close to a half an inch, so I made marks every 1/2″ and 1/4″ from the edge.

- Once again, a rubber mallet would have been nice. I put some moleskin on a small hammer so that I didn’t scratch the tacks. I had to replace it several times and the way I knew it needed to be replaced was that the tacks were getting scratched.
- I had a pair of beading pliers that worked perfectly for holding the tack while I hammered.
So…those are my handy hints for reupholstering a chair or a sofa. I highly recommend that Sailrite video…it was invaluable.
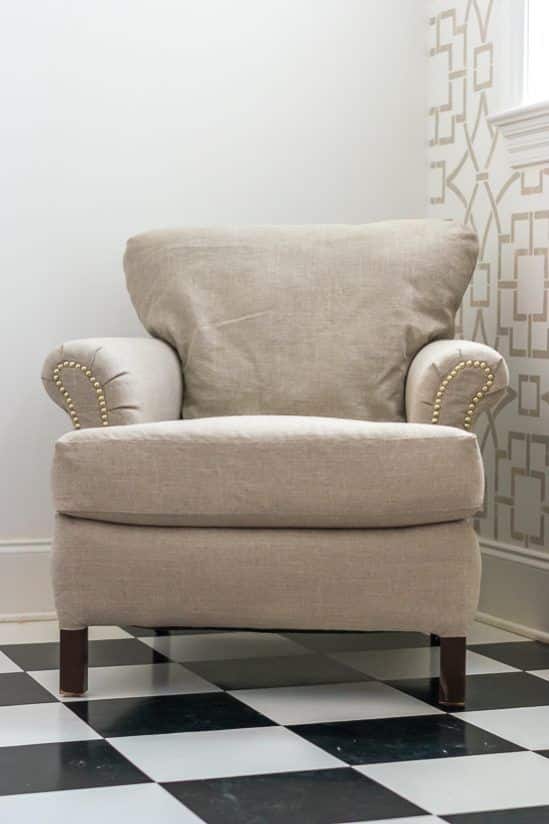
Let’s just have one more look at that beauty, shall we:
So, with my chair DONE and the wall stenciling DONE, it’s party time all the time in my office right now. By no means am I coasting here. I am busting it and will be until the final reveal. But, those were two biggies on my list. So, speaking of the ‘list’, let’s take a look at where we are and what still needs to be done:
Reupholster club chair- Paint Walls
Stencil Walls- Prime and paint chest
- Make a pillow for the chair
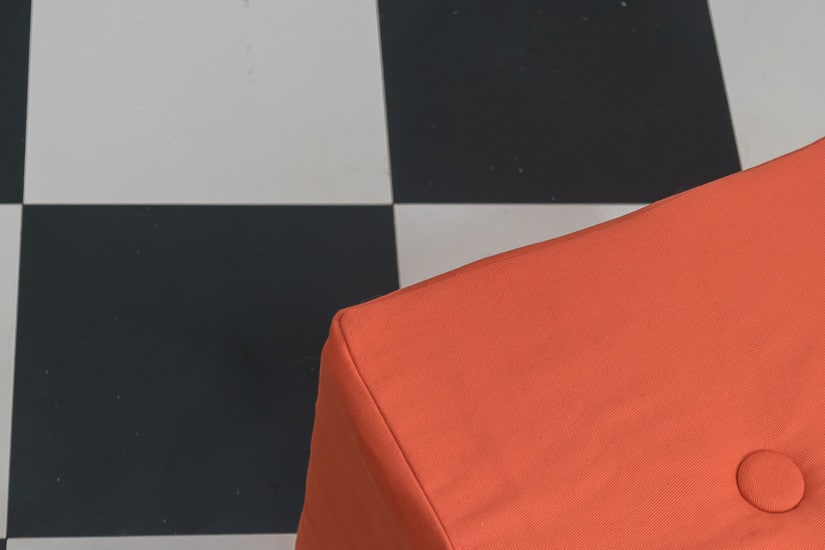
Make anottoman out of that gorgeous, to die for, coral fabric. OK…you’ve twisted my arm…I’ll give you a wee peak now.
- Paint trim (this may or may not happen. It needs to be done but …we’ll see)
- Find lamps
- Make skirt for counter (I’ve got almost all the ‘parts’…which was half the battle)
Find or make and frame artwork(it’s on its way…Thanks Minted!)Find a rugOrderedFigure out what to do with bulletin boards.I’ve figured it out, now I just need to do it.- Recover bulletin boards.
I am excited about how the room is coming together and the family may have a hard time getting me out of here once it’s done. I could easily sneak a little beverage refrigerator under my counter and could last for days.
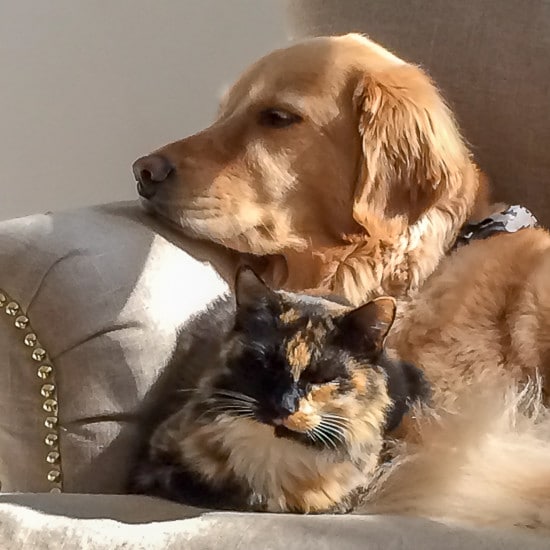
Before I leave, I have to share this photo I snapped on my phone yesterday. Terry and I had just brought the chair back into my office. It was here less than an hour when these two cozied up on it to soak in the afternoon sun. Puddles (the cat) is not very generous with her snuggles so this was especially sweet.

Thanks again for spending a few minutes of your busy day with me today.
Please know that I welcome each and every comment that comes my way.





You did a beautiful job reupholstering this chair. I am going to pin the step by step instructions. Thank you! Even Flora approved!!!!
My sweet Flora, she is so glad to have that chair back. The one I put in here while the other was being reupholstered was just a tad smaller and she had a hard time getting her big girl butt comfy. But the world is back to being right, so she’s a happy girl.
Have a great day and weekend my friend.
Hugs, Lynn
I’ve always wanted to tackle an upholstery job, but it scares me. You just gave me hope lady! This turned out great.
Hi Kyla, OK…I’ve seen your crazy mad skills and there is no doubt you could tackle this. It really seemed harder than it was. It was that monkey on my back that I needed to get rid off. Seriously, watch the video, get the book and you’ll be golden.
Hugs, Lynn
Wow! You did such a great job with that chair! I love the nail head trim!
Thanks Emy…by far it is my favorite thing right now too! Hopefully the bright, shiny objects will deflect your eyes away from my little boo boos here and there.
Thanks for swinging by today.
Hugs, Lynn
Ooooh looking great! Can’t wait to see!
Thanks Amanda…I’m getting there!
Lynn, you are seriously my hero for doing this yourself. I thought I was a professional DIY-er, but you, my friend, are on a whole other level.
Aw gee whiz Oksana! It’s one of those things that you think you can’t do, but when you break it down, it is doable. There is no doubt in my mind that, given your skills, you could do this too!
Thanks for coming by and throwing your happy vibes!
Have a great day and a productive weekend.
Hugs, Lynn
Your chair looks gorgeous, my friend! I’m oozing with giddiness for you that it’s scratched off your list of things to still do. I think all our pets love the pampered life!
‘Ooozing with giddiness’! I love that! And I’ am loving my chair…turned out better than I had thought, even if there’s a spot of glue here and a piece of ducktape there.
And yes, our pets are spoiled…but isn’t that how it should be?
Hugs and kisses my friend.
Lynn
It turned out SO beautifully!
Thanks Kristi, I really am quite tickled with it. Thanks for swinging by and hope you have a fantastic weekend.
Lynn
Wow, you did an amazing job with the chair! Love your fabric choice and nailhead, too. Isn’t it so funny how pets tend to claim what is new in a house? Your sweet pets are precious! xo I look forward to seeing your week 5 and then 6!
Hi Melanie…my 4-legged babies surely do that! They are so funny. And the cat, Puddles,…she NEVER snuggles with Flora but since the chair had been gone so long I guess she figured that she’d lower her standards to have time on the chair. And Flora…she was not too happy about it either. Think she’s a little afraid of Puddles.
I’m chugging along, as I know you are too. Two more weeks!
Hugs and wishes for a productive weekend.
Lynn
Lynn!! What a fantastic job and I love the coral accents almost as I adore you sweet dogs. 🙂 Can’t wait to see the finished room!
Hey friend…I’m really digging in now to get this done so I can just sit and enjoy it! Thanks for swinging by and for sharing some love for my sweet Flora!
Hugs, LYnn
This looks great! Glad we both made it through the trauma of chair reupholstery and box slipcovers just fine 😉
Hi Ariel…yes it was a little anxiety producing and glad to have it done, but really glad that I did it realized it wasn’t quite as scary as I thought it would be. Don’t you agree?
Thanks for stopping by!
hugs, Lynn
Lynn, Your chair turned out lovely! I have a couple of chairs in our family room that I would like to upholstery but scared to give it a go. I afraid to buy the fabric then I mess it up, it’s not cheap. But less then a new chair. They are a faux leather now and I want a fabric material. Going to watch the video when I have time, maybe it will give me the courage to try.
Hi Linda…I know with your skills that you will be able to master this. Definitely watch that video…they do such a good job breaking it all down and I know you’ll come away with much more confidence.
Let me know when you start your project! excited to see what you decide to do.
Hugs, Lyn
Your chair looks wonderful. Love the fabric you picked. I am reupholstering a chair for ORC master bedroom makeover also. I am just about done with mine and boy was it a job. You have given really great tips here. I, like you, used pliers and a screwdriver to remove the staples. What a job.
We should form a support group for those of who actually sat there with a screwdriver and pliers to pull out a bazgillion staples. Surely there is some form of PTSD that we will face!
Thanks for swinging by and keep on keeping on…I’m sure it will look great.
Hugs, Lynn
Hi Lynn! Thanks for the vote of confidence, if I get the nerve to try it will share. ?
I love the linen fabric that you chose, and the nailhead trim looks stunning. You did an amazing job on this chair, and seriously, that last picture is adorable.
Aw thanks Erin…I do love those two, though the cat makes it hard sometimes.
I am quite tickled with how that chair turned out and really do love that nailhead! Finished it perfectly. I hadn’t really planned on it, but need something to tack down those arm ends, and BINGO…nail head to the rescue.
Thanks for swinging by today.
Hugs, Lynn
Your chair looks wonderful. You did an amazing job!
Thanks Besa…I’m glad I did it, I’ll definitely do it again, but not real soon! You are so kind for leaving such a kind comment…I really appreciate it and hope you are enjoying a good week.
Hugs, Lynn
The chair turned out great! I love the gold nail heads!
Thanks Ruthie! I’m quite smitten with that nailhead as well…it really made a huge difference and actually proved equally useful to finish that arm facing.
Thanks for visiting!
Hugs, Lynn
It’s absolutely amazing that chair! Lynn you did such a fantastic job, wow! I really love the fabric you chose and the tacks go so well with it. And of course that last photo, just aww. The BEST!
Thanks Katrin, I am really quite tickled with it, especially now that’s it done! It will really be a versatile piece, will be able to go almost anywhere. And I love the nailhead.
Thanks for coming by today.
Hugs, Lynn
This is such a great post – you give some seriously good advice! I’ve always wanted to try reupholstering, but always chicken out! I’m pinning this for later in case I get the courage 🙂 Love the picture at the end. How do pets always know when there is something new in the house they can nap on? 🙂
Hey Jen…thanks for stopping by and piping in! I am so glad that I tackled it…I’ll never look at a piece of upholstered furniture the same way again! And how true about pets finding new things…got to love them.
Have a great day.
Lynn