
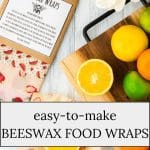
Beeswax Food Wraps: an easy and useful DIY

This post describes the benefits of Beeswax Food Wraps, how to make them, and how to care for them.
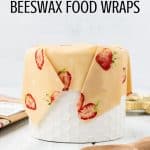
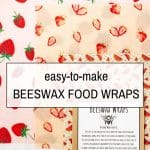
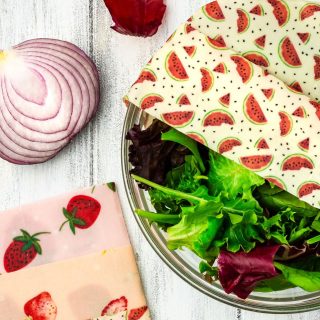
Reusable Beeswax Food Wraps are a fantastic replacement for single-use plastic wrap or aluminum foil. They’re reusable, which means you save money and reduce waste in the long run. And, not for nothing, they are easy to make!
Beeswax wraps are made from cotton infused with beeswax, resin, and jojoba oil. No harmful chemicals or plastics here! They’re biodegradable and compostable, so you’re doing your part for the environment.
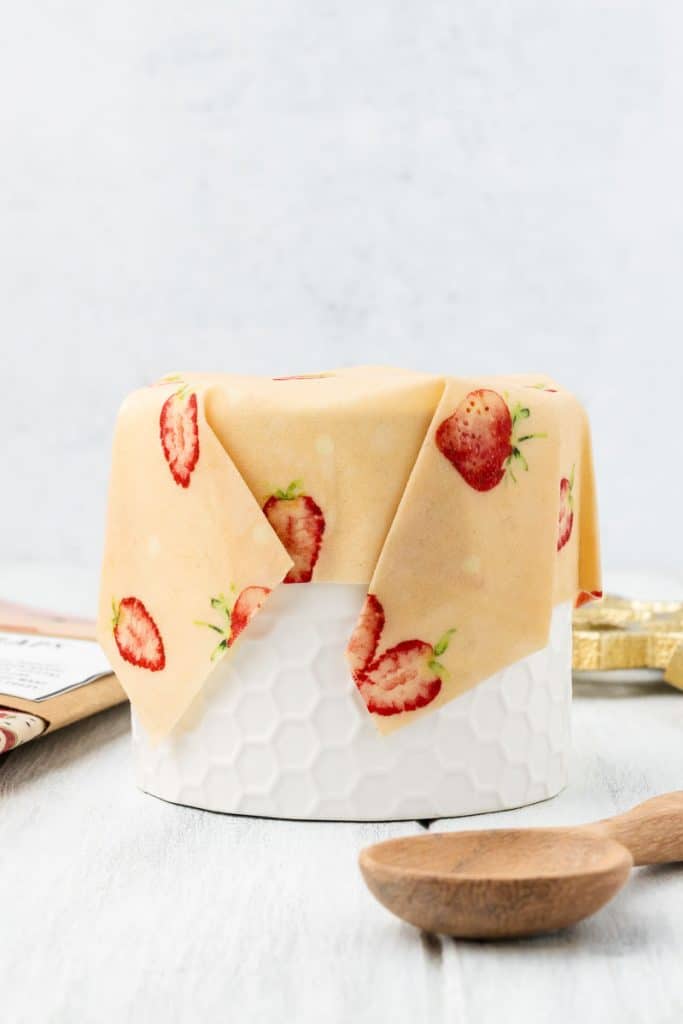
Table of Contents
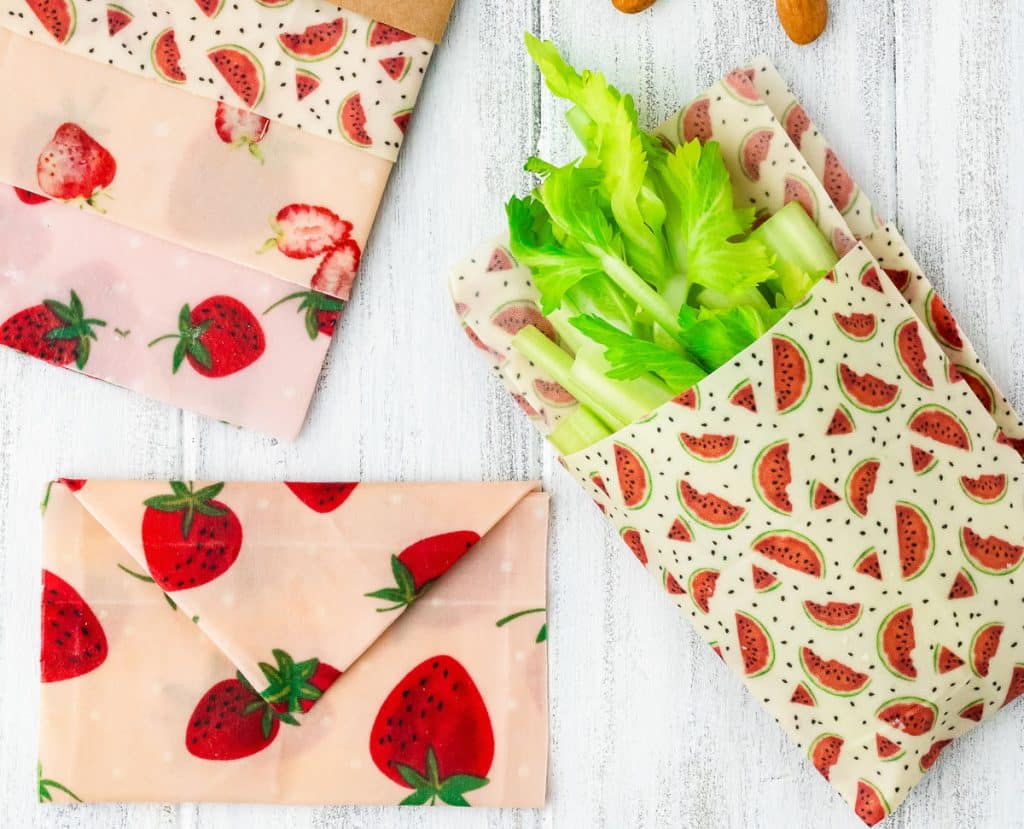
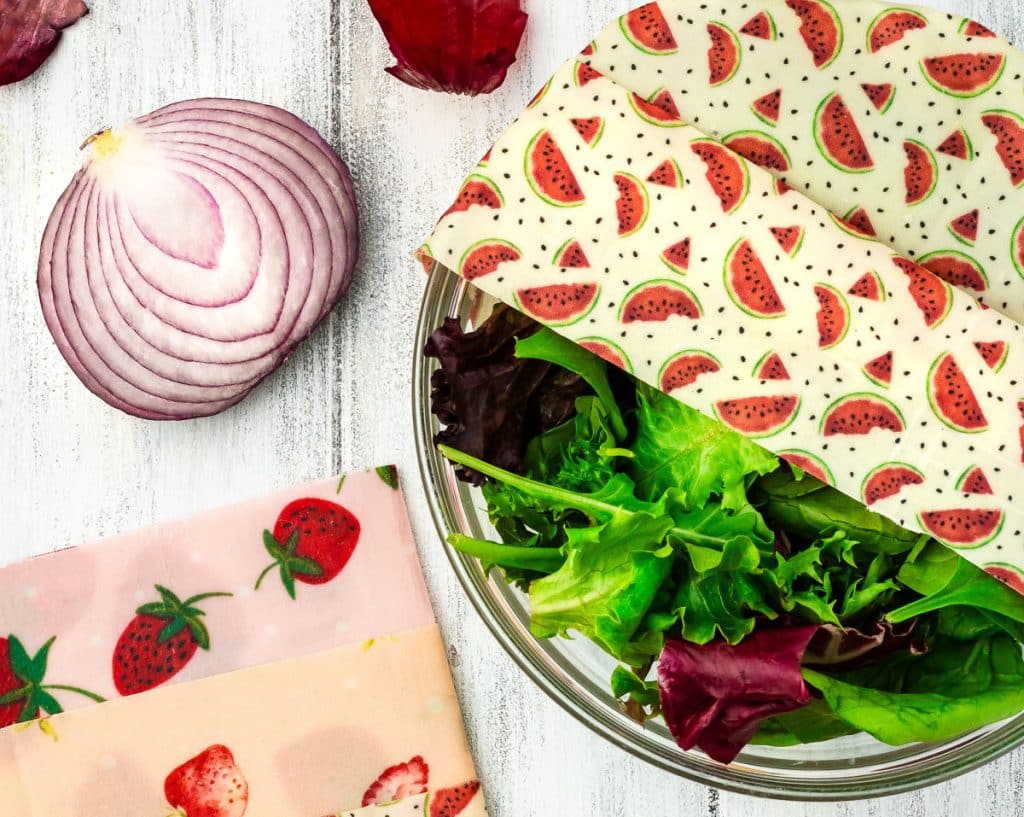
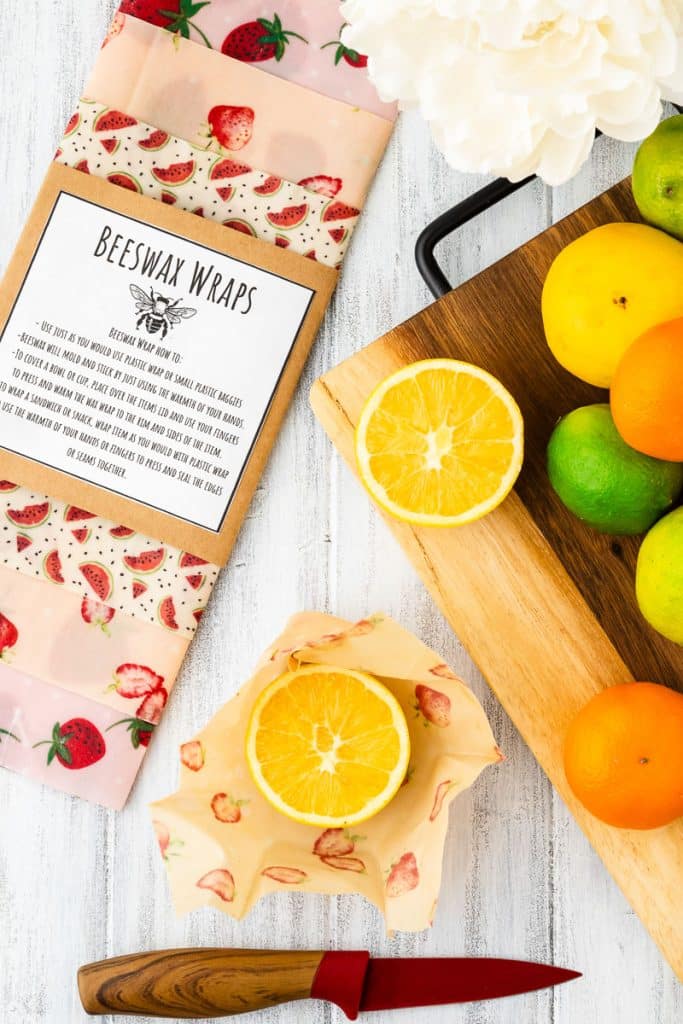
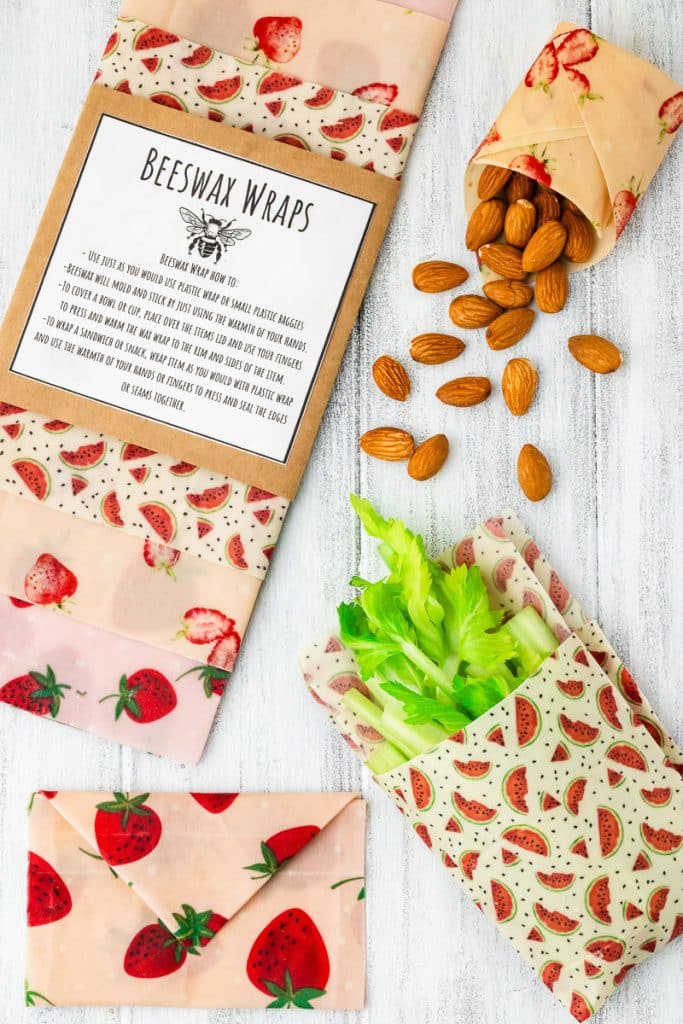
Beeswax wraps are also very versatile. They can cover bowls, wrap sandwiches, cheese, veggies, or even half-cut fruits. The natural beeswax and resin make them slightly sticky, which helps them cling to your food and containers. Plus, they’re breathable, so your food stays fresher for longer.
So, in a nutshell, these reusable food wraps are a money-saving, eco-friendly, and creative way to keep your food fresh without resorting to disposable plastic bags and food storage containers. They are non-toxic, antibacterial, and biodegradable.
It’s a simple switch that goes a long way in reducing waste and saving the planet – all while keeping your kitchen looking cool and sustainable. 🐝🌿
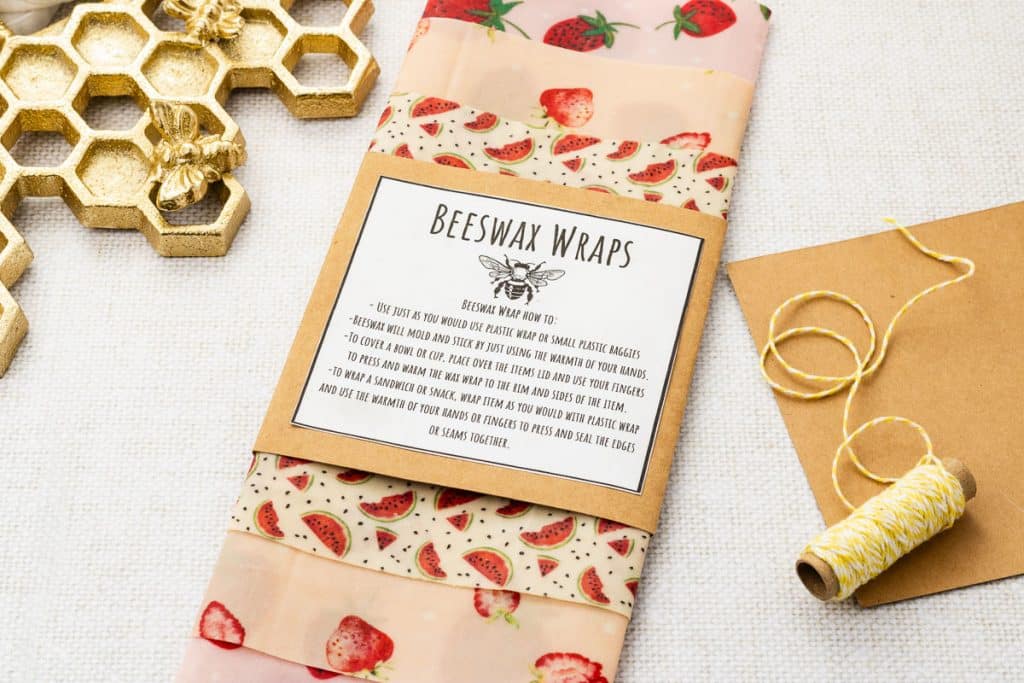
Great Gift Idea!
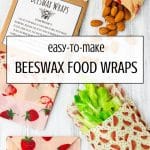
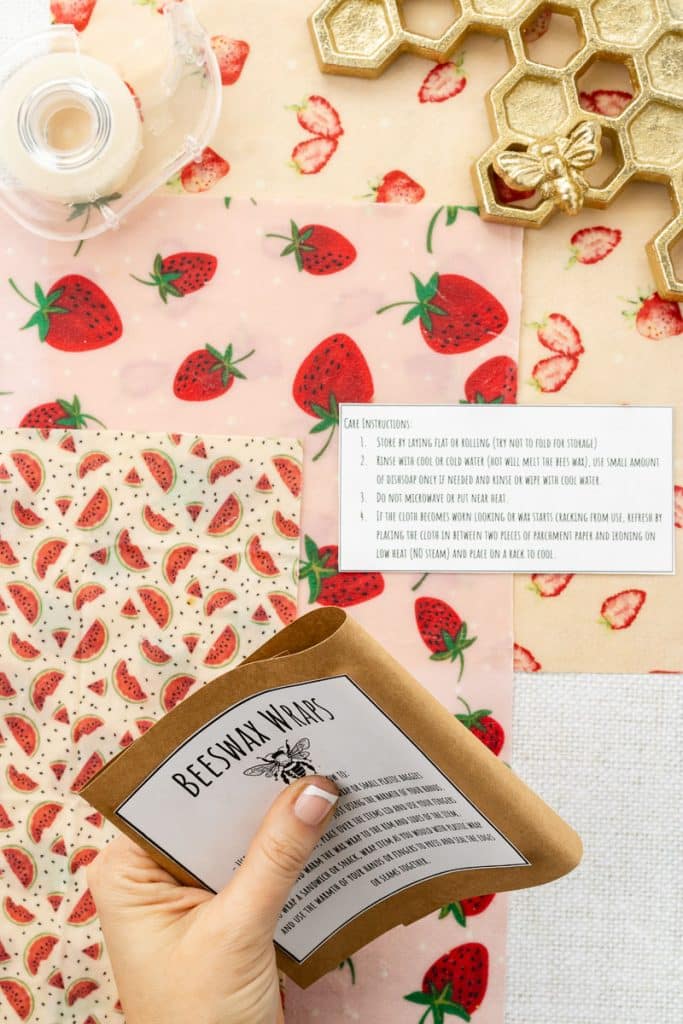
Of course, you’ll want to make these food wraps to use in your kitchen. But, while you are at it, why not make up several more to give as gifts?! The printable instructions give details on making gift packets with these food wraps. Additionally, free printables are included to make your gift spiffier!
Materials and Tools Needed for Beeswax Food Wraps
Some of these are affiliate links, and I will earn a small commission off the sale of these products, but the price you are charged is not affected. You can see my full disclosure policy here.
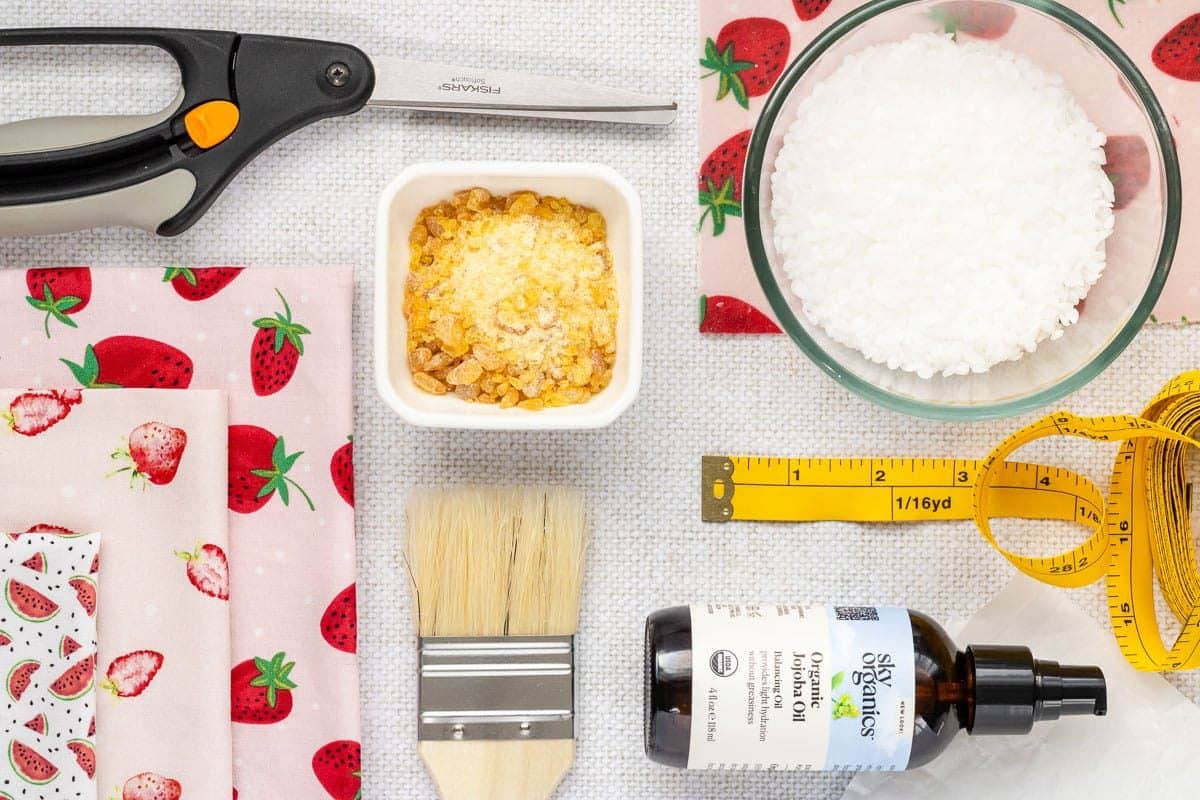
- 100% Cotton Fabric: This serves as the base material for your wraps and should be 100% natural cotton without synthetic blends. You can choose fun patterns or colors to add a personal touch, but be mindful that the resin and yellow beeswax will tint the fabric yellow, so choose accordingly. Organic cotton is also a great option as no pesticides or bleach would have been used in growing or processing it. (Walmart has precut ½ yard cotton fabric for around $1-$2)
- White Beeswax Pellets (Food Grade): Beeswax is the key ingredient that provides the wraps with their stickiness and waterproofing properties. Food-grade beeswax is essential to ensure safety for food contact.
- Crushed Pine Resin (Food Grade): Pine resin adds flexibility and moldability to the wraps. It helps them hold their shape and stick to containers. Make sure it’s food-grade and free from additives.
- Jojoba Oil: Jojoba oil is added for its antimicrobial properties and to prevent the wraps from becoming too brittle. It helps maintain their flexibility.
- Microwave-Safe Container or Jar: You’ll need a container or jar to melt and mix the beeswax, resin, and jojoba oil together. Ensure it’s microwave-safe for easy melting.
- 2-Inch Art Brush: This brush is used to evenly spread the melted wax mixture onto the fabric and ensure the wax is distributed smoothly. Ensure that it is clean as it will be against your food.
- Baking Tray: You’ll place the fabric on a baking tray when melting the wax mixture onto it in the oven. It makes the process more manageable and helps catch any drips.
- Parchment Paper: You’ll line the baking tray with parchment paper to prevent the wax from sticking to the tray and make cleanup easier.
- Fabric Scissors or Pinking Shears: Pinking shears create a decorative edge and help prevent fraying.
- Fabric Tape Measure or Ruler:
About Beeswax, Pine Resin, and Jojoba Oil
Foodgrade Beeswax Pellets: Beeswax is the primary ingredient, and it serves as the main source of the wrap’s stickiness and waterproofing. When melted and combined with the other ingredients, it provides that clinginess that helps the wrap adhere to itself and your food containers. Beeswax is antibacterial and is a natural preservative, keeping your food fresher for longer. You can use white or yellow beeswax, but if you want to minimize a more yellow hue, go for the white. Beeswax bars can be used in place of pellets, just use a cheese grater to grate the bar.
Jojoba Oil: Jojoba oil is added for its antimicrobial properties, which help keep your food fresh. Jojoba oil helps the wraps to remain soft and pliable, preventing them from becoming brittle and ensuring the wraps stay in good shape. Instead of jojoba oil, you can use coconut oil. It’s a readily available, natural oil that can help maintain the flexibility of the wraps. However, note that coconut oil can have a coconut scent, which might affect the aroma of your food.
Pine Tree Resin: Resin is the secret ingredient that gives beeswax wraps their moldability. It helps the wraps hold their shape and stick to containers even after they’ve cooled down. Think of it as the backbone of the operation. It’s the tree resin that makes the wraps pliable and effective at sealing in your food. Pine Resin will tinge the mixture yellow, so whatever fabric is being used will have a yellow hue. Choose your fabrics accordingly.
How to Make Beeswax Food Wraps, in a Nutshell
A printable version of these instructions is available at the bottom of this post.
- Step 1: Preheat your oven to 150°F (66° C). Some ovens won’t go below 200°F, which is fine.
- Step 2: Cut your cotton fabric into squares, circles, or rectangles depending on how you would like them to be used. If you will be giving the food wraps as gifts, cut your fabric into 3-4 different sizes as it makes for a nice variety gift set. I’ve included some common sizes for beeswax food wraps to help you out.
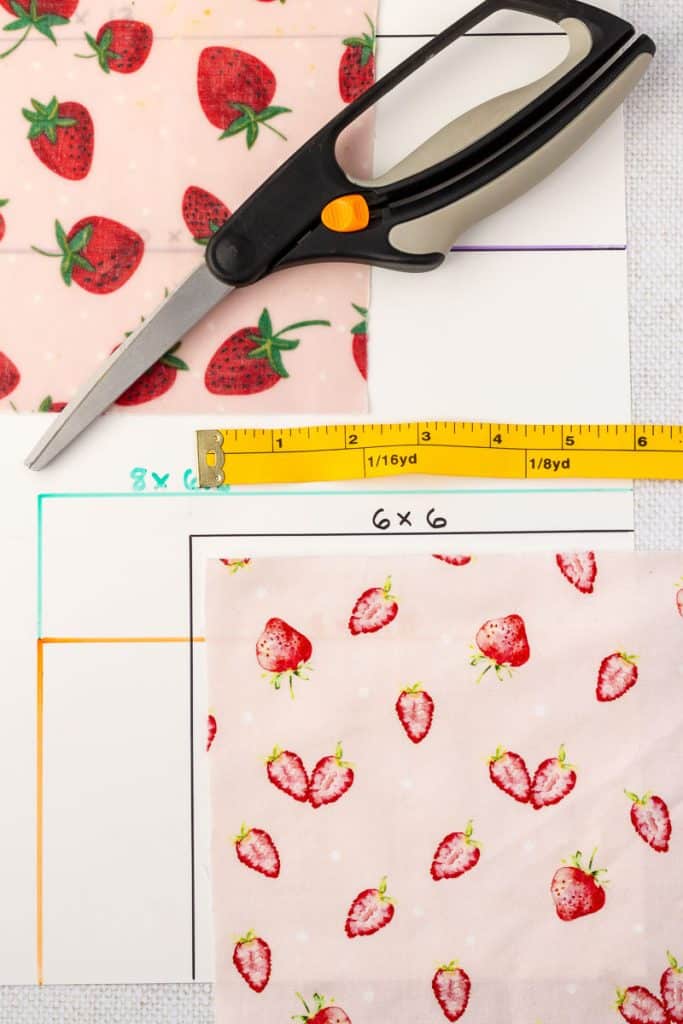
Common Sizes for Beeswax Wraps:
Small Wrap: 6″ x 6″ – For things like halved lemons, limes, avocado, and small prep cups or bowls.
Medium Wrap: 10″ x 10″ – For things like wedges of cheese, bell peppers, smaller melons like cantaloupe, and small mixing or serving bowl
Large Wrap/ Sandwich Wrap: 13″ x 13″ – For things like half a cabbage or watermelon, medium mixing bowls and sandwiches
Snack Bag: 8″ x 4.5″
Sandwich Bag: 8″ x 6.5″
Large Bowl Cover: 14.5″ x 14.5″ square or 14.5″ circle – For a 12″ bowl
XL Bowl Cover: 16.5″ x 16.5″, or 16.5″ circle – For 14”-15” serving bowl
*Note: You can also custom measure. Just add 2 inches to each side of your object and cut. For example, for a 4″ x 6″ container, cut an 8″ x 10″ piece of fabric so you have a 2-inch overhang on all sides.
- Step 3: If there are large chunks of resin, put them in a baggie and crush them with a meat mallet, hammer, or with mortar and pestle. Then, add the resin to a microwave-safe container and microwave it for about three minutes and then one-minute intervals after that until melted.
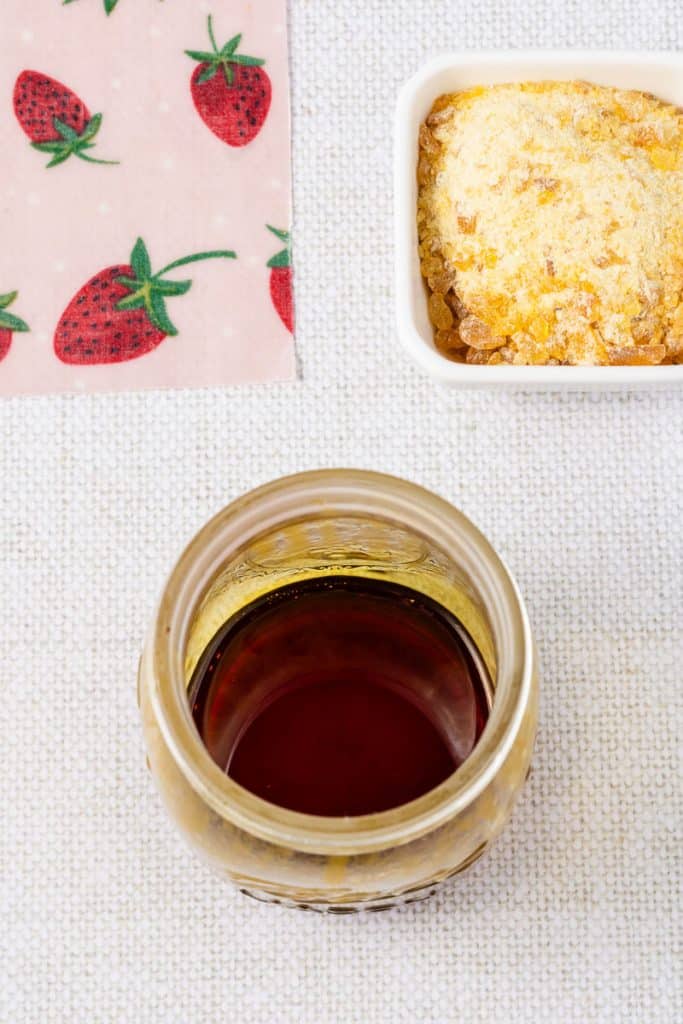
- Step 4: Add the beeswax and jojoba oil to the melted resin. Continue to microwave until melted starting with two minutes and then one-minute intervals afterwards, stirring after each interval.
- Step 5: Place parchment paper on a baking tray and arrange your fabric to fit inside the tray. You might need several baking trays.
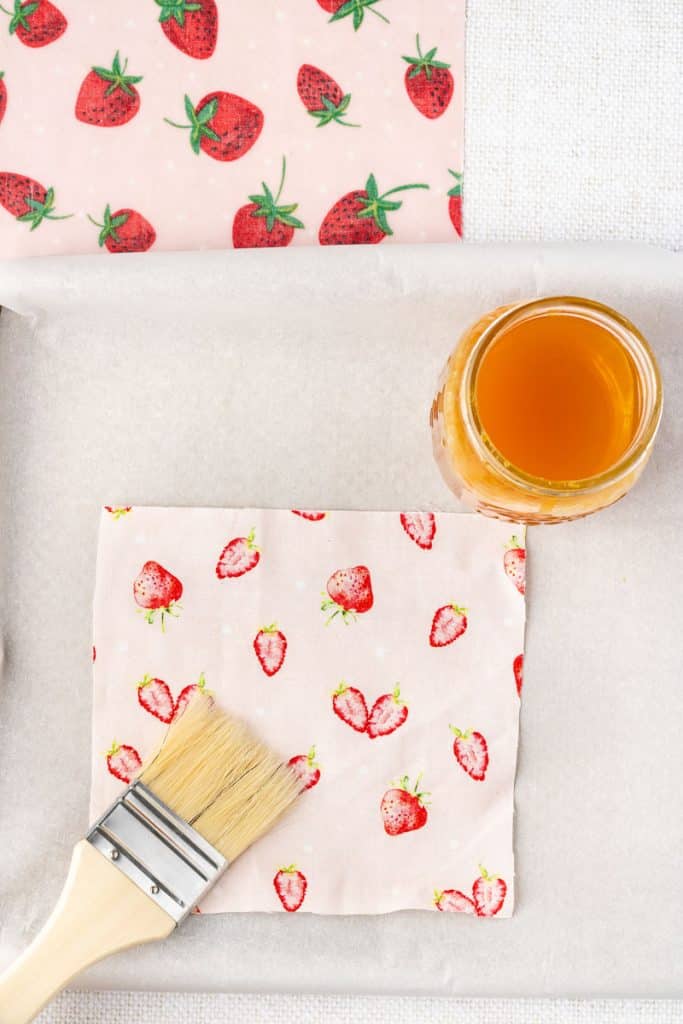
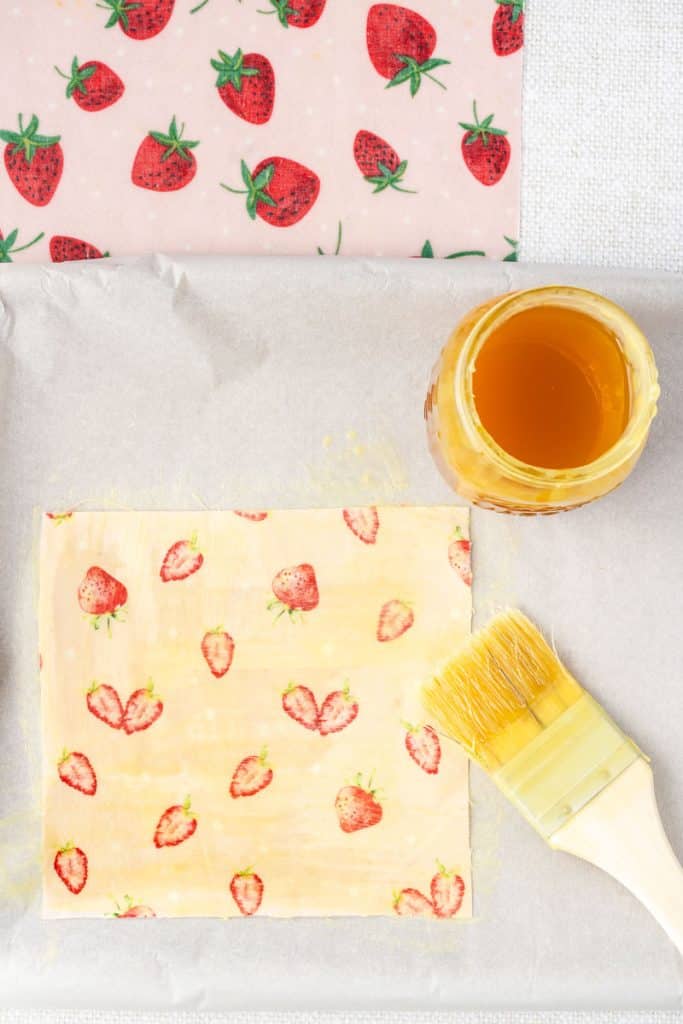
- Step 6: Once the beeswax/resin/jojoba oil mixture is melted, brush one even layer onto the fabric making sure to brush all the way to the edges. Don’t worry if it starts to solidify, it will absorb and melt into the fabric once in the oven.
- Step 7: Place the baking trays with the fabric into the oven for five minutes so that the beeswax can melt and be absorbed by the fabric.
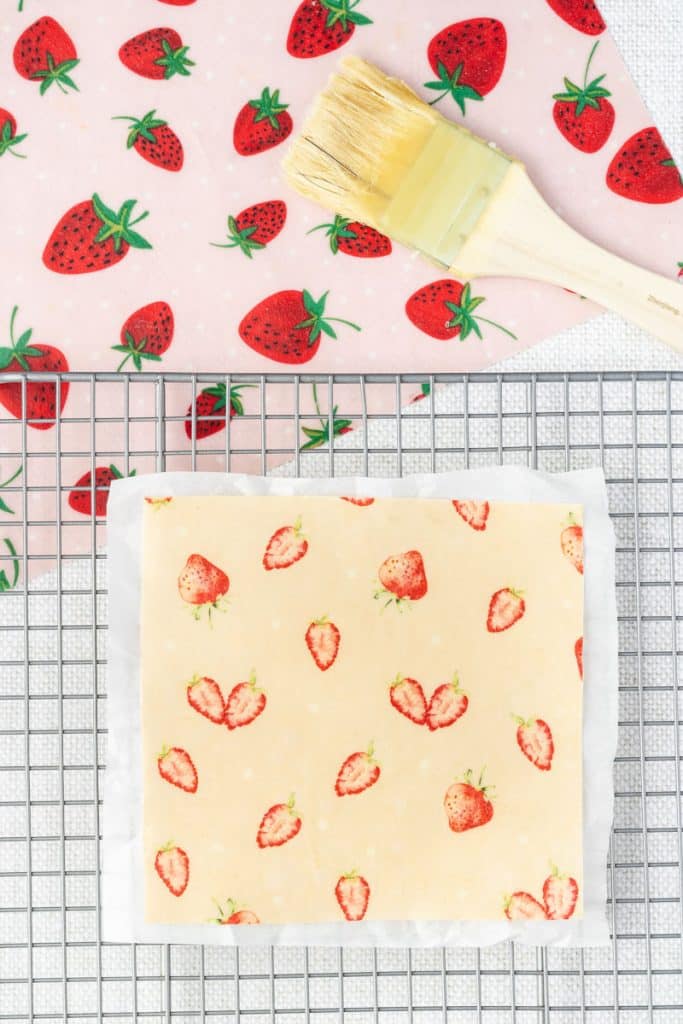
- Step 8: Take the wraps out of the oven and brush from the center to the edges with the same brush to ensure even coverage.
- Step 9: Peel off the wrap once it’s cool enough to handle and place onto a fresh sheet of crumpled parchment or hang to dry if you prefer. Once cooled, you can trim up any uneven edges or loose strings.
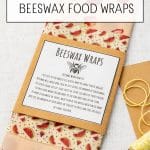
How to Make Wraps to Gift Beeswax Food Wraps
- Step 1: Print and cut the “How to Use” label and “How to Care For Your Beeswax Food Wraps” using these links: How to Use Beeswax Wraps and How to Care For Your Beeswax Food Wraps.
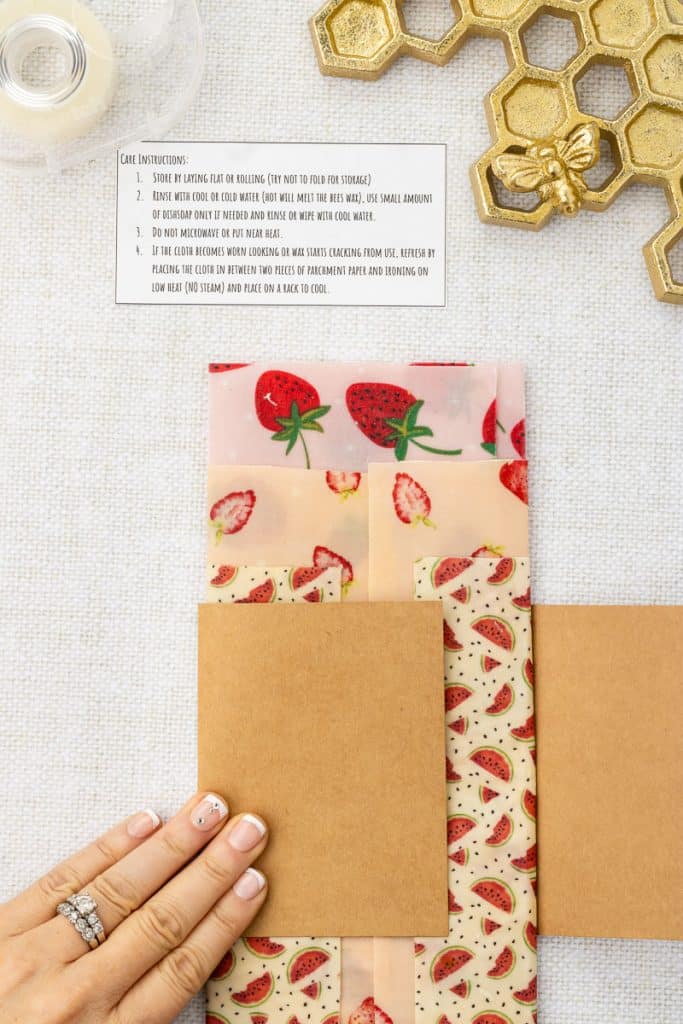
- Step 2: Cut 4 ½ inch strips of the cardstock and glue the “How to” label in the center leaving ¼ inch above and below the label.
- Step 3: Fold the cardstock on each side of the label also leaving approximately ¼ inch on each side.
- Step 4: Flip the cardstock so the label is facing down. Start with your biggest wrap, place it face down, and use the folds in the cardstock as guides to fold it inward. Repeat with the next size down, folding it around the biggest piece, and continue the process with any other wraps.
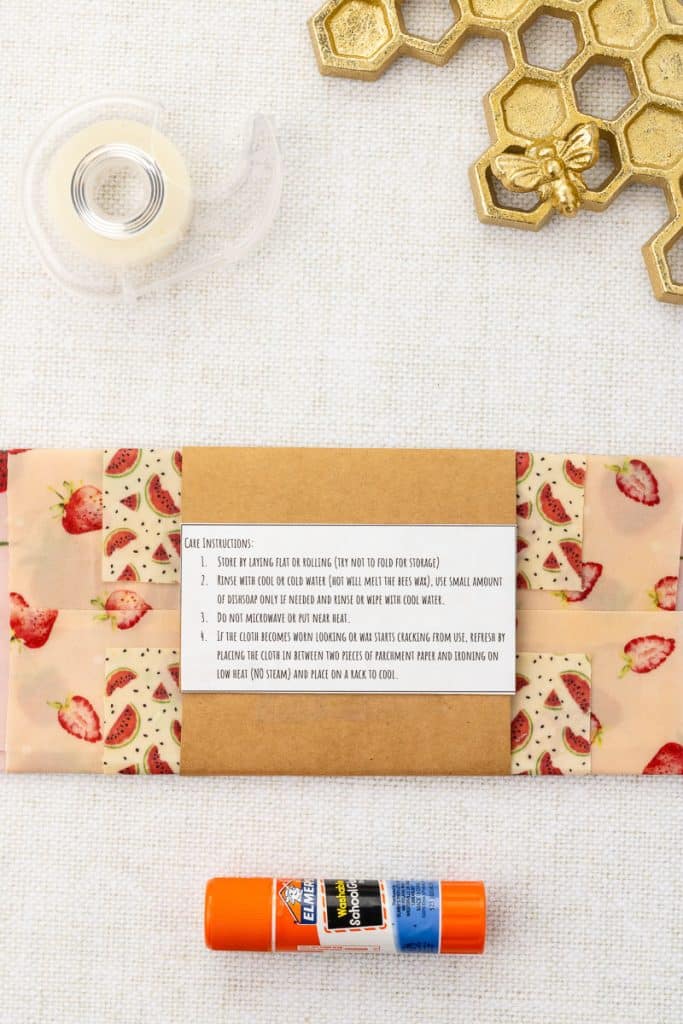
- Step 5: Close up the back and secure it with tape. With the glue stick, glue the care instructions to the back.
Looking for More Eco-Friendly Ideas for the Kitchen?
These 35 tips and eco-friendly kitchen products for a sustainable kitchen will not only help you be a better environmental steward, but they will also save you money, and help you live a healthier life.
And you’ll find more than 40 tips and suggestions to stop food waste in this post. Reducing food waste is helpful to both your wallet and the environment.
Common Questions about Beeswax Food Wraps
How long do Beeswax Food Wraps last?
The lifespan of beeswax wraps can vary depending on several factors, including how frequently they are used and how well they are cared for. On average, well-maintained beeswax wraps can last anywhere from six months to a year or even longer. Here are some factors that can affect their durability:
Frequency of Use: The more frequently you use your beeswax wraps, the faster they may wear out. They might need refreshing and replacement sooner when used often.
Proper Care and Cleaning: How you care for and clean your wraps plays a significant role in their longevity. Avoid using hot water, harsh detergents, or scrubbing them vigorously. Instead, gently clean them with cool water and mild dish soap when necessary.
Avoiding High Heat: Beeswax wraps are not designed for high-heat applications. Avoid using them in the microwave or wrapping hot foods directly from the oven. High heat can melt the wax and reduce the wraps’ effectiveness.
Avoiding Certain Foods: Acidic foods like citrus fruits and pineapple, as well as strong-smelling items like onions and garlic, can affect the beeswax coating and reduce the wraps’ lifespan. That said, I regularly wrap lemons and haven’t had a problem.
Refresh and Re-wax: Periodically refreshing and re-waxing your wraps can help extend their life. When you notice that they are losing their stickiness or becoming less effective, you can follow the process mentioned below to refresh them.
Quality of Materials: The quality of the beeswax wraps themselves can impact their durability. Higher-quality wraps may last longer than lower-quality ones.
Storage: Proper storage in a cool, dry place can also contribute to their longevity. Store them flat or rolled up, and avoid leaving them exposed to direct sunlight or extreme temperatures.
It’s essential to monitor the condition of your beeswax wraps regularly. If you notice signs of wear and tear, such as cracks or holes, it’s a good indication that they need to be replaced or refreshed. With proper care and maintenance, you can maximize the lifespan of your beeswax wraps and continue to enjoy their eco-friendly benefits for an extended period. 🐝🌿
How do I refresh my beeswax food wraps?
If your wrap becomes worn-looking or starts cracking, refresh it by placing it between two pieces of parchment paper and ironing on low heat (no steam). Place it on a rack to cool.
Is there anything that I shouldn’t wrap in my beeswax food wraps?
- It’s best to avoid wrapping raw meat with beeswax wraps due to hygiene and food safety concerns. Bacteria from raw meat can potentially transfer to the wraps and be challenging to clean thoroughly. Use airtight containers or plastic bags designed for food storage for raw meat.
- Avoid wrapping hot or steaming hot foods with beeswax wraps. The heat can cause the wax to melt and lose its effectiveness. Let hot foods cool down to room temperature before using the wraps.
- Beeswax wraps are not designed to contain liquids or very runny foods like soups or sauces effectively. They are better suited for dry or semi-dry items.
- Be cautious when wrapping acidic fruits like pineapple and citrus fruits. The acidity can break down the beeswax coating over time and reduce the wraps’ lifespan. That said, I regularly wrap lemons and haven’t had a problem…yet.
- Strong-smelling foods like onions and garlic can leave their odor on the wraps. Unless you want your wraps to have a persistent aroma, it’s best to use alternative storage for these items.
- While you can use beeswax wraps for some dairy products like cheese, be aware that they might not be as airtight as plastic wraps or containers. Soft or highly perishable dairy items may not stay fresh as long in beeswax wraps.
Can I use something other than 100% cotton fabrics?
100% cotton is the best fabric to use since it soaks up beeswax into its fibers better than other fabrics. Synthetic fabrics will not soak up the wax which would then just sit on the surface and flake off, so aren’t a good option for beeswax food wraps.
Can I use a different heating method other than a microwave?
Yes, you can heat the mixture in a double boiler which will take about 20 min for the wax and resin to melt.
What can beeswax wraps replace in my kitchen?
You can use beeswax wraps for anything you use plastic wrap or plastic sandwich bags for. For example, you can cover bowls, and cups, and wrap a sandwich or snacks. There are lots of videos on the internet that will instruct you on different ways to fold and wrap beeswax wraps. Once again, just do not use them with raw meats or things that are hot since the wax will melt.
How do I clean the beeswax wraps after use?
Wash with cool or cold water (hot water will melt the beeswax). If needs be, you can use a little mild dish soap, wipe with water, and a cloth to remove more heavily soiled wraps.
How should I store my beeswax food wraps?
To store the beeswax wraps, lay them flat or roll them and they should last up to a year.
What happens when the wrap starts to show signs of wear, the wax no longer looks fresh and I can no longer refresh it with an iron?
After the beeswax wraps are no longer refreshable, place them in your compost bin.
Beeswax Food Wraps
Equipment
- Hammer and/or mortar & pestle to crush pine rosin. It is helpful if the rosin and mortar & pestle are frozen before trying to crush as the rosin becomes sticky the warmer it gets.
- Microwave
- Oven
Ingredients
FOR BEESWAX FOOD WRAPS
- 100 % cotton fabric 3 colors or patterns, ½ yards each (Walmart has precut ½ yard cotton fabric for around $1-2)
- 1 ½ cups White Beeswax pellets food grade
- ½ cup crushed Pine Resin food grade
- 1 ½ tablespoons Jojoba Oil
- Microwave-safe container or jar
- 2- inch art brush
- Baking tray
- Parchment paper
- Fabric scissors or pinking shears
- Fabric tape measure or ruler
- Optional: Poster Board to draw and visualize sizes
- Optional: Marker for drawing sizes
FOR GIFT WRAPPING
- 2 pieces of 12×12 natural cardstock
- White printer paper for “How To” label and “Care instructions”
- Glue stick
- Tape
- Scissors
- How To Use Beeswax Food Wraps Label
- How to Care for Beeswax Food Wraps Label
Instructions
FOR BEESWAX FOOD WRAPS
- Preheat the oven to 150°F (66°C). If 200°F is your lowest setting, that’s fine.
- Cut your cotton fabric into squares, circles, or rectangles depending on how you would like them to be used. If you will be giving the food wraps as gifts, cut your fabric into 3-4 different sizes as it makes for a nice variety gift set. I’ve included some common sizes for beeswax food wraps farther down in this post.
- Once you have your shapes cut, add the resin to a microwave-safe container and microwave for about three minutes and then one-minute intervals after that until melted.
- Carefully take out the resin using a pot holder and add the beeswax and jojoba oil. Continue to microwave until melted starting with two minutes and then one-minute intervals afterwards, stirring occasionally.
- While the wax mixture is heating up, place parchment paper on a baking tray and arrange your fabric to fit inside the tray. You will most likely need to do multiple batches in the oven depending on your sizes.
- Once the beeswax mixture is melted, brush one even layer onto the fabric making sure to brush to the edges. If it starts to solidify do not worry, it will absorb and melt into the fabric once in the oven.
- Place the fabric into the oven for five minutes so that the beeswax can seep into the fabric.
- Take the wraps out of the oven and brush from the center to the edges to ensure even coverage.
- Peel off the wrap once it’s cool enough to handle and place onto a fresh sheet of crumpled parchment or hang to dry if you prefer. Once cooled, you can trim up any uneven edges or loose strings.
- *Note: If the wraps do not stick perfectly at first you can scrunch them up to help activate the wax mixture and then try again to seal the edges with the warmth of your hands.
FOR GIFT WRAPPING BEESWAX FOOD WRAPS
- Print and cut the Beeswax “How to Use” label and “Care Instructions” using these links: Beeswax Wraps How To and Beeswax Food Wraps Care Instructions.
- Cut 4 ½ inch strips of the natural cardstock and glue the “How to” label in the center leaving ¼ inch above and below the label.
- Fold the cardstock on each side of the label also leaving approximately ¼ inch on each side.
- Flip the cardstock so the label is facing down. Start with your biggest wrap, place it face down, and use the folds in the cardstock as guides to fold it inward. Repeat with the next size down, folding it around the biggest piece, and continue the process with any other wraps.
- Close up the back and secure it with tape. With the glue stick, glue the care instructions to the back.
- You will get two 4 ¼” strips from the natural 12″ x 12″ cardstock, there are two “How To” labels and three “Care Instructions” on the printable pages.
Notes
TO REFRESH YOUR BEESWAX FOOD WRAP:
If your wrap becomes worn-looking or starts cracking, refresh it by placing it between two pieces of parchment paper and ironing on low heat (no steam). Place it on a rack to cool.Bookmark this page or pin the following image to refer back to this tutorial on making Beeswax Food Wraps in the future.

Thanks so much for spending a few minutes of your busy day with me!
To ensure you don’t miss future content, pop your email in the pale green box on the right or click here. I usually send one email weekly, so I won’t inundate your inbox. I’m sensitive to an overflowing email inbox!
We will only use your email address to send you emails, no more than 1-2 weekly. In addition, you will have access to my growing library of knit & crochet patterns and other printables. Check back often as this library will continue to grow. You can unsubscribe anytime by emailing me or clicking on the “unsubscribe” link at the bottom of all emails.
And you can access many of the products I refer to on my Nourish and Nestle Amazon Page. You can access it here.
So, if you’d like to participate in the ‘subscriber benefit’ action, simply subscribe to Nourish and Nestle here or use the form on the right sidebar. It’s slightly towards the top.
I have sent all my subscribers the link to the Subscriber Benefits Library. If you missed it or misplaced it, let me know.
Until next time…


Love!!!!!!
Yay!!! We do too!
One of my favorite things!
Mine too! 🥰