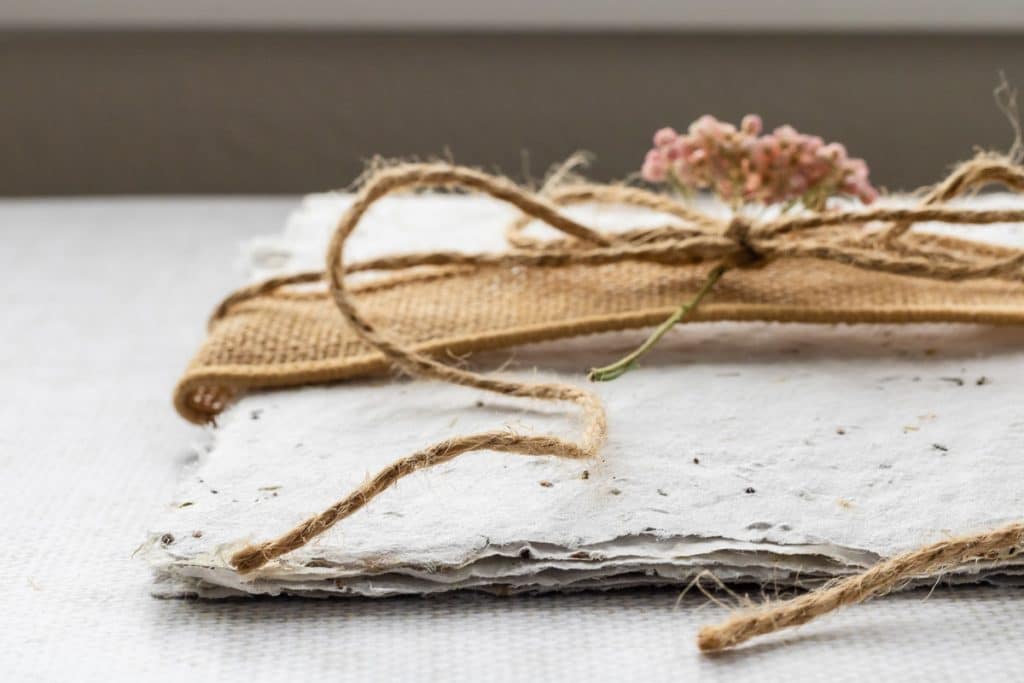
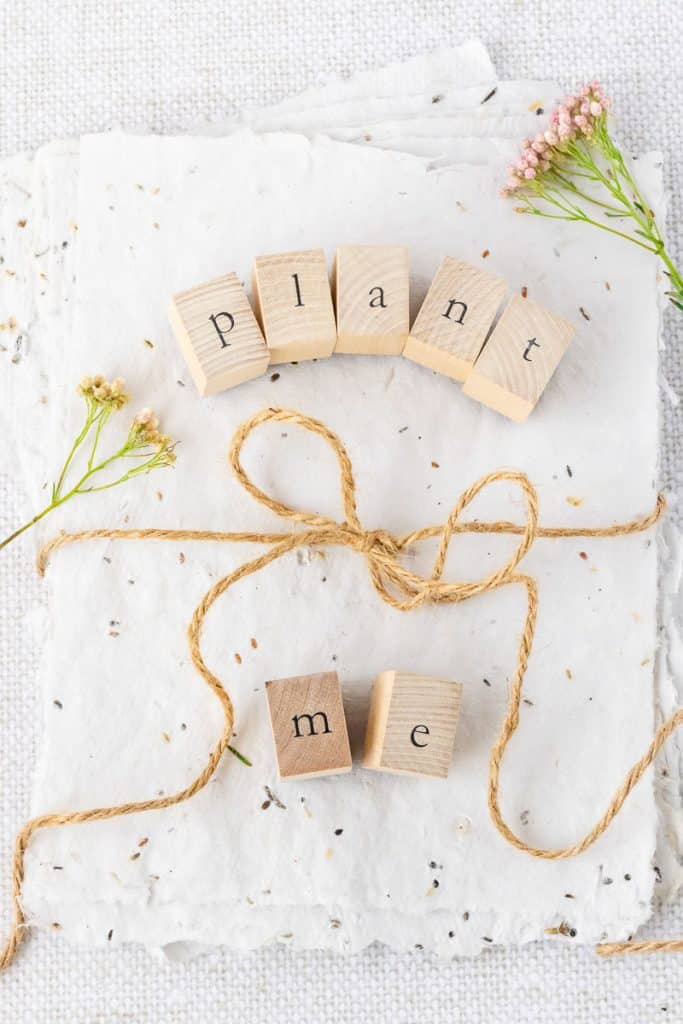
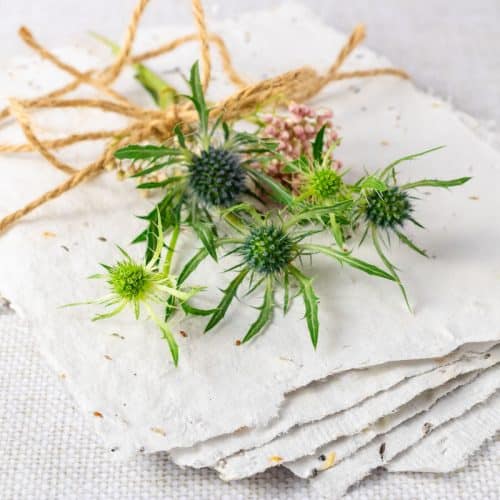
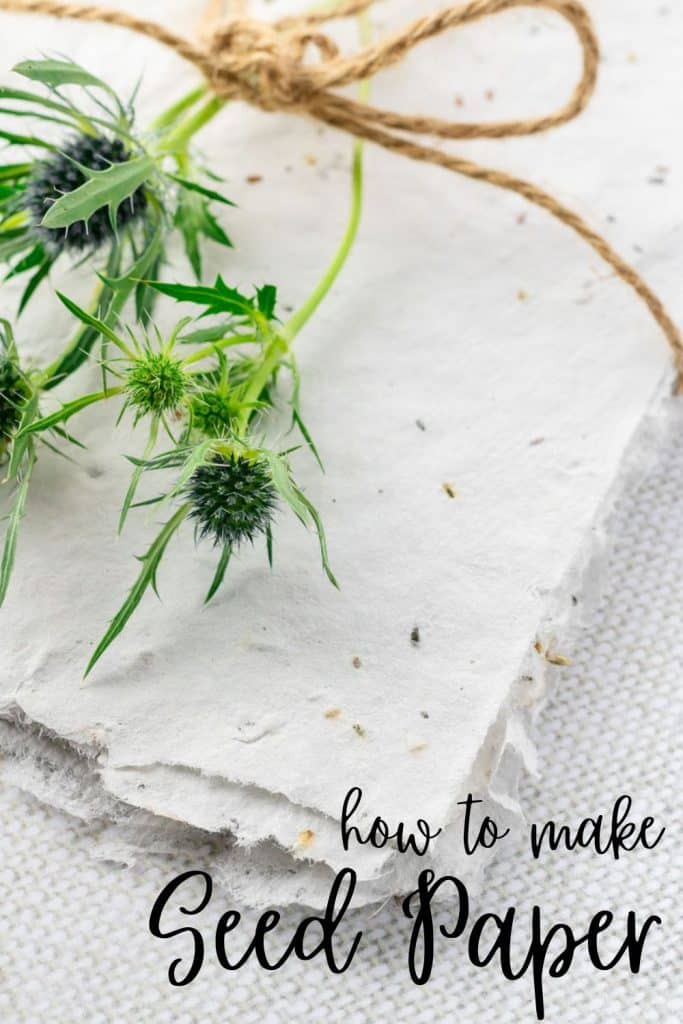
how to make seed paper
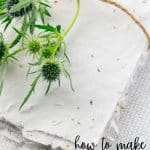
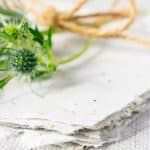
Creating seed paper offers a unique blend of craft, environmental stewardship, and gardening. It’s a project that turns waste paper into beautiful, plantable treasures, making it a perfect activity for those who love to repurpose, recycle, and bring a touch of nature into their lives. This post shares how to make seed paper that you can use to make stationery or include in cards.
Whether you’re a seasoned gardener looking for a new project or a craft enthusiast eager to try something different, making seed paper is a delightful endeavor that combines creativity with sustainability.
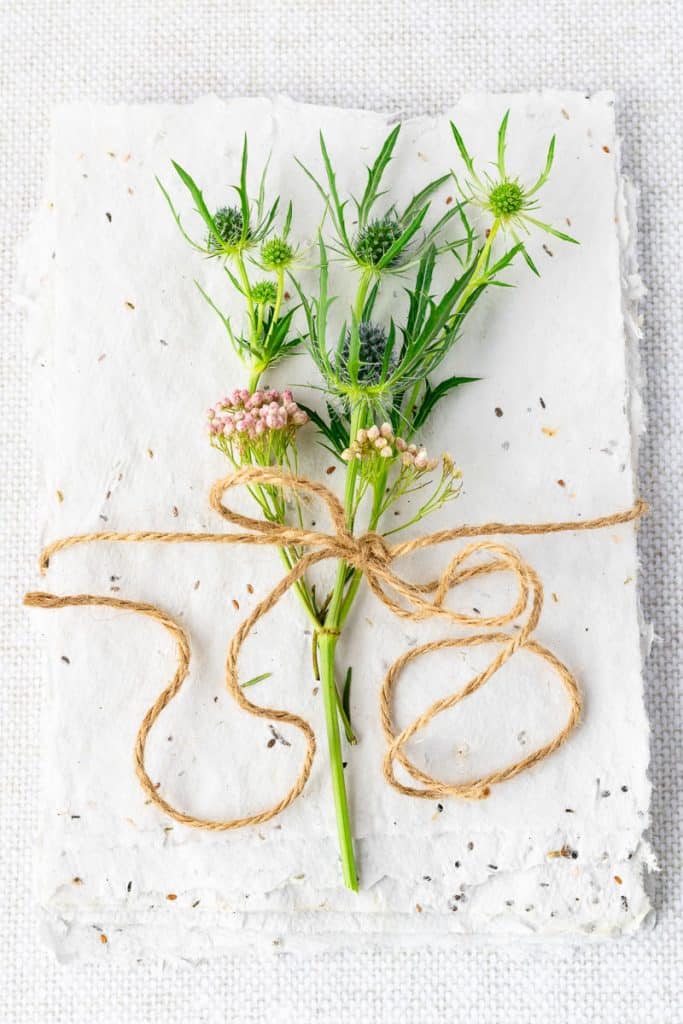
Table of Contents
Uses for Seed Paper
Plantable seed paper is a versatile material that combines eco-friendliness with creativity, offering a wide range of uses that appeal to gardeners, craft enthusiasts, and those looking to add a personal touch to their events or gifts. Here are some innovative and thoughtful ways to use seed paper:
- Gift Tags and Cards: Transform your gift-giving into a more sustainable practice by using seed paper for gift tags and cards. Afterward, recipients can plant the seeds, making your gift continue to give in the form of beautiful flowers or herbs.
- Wedding Invitations: Eco-conscious couples can opt for wedding invitations made from seed paper. These invites not only stand out for their unique texture and appearance but also allow guests to plant them as a lasting memory of the special day.
- Educational Tools: Seed paper can be a fantastic tool for educational projects, teaching children about the importance of recycling and plant growth. It’s a hands-on activity that combines art, science, and environmental education.
- Memorial Services: Use seed paper for memorial service invitations or as keepsakes for attendees to plant in memory of the deceased, growing a living memorial.
- Holiday Decorations: Create eco-friendly holiday decorations with seed paper. Ornaments, garlands, or advent calendars can be fun to make, display, and eventually plant after the holidays.
- Bookmarks: Book lovers can enjoy making or receiving bookmarks crafted from seed paper. It’s a practical and environmentally friendly accessory for any bibliophile.
- Plantable Packaging: Small businesses can use seed paper for product packaging, especially for items like handmade soaps, jewelry, or small textiles. This approach not only reduces waste but also adds a unique touch to the product presentation.
- Personalized Stationery: Writing on seed paper to create personalized stationery sets or thank you notes offers a special way to connect with friends and family, giving them something meaningful that they can plant and grow.
- Eco-Friendly Confetti: Use seed paper to create biodegradable confetti for weddings, parties, or other celebrations. It’s a way to add a festive touch without the environmental impact of traditional confetti.
The uses of seed paper highlight its versatility and the opportunity it provides to blend creativity with environmental responsibility. Whether for personal use or as part of a larger event, seed paper offers a unique and sustainable way to leave a positive impact.
Material Needed
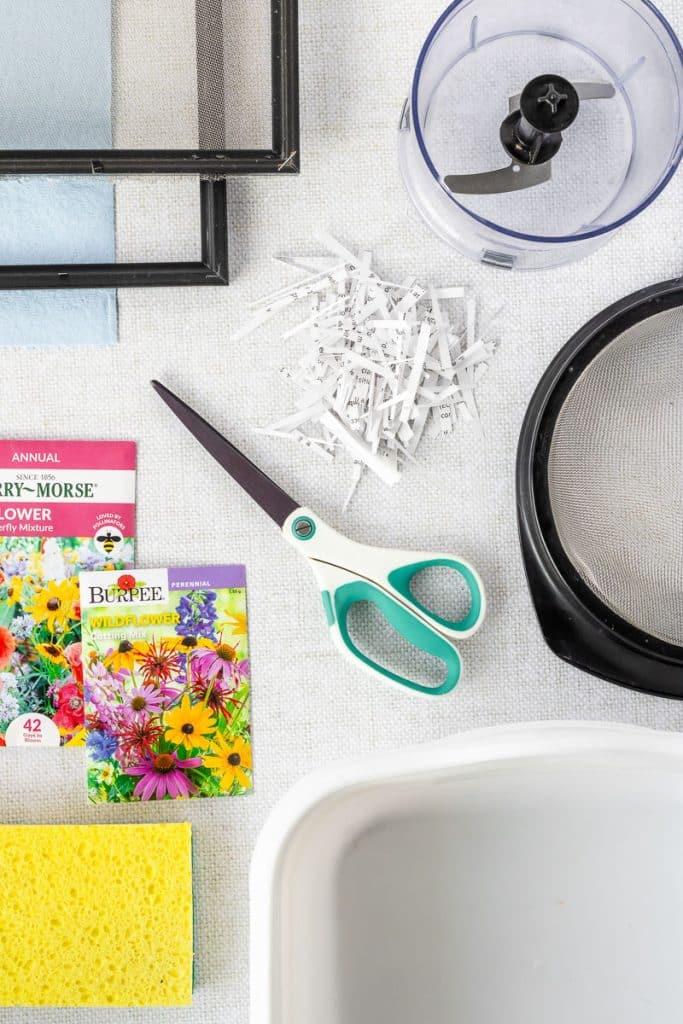
Making seed paper is a wonderful way to recycle paper waste and encourage the growth of plants. It’s a straightforward process that requires some basic materials and equipment. Here’s what you’ll need to get started:
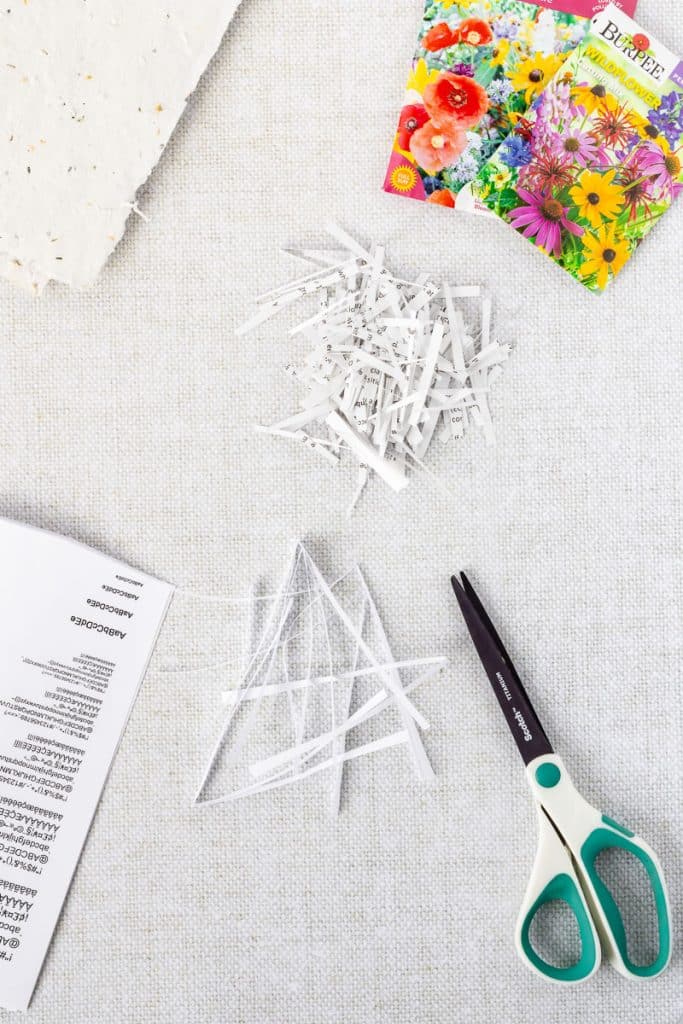
- Paper: This can be any non-glossy, recyclable paper. Junk mail, newspapers, office paper scraps, and old notebooks are great options. Avoid using glossy or coated paper as it might not break down properly in the soil.
- Seeds: Choose seeds based on what you want to grow. Wildflower seeds are popular for their ease of growing and general hardiness, but you can also use herb or vegetable seeds. Pick seeds that are small enough to be embedded in the paper. Make sure that you don’t get seeds with filler, that will just create dust in your mix and therefore, your paper.
- Blender or Food Processor: Used to create a fine pulp from your soaked paper. A standard kitchen blender or food processor works perfectly for this. If you are queasy about using the same food processor for paper and food, you can typically find a used food processor or blender at Goodwill, garage sales or the ReStore.
- Bucket or Plastic Tub: This container should be just large enough to hold water and allow you to dip your mold and deckle into it. It’s used for mixing the paper pulp and for the dipping process. Don’t use too big of a tub.
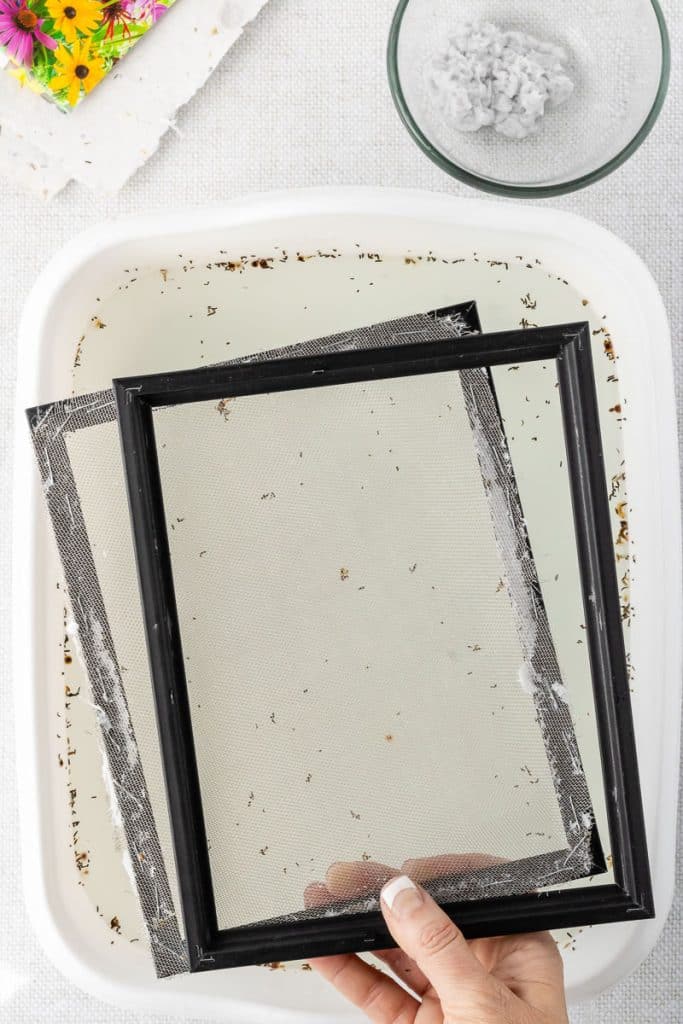
- Mold and Deckle: This is a two-frame set used to shape and size the paper. The bottom frame (the mold) is covered with a screen, and the top frame (the deckle) is open and frames the paper to make it a rectangular shape. You can purchase these online, or make your own using picture frames and mesh, as described below.
- Sponge: To help remove excess water from the paper pulp once it’s on the screen.
- Absorbent Towels or Fabric: Used for blotting and drying the newly formed paper sheets. Use old towels, felt, or any other absorbent, non-fuzzy fabric that you don’t mind getting wet. Your paper will take on the texture of absorbent paper or fabric.
- Mesh Strainer: To help remove excess water from the paper pulp after blending and before forming your paper sheets.
- Warm Water: For soaking the paper strips and for adding to the blender to create the pulp.
- A Flat Surface: For drying the seed paper. A countertop covered with towels or fabric works perfectly.
- Optional Additives: For color or texture, you can add natural dyes made from coffee, tea, or vegetable juices to the pulp. You can also add small amounts of dried flower petals or leaves for decoration, but be mindful of their potential impact on the germination of the seeds.
How to Make Plantable Seed Paper
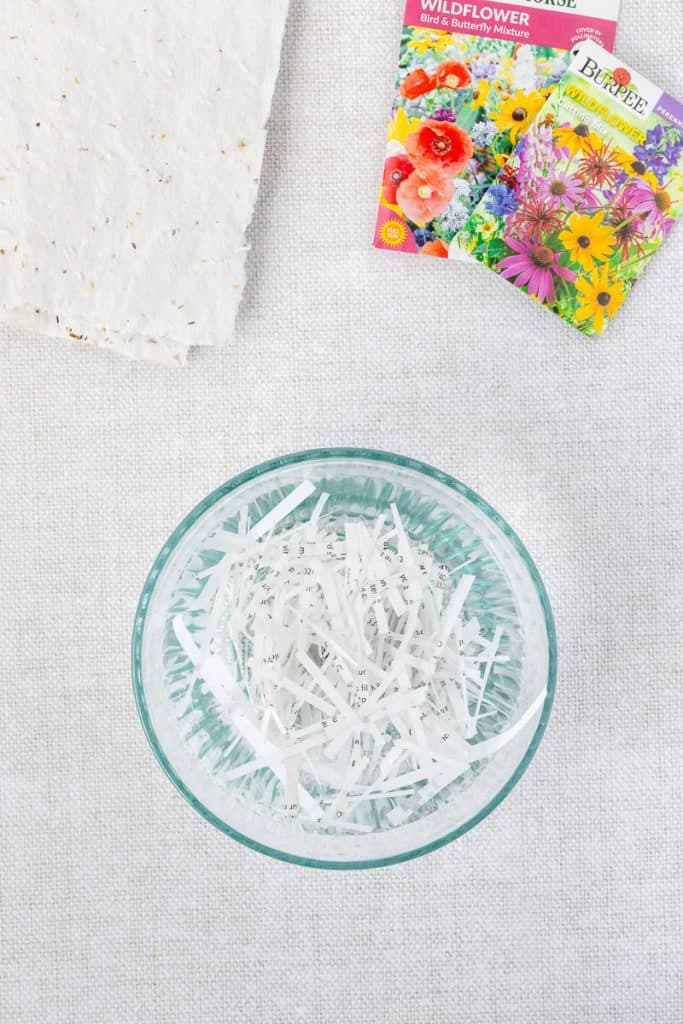
1. Prepare the Paper:
- Tear or cut the paper into small pieces. Avoid using glossy or coated paper as it may not break down in the soil.
- Soak the paper pieces in warm water for at least a few hours or overnight. This softens the paper and makes it easier to blend into a pulp.
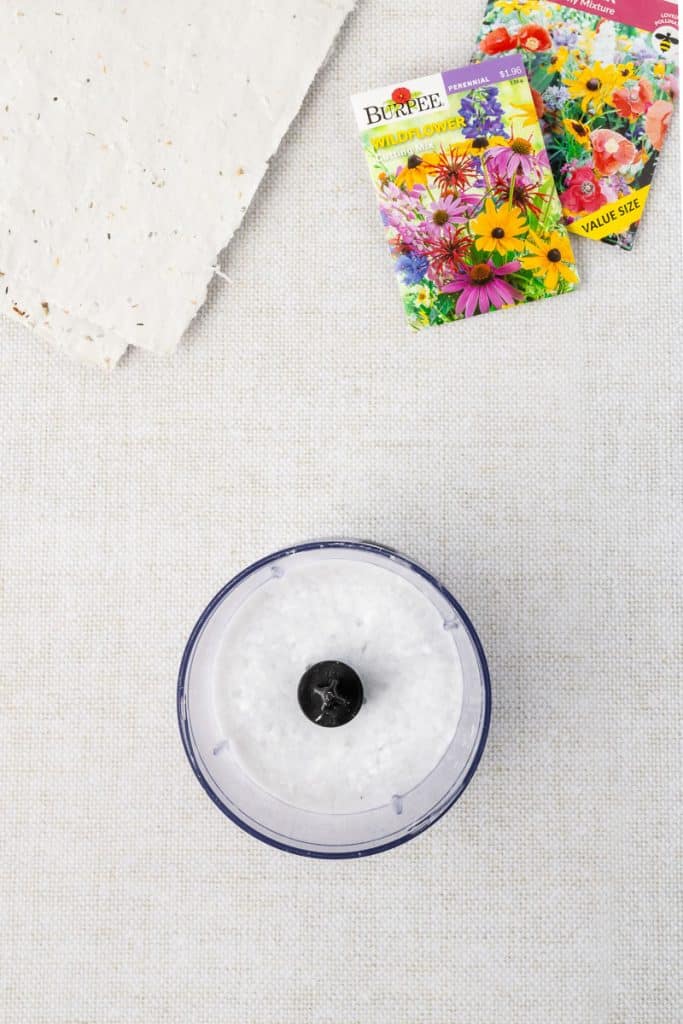
Make the Pulp:
- Drain the soaked paper and transfer it to a blender.
- Add warm water to the blender until it covers the paper.
- Blend the mixture until it reaches a smooth, oatmeal-like consistency.
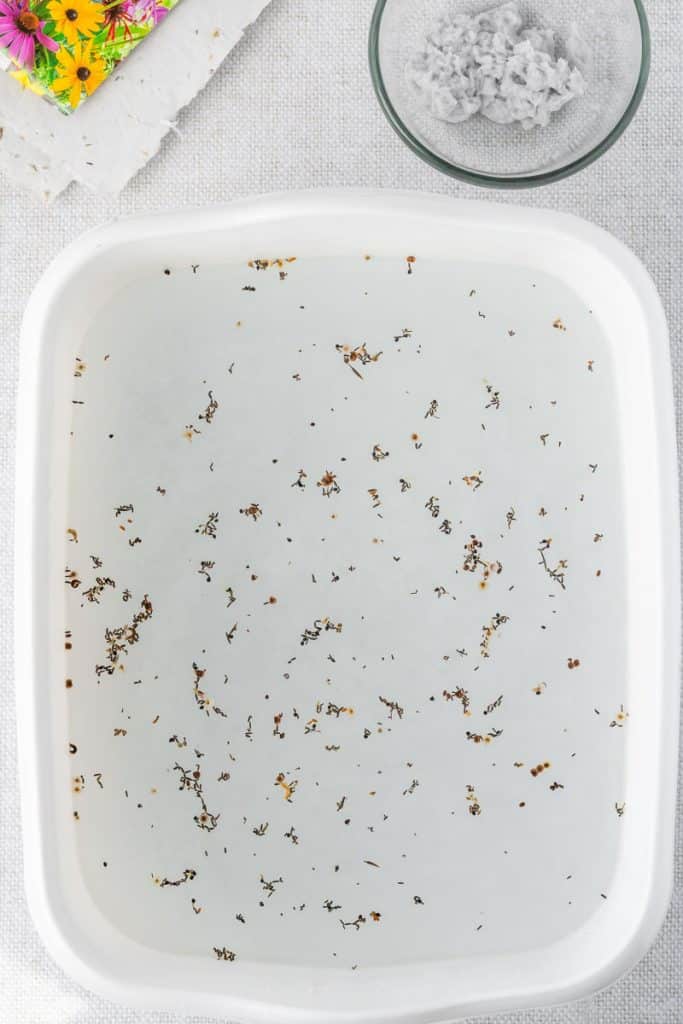
3. Strain the Pulp and Add a Handful for Each Sheet of Paper to the Tub.
- Pour the pulp mixture through a mesh strainer to remove excess water. You want the pulp to be wet but not dripping. Straining the pulp before you add it back to the water lets you know what exactly you have to work with and for the pulp to be a concentrated amount which will lead to more consistent thicknesses of the paper you make. Typically you’ll be making batches of paper and soaking and blending multiple sheets. Being able to see the concentrated amount helps you decide if you want more or less the same amount for each piece you make. It makes it easier to control for consistency in the thickness of each sheet.
- Fill your bucket or tub with water, about half full.
- Add a handful of paper pulp to the water to make one piece of paper.
- Lay out your absorbent towels or fabric on a flat surface nearby. This will be used to dry the seed paper.
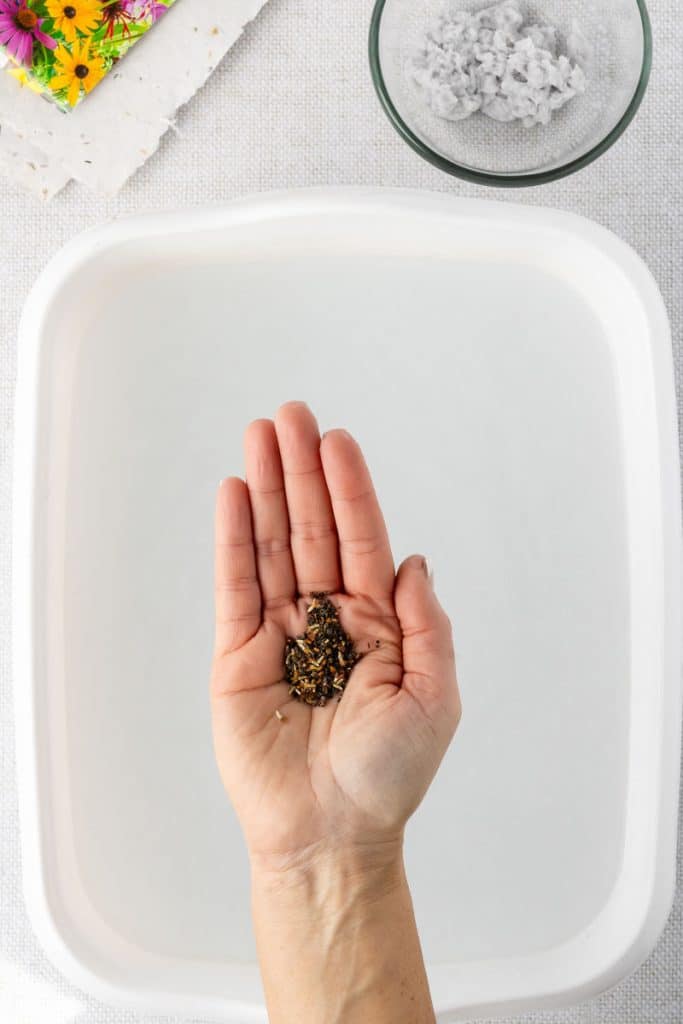
4. Add Seeds:
- Gently mix your seeds into the pulp. Be careful not to crush the seeds if you’re using a blender for mixing. Stirring by hand is recommended.
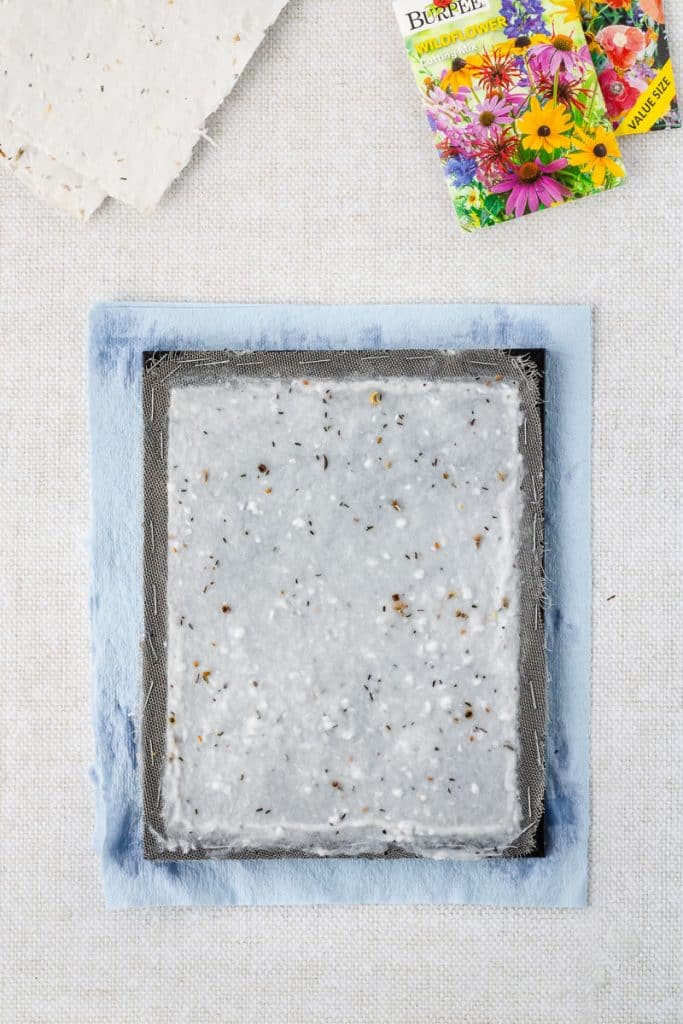
5. Form the Paper:
- Dip the mold and deckle, screen-side up, into the pulp mixture in the tub. Scoop up an even layer of pulp onto the screen.
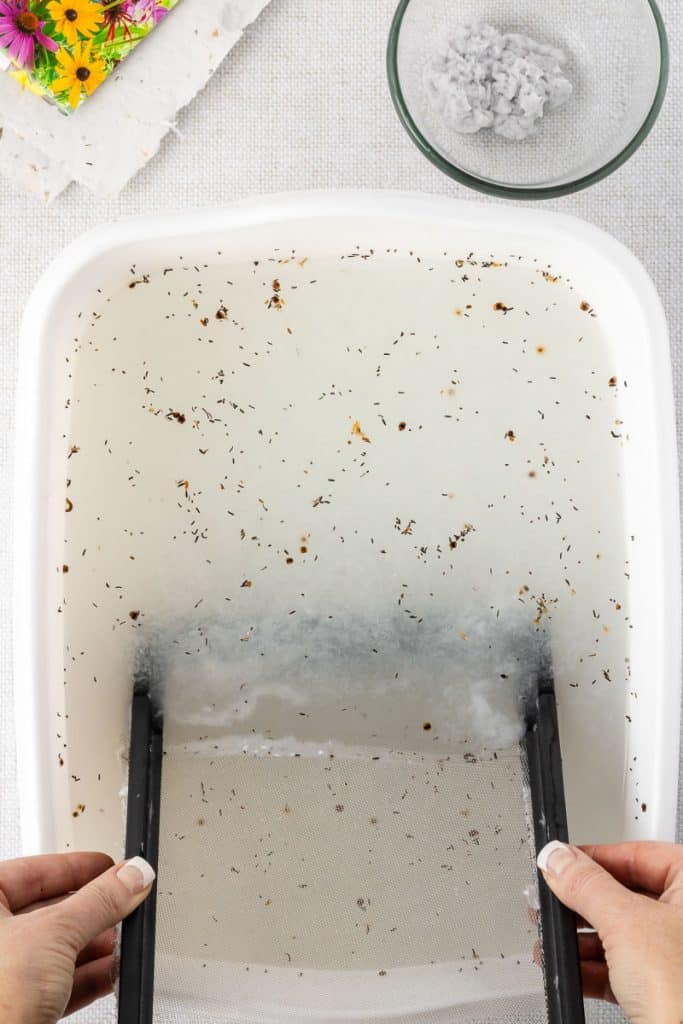
- Lift the mold and deckle out of the water, holding it level to drain. Keep the deckle (the top frame) aligned over the mold so that the paper pulp forms a rectangle.
- Wait for the water to drain through the screen, leaving a thin layer of pulp on the screen.
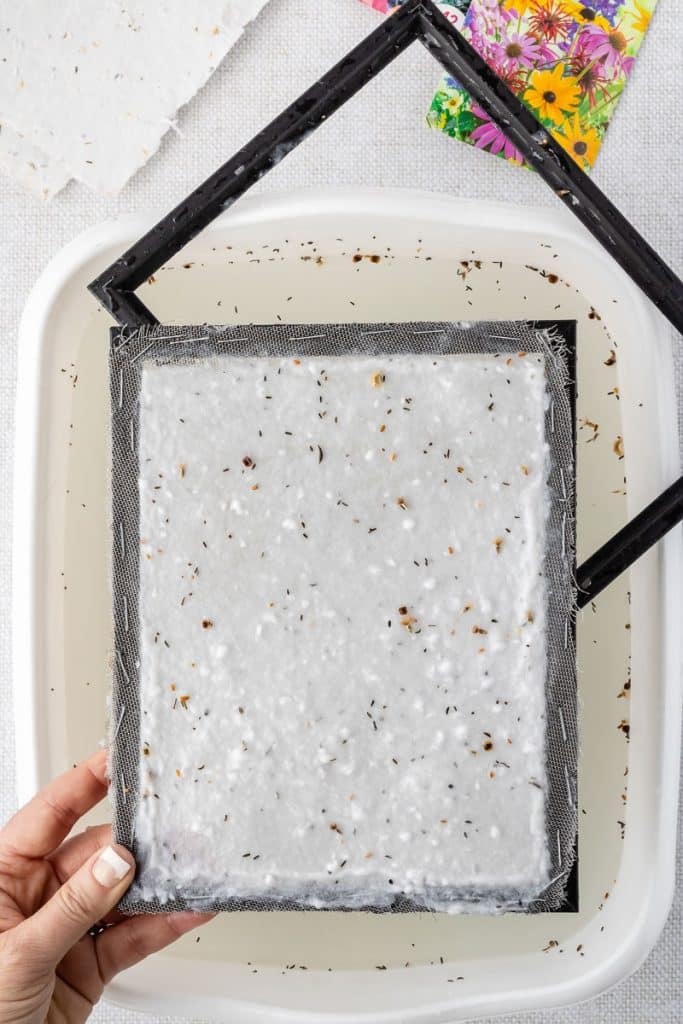
- Carefully remove the top frame (deckle), leaving the pulp on the screen of the bottom frame (mold).
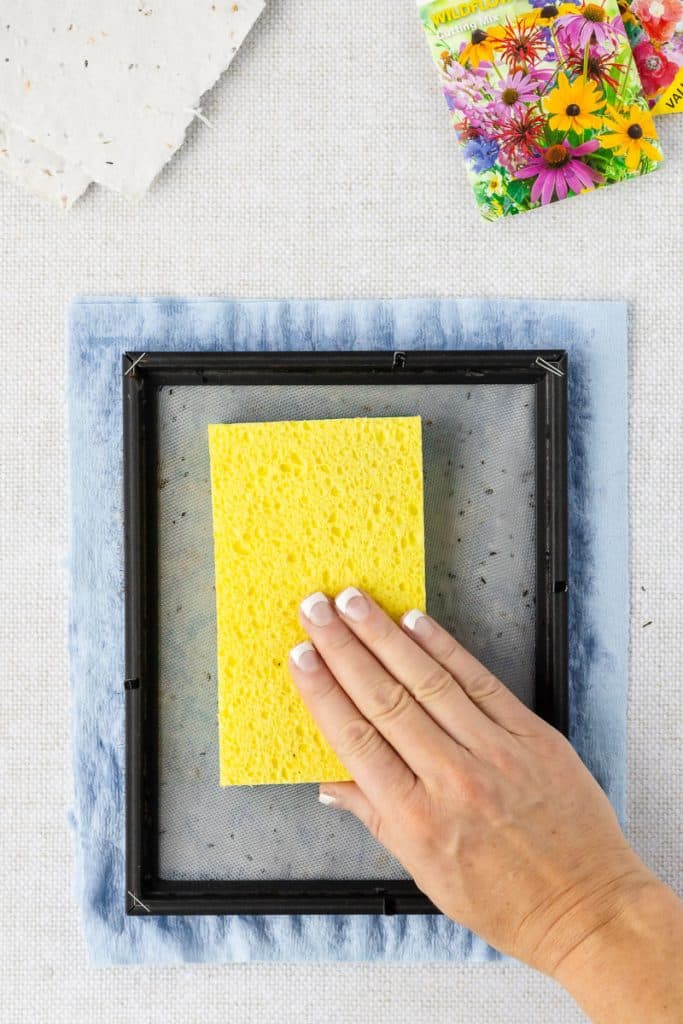
6. Dry the Paper:
- Place the mold, pulp side down, onto an absorbent towel or fabric.
- Use a sponge to press down gently on the mesh to remove excess water.
- Carefully lift the mold, leaving the pulp on the towel. If the paper sticks to the mold, gently press down on the back of the mesh to release it.
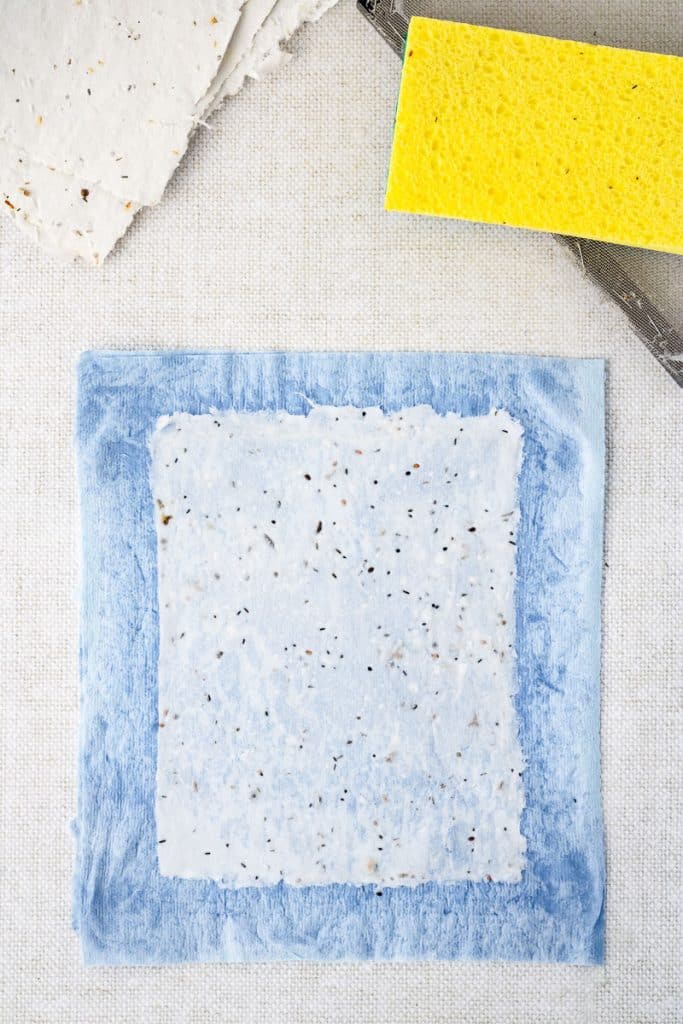
7. Let It Dry:
- Allow the paper to dry completely. This can take anywhere from 24 hours to several days, depending on humidity and thickness.
- To speed up drying, you can use a hair dryer on a low setting or place the paper in an oven at the lowest setting for a few minutes. Be sure to monitor it closely to prevent burning.
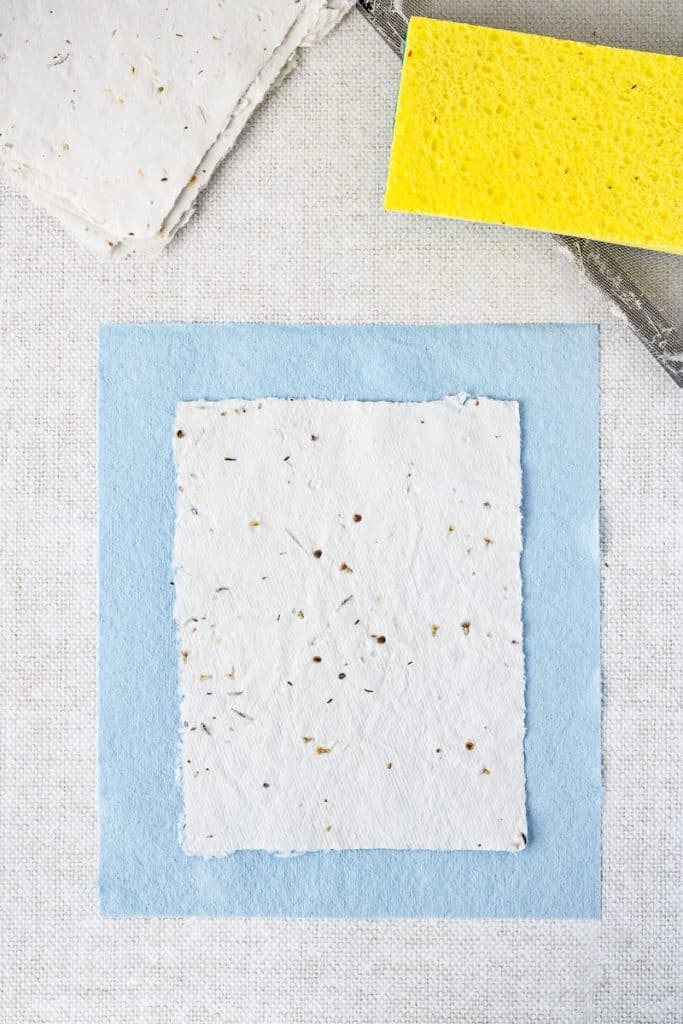
- Once dry, peel your seed paper off the towel.
- If the paper curls, place it under a heavy book to flatten.
Planting Your Seed Paper
- To plant your seed paper, lay it on top of a pot filled with soil. Lightly cover it with more soil and water it well.
- Keep the soil moist but not waterlogged, and place the pot in a location that gets plenty of sunlight.
Frequently Asked Questions
The best seeds for seed paper are those that are small, hardy, and have a good germination rate. They should be able to withstand the paper-making process without losing viability and should be suitable for the growing conditions of the area where the paper will be planted. Some seed types commonly used in seed paper are:
Wildflower Seeds: Wildflower seeds are popular for seed paper because they are generally hardy, can grow in various conditions, and have a mix of colors and types that appeal to many. Look for native wildflowers specific to your region for the best environmental impact.
Herb Seeds: Herb seeds, such as basil, parsley, cilantro, and dill, are excellent choices for seed paper. They’re useful, easy to grow, and can be planted in pots or gardens. Herbs also have the added benefit of being practical for culinary use.
Vegetable Seeds: Use smaller vegetable seeds, like lettuce, radishes, and carrots in your seed paper. They germinate quickly and are a great way to encourage gardening and healthy eating. However, they may require more space and specific growing conditions compared to wildflowers or herbs.
Annuals vs. Perennials: Annual flowers, which complete their life cycle in one year, and perennials, which come back for several seasons, can both be good choices depending on your goals. Annual flower seeds tend to germinate more quickly and easily, while perennials may last longer in the garden but take longer to germinate.
Large seeds, like sunflower seeds, are not a good choice for seed paper. Their bulk would render the paper rather useless.
Additionally, it’s important to choose seeds that are not invasive to the area where the paper will be planted. Invasive species can harm local ecosystems by displacing native plants and disrupting habitats.
Yes, you can use most types of paper, except for glossy or coated paper, as it may not break down properly in the soil. Recycled paper, such as junk mail, newspapers, and office paper, works well. Ensure the paper is shredded or torn into small pieces to create a smooth pulp.
Keep colors in mind when making your paper. If you toss in a bunch of different colors you are liable to end up with a muddy-looking paper.
To maximize the chances of growth, choose high-quality seeds, don’t overblend the seeds with the pulp (to avoid damage), and ensure the finished paper is stored in a cool, dry place until planting. When planting, follow the best practices for the specific seeds you’ve chosen, such as proper soil depth and watering.
The thickness of seed paper can vary, but it’s generally best to aim for the consistency of standard paper or slightly thicker. If the paper is too thick, it may be difficult for the seeds to germinate and break through the paper. A thinner layer allows for easier growth but still needs to be durable enough to handle without falling apart.
Drying time for seed paper can vary depending on the thickness of the paper, humidity, and temperature. Generally, it takes about 24-48 hours for seed paper to dry completely. You can speed up the process with a hair dryer set on a low, cool setting or by placing the paper in a warm, dry area.
Yes, you can print on seed paper using an inkjet printer, as long as the paper is not too thick. Avoid using a digital, offset, or laser printer, as the heat can damage the seeds. It’s best to print with minimal ink coverage to ensure the seeds’ viability is not affected.
To plant seed paper, place it on top of a pot filled with soil. Cover it lightly with more soil, water it well, and place it in a spot that receives plenty of sunlight. Keep the soil moist but not waterlogged. Germination times vary depending on the type of seeds used.
Seed paper can be stored for future use. To preserve its viability, store it in a cool, dry place away from direct sunlight. Under optimal conditions, seed paper can remain viable for about 1-3 years, depending on the seeds used.
How to Make Seed Paper
Equipment
- Mold & Deckle Inside should measure approximately 6" x 8" to make 1- 6|x8 piece of paper, 1- 4×6 card or 2-3×3 inch cards. These are available at Amazon or easily make your own from dollar store materials, as explained below.
- Bucket or plastic tub needs to be bigger than the mold and deckle
- Blender or Food Processor
Ingredients
- Paper cut into strips (junk mail works great!)
- Sponge
- Packet of seeds (wildflower)
- Absorbent materials such as lintfree towels, paper towels, squeegee or fabric/sheets cut into rectangles
- Mesh Strainer
DIY Mold and Deckle from Dollar Store Frames
- 2 Picture Frames The plastic frames shown are meant for a 5 x 7 picture with a mat, but the inside measurements of the frame are 8.5" x 6.5".
- A mesh covering for one side of the frame such as a splatter screen, window screen or any other fine mesh screening, metal or plastic. this will help strain water from the paper pulp
- Stapler and staples
- Scissors for cutting the screen material
Instructions
- Cut recycled paper into strips and soak in warm water preferably overnight. The longer the paper soaks the smoother the paper will be. The paper should all be the same type and weight
- Add the pre-soaked paper scraps and enough water to cover the paper pieces to a blender or food processor. Blend until smooth, making a fine pulp. The pulp should resemble oatmeal. *Note: Some people avoid using a food blender for this craft, I don't have a problem with it. That said, it's easy to find used blenders at a thrift store or a local used item site.
- The pulp can be put into an airtight container and stored for later use for up to a week
- Fill a bucket or basin tub with water about ¾ full.
- Place your towels or absorbent materials on a flat surface near your bucket in preparation for drying your paper
- Add a handful of paper pulp to the bucket and stir well. One handfull of paper pulp will make one sheet of seed paper.
- Sprinkle a handful of seeds into the water and continue to stir well.
- Using your mold and deckle with the mesh frame on the bottom and the mold pressed firmly on top of the mesh, slide your frames down to the bottom of the well-stirred water. Holding the frames tightly together, level the frames in the water, and then pull up and out. The paper pulp should be even on the mesh frame.
- Remove the top mold from the bottom and set aside.
- Allow as much water as you can to drip back into the bucket
- Flip your paper screen side down onto your absorbent material and blot any excess liquid with a sponge through the screen.
- Once enough liquid is removed you can gently peel your mesh frame away from the paper.
- Leave your paper on your paper towel or pieces of sheet to dry on a flat surface. *Note: the texture of your absorbent material will leave an imprint on your paper and become the same texture.
- Once fully dried you can peel your paper away from the towel or sheet.
- Depending on the thickness of your homemade paper, it could take 1-3 days to dry. You can help speed things up with a hair dryer or bake at a low temp in the oven at 200 degrees for 5-10 min. If you use the oven, watch carefully, you don't want all your hard work to burn.*Note: if your paper curls you can put some heavy books on it after it drys
- To plant paper, soak paper in water and place it in a sealed plastic bag. Place the bag in a well lit area but not in direct sunlight. Once sprouts start to form, transfer to a pot, place in a sunny spot and keep moist until sprouts are well established.
DIY Mold and Deckle from Dollar Store Items
- Remove paper mat and glass from the frames leaving just the outer frame.
- Cut your screen so that it fits over the front of one of the frames.
- Staple the screen to the edges of the frame.
- If using a material that has any give to it, make sure to pull it slack or tight over the frame before stapling.
Notes
- Keep in mind that if you use junk mail or left over paper scraps, the ink on your paper will change the color of the paper a little bit.
- You can use colored paper if you would like colored seed paper.
- Adding some coffee to your paper pulp can add a worn vintage look to your paper.
- Items purchased at the dollar store: Frames, splatter screen, sponge, bucket (dish rack bin)
- Amazon has a mold and deckle paper making kit.
Bookmark this page or pin the following image to refer back to this post on How to Make Seed Paper in the future.
Thanks so much for spending a few minutes of your busy day with me!
To ensure you don’t miss future content, pop your email in the pale green box on the right or click here. I usually send one email weekly, so I won’t inundate your inbox. I’m sensitive to an overflowing email inbox!
We will only use your email address to send you emails, no more than 1-2 weekly. In addition, you will have access to my growing library of knit & crochet patterns and other printables. Check back often as this library will continue to grow. You can unsubscribe anytime by emailing me or clicking on the “unsubscribe” link at the bottom of all emails.
And you can access many of the products I refer to on my Nourish and Nestle Amazon Page. You can access it here.
So, if you’d like to participate in the ‘subscriber benefit’ action, simply subscribe to Nourish and Nestle here or use the form on the right sidebar. It’s slightly towards the top.
I have sent all my subscribers the link to the Subscriber Benefits Library. If you missed it or misplaced it, let me know.
Until next time…