Paint + Fabric = New Life to an Old Bench
I was beyond tickled to have an opportunity to use and review the HomeRight Finish Max Fine Finish Paint Sprayer: however, I was not paid for my opinion and it is entirely my own. I will only share those products that I really find useful and have had a positive experience with. Please see my entire disclosure policy here.
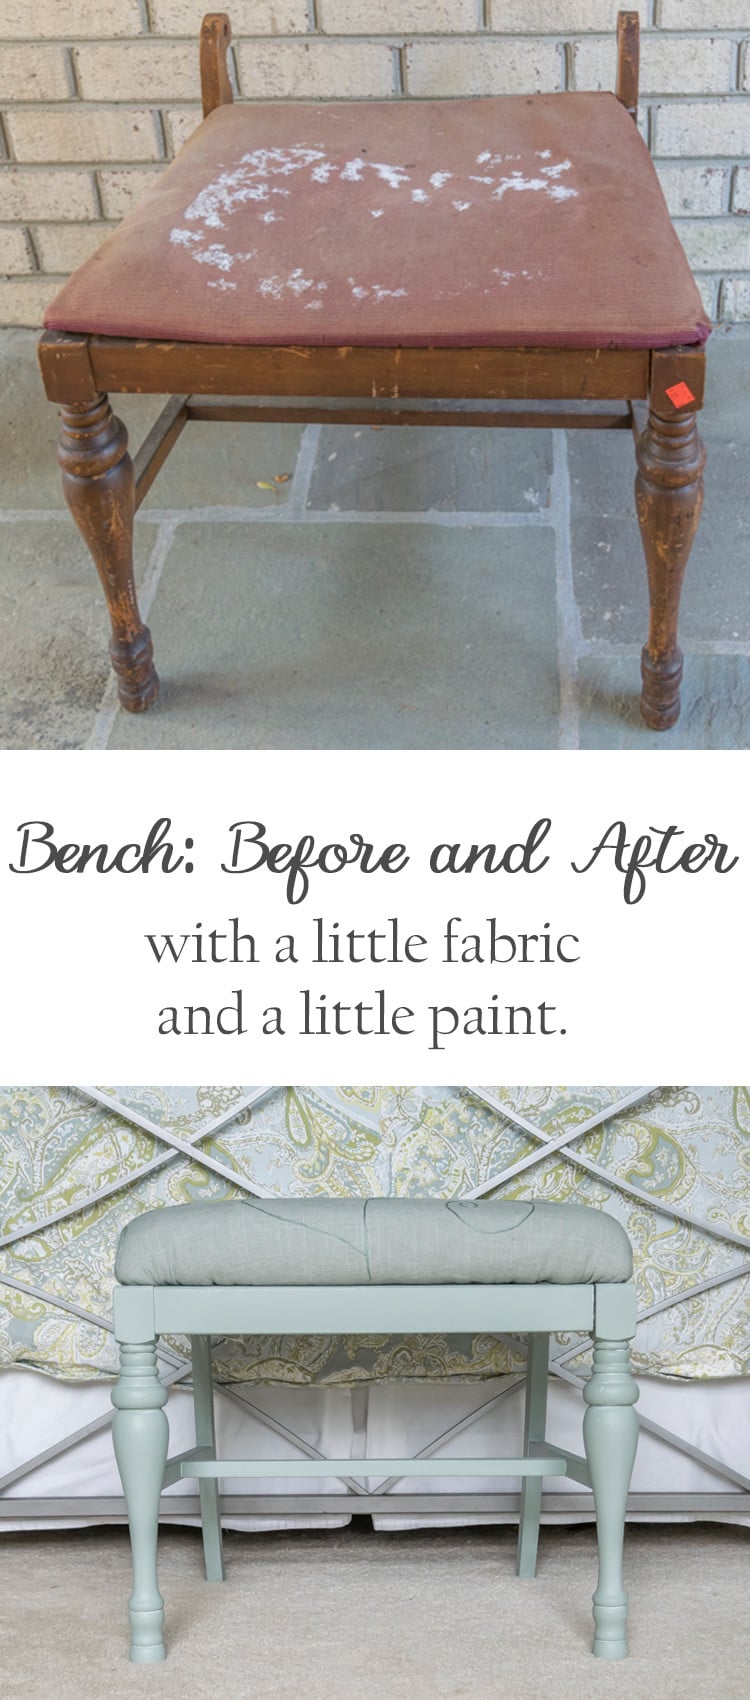
With a Little Paint and a Little Fabric, this Old Bench gets a New Lease on Life!
Back in January, Kate and I went shopping at some local salvage stores. We had a ball perusing all the bric-a-brac that these stores had to offer…it was quality mother/daughter time. This trip yielded an old window frame, which I used to make this Paisley Shell Wall Art, and a very sad old bench whose fate I’ve been pondering for the past 5 months.
I was all over the place when trying to decide what to do with this old bench. I know it needed a new coat of paint and the ‘cushion’ that you see is really nothing more than a piece of thin, cracked wood with some very thin padding. No matter what I ultimately decided, I knew that the base of seat would need to be replaced.
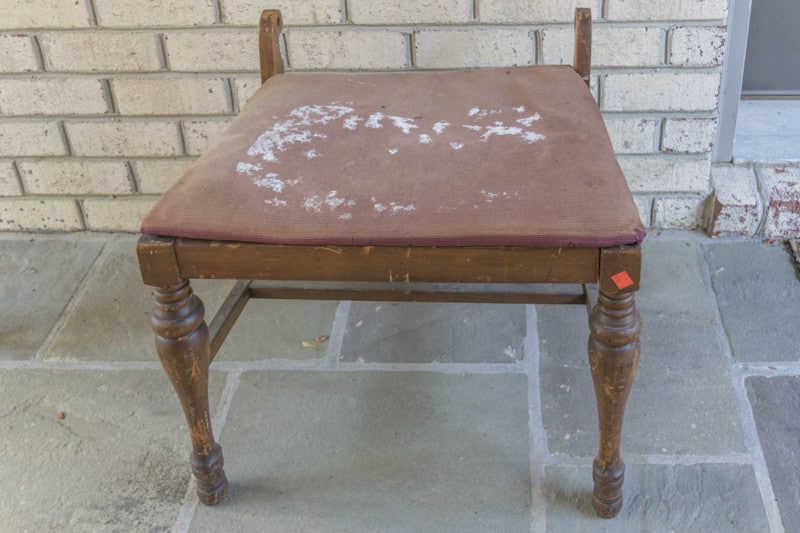
Table of Contents
For a period of time I thought of replacing the cushion with a hard surface and making it a nightstand or side table, but really just didn’t know what to do with it. This little bench has been roaming between my house and my garage since January until I figured out it’s fate.
And aren’t you curious why and how certain ideas pop into your head? One day, an idea popped in my head and it went something like this:
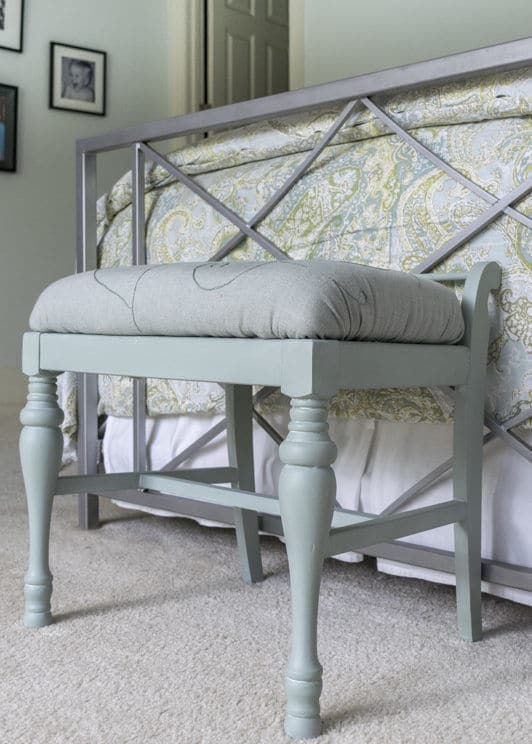
“Hey, you know that ugly little bench that has been floating around your house for almost half of year? Well, why don’t you try to do a crewel vine pattern on linen in a tone on tone color for the cushion and then paint the wood in the same color? If you can pick up one of the colors in your bedding, it really would look lovely at the foot of your bed.” To which I responded to the voice in my head, “You know, you’re right! Have I told you lately just how brilliant you are?“
So I had a plan! The first step was to stop at my favorite fabric store and grab some linen in a green/gray tone that works with my bedding. While there I picked up some 2″ foam and some batting.
On the way home from the fabric store I stopped at a wee little embroidery store and found some silk embroidery thread that was just a shade darker, but in the same color as the linen. Feeling that the creative kismet gods were smiling on me at that moment, I hightailed it Lowe’s and found Valspar Eucalyptus Leaf (in a flat sheen) paint which matched everything perfectly.
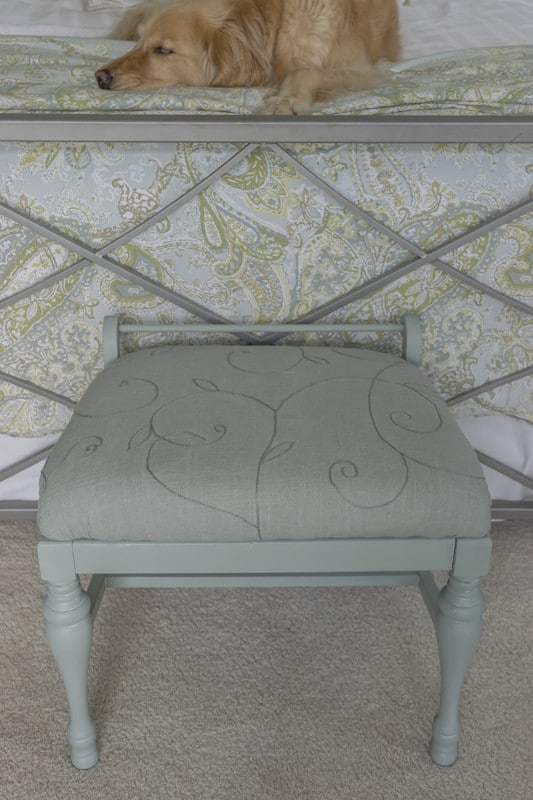
Truly, pondering what to do with this guy for the past 5 months was the hardest part of this whole process. Once I had what I needed for the transformation, everything else was easy.
And, as icing on the cake, I was tickled, or more like giddy, to use my brand-new toy, I mean tool, a HomeRight Finish Max Fine Finish Sprayer!
If you’ve been a reader for any length of time, you know that I will paint just about anything that doesn’t have a heartbeat. My family just shakes their collective heads now when they walk into the garage and discover my latest foray into repainting ‘stuff’.
Heretofore, the tools of my vice have been paint brushes and cans of spray paint. So, when an opportunity arose to add a new tool to my paint arsenal my response was an overwhelming “Ooooh, Goodie! Thank-you, Thank-you, Thank-you! Is it here yet?”
And since this paint sprayer has garnered great reviews, I was truly bursting with anticipation to use it.

HomeRight C800766 Finish Max Fine Finish Sprayer


How I Transformed this Sad Little Bench to a Stunning and Proud Bench with a Little Paint and Little Fabric
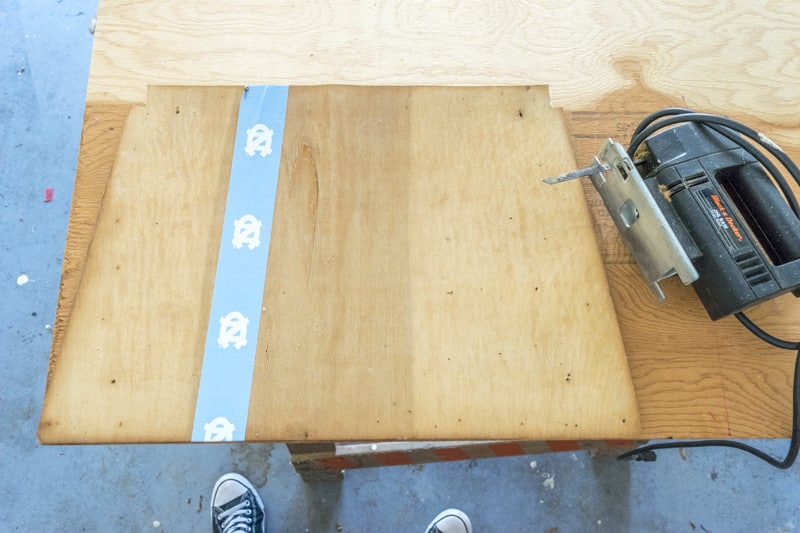
- The first step was to take the bench apart. I knew it was in bad shape, but it wasn’t until I took it apart that I realized that the wood support was cracked in half and I had to duct tape it together just to be able to use it as a pattern for a new base. The existing ‘cushion’ was really nothing more than 1/2″ of compacted fabric.
- I took the ‘cushion’ to the fabric store and they used it to cut the foam for the new cushion.
- Terry used the board that had been duct-taped as a guide for the new base.

- Once the new base was cut, I used my kitchen electric knife to cut the notches in the foam to match those on the back of the base.
- I wrapped the foam and base with batting and secured everything with my trusty staple gun. Here’s a little video showing one way to wrap the batting around the corners to avoid big bunching. After you’ve secured the batting with your staple gun, you can trim away the excess.
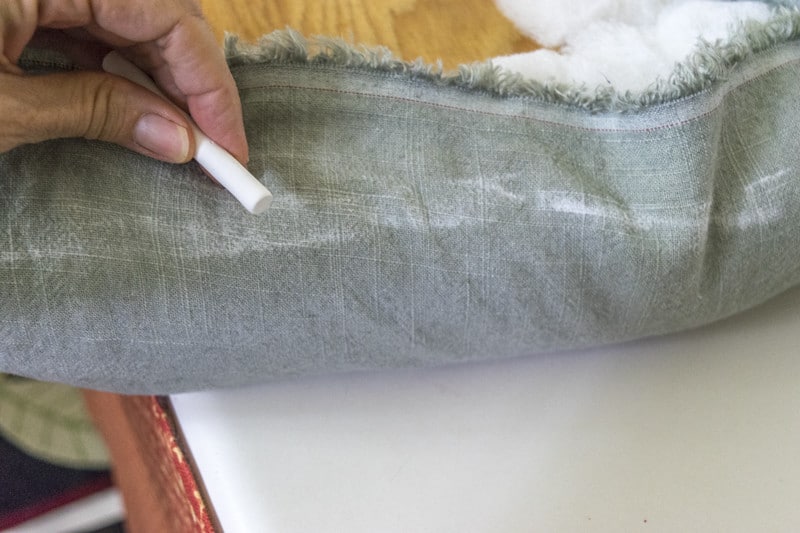
- Since I wanted to embroider a vine pattern on the cushion, I used my trusty white chalk to mark the outline on the fabric showing the bottom of the cushion as I wanted the vine to extend down the sides. This let me know the area I had available to embroider.

- Then I used my chalk again to draw a vine pattern on the linen.
N&N Tip: Basic white chalk is so handy to have in your craft store. I use it frequently to draw patterns that I will be painting or drawing over.
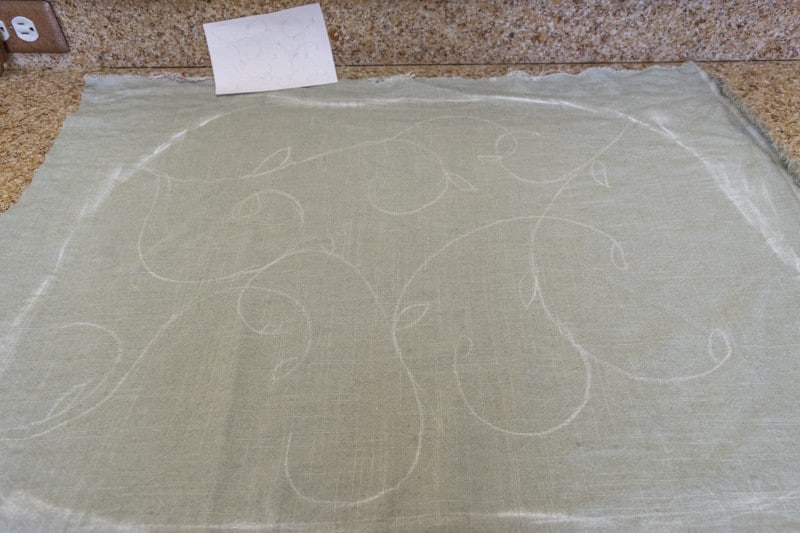
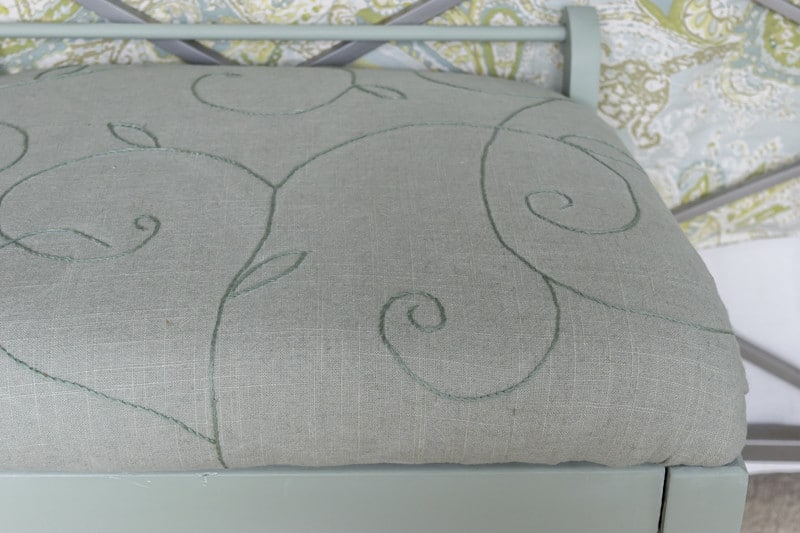
- Then I threaded my needle with three strands of the embroidery floss and began working in a stem stitch. When the chalk would start to rub off, I’d go over it again. Once that was done I set it aside while I worked on the wooden structure of the bench. This little video ditty (its a ditto!) is more for fun than for ‘education’.
- I was chomping at the bit to use my HomeRight sprayer, but before I did I lightly sanded the surface and wiped it down with deglosser. The enclosed instructions are very detailed and assured me that this was going to be a very easy tool to use. I did thin my paint a little bit to get the desired ‘run-out time’ as detailed in the instruction booklet. I set the spray pattern to ‘cone’ and the flow to medium and went to work. This was SO easy.
- I let the bench dry, which took about 30 minutes and then went over it again. The instructions advise to retest the spray pattern if you stop spraying for more than 30 minutes, so I did double check that.
- I waxed the wooden base of my bench with Valspar Clear Satin wax which gave it a lovely soft sheen.
- I ironed the embroidered linen and covered the cushion.
- I used the original screws to attach the cushion to the stool base, stood back and admired the fruits of my labor.
Some of my observations on using the HomeRight Finish Max Fine Finish Sprayer to paint my bench:
- Very detailed instructions and very easy to use. Some of the HomeRight tips that I employed to make my project successful were:
- Kept the sprayer 4-10 inches from the surface
- Made sure my wrist was stiff and not arched, especially at the beginning and end of each stroke.
- I made sure to start and stop the sprayer off of the surface I was spraying, which prevented any dripping.
- The paint dried easily in 1/2 an hour, allowing me to put a second coat on then.
- I am a notoriously messy painter, despite my best efforts. I usually end up with my hands covered in paint and even a few flecks in my hair. Imagine my surprise when I finished all my painting without a drop of paint anywhere on my body!
- Clean up is a breeze. I used the Rapid Clean kit to clean the sprayer, which again was very easy to do. By simply connecting the enclosed hose from my spigot to the Finish Max and turning on the water, I was able to clean the sprayer in a matter of minutes. As much as I really do love to paint, I.DON’T.LIKE.TO.CLEAN.BRUSHES! As such, my brushes are typically in really poor condition and I end up buying new ones frequently. Imagine a world where I can paint and not have to clean the brush…yup…that world arrived in the form of this paint sprayer!
- I used latex paint for this project, but the HomeRight sprayer can be used with oil-based paints as well as stains, primers, sealers, and varnish! We need to repaint our oil- painted doors and see this sprayer making that job much easier, as well as more efficient and effective…i.e. NO DRIPS!
- While spray paint now is available in quite an array of colors, being able to customize your paint AND spray…now that is a very wonderful thing.
So all in all, I am now a convert to the HomeRight Finish Max paint sprayer. Anything that lets me paint without brushstrokes and without drips is a plus in my book. But when you add in the benefit of not wearing my most recent paint color and the ease of clean-up, this paint sprayer is now an indispensable tool in my painting kit.
And I am really am happy with the ‘after’ of my little bench. It does look great at the foot of my bed like that little voice knew it would…looks like I need to listen to it more often.
Thanks again for spending a few minutes of your busy day with me today. Know that you are appreciated and that I welcome each and every comment that comes my way. If you want to make sure you don’t miss future content, pop your email in the beige box up on the right or click here. I usually send out 2-3 emails a week, so I won’t inundate your inbox…believe me, I’m sensitive to an overflowing email inbox!
Printables and knit patterns are available to all of my subscribers in the Subscriber Benefits Library. I will continue to add patterns and printables to this page as we go along.
So, if you’d like to get in on the ‘subscriber benefit’ action, simply subscribe to Nourish and Nestle using the form on the right sidebar. It’s towards the top a bit. I have sent all my subscribers the link to the Subscriber Benefits Library, but if you missed it or misplaced it, drop me a line.
Hugs,





I am loving the color and transformation. Great job on all the videos!! This is a fabulous tutorial 🙂
Wishing you a super fabulous day!!!!
-Jenny
Hi Jenny…thanks…I am loving it too. So funny because I considered putting it at the foot of my bed several times and discounted that idea several times until I stewed on it enough. Guess you just need to wait for that little voice sometimes.
Wishing you a lovely week.
Hugs my friend, Lynn
I love your bench so nice. I am not a diy’er and have no vision when it comes to this sort of thing, but love to see what others can do.
You are so kind! I do love my diy-ing…it’s what I’ve always loved to do and have just started to write about it. Thanks for swinging by and leaving your kind comments.
Hug, Lynn
I agree with Jenny! Your tutorial videos are super! I really love the embroidery you made on the fabric, a very unique and special detail and the little bench turned out so beautifully! Lovely colours!! I wish I’d find these kind of pieces… so much fun!
Hey Katrin, thanks for swinging by.I’m so glad that I thought of the embroidery…I think it really makes a difference. And the colors…just kismet! I really am quite tickled with it.
Hugs to you my friend and enjoy your week.
Lynn
Beautiful transformation Lynn.The color is beautiful and the whole thing looks so nice and fresh. I was particularly impressed with the fact that you embroidered the pattern on the fabric. I know that takes a lot of time and it is work! Kudos to you for having the patience to do it. It certainly was well worth it because the result is fantastic. Much better than just a piece of fabric with a design on it.
Hi Mary, I am so glad that I thought of that embroidery. I was inspired by a visit to Thomas Jefferson’s Monticello home and saw a chair with a beautiful crewel design on it. Once I saw that, the whole thing came together in my mind. So, I really should thank Thomas Jefferson’s sister for the inspiration as it was her bedroom!
Hope your week is fantastic.
Many hugs, Lynn
This turned out so beautifully, and I have to agree with the others about the embroidery. So impressive!
Hi Jessica, thanks and thanks! The embroidery is my favorite part of it as well, but thrilled that I could find the color in the fabric, thread and paint…KISMET!
Wishing you and your family a wonderful week.
Hugs, Lynn
Absolutely beautiful! You really did an amazing job with the embroidery! I don’t have the patience anymore. 🙂 The colors are perfect with your bedding and the tutorials are very clear and easy to follow.
I’m a new follower and look forward to seeing more of your creativity!
Pat
Hi Pat and first of all, so glad to have you as a new follower. And second, your comments are much appreciated! Thank you!
That embroidery was really a very easy thing to do…I think I did it all in one evening of TV watching! And I ‘m so glad that the tutorials are easy to follow. I know it makes sense to me, but then I know what I’m trying to say. I’m relieved to know that they make sense to someone else.
Wishing you a lovely day.
Hugs, Lynn
I didn’t even realize that was hand embroidery. I thought it was manufactured. Looks great!
Hi Brianna…Thanks for swinging by and leaving your kind comments. The embroidery was really the easiest thing to do but think it really makes a difference.
Thanks again and wishing you a wonderful weekend.
Hugs, Lynn
I love the transformation of the bench Lynn, it turned out beautiful! You did a great job on it and I love the color. Your video turned out great! You made it look so easy. I’m not very good at spray painting, I get it on to heavy and it runs. I wonder if I would be any better with a spray gun. Thanks for sharing your beautiful bench, your pieces always come out beautiful!
Linda…with all the painting you do, you really need to try the paint sprayer…it was so easy and I didn’t get any runs. Just needed to follow the directions on where to stop and start. I am definitely looking forward to using it again…and soon.
Thanks for swinging by today and leaving your kind comments.
Hugs for a great week,
Lynn
At first glance you can’t even tell it’s the same bench! It looks amazing, Lynn! That inner voice of yours truly is brilliant! 🙂 The bench looks fantastic by your bed and I’m so impressed with the embroidery. Any and all sewing always has me running the other way. But, if I see a bench like this, I might just try my hand at it. Good thing it’s yard sale season here!
Hey there Gina…the embroidery was truly the easiest part…actually it was all easy, but i could do the embroidery planted in front of the TV one night, so that’s a win in my book! Re-doing this little bench really makes me want to do more, so I’m keeping my eyes open for little pieces in need of love as well.
Wishing you a lovely week.
Hugs, Lynn
I get those amazing ideas that pop into my head, too, with no rhyme or reason…LOL. I love the color of the paint and the fabric is beautiful. You did a fantastic job on the tutorial. Awesome, Lynn! Enjoy your weekend. 🙂
Thanks Carol…always relieved to know that the tutorials make sense to someone other than me! You just never know. And I guess it’s the creatives in us that generate the voices…little scary, huh?
Anyway, thanks for coming by to visit and comment. You know it is much appreciated.
Hugs, Lynn
I love this! Beautiful color and fabric choices. You make it looks so easy.
Hi Ann and thanks for coming by to visit and leaving your kind comment. I do love the color…it’s so calming. And it was sheer kismet that I was able to find the fabric, embroidery floss and paint all in that color…truly meant to be!
Wishing you a lovely week.
Hugs, Lynn
Hi — visiting from Silver Pennies! Your bench is just the kind of project I love! I especially like that you created your own fabric, too. That looks like what my mother called a dresser stool?
Hi Ellen…thanks so much for your kind comments! And thanks for the suggestion that it might be a dresser stool! I’ve been calling it a bench, but it’s a little short for a bench, yet too big for a stool. I’m thrilled to realize that it probably is a dresser stool! And the embroidery on the fabric is one of my favorite elements of the ‘dresser stool’. And it was really easy to do.
Really appreciate you coming by today.
Hugs, Lynn
Lynn, your bench is just so beautiful. I’m so impressed with your sewing skills and all the videos. So appreciate your sharing those. I have been wanting one of the HomeRight paint sprayers since I saw it at Haven last year. Maybe I can win one this year! Thank you for sharing at Your Inspired Design Link Party.
Hi Carol, thanks for your kind comments and I’m really quite taken with my HomeRight sprayer..it’s the bees knees. Anxious to put it to work on other things around my home. And thrilled that you’ll be at Haven this year. I will be attending as a first-timer and really excited for it. I look forward to meeting you in person.
Have a great week.
Hugs, LYnn
really stunning. A job well done.
Tanks Kellie…I’m loving it!
I love how your little bench turned out! Great job on this!
Hi Holly for thanks for swinging by. I do love how the bench turned out and it looks great at the foot of my bed…except for when my hubby puts his shirts and pants on it! UGH. Oh well…got to chose my battles.
Wishing you a lovely weekend.
Hugs, Lynn