
Knit in the Round with Double Pointed Needles
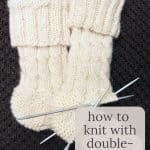

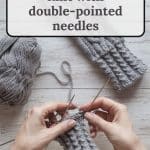
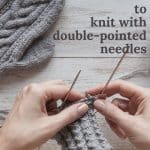

If you want to knit socks, mittens, baby hats, and other small-circumference knitting patterns, you will want to know how to knit in the round with double pointed needles. This post contains information about double pointed knitting needles and how to knit in the round with them. I also show an easy way to join your stitches without a gap.
You’ve mastered knitting with straight needles to make blankets, scarves, dishcloths, washcloths, and seamed sweaters. You may have even tackled circular needles to knit cowls and the Magic Loop, enabling you to knit some hats and maybe even Christmas Stockings.
So, what’s next? Meet the double pointed needles (or DPNs for the sake of brevity).
Even if you haven’t knit in the round with DPNs, you may have used them to knit an applied i-cord on the edge of your knitted (or crochet work). An i-cord is a great way to put a neat border on your work. If you are intrigued and want to learn about knitting an applied i-cord, pop over here.

Table of Contents
Working with 4-5 needles that have points on both ends seems intimidating to many. And I’d be lying if I didn’t say that there is a bit of digital dexterity involved, especially for the first round. But once you get past the first round, I think you’ll appreciate DPNs. They really expand the variety of knitting projects you can tackle.
an introduction to double pointed needles
Some of these links may be Amazon affiliate links and I may earn a small commission from the sale of these products to help defray the costs of operating this site, but the price you are charged is not affected. You can see my full disclosure policy here.
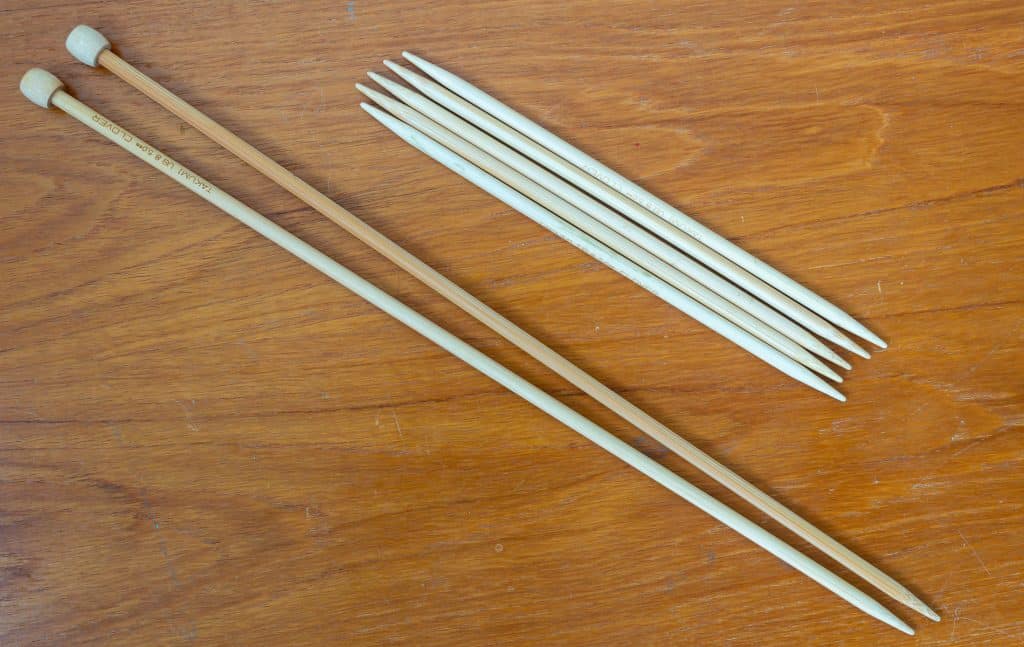
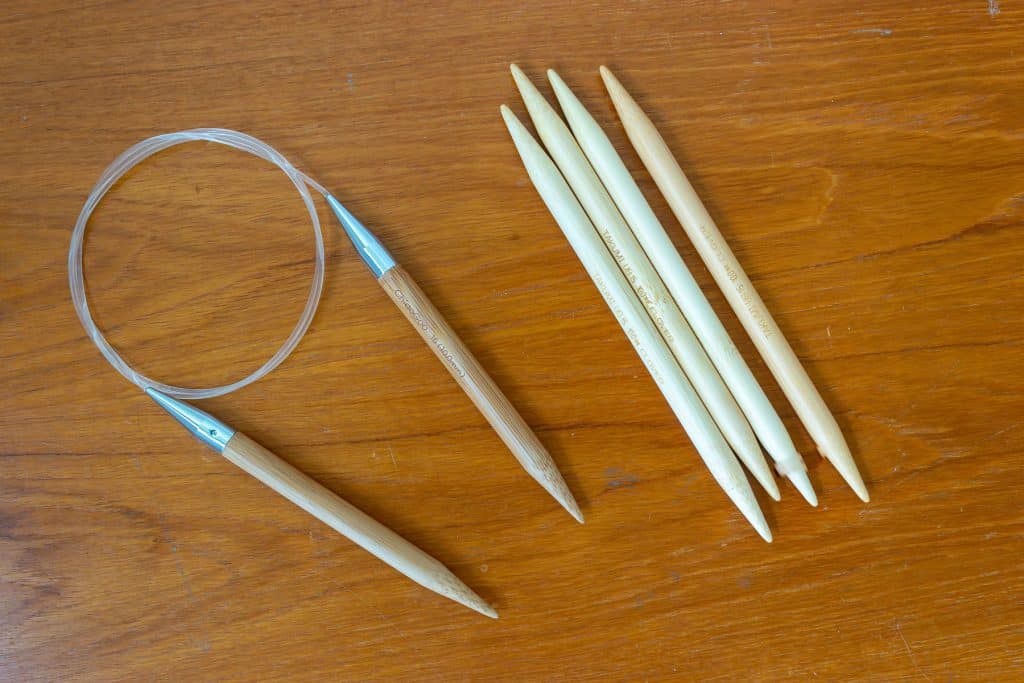
As the name implies, double pointed needles are knitting needles with points on both ends. Contrast them with single-pointed/straight needles with a point at one end and a ‘stopper’ at the other.
DPNs are knitting needles used to knit in the round. They are used instead of circular needles when the project has a small circumference. Typical DPn projects are baby hats, the top of adult hats, socks, gloves, and especially the fingers of gloves. DPNs just offer more flexibility than is available with circular needles when you are knitting smaller tubes.
Technically, you can also get that flexibility by using the Magic Loop, I think it is a personal preference. Really, whatever works best for you.
DPNs come in sets of four or five needles, and their sizes correspond to traditional knitting needles sizes. They do vary in length; for small projects like gloves, mittens, and socks, you will most likely use a 6″ length DPN. For larger projects, like hats and cowls, consider 8″ long DPNs.
The rule of thumb is to use the smallest needle length you are comfortable with; the longer the DPNs, the more unwieldy they are. But, on the flip side, it is easier for your stitches to slide off of shorter DPNs. Most of my DPNs are 6″ long.
best dpns for beginners
In terms of material, if you are new to using DPNs, I strongly recommend starting with bamboo or wood double pointed needles. Because there is no ‘stopper’ at the end of the needles, there is a greater chance of your stitches slipping off. Wood or bamboo has more ‘grip’ than metal and makes that a little less likely. I use both Chiao Goo and Clover bamboo needles.
Once you are comfortable with working with DPNs, you may want to consider some of the metal and/or carbon DPNs available. If I spent more time knitting socks and other items with fingering or sock-weight fibers, I’d probably invest in a really good set of DPNs like these carbon ones.
how to knit with double pointed needles
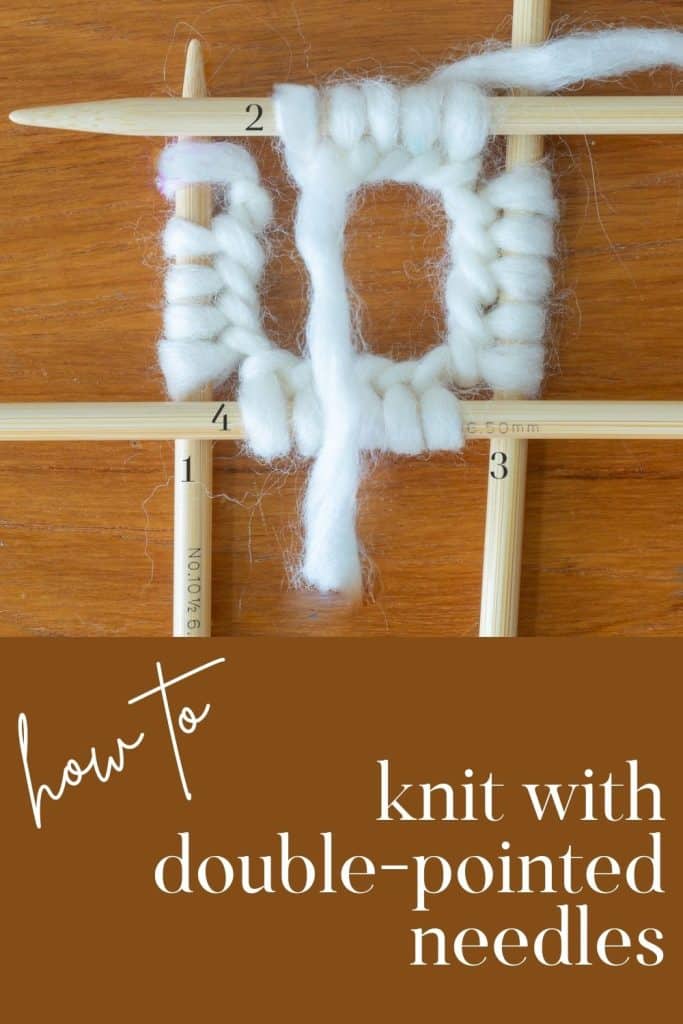
To help with explaining the process of knitting with double pointed needles, I’ve numbered the needles I am using. In this case, I will use five DPNs; the first needle will be needle 1.
Cast on the same way you typically do; it doesn’t matter which method you choose to cast on your stitches; I’m partial to the long tail cast on. The needle you use for cast-on is needle 1.
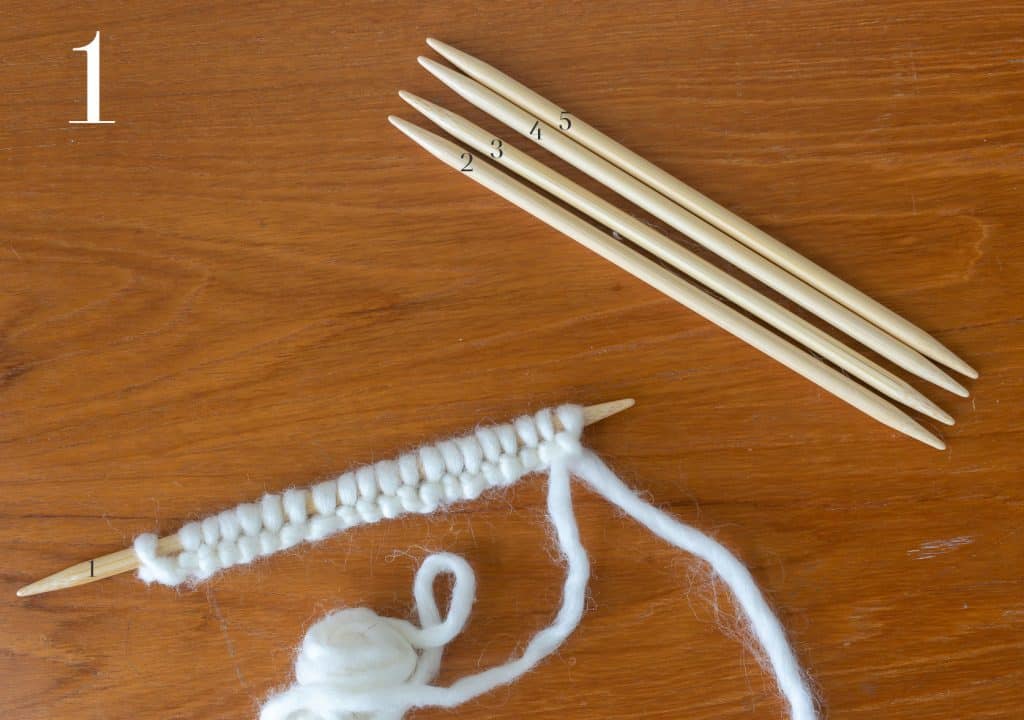
Once you’ve cast on, you must split your stitches between your double pointed needles. If you are using four DPNs, split your stitches between three, to begin with. If you use five DPNs, split your initial cast-on stitches between four DPNs. It makes it easier to split them as equally as possible between the DPNs, but don’t fret if one has a few more than another.
This example is using five DPNS. So, split twenty stitches between four needles, five stitches on each needle.
With a second DPN, slide the first five stitches, as if to purl, off of needle 1 and onto needle 2.

Ensure the stitches are snug on needle 2 and let it drop. Then slide the next five stitches off of needle 1 and onto needle 3.
Then, ensure the stitches on needles 2 and 3 are secure, and use needle 4 to pick up the next group of five stitches.
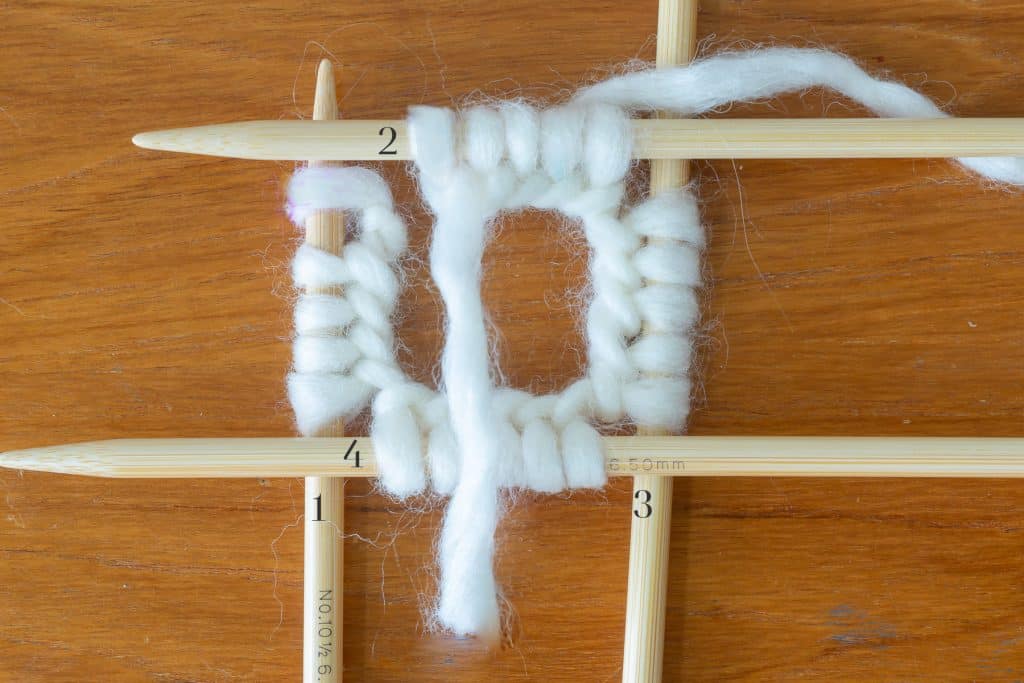
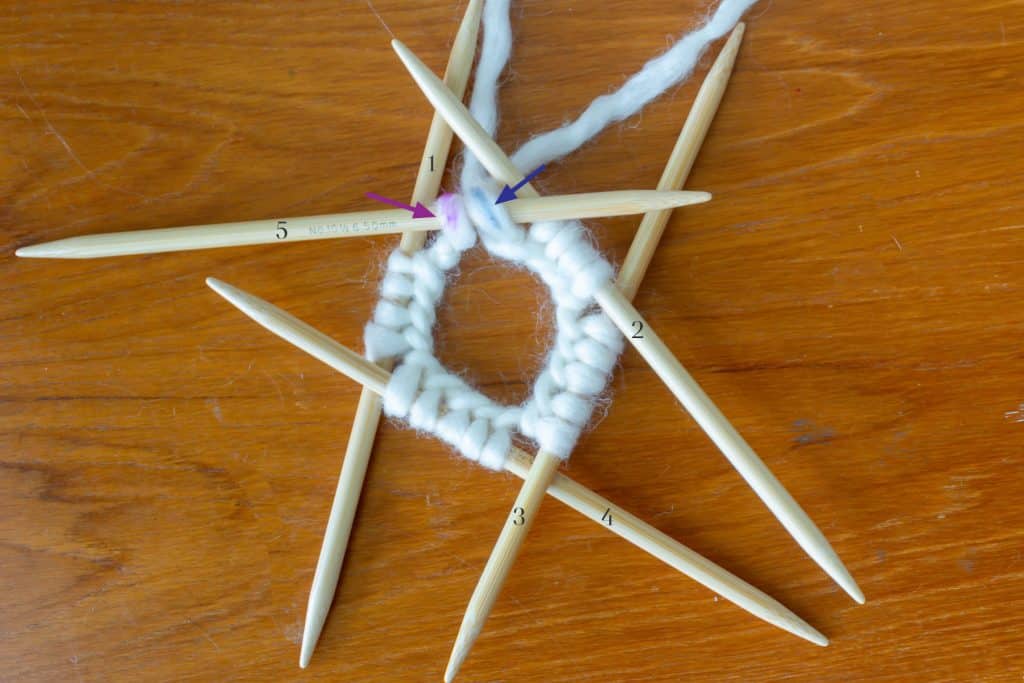
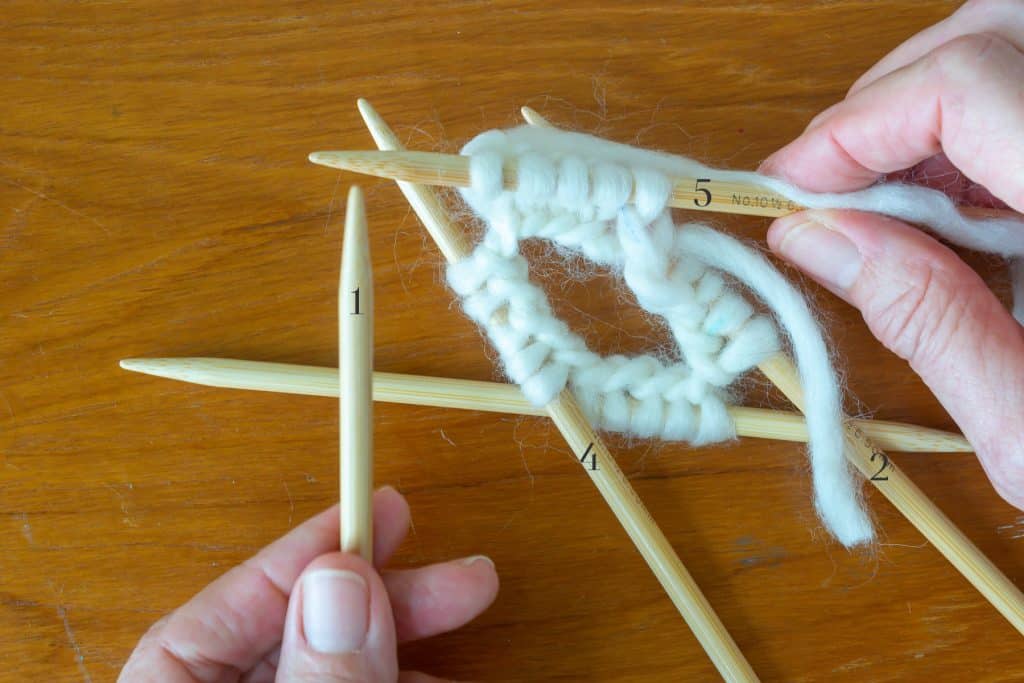
Straighten up your double pointed needles and form them in a square (if four needles) or a triangle (if three needles). Check that none of the needles are twisted. Further, check that the cast-on ‘braid’ runs around the inside of your square.
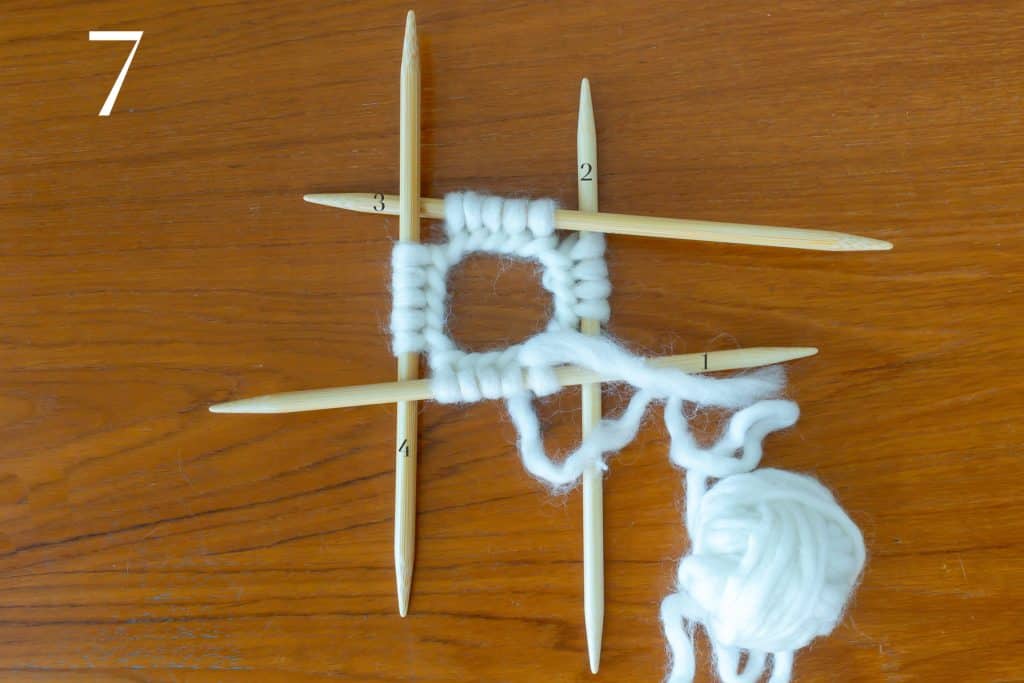
Set up the needles such that the needle with the working yarn and the tail, in this case, needle 2, is to the right of the first stitches to work, which are on needle 1.
joining knitting in the round with double pointed needles
BEFORE YOU DO ANYTHING ELSE, double-check that your stitches are not twisted. Laying them on the table and doing a quick check is the best way to do that. I also find that attaching that first stitch while keeping the work flat on the table (as much as possible) is the best way to keep it from twisting. You won’t have to worry as much about twisting once the two sides are attached.
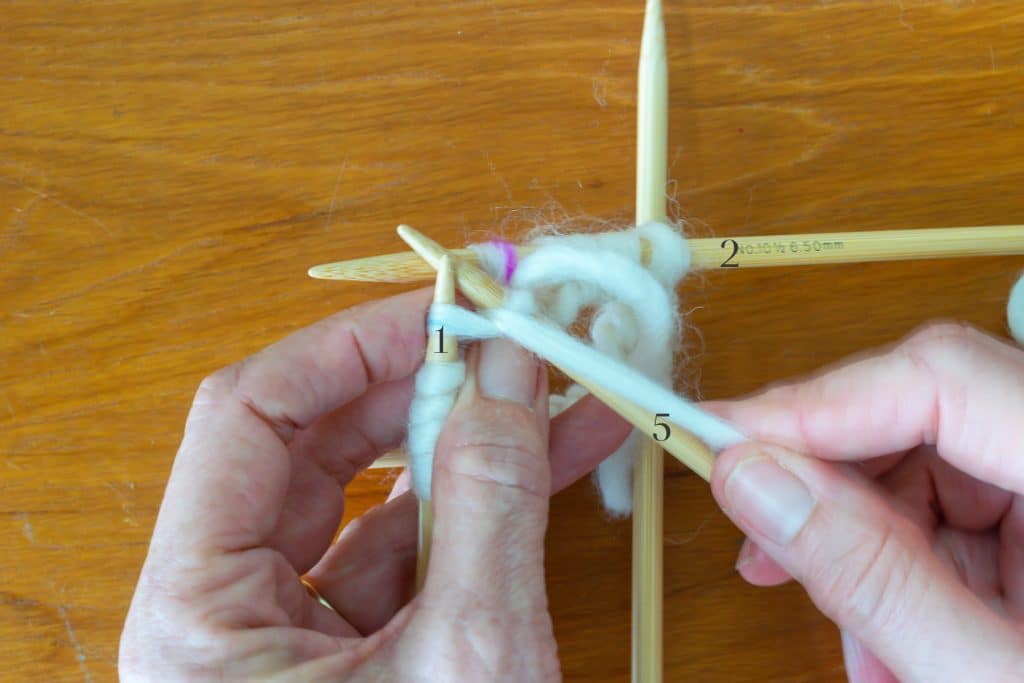
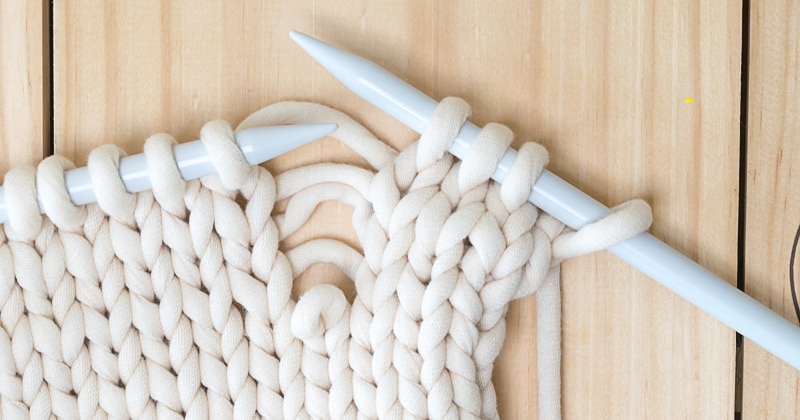
Notice the blue and purple marks I made on the yarn in the image below. The blue mark is the first stitch picked up with your needle 2, which is also the last stitch cast on. The purple mark is the very first stitch that was cast on and is on needle 1.
You will need to join these two stitches to knit in the round.
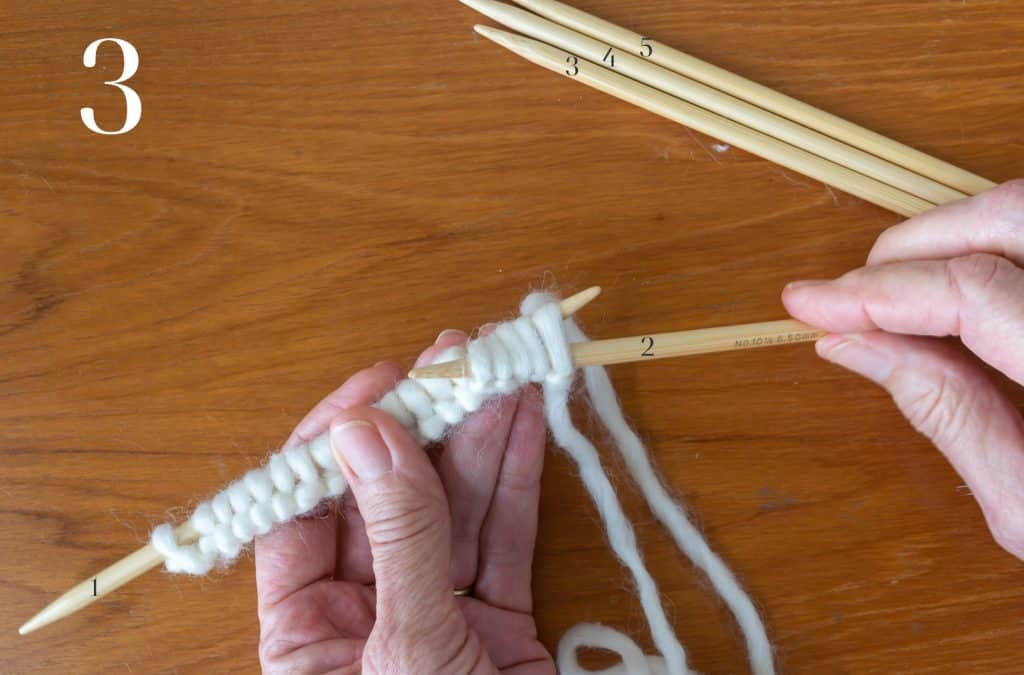
You could easily just use needle 5 to go into the purple stitch on needle 1, use your working yarn on needle 2 and start knitting. This would join the two sides. There’s nothing wrong with this method; you just want to be sure to snug up your yarn to avoid a gap on that first connection.
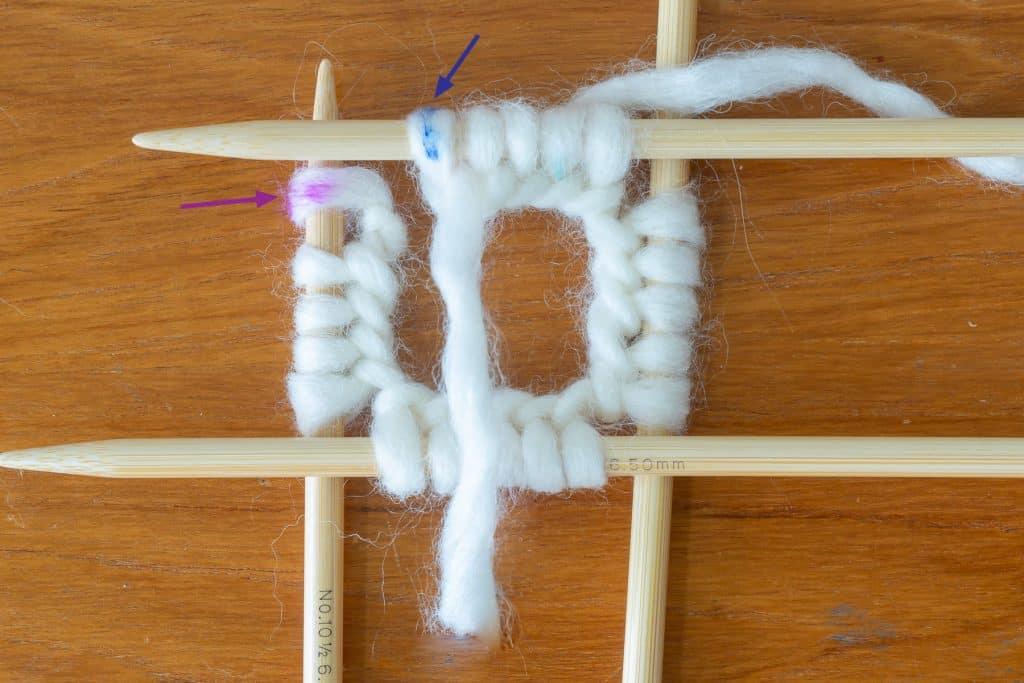
However, I will show you another method of joining the two sides. This option really minimizes any gap between the two sides and is my preferred method of joining.
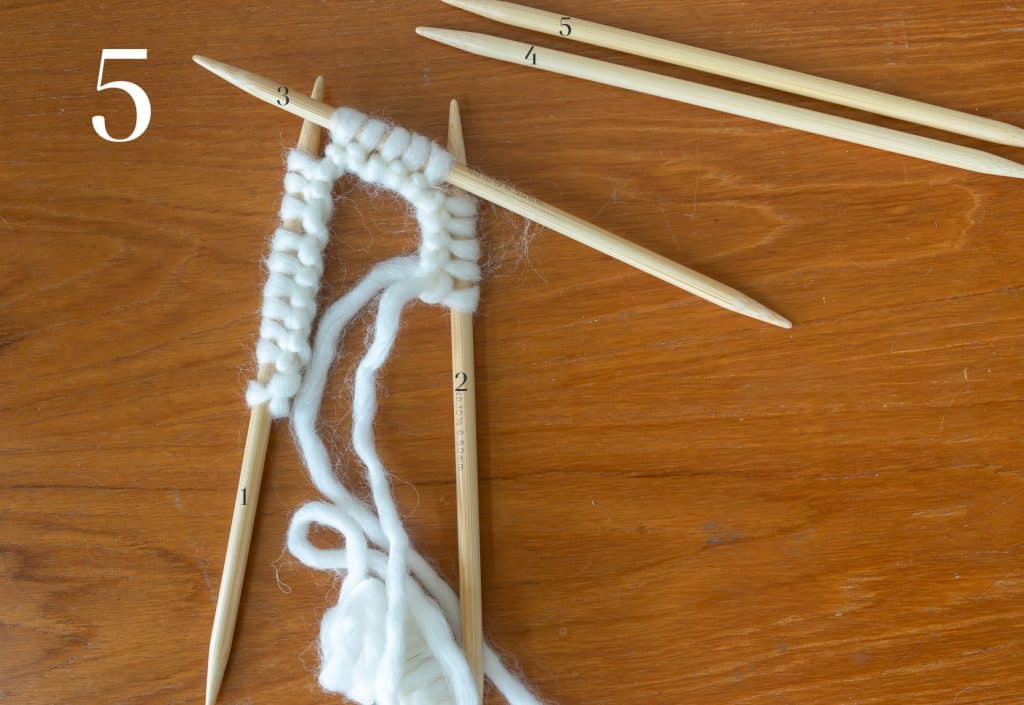
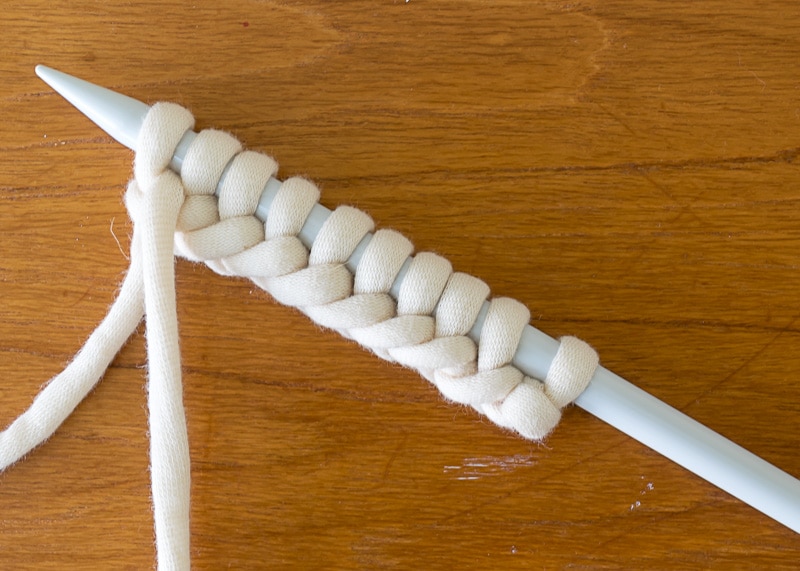
Slide the purple and blue stitch onto needle 5.
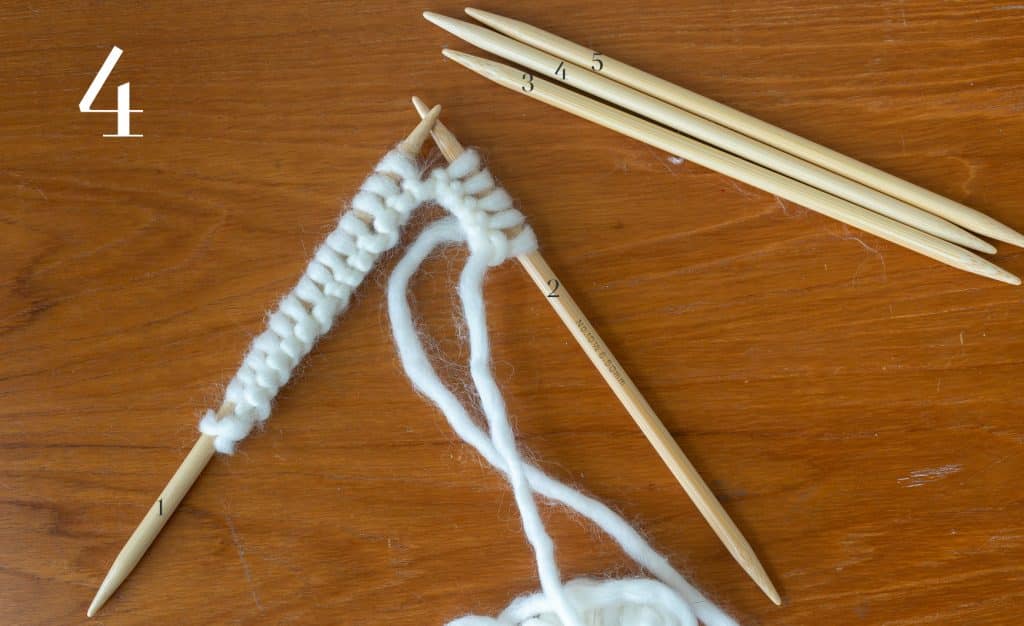
Twist needle 5 once so that the blue and purple stitches have traded places.
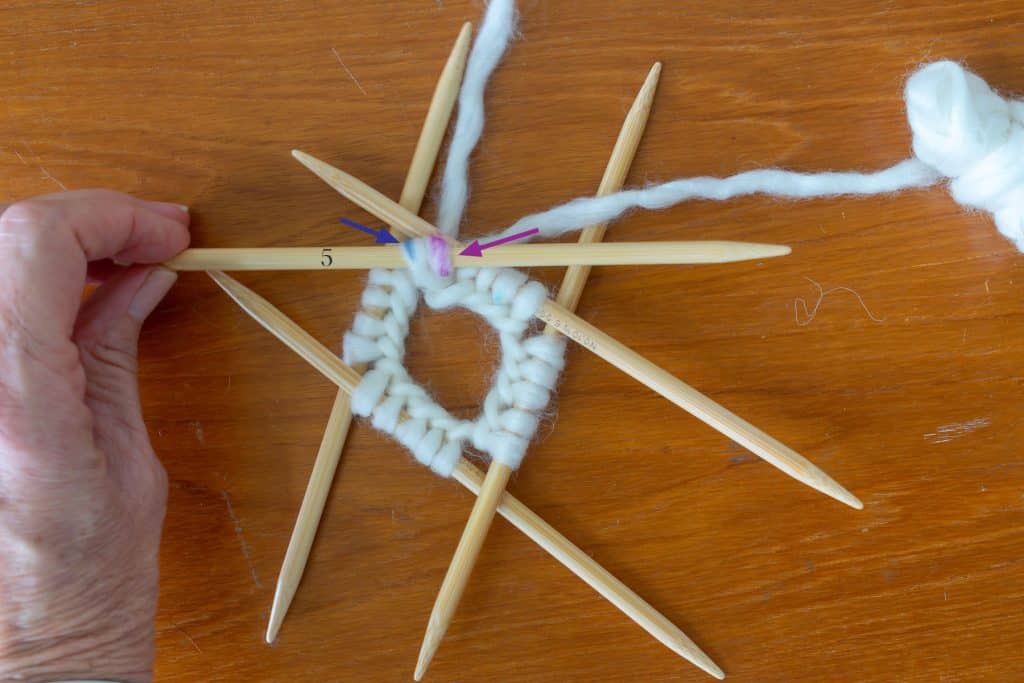
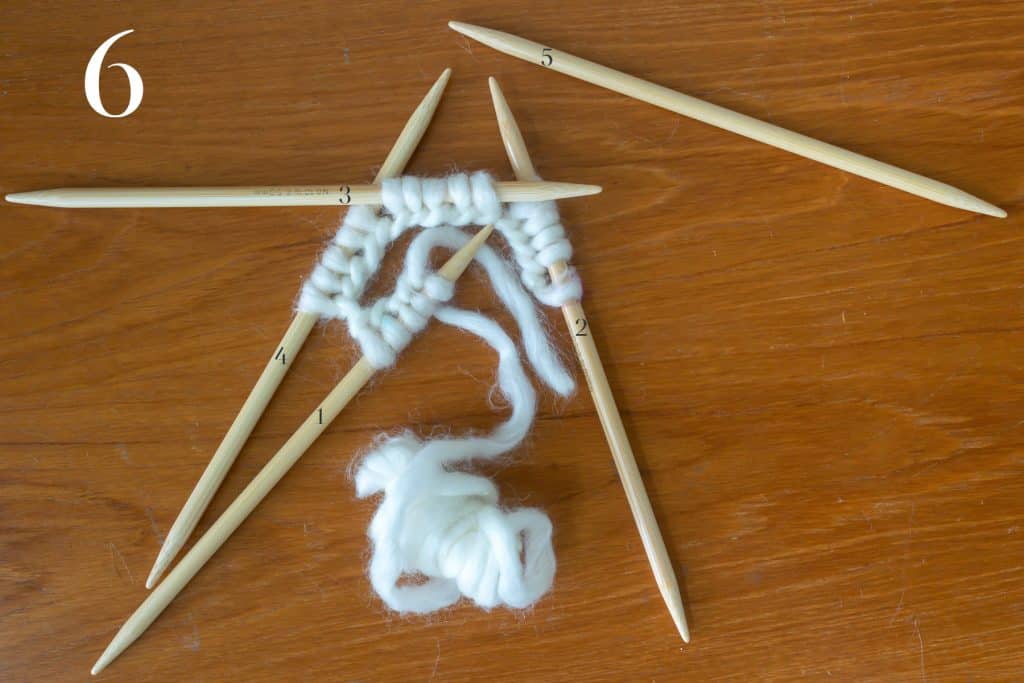
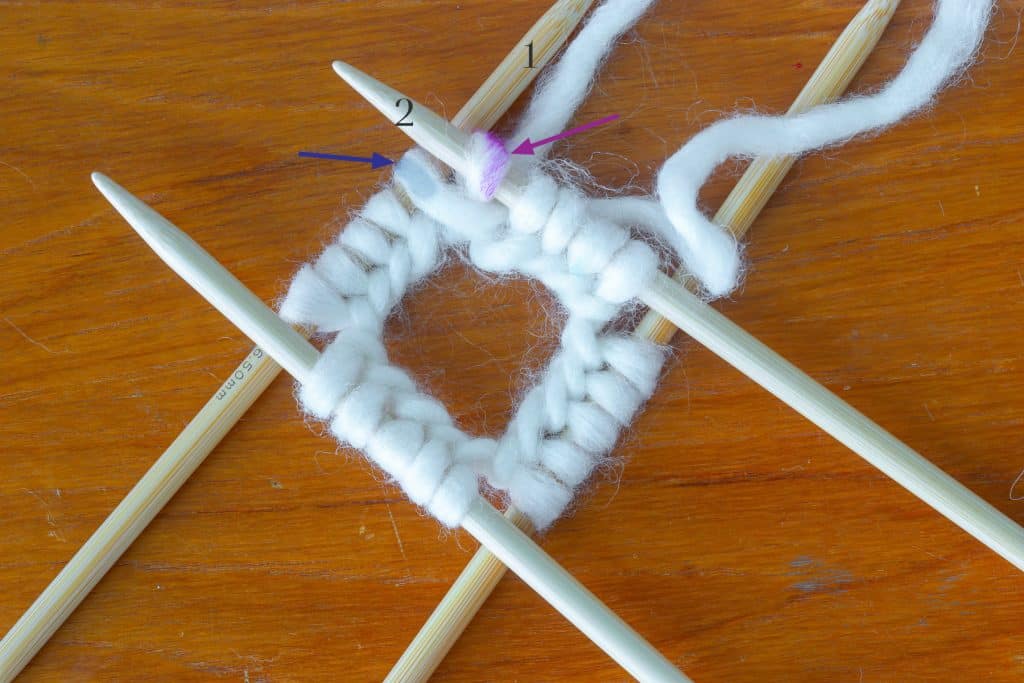
Then slide the blue stitch onto needle 1 and the purple stitch onto needle 2.
knitting in the round
Now that you have the two sides connected, it is just a matter of knitting as you normally would. Needle 5 goes into the first stitch on needle 1 and uses the working yarn that is connected to needle 2.
Sounds so easy, right? And it is, but there is no way to avoid what seems like chaos with four to five needles seemingly with their own agendas. All the while, you try to knit and not let any slip off any of the 4-5 needles. No two ways around it, that first row can feel very wonky and require a bit of manual dexterity, even after you’ve become a double pointed needle pro. But I promise it gets easier.
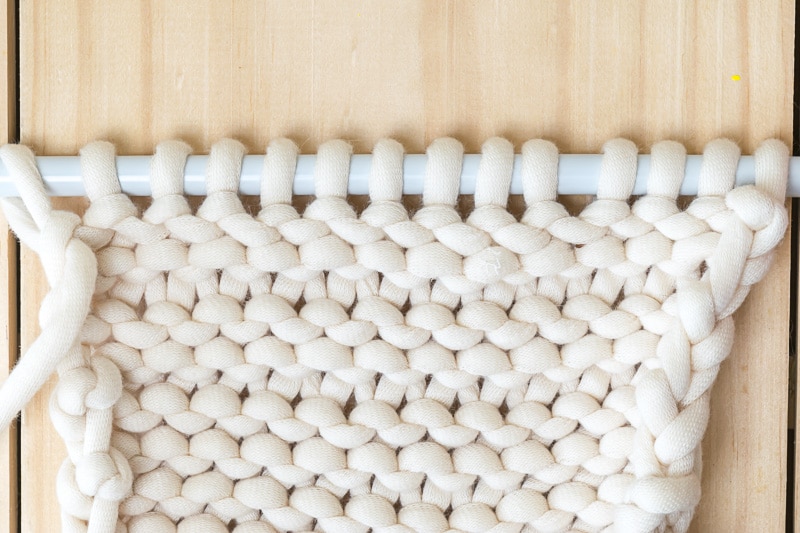
Continue to knit all the stitches off of needle 1 and onto needle 5. Keep your working needle (#5) on top of all your other needles.
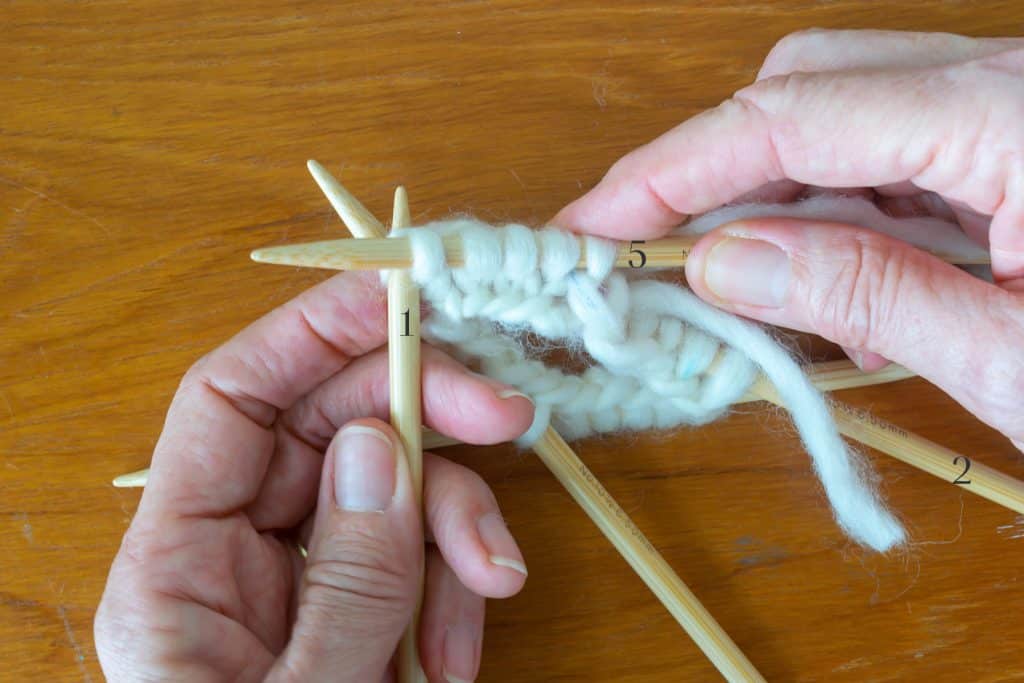
After you’ve knit all the stitches off of needle 1, in this case, five stitches, needle 1 will be empty.
Move needle 1 to your right hand (it will now become the next working needle) and begin knitting the stitches off of needle 4 onto needle 1. Continue to work in the round. You will ’empty’ a needle after each ‘segment.’ Then you will move it to your right hand to become the next working needle.
tips for dpn success
- Because there is no ‘stopper’ at the end of the needles, your work can slip off. Be mindful of that. Check often and move your work into the middle of the needles from time to time.
- This illustration uses five DPNs, the process would be the same if you use four needles. Just remember to split your cast-on stitches between three needles, saving the fourth for your working needle.
- Check that your stitches are not twisted before you join.
- Feel free to use a stitch marker where you join the stitches. I’ve always used the cast on tail to let me know.
- As you move from one needle to the next, it is easy for your tension to loosen between the two stitches. This creates a column of looser stitches that is called ‘laddering.’ Here are two ways to avoid laddering
- Keep your tension consistent and consciously tighten the first two stitches worked on a new needle.
- Move your stitches around from time to time so that you don’t always connect needles on the same column. So, for instance, if you have five stitches on each of four needles (a total of twenty stitches), consider knitting five off of one needle and then the first one off of the next needle for a total of six on one needle for a bit.
- Storing your work when using DPNs is just a little different. With straight needles, it’s a matter of putting a stopper at the end of two points. If using five DPNs, you are looking at ten stoppers. Use a stopper if you are new to DPNs or if your project is stuffed on your needles.

- Hold your needles such that your working needle is on top of all the other needles. Also, make sure your yarn isn’t tangled up with the other needles.
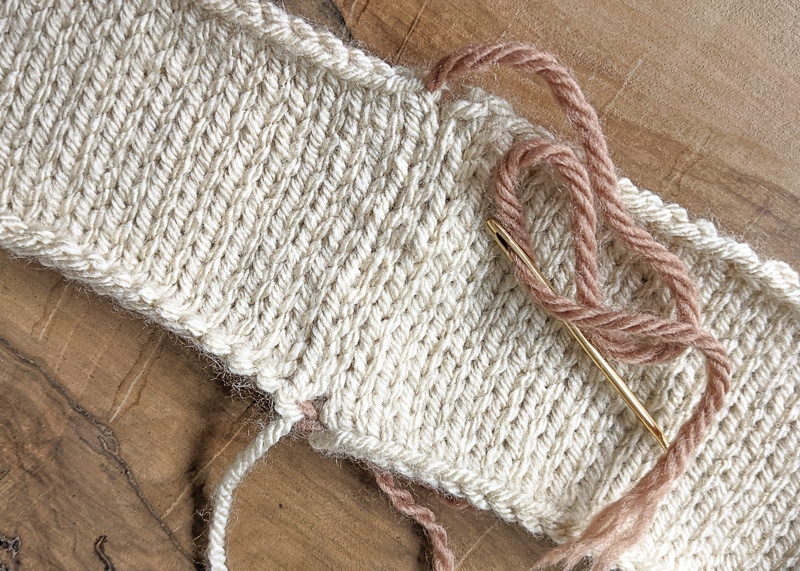
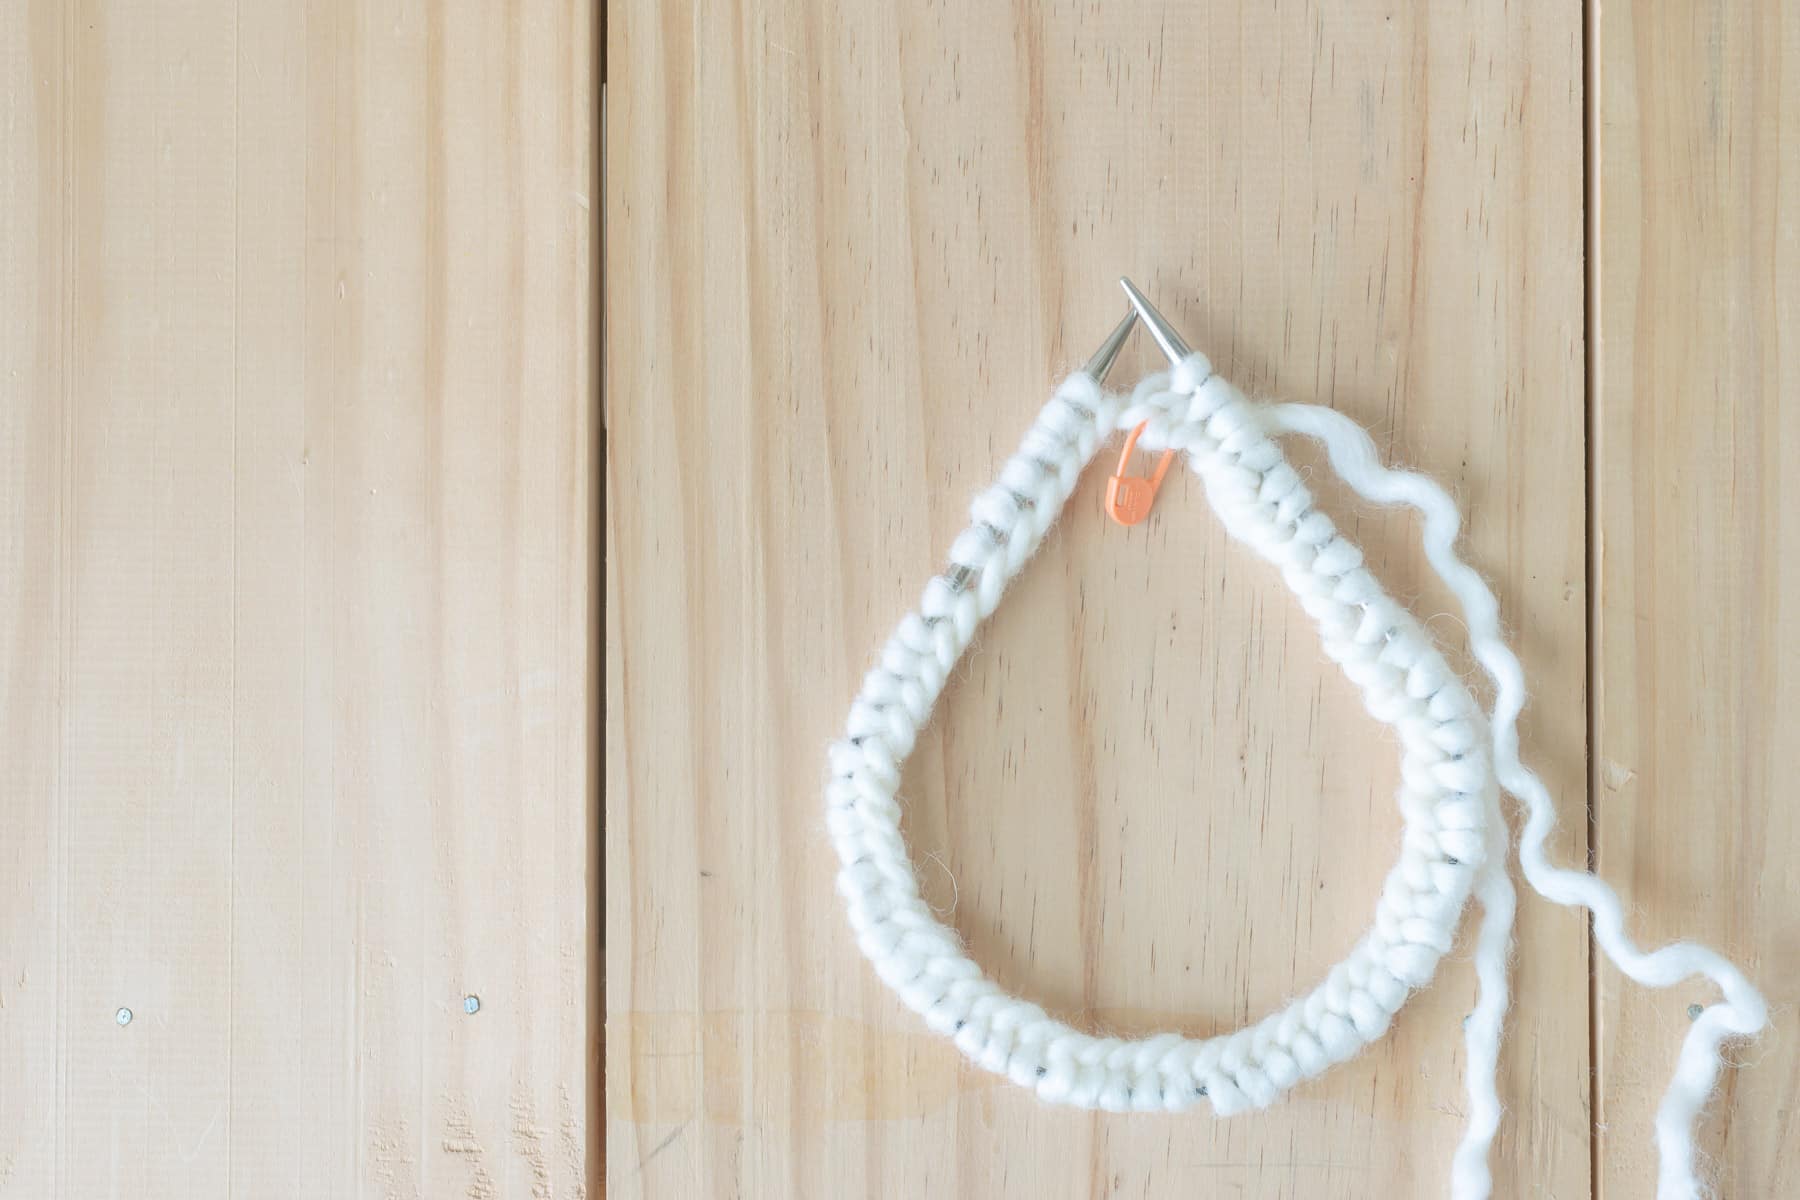
Bookmark this page or pin the following image. This way, you can easily refer back to this post showing how to knit in the round with double pointed needles.
Thanks so much for spending a few minutes of your busy day with me!
To ensure you don’t miss future content, pop your email in the pale green box on the right or click here. I usually send one email weekly, so I won’t inundate your inbox. I’m sensitive to an overflowing email inbox!
We will only use your email address to send you emails, no more than 1-2 weekly. In addition, you will have access to my growing library of knit & crochet patterns and other printables. Check back often as this library will continue to grow. You can unsubscribe anytime by emailing me or clicking on the “unsubscribe” link at the bottom of all emails.
And you can access many of the products I refer to on my Nourish and Nestle Amazon Page. You can access it here.
So, if you’d like to participate in the ‘subscriber benefit’ action, simply subscribe to Nourish and Nestle here or use the form on the right sidebar. It’s slightly towards the top.
I have sent all my subscribers the link to the Subscriber Benefits Library. If you missed it or misplaced it, let me know.
Until next time…


When we meet again, I need you to teach me!
Gladly!!
You are a genius Lynn; I wonder if there is anything you can’t do? Thanks for sharing your detailed tutorial. May I add a comment? If the knitters have problems keeping the stitches on the needles, place a rubber band in a figure 8 on each of the two non-working needles. Free and easy instead of moving stoppers.
That’s a brilliant tips Tove! Thanks so much for sharing it. I’ll add it to the post.
Hugs, Lynn