
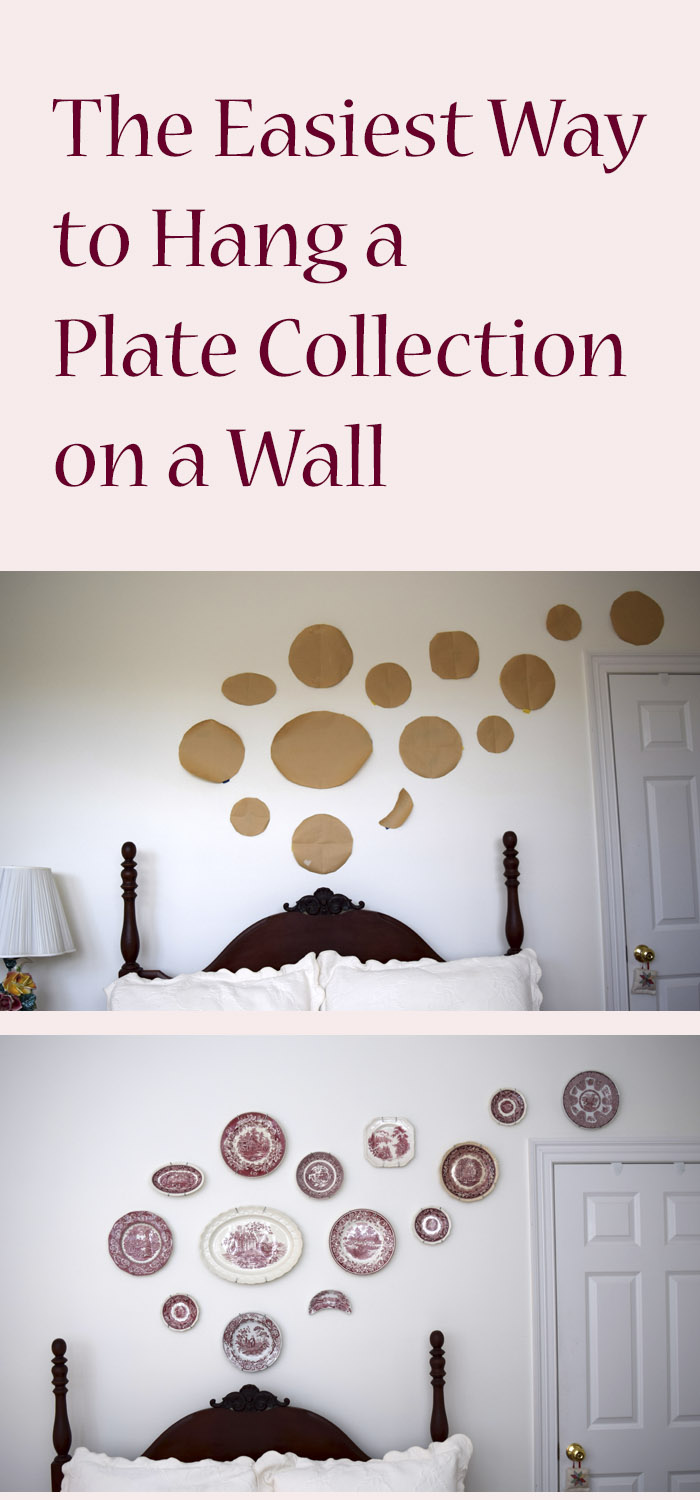
The Easiest Way to Hang a Plate Collection
I’m popping in to show you how to use a plate collection in your home decor and the easiest way I found to hang a plate collection.
With many of our friends and family located out of town, having a welcoming room for our house guests is a happy necessity. But I’m a wee bit embarrassed to admit that our guest room has been somewhat neglected for the past year.
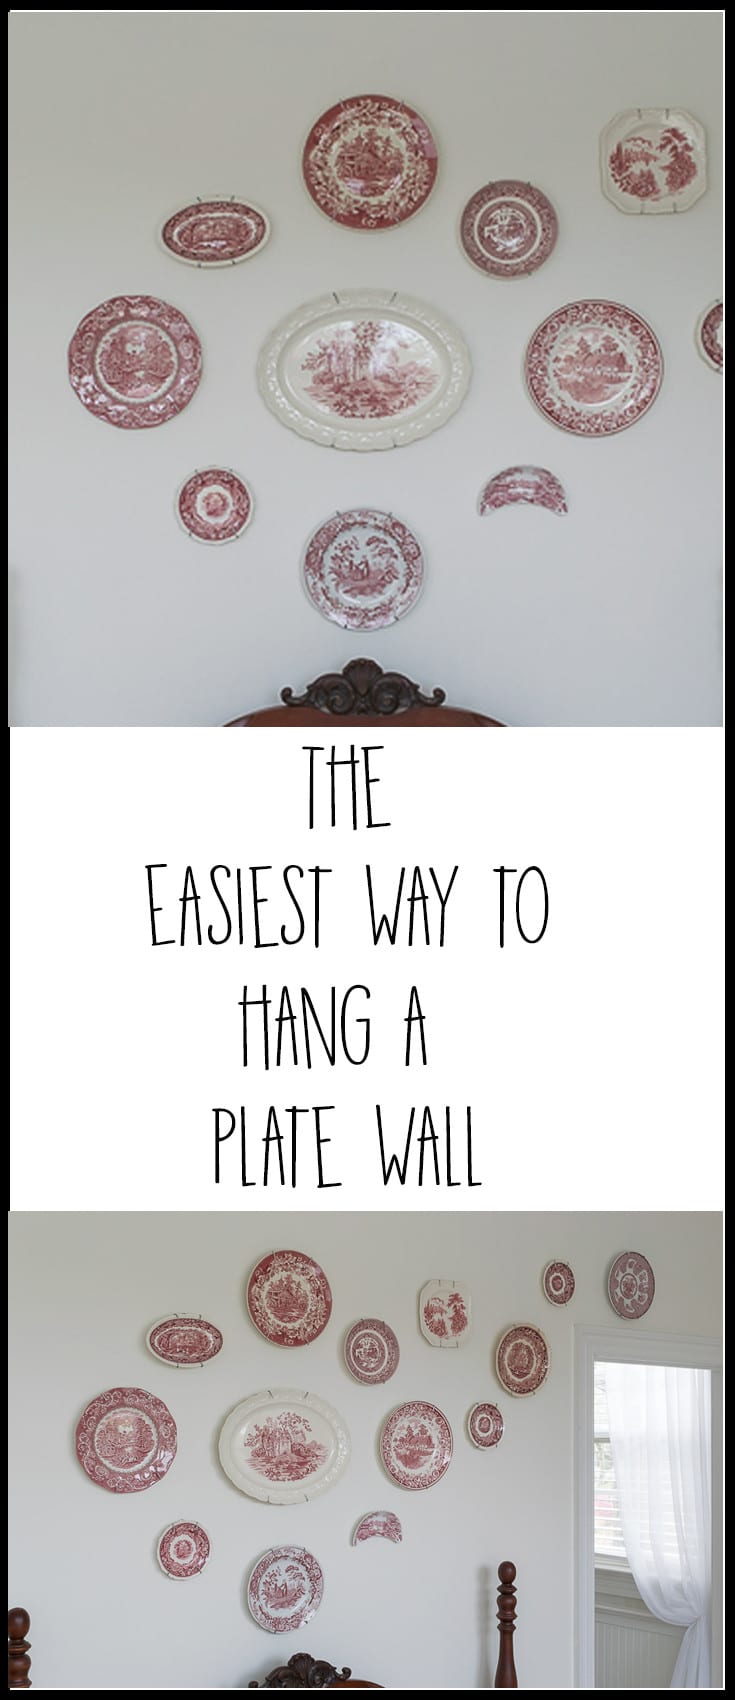
Last summer I repainted the room and updated the bedding, but never got around to decorating it as had planned. The bed skirt is a red toile and I had it in my mind that a red transferware plate wall would be pretty cool.
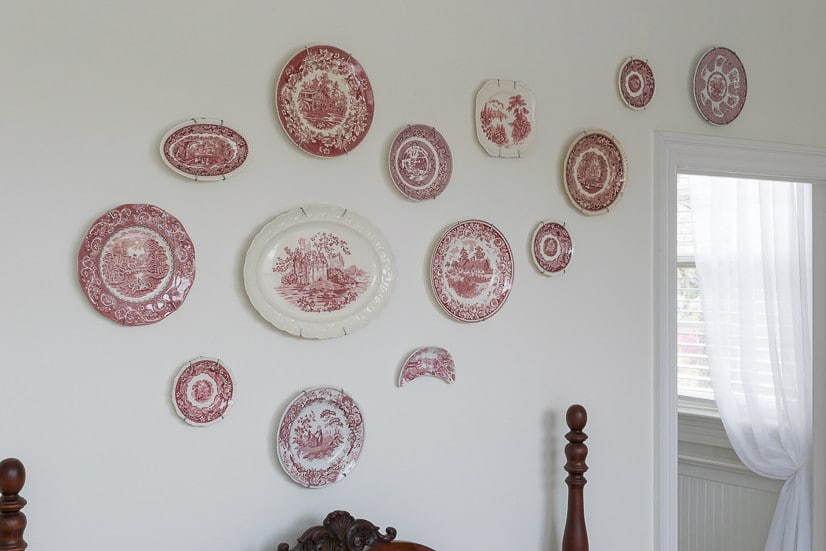
Both the toile and the transferware are fairly traditional decorating styles, but I’m rather an un-traditional decorating style gal, so I wanted to ‘un-traditionalize’ the room as I continued to decorate it. One way I hoped to tone down the traditional was by making my plate wall asymmetrical and wandering.
“The atmosphere breathes rest and comfort, and the many chambers seem full of welcomes.”
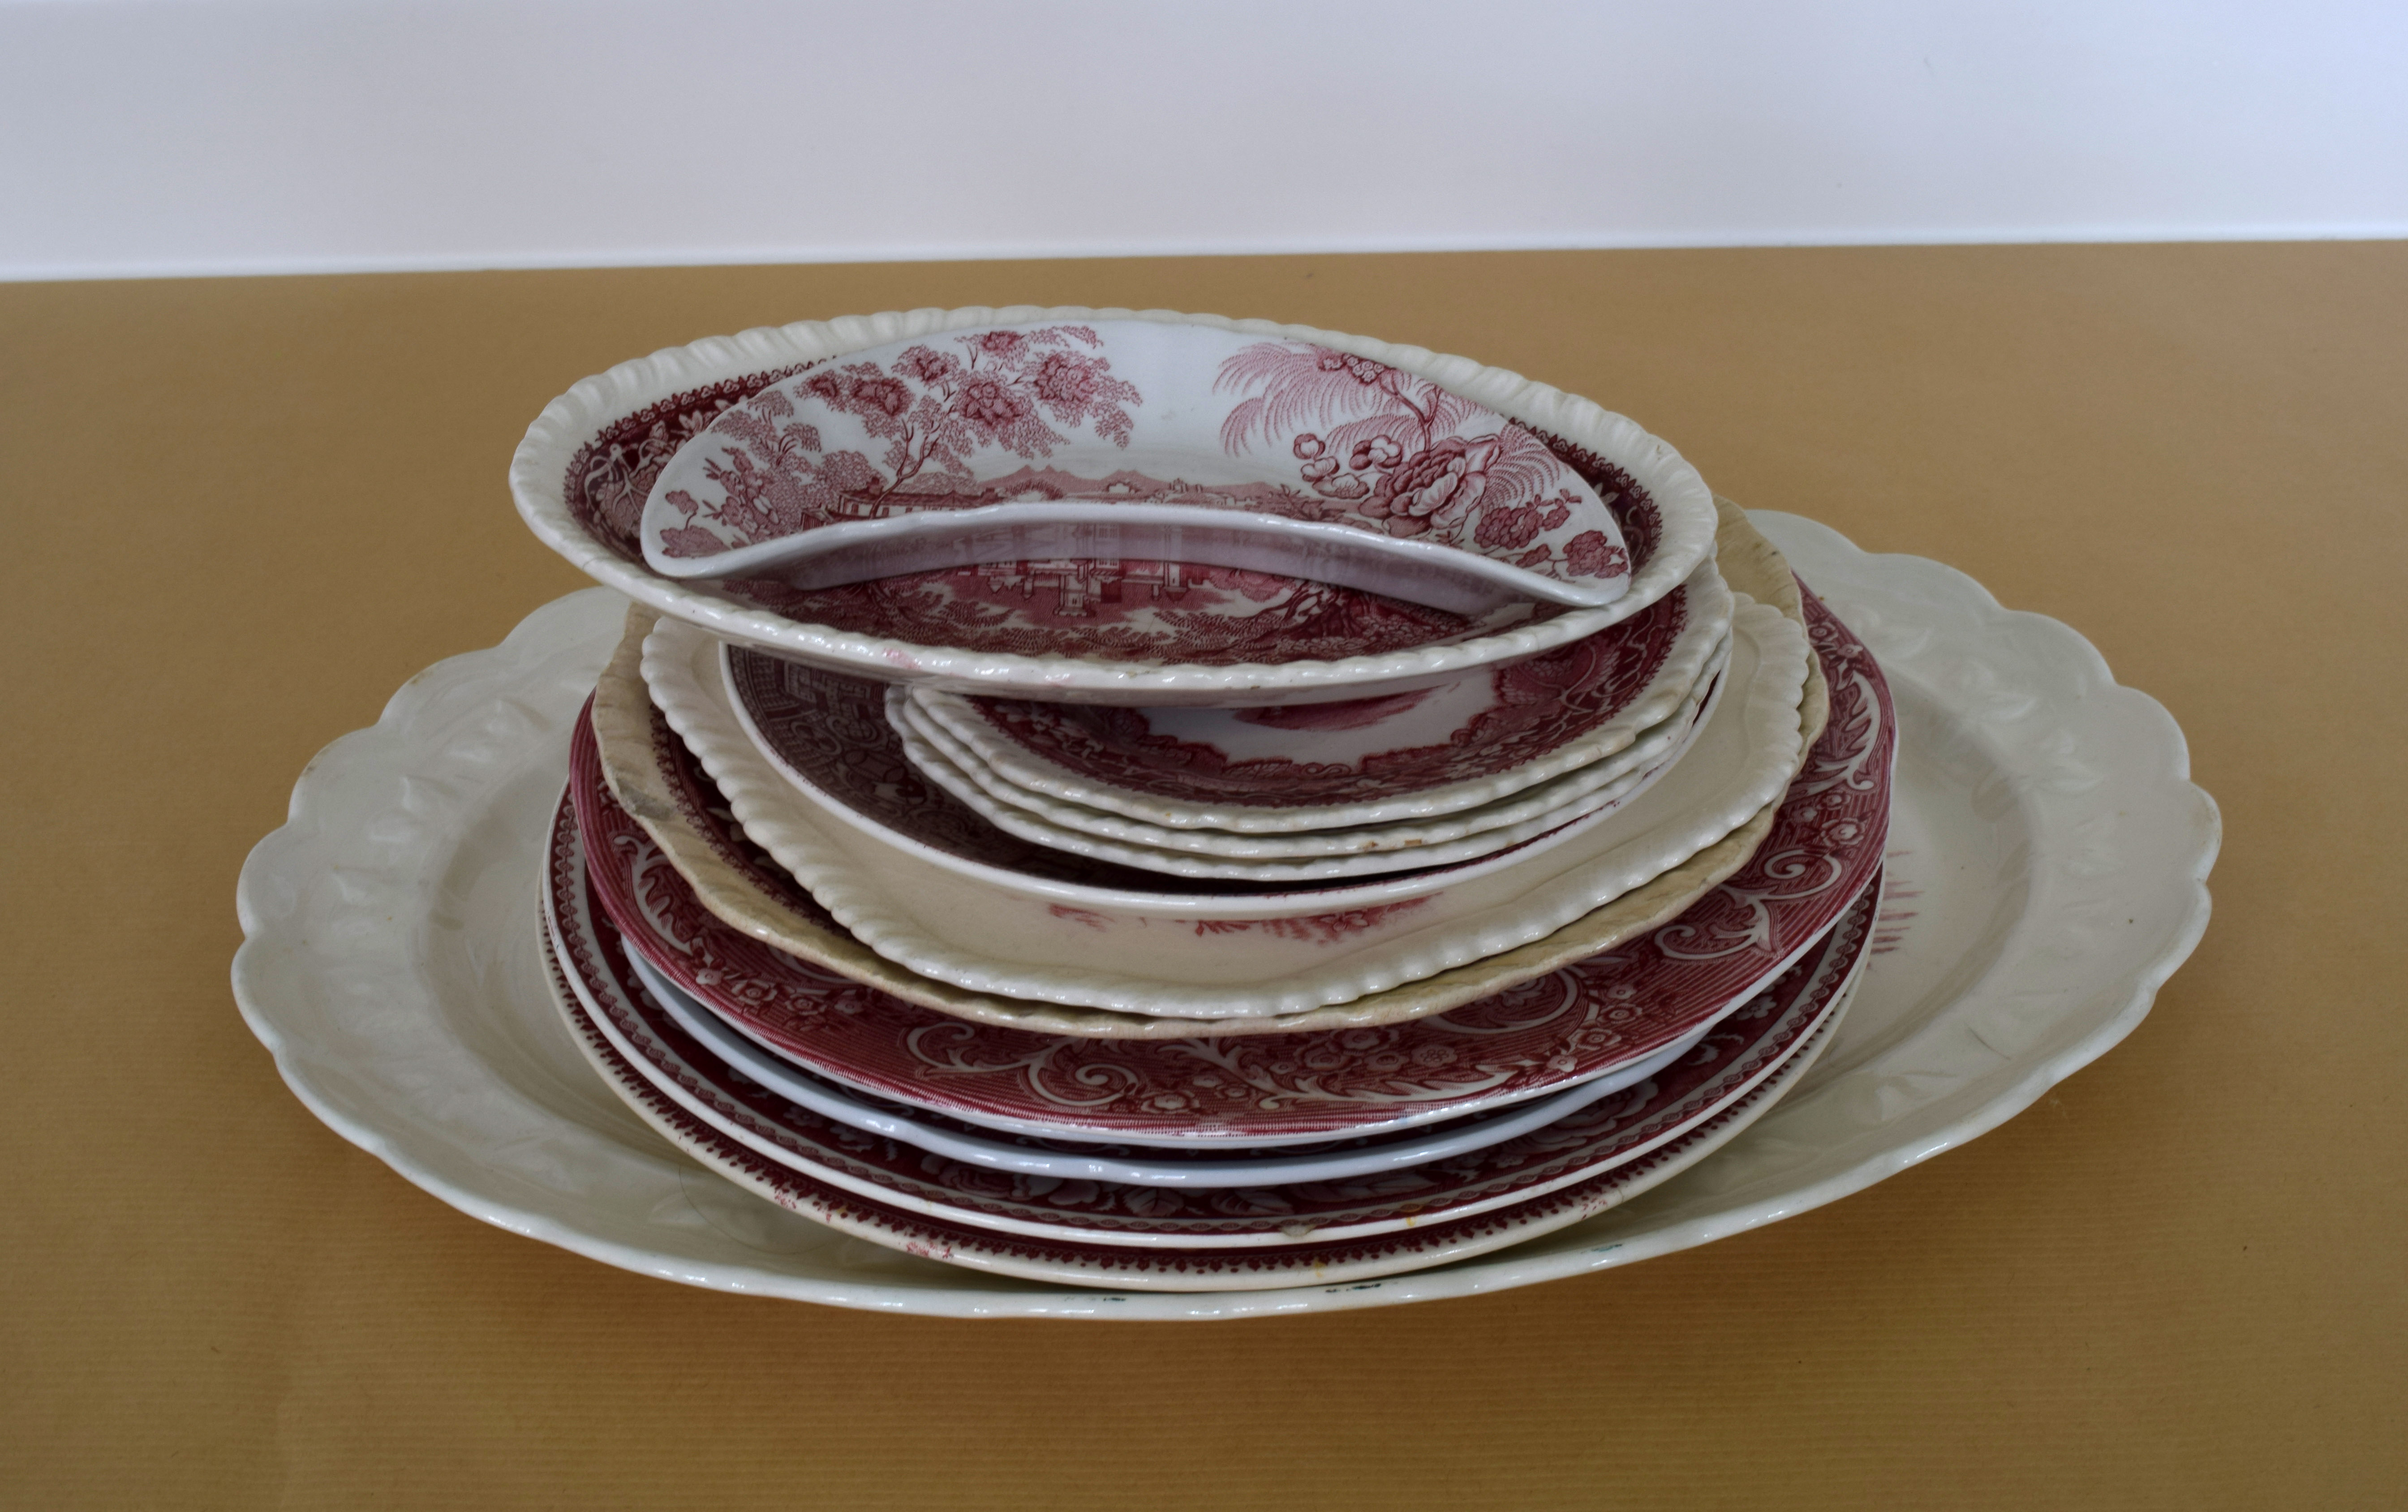
Table of Contents
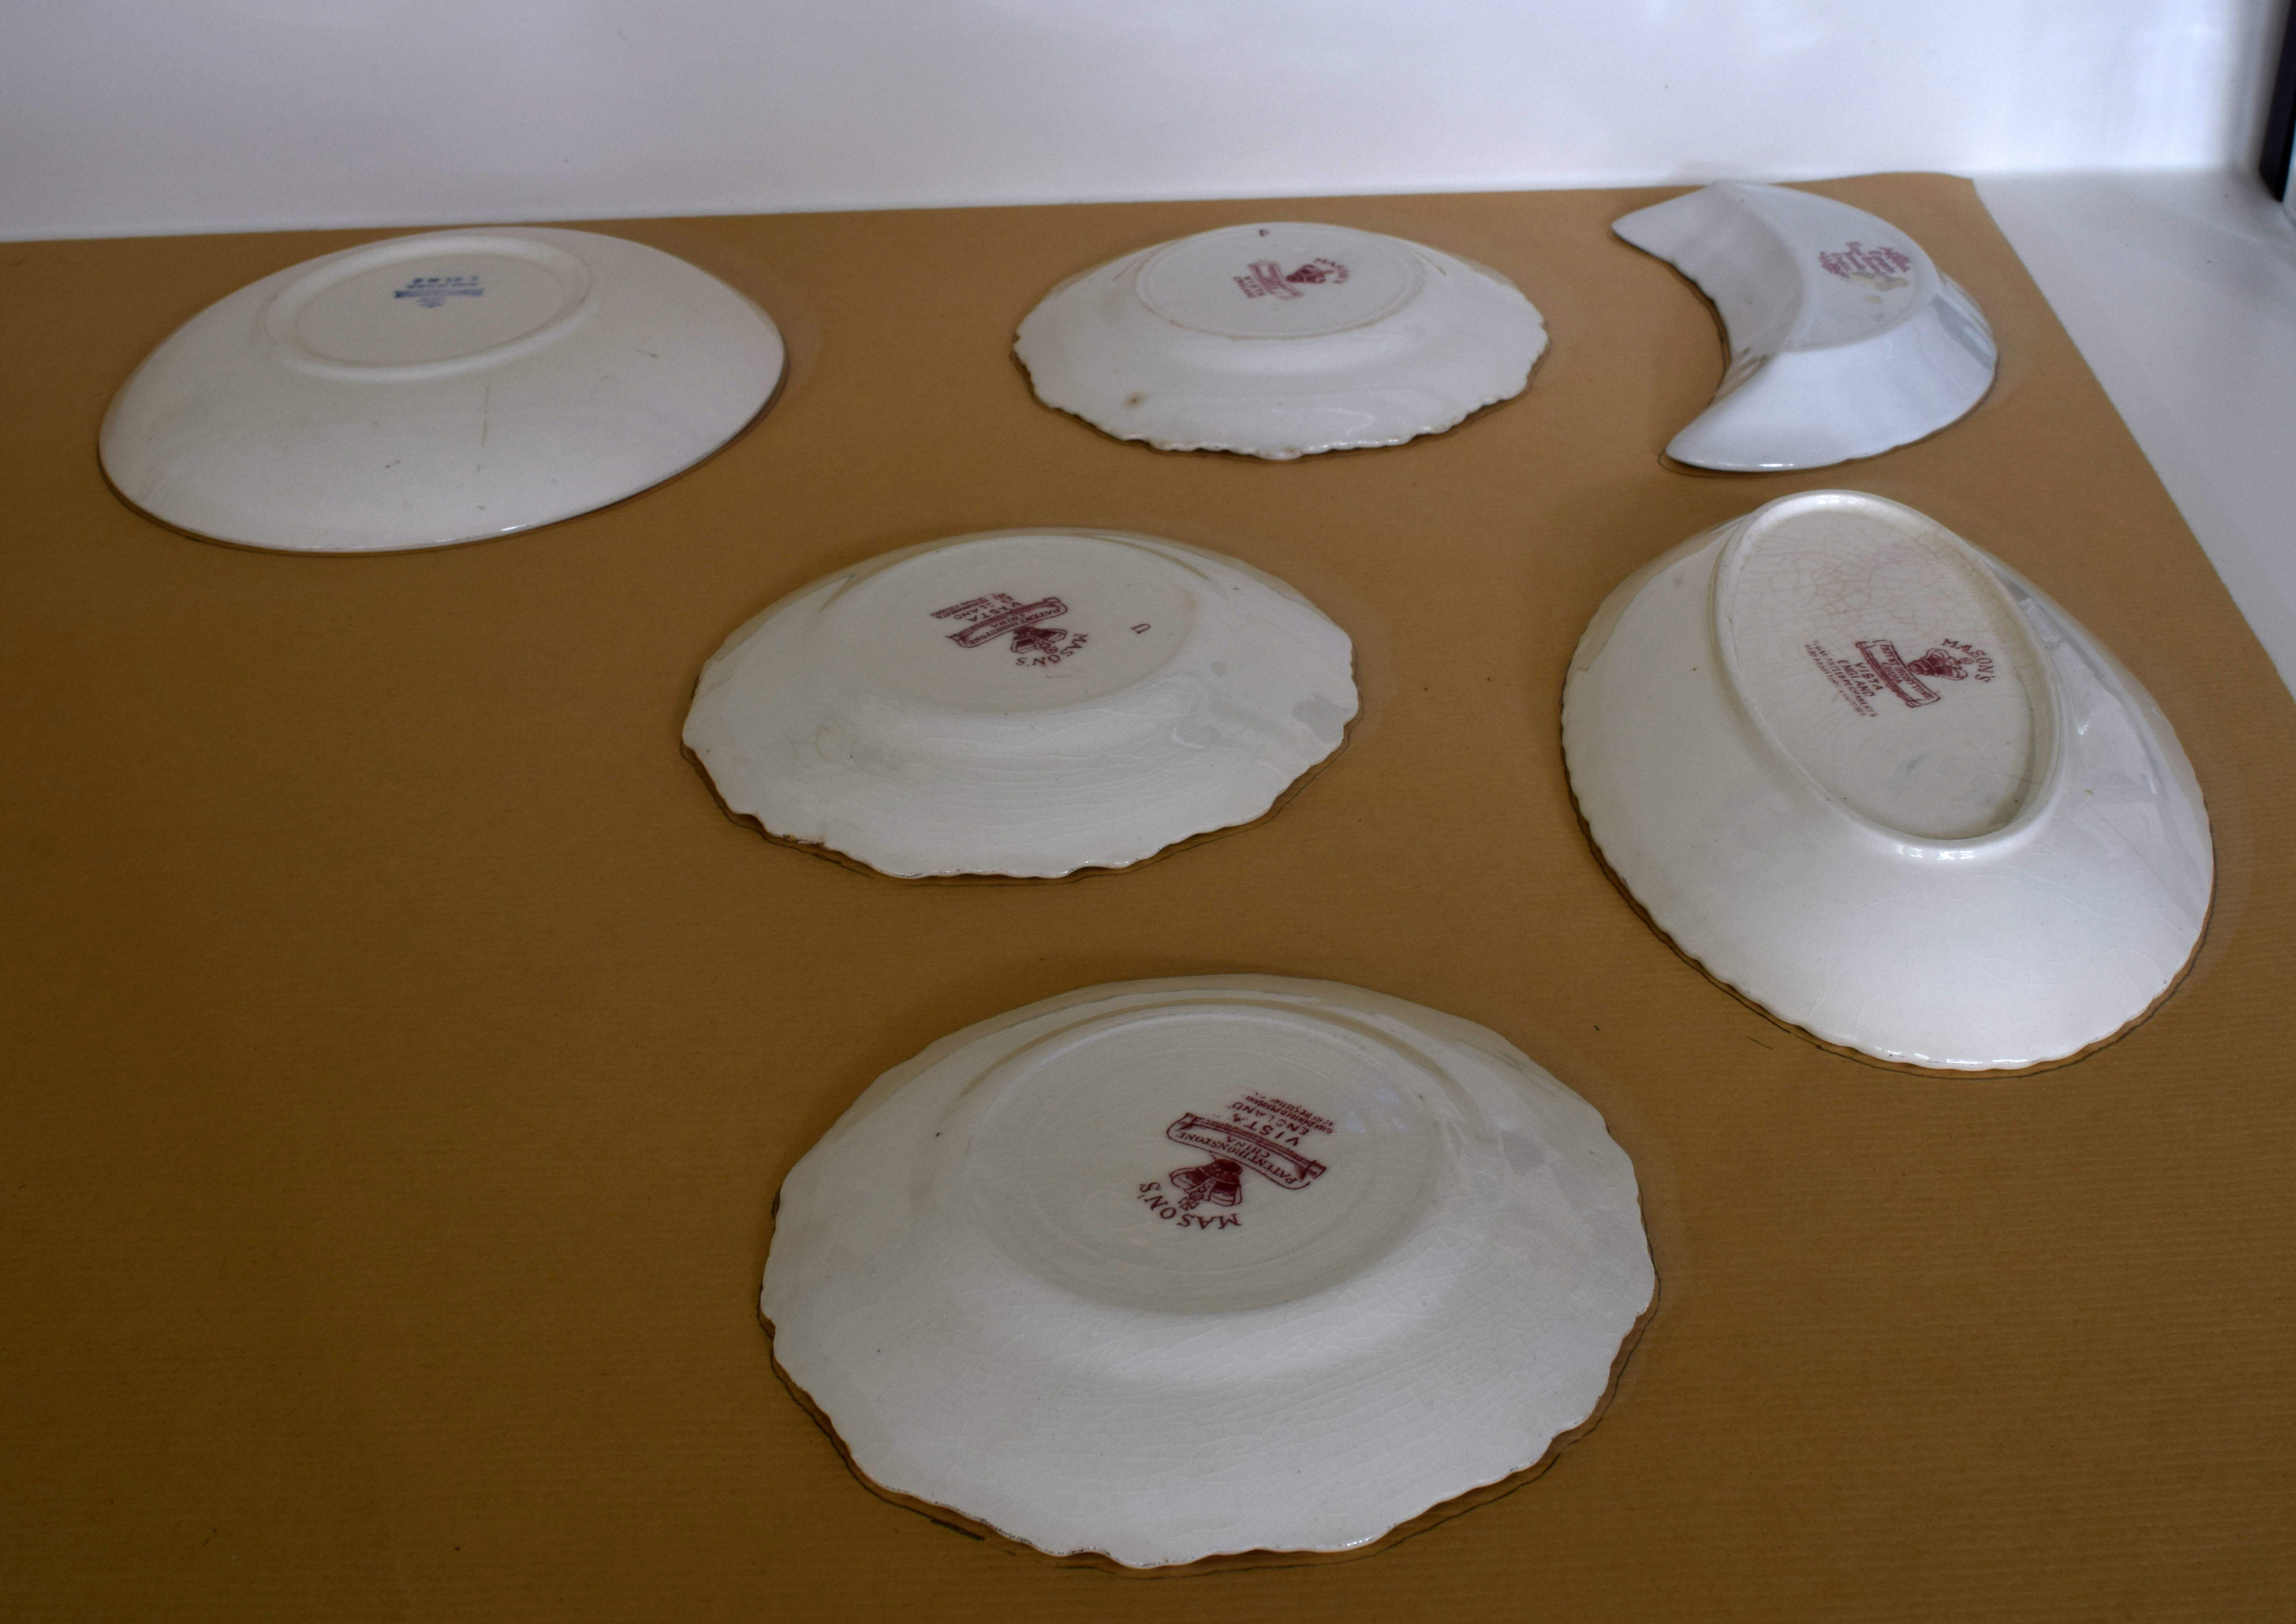
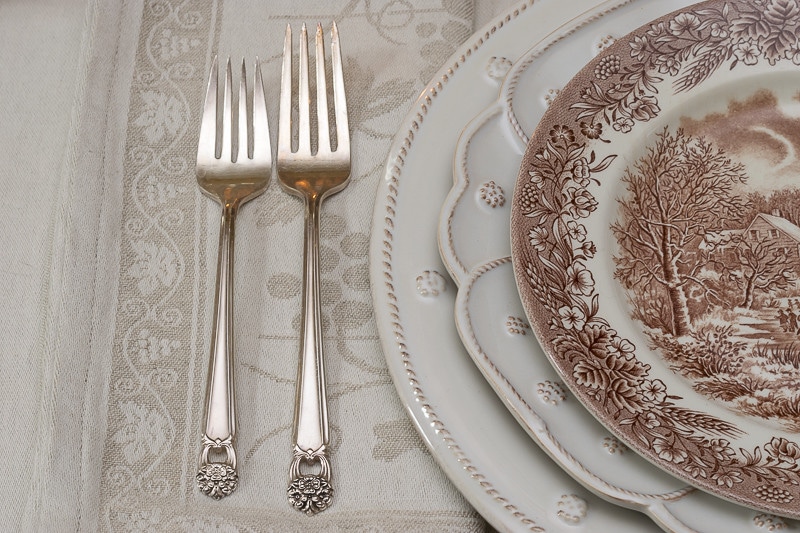
I started gathering red transferware from a variety of local antique stores and from eBay. I wasn’t concerned that my plates were in pristine collection; in fact, a few nicks here and there would add to the character of the wall.
I accumulated 14 plates of different shapes and they’ve been sitting in a stack in the guest room for the last 6 months. One of the perks of blogging is that I’m motivated to get my projects done, and my recently completed plate collection wall is one of the ‘to-do’s’ that has finally been moved to ‘done’.
Some of these links may be affiliate links and I may earn a small commission off of the sale of these products to help defray the costs of operating this site, but the price you are charged is not affected. You can see my full disclosure policy here.
Here’s the easiest way to hang a plate collection:
- Accumulate your plates and plate hangers. I opted to go with the traditional wire hangers as opposed to the kind that stick with glue on to the back of the plate as these will be hanging over a bed and there were a few reviews of plates becoming ‘unstuck’ and falling. I’m fairly confident that plates raining down on my guests at night would not fit in with the ‘welcoming’ feel I’m working towards.
- Get a piece of paper big enough to place all your plates on upside down on.
- Trace around all of your plates
- Cut out each ‘paper plate’.
- Fold each plate into 1/4ths, making sure that your quarters are equal.
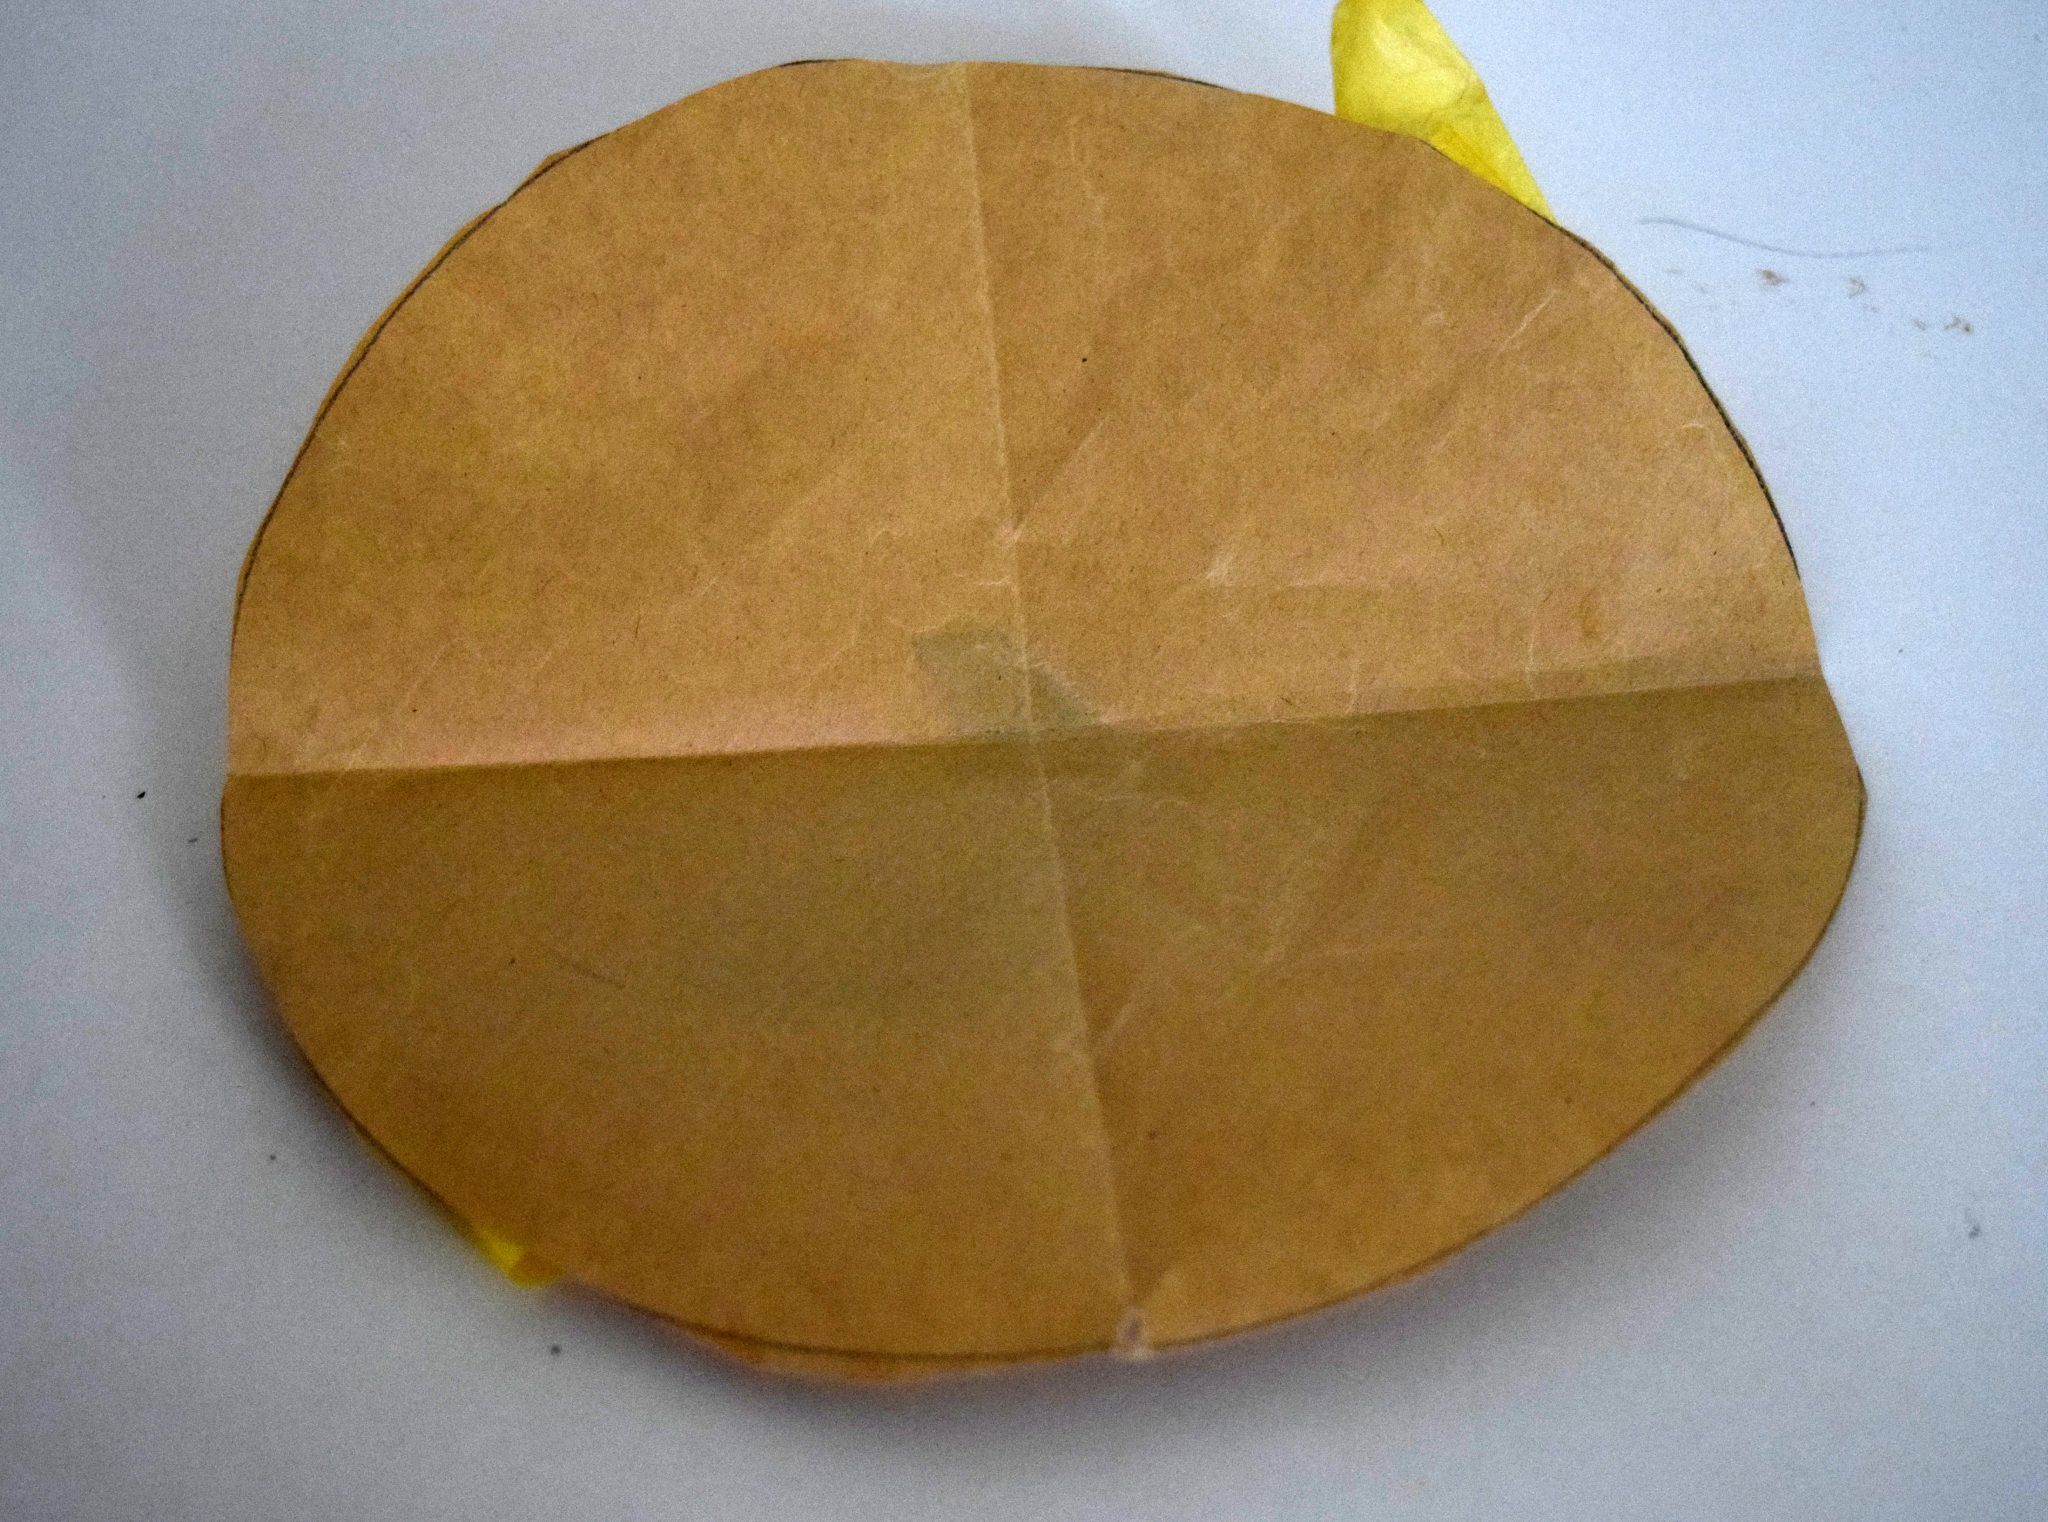
- Stick painter’s tape on the back of your paper plates. (FYI…I first used the yellow Frog Tape to get all my paper plates up on the wall. I stepped away for about an hour and when I returned, they had all become unstuck! Rats. So I started all over again, this time with Blue Hawk painter’s tape which stayed stuck for a much longer time, but did not leave any residue on the wall)
- Arrange your plates. You’ll see I took 2 pictures. After having taken the first photo, I realized that I didn’t like the way the plates flowed on the right side ( a little too ‘organized’), so I moved a plate and it made all the difference, as shown in the second photo. By folding your circles and lining up the folds with a ruler and level, you can make sure that your plates are lined up if you want them to be so. I lined up the 4 at each axis around the platter in the middle and then just eyeballed the rest.

- Once your paper plates are up the wall, the rest is easy and rather fun!
- Measure your hanger. The hangers for my plates measured 1″ from the nail hole to the hook where the plate would attach.
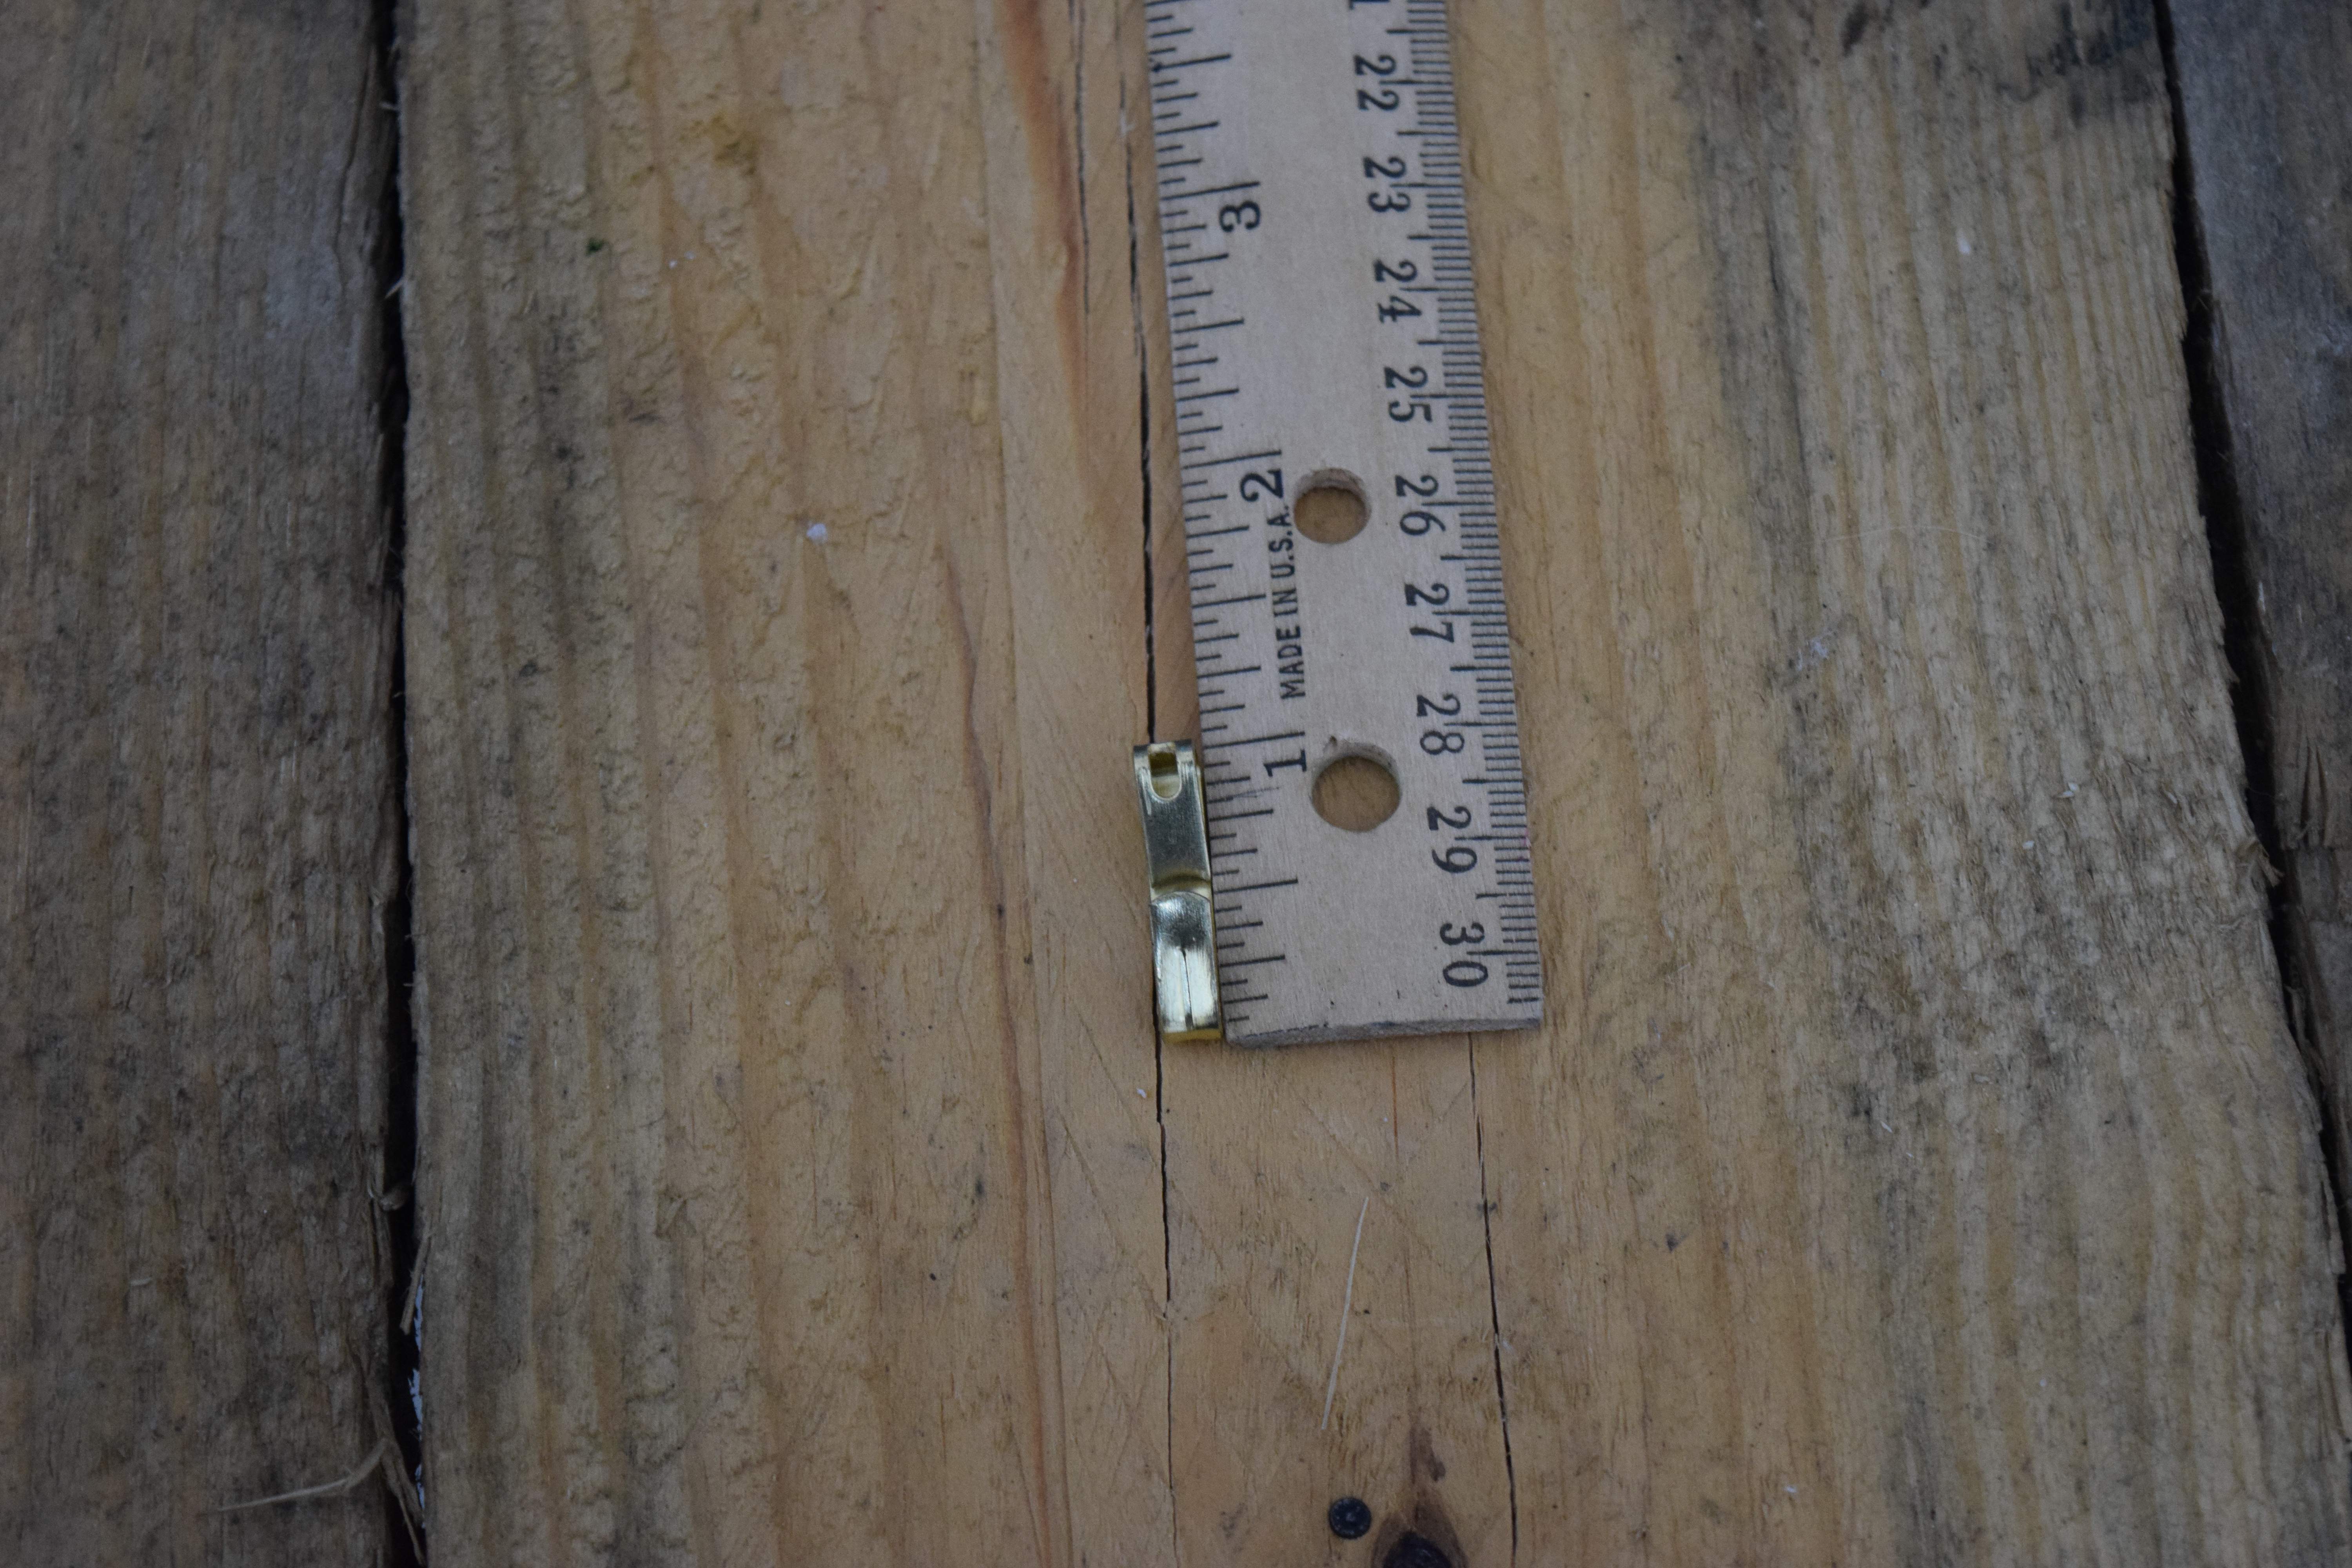
- Measure the length from the top of the plate to the place on the plate hanger where it will attach to the wall hook. In the photo below, it was an 1 and 1/8th of an inch.
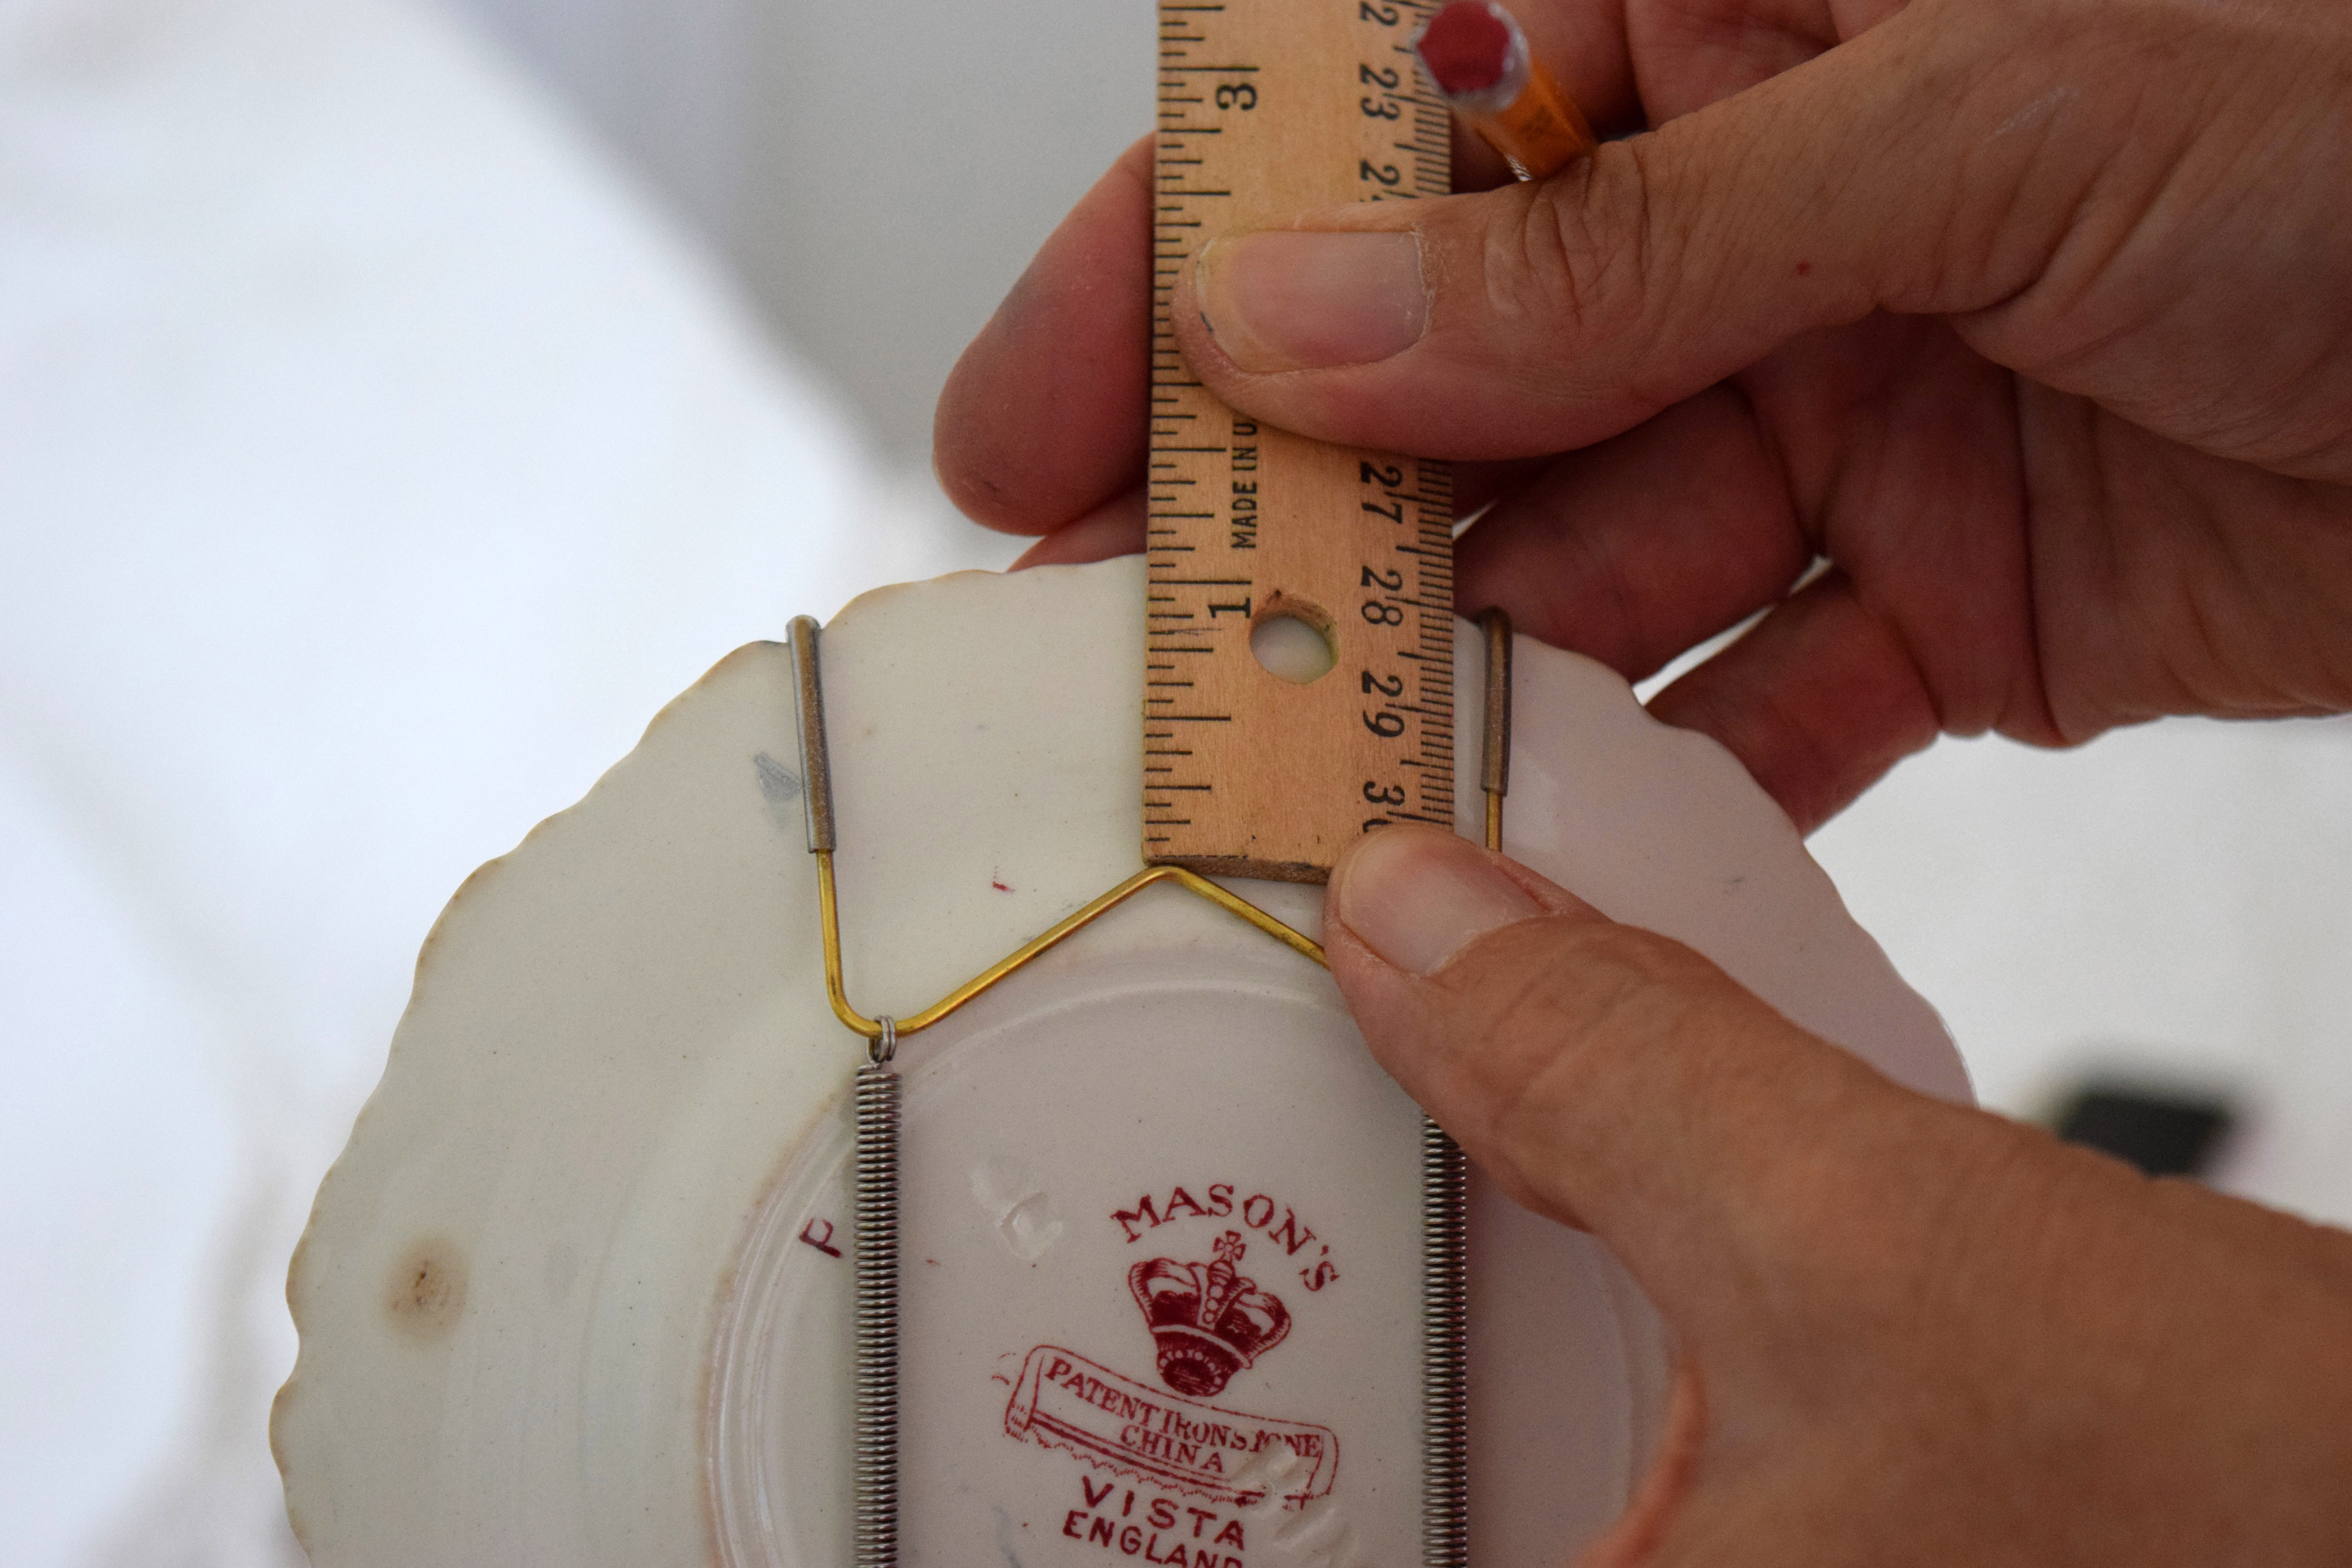
- Measure down, in this case 1/8th of an inch from the top of your paper plate and place your nail there. Hammer away.
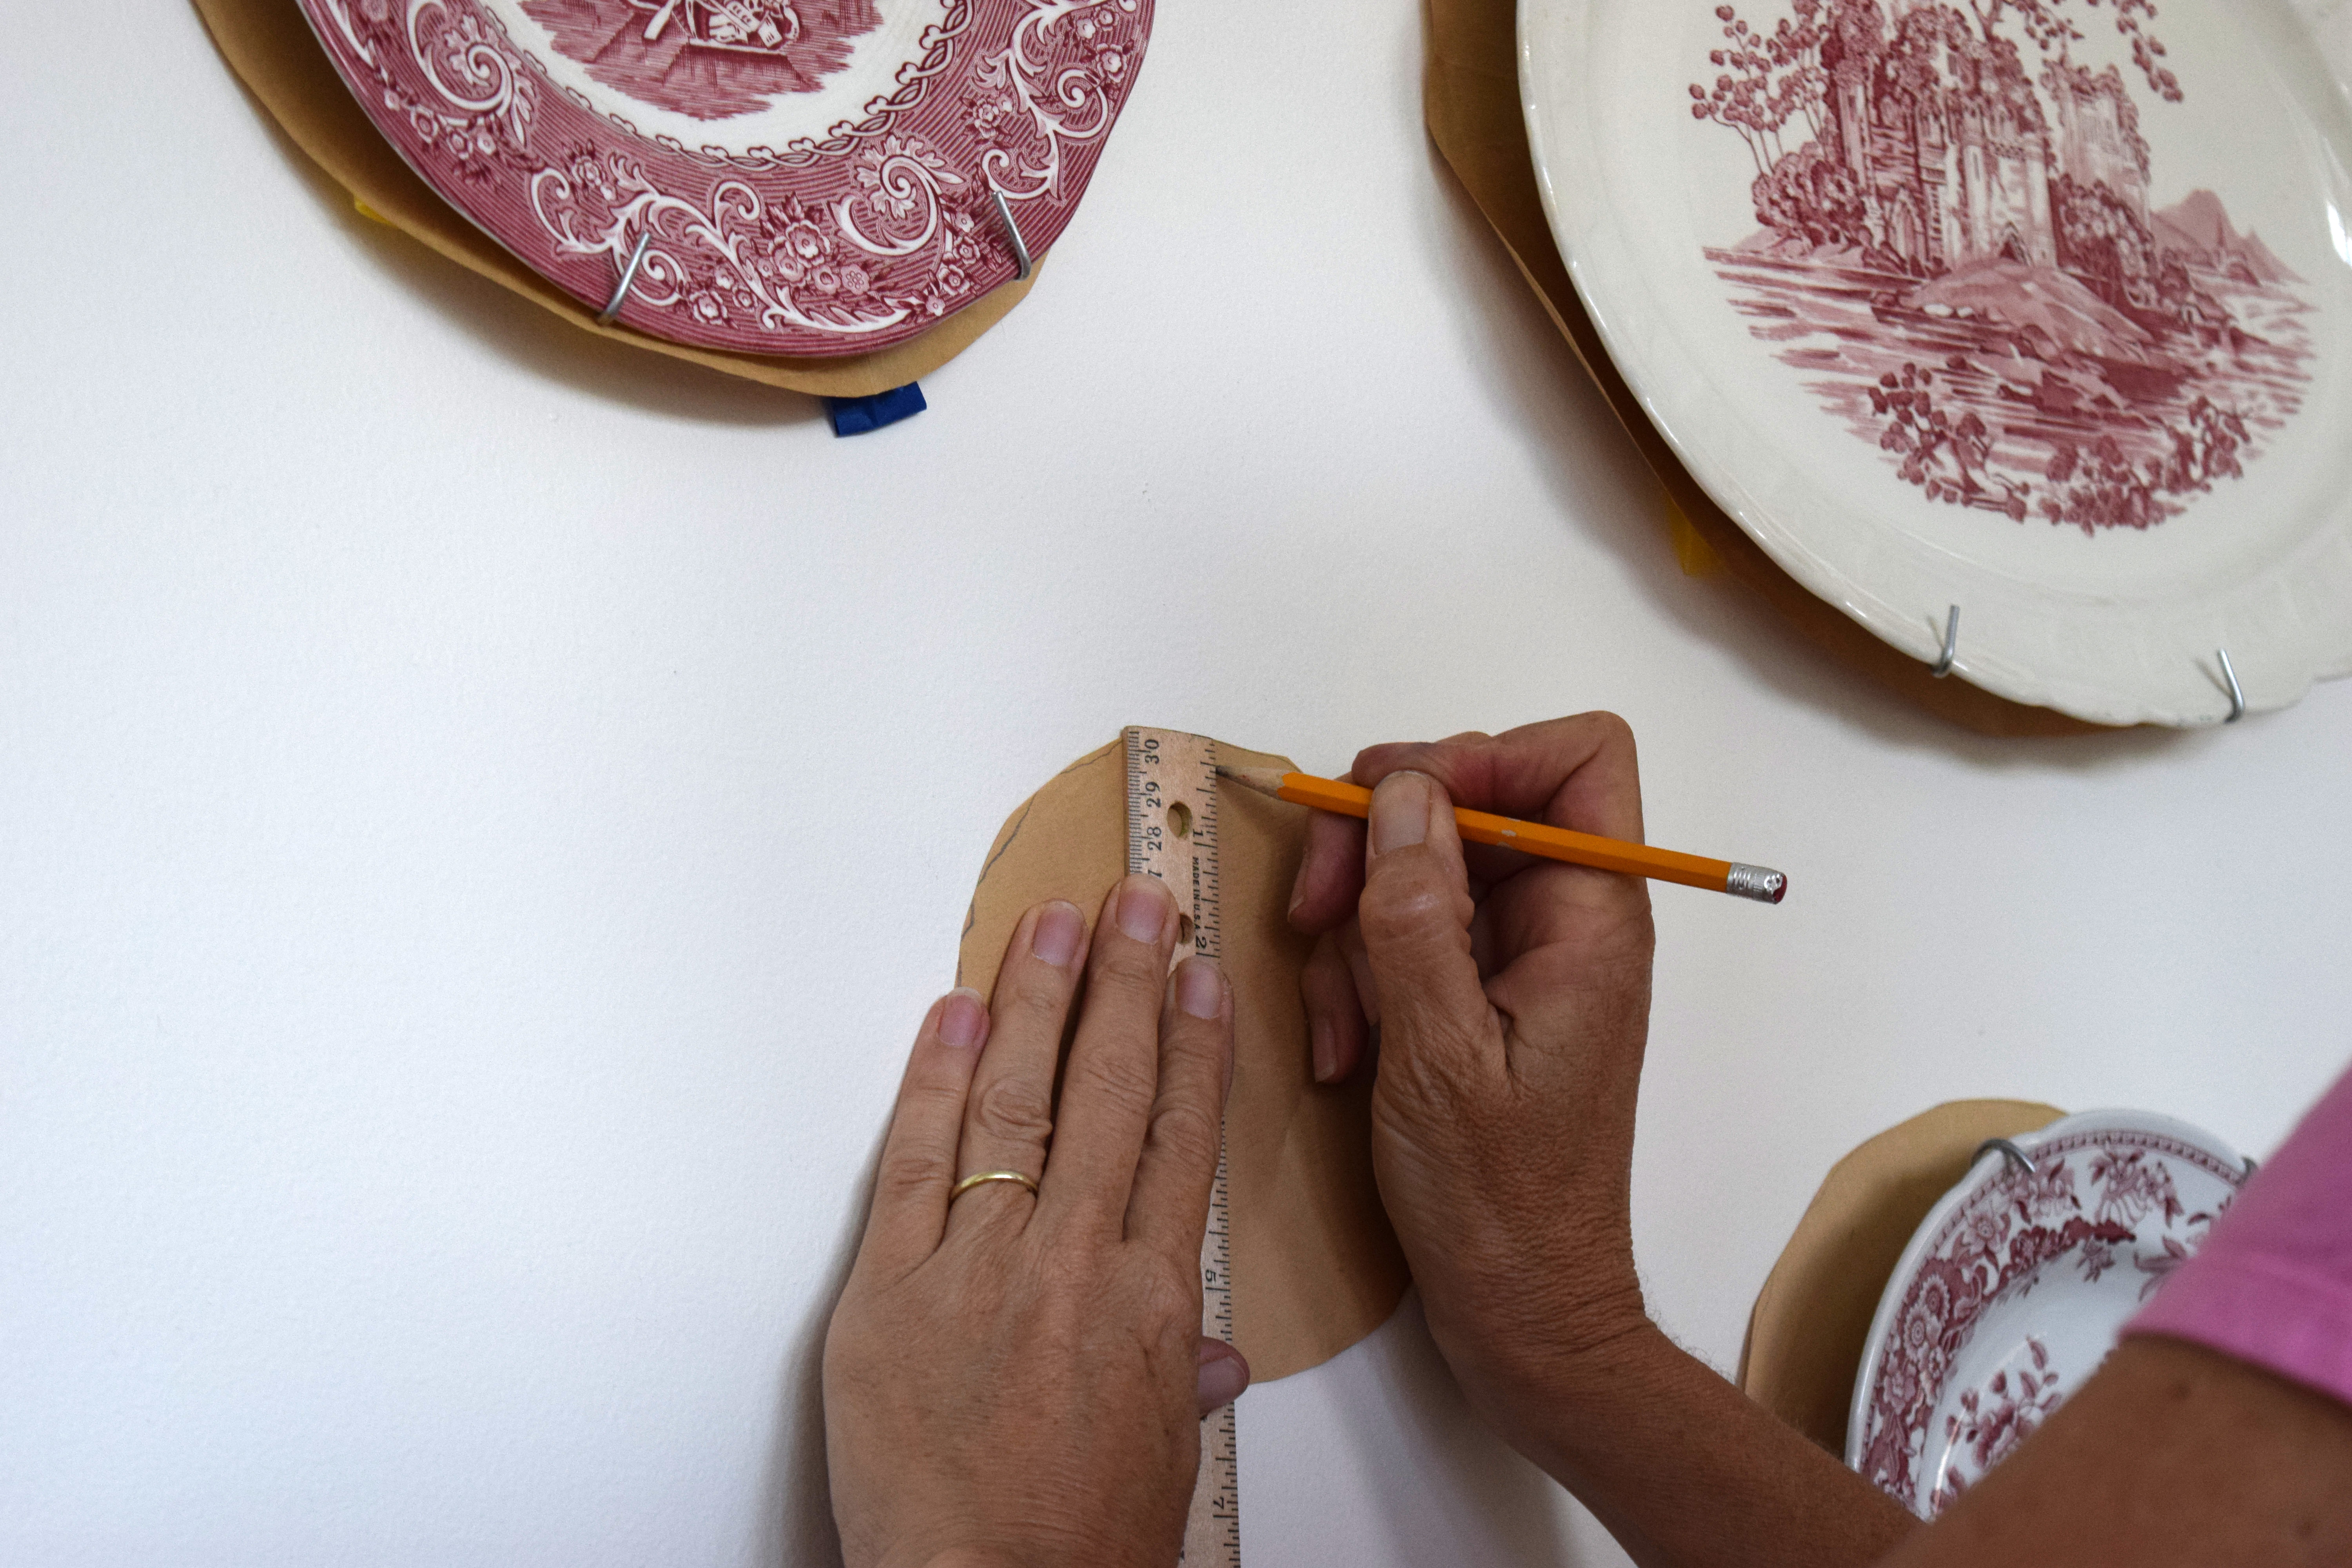
- Hang your plate. If it’s good, then tear away the paper and you’re done! Step back and enjoy your wall. I love the way it looks, but think I have room to pop up a few more plates, so I’ll keep my eyes open when I wander antique stores.


But here’s the rub. Are you familiar with the children’s book, “If You Give a Mouse a Cookie?” It was one of my kids’ all-time favorite books when they were younger.
The gist is this: if you give a mouse a cookie, he’ll surely want a glass of milk. Once you give him the milk, he’ll need a straw, then a napkin, then a nap, and so on and so on.
So this is now my “if you hang a plate wall, then you’ll need to fix up the lamp” room. Once you fix up the lamp, you’ll need to get some pretty pillows for the bed. Once you get the pretty pillows, you ought to get one of those bedside carafes with a tumbler on top. You can see where this is going, right?
Well, Kate’s off to school, so I’ll have all this time on my hands…right? In any event, my project queue is growing, which is fine with me.
Thanks again for spending a few minutes of your busy day with me today.
Please know that I welcome each and every comment that comes my way.


Beautiful! I love the pattern!
Taping paper plates to the wall to work out the arrangement is genius! My house was built in the 50’s so when putting a nail in the wall, you need to be sure where you want it to go!
This is just great!
Thanks for sharing at Something to Talk About!
Karen
Thanks Karen! I’m pretty tickled with it as well. I love it when something works out as planned! See you next week.
Lynn
I love the fact you didn’t keep them symmetrical, which would have looked great but this will start a conversation! My first impression was it looked like the Big Dipper star formation which of course makes me,think of nighttime, and peaceful sleep.
Hi Ann, I always lean asymmetrically..just in my genes! Wow, love the Big Dipper observation…think I’ll adopt it and share it with my guests. A little subliminal suggestion.
I have been working on a guest room as well. It is fun and you are completely correct that one project definitely leads to another. Your plate wall turned out fabulous and I know the rest of the room will too.! I finally got more pillows and some new bedding and now need an new update. LOL! Thanks for sharing at #HomeMattersParty
Hi Michelle…working on my pillows now! Will pop over to visit your guest room today! Thanks for stopping by
Hi Lynn. Just landed on your blog tonight and I’m enjoying clicking around. I had to comment here for sure because I also have a love for red and white transferware. Isn’t it the prettiest? I really like the way you spread it across the wall.
Good Morning Stacey, thanks for spending a little time with me yesterday! I love it that you browsed around the guest room. I popped over to your house and felt right at home in your dining room with all of your beautiful transferware and toile. It is a classic combination!
Thanks for visiting and hope to catch up with you again soon!
Lynn
Great tutorial. Thanks for sharing. I love the asymmetric placement.
Hi Mary, I’m so glad you found it useful and I’m an assymetrical gal as well. Happy plate hanging!
Lynn
Hi Mary, thanks for stopping by. I’m so glad you found this useful…are you doing your plate hanging soon? If so, have fun.
Happy New Year, Lynn