
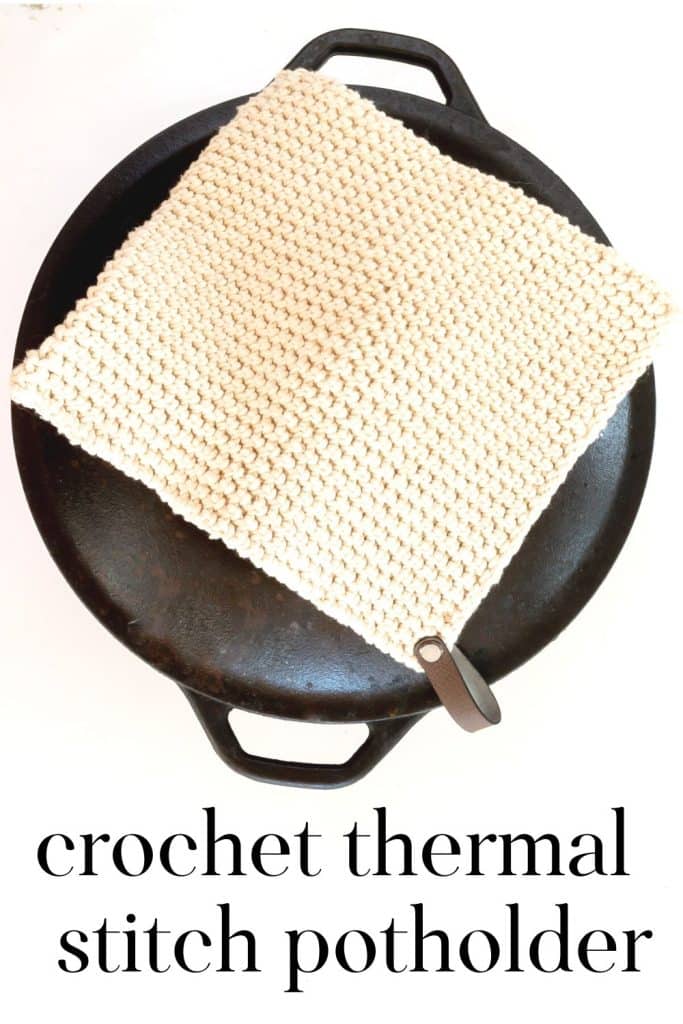
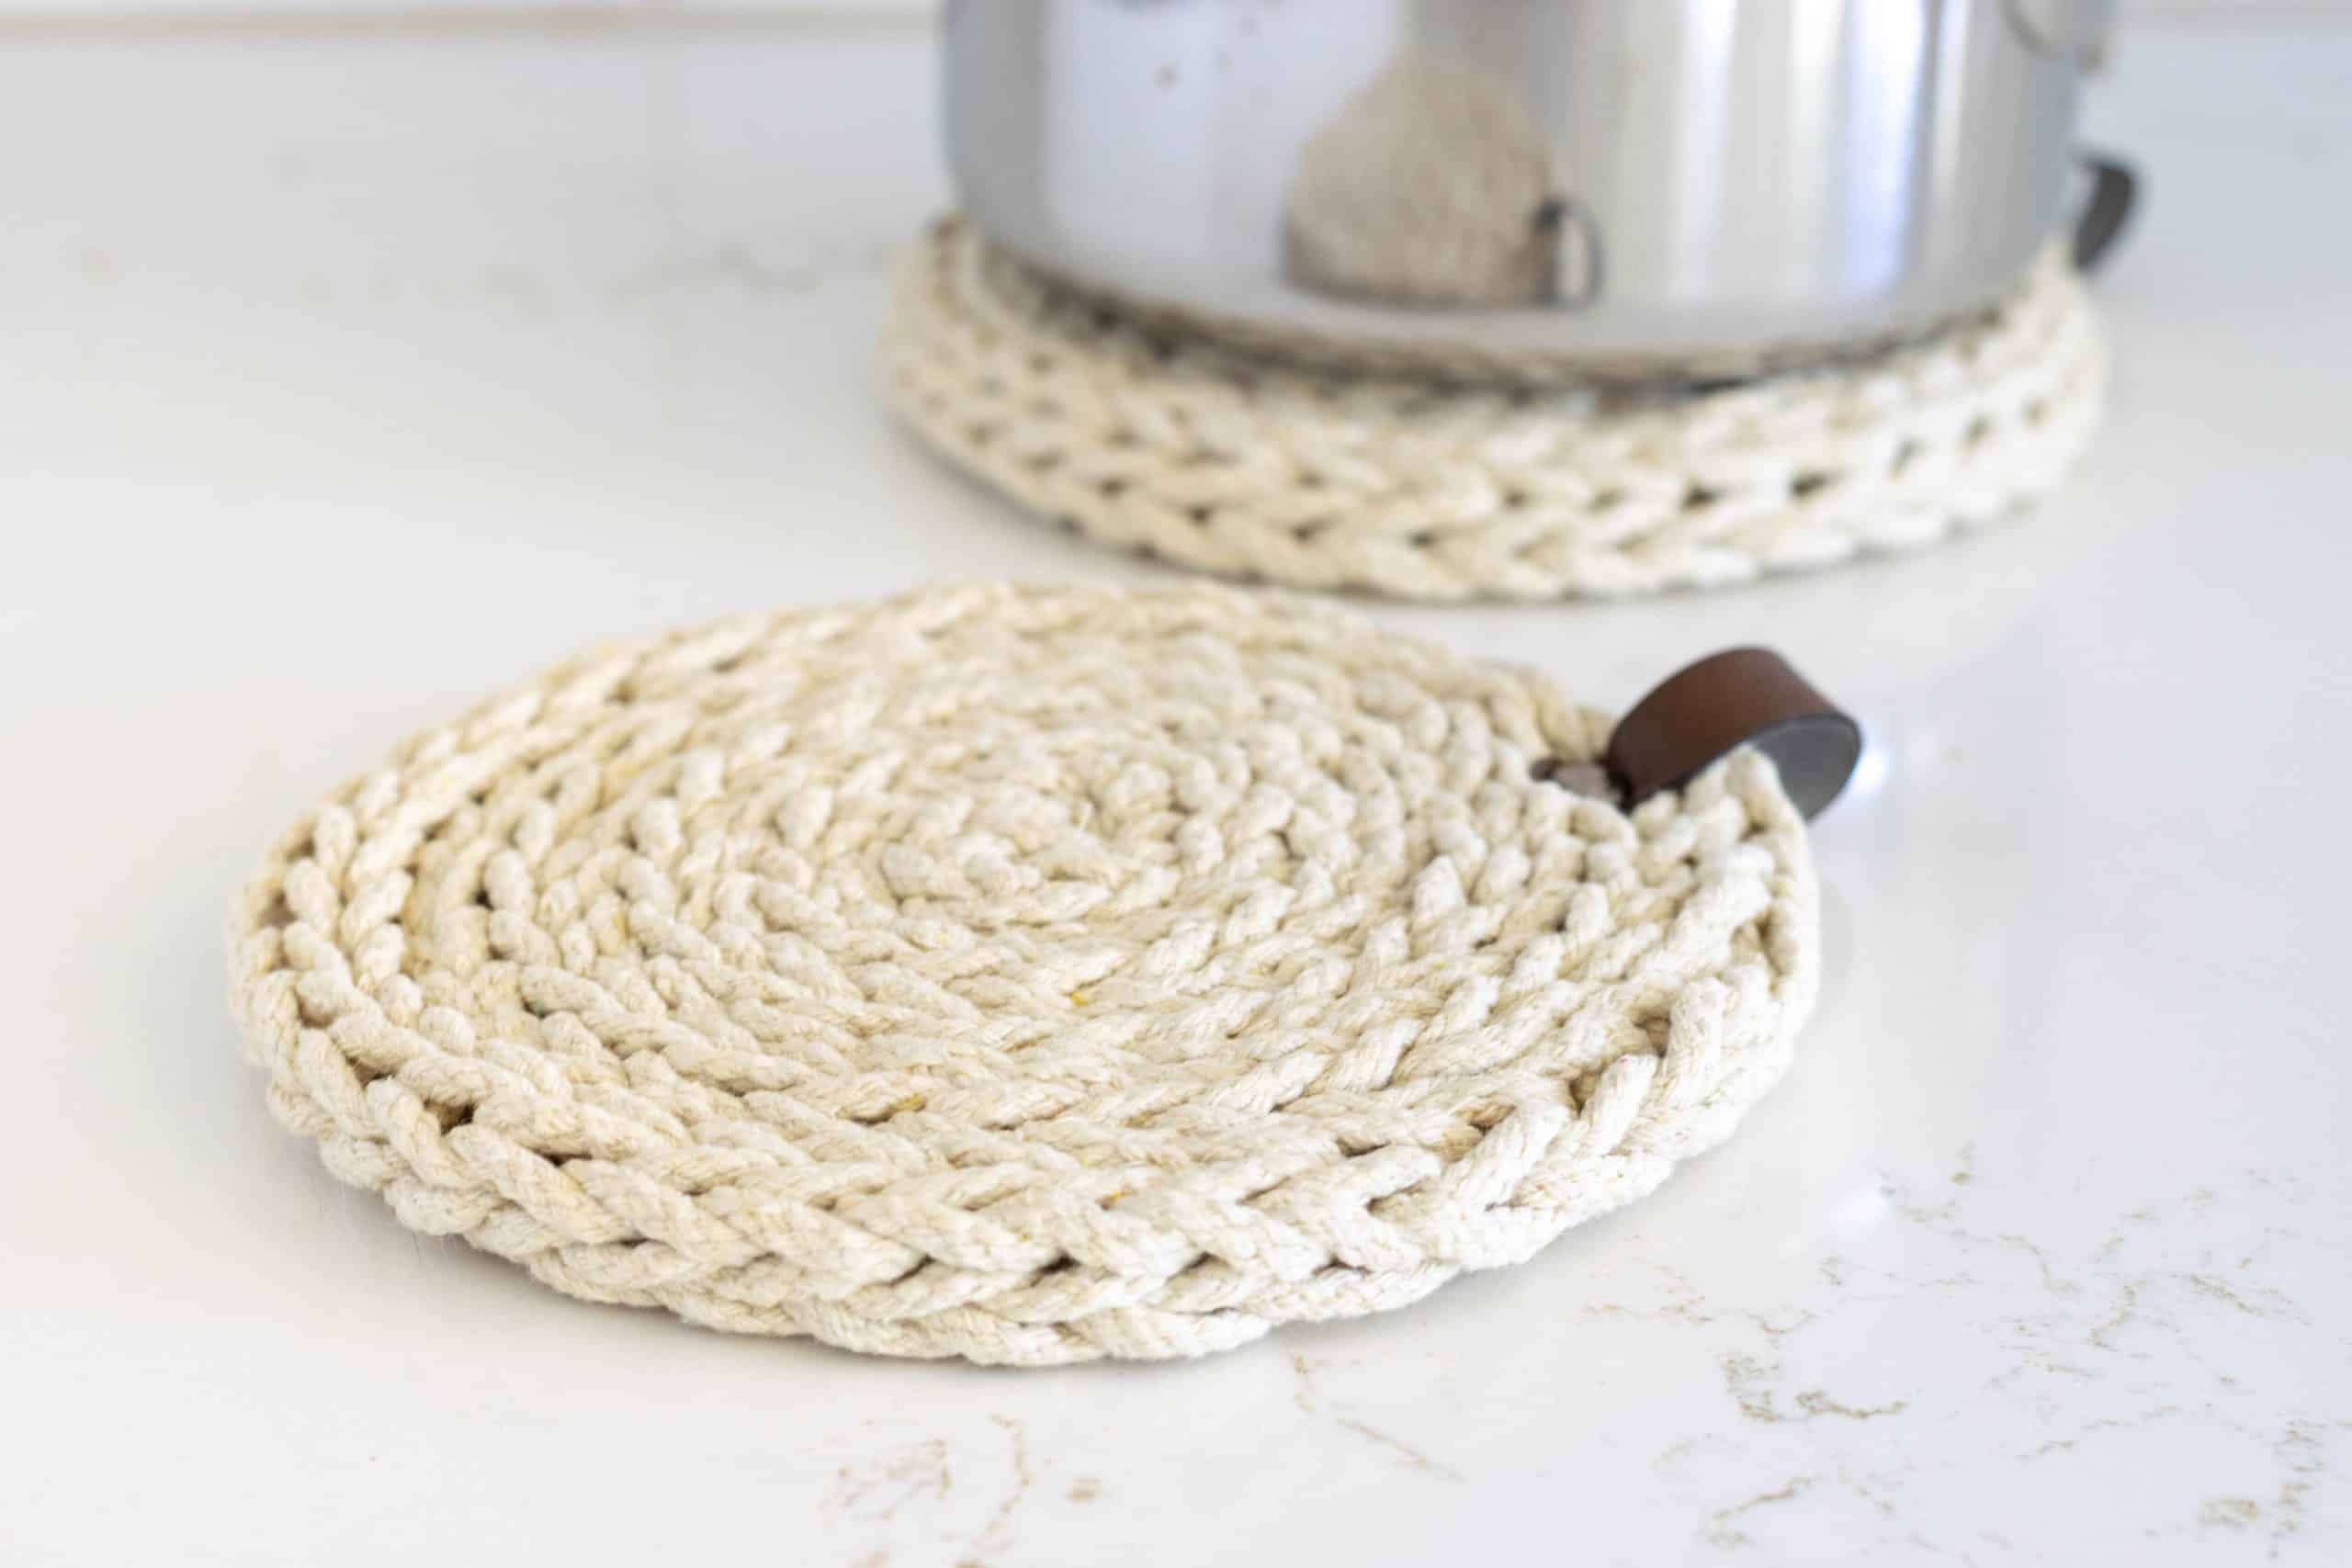
Crochet Potholder Pattern using the Thermal Stitch
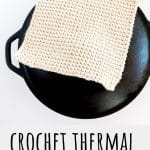
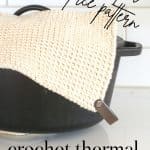
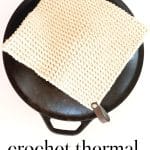
This free crochet potholder pattern uses the thermal stitch for a double-thick fabric without having to crochet two separate pieces.
I don’t know about you, but it seems that ‘potholders’ are something that often makes it on my ‘stocking stuffer gift ideas’ list that I give to my family. With that in mind, I figure that they will make great housewarming or Christmas gifts. What do you think?
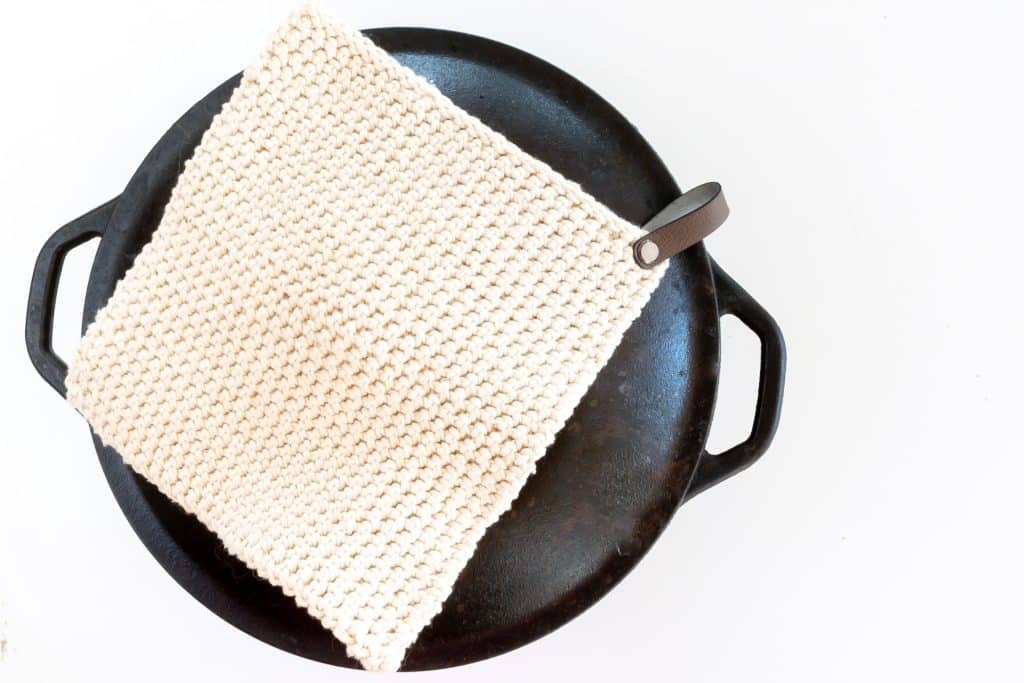
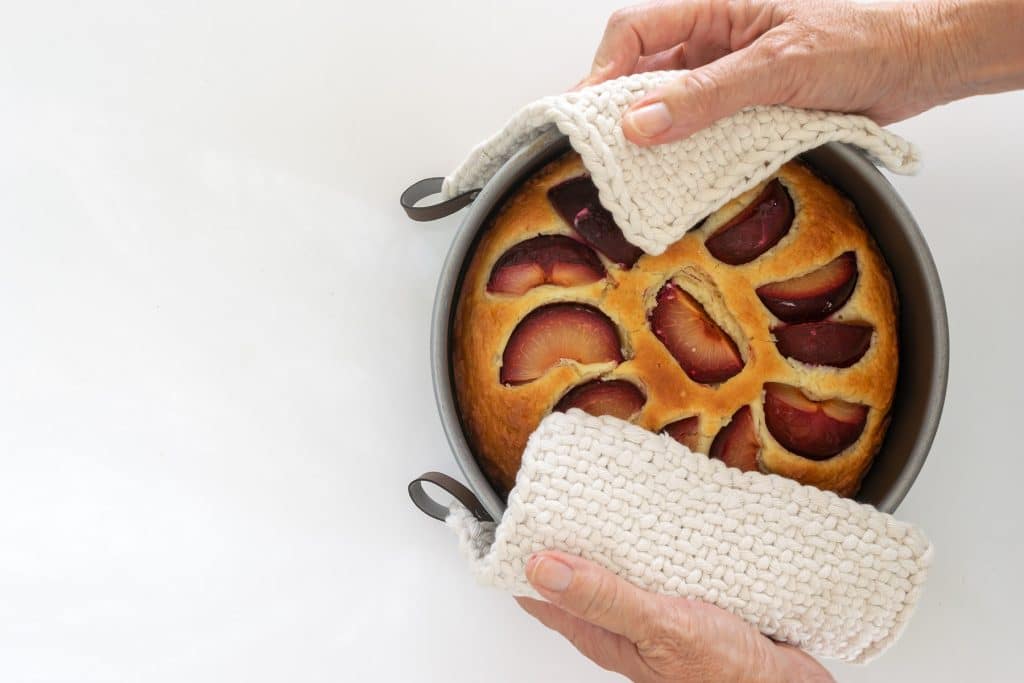
Several readers requested knit and crochet potholder patterns, and since I aim to please. Here ya go! After I knit this linen stitch potholder, it was time for a crochet one. The thermal stitch could not be more perfect for crochet potholders. The stitch produces a double-thick fabric needed to handle hot items.
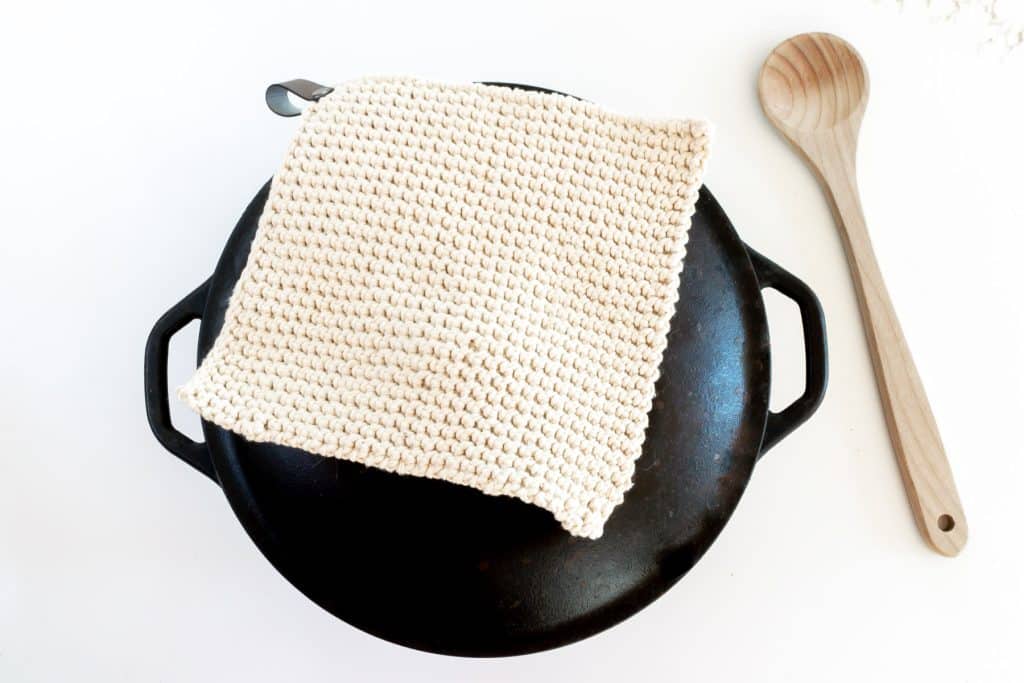
Table of Contents
No special skills are needed for this Crochet Potholder Pattern.
I am by no means a crochet expert. I am a long-time knitter who picked up crochet primarily to add sweet edges to my knit blankets. I say this only to convince you that no special crochet skills are needed for this pattern. It is truly just simple single crochet. The only ‘wrinkle’ is where you place your crochet hook to produce this double-thick fabric.
But not to worry, I have pictures for you!
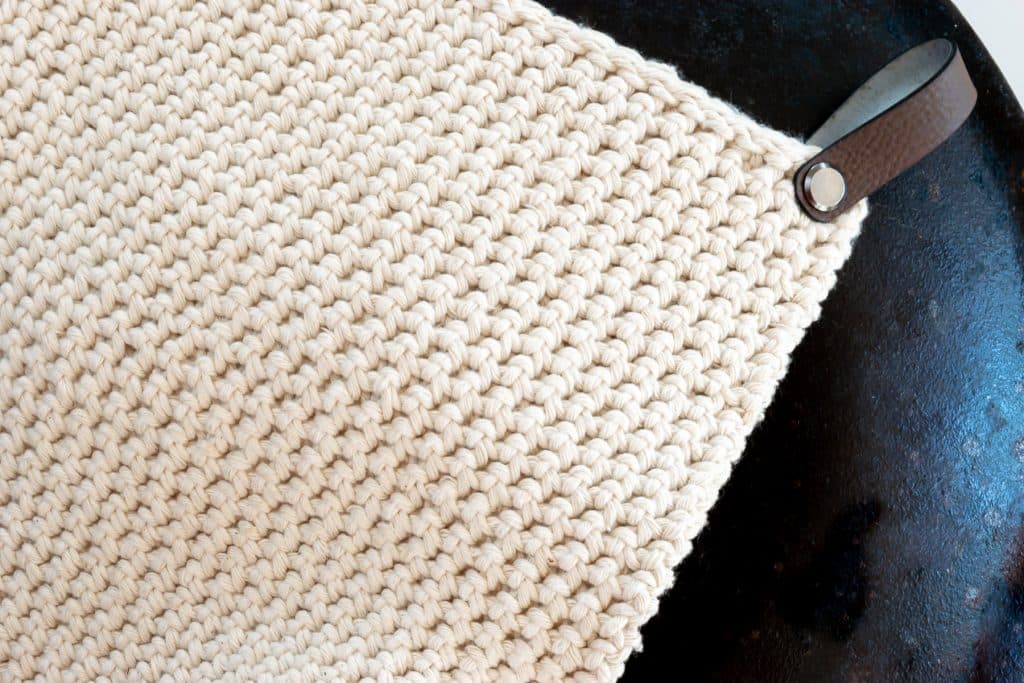
I especially love that the Thermal Stitch creates a crochet potholder that has the same pattern on the front and the back.
Are you a visual learner?
I’ve got you covered! Here’s a video pin I made showing step-by-step how to crochet this thermal stitch potholder. Make sure to save it to your Pinterest board so that you have easy access to it when you need it.
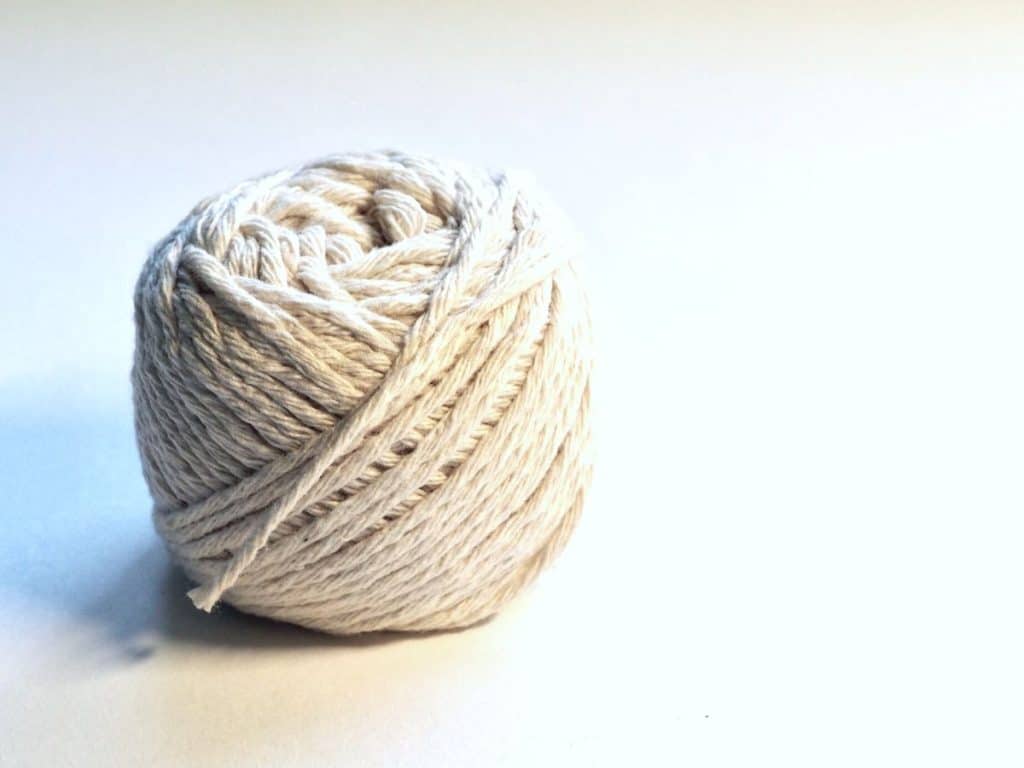
Without exception, you want to use 100% cotton yarn for any type of potholder. Here’s why:
- It won’t melt! Rather important when handling really hot things.
- It is washable! For the same reason that cotton is great for knit and crochet washcloths, it is also great for potholders. It is a fiber that withstands multiple washings without felting, like wool
- Cotton will hold its shapes when wet, given its inelasticity.
These crochet potholders are a very economical, handmade gift.
I used cotton kitchen twine for my crochet potholders, which brings up another really great benefit…it is really economical! You can crochet 4 potholders from a $6.00 spool of cotton kitchen twine!
Subscribers to Nourish and Nestle can nab the free, printable pattern in the Library. If you would like to receive the printable pattern pdf directly to your email inbox, click the button below.

Materials Needed for a 7.25″ Square Crochet Potholder
Some of these links may be Amazon affiliate links and I may earn a small commission from the sale of these products to help defray the costs of operating this site, but the price you are charged is not affected. You can see my full disclosure policy here.
- 72 yards of Sport weight Cotton Yarn (2mm). I used cotton kitchen twine like this.
- Crochet hook K/6.5mm One note on the crochet hook. I used my … which has a more rounded head. If you can find a crochet hook with a pointed head, I think that would make the process easier. But its not the end of the world if you can’t. I will show you how to work your hook in the instructions below.
- Faux Leather Hook and Screw (optional)

Stitches Used
- CH – chain stitch
- SC – single crochet
Gauge
- 15 stitches in thermal stitch and 19 rows over 4 inches.
Instructions
Keeping a loose tension is helpful when working the thermal stitch.
- Chain stitch 28 stitches (27 working stitches plus one turning chain)
- SC in the second stitch from the hook and all the rest of the stitches (27 stitches)
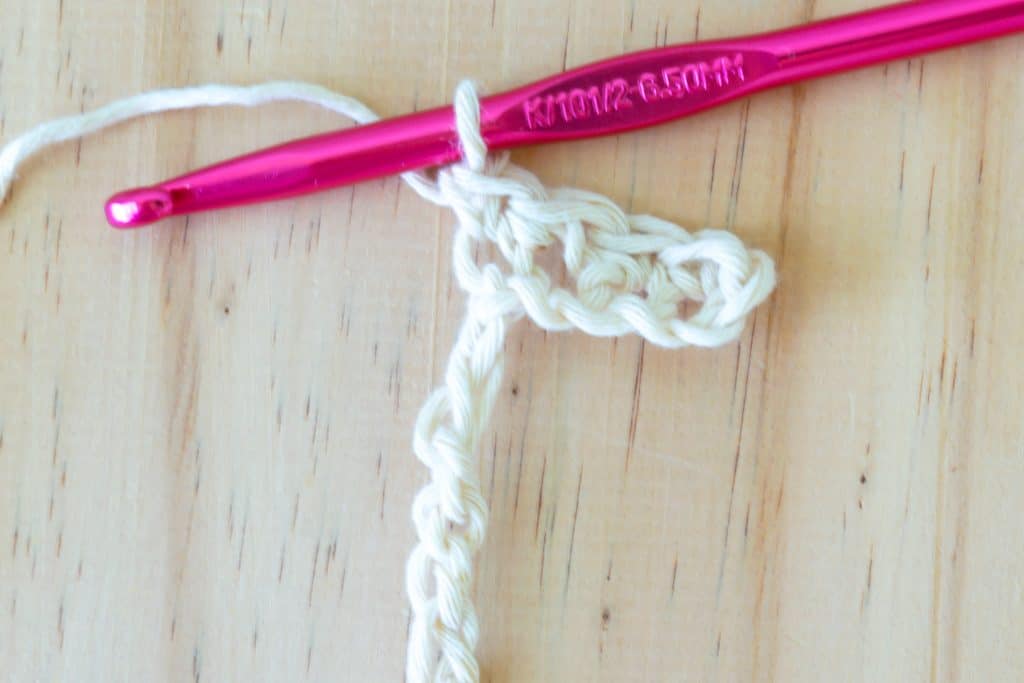
- Work 1 chain at the end of the row and turn your work to look like this.

- Note the loops that are parallel to each other. On the right side are the back loops of the row you just finished, and parallel to that are the unworked loops from the previous row. To me, it looks a bit like a zipper that we will zip close with the thermal stitch.
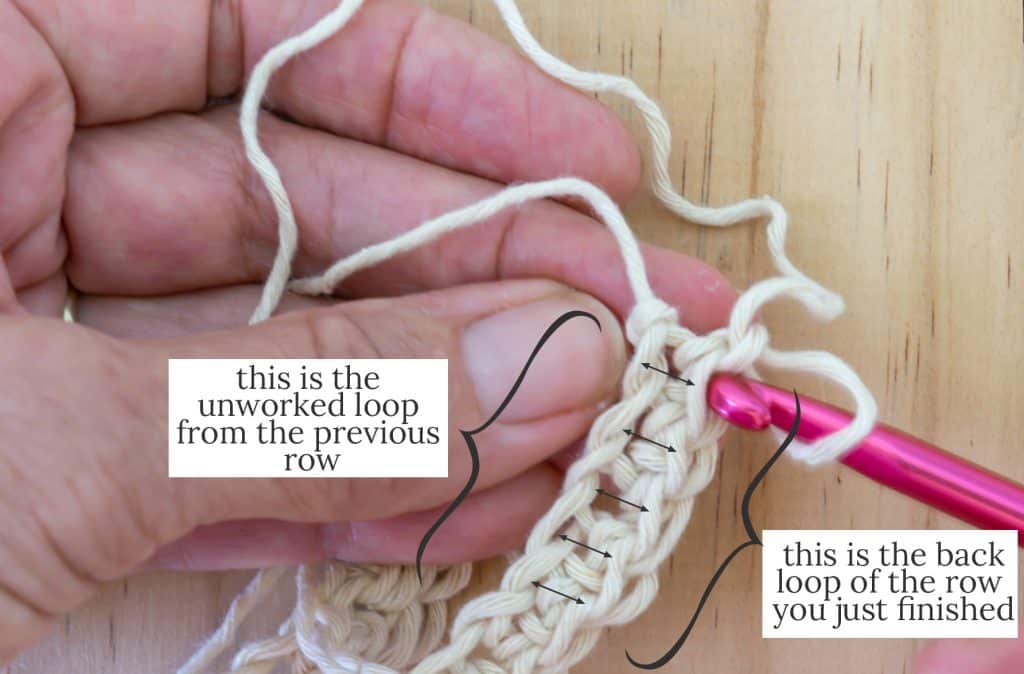
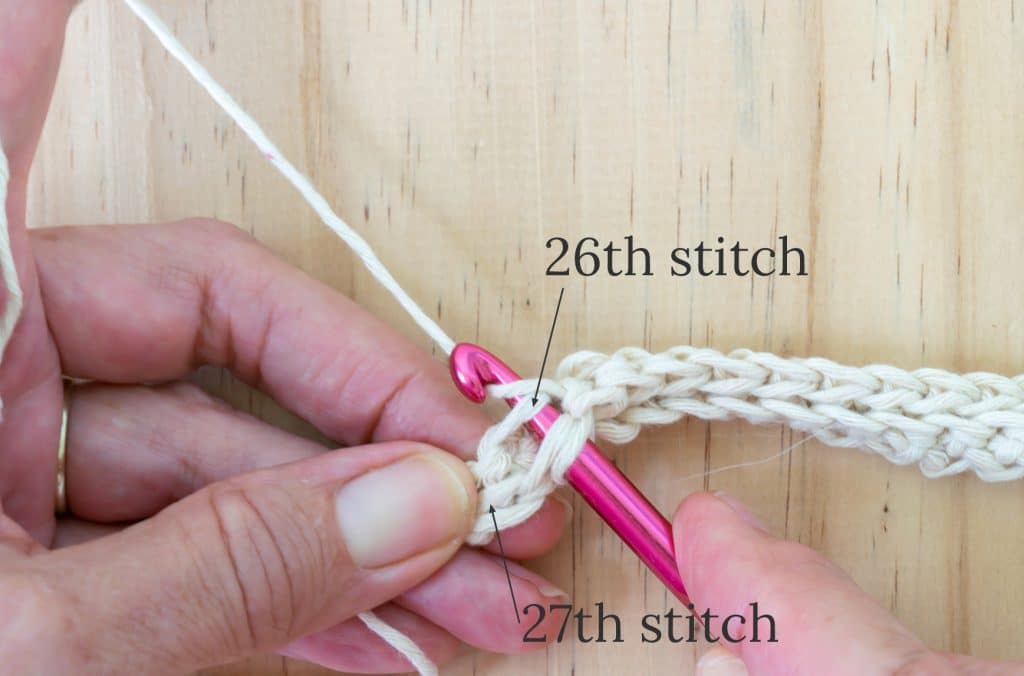
TIP: Until you fully get that hang of it, I strongly urge you to count your stitches. In this case, you should work 27 stitches in each row (not counting the turning chain).
- Place your crochet hook through both parallel loops and work a single crochet stitch into each pair of loops.
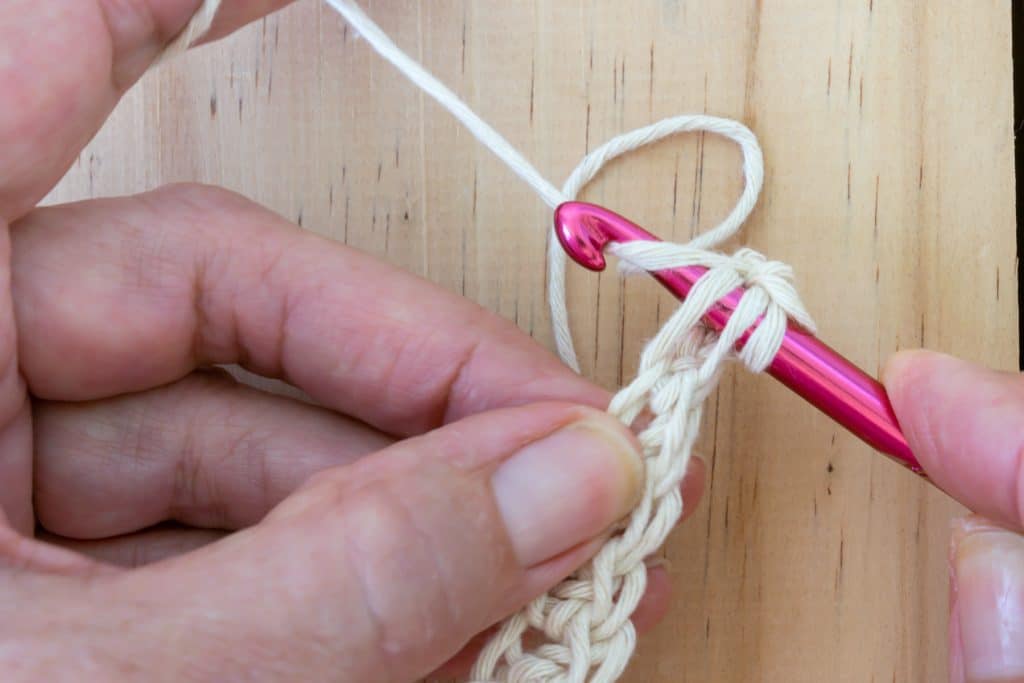
- Continue to the end of the row, ensuring you have worked 27 stitches. The last stitch can be hard to find. You often have to use your fingers to uncover it clearly. If you have difficulty locating the last stitch, undo the one right before it and use it as a guide for where the last stitch should be.
- Continue working the thermal stitch across all rows and a turning chain at the end of each row. Continue to place the first stitch in each row from the crochet hook’s second stitch. I found that it was much easier if I turned the work to ‘hook’ the loops with my crochet hook instead of just trying to push it through.
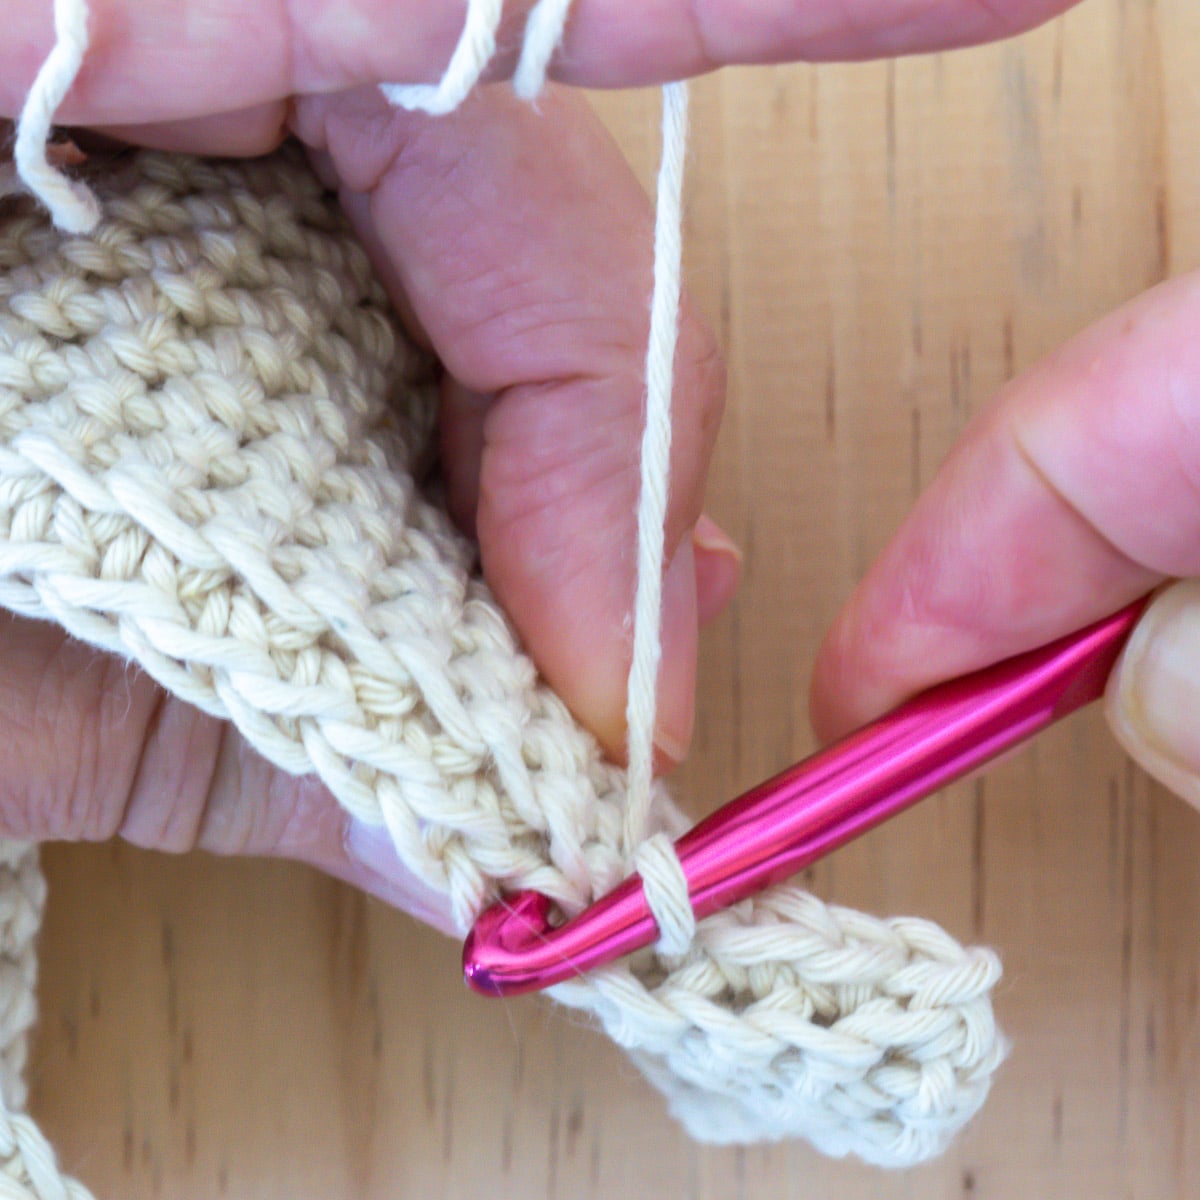
- This pattern produces a 7.25” potholder, so work until you reach 7.25”, approximately 31 rows.
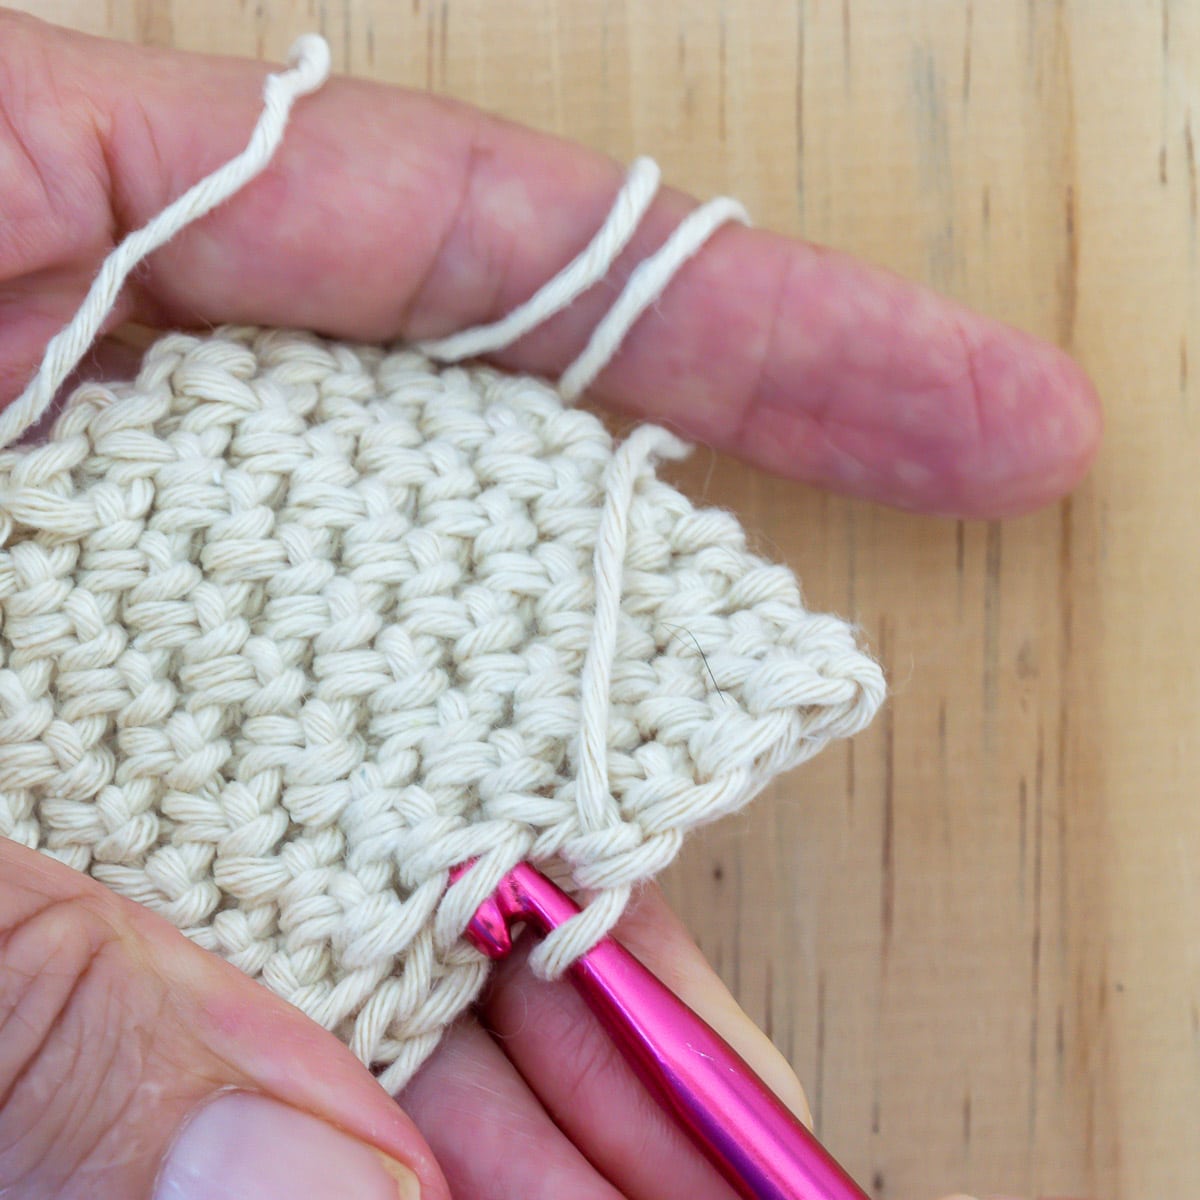
- To bind off, go through all three loops (the two loops of the current row’s stitches and the one loop that was not worked from the previous row.
- Weave in loose thread
- Attach a faux leather tag (optional) to your Crochet Potholder and admire your work!
So, what do you think? Will you make some of these crochet potholders to give as gifts for housewarming or Christmas? You could pair it with these Turk’s Head trivets for a very practical gift.
Other Potholder Patterns
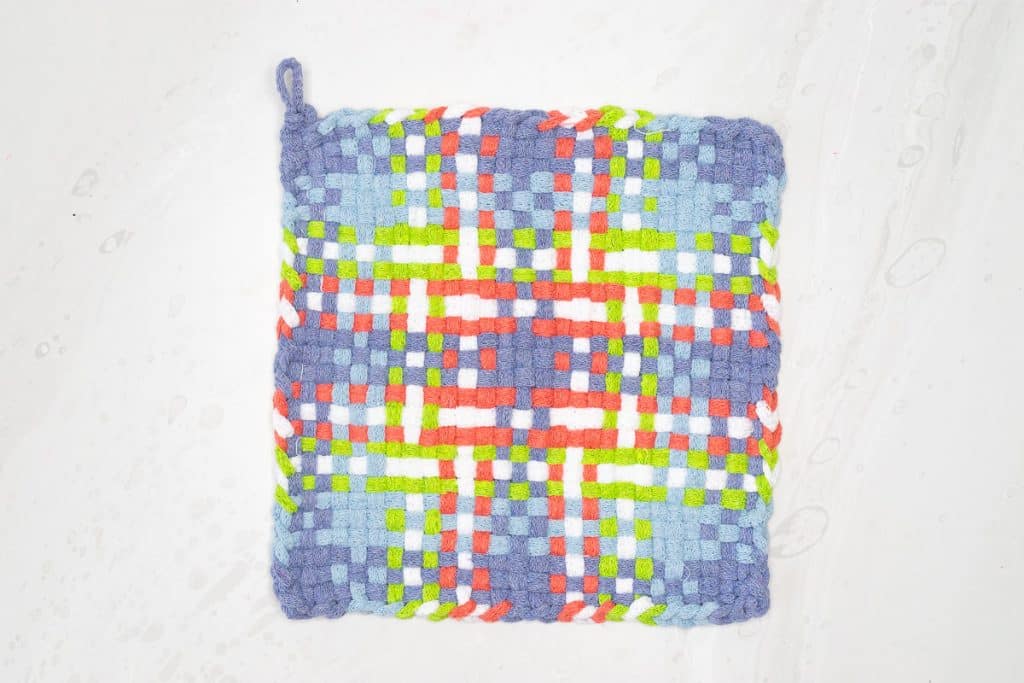
- Here’s a knit potholder pattern if you’d prefer to knit.
- Or, here’s a loom potholder if you’d prefer to weave.
Bookmark this page or pin the following image to refer back to this Crochet Potholder Pattern in the future.
Thanks so much for spending a few minutes of your busy day with me!
To ensure you don’t miss future content, pop your email in the pale green box on the right or click here. I usually send one email weekly, so I won’t inundate your inbox. I’m sensitive to an overflowing email inbox!
We will only use your email address to send you emails, no more than 1-2 weekly. In addition, you will have access to my growing library of knit & crochet patterns and other printables. Check back often as this library will continue to grow. You can unsubscribe anytime by emailing me or clicking on the “unsubscribe” link at the bottom of all emails.
And you can access many of the products I refer to on my Nourish and Nestle Amazon Page. You can access it here.
So, if you’d like to participate in the ‘subscriber benefit’ action, simply subscribe to Nourish and Nestle here or use the form on the right sidebar. It’s slightly towards the top.
I have sent all my subscribers the link to the Subscriber Benefits Library. If you missed it or misplaced it, let me know.
Until next time…

Help! Went to Etsy for the faux leather tag for potholder and got overwhelmed! Could you please direct me to the specific one you used on potholder. I liked the one you used and couldn’t find it.
Would really appreciate it!
Thanks,
Connie
HI Connie, sorry for the late response. We’ve been traveling for the past two days. I used these tags in color brown. I bought them with the rivets. And I didn’t print anything on them. I hope this helps. Let me know if you need more info.
https://www.etsy.com/listing/886039664/long-and-skinny-tags-for-knitted-items?source=aw&utm_source=affiliate_window&utm_medium=affiliate&utm_campaign=us_location_buyer&utm_content=136348&utm_term=0&awc=6220_1682164816_721be2e5b0d6f5e2090ccfa98c7d7a6f&variation0=1617283988
Lynn
Hi Lynn,
I really like this pattern. Do you think it would work as a dish cloth if made with cotton yarn.
Hi Mary,
I love this pattern too! Here are my quick thoughts about using it as a washcloth…due to the thickness of the fabric created, I wonder how long it will take to dry. It might be more prone to become musty given the thickness. What do you think? I’d love to know if you decide to go forward with it as a washcloth. Maybe just crochet a small sample to see how it does when wet.
Lynn