
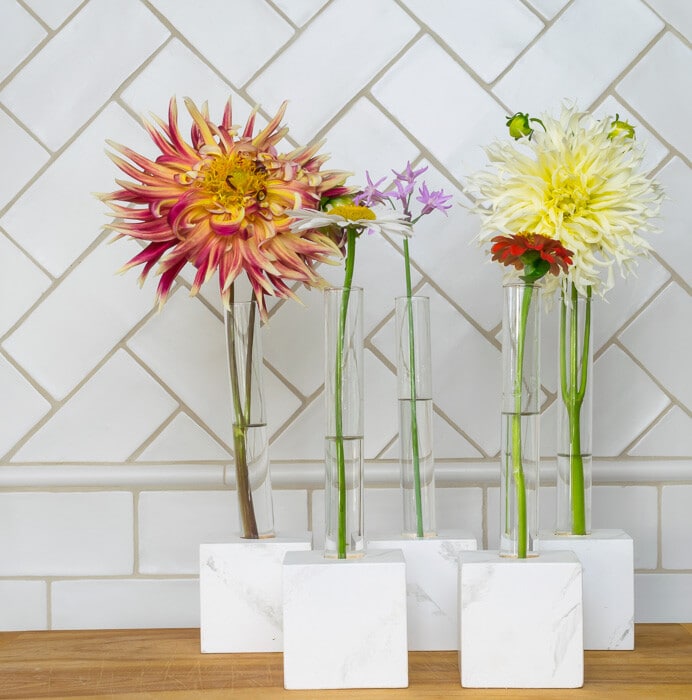
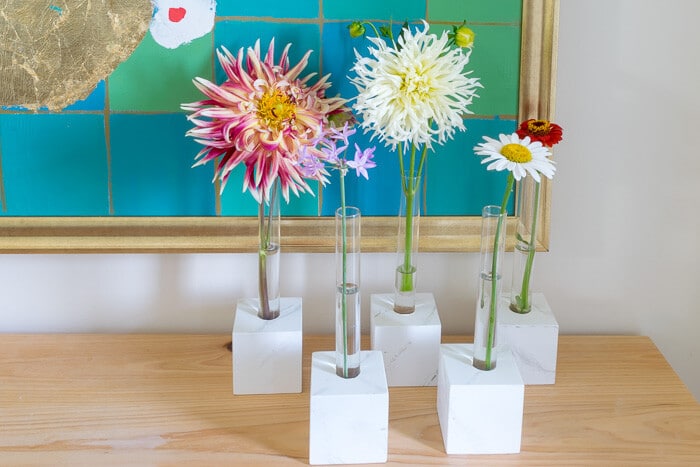
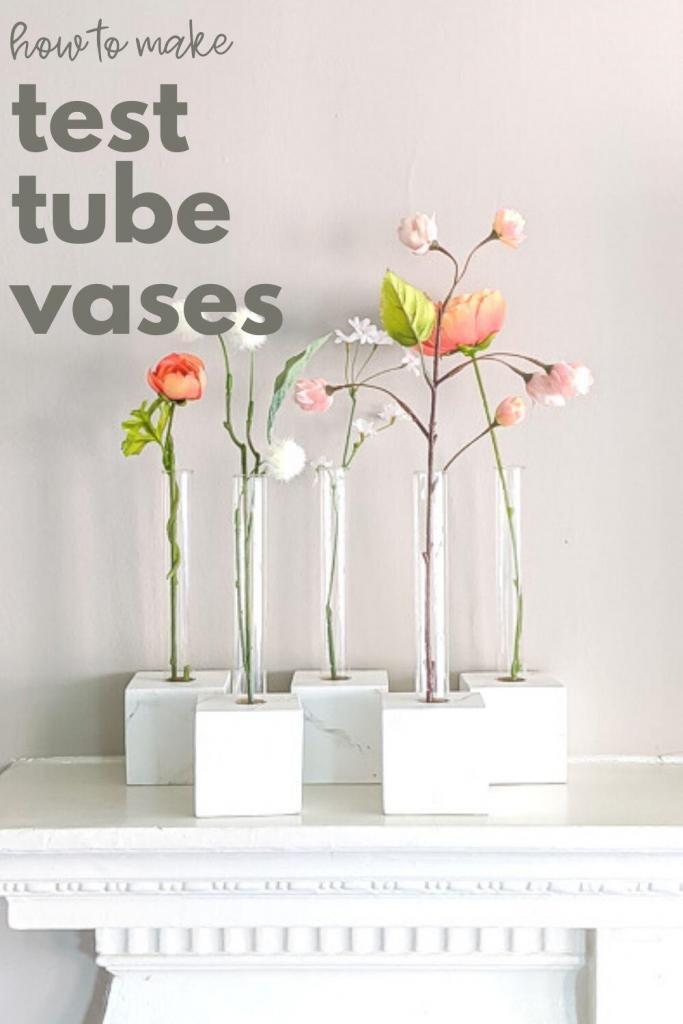
DIY Test Tube Vases with ‘marble’ base

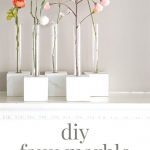

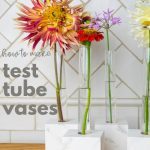
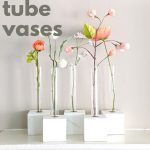
Sharing how we made these diy test tube vases for our daughter’s new apartment.
For renting an apartment sight unseen in the midst of a pandemic, our daughter really did well! She landed in a 100-year old building in Philadelphia that just oozes Great Gatsby charm! I can truly see Daisy flitting through the grounds, playing a game of badminton with Jordan and sipping on a Gin Rickey between rounds!
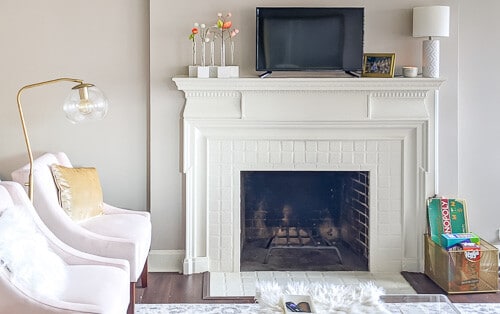
Table of Contents
There are many charming features in her one-bedroom apartment, but the working fireplace with all sorts of gorgeous mantel detail tops the list! Once she saw the pictures of the apartment, she started working on how she wanted to decorate it.
She was home when I painted and built this faux marble console table and I think that was her jumping off point for deciding on a set of DIY test tube vases with ‘marble’ bases for the mantel.
We really didn’t have much to go on and constructed these test tube vases on the fly, so to speak. But I have to say, they turned out better than we had hoped!
Some of these links may be Amazon affiliate links and I may earn a small commission from the sale of these products to help defray the costs of operating this site, but the price you are charged is not affected. You can see my full disclosure policy here.
Here’s what we used to make the test tube vases:
Test Tubes, 25mm by 200mm
As luck would have it, it appears that these test tubes have become a hot commodity and are very hard to find! Specifically the 25 x 200mm size (which for us in the US is 1″ by 8″)…inquiring minds want to know why they are in such demand!
In any event, there are oodles of the smaller size of the test tubes. If I couldn’t get the 25 x 200mm tubes, I would go for the 20 x 180mm test tubes. You only lose an inch of height and 1/4 inch in diameter.
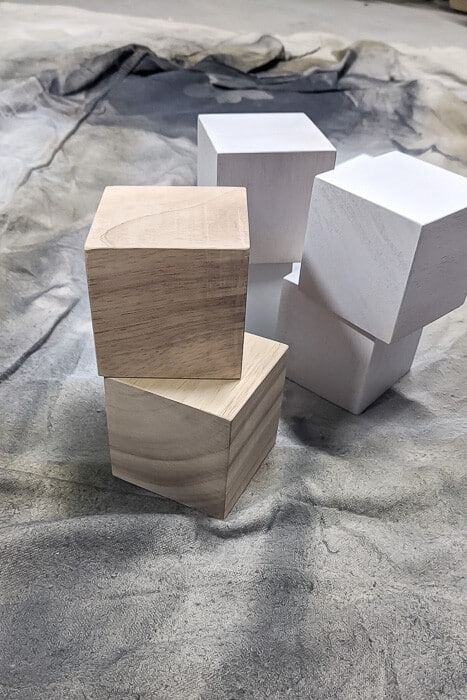
3″ Wood Blocks When we purchased the blocks, we were able to get a pack of 6 blocks for $27. At this writing, the manufacturer only has the packs of 3. But these were nice, with very little heavy graining that we needed to cover. The only downside is that they are hard wood…not sure what kind of wood, but definitely not pine.
What You’ll Need To Marbleize the Blocks
Acrylic paint for the base color of the blocks and a second color for marble veining. We used white paint and primer spray paint for the white base and Liquitex Basics in Neutral Gray, mixed with a little white, for the veining. I used the same white to glaze the surface as well.
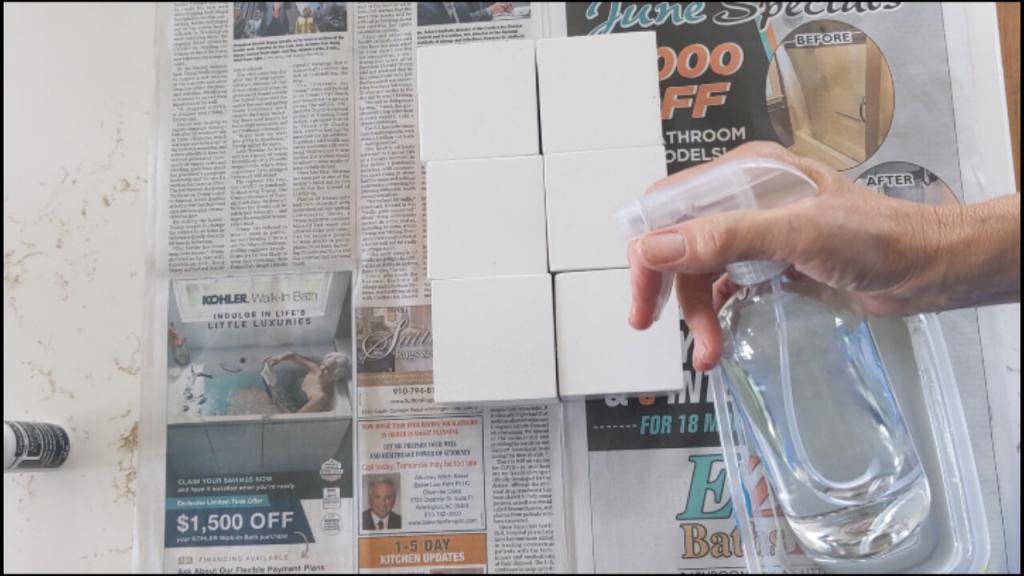
Water in a fine mist spray bottle
Large feather (like Turkey, Pheasant or Goose)
Container to mix and store paint
Paper Towels
Lint-free rag
Hairdryer
What You’ll Need to Make the Block Vase Bases
Drill
1″ Speedbor or 1″ Wood Flat Bit(or whatever the diameter of your test tube is)
A Drill Press or Drill Guide would make this whole process so very simple. But we don’t have a drill press so we jury-rigged a process. It worked pretty darn well; we only had one hole that really wasn’t plumb and so we used candle adhesive to keep the test tube upright in that one.
Another option that we didn’t think of at the time would be to use the bubble on our drill! (duh!) If you don’t have a bubble on your drill, check ou this video. Not only was it exactly what I wanted to know, but he is such a charming gentleman!
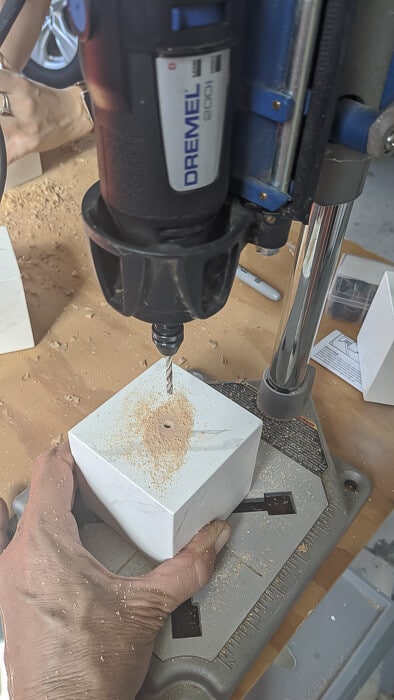
Instead of a drill press, we used my Dremel Workstation to drill a guide hole.
Then, and don’t laugh, we drilled a hole just the width of the drill bit stem, through a spraypaint can cap. The theory was that if the hole was just the width of the 1″ drill bit shank and we held the cap firmly on the block, it would help us stay plumb.
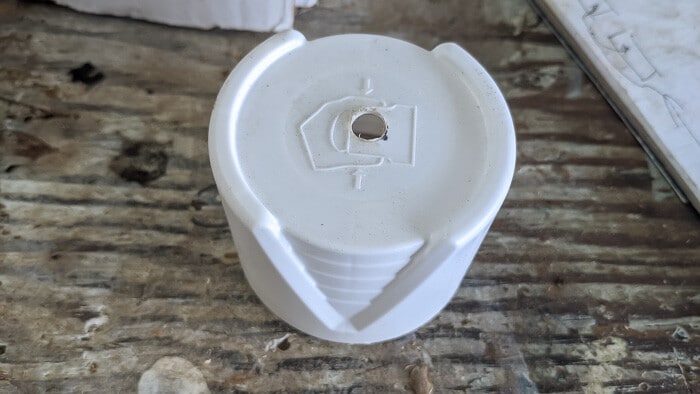
I think this was better than nothing, but it clearly isn’t a substitute for a drill guide or a drill press. But, like I said, we really only had one hole that was slightly not plumb.
How to Make the Bases for Your Test Tube Vases
The First Step is Marbleizing
If you are new to marbleizing…lucky you! I really enjoy this quick faux finish and the only problem I have is knowing when to stop. Check out the video I made when I marbleized my console tabletop as I used the exact same process and material.
Paint your blocks the base color.
We used spray paint that had paint and primer, so it was an easy process. The wood we used was not very grainy, so we didn’t need to fill the grain or to sand. We just applied 2-3 coats to fully cover the wood
Mix equal parts of your gray paint, your glazing medium, and water in a container. (I did add a little white paint to the out-of-the-tube gray to lighten it, but that is a personal preference.) You don’t need very much of these 3 ingredients…probably the equivalent of 2 tablespoons of each.
With your spray bottle filled with water, spray one side of the blocks. Don’t saturate, just a fine mist will do the trick.
Begin Marbleizing! Drag your feather through your paint mixture, dab off most of the paint on a paper towel, and slowly drag the feather diagonally across your blocks. Slowly rotate your feather from side to side…the last thing you want is a perfectly straight line!
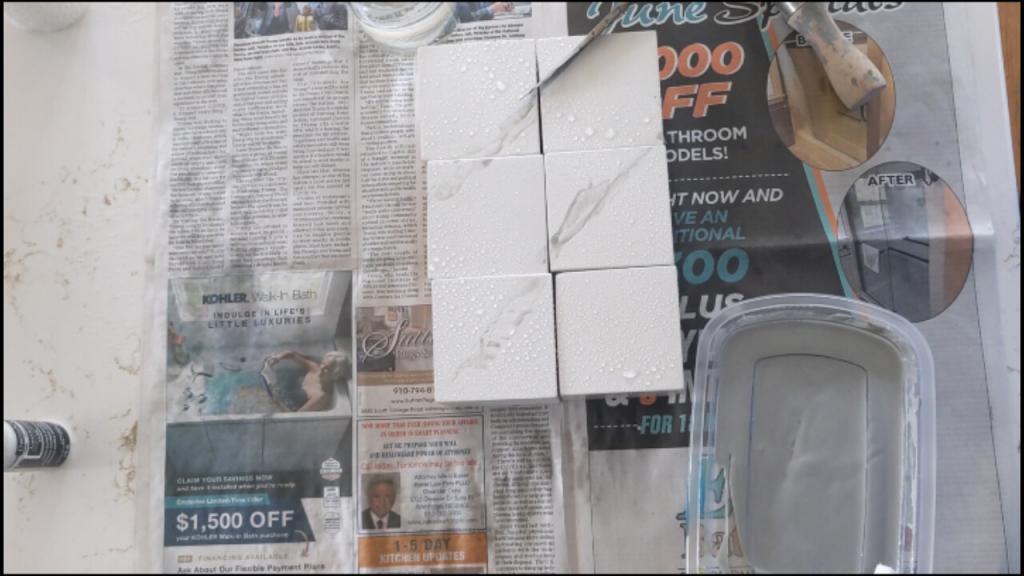
Thin out areas of heavy paint. Use your round bristle brush to tamp down on thicker areas of the paint
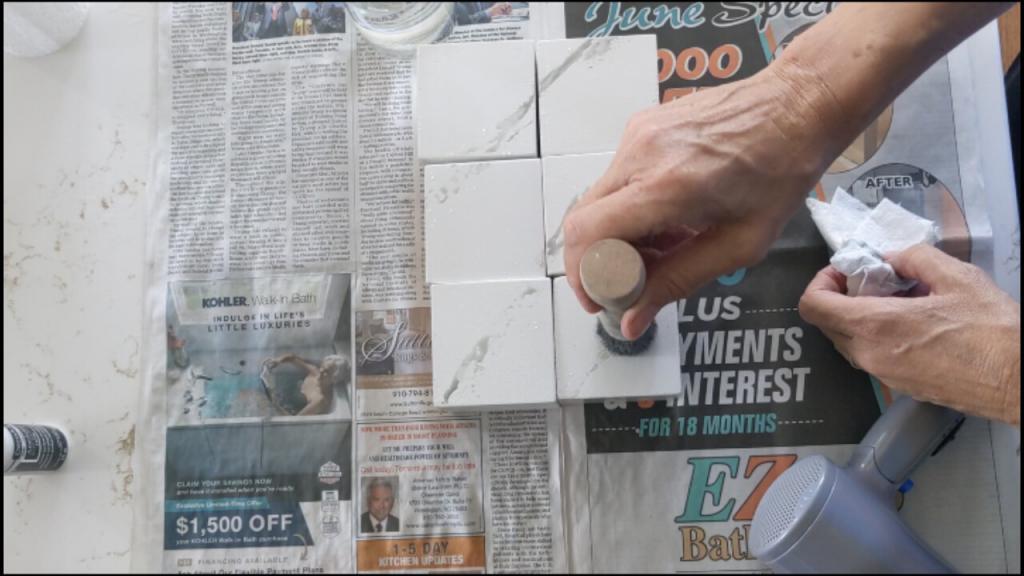
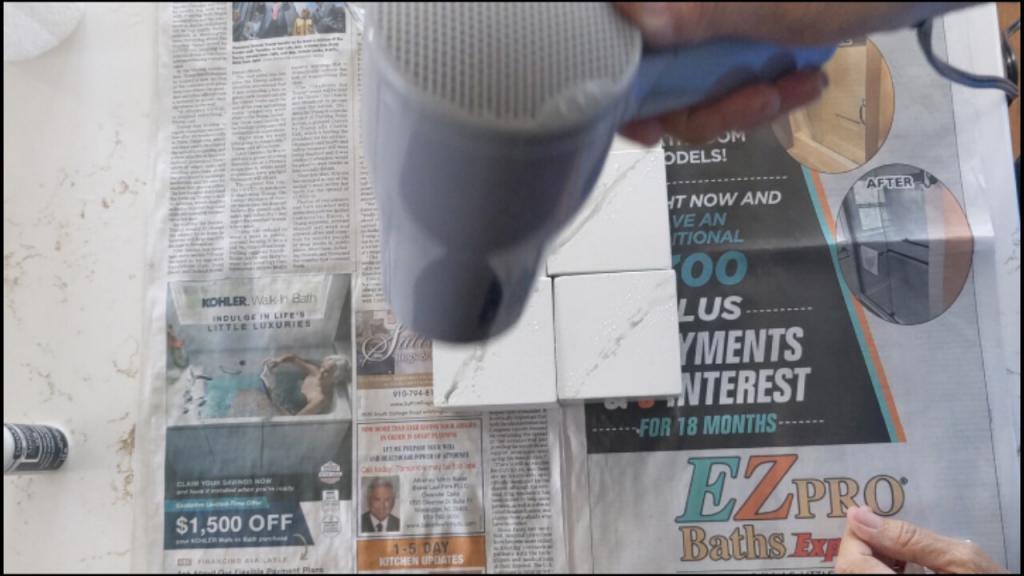
Dry the paint with the hairdryer and once dry, do another side. Repeat until all sides have been marbled. (pro tip…don’t get the hairdryer right up against the block…the heat may turn the paint yellow)
Once all the marbling is done, mix equal parts of white acrylic paint, glazing medium and water, and paint over the blocks. Wait about 1 minute and then gently, with a lint-free rag, dab the surface to pick up the paint. This just will soften the marbling and make it look more realistic.
Now that you’ve marbled the blocks, it is time to make the bases for your DIY Test Tube vases…not quite haiku…but close!
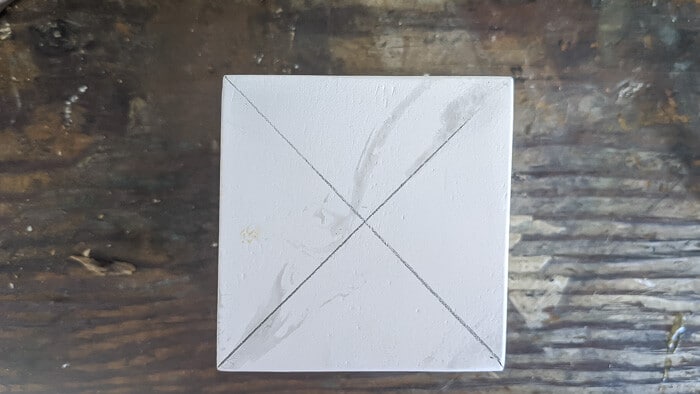
Once the paint on the cubes is thoroughly dry, mark the center. Lightly use a pencil to mark the center. After we did the one shown below, we realized that we didn’t need to draw the lines all the way across the block, we just focused on marking a smaller X in the center.
Drill the holes in your blocks. Once again, if you have a drill press or drill guide, then use it to drill holes in your blocks. With our 3″ blocks and 8″ tall tubes, we drilled holes 1.5″ deep into each block. Since we didn’t have a drill press or guide, I first used our Dremel Workstation for a guide hole.
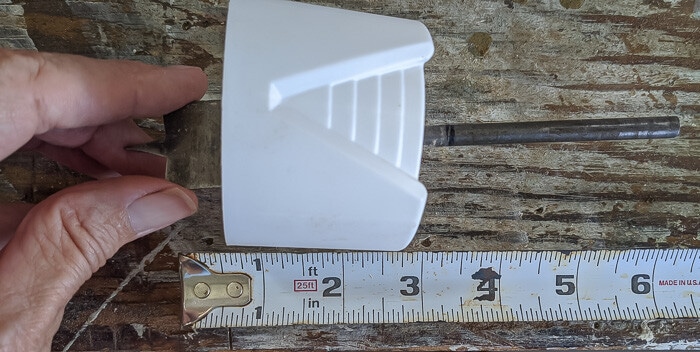
Once again, here is my jury-rigged drill guide. It definitely helped us get close to plumb. We marked 3.5″ from the blade of the drill bit up the shank. The paint cap was 2″ and we wanted our holes to be 1.5″ deep, hence the 3.5″.
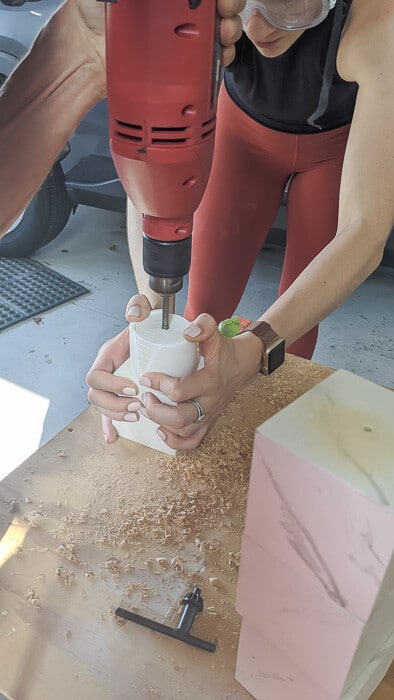
Drill the hole in each block
Spray each block with a non-yellowing polycrylic.
We used candle adhesive at the bottom of each test tube to hold it in place, especially on the one that was slightly wonky.
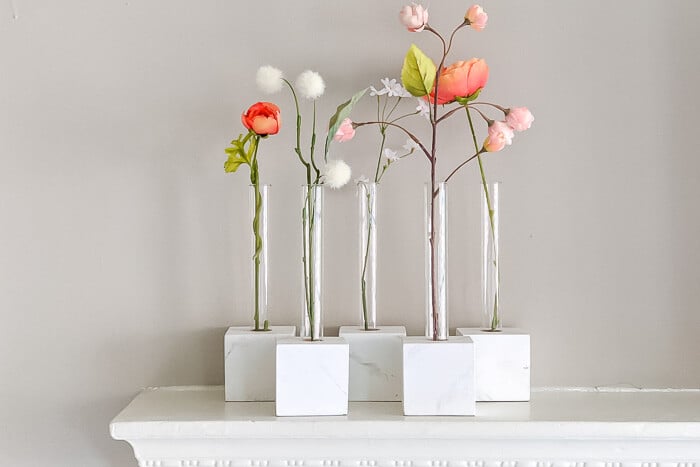
But, arent they just too fun? Before she moved, we cut fresh flowers from the garden for each vase.
To refer back to this DIY Test Tube Vase post in the future, bookmark this page or pin the following image.
Thanks so much for spending a few minutes of your busy day with me!
To ensure you don’t miss future content, pop your email in the pale green box on the right or click here. I usually send one email weekly, so I won’t inundate your inbox. I’m sensitive to an overflowing email inbox!
We will only use your email address to send you emails, no more than 1-2 weekly. In addition, you will have access to my growing library of knit & crochet patterns and other printables. Check back often as this library will continue to grow. You can unsubscribe anytime by emailing me or clicking on the “unsubscribe” link at the bottom of all emails.
And you can access many of the products I refer to on my Nourish and Nestle Amazon Page. You can access it here.
So, if you’d like to participate in the ‘subscriber benefit’ action, simply subscribe to Nourish and Nestle here or use the form on the right sidebar. It’s slightly towards the top.
I have sent all my subscribers the link to the Subscriber Benefits Library. If you missed it or misplaced it, let me know.
Until next time…


Lynn, I love these! Perfect for your daughters apartment! Simple, classy, easily change with the seasons! Another DIY WIN!
Aw, thanks friend. They really did turn out well and look so perfect in her apartment.