
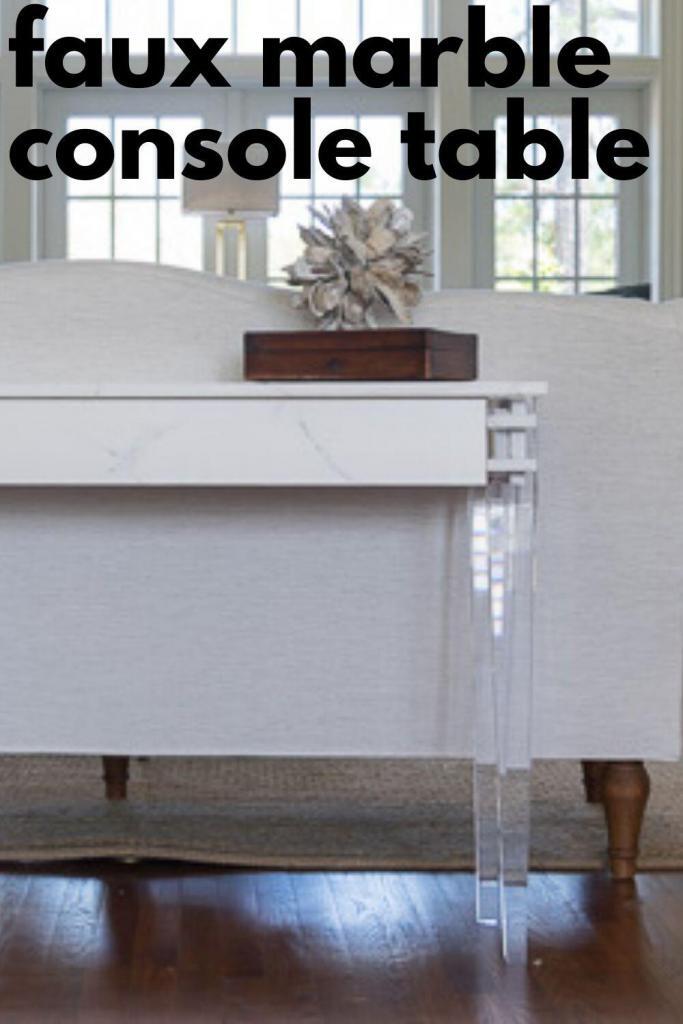
DIY Faux Marble Console Table
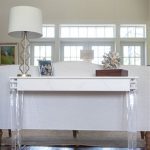
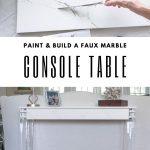

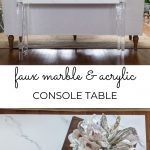
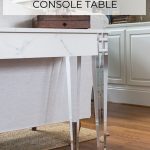
Sharing how to paint faux marble and build a console table with a faux marble top and acrylic legs.
I’m struggling here. We need another word in the English language for multiples of favorites. I guess I can go with ‘tied for my favorite’…but can I have a 3-way tie for favorite? Because that’s where I’m finding myself.
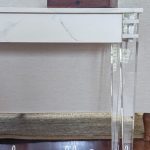
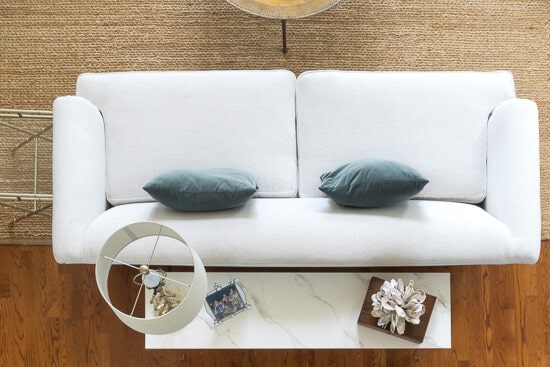
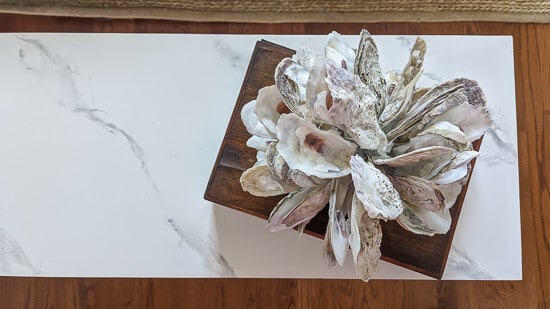
This Faux Marble Console Table is without a doubt, tied for first place among my favorite Home Decor DIYs. I would also have to throw in my Oyster Shell Mirror and the Original Console Table into the mix.
Not only am I tickled with the way the faux marble top and apron came out, but the acrylic legs just add a whole level of ‘way cool’ to my new sofa table.
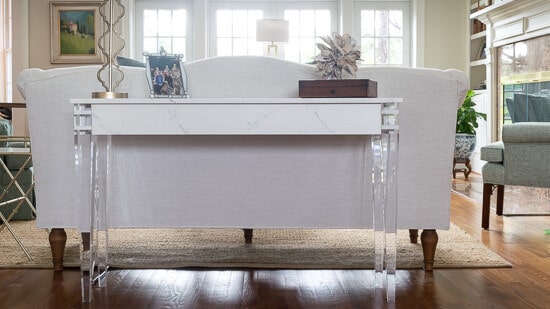
Table of Contents
Since moving almost a year ago, I’ve been slowly getting each room to the way we want it and adding this console table to the living room gets me one step closer to being finished.
So, let’s just dive right into what was needed to make this table happen, starting with faux marbling and ending with building your console table!
Just as there are many different types of marble, there are many different ways to DIY Faux Marble. I was looking for a simple, uncomplicated marble look, so kept my process very simple. If you are looking for a busier, all over faux marble, you will have no problem finding videos and instructions for that.
Materials Needed for Faux Marble Console Table with Acrylic Legs
Some of these links may be Amazon affiliate links and I may earn a small commission from the sale of these products to help defray the costs of operating this site, but the price you are charged is not affected. You can see my full disclosure policy here.
- A piece of low-grain wood, like poplar. Mine measures 4′ by 12″.
- Wood for the apron of the table. If you are using the Amicalola legs, you will need your apron sides to be 5″ tall to cover the hardware of the leg.
- Primer
- Wood grain filler (optional)
- 220 grit sandpaper
- Acrylic paint for the base color of the table and a second color for marble veining. I used Sherwin Williams Swiss Coffee for the white base and Liquitex Basics in Neutral Gray, mixed with a little white, for my veining.
- Water in a fine mist spray bottle
- Glazing medium
- Large feather (like Turkey, Pheasant or Goose)
- Paintbrush
- Container to mix and store paint
- Stiff bristle round brush
- Paper Towels
- Lint-free rag
- Hairdryer
- 1000 grit wet/dry sandpaper
- Polycrylic
- Good quality brush for Polycrylic
- Amicalola Acrylic Table Legs (The legs come with gold bands. I painted mine to match the marble top, so if you go that route you will need spray paint, with primer, in a color close to your base). These acrylic table legs are really solid and well made, weighing just under 2 lbs. per leg, so you know your table will be stable. My friends at Osborne Wood, who graciously provided me with these legs, are offering readers of Nourish and Nestle a 10% discount on a purchase. Use the code Nourish10 for your discount.
- Corner brace
- Bolts
- L-brackets to attach the top to the sides
- Power saw
First Step: Prepare Your Wood
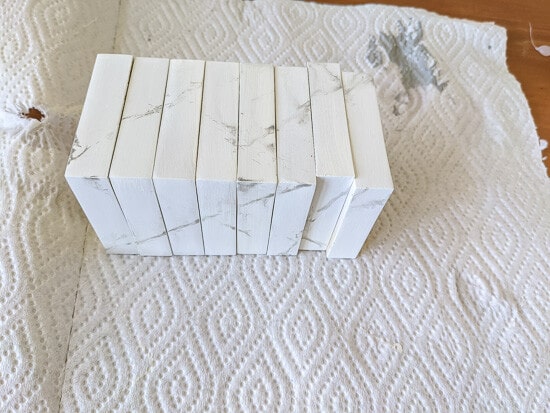
- Sand, prime and paint your tabletop and apron sides. If the grain still shows through, consider a wood grain filler. I did this project when I wasn’t able to run to the hardware store, so I had to make do with what I had and this wood filler worked wonders for the grainy piece of wood I had.
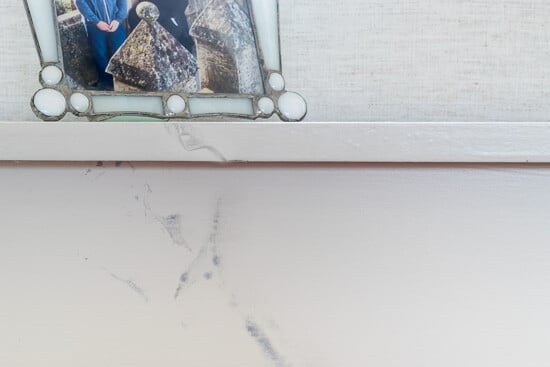
- Since you want your faux marble to look as much like real marble as possible, make sure the top and sides are really smooth. Get comfy with your sandpaper!
Second Step: Marbling Your Tabletop
Right upfront, I have to admit that I love faux marbling! It really is so easy. But as in any artistic creation, the key is knowing when to stop. You’ll find it so easy and rewarding that you’ll want to just keep going. But…be disciplined and stop when are find yourself searching for areas to keep marbling.
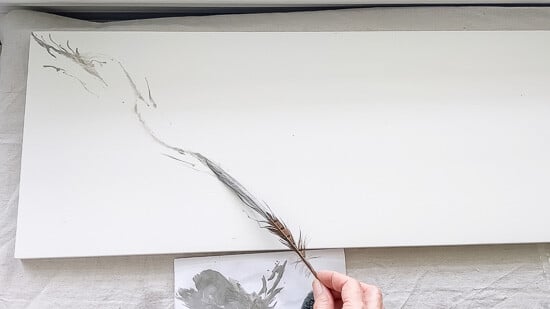
I also highly recommend practicing marbling on a scrap piece of wood before you start on your ‘real’ piece.
- Mix your paint: 1/3 each of the color of your veining, water, and glaze. I used
- Using a spray bottle with a fine mist, spray a very light mist over your tabletop.
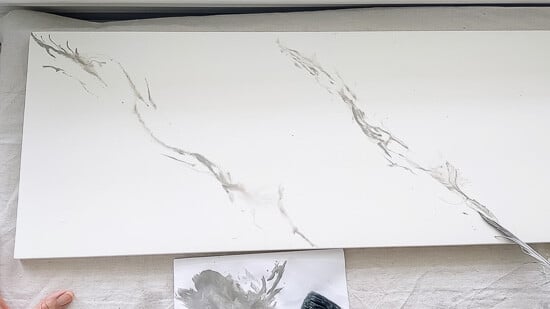
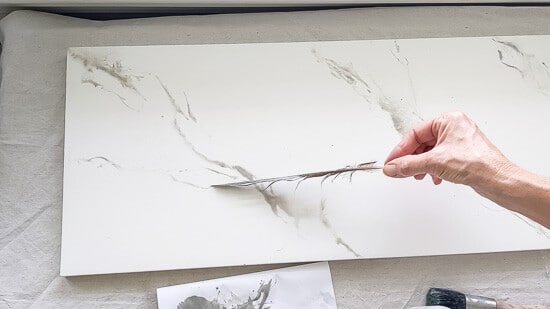
- Dip your feather into the paint and then dab off much of the paint on a paper towel.
- Starting in the upper left-hand corner of your piece, slowly drag your feather in a diagonal (from left to right) across your tabletop. Barely skim the surface of the wood, rotating your wrist from side to side. Rotating your wrist will result in a more natural, uneven line like you would find in natural marble.

- Make sure you continue your veining naturally over the edge of your table.
- Repeat this procedure across the table surface.
- If you find you have heavy paint in any area, use your round bristle brush to gently dab it.

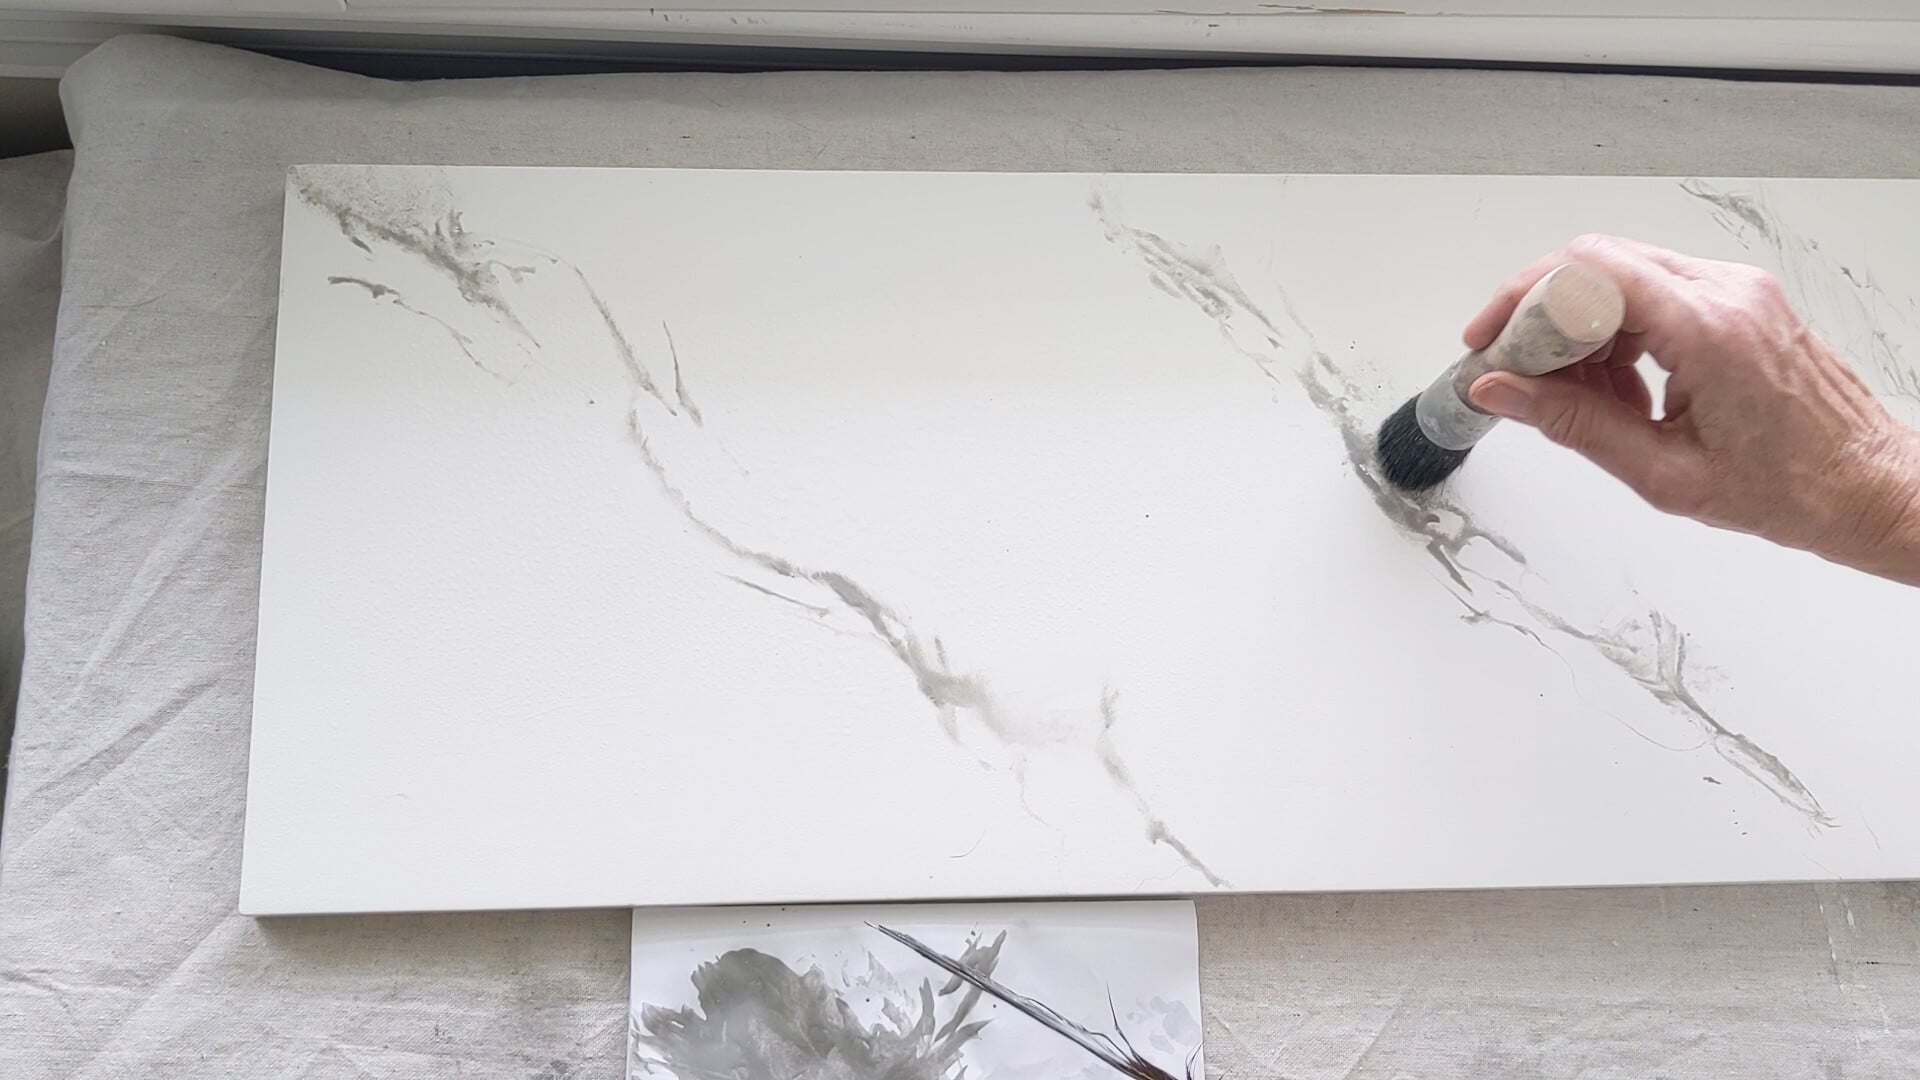
- I also find that misting heavy areas again with help the paint dissipate and look more natural.
- Once you’ve done your diagonal across the whole surface, do a few, sparing, strokes on a horizontal plane.
- If you are unhappy with what you are seeing, remove the paint before it dries and do it until you are happy.
- Once you like what you see, use a hairdryer on the coolest setting to dry the paint. Don’t get the heat too close to your wood as some white paints will yellow with the direct heat. No Bueno!
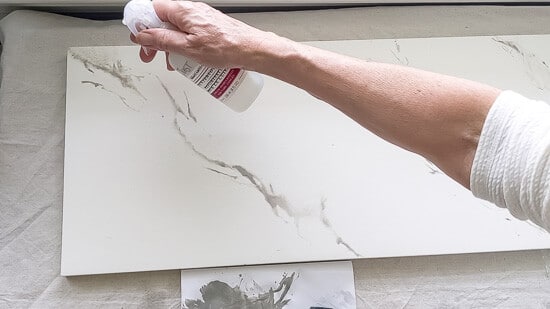
- Now, mix up 1/3 of each the white base color, glaze, and water.
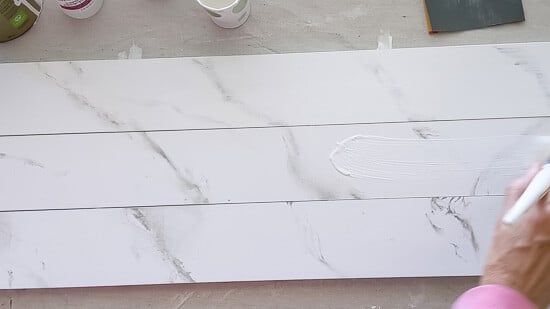
- Using a medium to large paintbrush, sweep the glaze over your dried veining.
- Let it sit all of a minute and then, using your lint-free rag, pick up the glaze. I find that dabbing it eliminated ‘strokes’. Definitely look at it from all angles so that you dab any of the brush strokes, you don’t want to see any brush strokes in your marble. This glaze just softens the veining.
- Repeat the entire process for the apron pieces.
I made a video showing the faux marbling process from start to finish. You can see it here.
- I applied several coats of Polycrylic to the apron and tabletop, wet sanding between each coat. I tried several different methods (sponge brush, rag, and bristle brush) of applying the polyacrylic and found that adding a wee bit of water and using a good quality brush made for acrylic did the best job of spreading evenly. Work quickly, avoiding the urge to go back and touch up spots you might have missed…you are better off just getting those spots on a second or third coat.
- If you are going all marble, you may also want to marble the gold pieces that hide the bolt on the acrylic legs.

- I spray painted them with Krylon CoverMax in white (a primer/paint in one) and then did a quick marbling to them and then sprayed them with clear polyacrylic after done marbling.
Third Step: Build Your Console Table
Once you are done with all the faux marbling fun, it is time to get in the garage and build your console table.
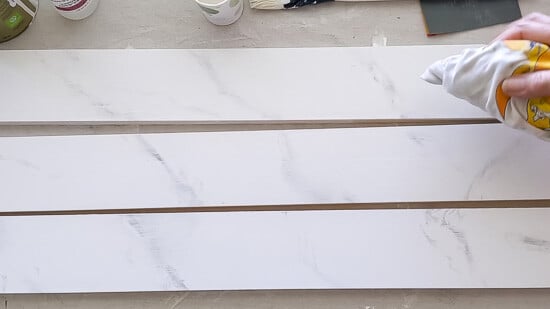
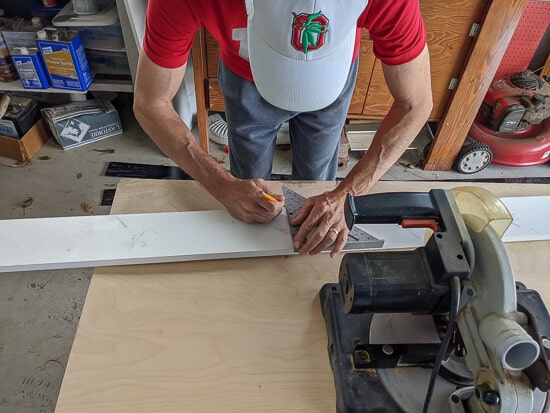
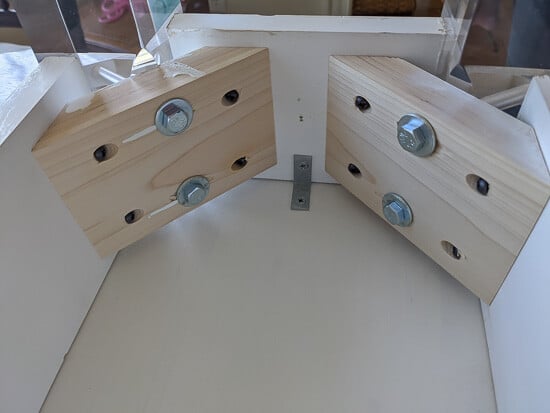
- Determine where you want your legs and apron to be on the underside of your table. I wanted my legs to be 1/2″ in on each side of the table, so I marked that on the underside.

- Place the legs where you want them and measure the space between the legs for the apron lengths.
- Cut the 4 apron pieces. (2 long and 2 short)
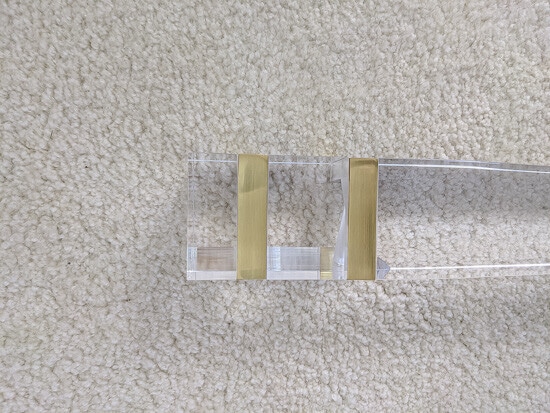
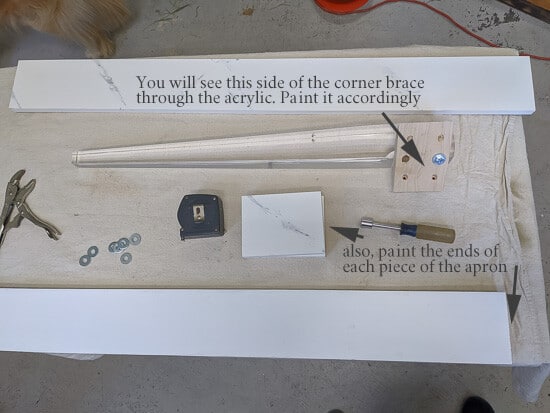
- If using wood corner braces, you will probably want to paint the outside of them (the side facing the legs) as you will see them through the acrylic leg. We went with white.
- Paint the ends of your apron pieces as well, as those will also show through the acrylic leg.
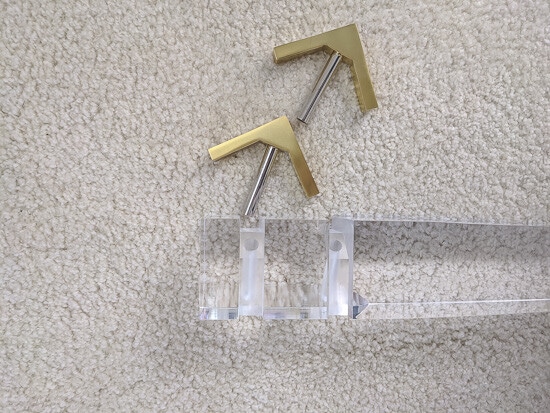
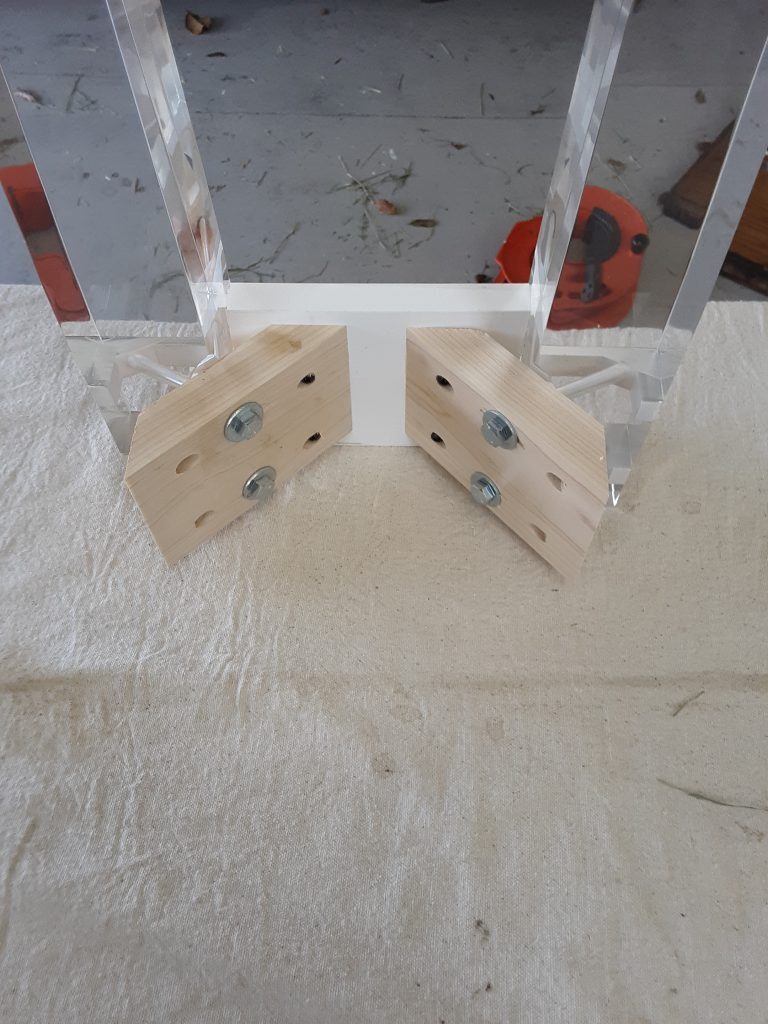
- Attach each corner brace to each leg using a bolt through the 2 metal sheaths in each leg.
- Then attach the aprons to each side of the corner brace with wood screws. This is a two-person job unless you have some good vises…but you don’t want to mar your acrylic or marbling…so I’d get a second set of hands. You want to apply appropriate pressure such that there are no gaps between the legs and the aprons.
- Then, using little L braces, attach the top of your table to the apron sides under the table and BAM! You just built a console table!
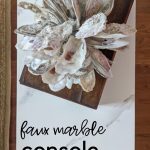
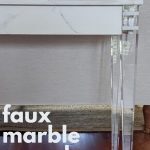
To refer back to this tutorial on faux marble and making a console table, bookmark this page or pin the following image.
Thanks so much for spending a few minutes of your busy day with me!
To ensure you don’t miss future content, pop your email in the pale green box on the right or click here. I usually send one email weekly, so I won’t inundate your inbox. I’m sensitive to an overflowing email inbox!
We will only use your email address to send you emails, no more than 1-2 weekly. In addition, you will have access to my growing library of knit & crochet patterns and other printables. Check back often as this library will continue to grow. You can unsubscribe anytime by emailing me or clicking on the “unsubscribe” link at the bottom of all emails.
And you can access many of the products I refer to on my Nourish and Nestle Amazon Page. You can access it here.
So, if you’d like to participate in the ‘subscriber benefit’ action, simply subscribe to Nourish and Nestle here or use the form on the right sidebar. It’s slightly towards the top.
I have sent all my subscribers the link to the Subscriber Benefits Library. If you missed it or misplaced it, let me know.
Until next time…

I received compensation in the form of a product for this post, however, the opinions are all mine.

Gorgeous, Lynn! Your marble technique looks fabulous! And those legs! I’ve never seen them before but now I’m thinking of ideas to use them. Thanks!!
Hi friend…they really are gorgeous! And very sturdy! I was surprised how hefty they are.
After reading through your directions on marbling with paint I do believe I can summon up the courage to tackle my upcoming project of painting my kitchen counters with Rustoleum floor paint and marbelizing them. Your console table turned out so beautifully! Thank you Lynn for sharing…
Terry in Victoria, B. C.
You can do it, Terry! Definitely try your marbling on a scrap piece of wood beforehand to get yourself comfortable with it. And please, come back and share your success!!
Hugs, Lynn