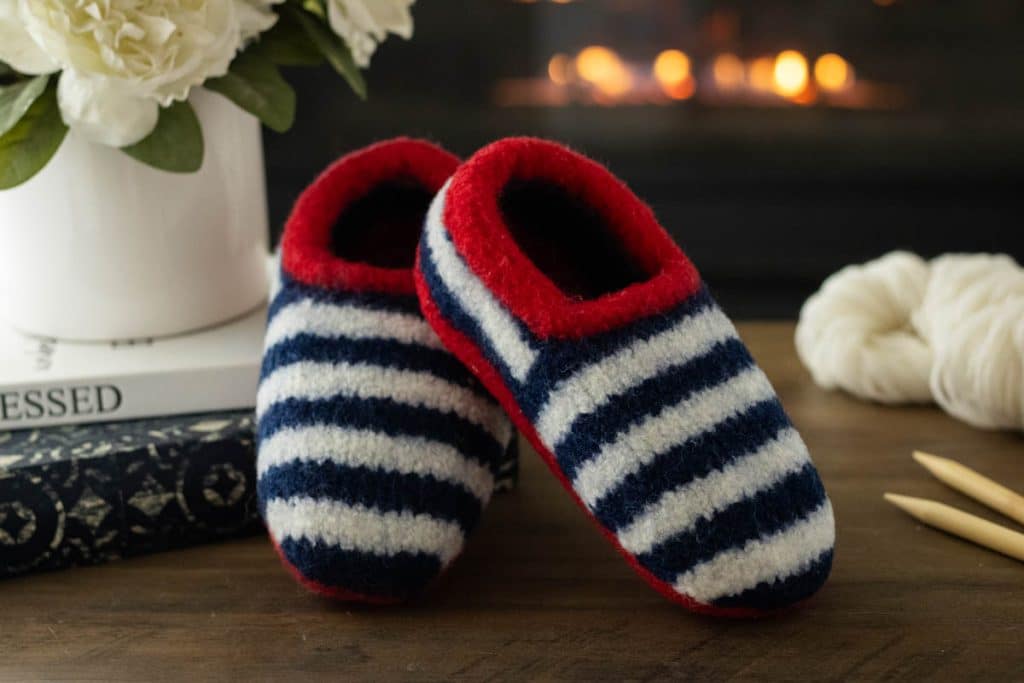
Felted Slippers Knitting Pattern: Striped Sailor Slippers
If cold floors chill your piggies and hurt your feelings, this felted slippers knitting pattern is the solution! Cozy, comfy, and endlessly customizable, you can knit a pair of these sailor slippers in a weekend or two, then felt them over a day. Bottom line, there’s no excuse for cold piggies this winter!
They start out as big, floppy, striped slippers that honestly look like they were made for a giant. Then they go into the washing machine, where hot water and agitation shrink the wool into a thick, sturdy fabric that holds its shape and keeps your toes cozy. Pulling them out of the wash and seeing how much they changed is my favorite part.
The pattern comes in five adult sizes, from women’s 3 to men’s 10 1/2, uses plain stockinette with simple increases and decreases, and is worked flat in one piece before seaming. Felting hides the little imperfections, so it’s a very forgiving project for a newer knitter who is ready to try something beyond scarves. And at about $40 a pair, they cost less than many store-bought wool slippers.
The entire pattern is written out below. It’s quite detailed, and I share lots of tips to help you knit and felt these sailor slippers successfully and enjoyably. Feel free to nab the printable PDF (link in the Materials section). But, do take a minute to read through for all the tips.
This post contains affiliate links. As an Amazon Associate, I may earn a small commission from qualifying purchases at no extra cost to you.
Table of Contents
Tips for Success
A few simple tips make this felted slippers knitting pattern go smoothly, from winding your yarn to pulling the finished slippers out of the wash.
- Before you cast on, wind each color into a single ball with two strands held together, so they feed as one. Since the yarn is held double the whole way through, pulling two strands from separate balls is a recipe for a tangled mess.
- Check every yarn label for the word superwash. Superwash wool has been treated so it won’t shrink, which is wonderful for socks but means it will not felt. Your slippers will come out of the wash looking exactly the same size they went in. BOTTOM LINE: IF IT SAYS ‘SUPERWASH’ IT WON’T FELT, DON’T USE IT!
- Test your colors for bleeding before you knit. Deep colors like red and navy can release dye in hot water, and once the slippers are knit and felted, there’s no undoing it.
- Snip a few inches of each dark or bright color, wet it with hot tap water, and press it onto a white paper towel. No color on the towel means you’re good to go.
- Color on the towel means that skein may bleed. Soak it in cool water, still in the skein, without swishing or rubbing, and change the water until it runs clear. A splash of white vinegar in the soak can help set loose dye.
- Roll the skein in a towel to remove extra water, then hang it to dry completely before winding. Be gentle here, since too much handling can start to felt the yarn.
- Even when every color passes the test, toss a color catcher sheet into the washer when you felt your slippers. Hot water and a long wash are much harder on dye than a quick test, and the sheet is cheap insurance, especially with red next to white.
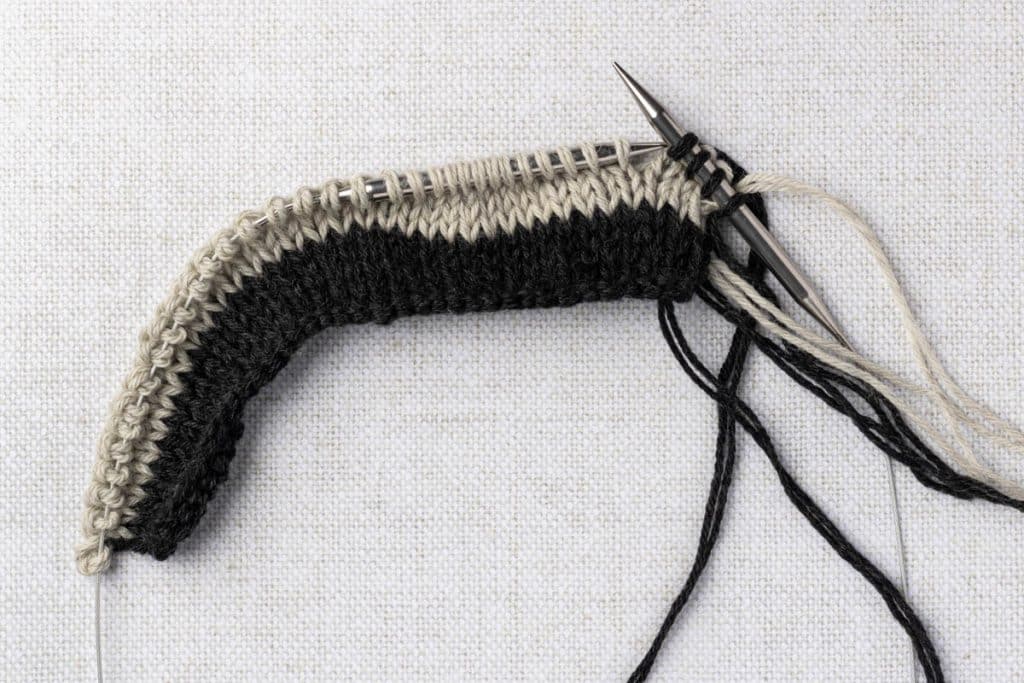
- Carry the stripe colors up the side instead of cutting them each time. The stripes change every 4 rows, so you can simply drop one color and pick up the other at the edge. Fewer cut ends means less weaving in, and the carried strands disappear into the seam.
- Use a row counter or keep a scrap of paper nearby. The top panel and sole both have specific row counts, and the stripe sequence makes it easy to lose your place. A quick tally mark at the end of each row saves a lot of frogging.
- Weave in your ends securely before felting. Felting will lock most of them in place, but loose tails can work their way out in the wash.
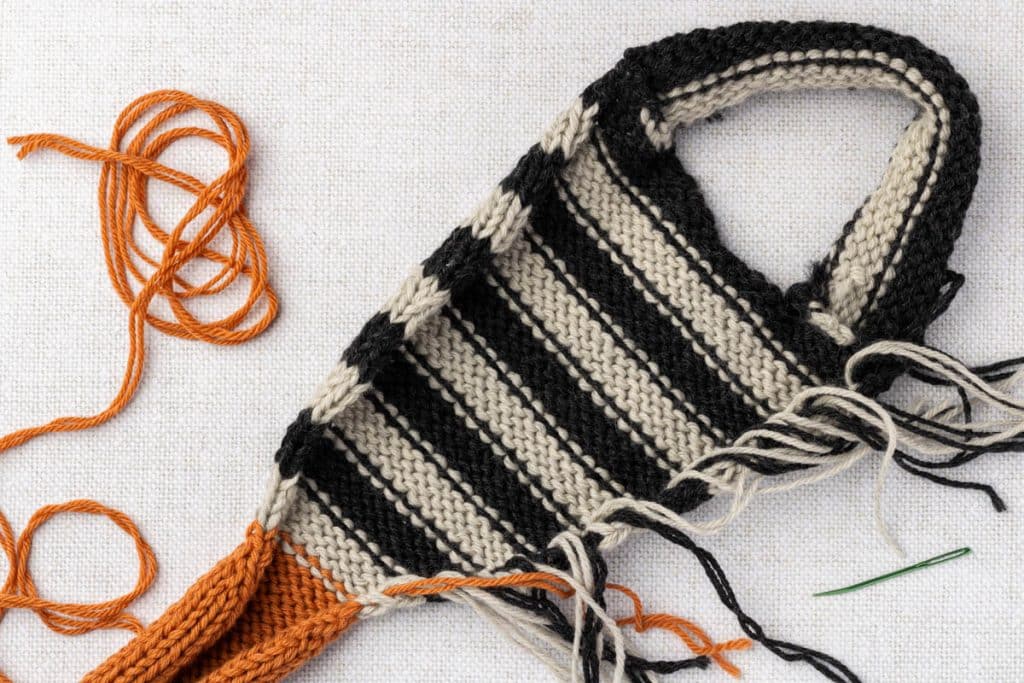
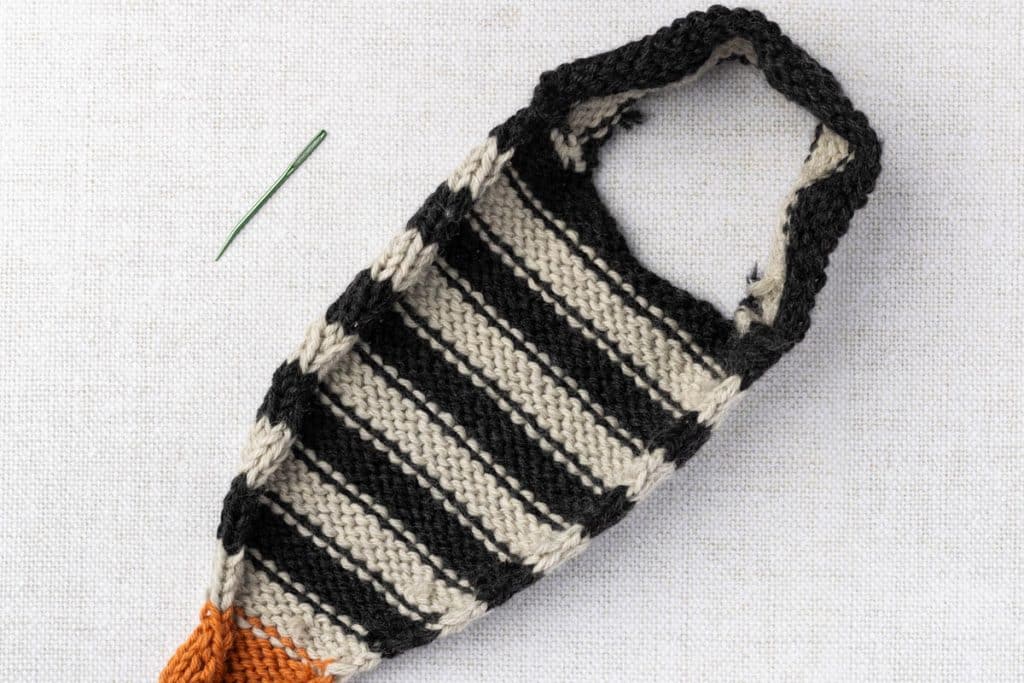
- Pull your seams snug. Mattress stitch that is a little tight before felting looks smooth and tidy afterward, while a loose seam can leave a visible ridge.
- Measure your foot before you start felting. Felt to your own measurement instead of the size chart for the best fit, and check often during the first wash.
- Tuck the slippers into a zippered pillowcase or mesh laundry bag before they go into the washer. Felting releases a surprising amount of fuzz, and the bag keeps it out of your machine’s drain.
- Felt both slippers together in the same load. They shrink at the same rate that way, and you end up with a matching pair.
- Write down how long your slippers took to felt in your machine. The next pair will be much easier when you already know your washer’s timing.
Troubleshooting
Felting has a few more variables than regular knitting, so here are the most common hiccups with a felted slippers knitting pattern and how to fix them.
My slippers aren’t shrinking.
First, check the yarn label for superwash. Superwash yarn will not felt, no matter how many times you wash it. Next, make sure the wash is set to hot with a cold rinse and a heavy duty or normal cycle, not delicate. Adding a towel or an old pair of jeans gives the wool more friction. Front loading machines often need 2 to 3 cycles, so be patient. Very light or bright white yarns are sometimes bleached, and bleached wool can felt more slowly or not at all.
My slippers shrank too much.
Soak them in lukewarm water with a little hair conditioner for about 30 minutes, then gently stretch them over your foot (in socks) or a shoe stretcher while they are still damp, and let them dry in place. You may be able to gain back a little length this way, but it won’t undo a lot of shrinkage. That’s why checking every 10 to 15 minutes the first time matters so much.
One slipper is bigger than the other.
Run the bigger one through another short cycle on its own, checking it often. While both are still damp, you can also stretch the smaller one a bit and shape them side by side so they dry to match.
I can still see my stitches after felting.
That just means they need more time in the wash. Run another cycle and check again. Fully felted fabric looks fuzzy and solid, and the individual stitches are hard to pick out.
My stitch count is off in the decrease rows.
All of the shaping happens on right side rows, with a plain k1 at each edge. Double check that you are working the ssk at the beginning and the k2tog at the end of the row, and that you haven’t accidentally decreased on a purl row.
There are small holes where the top panel meets the heel.
This sometimes happens at the corners when picking up stitches. Use a nearby yarn tail to stitch the gap closed from the wrong side before felting. Felting will hide any small leftover gaps.
My slippers are slippery on hardwood floors.
Felted wool can be slick on hard floors. Brush on a product like sock stop or add suede or gripper soles to the bottoms after they are fully dry. More ideas are in the Make It Your Own section below.
My slippers are fuzzy and pilled after felting.
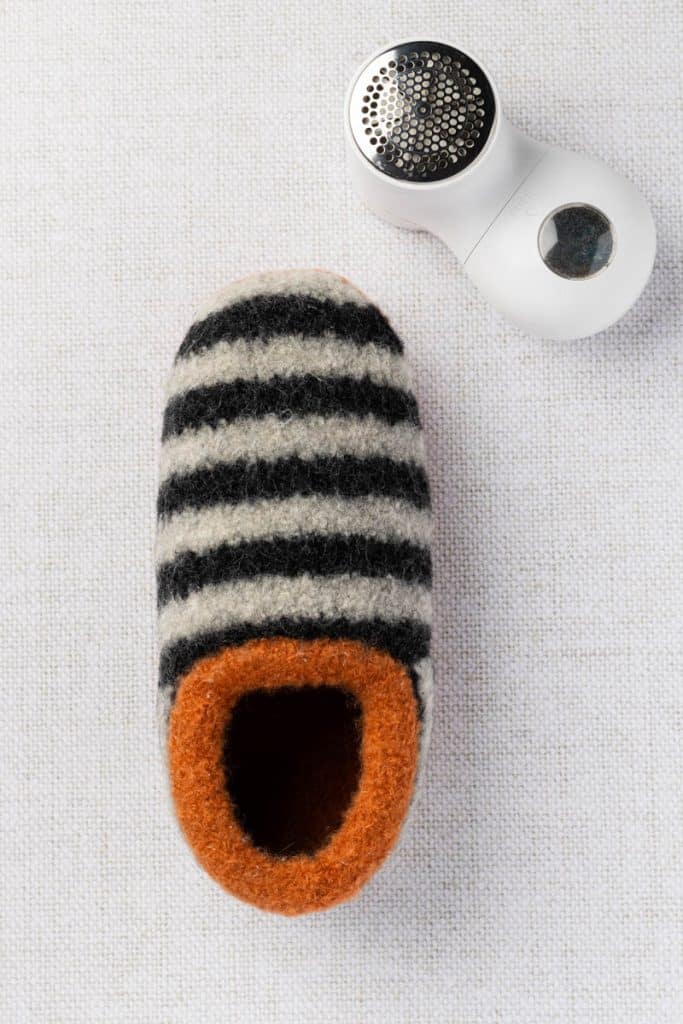
That’s completely normal. A quick pass with a fabric shaver tidies them right up.
Thoughts on Yarn and Yarn Substitutions
I chose Cascade 220 held double for these slippers. It’s 100% non-superwash Peruvian Highland wool, it felts evenly and predictably, and it comes in a huge range of colors. I was able to find it at my local craft store, and it’s also easy to order online.
Any yarn you use for this felted slippers knitting pattern has to felt reliably, so here’s what matters most when choosing a substitute:
- Fiber: 100% wool is the safest choice. Wool, alpaca, and mohair blends can also felt, but anything with acrylic, nylon, or cotton will felt poorly or not at all. Even a small amount of acrylic or nylon can keep a yarn from felting evenly, so check the fiber content on every label, not just the yarn name. Some yarn lines include a few blended shades alongside their 100% wool colors.
- Not superwash: this is the most important rule. Check every label.
- Weight: a worsted weight wool held double, or a single strand of bulky wool, gives the thickness these slippers need.
- Color: very pale or bright white yarns are often bleached and may felt more slowly. Dark, saturated colors may bleed a little in hot water.
Always knit a small swatch and felt it before committing to a new yarn. It takes a little extra time, but it tells you exactly how your yarn and your washer behave together.
Yarn Options
Cascade 220 (the yarn used in this pattern)
100% Peruvian Highland wool, worsted weight, 220 yards per 100 g skein, not superwash, and available in well over 100 colors. One skein of each color is enough for a pair in any size. Find it at LoveCrafts or Amazon.
Lion Brand Fishermen’s Wool
A budget-friendly favorite for felting. Each 8 oz skein holds about 465 yards of 100% wool, which is enough for a whole pair, and then some, in a single color. It comes in a small range of natural, undyed shades, so it’s perfect for a cozy oatmeal and brown striped pair. Skip the tweed shades, which include acrylic and rayon. Buy it on Amazon.
Here’s a fun money saver: because the natural shade is undyed, you can dye it yourself at home with unsweetened drink mix packets or food coloring and a little vinegar. One big skein can become all three of your colors.
Patons Classic Wool Worsted
100% wool, worsted weight, about 210 yards per 100 g ball, and a long-time go-to for felted projects. It’s often a little less expensive than Cascade 220, though it can be hard to find. As of this writing, it is available at Michaels, order it online and have it ready for you when you arrive.
Malabrigo Worsted
A soft, kettle-dyed 100% merino in beautiful colors, about 210 yards per 100 g skein. It’s a heavier aran weight, so held double it will knit up thicker than Cascade 220. Swatch first and consider going up a needle size. Merino tends to felt quickly, so check often. Find it at Amazon and LoveCrafts.
Cascade EcoWool and EcoWool+
A bulky 100% Peruvian Highland wool that can be worked with a single strand instead of two, which means fewer tangles and no winding double balls. Each 250 g skein holds about 478 yards, so one skein of each color will make two or three pairs. That makes it a smart buy for holiday gift knitting. Swatch to check your gauge before you start. Eco+ comes in a full range of colors, and it works perfectly with the natural, undyed shades of Ecological Wool if you’d like to mix the two.
You’ll find the estimated grams and yardage for each size in the Estimated Yarn Usage per Pair table in the pattern below, including totals for a solid color pair.
The Pattern
Subscribers can download an ad-free, printable PDF of this felted slippers knitting pattern, as well as our many other patterns and printables, from our Subscriber Library. Subscribing is free.
Materials
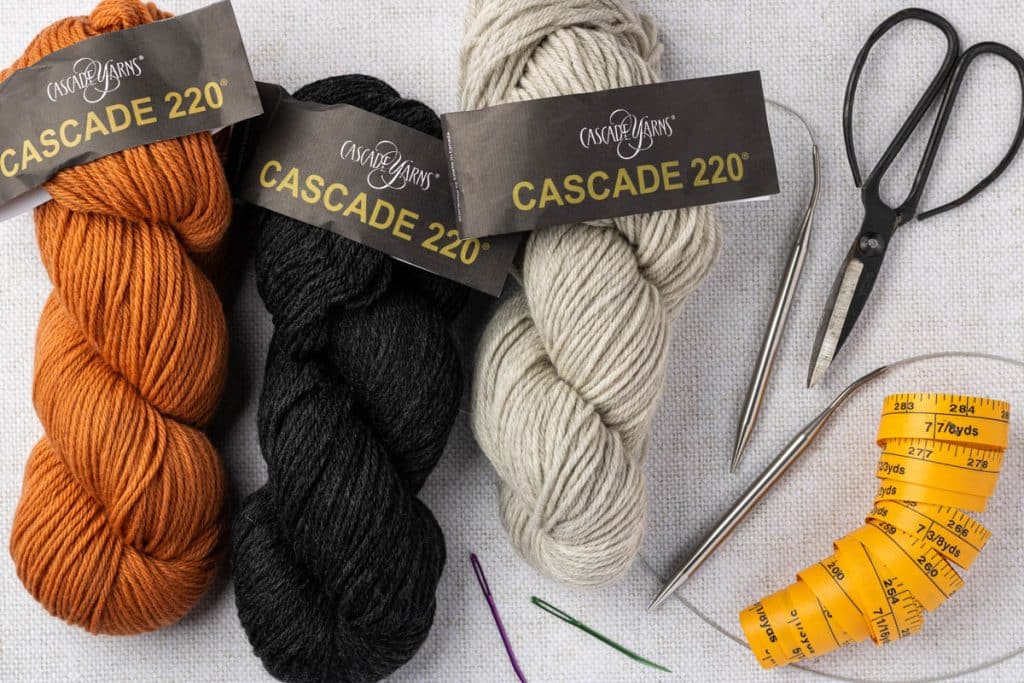
- 8 mm (US 11) circular knitting needles (the slippers are worked flat; the circular needle simply holds all the stitches). 8 mm straight needles or double-pointed needles can be used instead of a circular needle.
- 100% wool yarn that is NOT superwash: We used Cascade 220 (100 g skeins) in 3 colors, held double throughout. One skein of each color is enough for one pair in any size.
- Tapestry needle
- Fabric measuring tape
- Scissors
- Locking stitch markers or scrap yarn in a contrasting color
- For felting: washing machine, one towel, and enzyme-free laundry detergent
- Optional: fabric shaver for removing fuzz after felting and Color Catching Sheets if using multiple colors.
- This free Felted Slipper Knitting Pattern is available in this post below and as an ad-free printable PDF for subscribers. You can find the pattern in the Miscellaneous section of the Library (your super secret password is included at the bottom of every Monday’s Newsletter email) or email me, and I’ll send it to you. Not a subscriber? C’mon—we’d love to have you. A subscription costs nothing and gives you access to all our printables and pattern PDFs. Click here to have the Felted Slipper Knitting pattern directly emailed to you.
Yarn and Colors
Cascade 220 is held double (2 strands at a time) for the entire pattern. Three colors are used:
- Color A and Color B: stripes on the heel panel and top panel
- Color C: sole panel and i-cord edge
Estimated Yarn Usage per Pair
| Size | Color A | Color B | Color C | Total (Solid Color) |
|---|---|---|---|---|
| XS | 40 g / 88 yds | 35 g / 77 yds | 55 g / 120 yds | 130 g / 285 yds |
| S | 45 g / 99 yds | 40 g / 88 yds | 60 g / 131 yds | 145 g / 318 yds |
| M | 50 g / 110 yds | 45 g / 99 yds | 65 g / 142 yds | 160 g / 351 yds |
| L | 60 g / 131 yds | 50 g / 110 yds | 70 g / 153 yds | 180 g / 394 yds |
| XL | 65 g / 142 yds | 55 g / 120 yds | 80 g / 175 yds | 200 g / 437 yds |
Yardage is approximate, based on Cascade 220 (220 yards per 100 g), and counts both strands. Use the yardage to compare yarns with a different yards-per-gram. For a solid color pair, use the Total column.
Gauge
12 sts and 17 rows = 4 x 4 inches in stockinette stitch, with Cascade 220 held double, on 8 mm (US 11) needles, before felting.
Because these slippers are felted, gauge is more forgiving than in a fitted garment, but it still affects how much felting is needed to reach the right size.
Sizes and Finished Measurements
Instructions are written for size XS, with sizes S, M, L, and XL in parentheses: XS (S, M, L, XL). When only one number is given, it applies to all sizes.
| Size | Women’s US Shoe Size | Men’s US Shoe Size | Finished Foot Length After Felting |
|---|---|---|---|
| XS | 3 to 4 | 1 1/2 to 2 1/2 | 8 to 8 1/4 inches |
| S | 5 to 6 | 3 1/2 to 4 1/2 | 8 1/2 to 9 inches |
| M | 7 to 8 | 5 1/2 to 6 1/2 | 9 1/4 to 9 1/2 inches |
| L | 9 to 10 | 7 1/2 to 8 1/2 | 9 3/4 to 10 1/4 inches |
| XL | 11 to 12 | 9 1/2 to 10 1/2 | 10 3/4 to 11 inches |
Men’s sizes are approximate conversions. Shoe sizing varies by brand, so the finished foot length is the most reliable guide. For the best fit, measure your foot and felt the slippers to that measurement.
Abbreviations Used in This Felted Slippers Knitting Pattern
- k: knit
- p: purl
- st(s): stitch(es)
- RS: right side
- WS: wrong side
- rep: repeat
- ssk: slip 2 sts knitwise one at a time, knit them together through the back loops
- k2tog: knit 2 sts together
- tbl: through the back loop
- m1L: make 1 left, lift the bar between sts from front to back and knit it tbl
- m1R: make 1 right, lift the bar between sts from back to front and knit it through the front
- held double: working 2 strands of yarn together as one
Techniques Used
Long tail cast on, knitted cast on, stockinette stitch, increasing (m1L, m1R), decreasing (k2tog, ssk), picking up stitches, stripes and color changes, seaming with mattress stitch, applied i-cord edge, and machine felting.
Notes Before You Begin
- This felted slippers knitting pattern is worked flat in one continuous piece: first the heel panel, then the top panel is picked up from the heel, and the sole continues from the toe of the top panel. The sides are seamed and the opening is finished with an applied i-cord before felting.
- Yarn is held double throughout.
- Stripes alternate between Color A and Color B every 4 rows on the heel and top panels.
- Row counts do not include cast on or bind off rows unless noted.
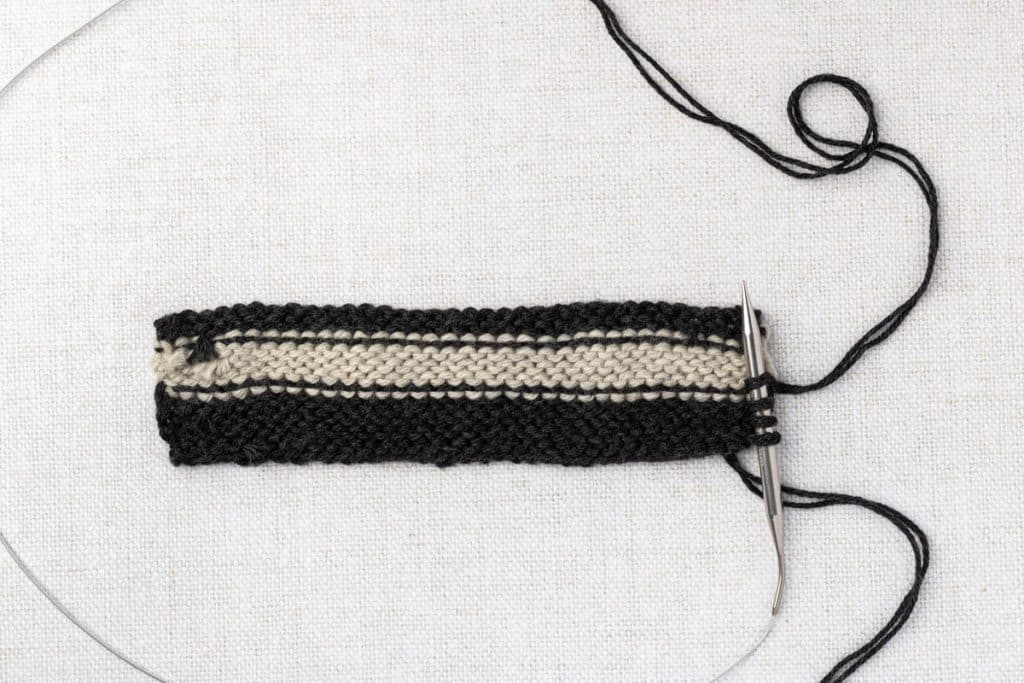
Heel Panel
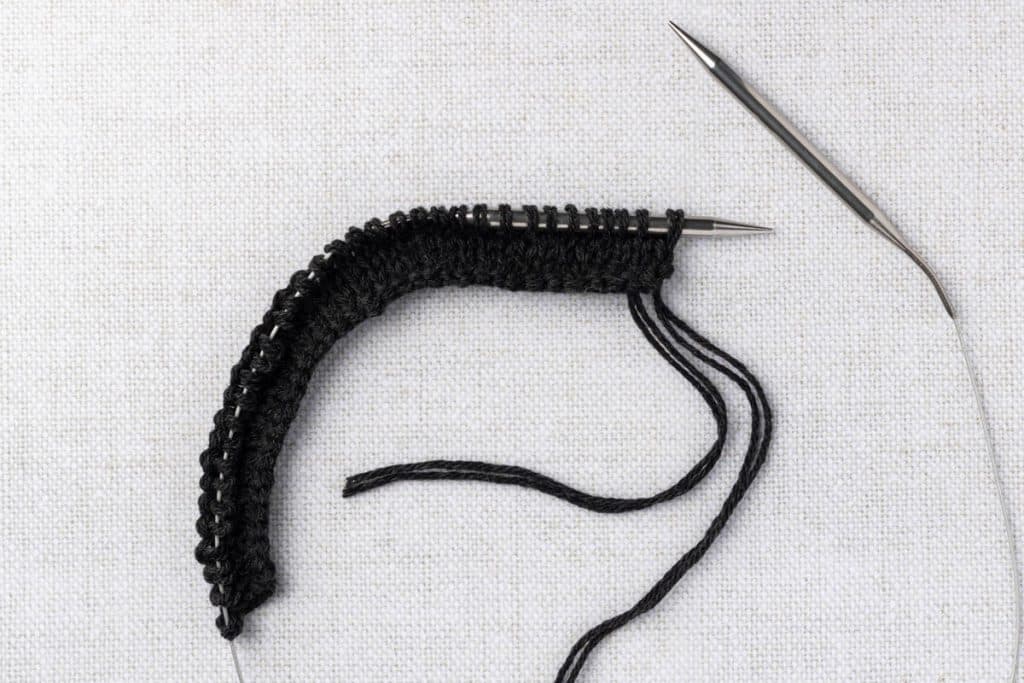
Step 1: Using Color A held double, cast on 33 (34, 34, 35, 36) sts using the long tail cast on.
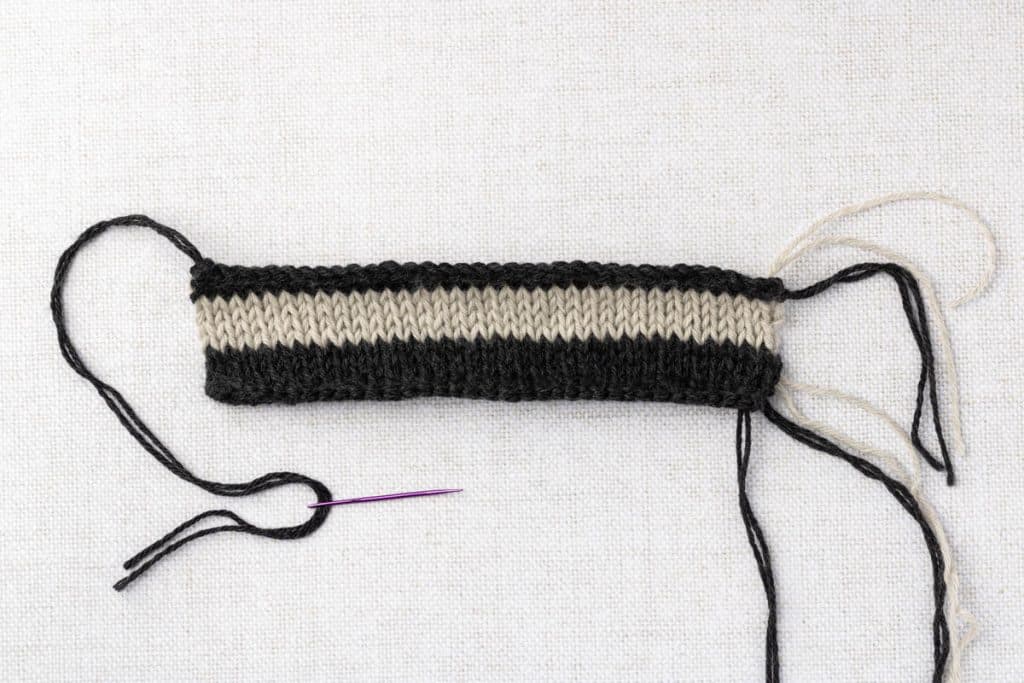
Step 2: Work in stockinette stitch for 10 (10, 10, 10, 12) rows, changing colors every 4 rows as follows:
Row 1 (RS): With Color A, knit.
Row 2 (WS): Purl.
Row 3: Knit.
Row 4: Purl.
Row 5: Change to Color B, knit.
Row 6: Purl.
Row 7: Knit.
Row 8: Purl.
Row 9: Change to Color A, knit.
Row 10: Purl.
XL only, Rows 11 and 12: Knit 1 row, purl 1 row in Color A.
Step 3: Bind off all sts.
Top Panel
Top Panel Setup
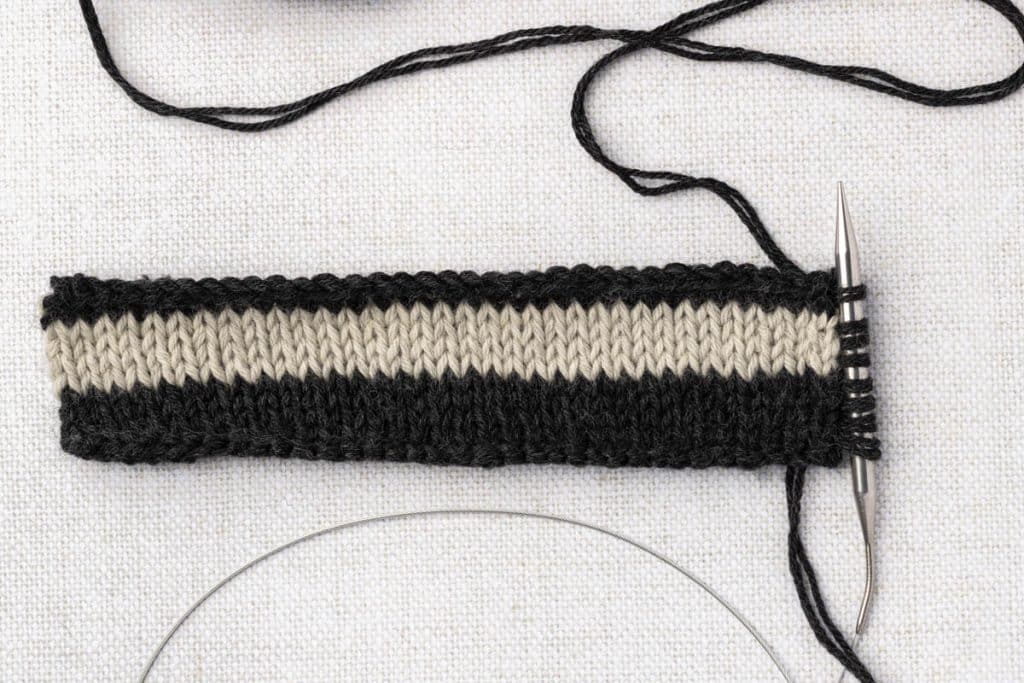
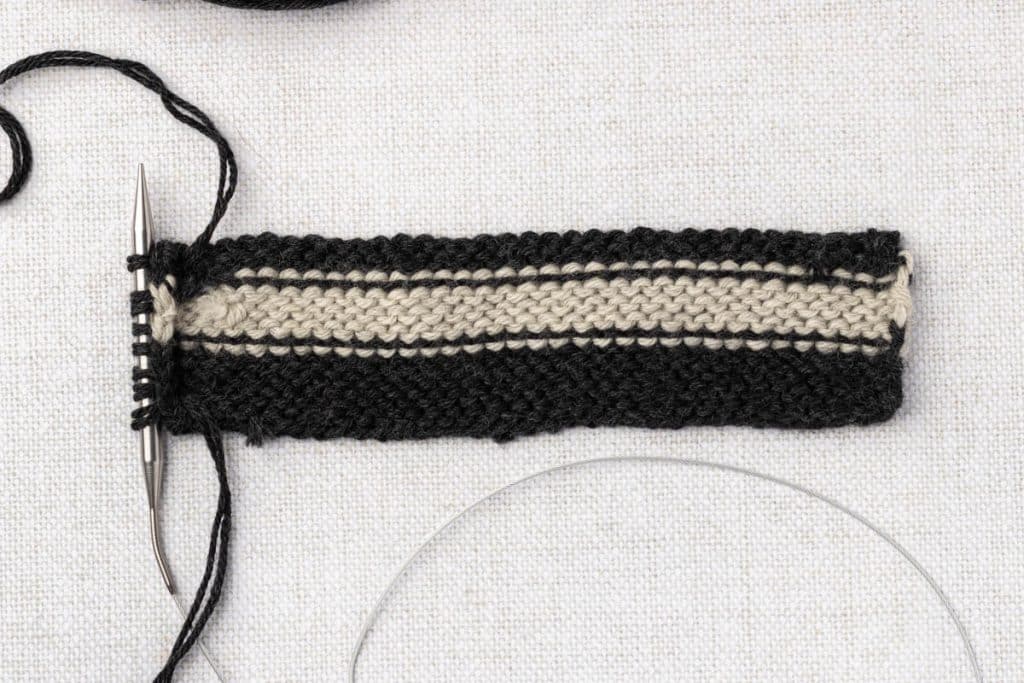
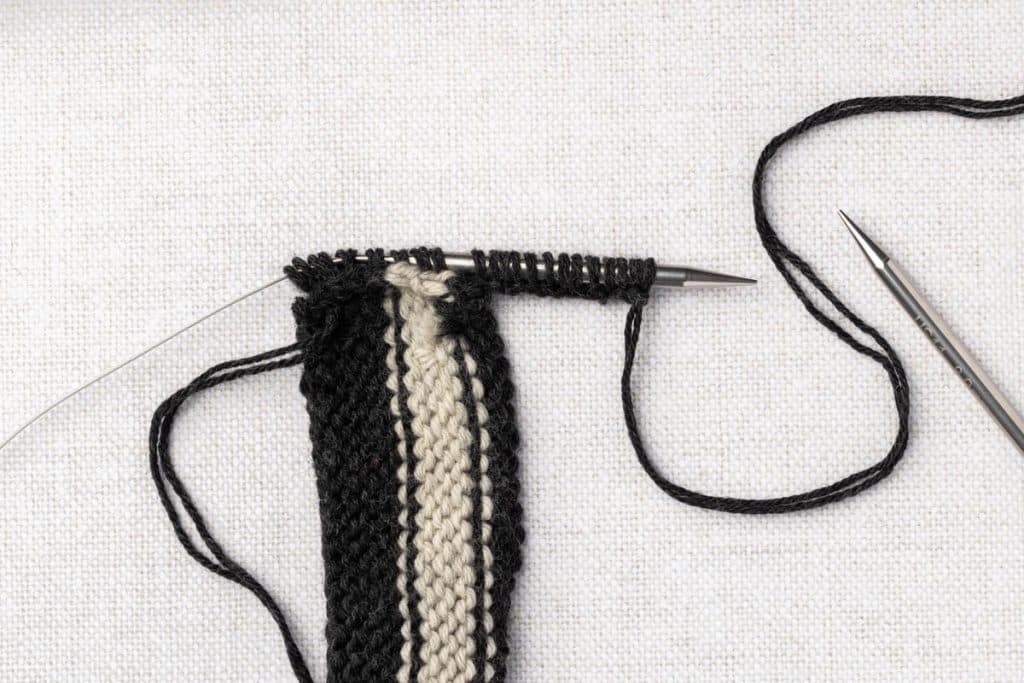
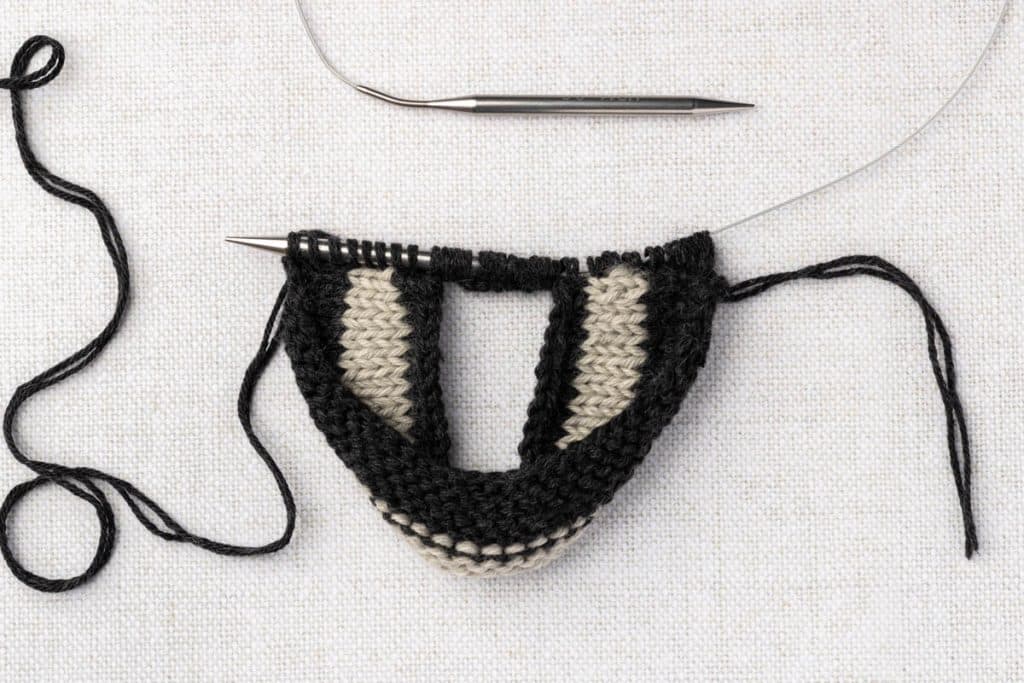
Step 1: With the RS of the heel panel facing and Color A, pick up and knit 8 sts evenly along the short right-hand edge of the heel panel. To space them evenly, you will need to skip a row here and there.
Step 2: Turn the work so the WS is facing. Using the knitted cast on, cast on 10 (12, 12, 13, 14) sts as follows: insert the right needle knitwise into the last picked up st, wrap the yarn as if to knit, and pull a loop through. Give the loop a twist and place it on the left needle. This is your first cast on st. Continue in the same way, working into the newest st each time, until all the sts are cast on. These are added to the 8 sts already on the needle.
Step 3: Turn the work back to the RS and pick up and knit 8 sts evenly along the remaining short edge of the heel panel, ending at the bottom corner. You now have 26 (28, 28, 29, 30) sts.
Top Panel Stripes
Row 1 (WS): With Color A, purl across all 26 (28, 28, 29, 30) sts.
Row 2 (RS): Knit.
Row 3 (WS): Purl.
Row 4 (RS): Change to Color B, knit.
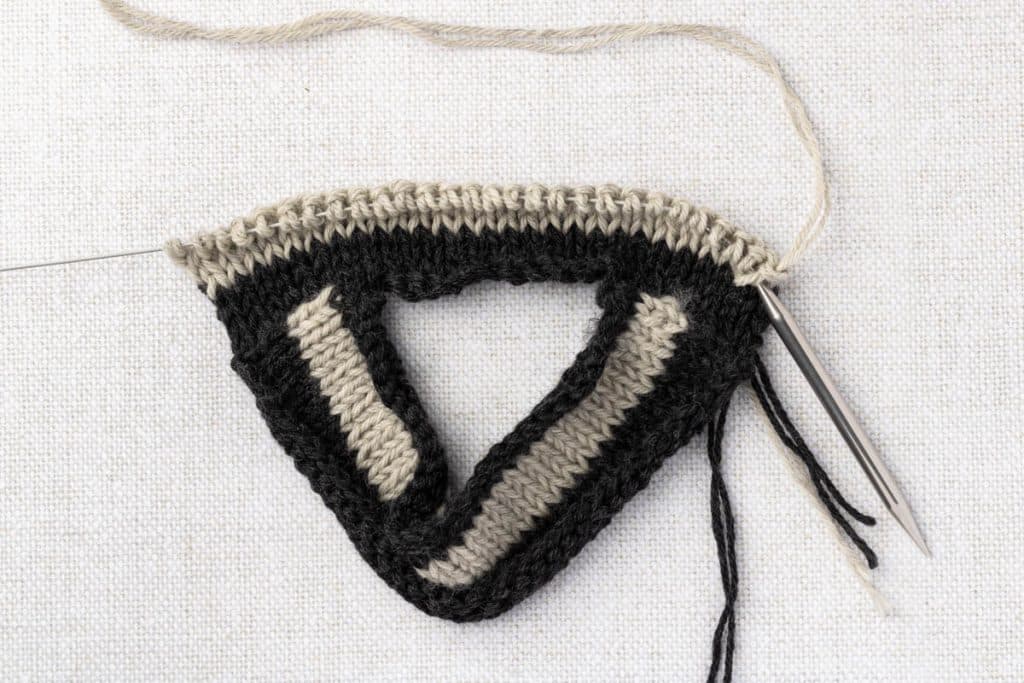
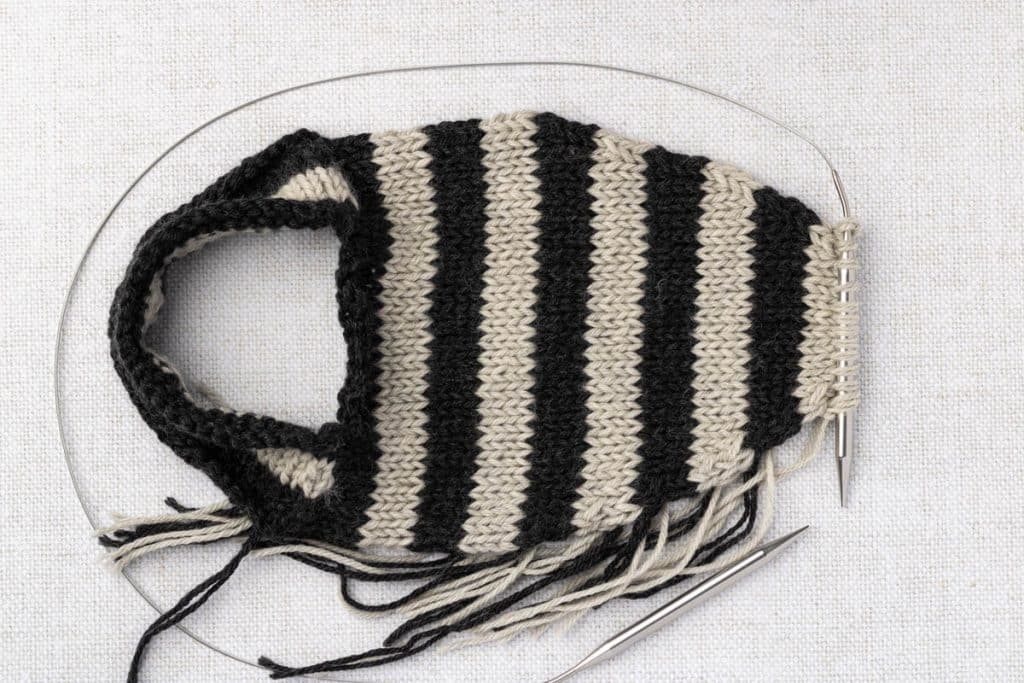
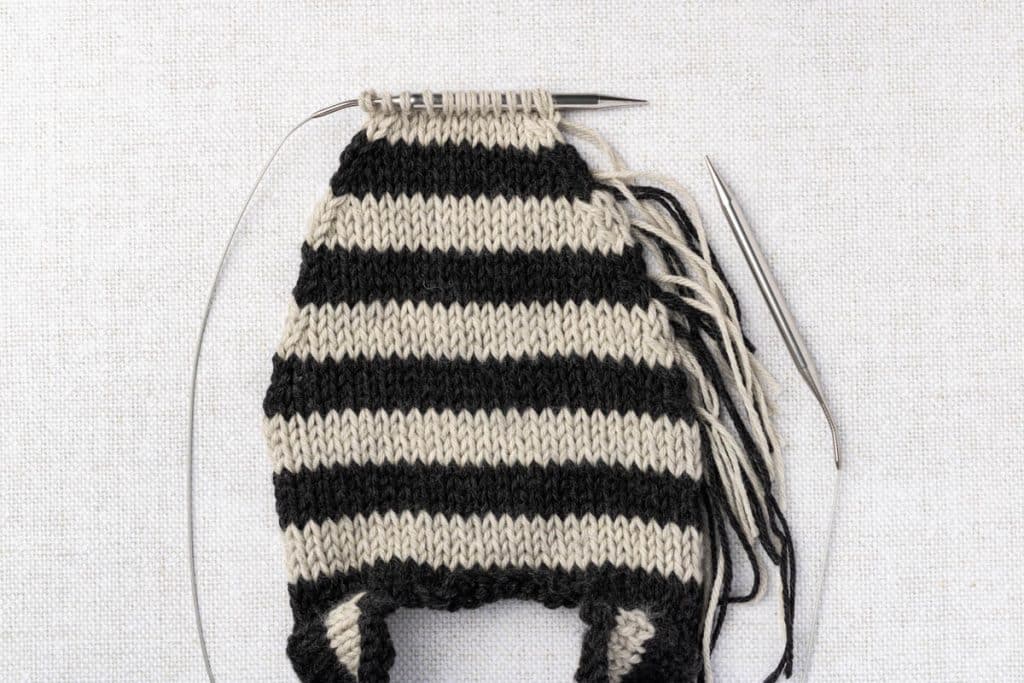
Rows 5 to 10 (14, 18, 22, 26): Continue in stockinette stitch, changing colors every 4 rows, ending with a RS row.
Note: The pick up row counts as the first row of the first Color A stripe, so Color A is worked for only 3 rows after the pick up before changing to Color B. Because the top panel curves where it joins the heel, this first Color A stripe can be hard to see in the photos.
Top Panel First Decrease
Decrease every 4th row, 3 times (12 rows for all sizes). Continue the Color A and Color B stripe sequence.
Row 1 (WS): Purl.
Row 2 (RS): Knit.
Row 3 (WS): Purl.
Row 4 (RS): K1, ssk, knit to last 3 sts, k2tog, k1. (2 sts decreased)
Rows 5 to 12: Rep Rows 1 to 4 two more times.
Stitch count: You now have 20 (22, 22, 23, 24) sts.
Top Panel Second and Final Decrease
Decrease every other row, 5 times (all sizes). Continue the stripe sequence.
Row 1 (WS): Purl.
Row 2 (RS): K1, ssk, knit to last 3 sts, k2tog, k1. (2 sts decreased)
Rows 3 to 10: Rep Rows 1 and 2 four more times.
Row count: You have now worked 33 (37, 41, 45, 49) rows in the top panel, including the pick up row.
Final Row (WS): Purl 1 row in the current stripe color.
Stitch count: You now have 10 (12, 12, 13, 14) sts.
Sole Panel
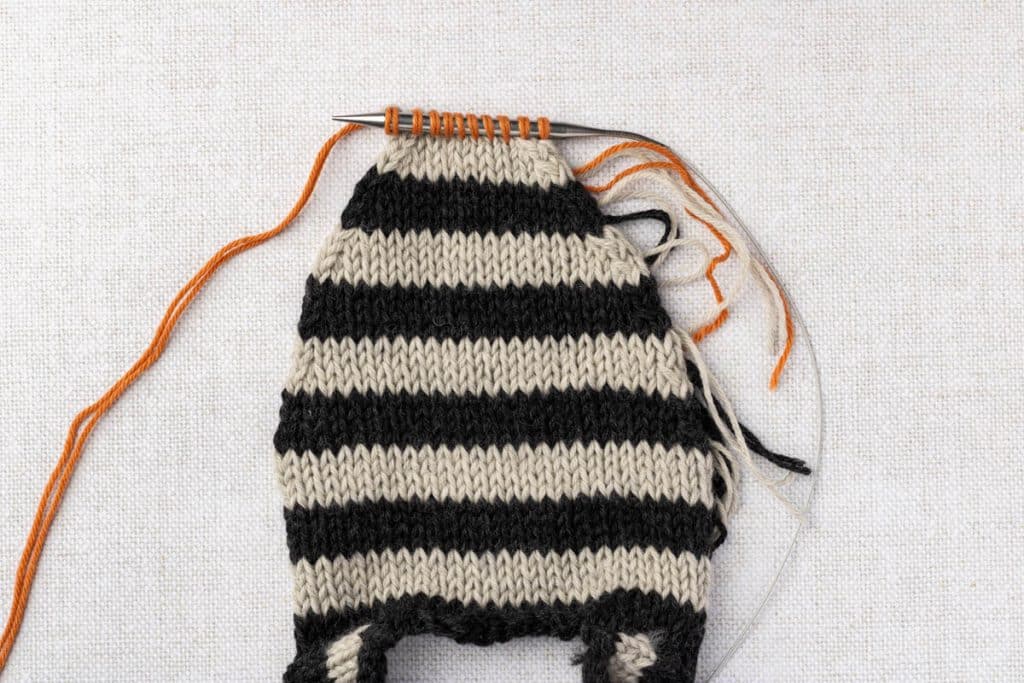
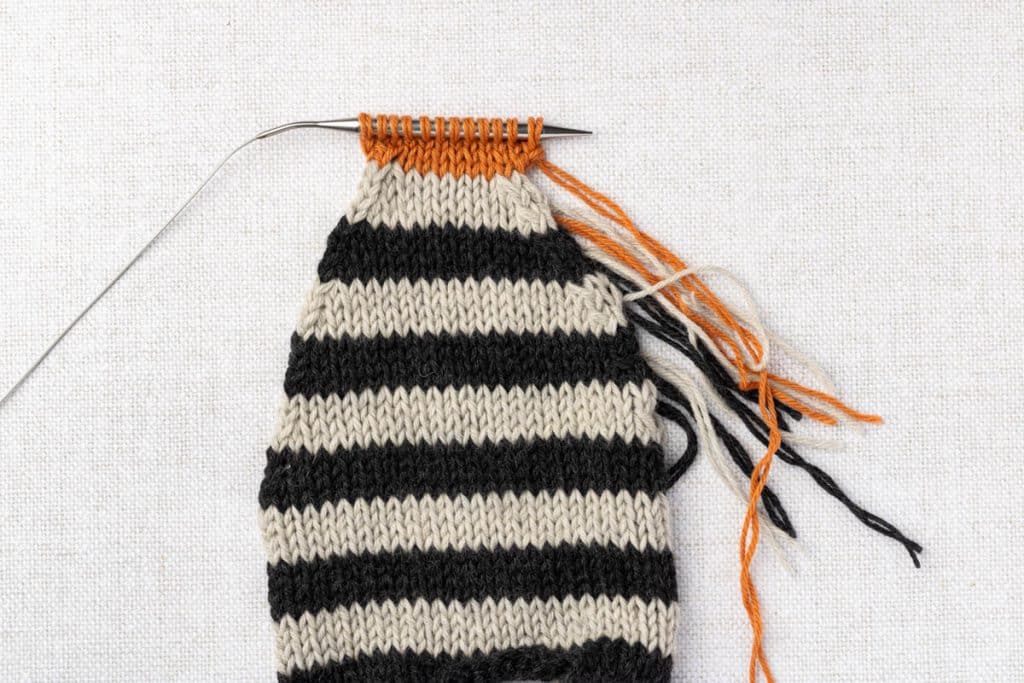
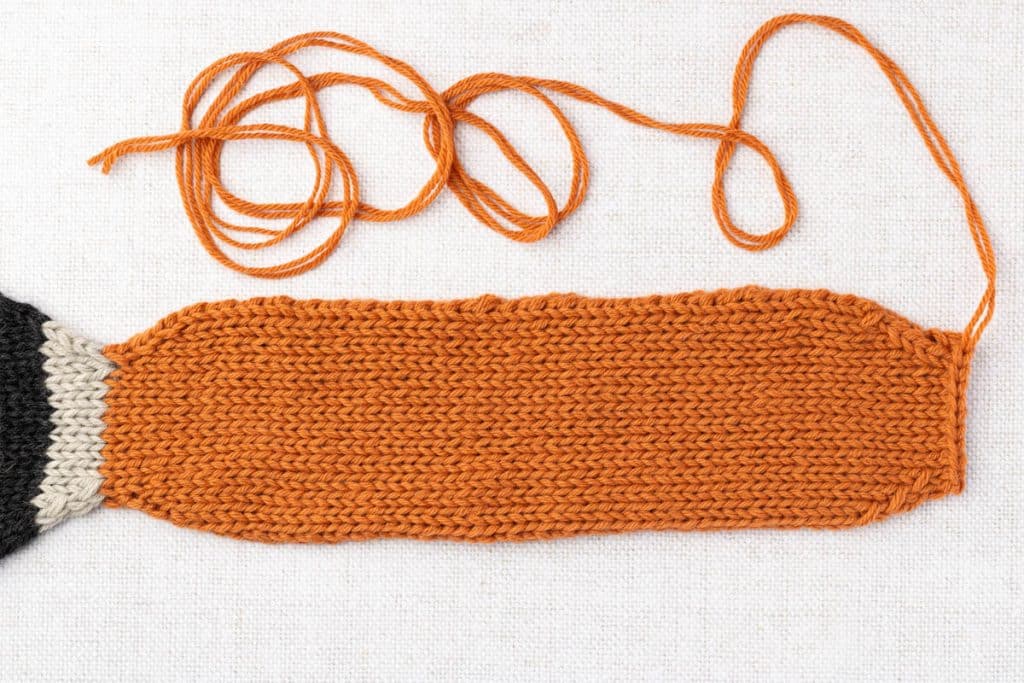
Row 1 (RS): Change to Color C. K1, ssk, knit to last 3 sts, k2tog, k1. You now have 8 (10, 10, 11, 12) sts.
Sole Increases
Increase every other row, 3 times (Rows 2 to 7, all sizes).
Row 2 (WS): Purl.
Row 3 (RS): K2, m1L, knit to last 2 sts, m1R, k2. (2 sts increased)
Rows 4 to 7: Rep Rows 2 and 3 two more times.
Stitch count: You now have 14 (16, 16, 17, 18) sts.
Rows 8 to 51 (55, 59, 63, 67): Continue in stockinette stitch, ending with a RS row.
Sole Heel Shaping
Decrease every other row, 3 times (all sizes).
Row 1 (WS): Purl.
Row 2 (RS): K1, ssk, knit to last 3 sts, k2tog, k1.
Rows 3 to 6: Rep Rows 1 and 2 two more times.
Stitch count: You now have 8 (10, 10, 11, 12) sts, and have worked 57 (61, 65, 69, 73) rows in the sole.
Bind off: Bind off all sts. Weave in all loose ends on the wrong side.
Assembly and Seaming
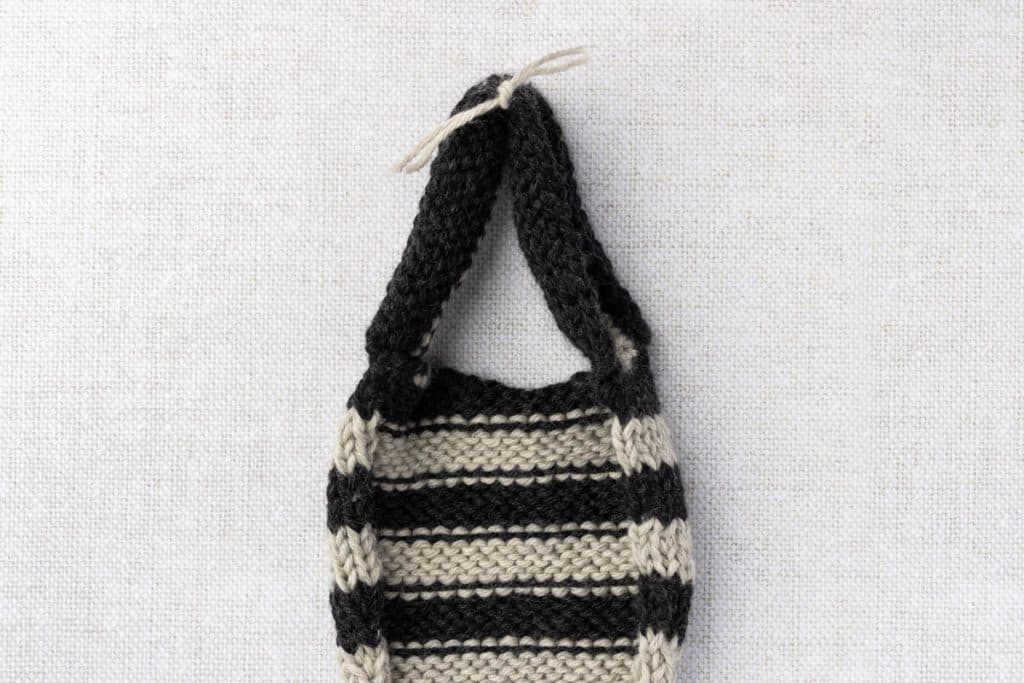
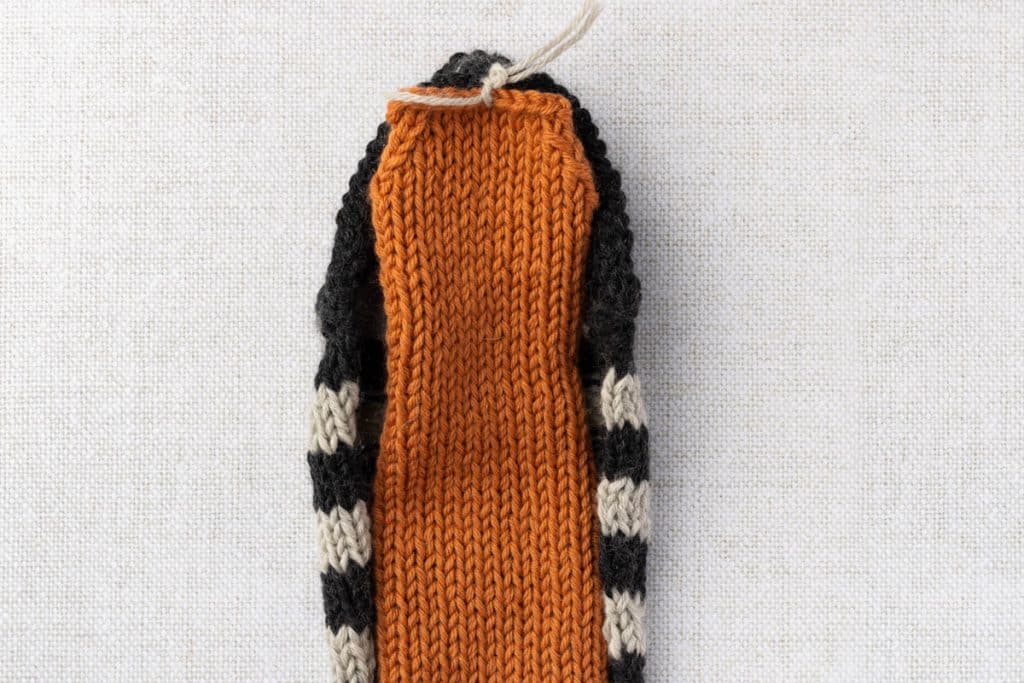
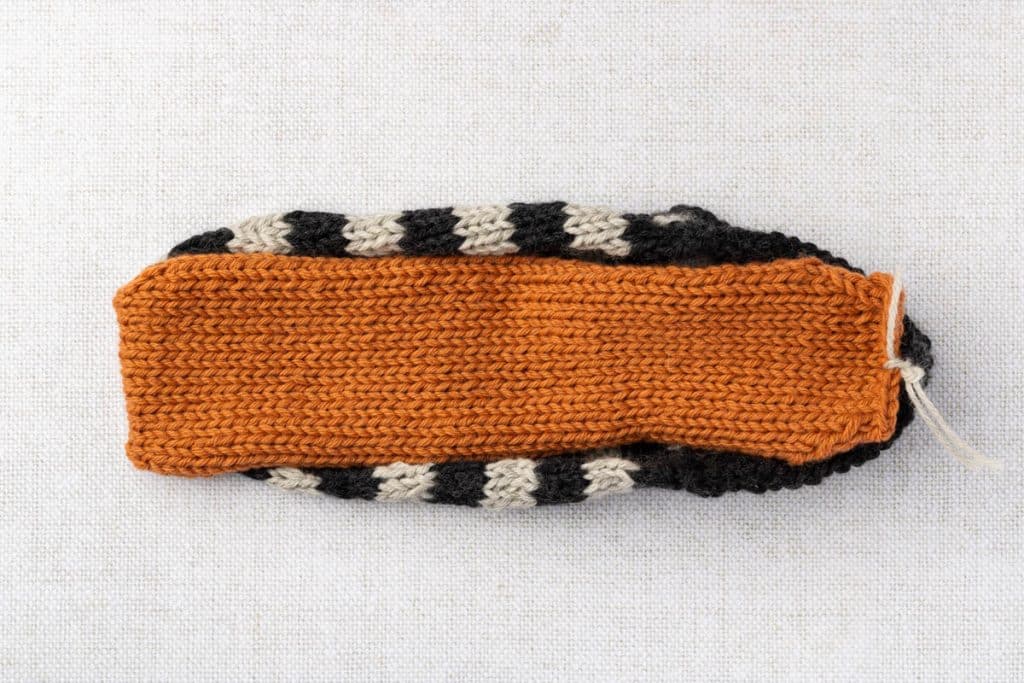
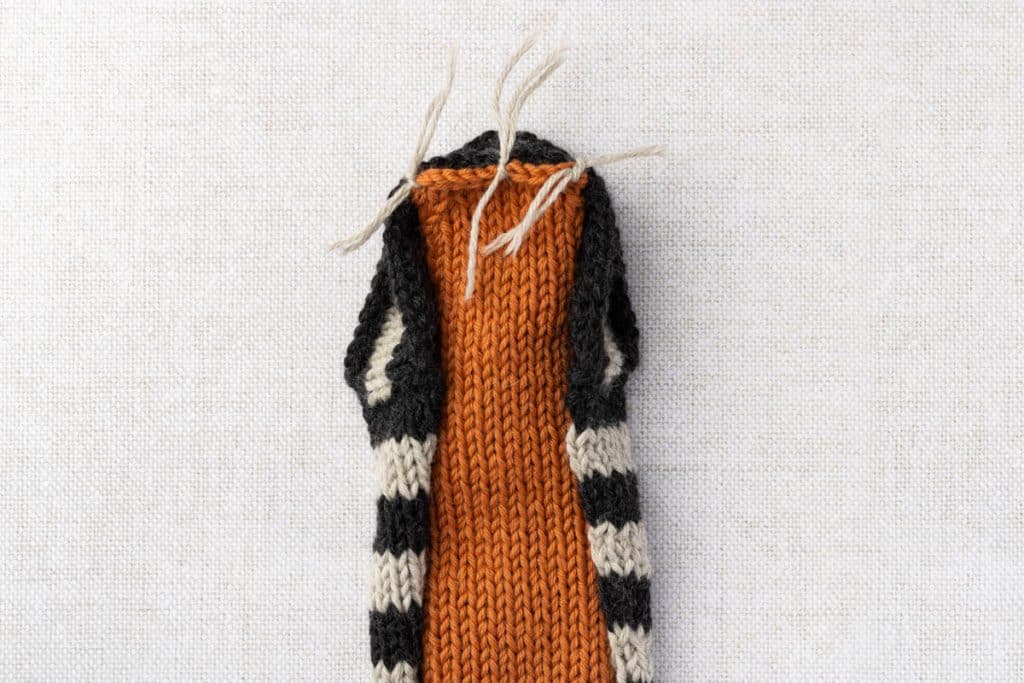
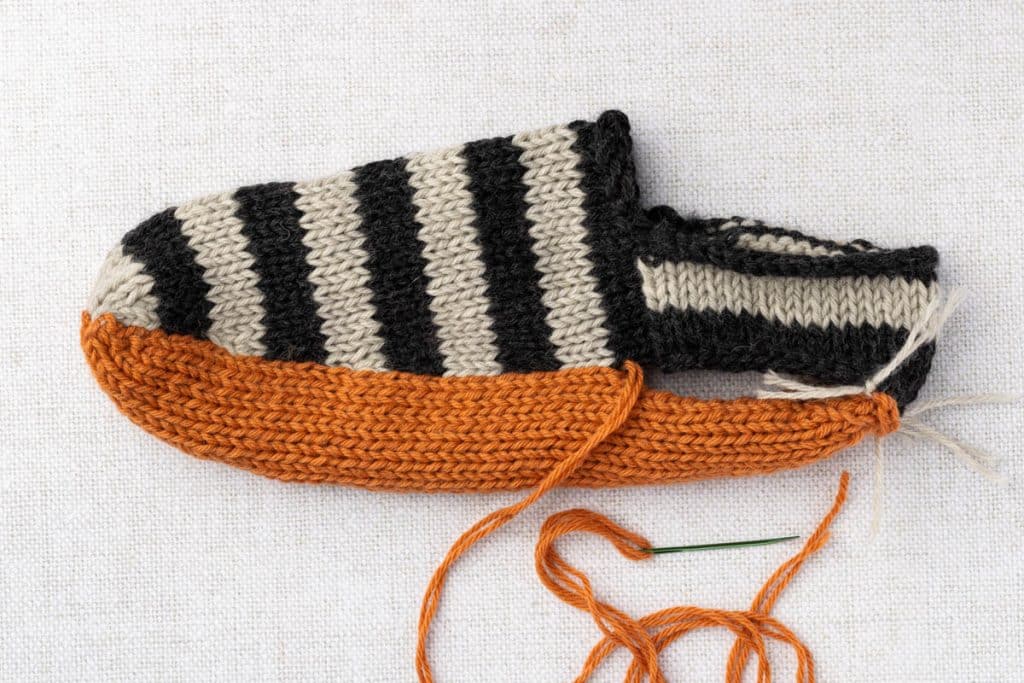
Step 1: Mark the centers. Using a locking stitch marker or a scrap of contrasting yarn, mark the bottom center of the heel panel’s cast on edge. Match this point to the center of the sole’s bind off edge and tie or lock them together.
Step 2: Align the corners. Match the outer corners of the sole’s bind off edge to the lower corners of the heel panel and secure them with markers. You now have 3 alignment markers (left corner, center, and right corner) holding the sole and heel in place.
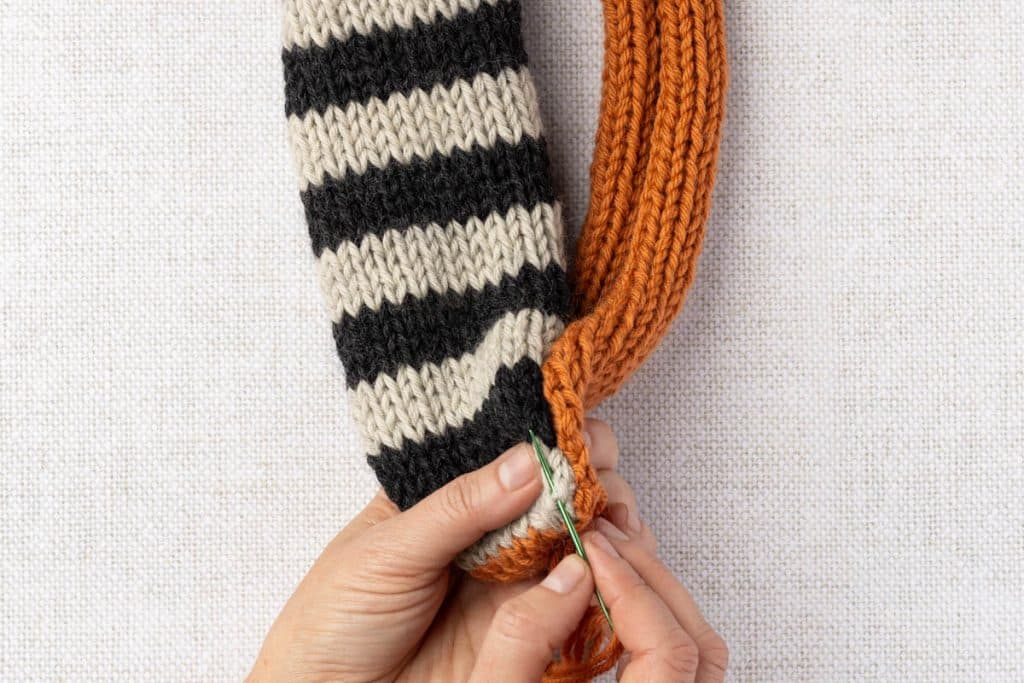
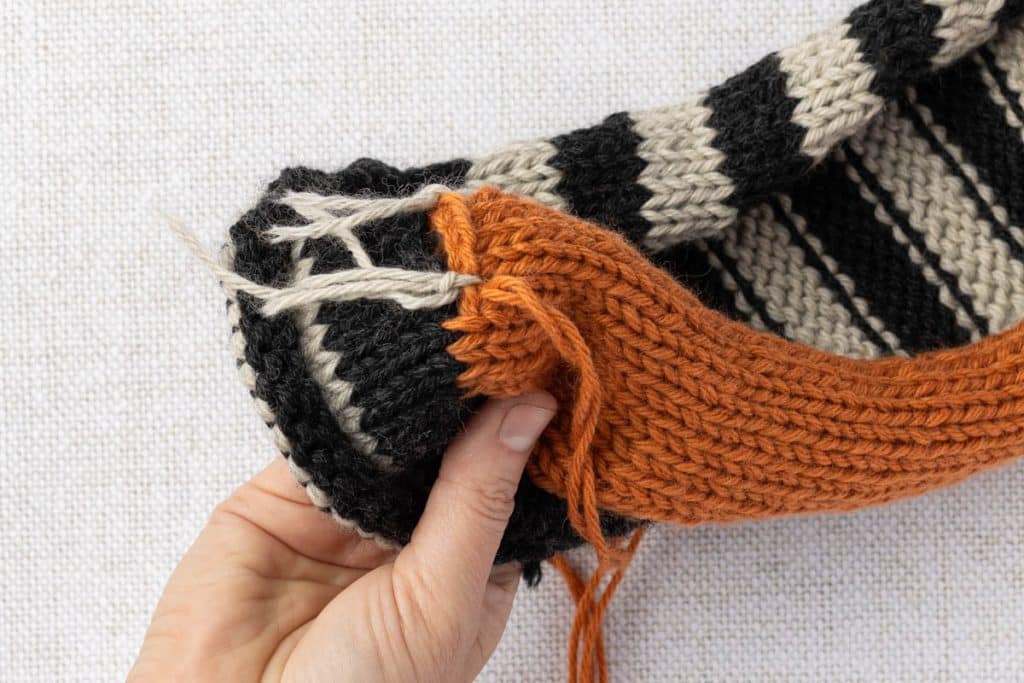
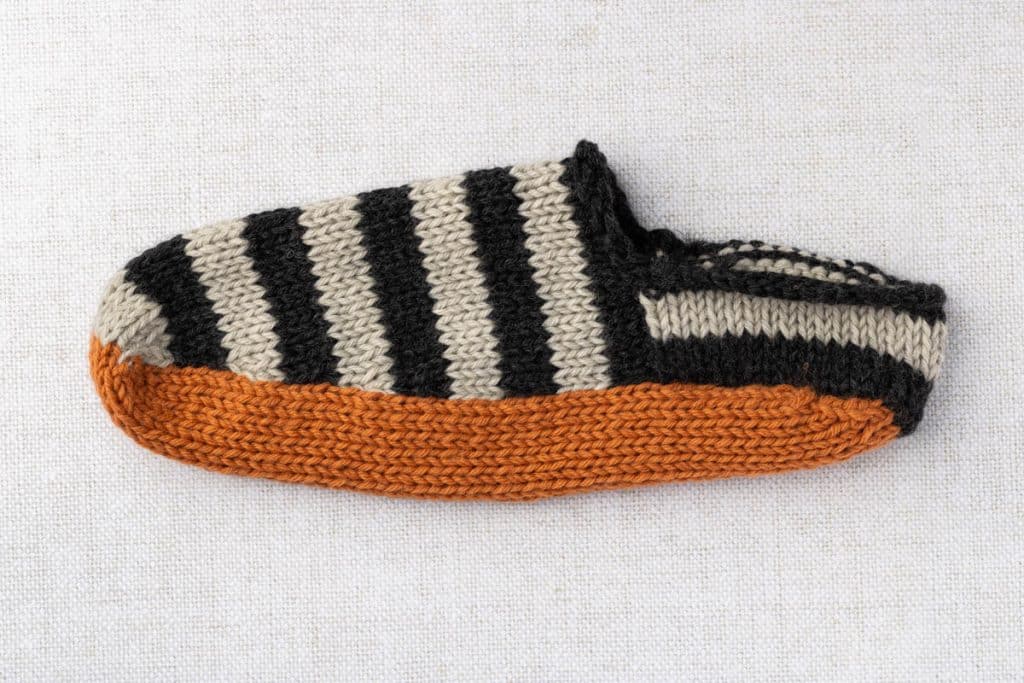
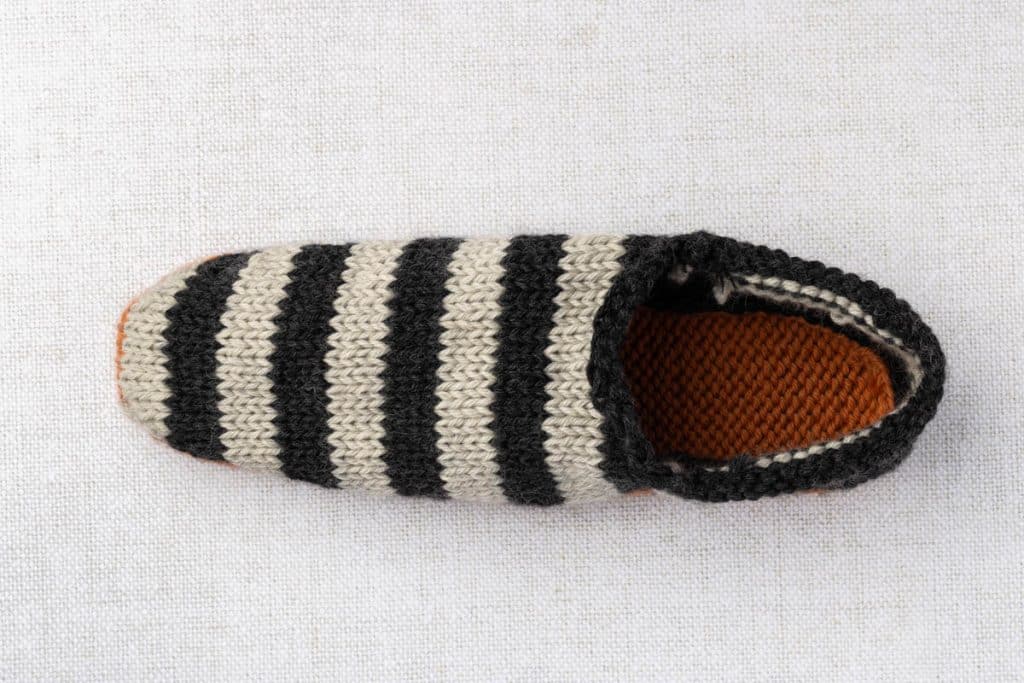
Step 3: Seam the first side. Thread a tapestry needle with Color C. Beginning at the toe, use mattress stitch to seam the side edge of the sole to the top panel, working toward the heel. Pull the seam firmly every couple of inches.
Step 4: Seam the second side. Starting again at the toe on the opposite side, seam toward the heel the same way. Both seams meet at the center heel marker.
Step 5: Secure the yarn and weave in the tails.
Applied I-Cord Edge
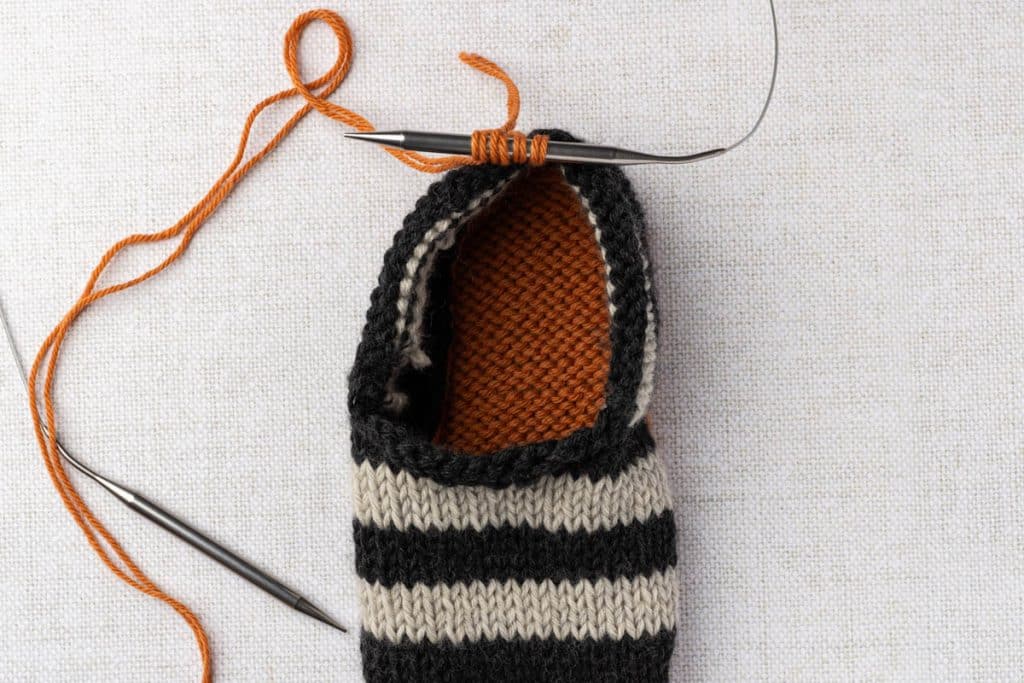
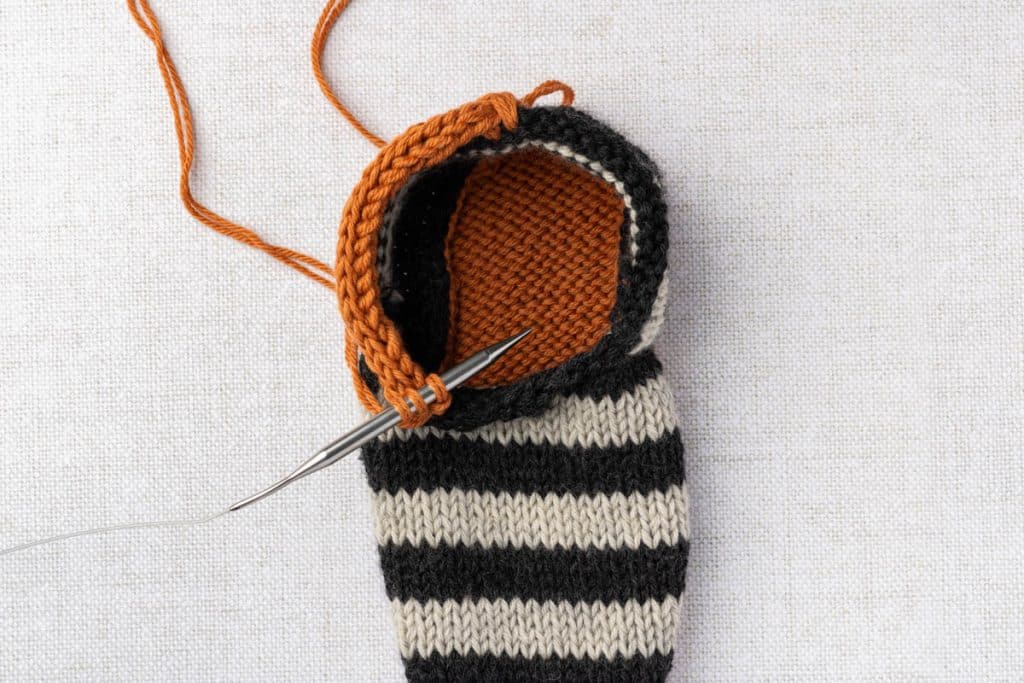
New to applied i-cord? My applied i-cord tutorial walks through it step by step with photos and video, including how to connect the two ends with a kitchener stitch.
Step 1: Using Color C held double, cast on 3 sts using the long tail cast on.
Step 2: With the WS of the heel panel facing you, pick up 1 st from the edge of the opening. You now have 4 sts on the right needle.
Step 3: Slip all 4 sts back to the left needle without twisting them.
Step 4: K2, k2tog tbl, then pick up 1 more st from the edge of the opening. You again have 4 sts on the right needle.
Step 5: Rep Steps 3 and 4 all the way around the opening, picking up 1 st through the center of each V along the edge of the heel panel and the top panel.
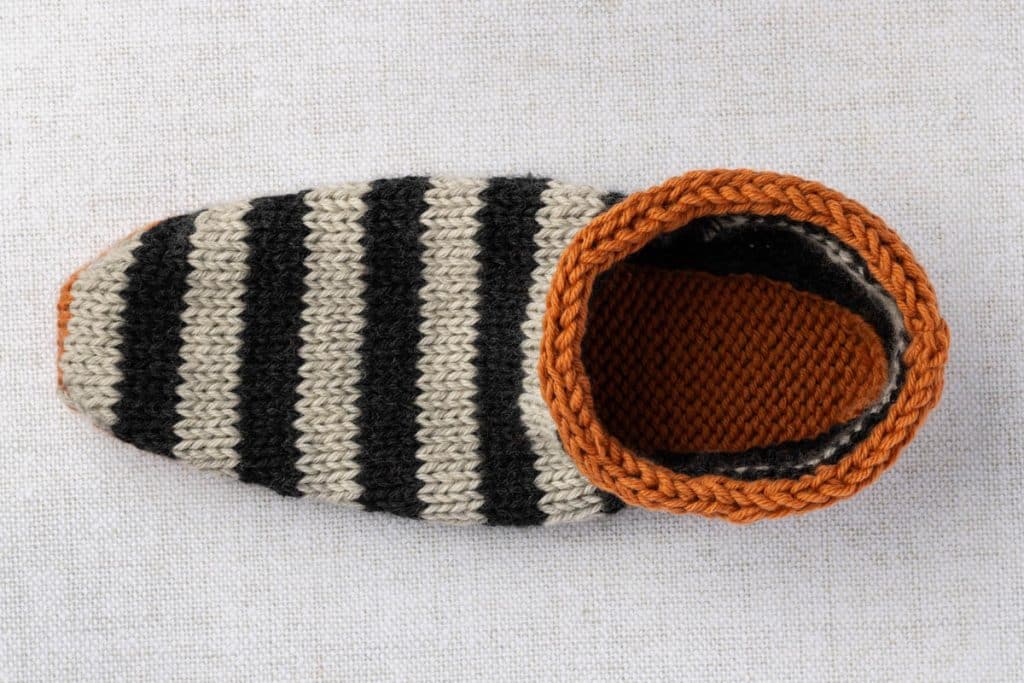
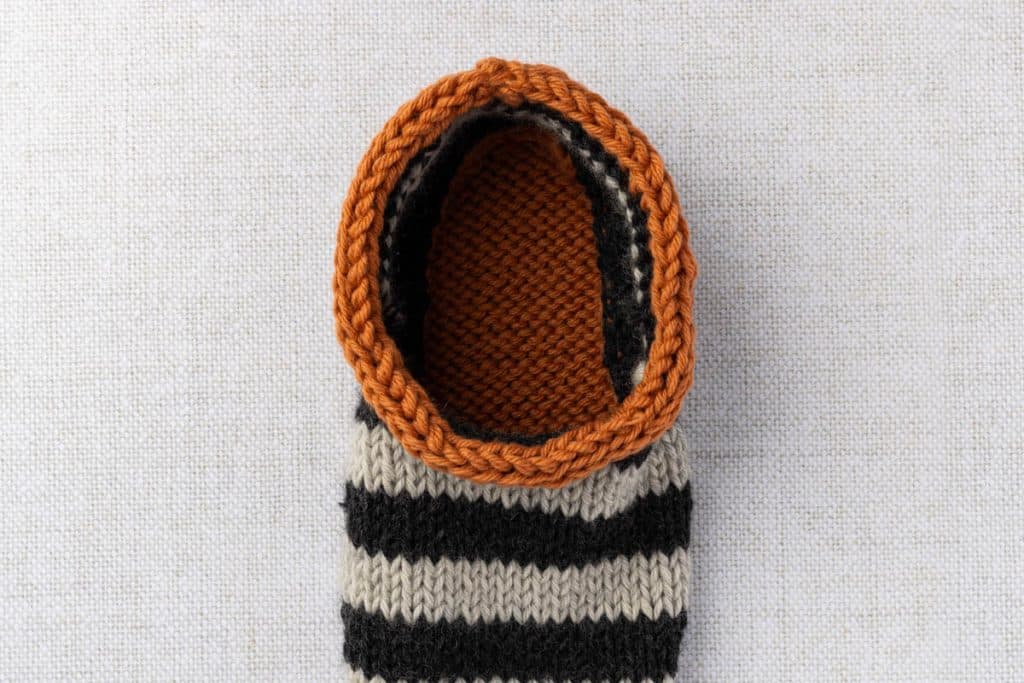
Step 6: When you reach the beginning, graft the 3 live i-cord sts to the cast on end of the cord using Kitchener stitch, then weave in the tails with a tapestry needle.
Note: Working from the wrong side, the finished cord rolls neatly to the outside of the opening.
Felting
This is the last step of the felted slippers knitting pattern, and where the magic happens! The slippers are felted in the washing machine, using hot and cold water plus agitation to shrink the wool and lock the fibers together.
Because washing machines vary widely (old, new, top loading, and front loading all give different results), felting can take anywhere from 30 minutes to 1 1/2 hours total. The first time you felt a pair, check them every 10 to 15 minutes so you don’t accidentally shrink them too far. Use the size table above, or your own foot measurement, as your target.
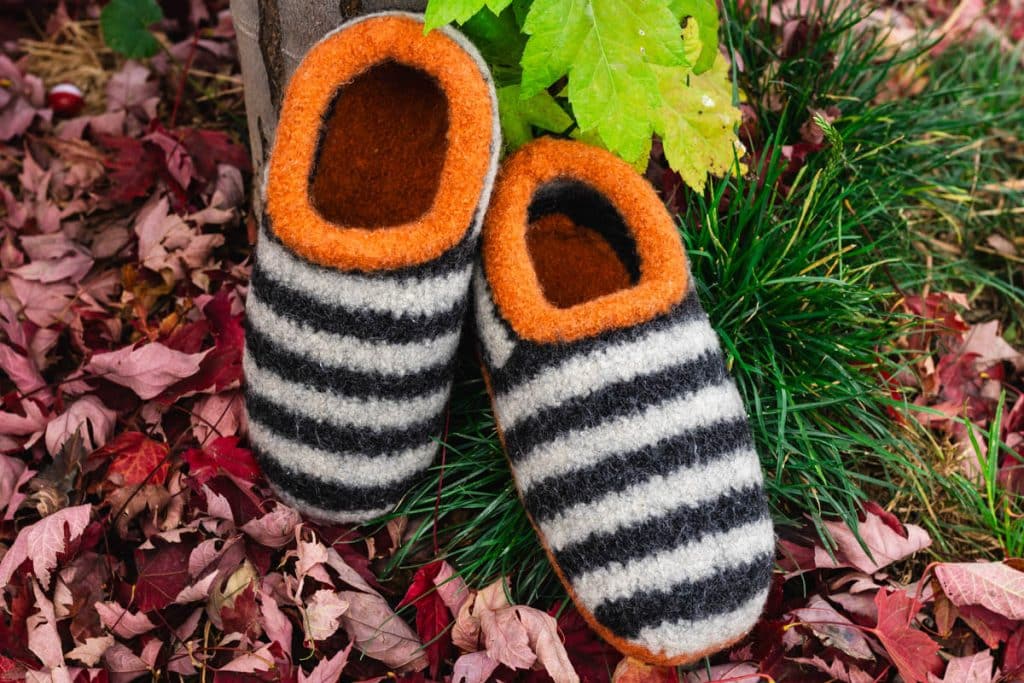
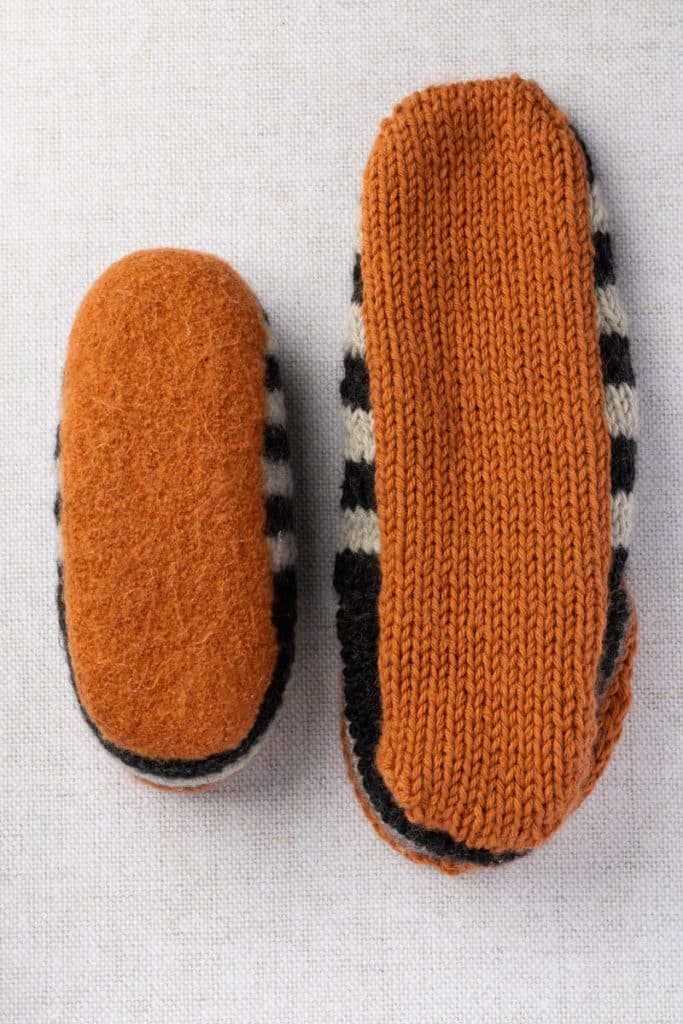
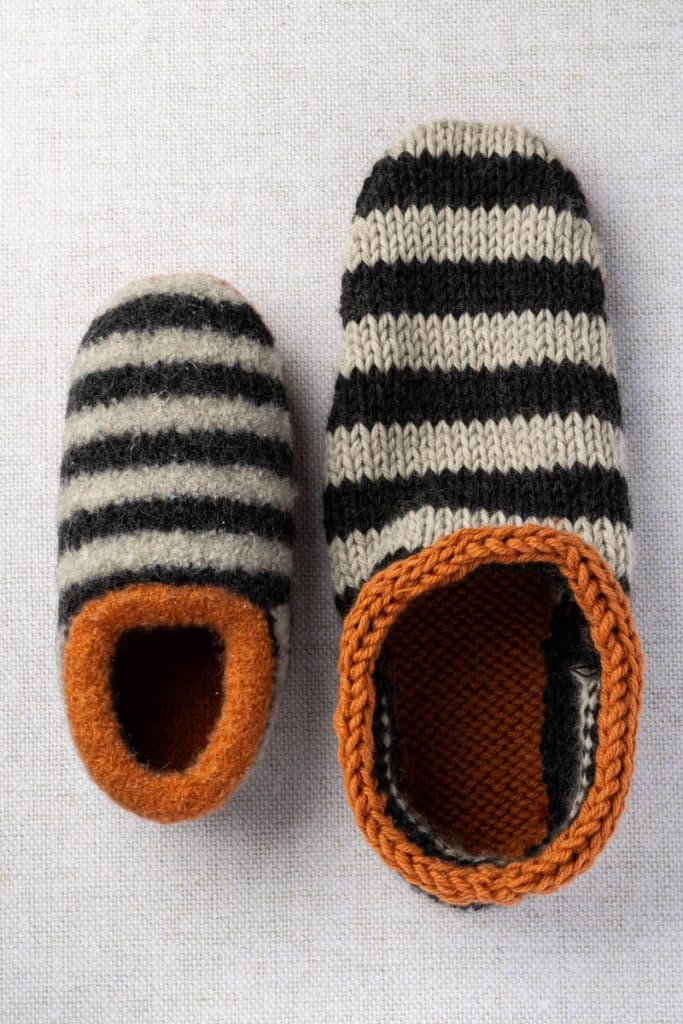
This photo shows what felting in the washer does. The slipper on the left has been felted, and the one on the right is straight off the needles.
Instructions for Felting in the Washing Machine
Step 1: Add the slippers and one towel to the washing machine. The towel adds extra agitation.
Step 2: Choose a hot wash with a cold rinse. Heat makes the scales of the wool expand, and the cold rinse shocks them into locking together.
Step 3: Choose a normal, heavy duty, or power wash cycle. You want strong agitation, not a gentle or delicate cycle.
Step 4: Choose a high spin speed. A high spin squeezes out water and presses the fibers tightly together, which increases shrinkage.
Step 5: Add a tiny squirt of enzyme-free laundry detergent to help lubricate the fibers. Do not use a wool wash such as Woolite, which keeps the fabric from shrinking.
Top Loading Machines
Top loaders are the easiest to control because you can stop and check at any time, which makes them the machine of choice for this project. Use the settings above and check the slippers every 10 to 15 minutes, measuring with a tape or trying them on until they reach the size you want. In my top loader, my slippers took two 40 minute cycles to felt to the right size.
Front Loading Machines
Front loaders use less water and tumble rather than twist, so felting takes longer and usually needs more than one cycle. They also lock while running, so you can’t check every 10 to 15 minutes.
Step 1: Choose a short, hot power wash cycle of about 30 to 40 minutes.
Step 2: When the cycle finishes completely, open the door and measure the slippers.
Step 3: Repeat as needed. Cascade 220 slippers usually reach the right size in 2 to 3 cycles, but if you use different yarn, yours may take fewer or even more cycles.
Drying and Shaping
Do not put the slippers in the dryer. The intense heat and tumbling will shrink them unevenly and too far, warp their shape, and leave the wool stiff, board-like, and rough to the touch.
Step 1: Once the slippers reach the size you want, they will be damp. Smooth out the seams with your hands and shape them.
Step 2: Air dry overnight on a small towel.
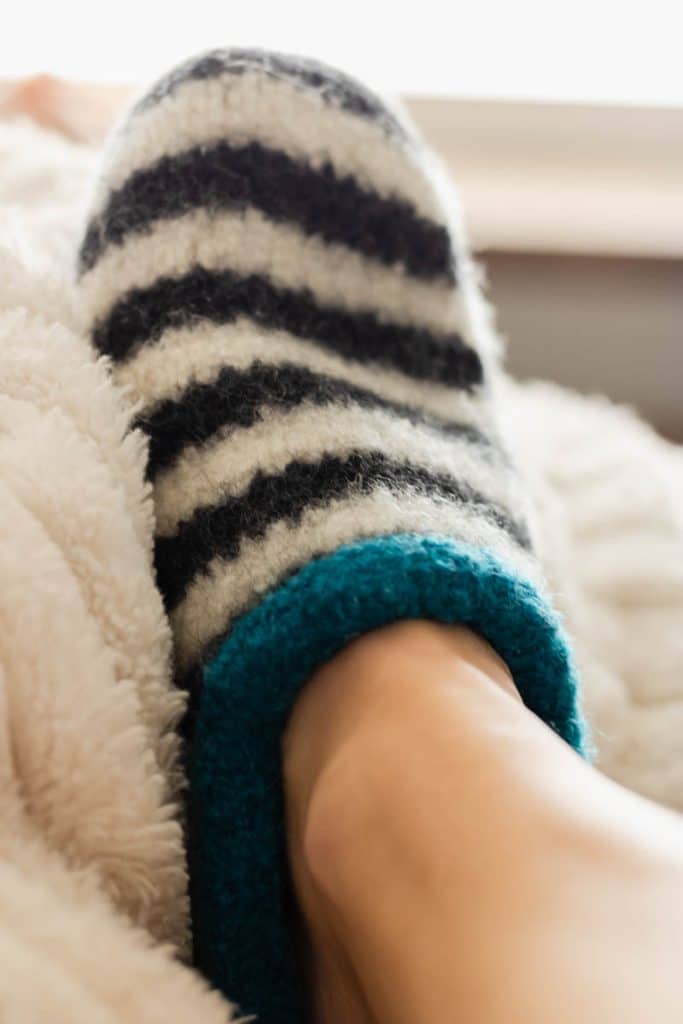
Step 3: Optional: for a custom fit, pull the slippers onto your feet to mold them to your shape. Wear socks if you don’t want to feel the damp wool on your skin.
Step 4: Felted properly, the slippers will hold their shape while drying, especially the smaller sizes. Larger sizes may be less stiff; tuck crumpled paper towels inside to help them hold their shape as they dry.
Optional Finishing Step
When the slippers are dry, they will have some fuzz and possibly a few pills from the wash cycle. A fabric shaver is an inexpensive little tool that is safe for fabrics and easily removes extra fuzz, lint, and pills from sweaters and other garments. It gives the slippers a more polished look.
Make It Your Own
Once you’ve made your first pair, this felted slippers knitting pattern is easy to customize. Here are a few ideas to get you started.
- Color: Play with color combinations (contrasting, monochrome, and so on), stripe widths, or skip the stripes entirely for a solid slipper with a contrasting sole and i-cord.
- Embroidery: Add small decorative stitches.
- Width: For wider slippers, cast on 1 to 3 extra sts for the heel panel and the same number extra for the top panel cast on. For narrower slippers, cast on 1 to 3 fewer sts in both places.
- Grip and durability: Add sock stop glue, pre-punched suede outsoles, natural rubber soles, or anti-skid gripper fabric to the bottoms to improve traction and durability. This is very helpful in homes with pets, so pet hair on the floor doesn’t stick to the wool, and on hardwood, tile, or other hard floors to reduce the chance of slipping.
Some of Our Other Knit Patterns We Know You’ll Love!
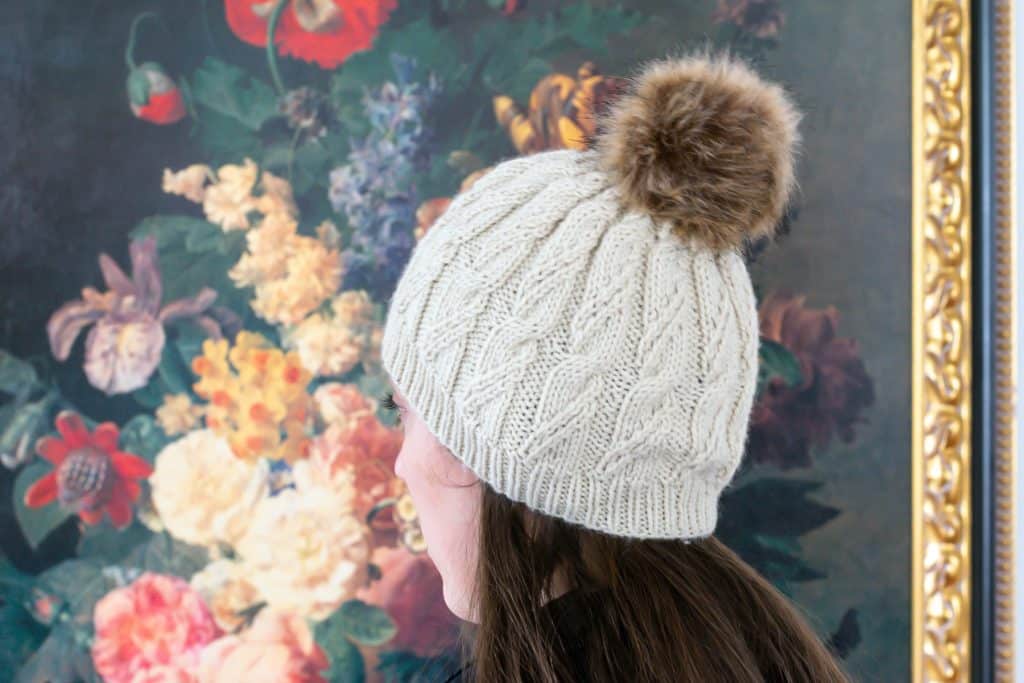
Twists & Cables Knit Hat: Another cozy cold-weather knit, with classic cables that look far fancier than they are to knit.
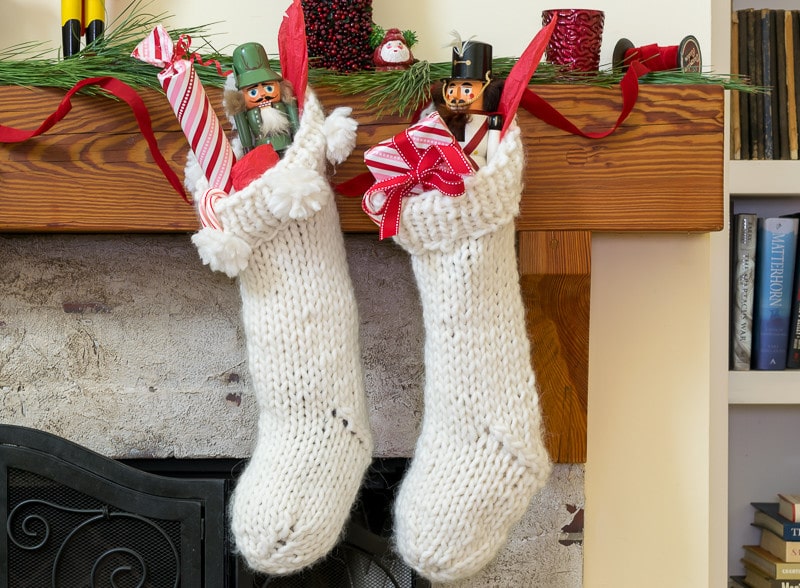
Chunky Knit Christmas Stocking: A quick, chunky holiday stocking that’s perfect for the same cozy season as these slippers.
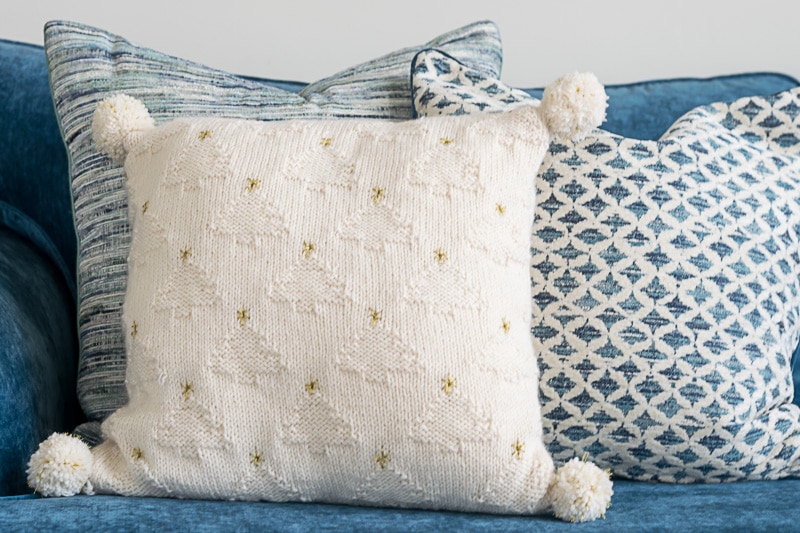
Knit Pillow Pattern: Christmas Trees & Pom Poms: A festive throw pillow to dress up your living room for the holidays.
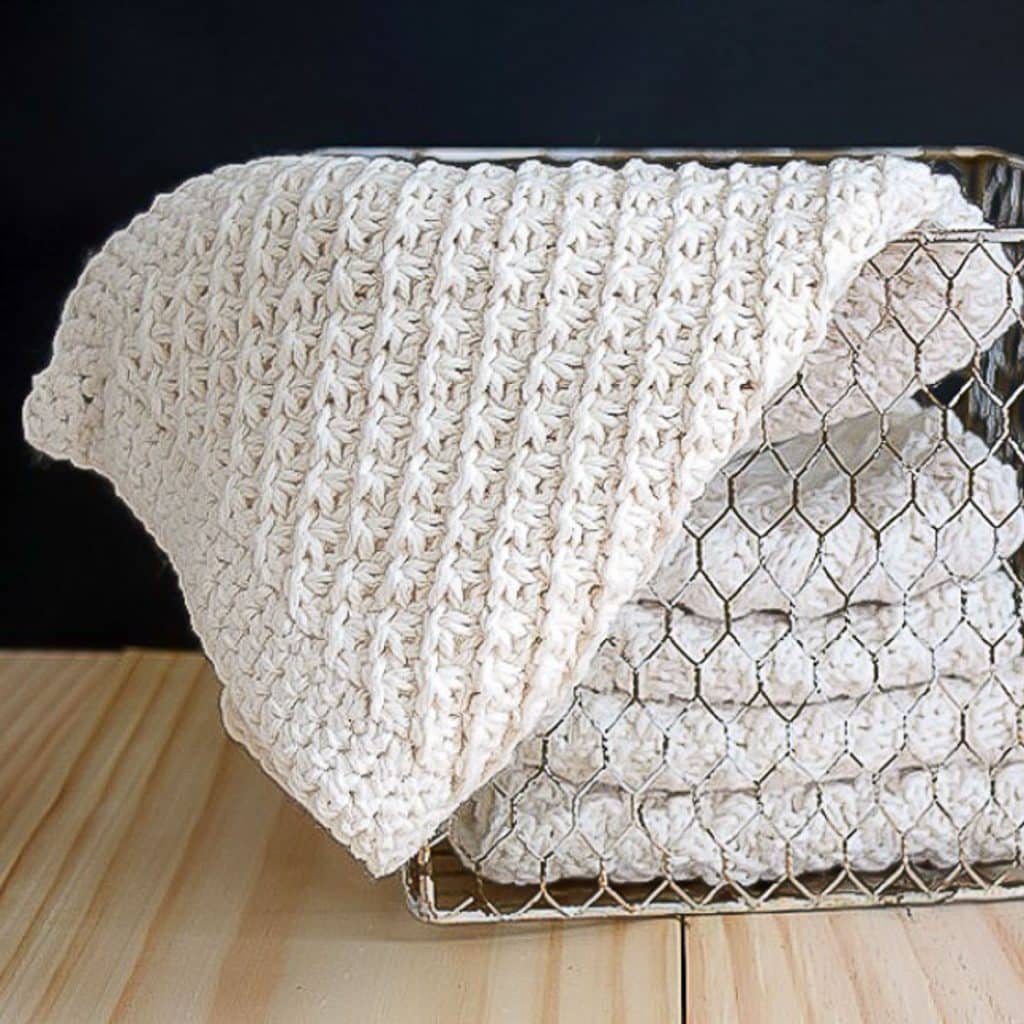
Daisy Stitch Knit Washcloth: A small, satisfying project for using up leftover yarn and learning a pretty textured stitch.
How to Knit an Applied I-Cord: My step-by-step tutorial for the neat, rounded edge used on these slippers.
Thanks so much for spending a few minutes of your busy day with me!
Until next time,