
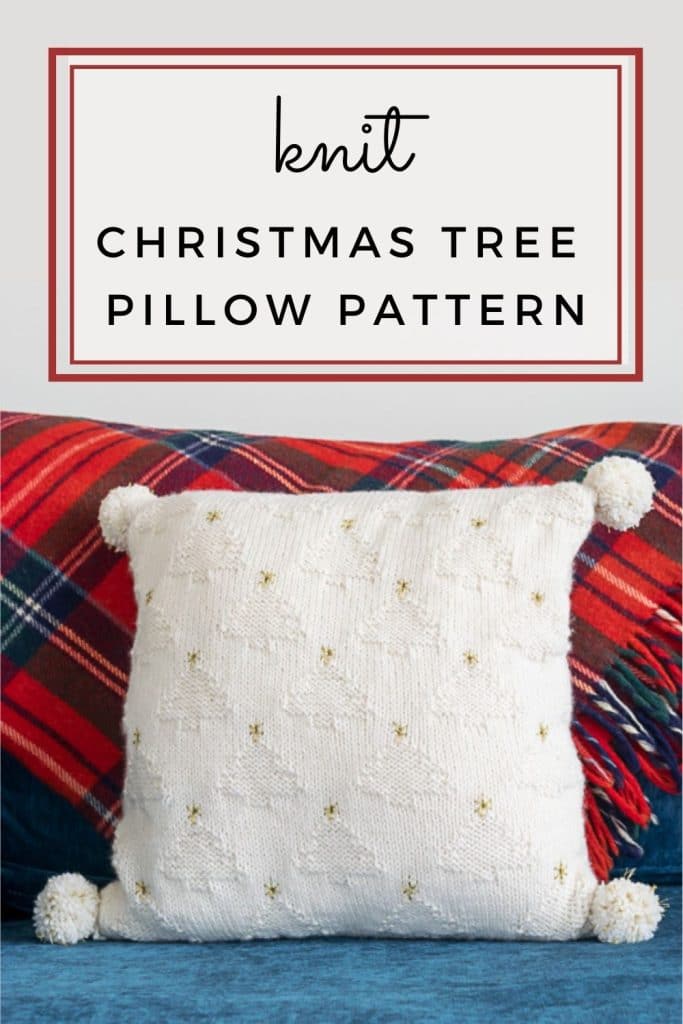
Knit Pillow Pattern: Christmas Trees & Pom Poms
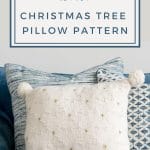

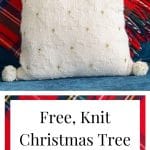
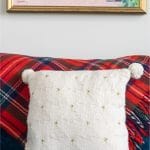
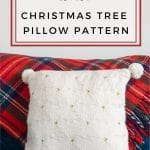
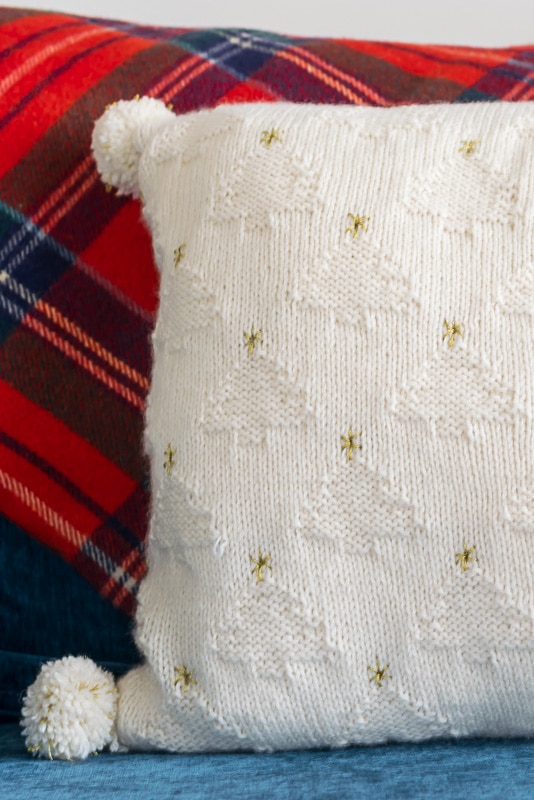
Download this free Knit Pillow Pattern to add cozy pillows to your Christmas decor and/or give as gifts this holiday season. Complete with White on White Christmas Trees, Gold Embroidered Stars, and Gold Speckled Pom Poms, this Christmas Pillow will be a hit with everyone. Basic Knit and Purl skills are all that is needed to make this festive knitted pillow for your holiday home decor.
This knit pillow pattern uses only knit stitches and purl stitches, suitable for even the beginner knitter. Because this is a reversible knit pattern, there is not necessarily a right side or wrong side; you can choose which side you would prefer. My finished pillow shows knit rows for the background of the pillow, with purl rows making up the Christmas trees. The different textures between the two stitches create the contrast to make the subtle Christmas tree pattern pop.
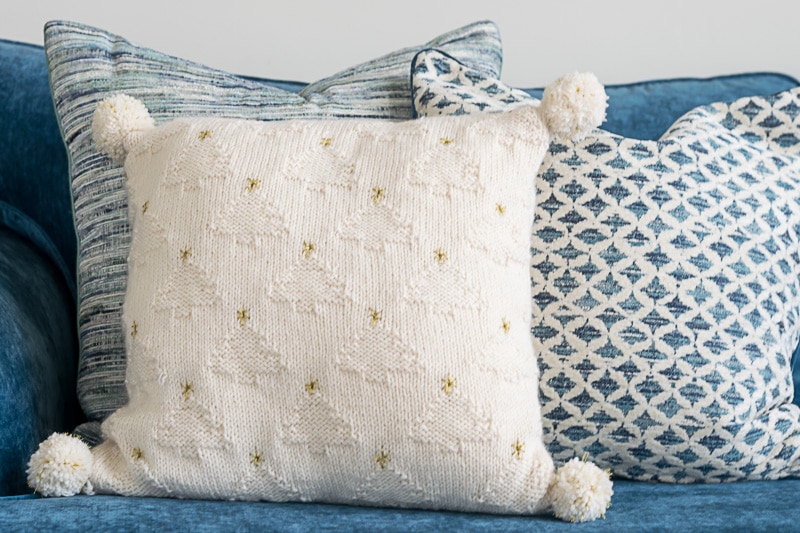
Table of Contents
These knit pillows work up quickly, making them a perfect project if you want to make gifts this year.
Materials Needed for Throw Pillow
Some of these links may be Amazon affiliate links and I may earn a small commission from the sale of these products to help defray the costs of operating this site, but the price you are charged is not affected. You can see my full disclosure policy here.
Pillow measures 18″ by 18″
- 600 yards of Worsted Weight Yarn. I used Lion Brand Wool-Ease in Fisherman.
- US Size 8 ( 5mm) Knitting Needles (14″ length)
- For the Embroidered Stars, 1 skein of Gold Metallic Embroidery Floss. I used DMC 3821. I used another skein of the gold embroidery floss in the pom poms
- Large-eye Embroidery Needle.
- Tapestry Needle, Yarn Needle or Crochet Hook
- Scissors
- Pom Pom maker or a piece of sturdy cardboard to make your own Pom Pom maker
- 18” x 18” square pillow insert (Check your attic for old pillows, this is a great way to recycle their pillow forms)
- Grab your free Knit Pillow Pattern by clicking the button below or by heading over to the Subscriber Library and download the free pattern for this festive decorative pillow from there.
Instructions to Knit Christmas Tree Pillow:
Gauge: 18 stitches and 24 rows for 4” by 4” square.
Skill Level: Beginner or Easy
With standard 14” knitting needles, you could cast on and knit both sides of the simple knit pillow simultaneously. It would be snug, but this ensures that the back of your pillow is the same size as the front of your pillow. Use two skeins of yarn, one for the front and one for the back.
Cast on 80 stitches with one skein and then, on the same needle, cast on another 80 stitches with the second skein. You could also use circular needles instead of straight needles if you prefer your work to be less snug. Follow the chart pattern below for one piece and knit the other piece in stockinette stitch.
· Cast on 80 stitches.
· 1st—6th row: work stocking stitch
· Download the pattern PDF for the stitch pattern chart. Click the button above for that download.
· 7th Row (should be the right side): [K8, P3, K17, P3, K9] x 2
· 8th Row: [P9, K3, P17, K3, P8] x 2
· 9th Row: [K4, P11, K9, P11, K5] x 2
· 10th Row: [P4, K13, P7, K13, P3] x 2
· 11th Row: [K4, P11, K9, P11, K5] x 2
· 12th Row: [P7, K7, P13, K7, P6] x 2
· 13th Row: [K5, P9, K11, P9, K6] x 2
· 14th Row: [P7, K7, P13, K7, P6] x 2
· 15th Row: [K7, P5, K15, P5, K8] x 2
· 16th Row: [P7, K7, P13, K7, P6] x 2
· 17th Row: [K7, P5, K15, P5, K8] x 2
· 18th Row: [P9, K3, P17, K3, P8] x 2
· 19th Row: [K9, P1, K19, P1, K10] x 2
· 20th –23rd Row: Stocking Stitch
· 24th Row: K2, [P17, K3] x 3, P17, K1
· 25th Row: P1, [K17, P3] x 3, K17, P2
· 26th Row: K6 [P9, K11] x 3, P9, K5
· 27th Row: P6, [K7, P13] x 3, K7, P7
· 28th Row: K6, [P9, K11] x 3, P9, K5
· 29th Row: P3, [K13, P7] x 3, K13, P4
· 30th Row: K5, [P11, K9] x 3, P11, K4
· 31st Row: P3, [K13, P7] x 3, K13, P4
· 32nd Row: K3, [P15, K5] X 3, P15, K2
· 33rd Row: P3, [K13, P7] x 3, K13, P4
· 34th Row: K3, [P15, K5] x 3, P15, K2
· 35th Row: P1, [K17, P3] x 3, K17, P2
· 36th Row: [K1, P19] x 4
· 37th-40th Row: Stocking Stitch
· 41st-74th Row: Repeat rows 7-40
· 75th-91st Row: Repeat rows 7-23
· 92nd & 93rd Row: Stocking Stitch
· Bind Off
· If you didn’t knit the back of the pillow at the same time as the front, then CO 80 and knit in stocking stitch for 93 rows. BO
(A note about the chart: The chart is worked from the right side to the left side. When you turn your work at the end of row 7, you begin row 8, working the chart from left to right.)
Wash and Block both sides
Embroider Stars:

- Thread needle with all 6 strands of gold metallic thread.
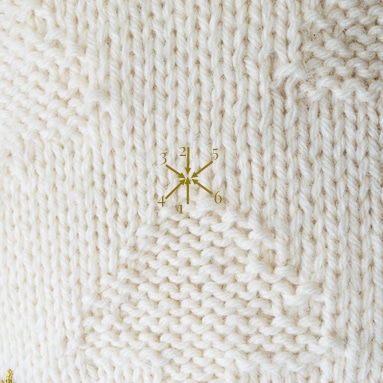
- Tie a tight knot in the end and bring the needle up from the wrong side of the work, THROUGH the yarn of the second purl down from the top of the center of a tree. See diagram. Going through the yarn helps secure the knot.
- Follow the diagram below, coming up at each number and then back into the center of the star.
- Embroider a star at the top of each Christmas Tree, tying off your embroidery floss after each tree.
Finish Knit Pillow Pattern:
Put Pillow Together:
Your finished pillow cover should fit snugly around an 18” by 18” pillow. You might have to pull a little, but that is better than it being too loose. Before you start sewing your pillow together, check and see that with a 1/4—1/2” seam all the way around, it will fit snugly. If you need to, increase your seams to get a snug fit.
- With wrong sides together and starting at one of the bottom corners, use mattress stitch to go up one side, across the top, and back down the other side.
- Insert pillow form and continue to use the mattress stitch to close that last side.
Make Pom Poms:
- If you have a pom pom maker, then, by all means, use that!
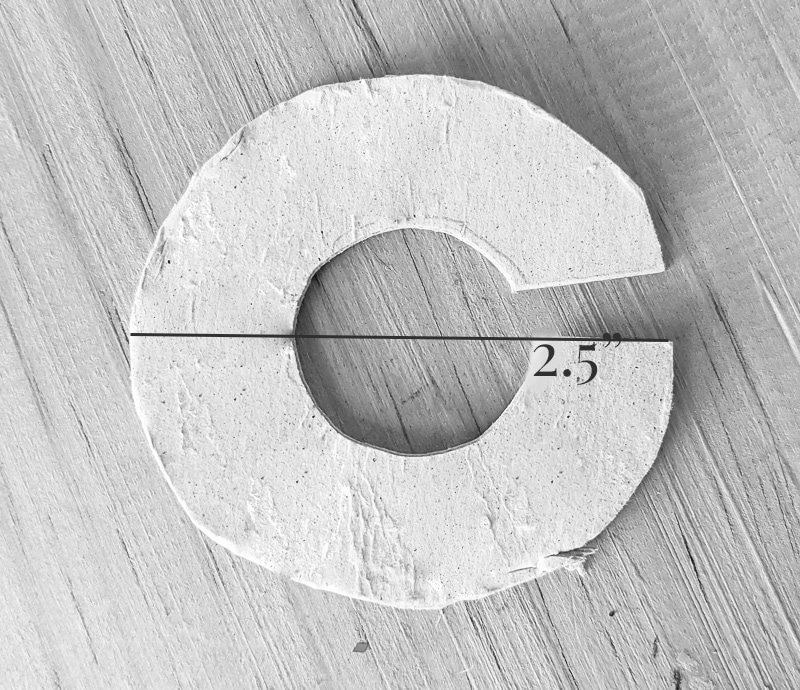
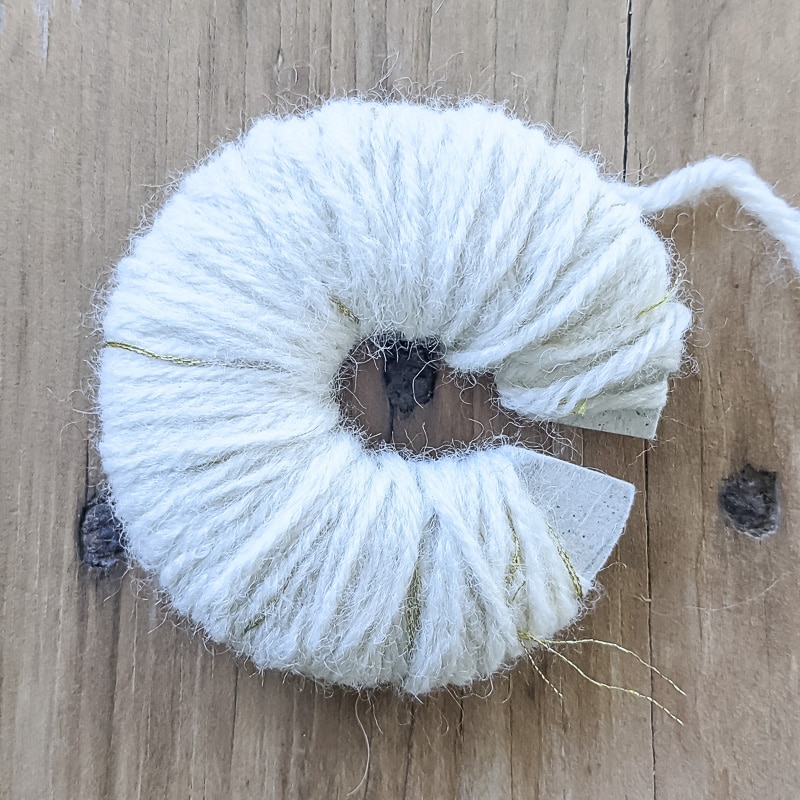
- If you don’t have a pom-pom maker, here’s my easy way to make a pom-pom. Trace a circle on stiff cardboard the same diameter you want your pom-pom to be. Mine was 2.5”, but I think you could even go a bit bigger if you are so inclined.
- Then trace a smaller circle in the middle. My smaller circle is 1” in diameter.
- Cut out your big circle and then cut through one side of your big circle so that you can cut out your smaller circle.
- It will look like the letter C.
- If you want a sprinkle of gold in your pom-poms, then divide and cut the second skein of gold embroidery floss into four lengths. Then separate each of the four lengths, with three strands in each section. You should have eight lengths of gold embroidery floss, two for each pom.
- Take one end of your main yarn and start wrapping your yarn around it at one end of your C. Use the yarn you are wrapping to secure the loose end by wrapping the yarn over it.
- When you get to the other end of the C, turn around and come back for the 2nd wrap.

- If you want to add some gold thread to your pom-pom, you will do it after the 4th wrap. After you have wrapped 4 times, wrap your gold thread around at the end opposite your yarn thread.

- Wrap the entire length of your C and then pick back with your white yarn, using your yarn to catch the gold thread.
- Then, wrap yarn 4 more times for a total of eight and then add another round of gold thread.
- After the gold wrap, wrap 2 more times. You will have a total of 10 yarn wraps for each pom.
- Holding the yarn in place with one hand, use your scissors to cut through the side of the yarn. Do your best to hold all the yarn in place.
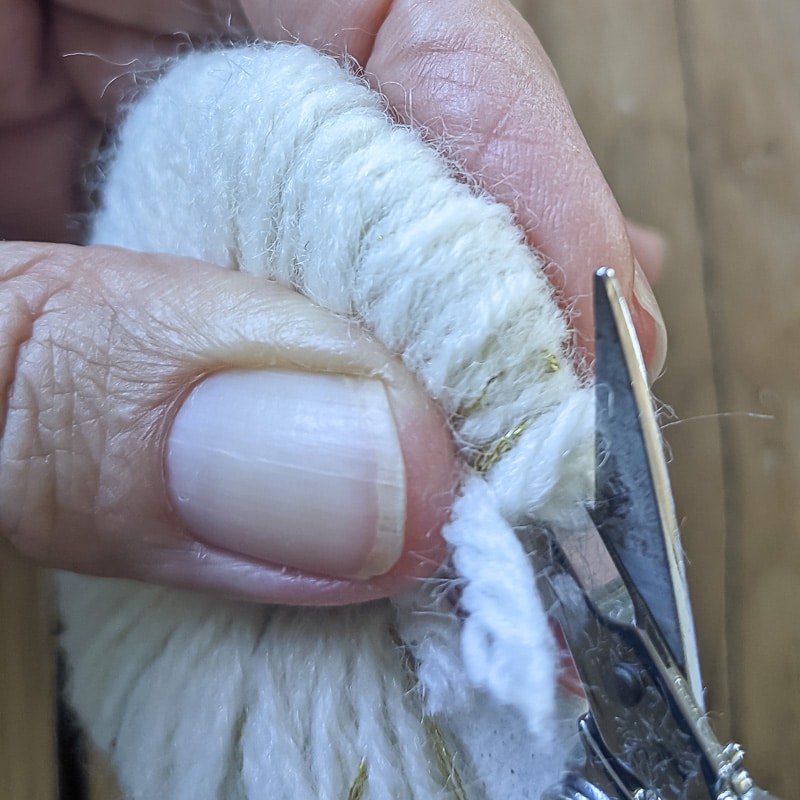
- Cut a piece of yarn about 10 inches long and wrap it around the pom center, using the cardboard pattern as a guide. At the opening of your C, some of your yarn will want to escape; push it back in and catch it with the yarn you are using to tie it together. Tie your knot as tightly as possible against the pom-pom center, and then tie a second knot as tightly as possible. An extra set of hands is helpful here. Try to get the pom-pom tied as tightly to the middle of the piece of yarn as possible. Don’t cut the ends of the yarn you just tied your pom with. You will use this yarn tail to attach the pom-pom to your pillow.
- Trim any ‘wild hairs’ with your scissors.
Attach Pom Poms to your pillow!
- Thread a needle with one of the long tails of yarn on your pom pom; alternately, you could use a crochet hook to attach the pom-pom.
- Come down about 1 inch from one of the corners of your pillow and insert the needle or crochet hook through to the other side, about 1 inch down on the other side.
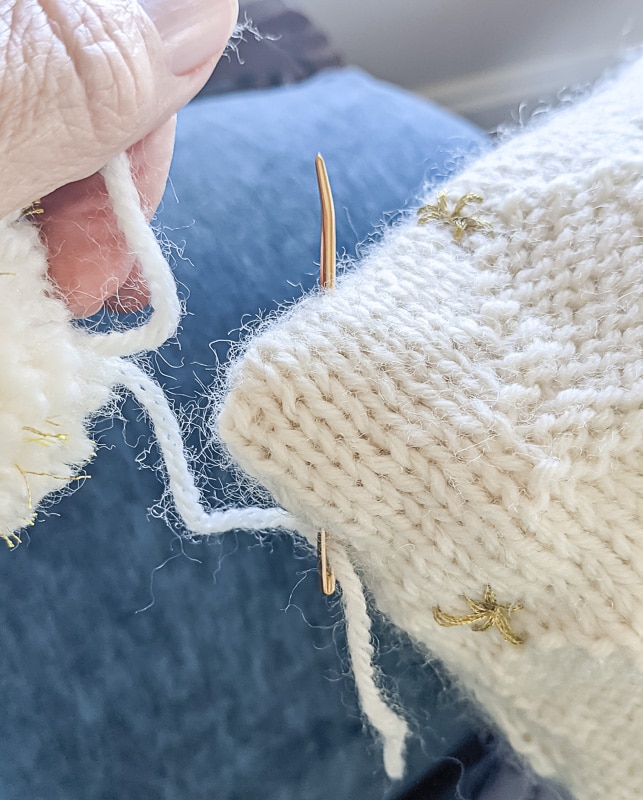
- Pull the yarn through and then tie that end of the yarn to the other end of the yarn on the pom-pom. Tie it twice, snugly.
Make sure to head over to this list of 🎄 Free Christmas Knitting Patterns 🎄! I think there is something for everyone on this list!
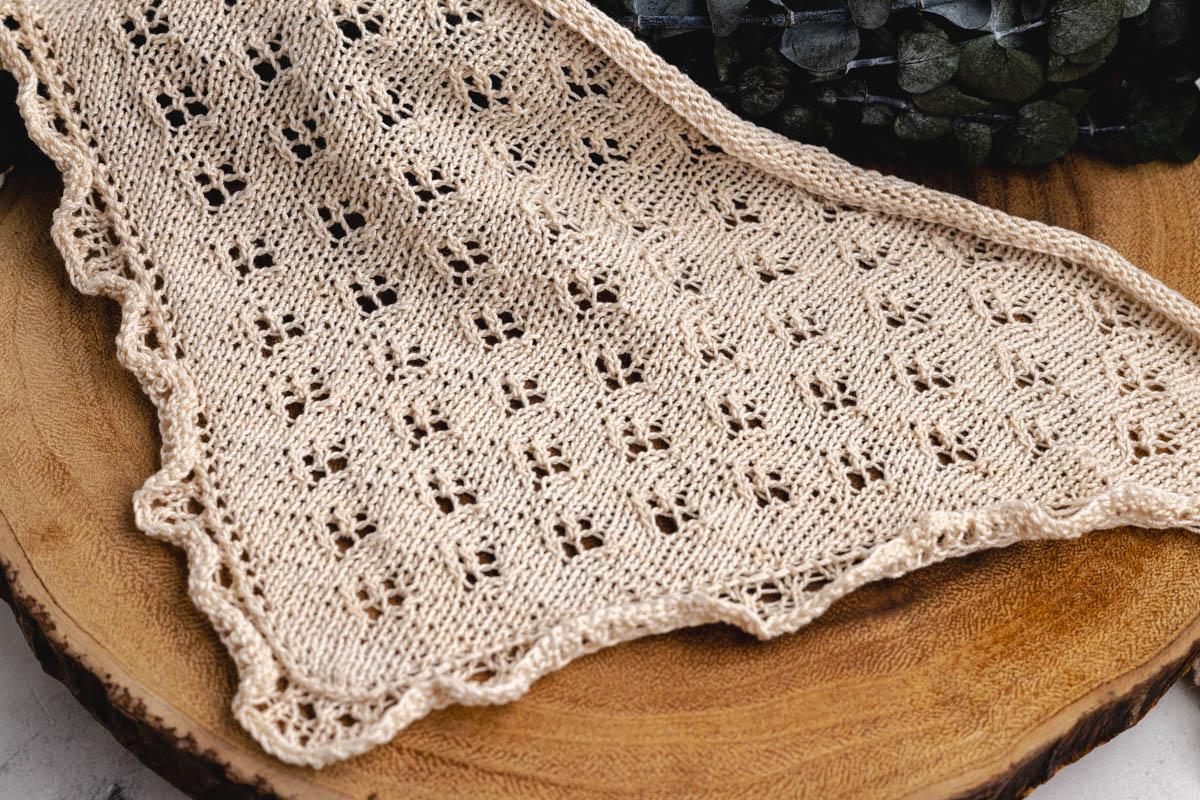
And then, pop on over to My Crochet & Knitting Patterns for all of my free knitting patterns. There is a pattern for all skill levels, from easy to advanced. Washcloths and simple knit blankets are some of the easy knitting patterns available for free to subscribers.
Bookmark this page or pin the following image to save this Knit Pillow Pattern for future reference.
Thanks so much for spending a few minutes of your busy day with me!
To ensure you don’t miss future content, pop your email in the pale green box on the right or click here. I usually send one email weekly, so I won’t inundate your inbox. I’m sensitive to an overflowing email inbox!
We will only use your email address to send you emails, no more than 1-2 weekly. In addition, you will have access to my growing library of knit & crochet patterns and other printables. Check back often as this library will continue to grow. You can unsubscribe anytime by emailing me or clicking on the “unsubscribe” link at the bottom of all emails.
And you can access many of the products I refer to on my Nourish and Nestle Amazon Page. You can access it here.
So, if you’d like to participate in the ‘subscriber benefit’ action, simply subscribe to Nourish and Nestle here or use the form on the right sidebar. It’s slightly towards the top.
I have sent all my subscribers the link to the Subscriber Benefits Library. If you missed it or misplaced it, let me know.
Until next time…

Pattern won’t send!
Hi Barb, for whatever reason, you weren’t in the queue to get that pattern. I have added you, so you should receive it shortly. Please let me know if you haven’t received it within an hour.
Thanks for your patience.
Hugs,
Lynn
Hi Lynn
Thankyou dearly.
Nadine
You are so very welcome, Nadine! 🫶🏼
I’d like to make this pillow in a smaller size, 14 x 14.
How do you scale it down?
Thank you!
Hi Terri,
What I would do is this:
Cast on 63 stitches
Rows 1-10: Work in stocking stitch (knit RS, purl WS)
Row 11: K10, P3, K17, P3, K17, P3, K10
Row 12: P10, K3, P17, K3, P17, K3, P10
Row 13: K5, P11, K10, P11, K10, P11, K5
Row 14: P5, K13, P8, K13, P8, K13, P5
Row 15: K5, P11, K10, P11, K10, P11, K5
Row 16: P7, K7, P12, K7, P12, K7, P7
Row 17: K6, P9, K11, P9, K11, P9, K6
Row 18: P7, K7, P12, K7, P12, K7, P7
Row 19: K8, P5, K14, P5, K14, P5, K8
Row 20: P7, K7, P12, K7, P12, K7, P7
Row 21: K8, P5, K14, P5, K14, P5, K8
Row 22: P10, K3, P17, K3, P17, K3, P10
Row 23: K10, P1, K19, P1, K19, P1, K10
Rows 24-27: Stocking stitch
Row 28: K13, P17, K3, P17, K13
Row 29: P13, K17, P3, K17, P13
Row 30: K17, P9, K11, P9, K17
Row 31: P18, K7, P13, K7, P18
Row 32: K17, P9, K11, P9, K17
Row 33: P13, K13, P11, K13, P13
Row 34: K16, P11, K9, P11, K16
Row 35: P13, K13, P11, K13, P13
Row 36: K12, P15, K9, P15, K12
Row 37: P13, K13, P11, K13, P13
Row 38: K12, P15, K9, P15, K12
Row 39: P13, K17, P3, K17, P13
Row 40: K10, P19, K5, P19, K10
Rows 41-44: Stocking stitch
Rows 45-57: Repeat rows 11-23
Rows 58-61: Stocking stitch
Rows 62-74: Repeat rows 28-40
Rows 75-84: Stocking stitch
Bind off.
Make sure to send a pic of your finished pillow!