
Add a Crochet Border to Knitted Piece


Illustrated directions and video on how to add a crochet border to a knitted piece of work.
It is rare that I don’t add some sort of border to my throws, blankets, and washcloths. And when I do, it typically is a crochet border of some sort. In fact, adding borders to my knit pieces is really the only time I crochet.
A crochet border really does clean up the raw edges of a knit piece and is a great way to wrap up the loose yarns and tails from knitting. And sometimes, it can help ‘uncurl’ a curled knit edge.
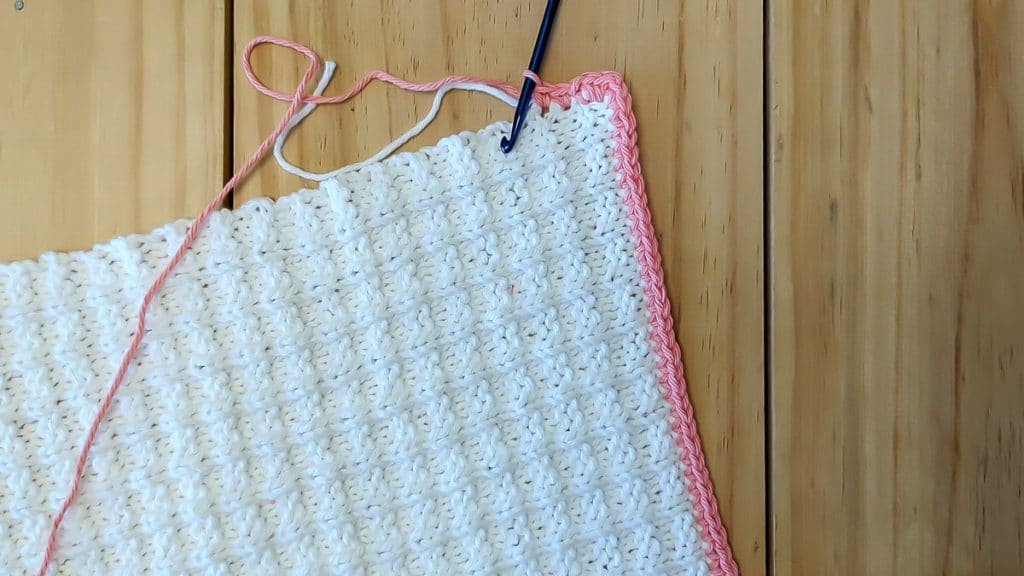
Table of Contents
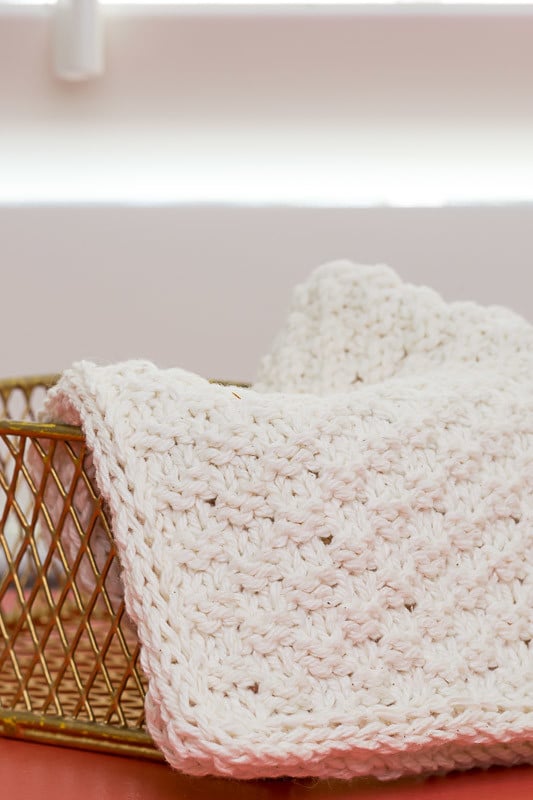
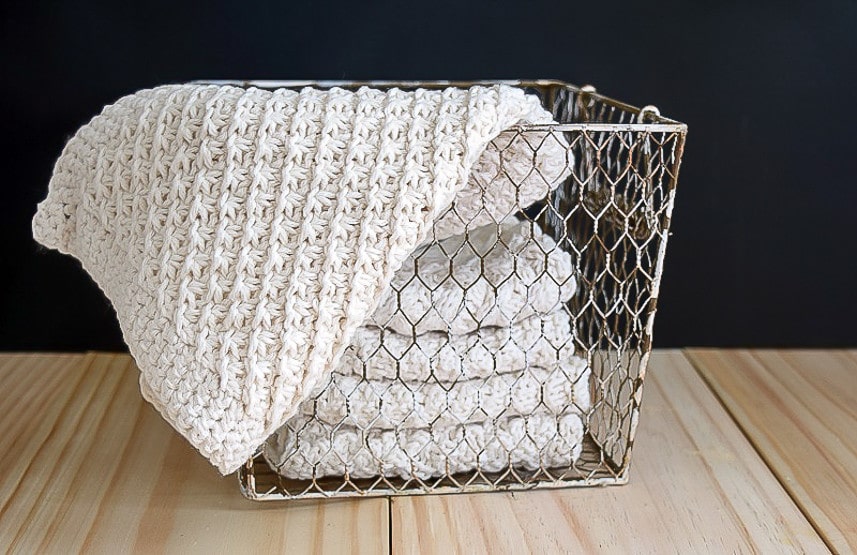
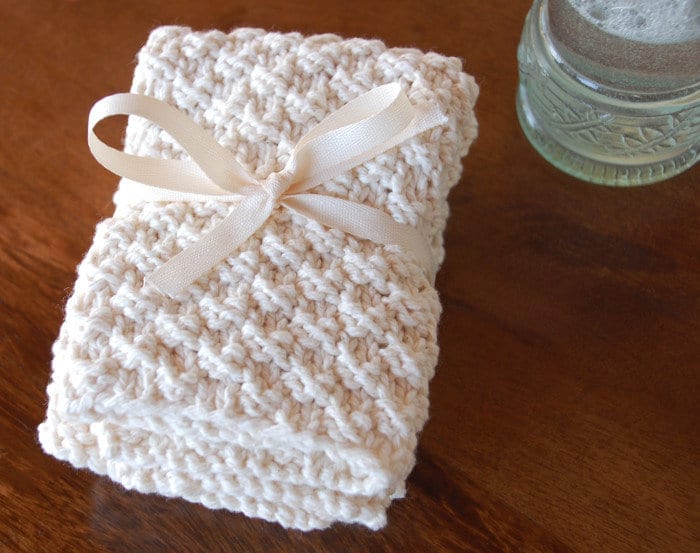
I added a pink border to this Waffle Stitch Knit Dishcloth, which you can access here.
Tips for Adding Crochet Border To a Knit Project
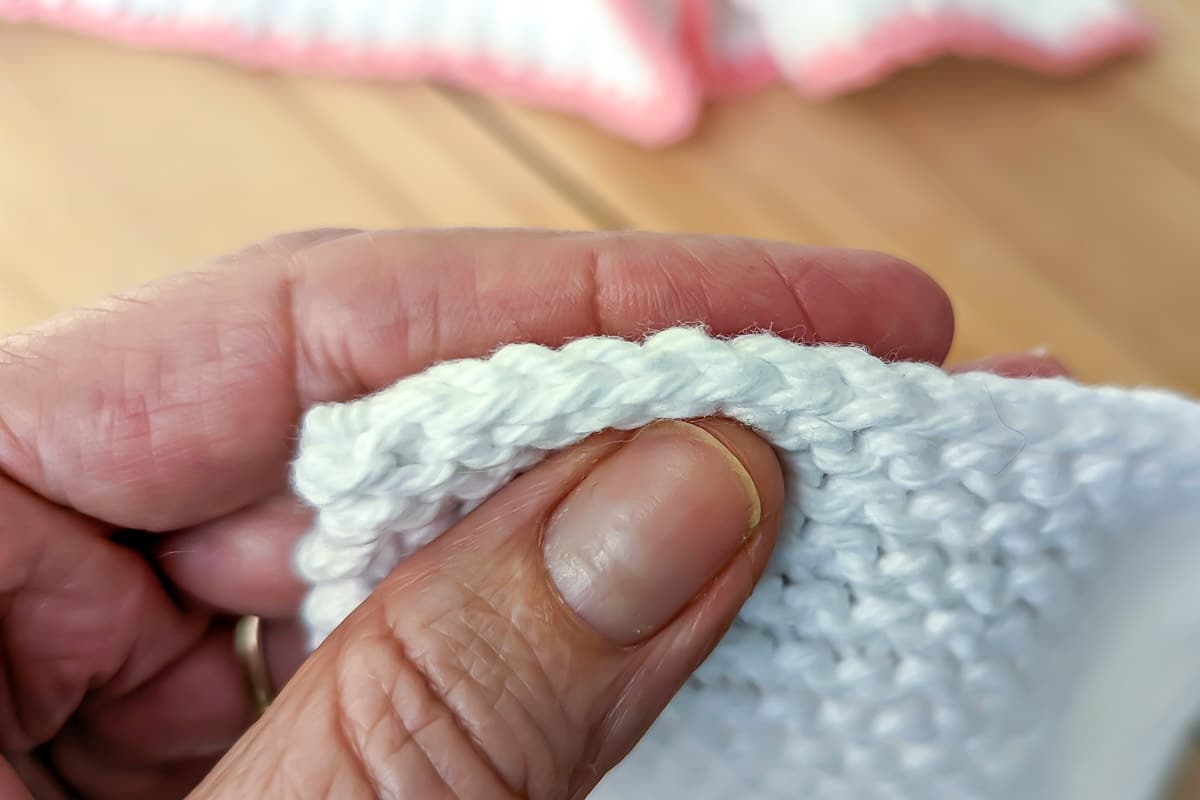
- Pick up your stitches with the front side of your knitted piece facing you.
- I like to come in a few stitches from a corner to start adding the crochet border.
- Your crochet hook will go underneath the V made by the knit stitches along all edges.
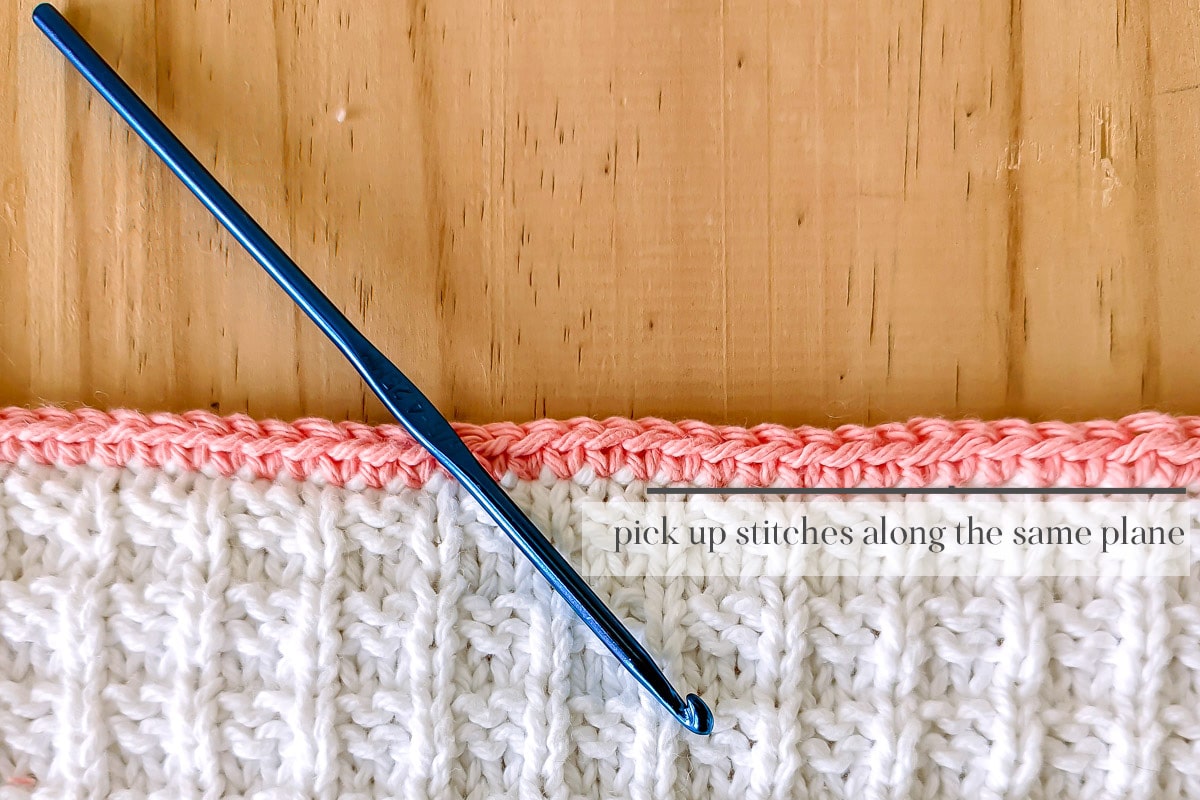
- Make sure you pick up your stitches along the same plane, so that your stitches are lined up with each other.

- Keep your tension light
- On the the Cast On and Bind Off rows, pick up under each V on the edges. Make sure you pick up under both piece of yarn in the V.
- On the vertical edges (the sides) of your knitted piece, you will (typically) pick up two stitches for every three rows or three stitches for every four rows, still under the Vs. If you have knit your piece in garter stitch, pick up the very top loop of yarn in each purl bump along the selvedge; one stitch for every two rows.
- That notwithstanding, you need to lay your piece down from time to time and observe how it is laying. If it is flaring out, you have picked up too many stitches. You need to pull them out and space them out more. If your work is puckering, you have not picked up enough stitches. Pull them out and pick stitches closer together so that you will pick up more stitches.
- Wrap your tails and loose threads under your crochet edging by holding them close to the edges as you work your single crochets.
Step-by-Step Instructions Showing How to Add a Crochet Border to Knitted Piece
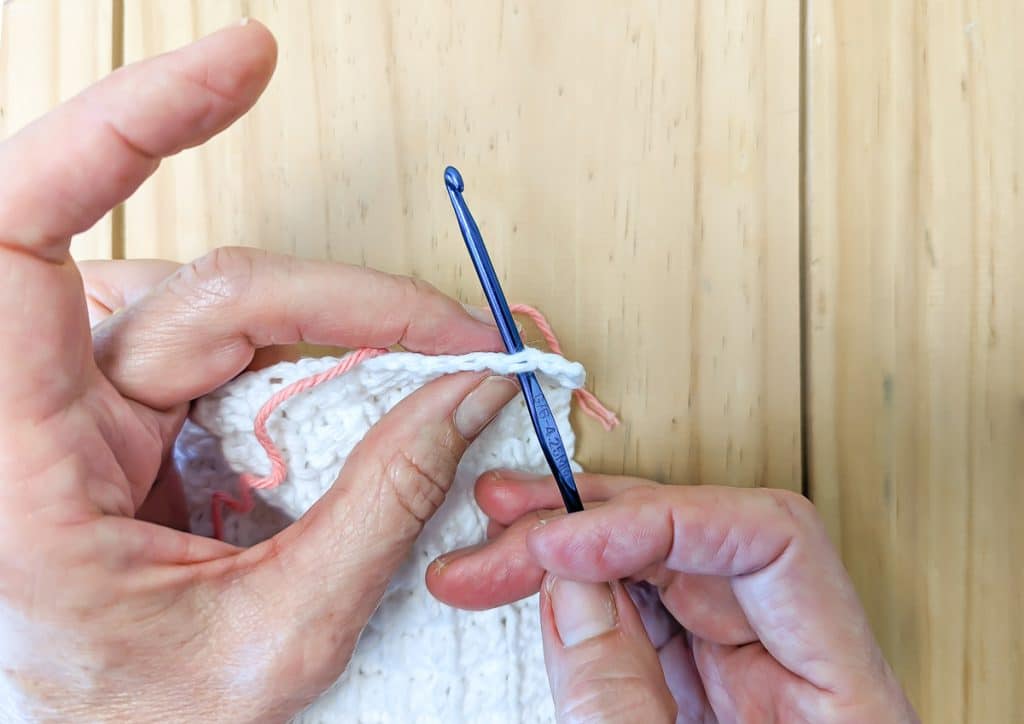
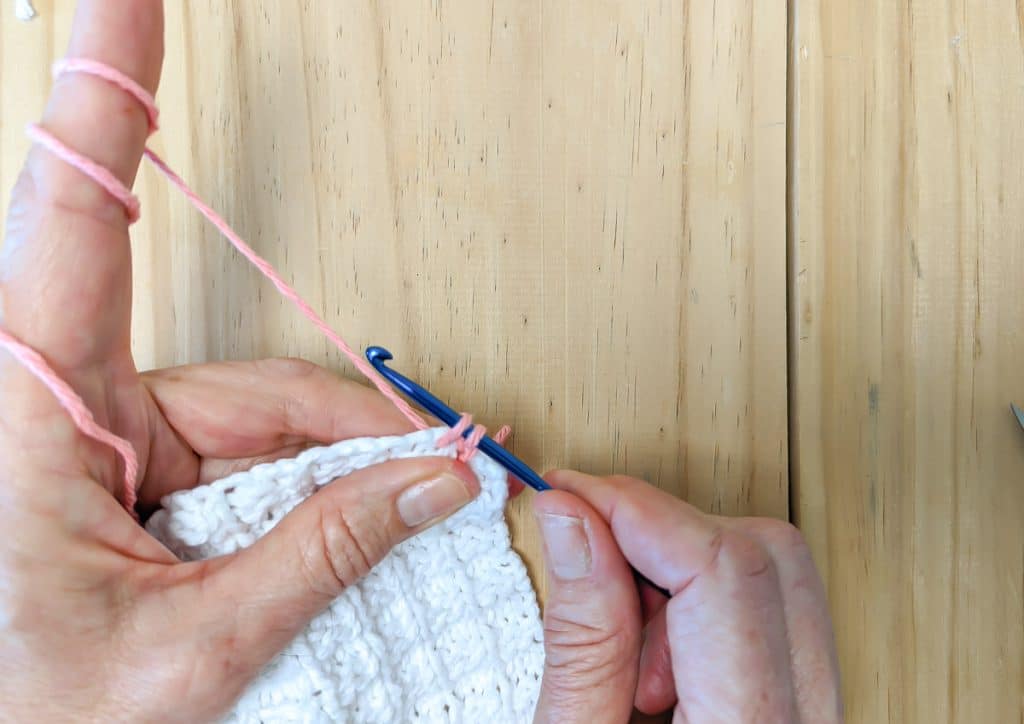
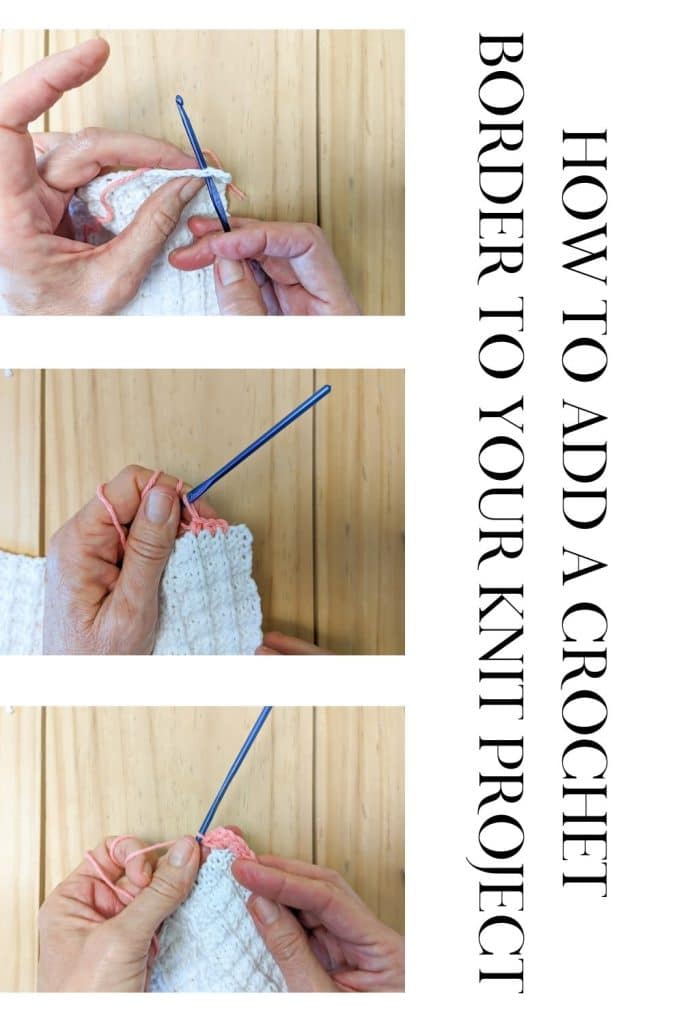
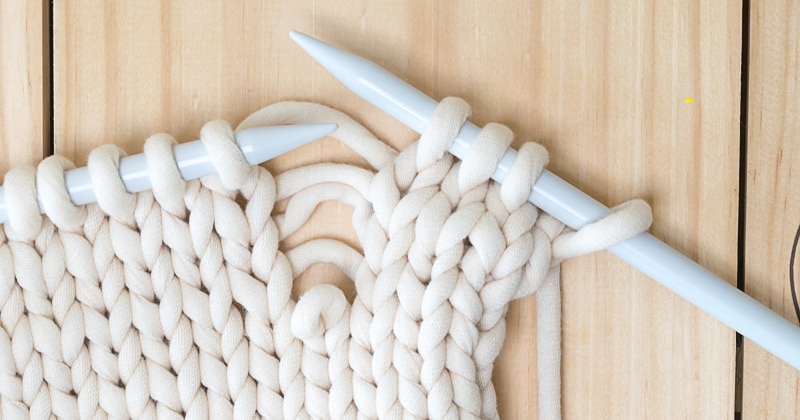
Place crochet hook under V on edge of knit piece, from front to back.
Grab the yarn, leaving several inches for a tail.
Pull crochet hook and yarn back through the piece.
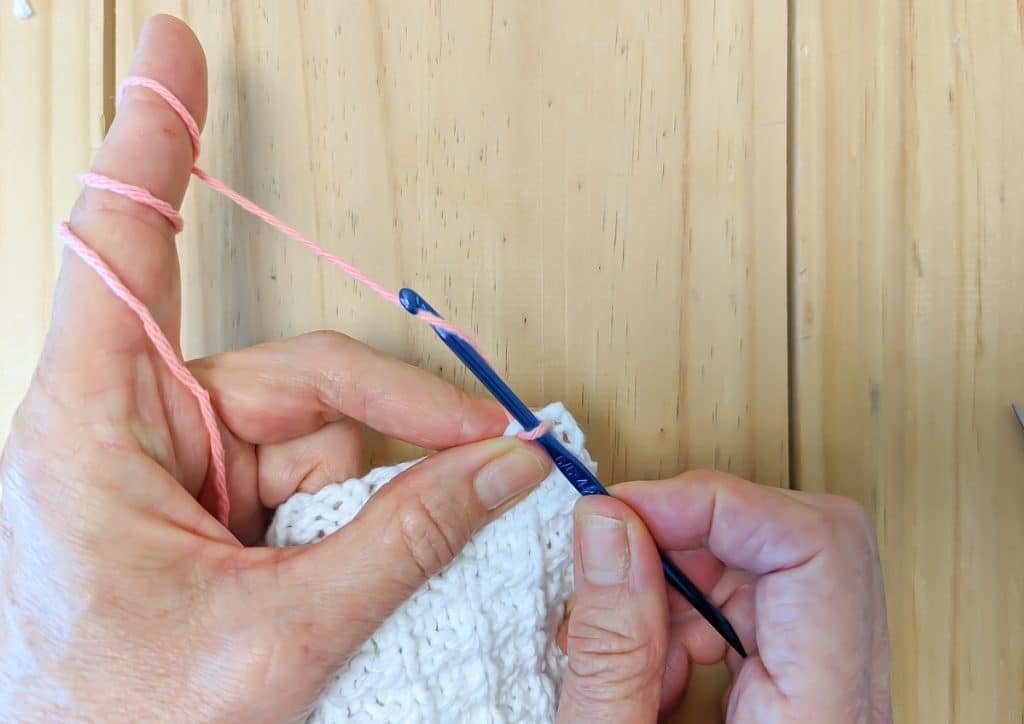
Work a slip stitch: with your crochet hook, grab the working end of the yarn …and pull the yarn through the loop on the crochet hook.
You have just made a slip stitch and the first stitch of the edging.
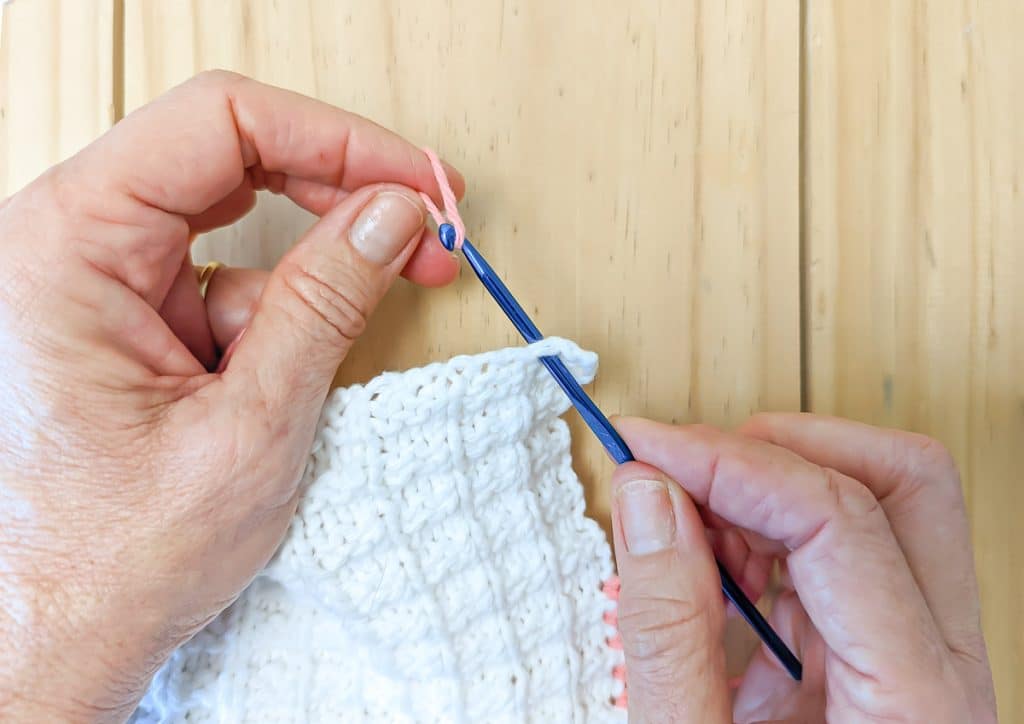
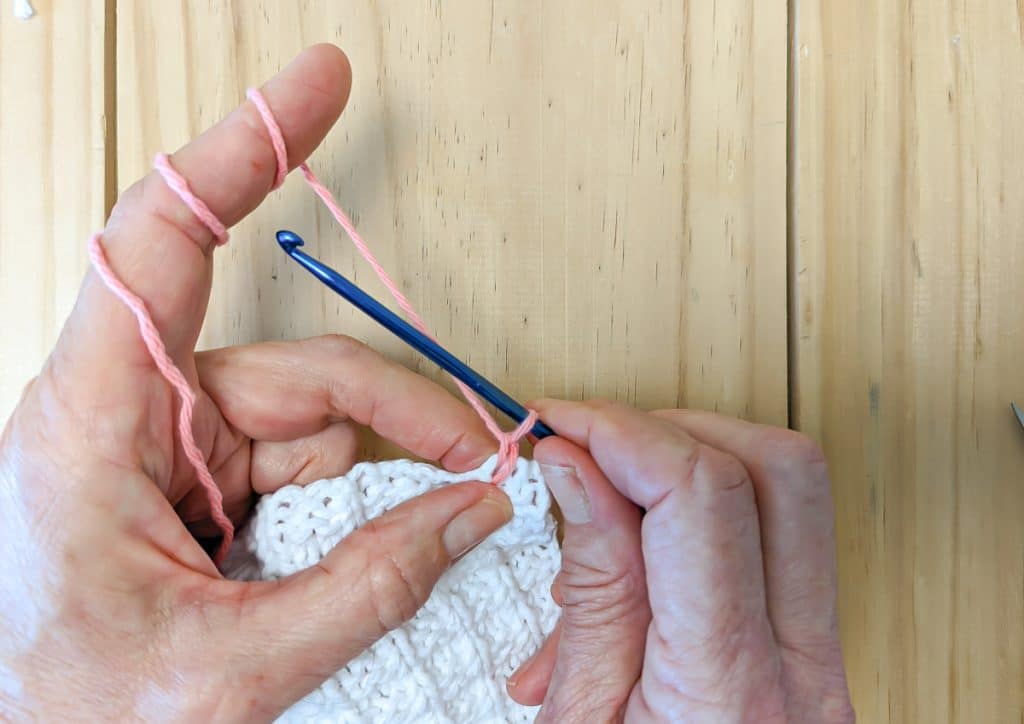
Determine how far apart to pick up stitches.
Work a single crochet: In the space you’ve determined for the next stitch, place your crochet hook under the V, from front to back.
Grab the working yarn with your hook…
…and pull it back through the hole. You now have two loops on your hook.

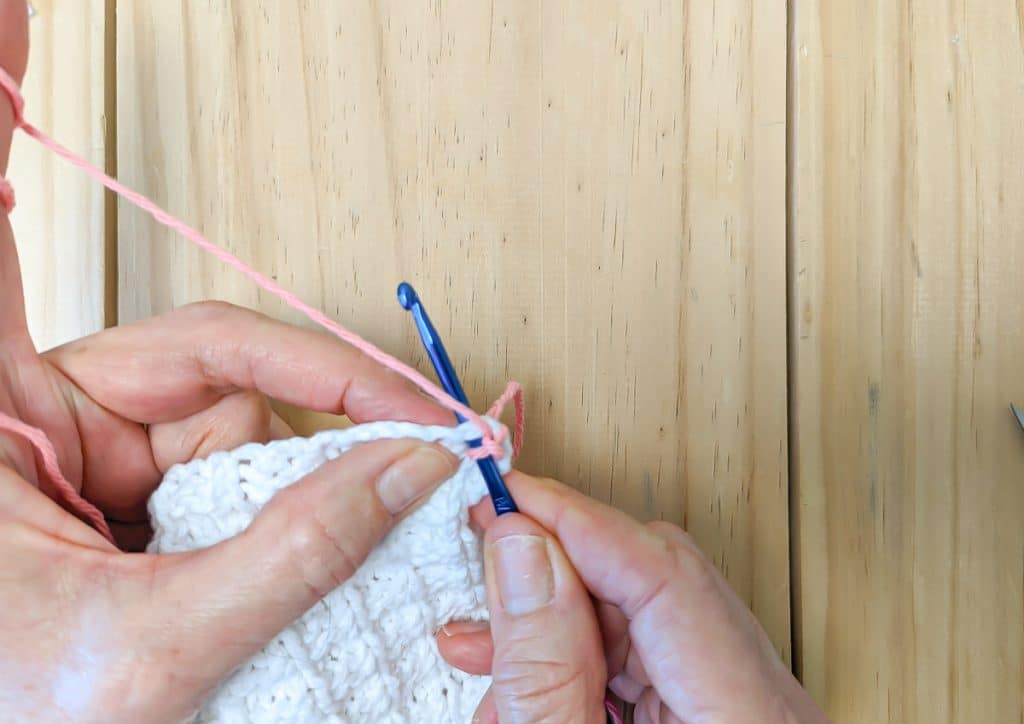
Grab the working yarn again and …
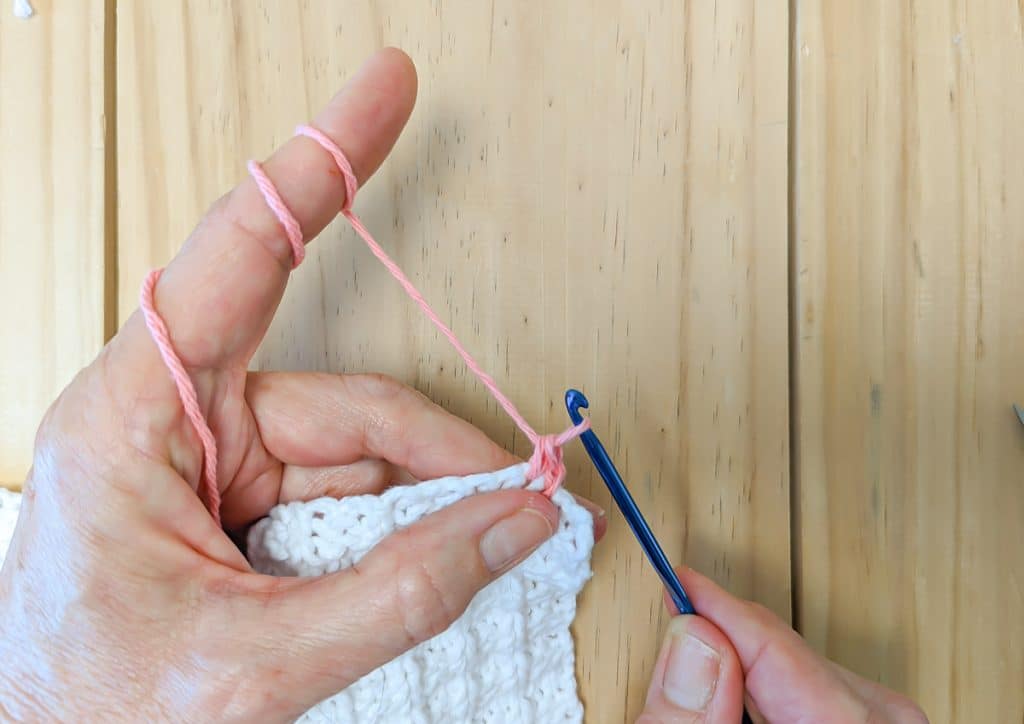
…pull it through the two stitches on the hook, resulting in one stitch on the hook.
You now have two stitches of your edging.
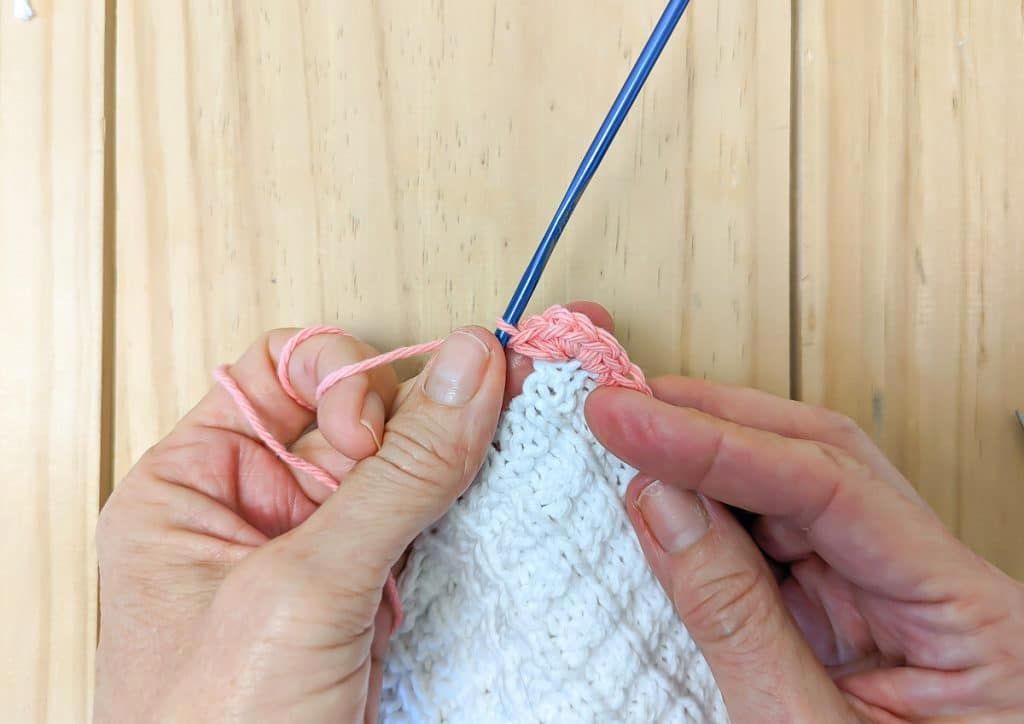
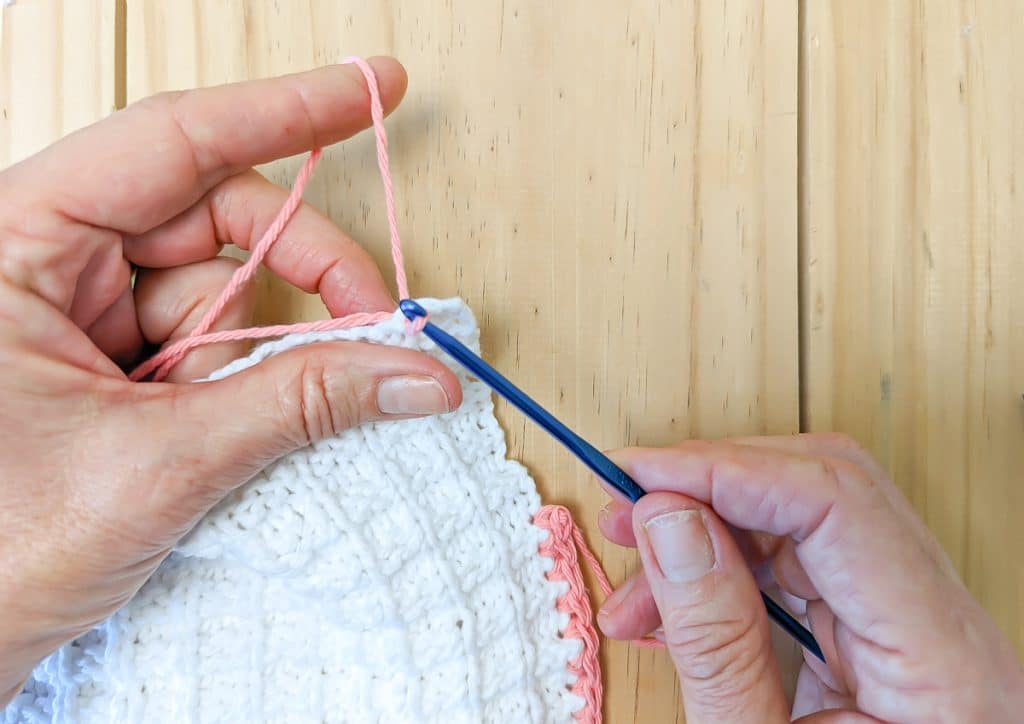
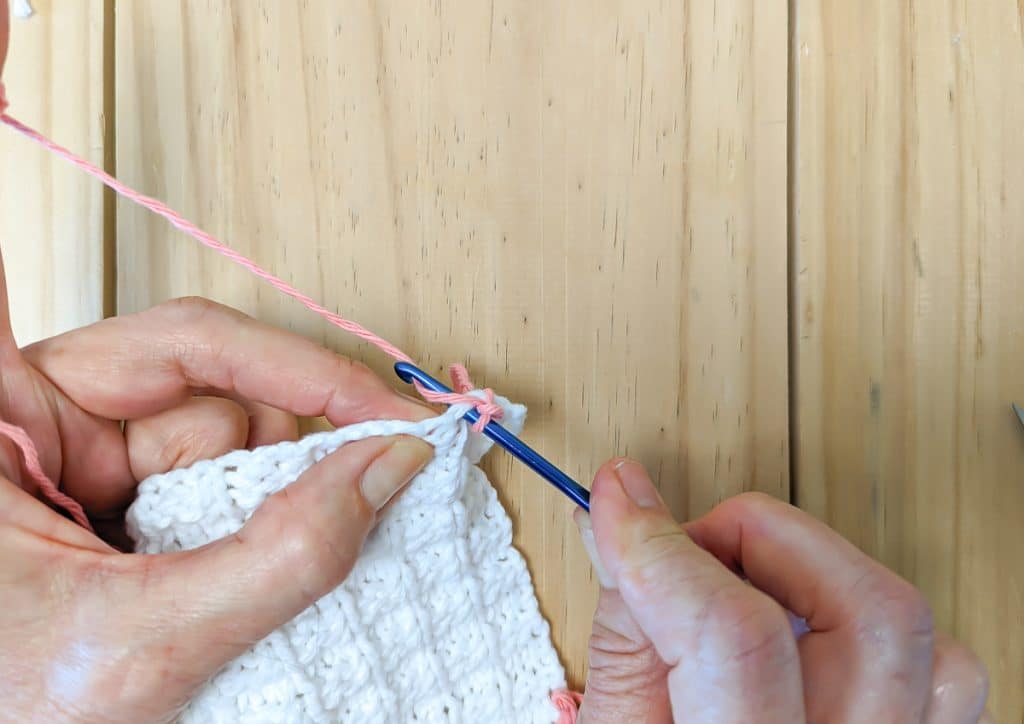
Continue to pick up stitches along each edge, working four single crochet into each corner.
If it would be helpful to see how to add a crochet border to a knit piece in action, click this link.
Try this Knit Edge if You Don’t Want to Try Crochet
An Applied I-Cord is a great option if you’d rather knit an edge.
Bookmark this page or pin the following image to refer back to this post on how to add a crochet edge to a knitted project in the future.
Thanks so much for spending a few minutes of your busy day with me!
To ensure you don’t miss future content, pop your email in the pale green box on the right or click here. I usually send one email weekly, so I won’t inundate your inbox. I’m sensitive to an overflowing email inbox!
We will only use your email address to send you emails, no more than 1-2 weekly. In addition, you will have access to my growing library of knit & crochet patterns and other printables. Check back often as this library will continue to grow. You can unsubscribe anytime by emailing me or clicking on the “unsubscribe” link at the bottom of all emails.
And you can access many of the products I refer to on my Nourish and Nestle Amazon Page. You can access it here.
So, if you’d like to participate in the ‘subscriber benefit’ action, simply subscribe to Nourish and Nestle here or use the form on the right sidebar. It’s slightly towards the top.
I have sent all my subscribers the link to the Subscriber Benefits Library. If you missed it or misplaced it, let me know.
Until next time…

Thank you SO much for this tutorial! I started learning to knit in the lockdown and recently started learning crochet as well. I am making a throw for my hubby that is knit. I added extra in width and especially length because he is so tall, but I have a few skeins of yarn leftover and I thought why not give him even a little more room. This is great, I hadn’t thought it was possible or how lovely it looks when adding a border! I can’t wait to finish the body of the blanket so I can get started on the edging now!
Sending you best wishes and again many thanks! BQ
Oh, Barbara, I am thrilled that this was helpful to you! That’s always been my goal!
Please do send a photo of your finished project with the crocheted edge. I’d love to see it!
Hugs, Lynn
Hi
I was recently asked to crochet a border for a friend’s knit afghan. She just wanted a single crochet. I picked up each stitch all the way around but found it was wavy on the sides of the Afghan but not the top and bottom. I tried using a smaller hook but it didn’t seem to help. What am I doing wrong
Hi Pam,
That’s a common problem! Sounds like you picked up every stitch, which is what you probably did on the op and bottom. However, on the side, you need to pick up three fo revery four stitches or two for every three stitches. Knit stitches are taller than they are wide, which is why you need to pick up fewer. Does that make sense?