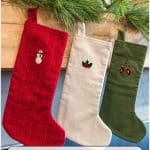
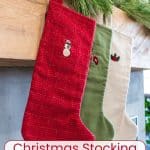
Christmas Stocking Sewing Pattern
This Christmas stocking sewing pattern produces a stocking replete with simple charm. It is perfect for adding a personal, cozy touch to your home or gifting thoughtful keepsakes.
Whether you’re a seasoned seamstress or just starting out, this step-by-step guide will walk you through creating beautiful flannel stockings and then complete embroidery options to make your stocking all the more special.
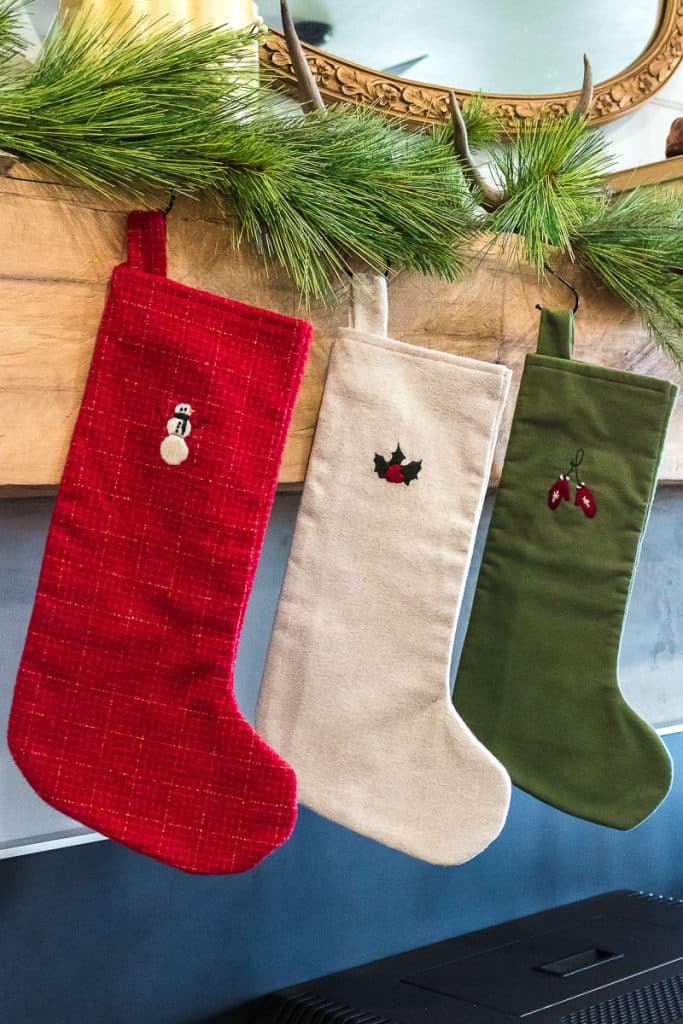
Table of Contents
Notes on this Simple Christmas Stocking Sewing Pattern
- Cutting, sewing, and ironing each stocking took approximately 30 minutes to an hour. Once everything is cut and ironed, they are very simple to sew. The embroidery time depends on the pattern, but each should take less than an hour. If you are new to embroidery, it would probably take an hour or two.
- Depending on the material you have at home, figure on approximately $15.00 in materials for each stocking.
- When embroidering the stocking, you could embroider your designs before or after sewing the stocking. Here are some considerations:
- If you embroider your designs before sewing the stockings, the back side of the embroidery won’t be visible inside the stocking. However, this method makes it more challenging to determine the exact placement of the finished image once the stocking is sewn.
- If you embroider your designs after you sew the stockings, the backside of your embroidery will be on the inside, but you won’t see it unless you turn the stocking inside out. However, this method makes it much easier to determine the final placement of the images on the finished stocking. A 5″ embroidery hoop will fit inside the stocking when sewn following the pattern directions.
Choosing Embroidery Floss
The best kind of embroidery floss is six-strand cotton embroidery floss. It is versatile, durable, and widely available, ideal for most embroidery projects. DMC and Anchor are two respected brands. Here are some details to consider when selecting embroidery floss:
- Material:
- Cotton is the most popular choice because it’s smooth, strong, and easy to work with.
- Silk floss can add a luxurious sheen but is more expensive and delicate.
- Metallic floss adds sparkle but can be trickier due to its stiffness.
- Ease of Use:
- Six-strand floss can be split into finer strands for detailed work or used as is for bolder stitches.
- Colorfastness:
- Look for floss labeled “colorfast,” which prevents colors from bleeding during washing or when damp.
Other Christmas Projects
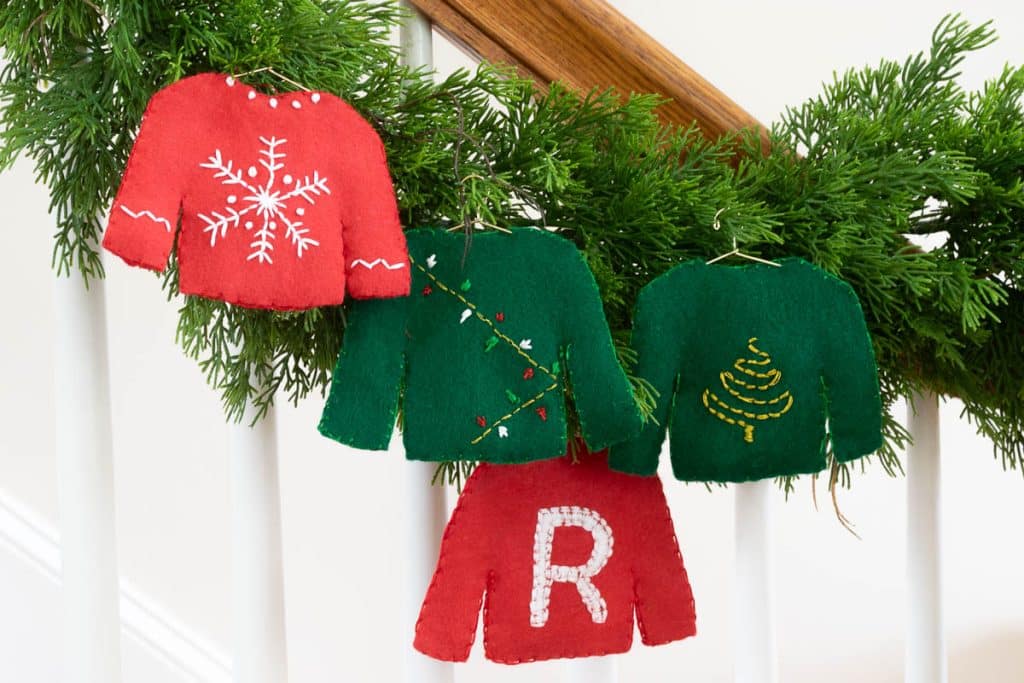
- These Felt Christmas Sweater Ornaments are a creative and fun project. You can personalize them with initials or other ornamentation. Truly the possibilities are only limited by imagination. Step-by-step illustrated instructions and a printable pattern make this an easy Christmas ornament project.
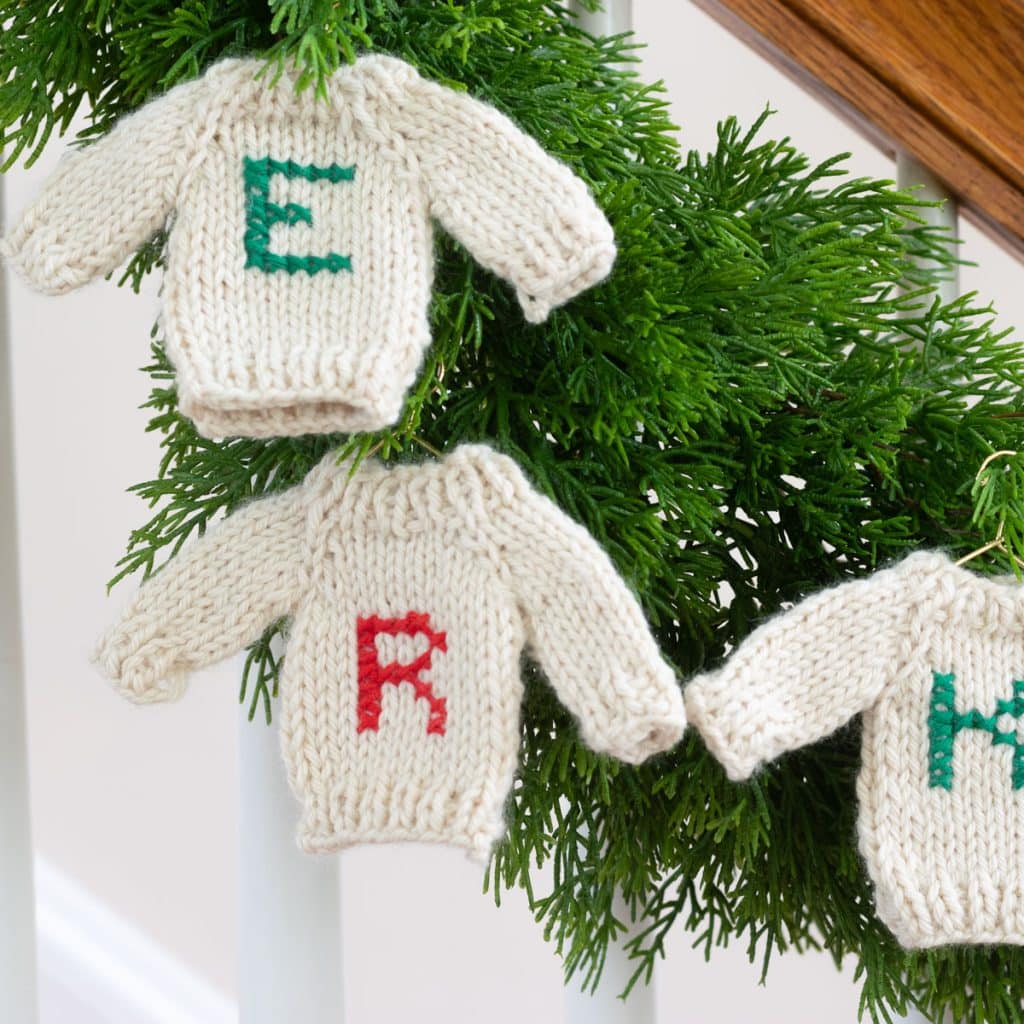
- I know I’ve said this before, but these wee sweaters may just be one of my most favorite knit projects, ever! I mean, could they be any cuter? These Tiny Knit Sweaters knit up quickly and make adorable Christmas tree ornaments. They are equally cute on a garland, a wreath, as a gift topper, or as a place setting. Use some of your yarn stash for these knit Christmas ornaments.
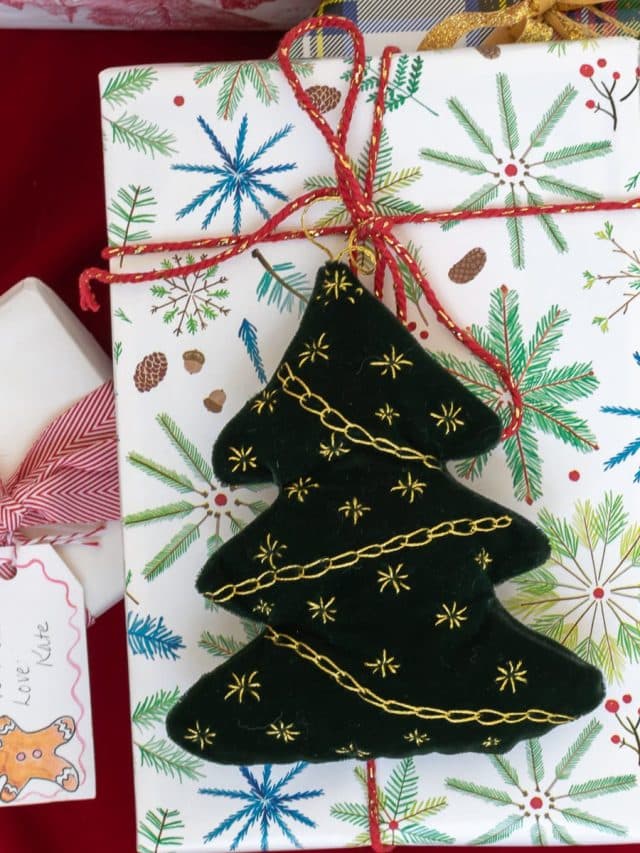
- You can make these Embroidered Christmas trees as fancy or as simple as you like. With the simple embroidery design I used, I could start and finish one in about 90 minutes, but feel free to ‘bling’ them up a bit with fancier stitches and beads. You can use these little trees as holiday gift adornments, tree ornaments, or to hang from garland.
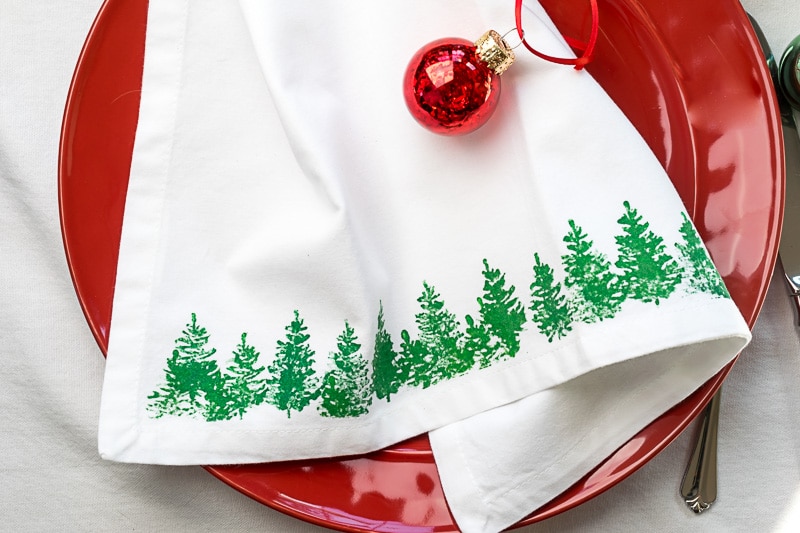
- These Stamped Fabric Napkins are easy and inexpensive to make. Embellished with Christmas Tree Stamps, they would add some festive cheer to your holiday table and be exciting gifts for any recipient.
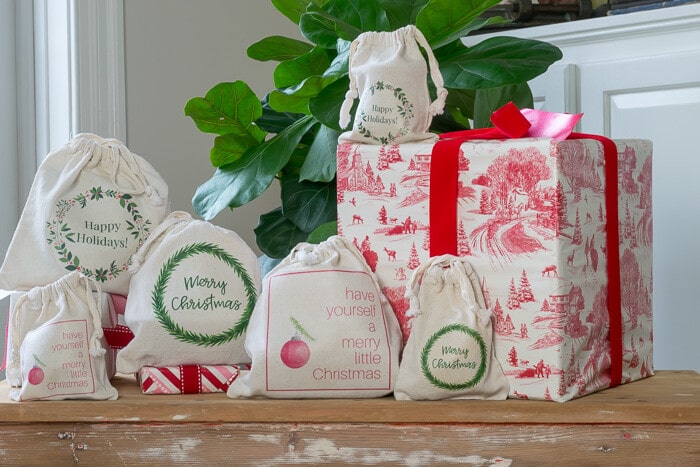
- I was looking for a way to make my handmade gifts of food and washcloths/dishcloths just that much more special. Tucking the gifts into a canvas bag with a label tailored to that gift was my solution. I couldn’t be more thrilled with how they turned out. I am sharing this tutorial for easy to make Gift Bags using Iron-On Fabric Transfers, perfect for your handmade or purchased gifts.
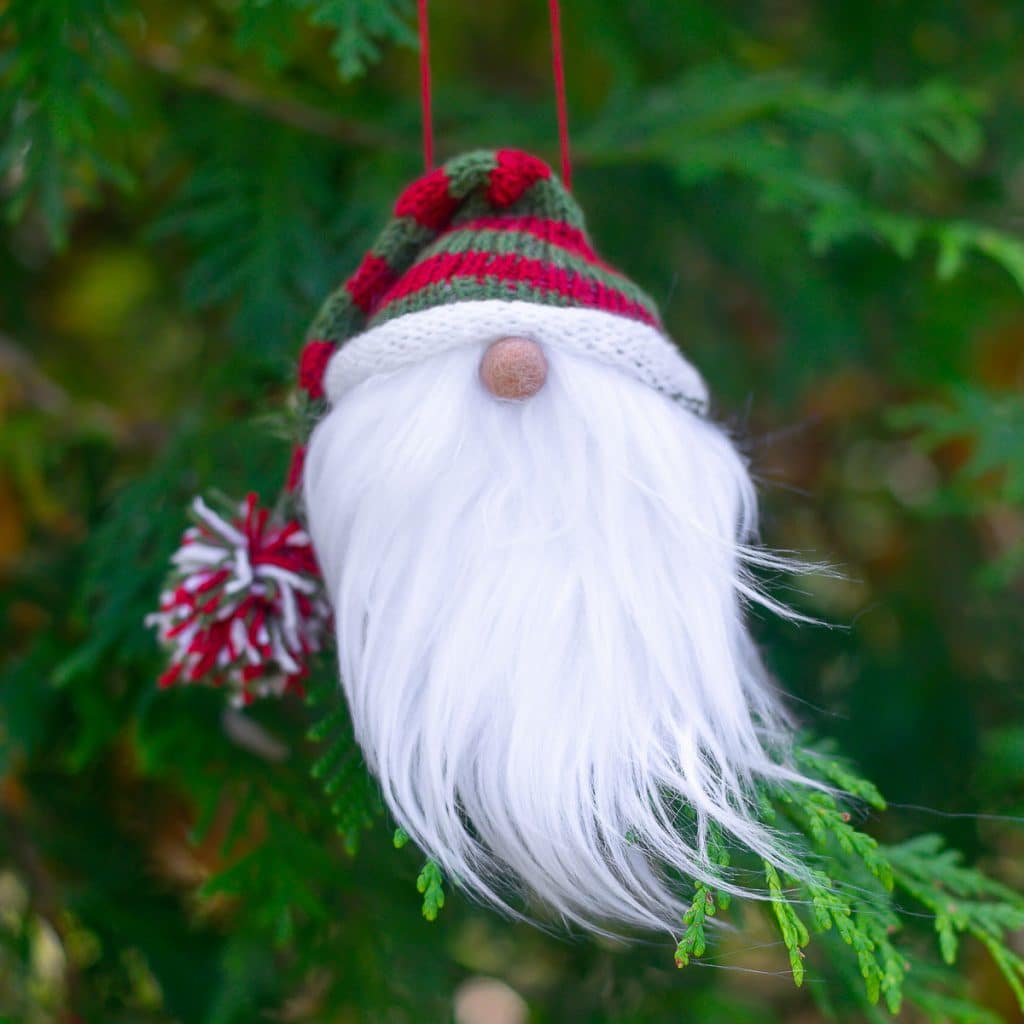
- Knit the head and hat of this charming and festive little gnome, and then add a bit of fur and a small pom pom for a nose. Alternatively, if you’d rather knit the gnome gnose 😉, I have instructions for that, too. Use this free, printable gnome knitting pattern and make some festive gnome ornaments for your Christmas Tree or for gifts.
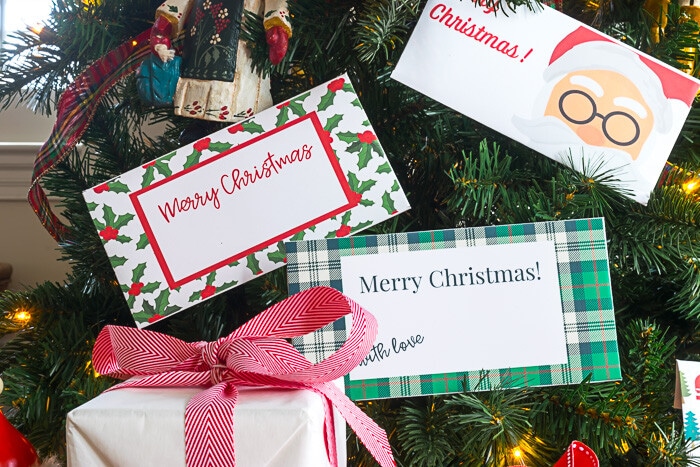
- Download these free designs, cut them out and add a wee bit of glue and you will have charming Gift Envelopes in no time. These Christmas Money Gift Envelopes make the gift of money just that much more festive.
Make the Christmas Stocking
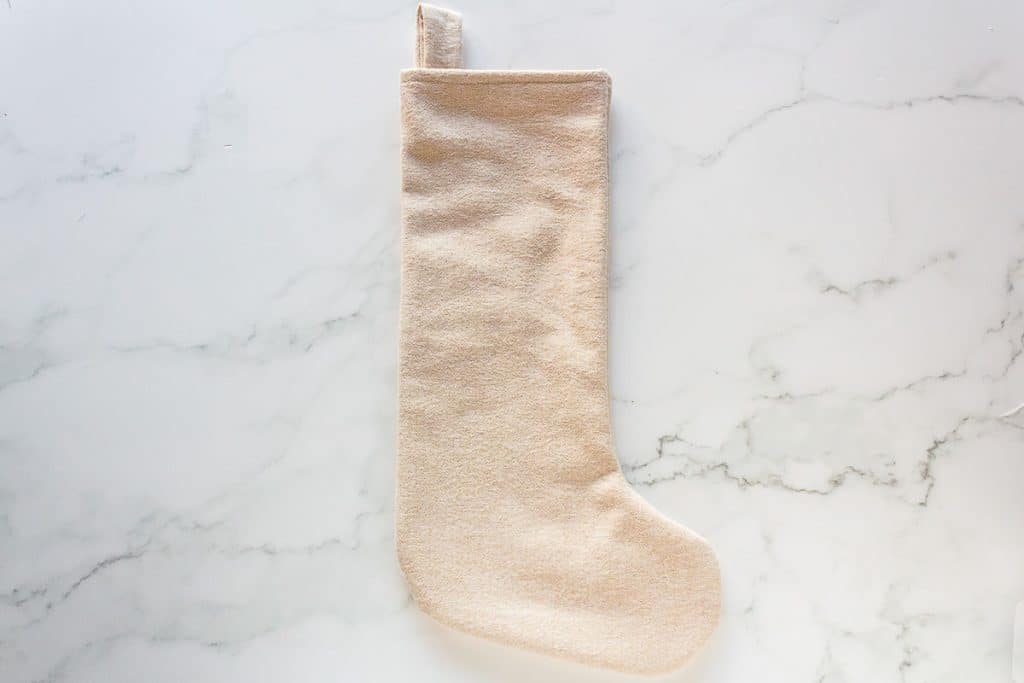
The final measurement of the stocking will be 6” wide and 15 ¾ ” tall.
We used flannel because it is thick and cozy, ideal for stockings. You can also use cotton, velvet, or wool. While we made the hanger for our stocking from the same fabric, another option would be a leather hanger.
Christmas Stocking Sewing Pattern Materials
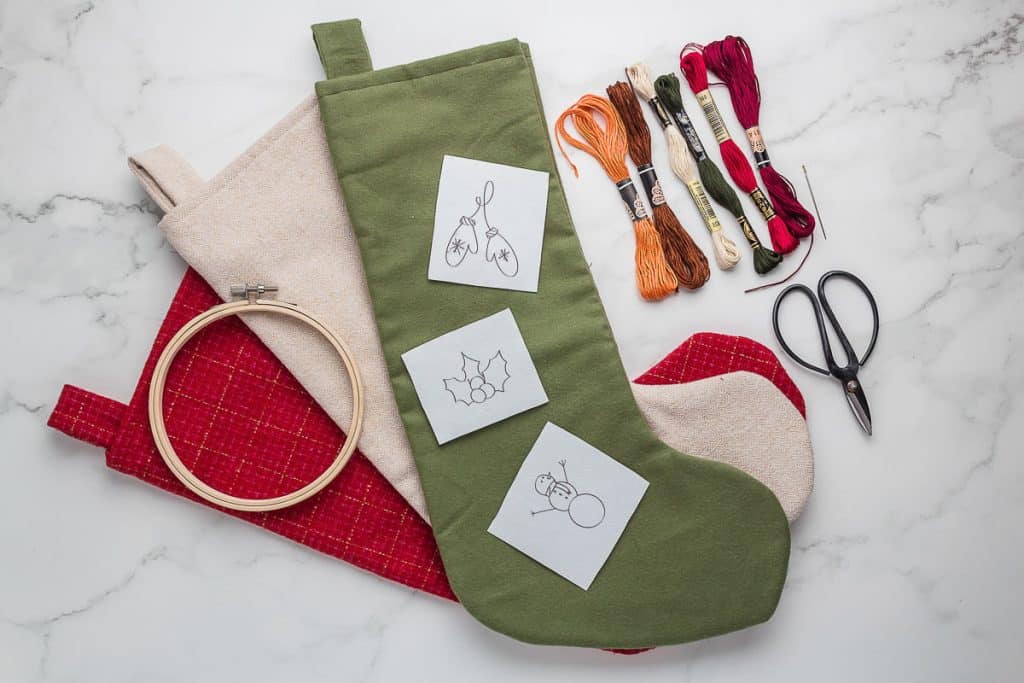
- ½ yard flannel fabric (per stocking)
- Matching thread
- Fabric scissors
- Pins for sewing
- The free, printable pattern is available to all Nourish and Nestle subscribers in the library. If you’ve forgotten the super secret password, it is at the bottom of the email I send you every Monday. If you still can’t find it, email me and I’ll gladly send it to you. If you aren’t a subscriber yet, don’t worry—we’ve got you covered. Subscribing is free and gives you access to all our patterns and printables. ➡️Click here to subscribe and have the pattern sent directly to your inbox.⬅️
Cutting Instructions
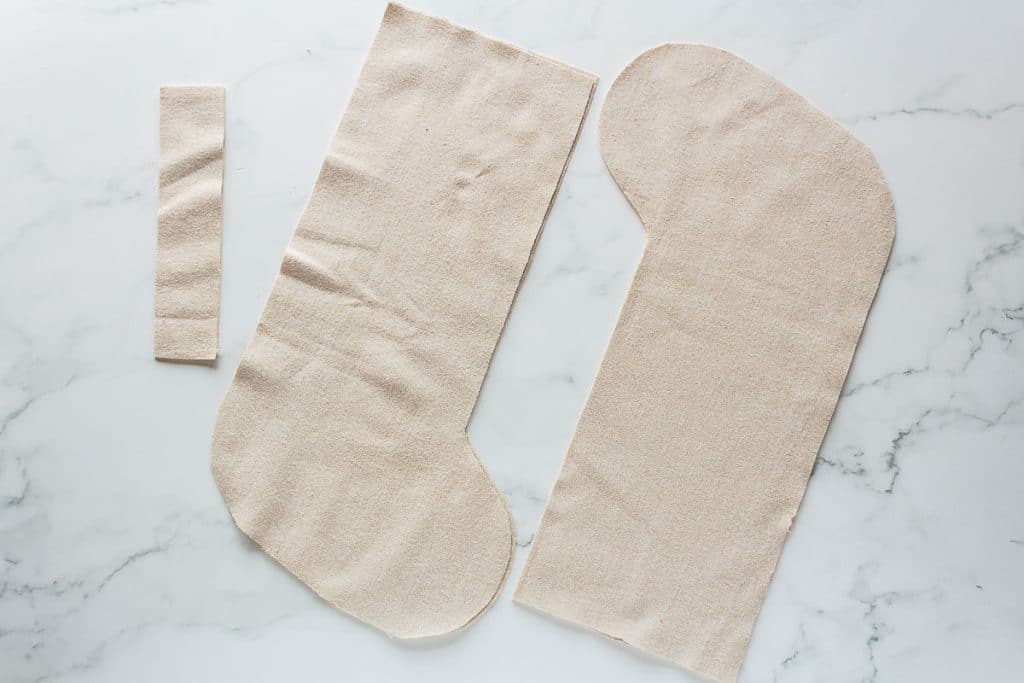
Note: This Christmas stocking pattern has four layers and uses the same fabric to make a lining, simplifying the sewing process. This means you will cut four of the stocking outlines.
- Cut out the stocking pattern along the solid line. Also, cut out the pattern for the stocking hanger and set it aside.
- Tape the pattern pieces together at the indicated lines on the pattern.
- Iron the ½ yard of fabric and fold it in half.
- Lay the pattern on top of the fabric, and cut around it using your fabric scissors for a clean line (you can also use a rotary cutter here).

- Cut out another outline of the stocking while the material is still folded in half. You will cut two of the stocking outlines, but the folded fabric will yield four individual stocking outlines.
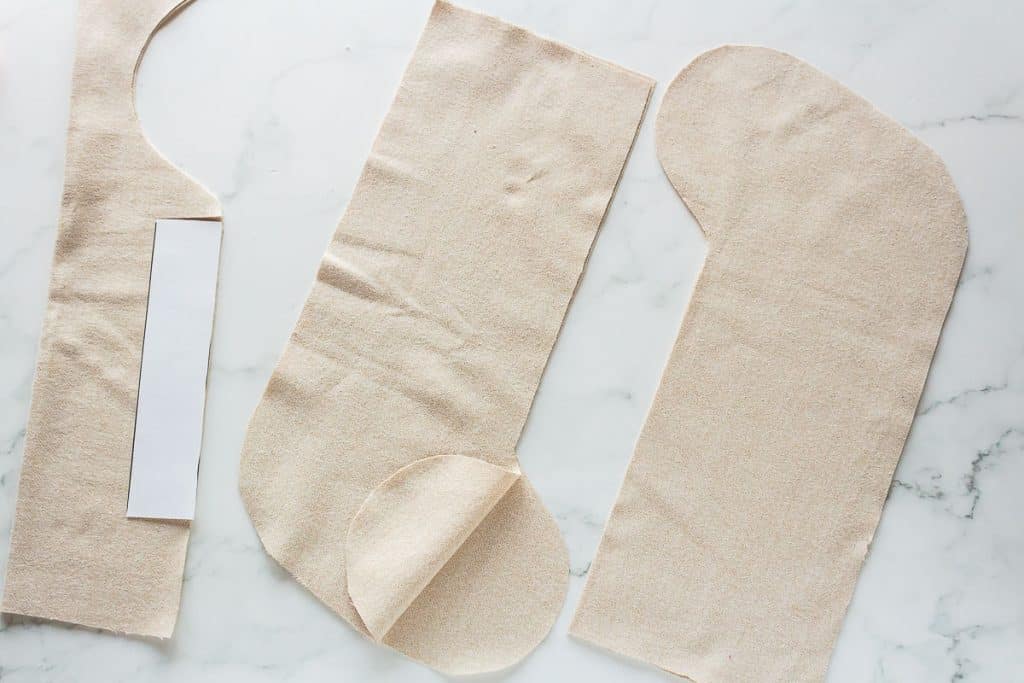
- Using the pattern for the stocking hanger, cut out the hanger. Make sure the fabric is still folded in half (this will be one long strip).
Pinning Instructions
Note: If the fabric has wrinkles, iron the individual cutouts before pinning them. Additionally, you can pin it in a way that suits your personal preference. For example, I like to pull the pins with my left hand while I sew, so I pinned the fabric accordingly.
- Using the pattern for the stocking hanger, cut out the hanger. Make sure the fabric is still folded in half.
- Lay out the stocking cutouts. Place two layers together with the right sides facing each other (this will be the outside of the stocking when you turn it inside out later.) You will have the other two cutouts remaining. Place one remaining cutout with the wrong side facing you on top of the two layers that you lined up previously. With the final cutout, place it on the bottom of the stack with the wrong side facing away from you. The feet will all line up, and the two center cutouts must have the right sides touching. This will create the lining and the outside as you sew.
- An indicated fold line at the top of the stocking pattern will show where to create the top seam. You will pin this before pinning the stocking together. Take the two layers facing you and fold down towards you. The fold will be ¾”. Pin in place. Flip the stocking over, and repeat for the other two layers.
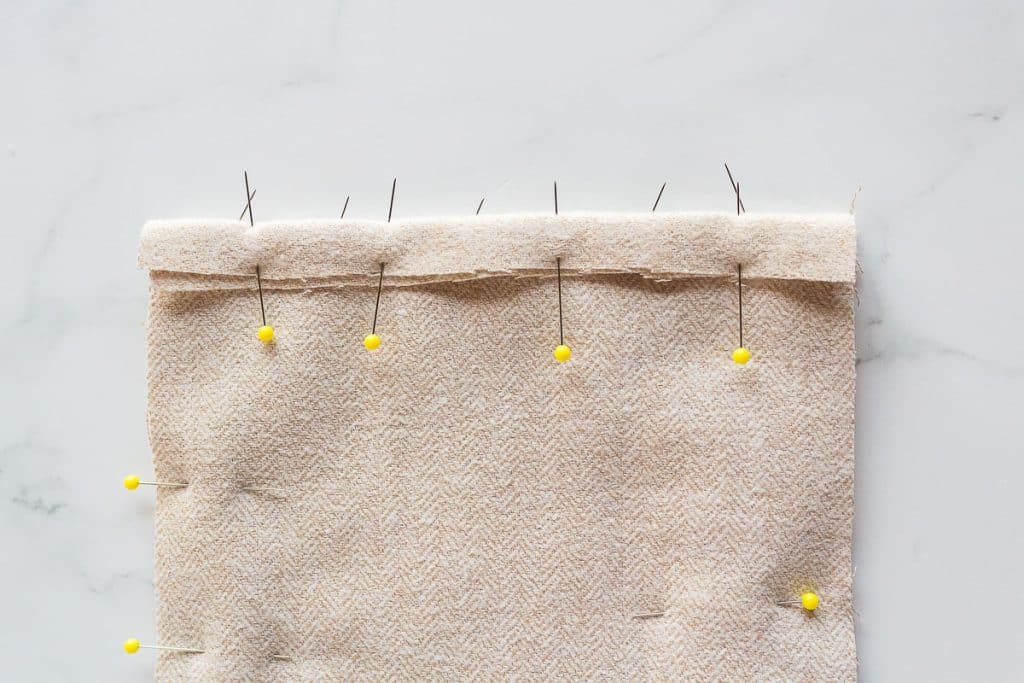
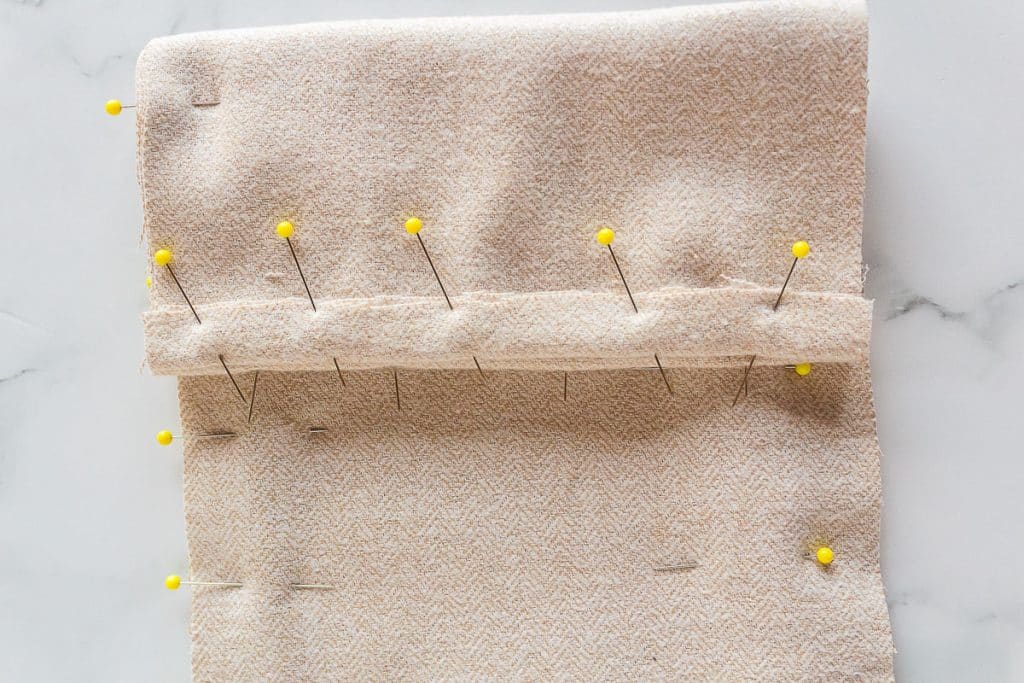
- Now, pin the whole stocking together. Pin through all four layers of fabric while ensuring the fabric lines up along the edge of the stocking.
- Pin the stocking hanger cutouts with the right sides facing each other.

Christmas Stocking Sewing Instructions
- Thread your sewing machine, and remove the outer section of the bobbin housing if possible to give you more room to sew the top seam.
- Using a 1/2” seam, sew along the top seam (only the two layers you had pinned). Backstitch at the beginning and end of the seam to ensure it is sturdy.
- Repeat step two for the top seam on the other side of the stocking.
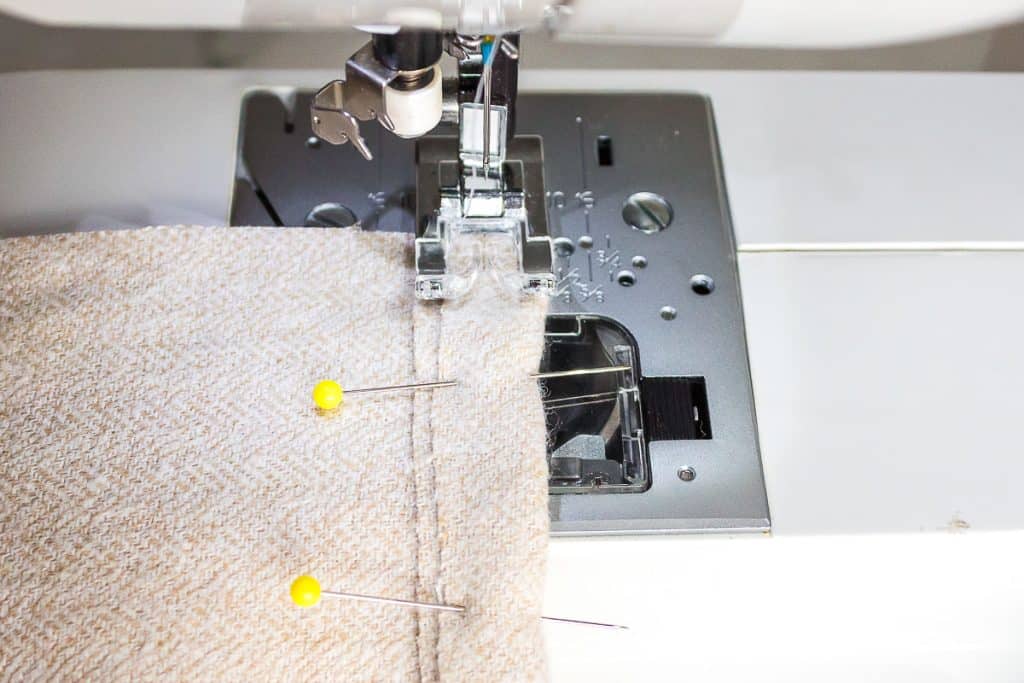
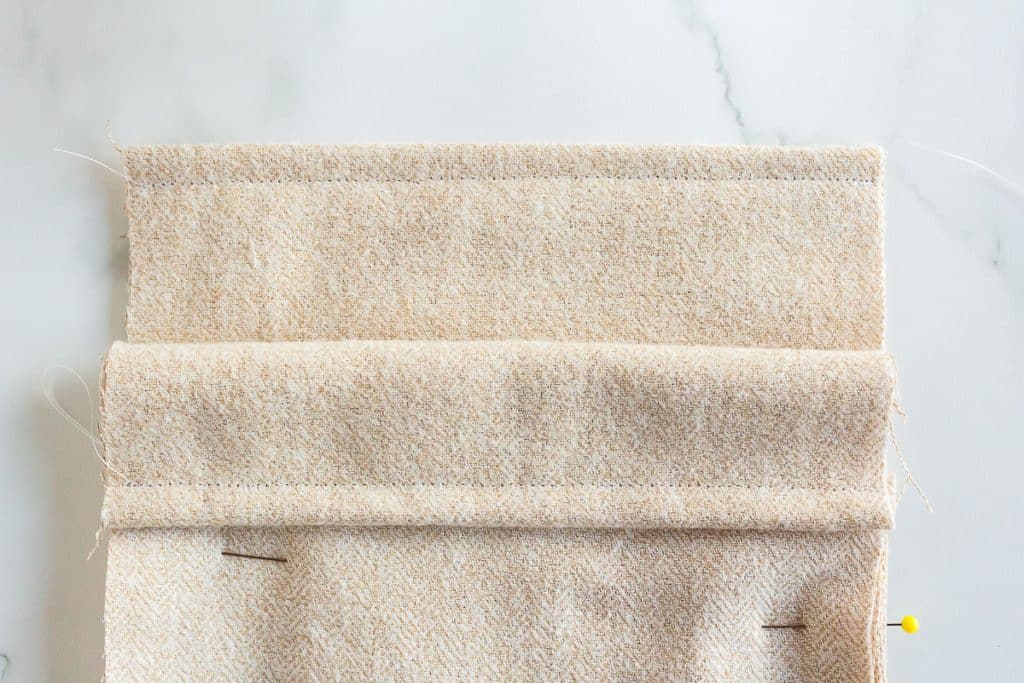
- Now, sew through all four layers of the stocking. Start at the top (at the seam you just completed) and sew along the edge of the stocking using a ⅛” seam. Note: on my machine, a ⅛” seam is at the edge of my pressure foot. You can use this as a guide around the corners. Keep the pressure foot’s edge on the fabric’s edge as you sew.
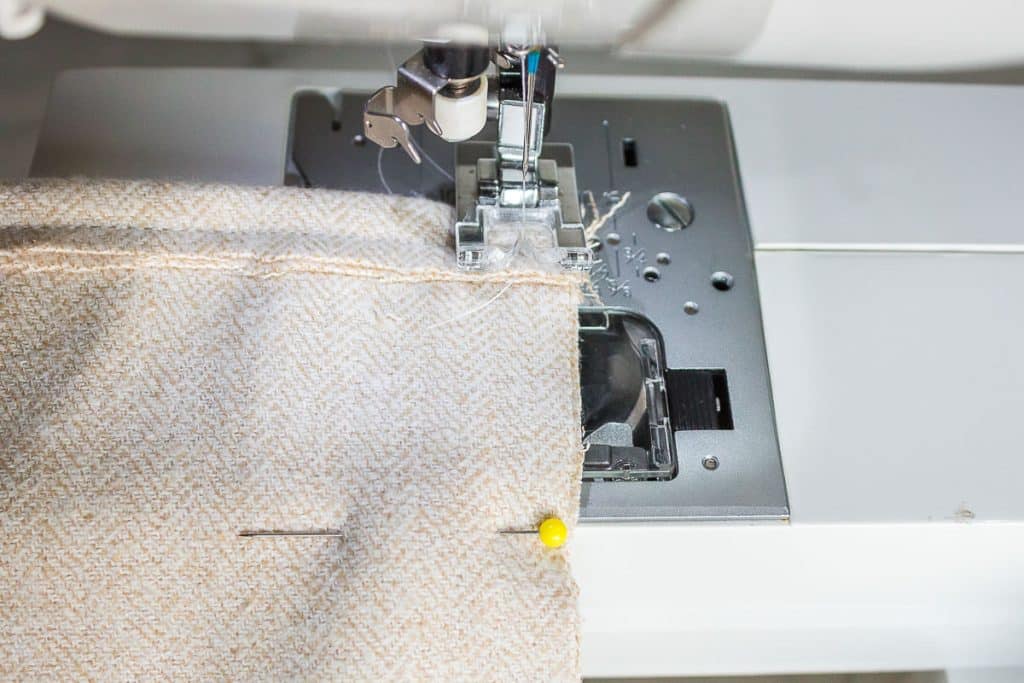
- Backstitch at the beginning and end of the stocking to ensure all seams are strong.
Flip inside out
- Cut small triangles out with the seam allowance around the toe (be careful not to snip any stitching). This will help round out the toe when you flip it inside out.
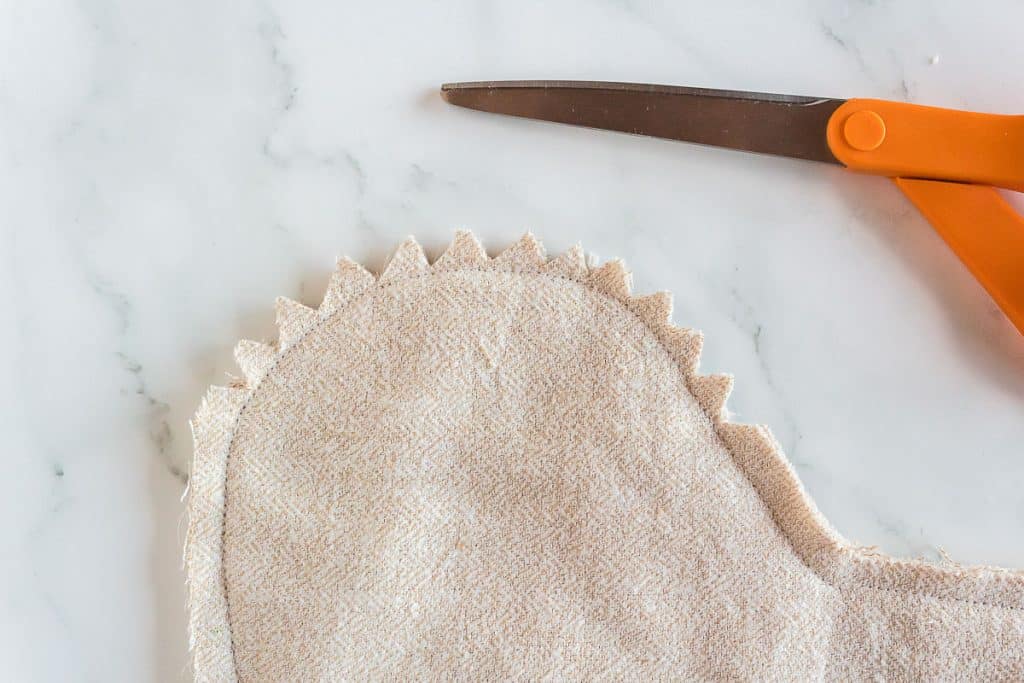
- Flip the stocking inside out. Make sure that the toe and the sides are even. Iron the stocking flat, making sure that the seams are not twisted.
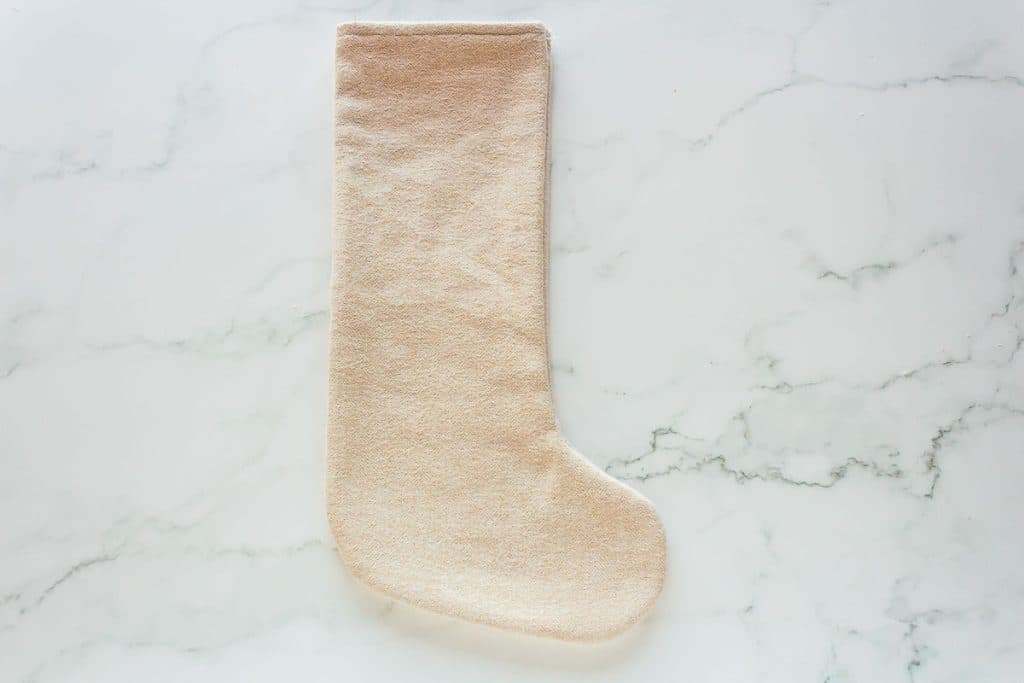
Sew the Hanger
- Sew along the sides of the stocking hanger using a ½” seam. Leave one short side of the hanger open to flip it inside out later. Backstitch at the hanger’s beginning and end to ensure the seams are strong.
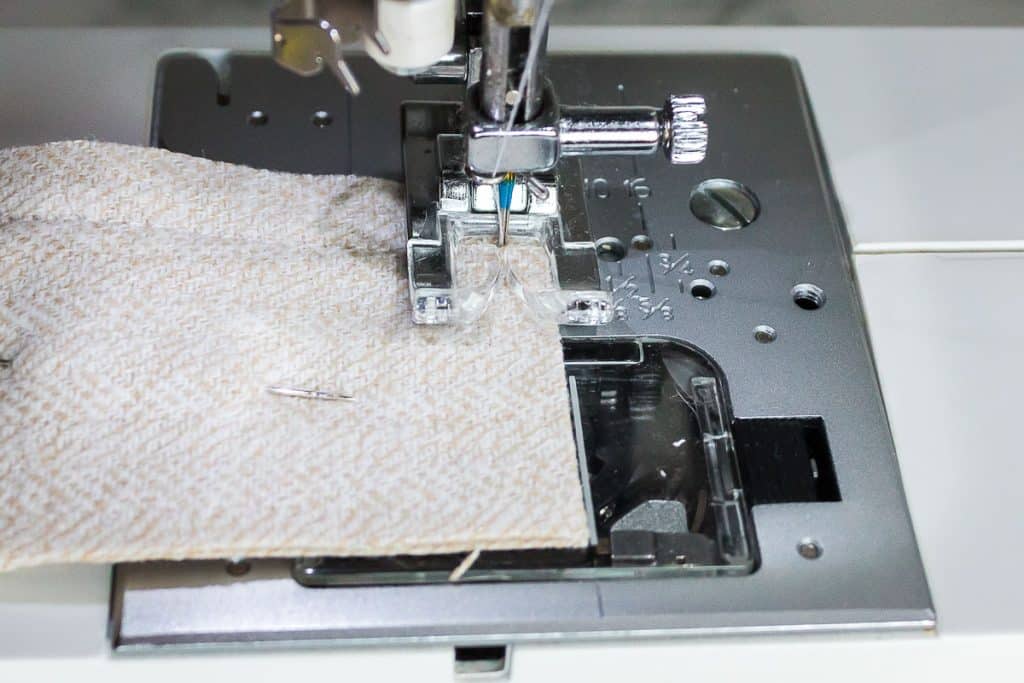
- Use a pen, batting stick, or chopstick to push the stocking hanger inside out. Poke the corners out to make sure the square edges remain.
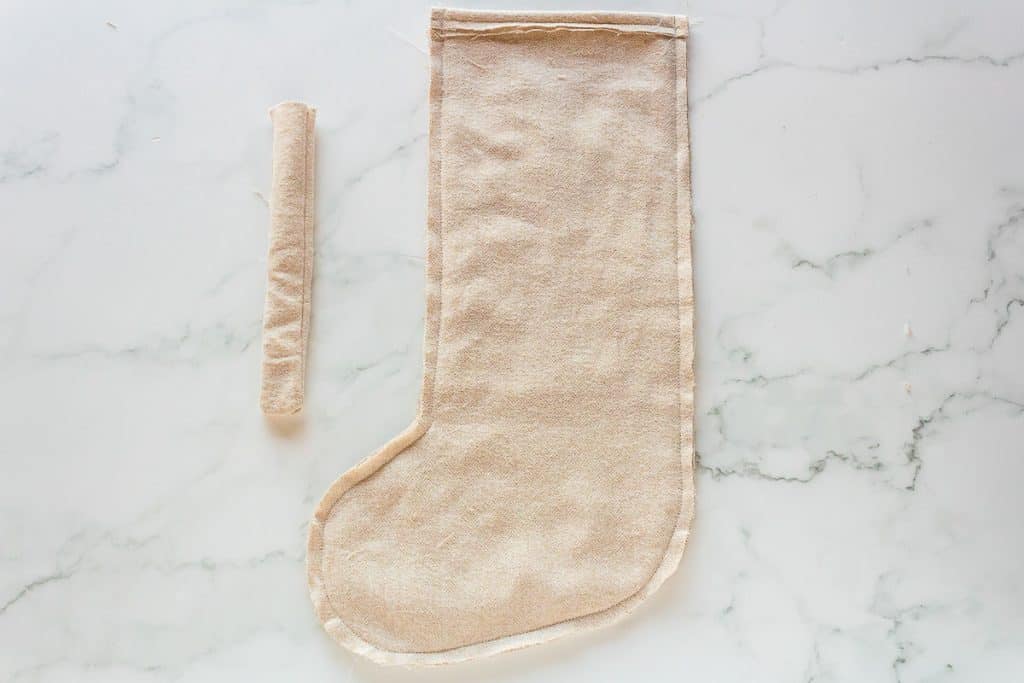
Attach the hanger
- Decide which direction you want the foot of the stocking to face. You will attach the hanger to the back inside of the stocking (opposite side of the direction you want the toe to face). On mine, I will sew the hanger to the left corner with the toe facing to the right.
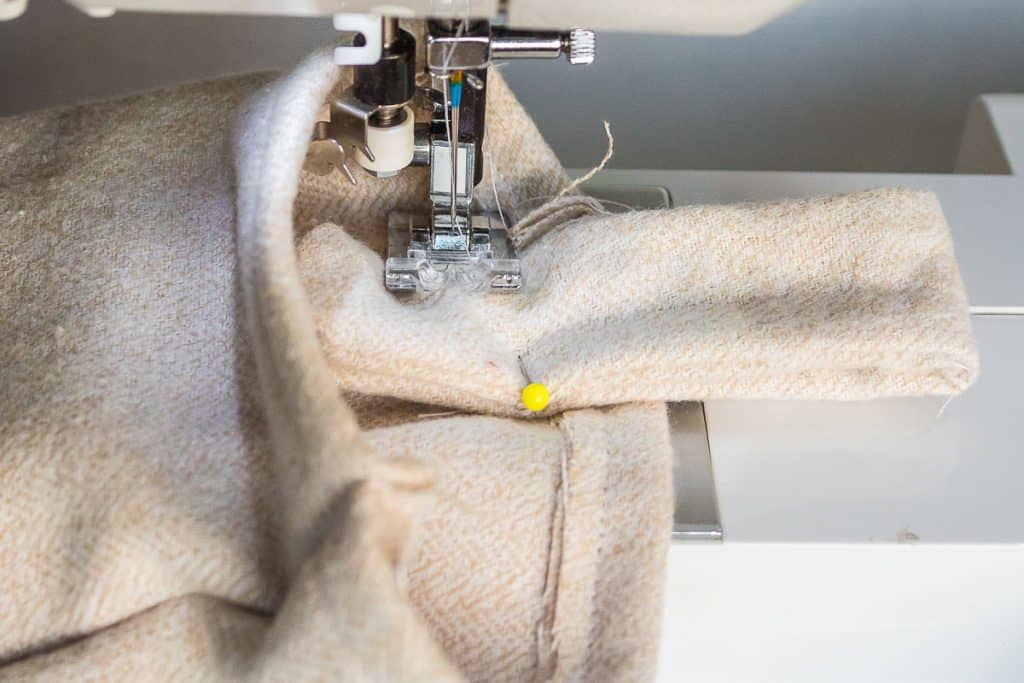
- Fold the hanger in half with the sewn edge touching the raw edge of the hanger. Place the hanger in the stocking 3” down in the corner of the stocking. Sew through the hanger’s four layers and the stocking’s two back layers to secure the hanger.
Embroider your Sewn Christmas Stocking
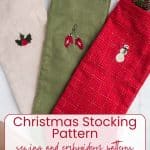
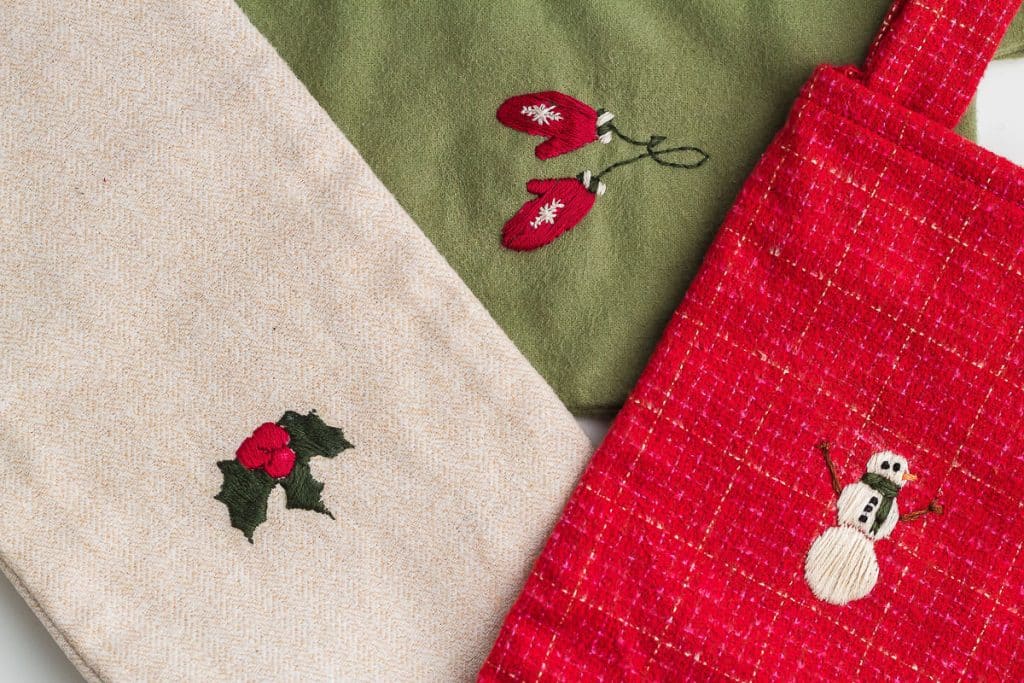
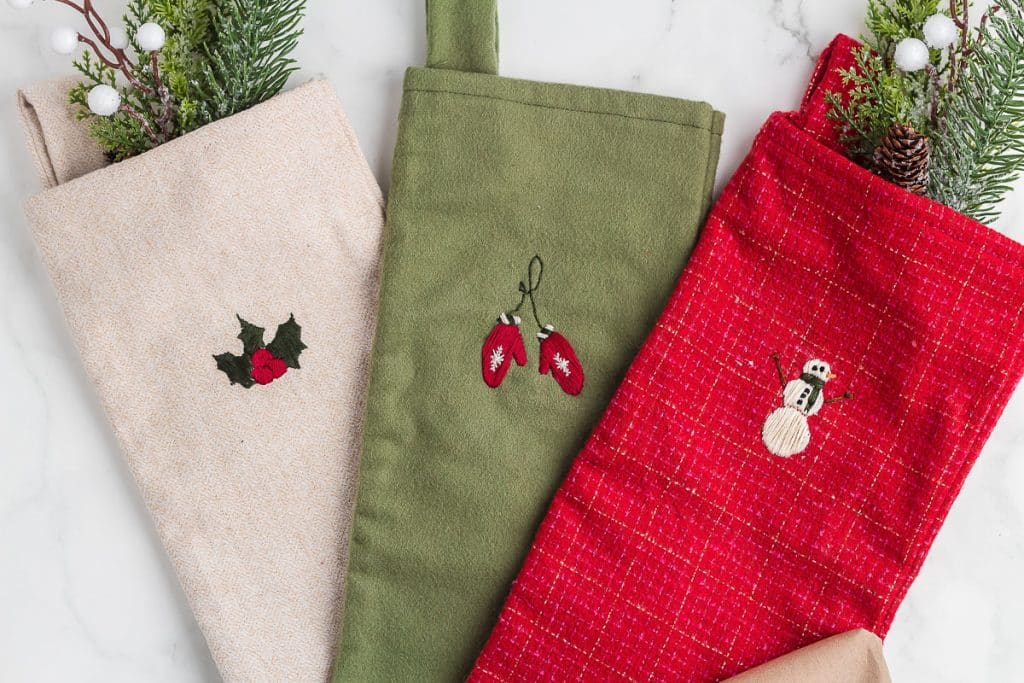
Once you have finished sewing your Christmas stocking, add some character with these embroidery patterns.
Materials Needed to Embroider the Stocking
- Dissolving embroidery fabric
- Embroidery floss
- For the snowman – 3853 (orange), 801 (brown), 934 (dark green) and ecru.
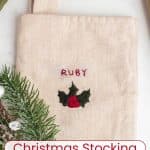
- For the holly – 934 (dark green) and 816 (garnet red)
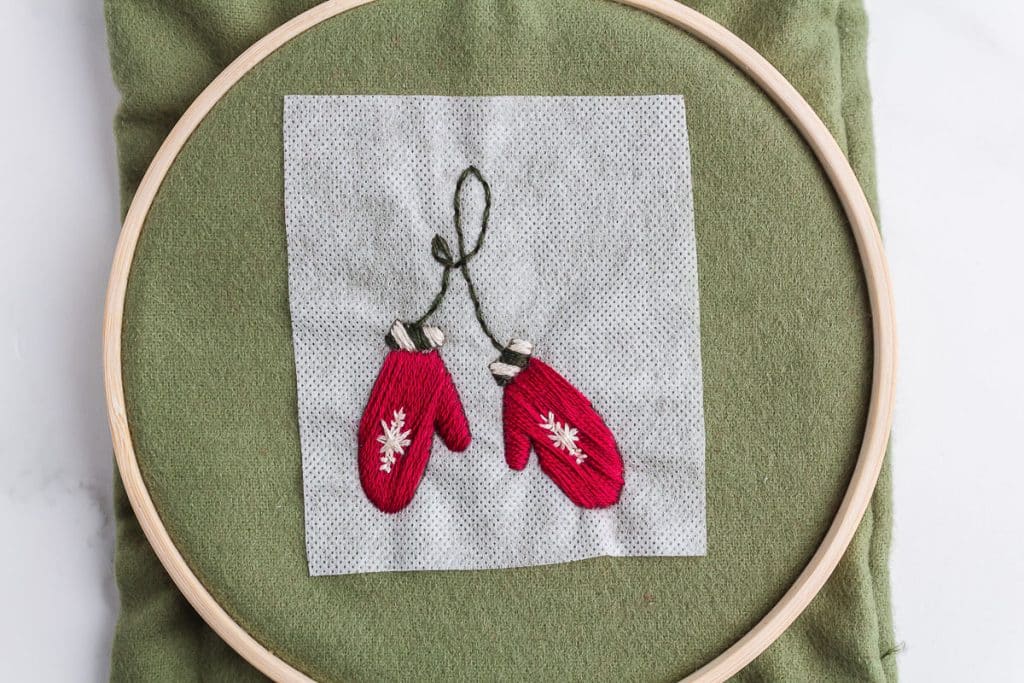
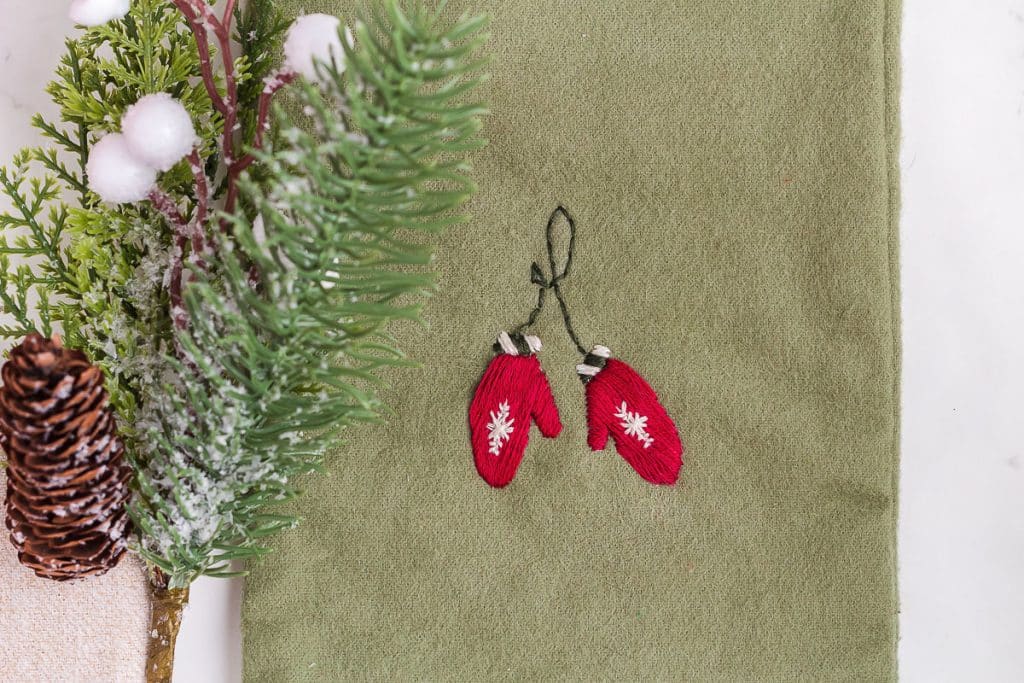
- For the mittens – 816 (garnet red), 934 (dark green), and ECRU.
- Small embroidery needle
- Embroidery hoop 5″
- Patterns (Included in the free, printable pattern. The free pattern is available to all Nourish and Nestle subscribers. If you aren’t a subscriber yet, don’t worry—we’ve got you covered. Subscribing is free and gives you access to all our patterns and printables.)
Embroidery Instructions
- Print the design on the dissolvable transfer paper as you would print with regular paper.
- Cut out each design and stick the paper to the stocking. I did the top of the design 4” down from the top stocking hem. Make sure the design is centered.
- Once the design is complete, rinse the dissolvable paper until entirely removed. Lay the stocking flat to dry, and iron once dry to ensure no wrinkles in the flannel. (Do not iron over the embroidery; just go around it on the fabric.)
Stitches Used
- Satin stitch
- Backstitch
- French knot
Holly instructions
- Place the embroidery hoop tightly so the fabric is taut but not overly stretched.
- Split the embroidery floss into three strands. (Usually, there are six total strands, so this will be half.) Knot one end of the embroidery floss and thread the other through your needle.
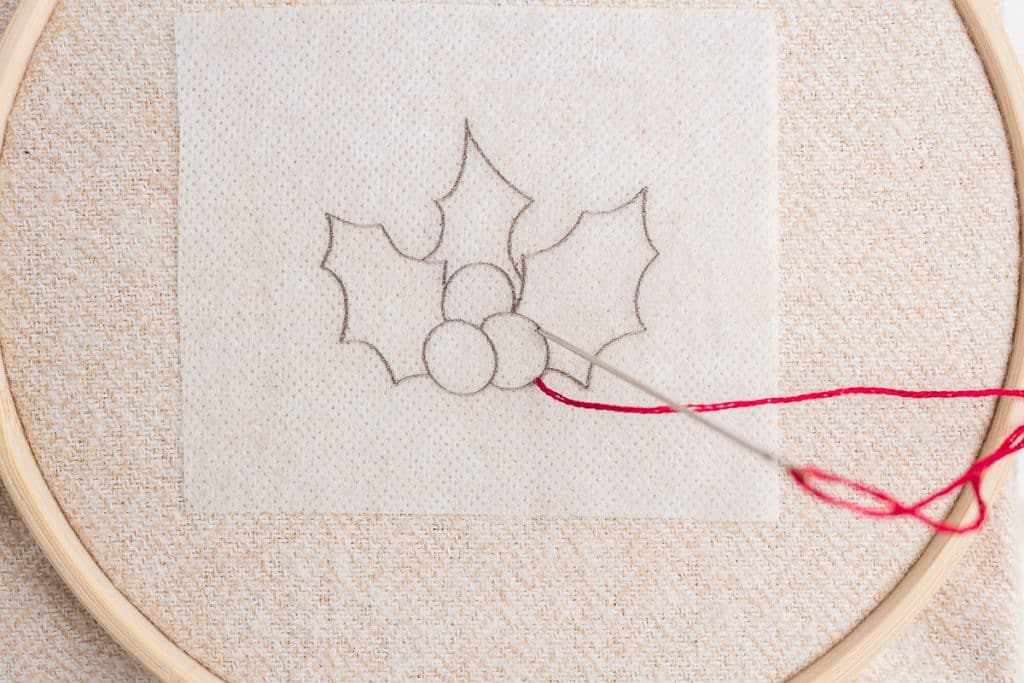
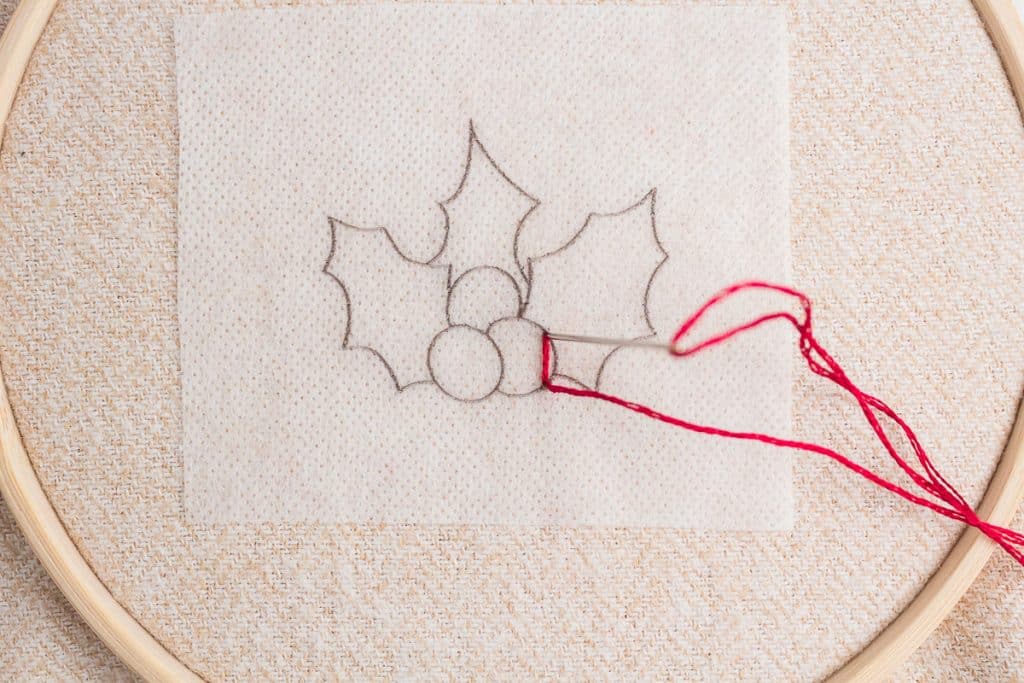
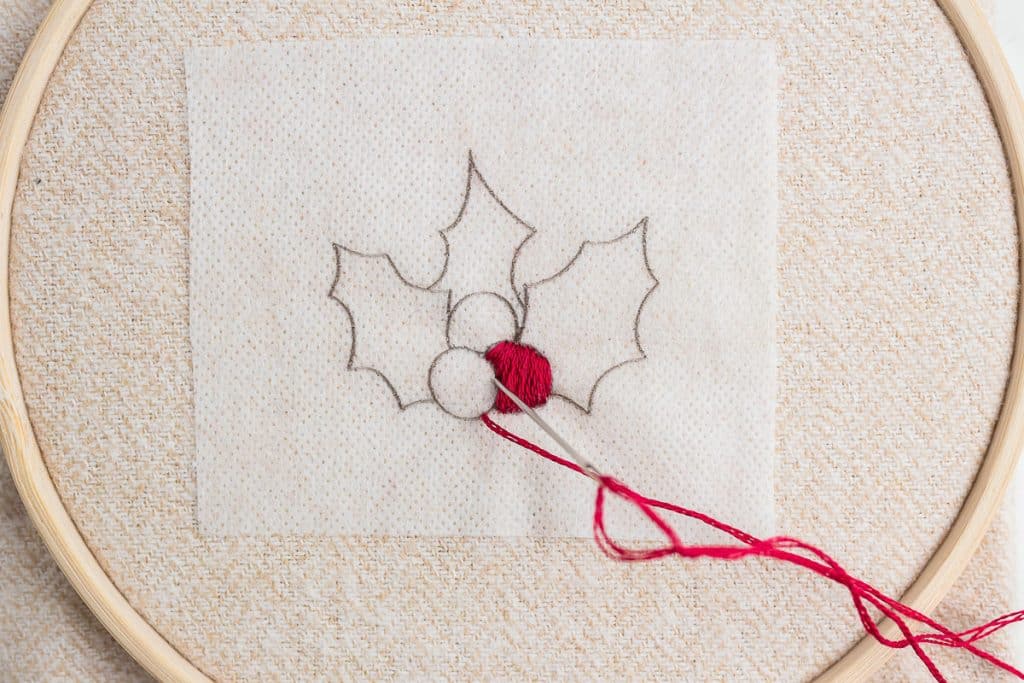
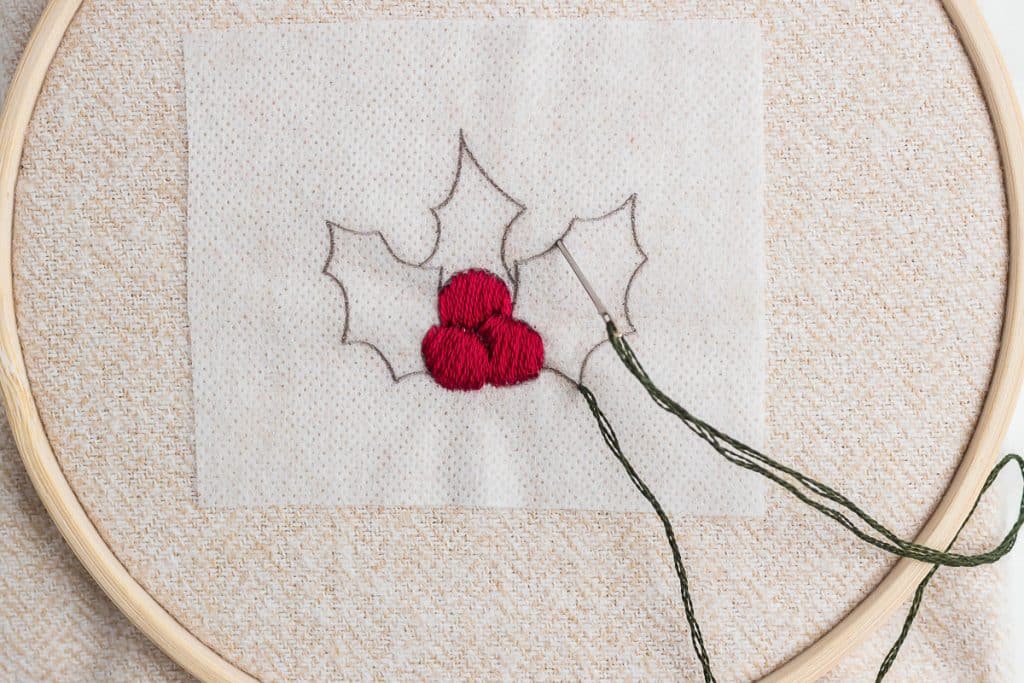
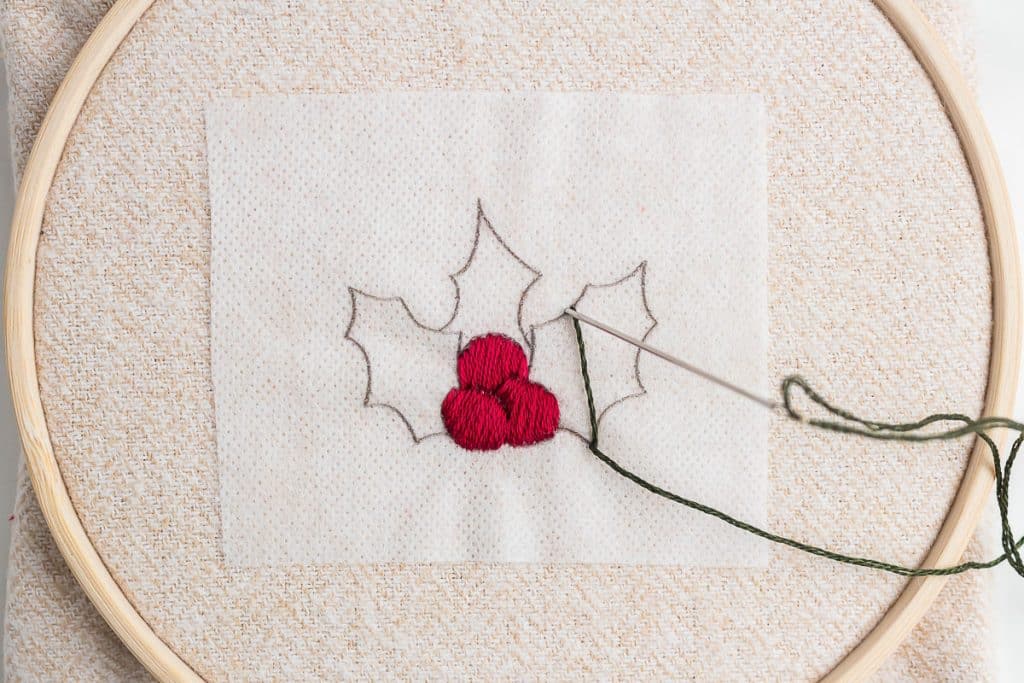
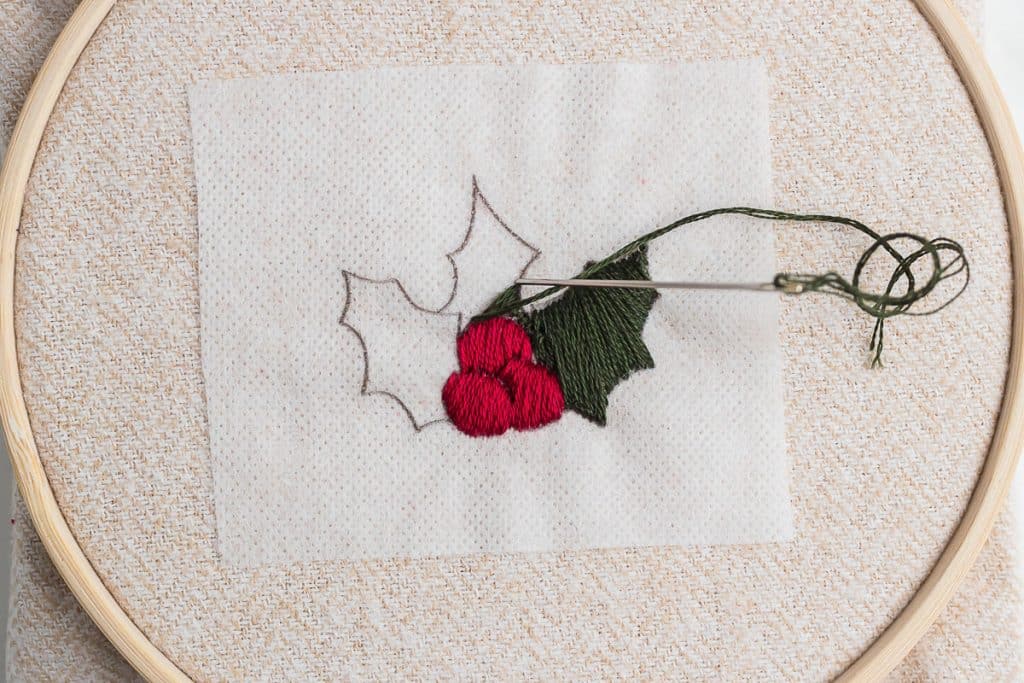
- Starting with the satin stitch, insert your needle through the back of the fabric along the printed line in the pattern. You can start anywhere; pull the needle up through the line. Push the needle back through the line on the pattern’s other side of the leaf.
- The satin stitch is the only stitch used for the holly pattern, so you will repeat step 3 for the berries and leaves until you feel that the fabric is fully covered with embroidery thread. Feel free to go over previously embroidered spots if they look sparse.
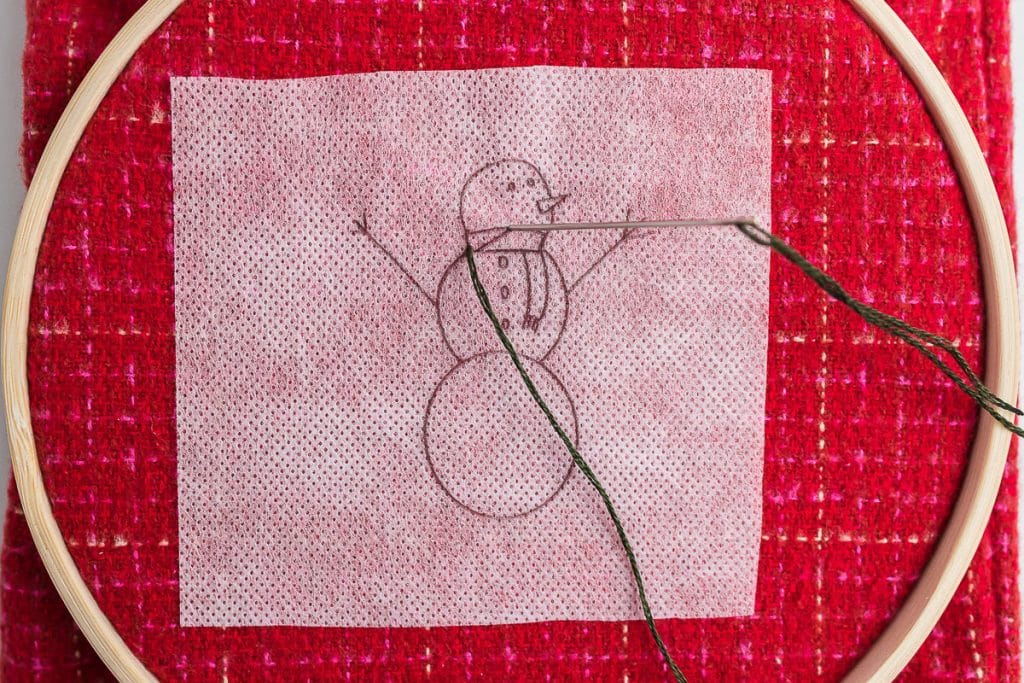
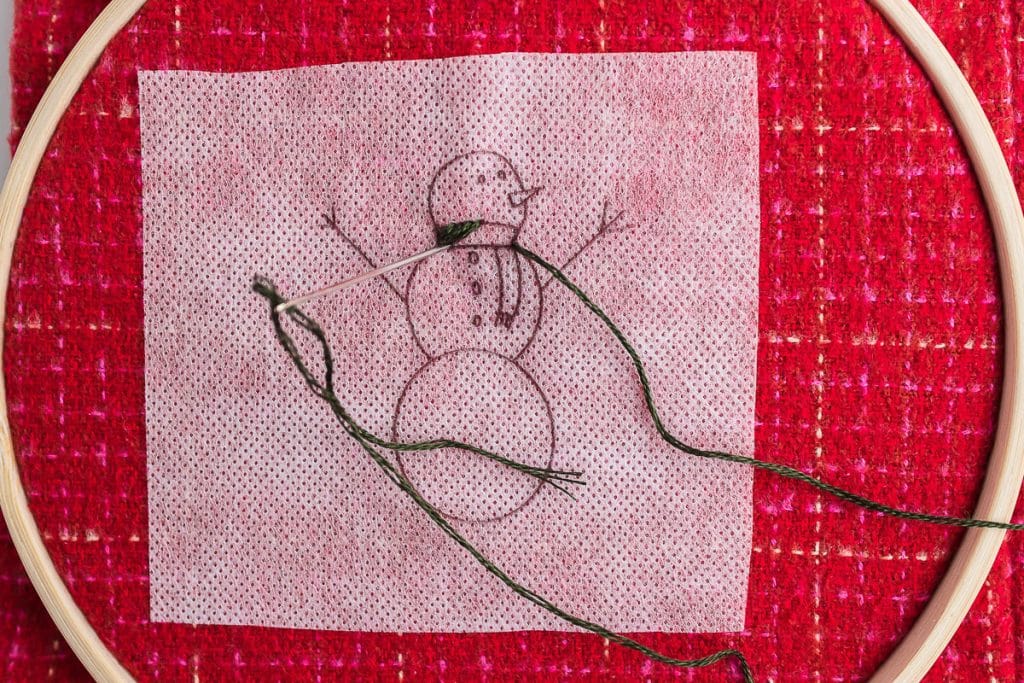
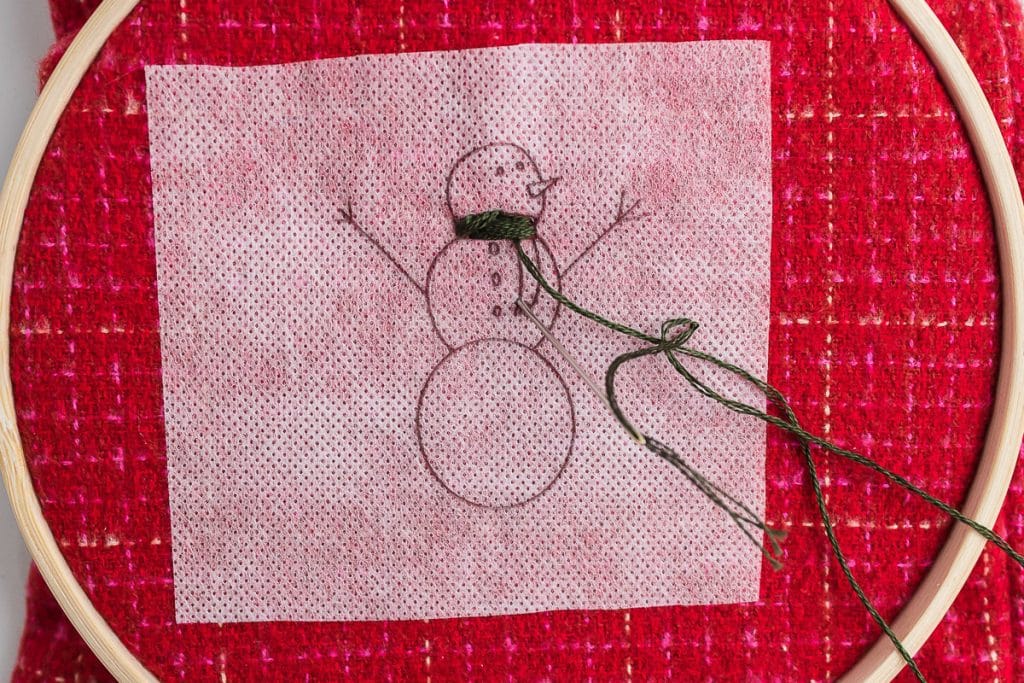
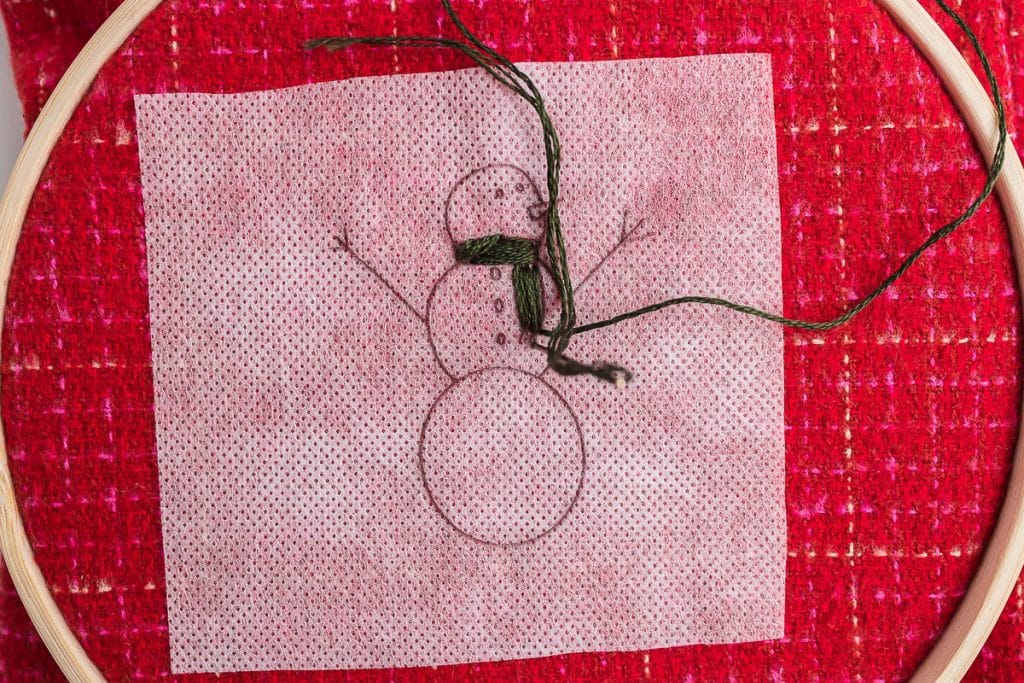
Snowman instructions
- Place the embroidery hoop tightly so the fabric is taut but not overly stretched.
- Split the embroidery floss into three strands. (Usually, there are six total strands, so this will be half.) Knot one end of the embroidery thread and thread the other through your needle.
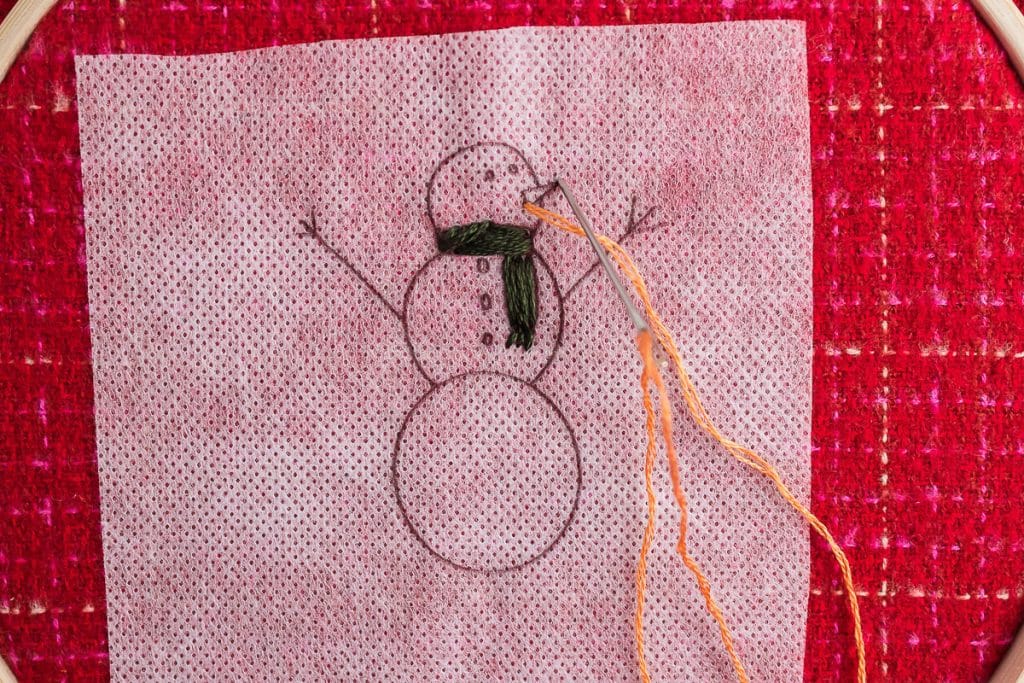
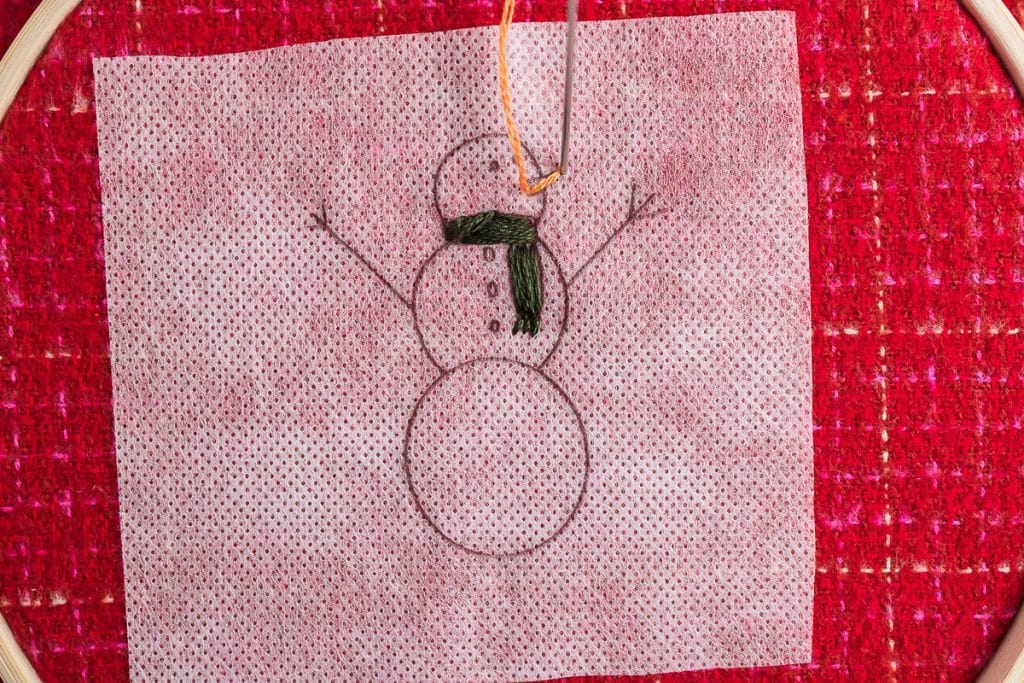
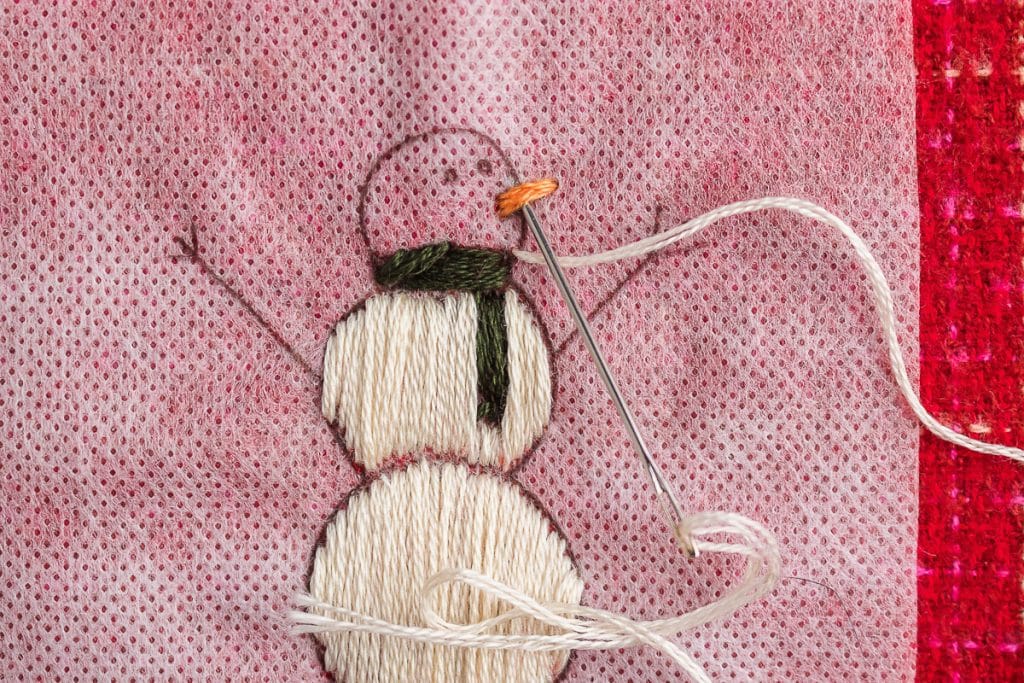
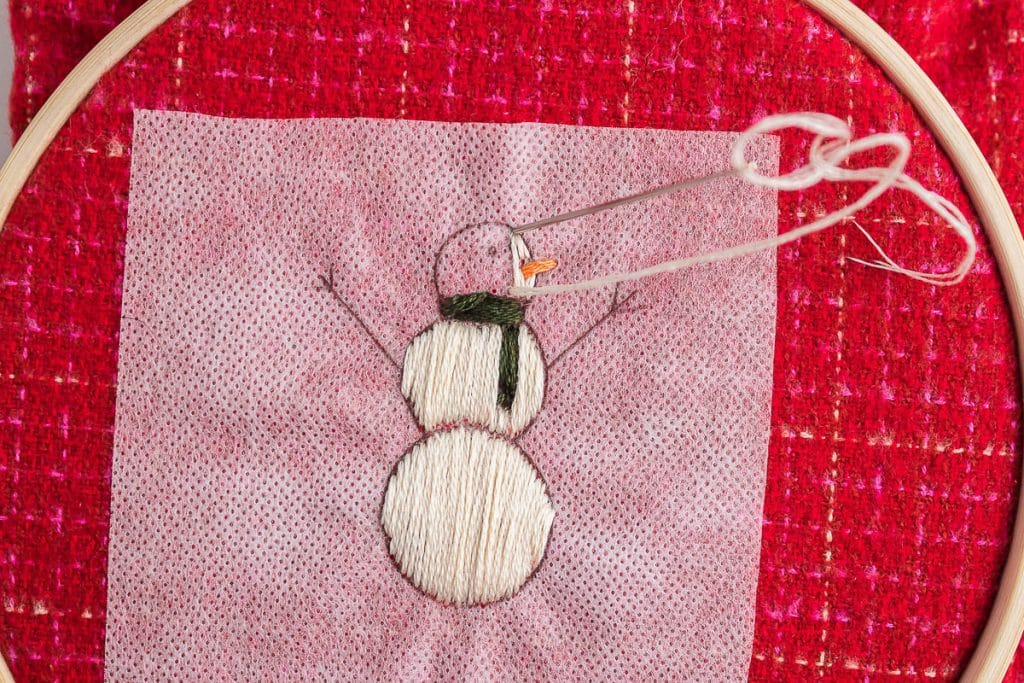
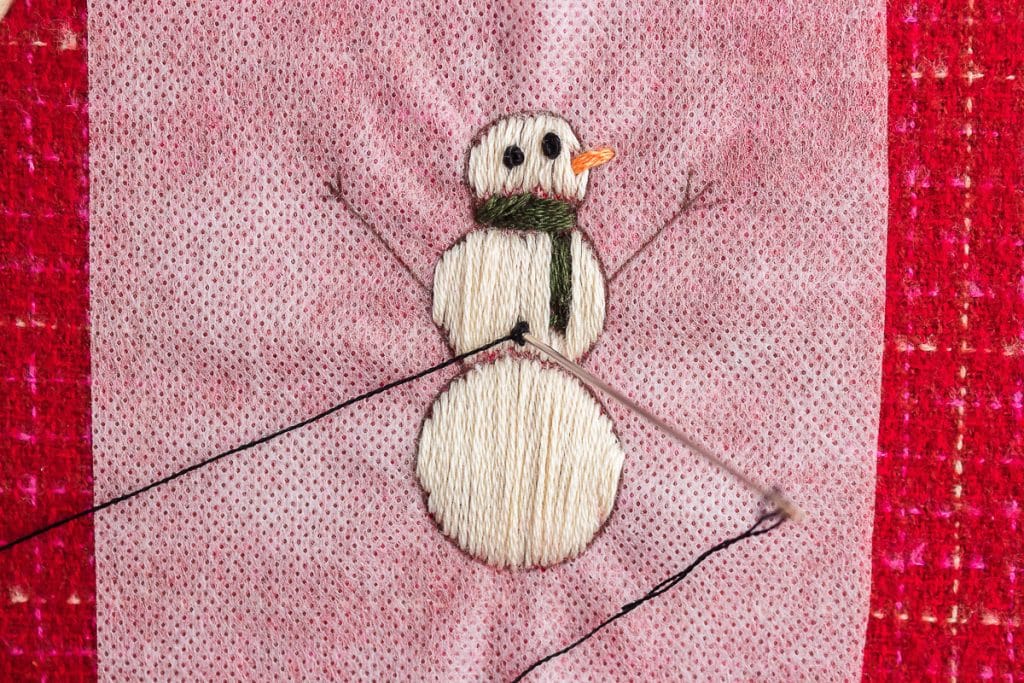
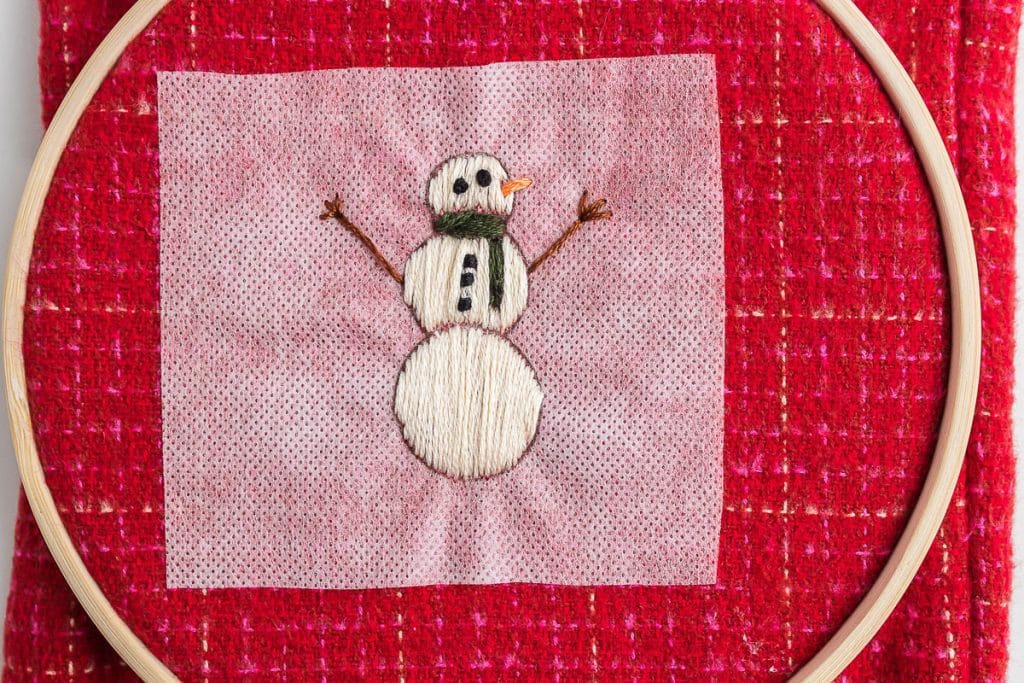
- Scarf – Using the satin stitch, follow the lines in the pattern for the scarf on the snowman, pulling the needle up through the back of the fabric and back down through the other side on the guideline.
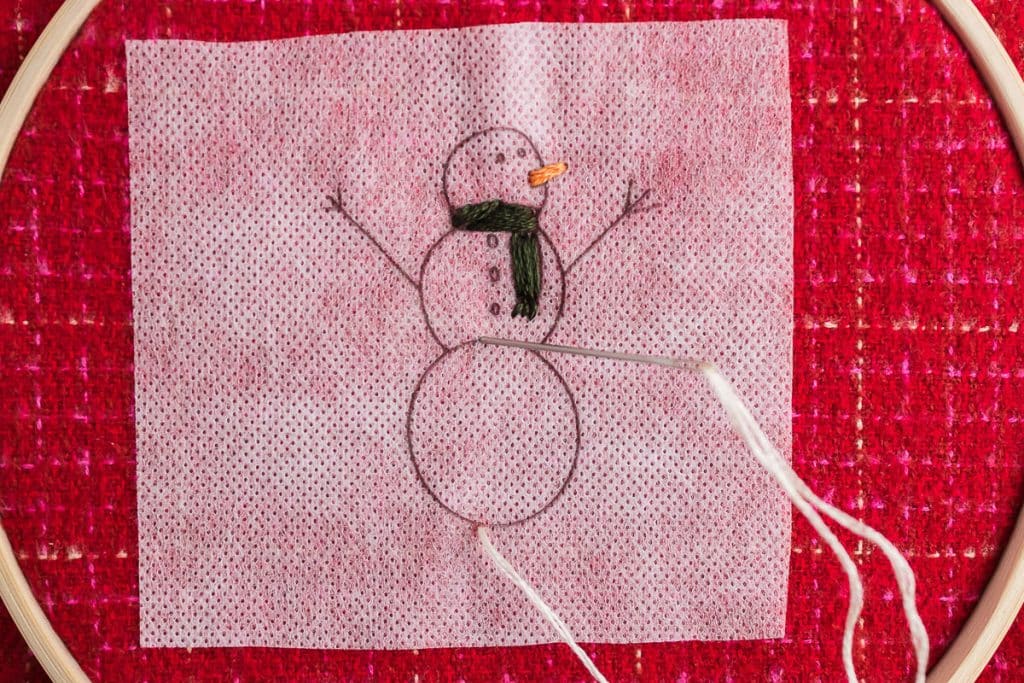
- Nose – For the nose, you will also use the satin stitch, but make sure that you push the needle down through the same hole at the tip of the nose each time you stitch so that the nose will remain pointed.
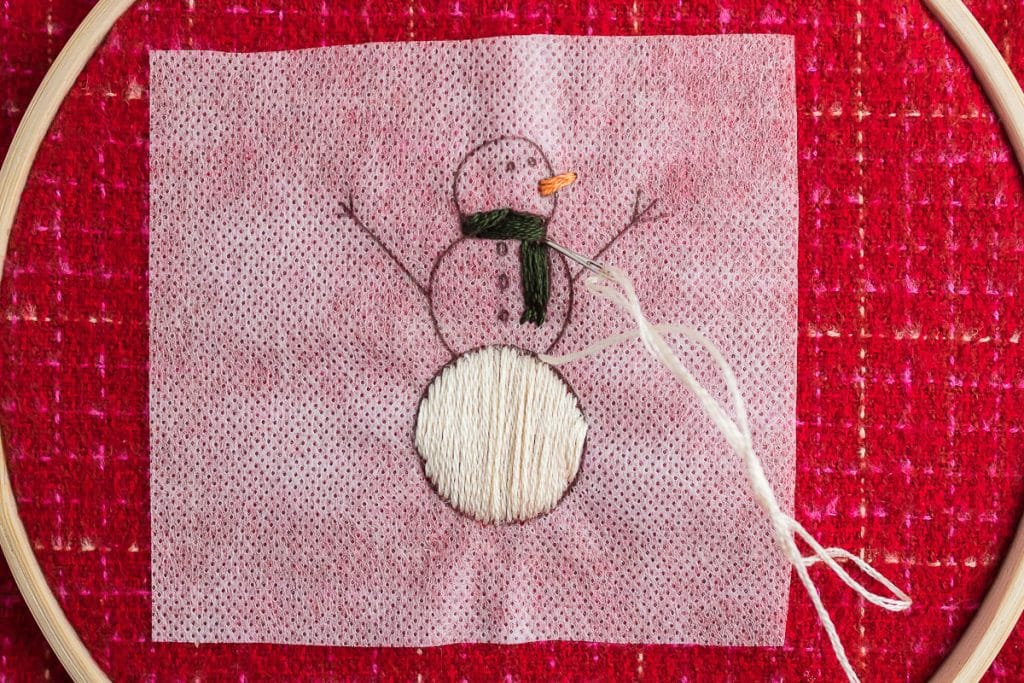
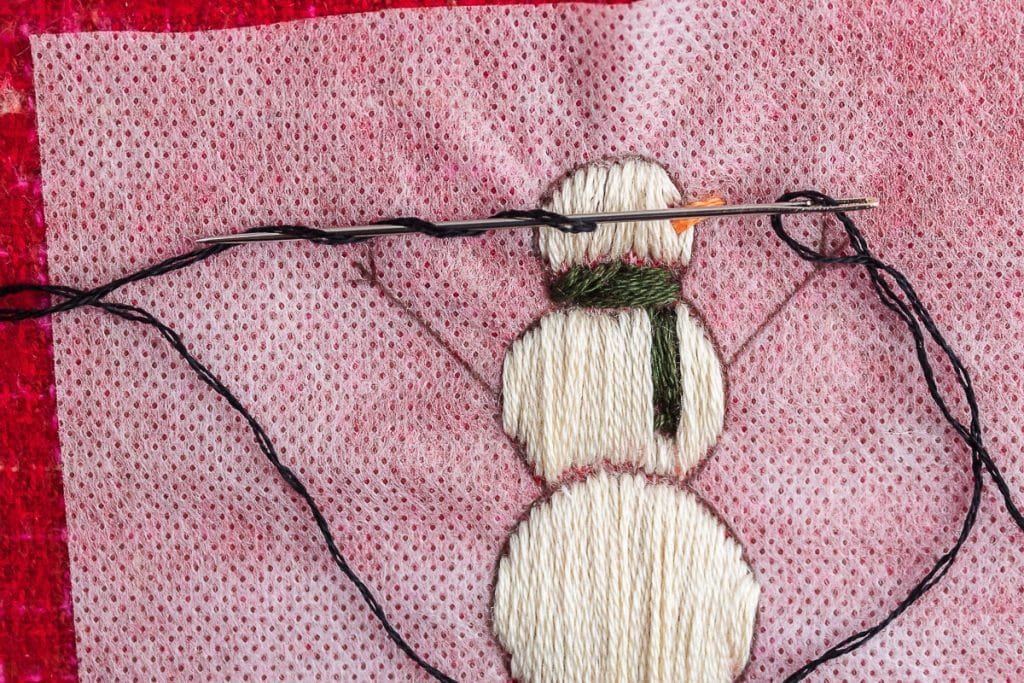
- Body – Using the satin stitch, embroider each section of the snowman’s body, following the lines on the pattern. Push your needle under the nose for the head to avoid embroidering over it. Then, resume stitching above the nose to complete the head.
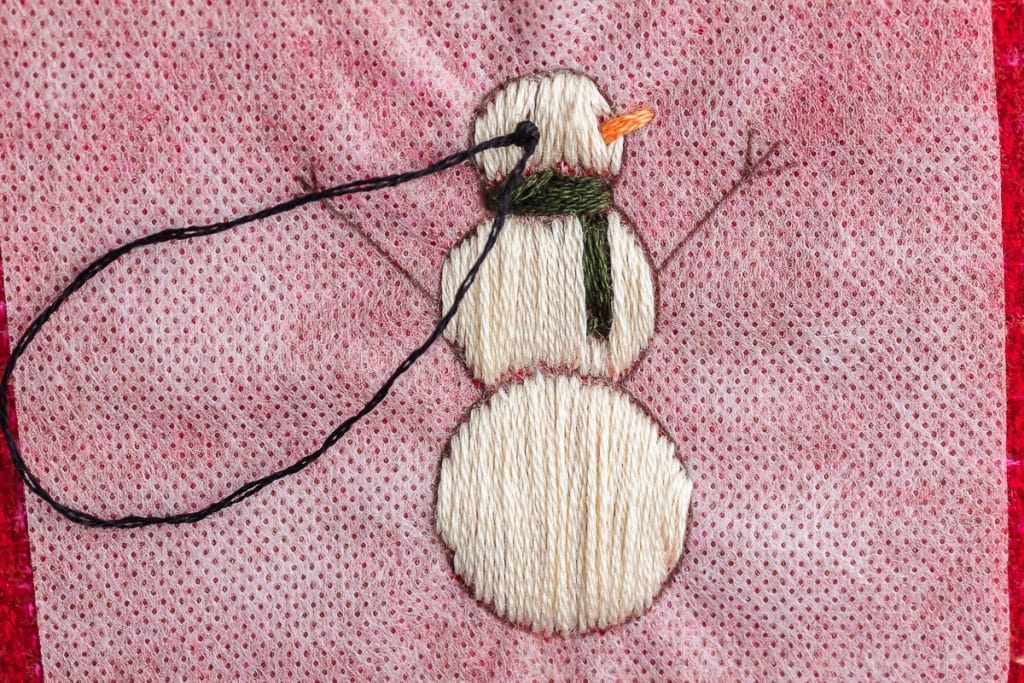
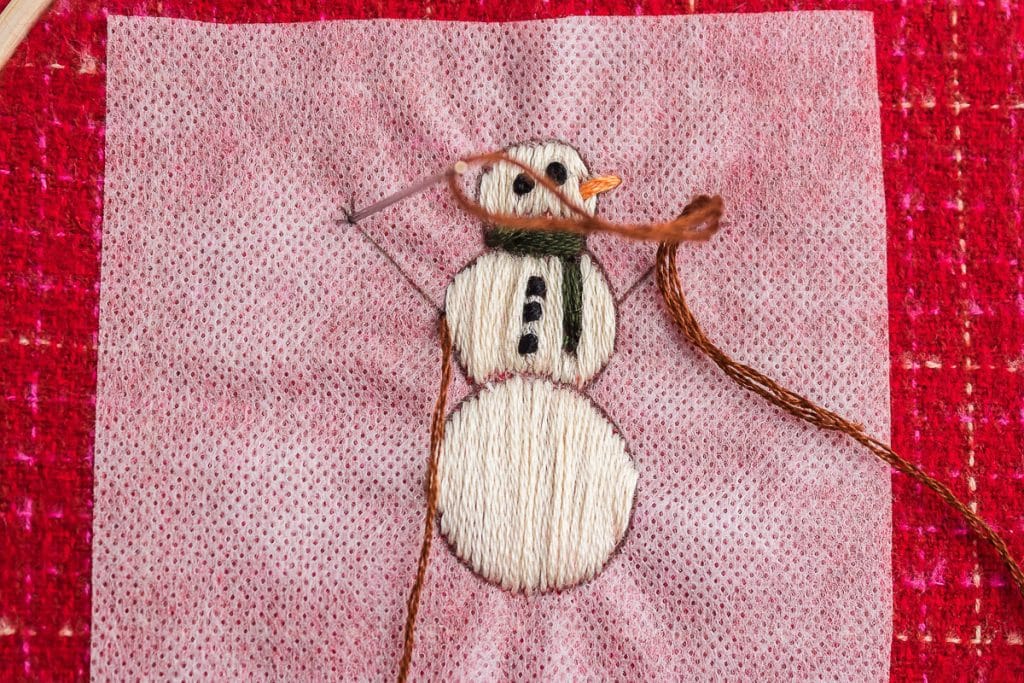
- Eyes and Buttons – Use the French knot to embroider the eyes and buttons. Hold your needle perpendicular to you to do this, and wrap the thread around the needle 2-3 times. Hold the thread taut in one hand, and with the other hand, push the needle directly through the center of the hole you made when pulling the thread through the fabric. Ensure the thread is taut so the eye won’t have excess embroidery thread. Pull the thread tight, and your knot will be complete.
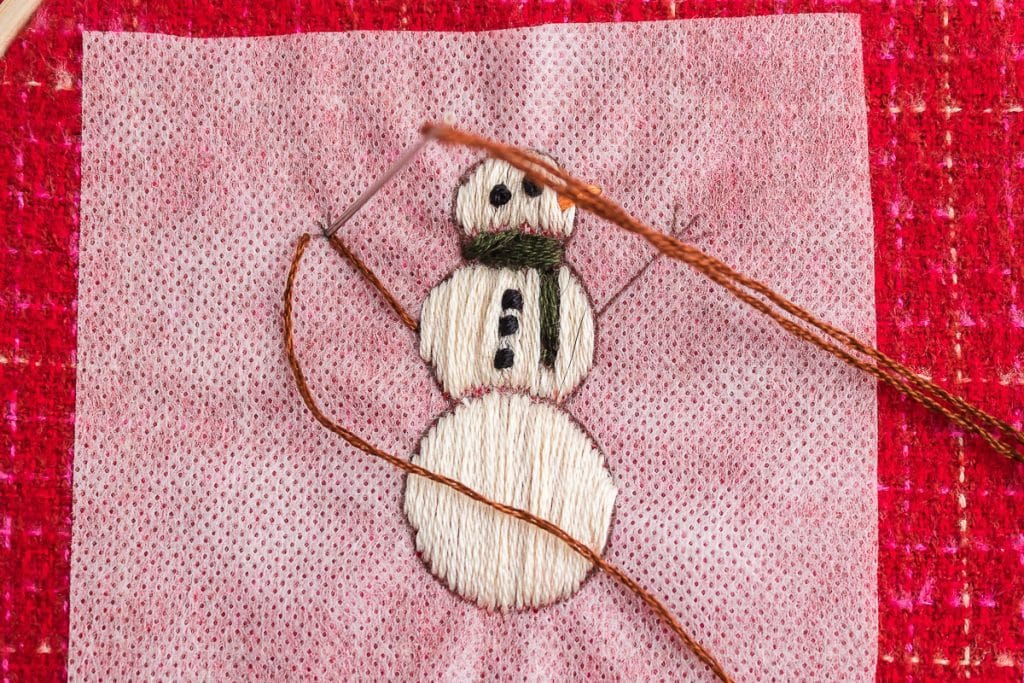
- Arms – Finally, for the arms, use the satin stitch to embroider the arm’s length in one stitch. Then, go over each finger, following the lines on the pattern.
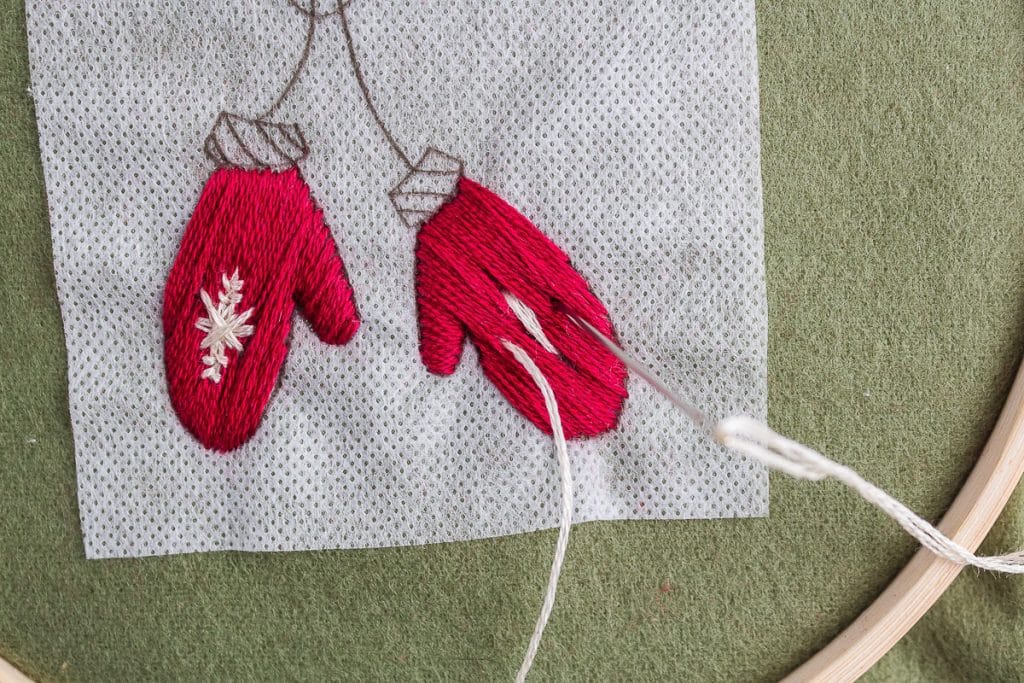
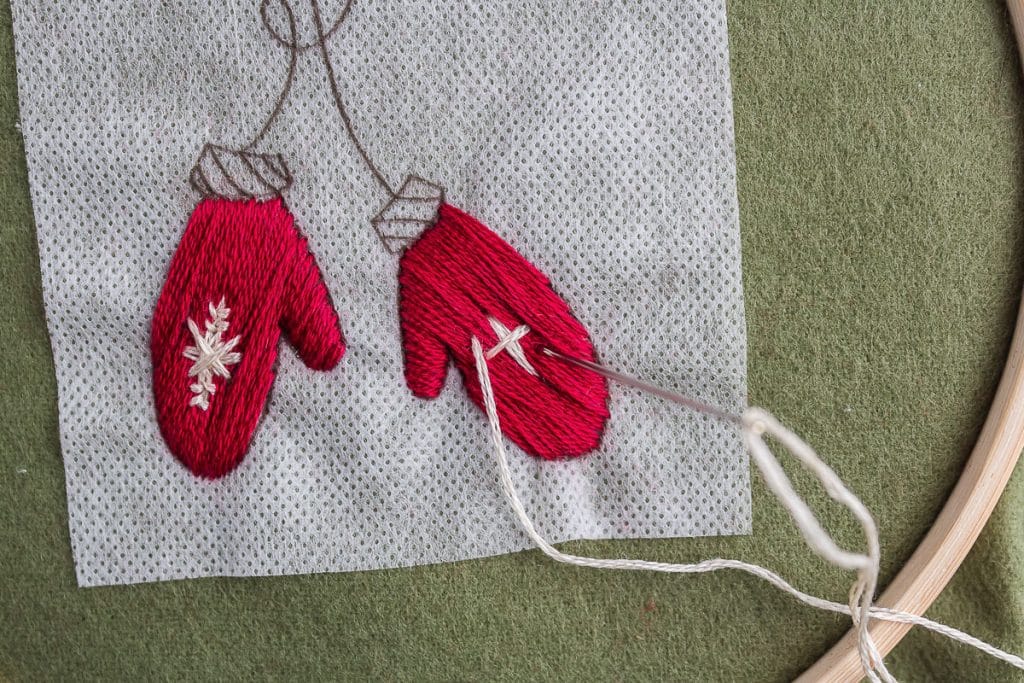
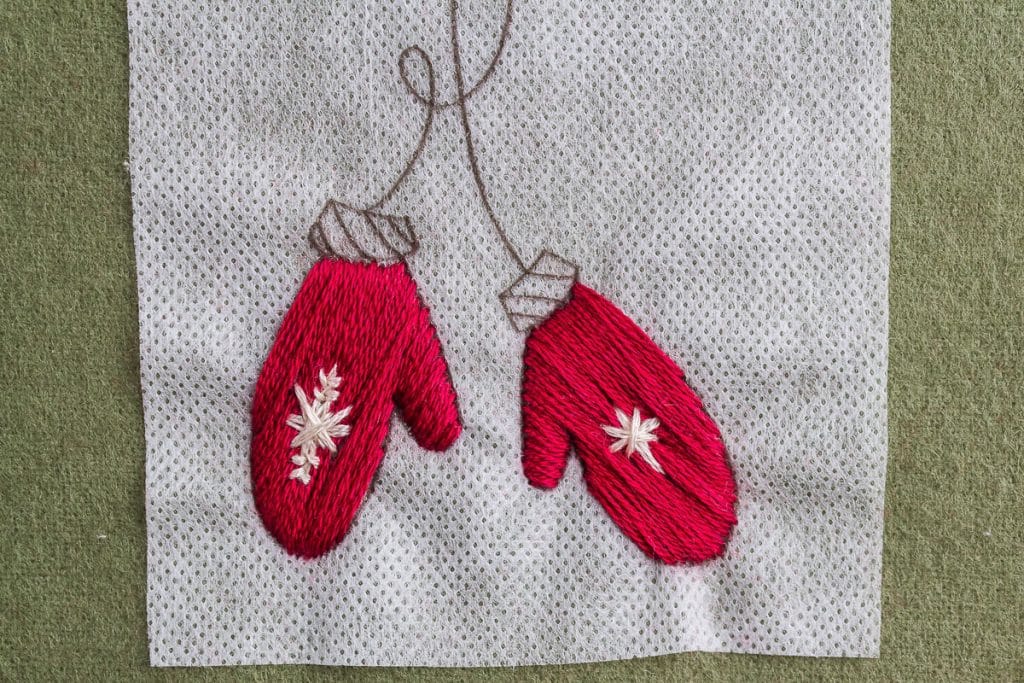
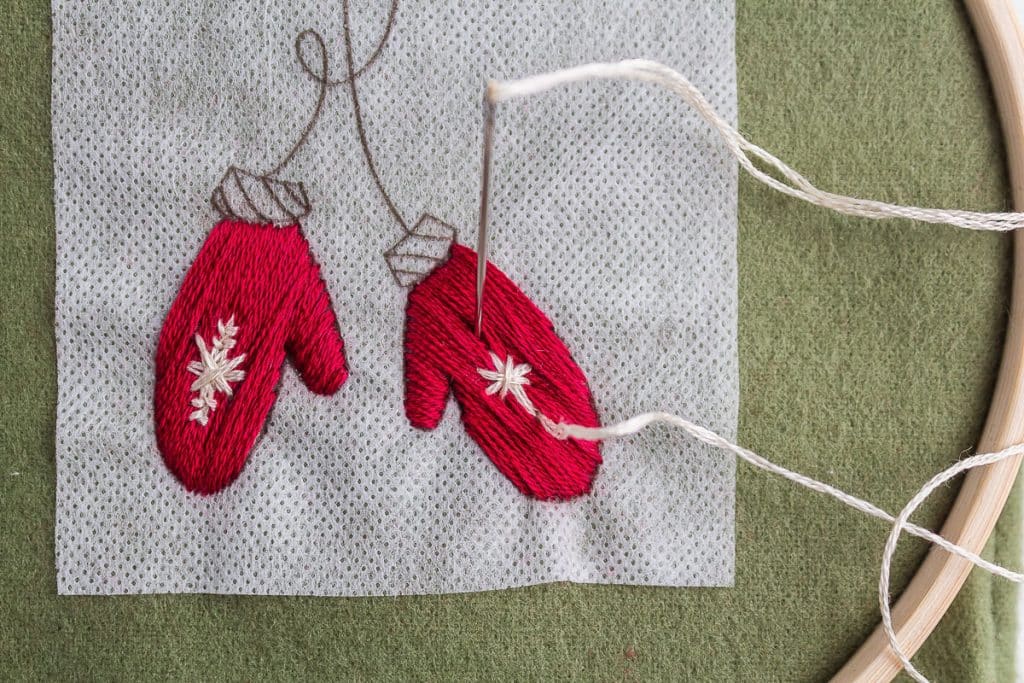
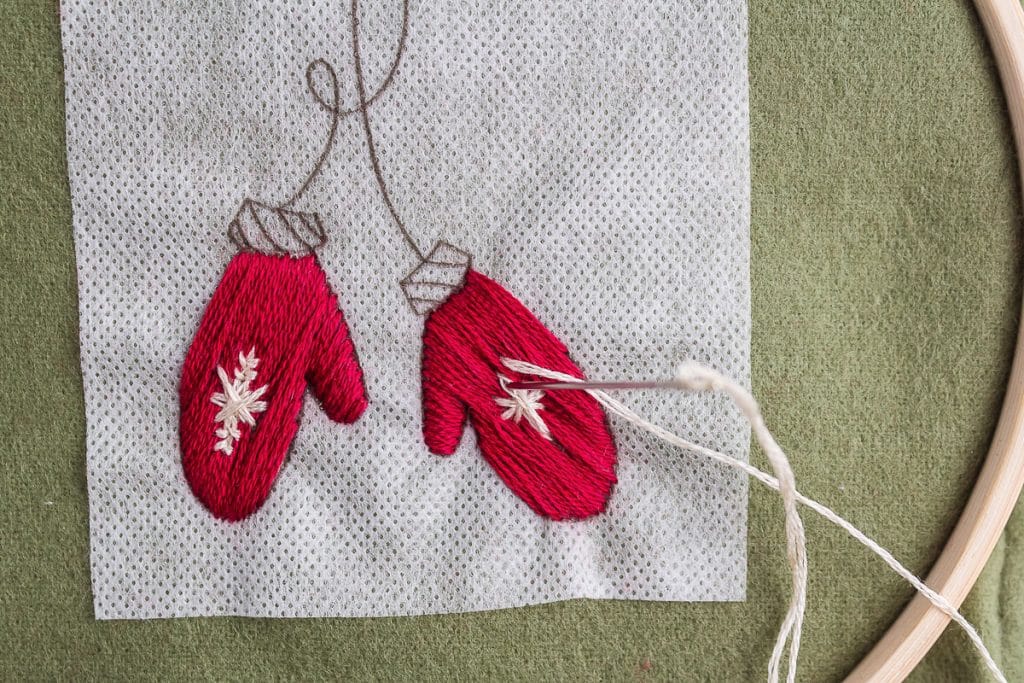
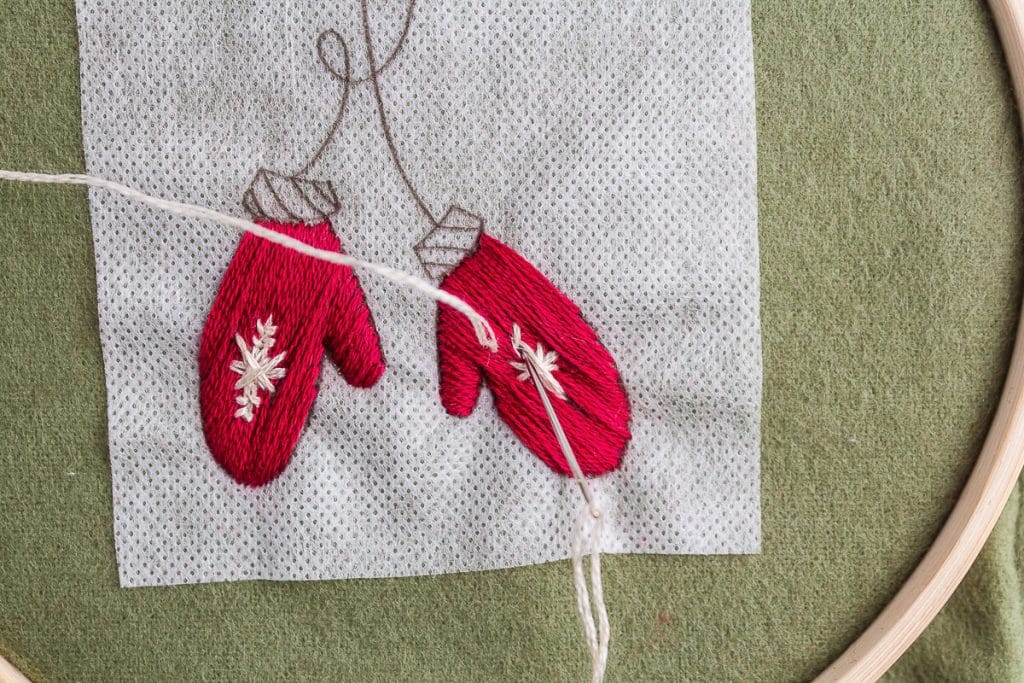
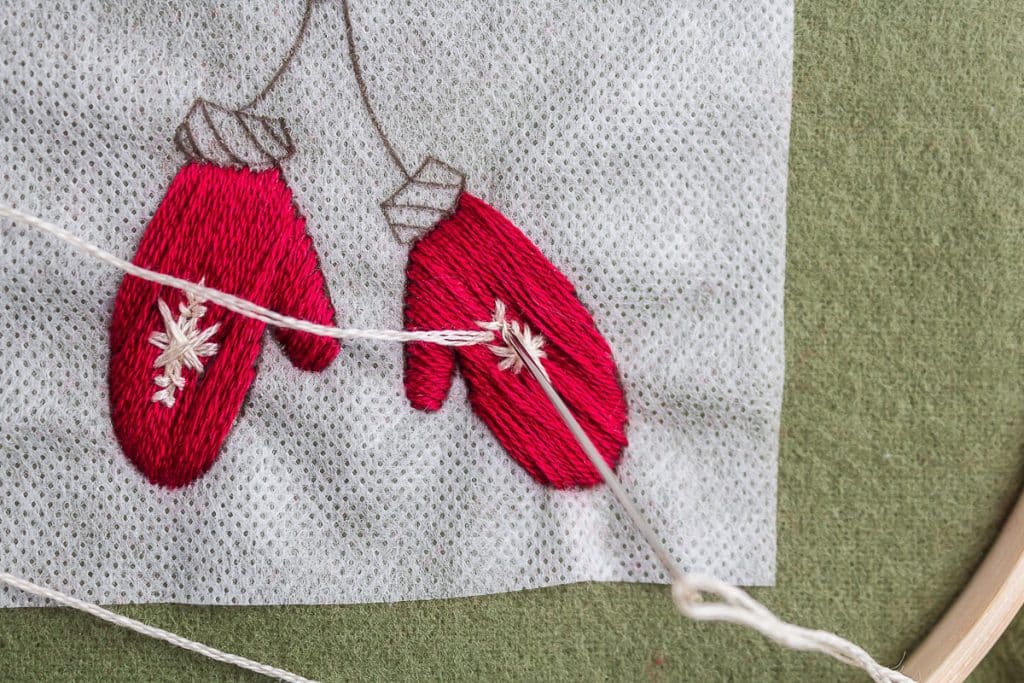
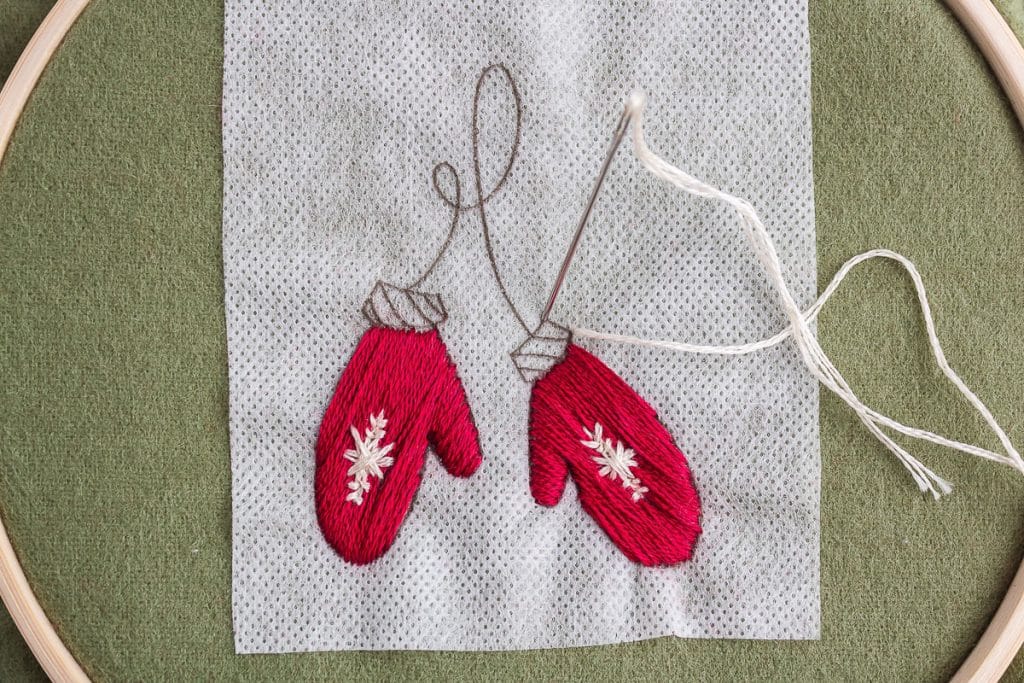
Mittens instructions
- Place the embroidery hoop tightly so the fabric is taut but not overly stretched.
- Split the embroidery floss into three strands. (Usually, there are six total strands, so this will be half.) Knot one end of the embroidery thread and thread the other through your needle.
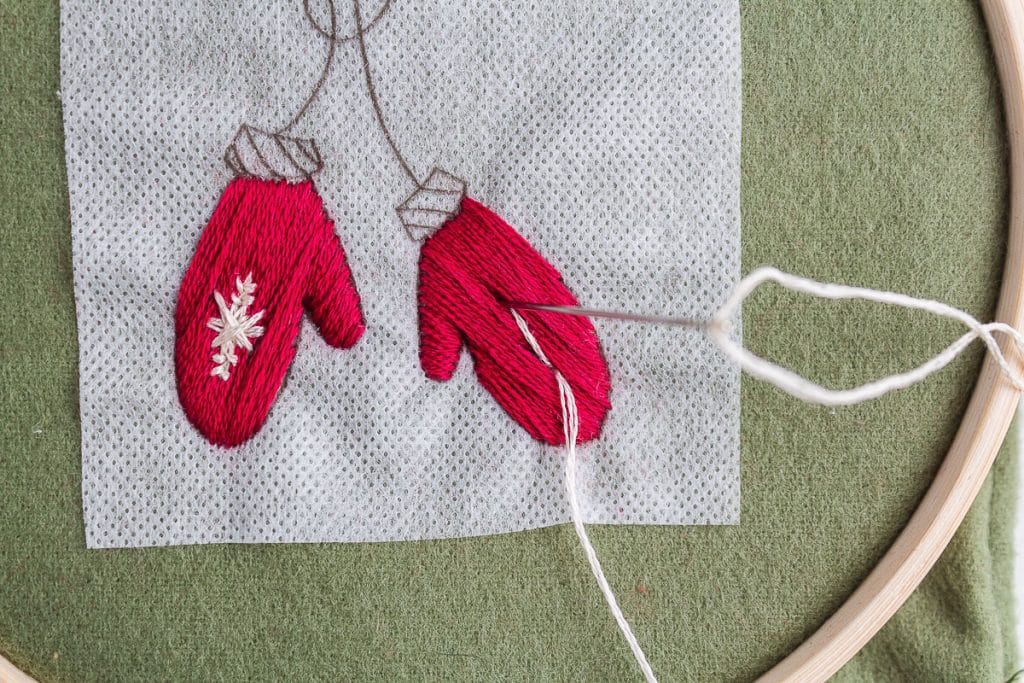
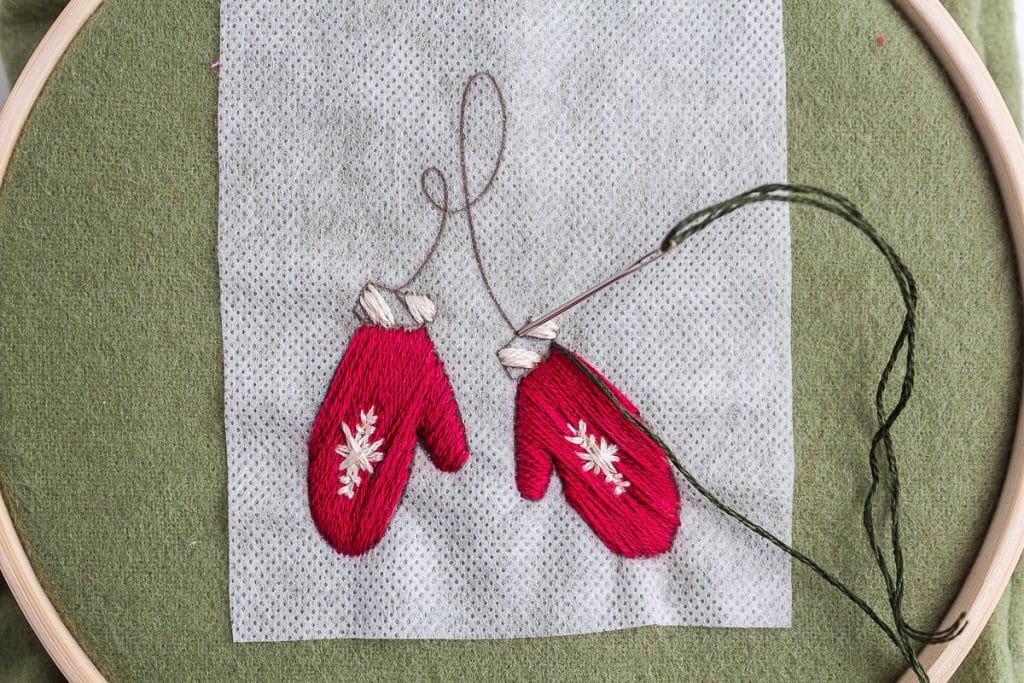
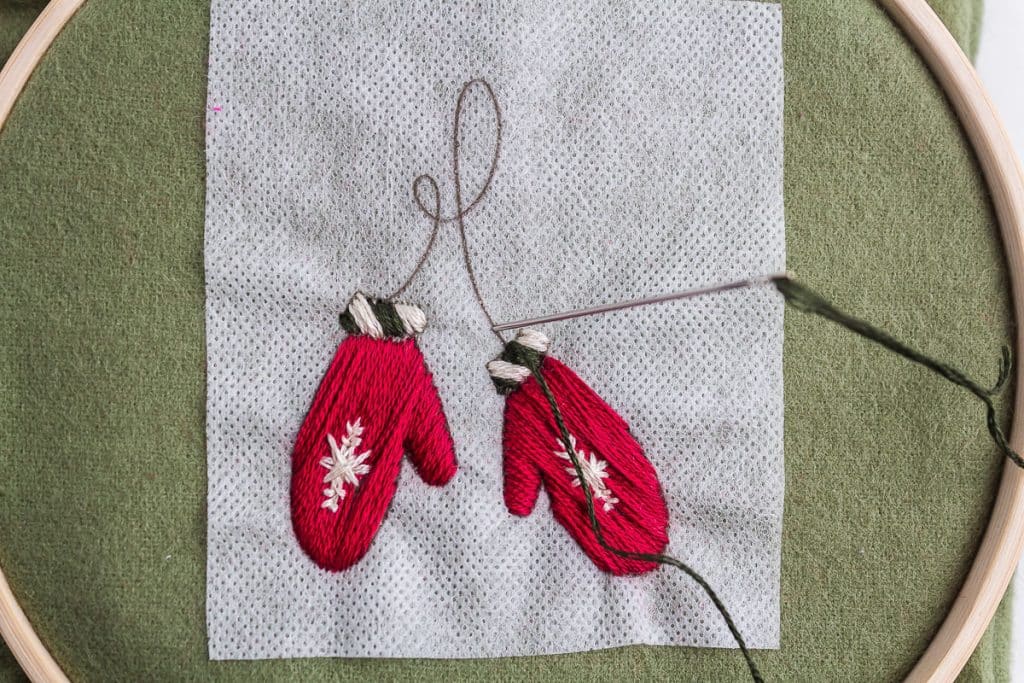
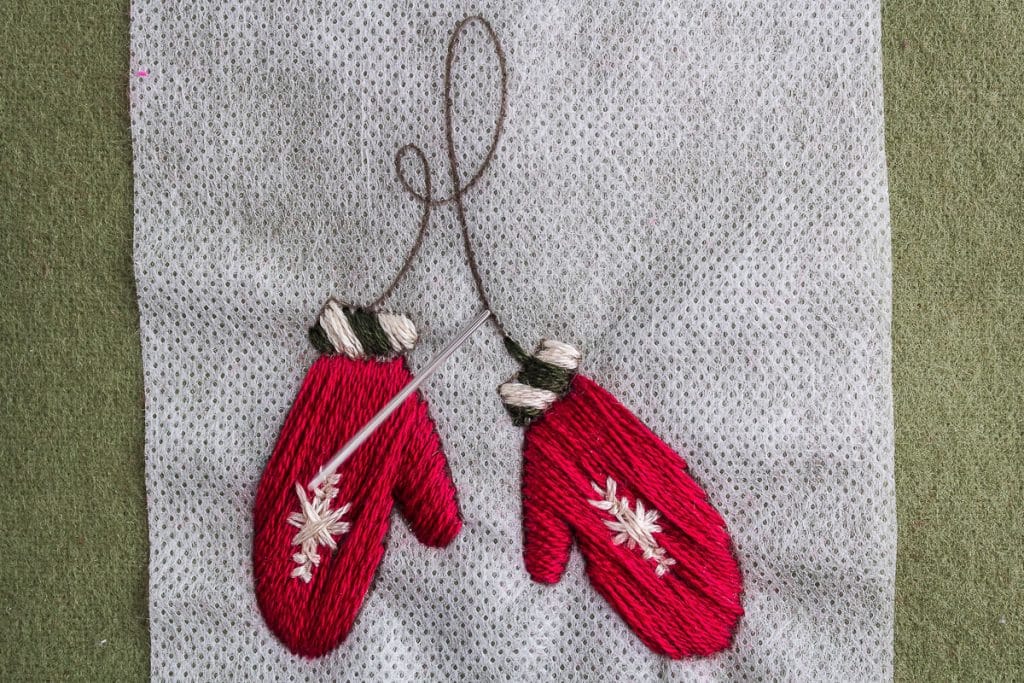
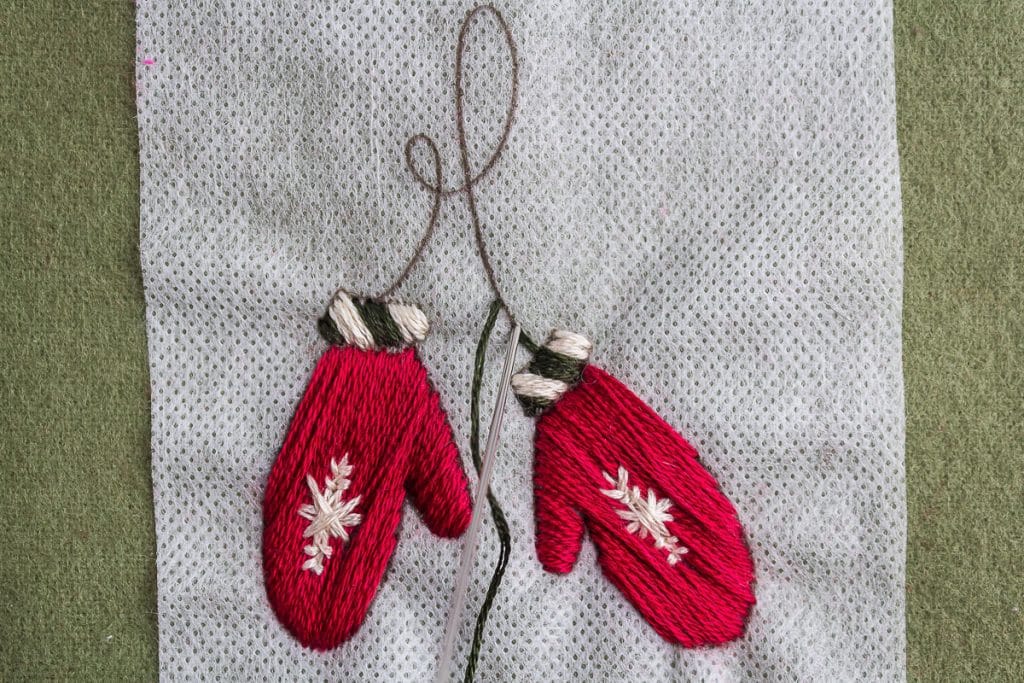
- Use the satin stitch to follow along the outline of each mitten until the fabric is fully covered.
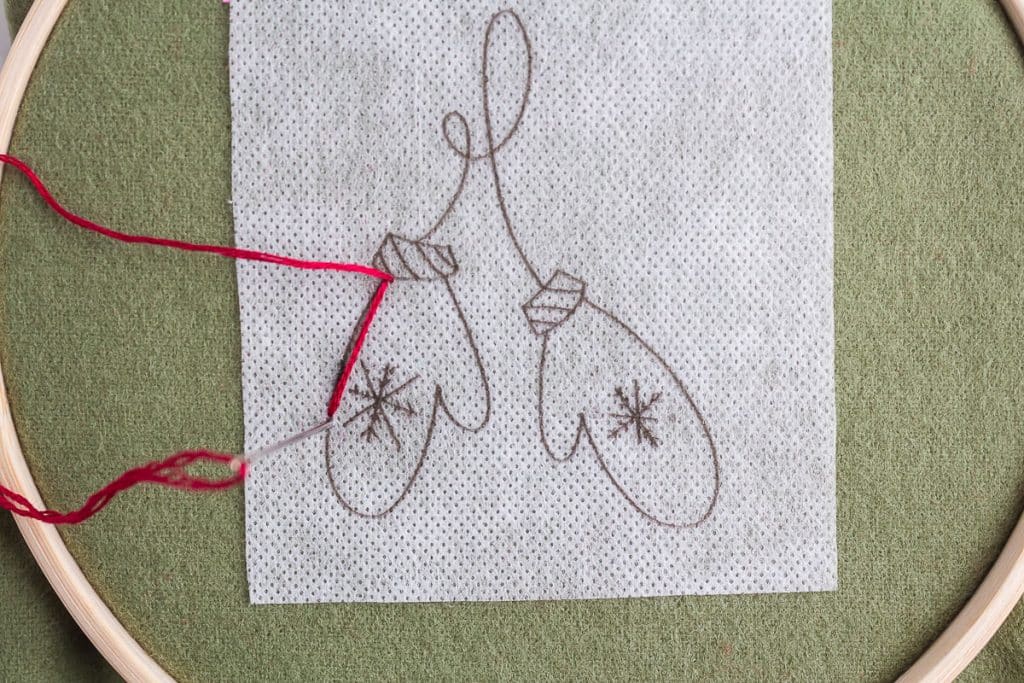
- You will not be able to see the outline for doing the snowflake. This is fine because it is meant to give an idea for the placement of the snowflake. Using the images as a guide, stitch a straight line for the main line of the snowflake in the center of the mitten (or where you want it to be placed). Next, stitch a line perpendicular to the line you stitched previously. Then, place two lines forming an X across the main line.
- To form the arrows on the main line of the snowflake, pull up the embroidery floss where you want the outer part of the arrow to fall. Then, push the needle through the center of the main line, splitting the thread as you do so. Repeat for the other side of the arrow and the arrows on the opposite side of the main line. You can make the main line longer with another stitch if you need more room for the arrows.
- For the cuff of the mitten, continue to use the satin stitch following the lines on the pattern to know when there is a color change.
- For the mitten hanger, use the backstitch by inserting the needle into the fabric, then when you pull it back up, leave a small space. You will push the needle back through the hole that ended your previous stitch.
Add a Name to Your Stocking
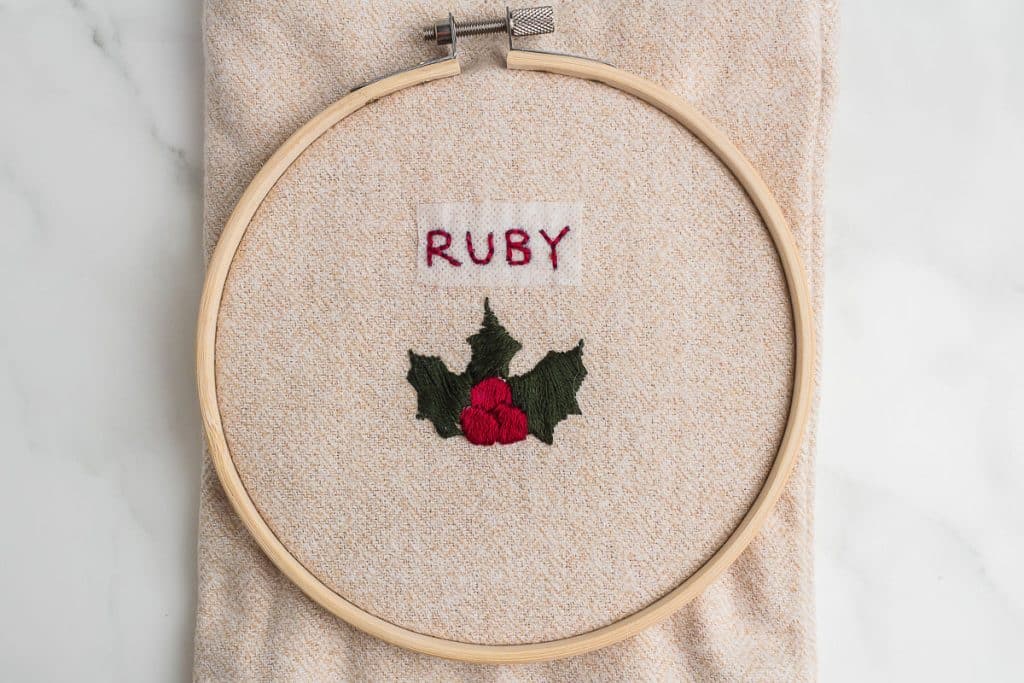
Adding a name can be a fun way to personalize the stocking after you complete the embroidery.
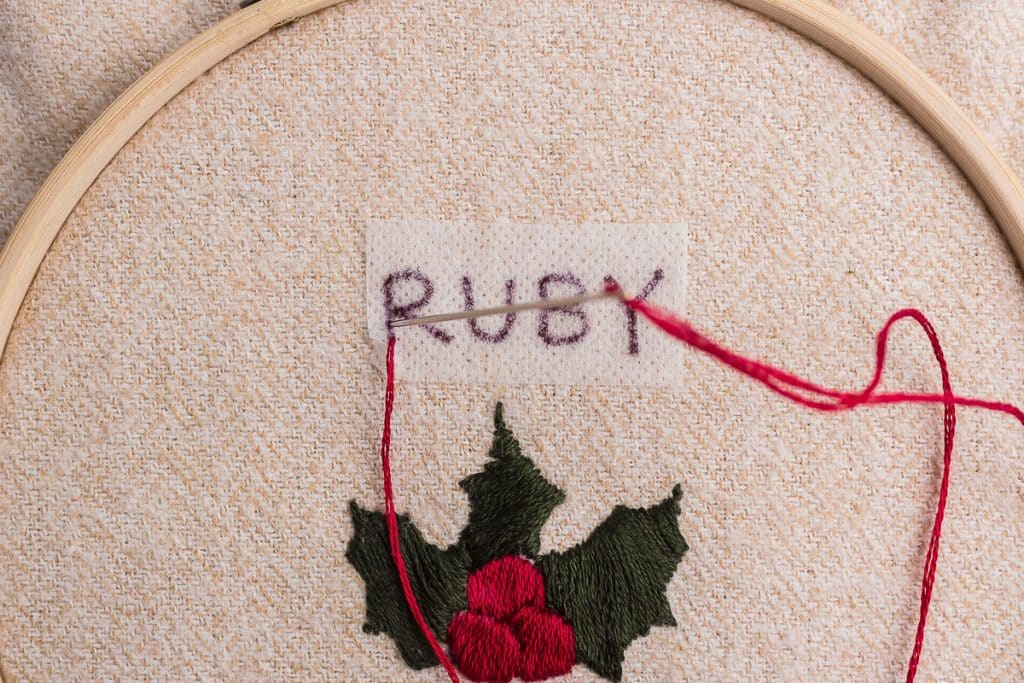
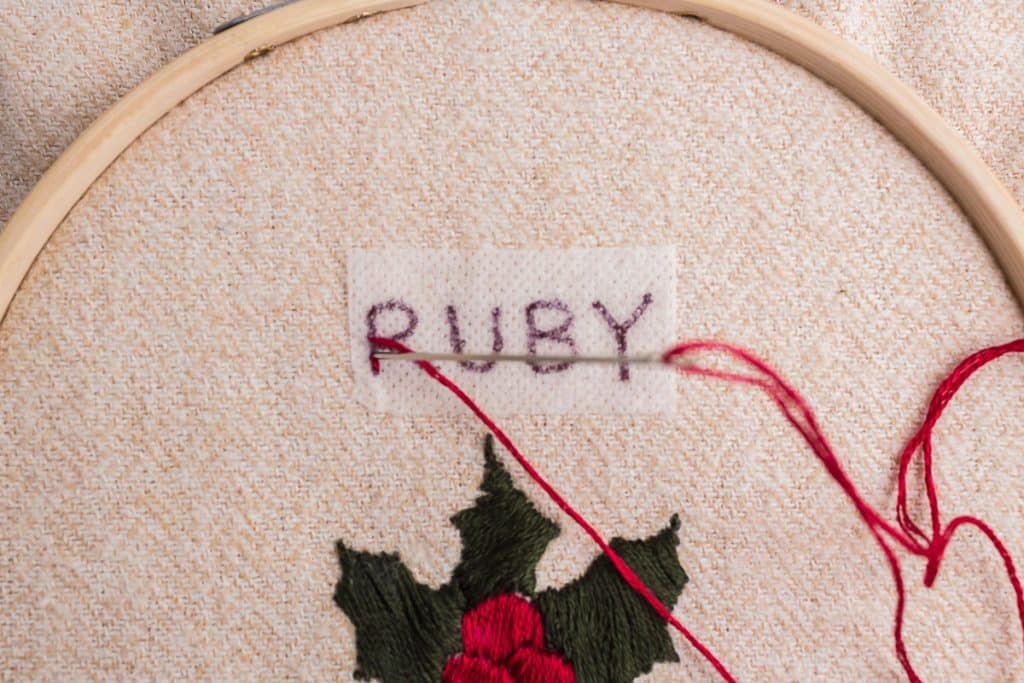
- Cut a small piece of the water-soluble paper. Using a water-soluble marker, write the name you want to embroider in small block letters. Place the sticker paper above the embroidered design on the stocking and make sure it is centered.
- Use the backstitch and follow the lines of the letters. Use tiny stitches (leaving small gaps between stitches as you pull up the thread) to ensure the letters are legible.
Ideas to Add More Decorations to Your Christmas Stockings
Add trims, like pom-poms, lace, or ribbon, to the stocking edges or around the cuff. For additional embellishments, you can also use fabric paint or appliqués.
Frequently Asked Questions
Yes, but the lining adds structure and durability. If you skip the lining, consider using thicker fabric to maintain the stocking’s shape.
Spot-clean the stockings with a damp cloth to avoid damaging the embroidery. If the flannel becomes wrinkled, lightly iron on a low setting, avoiding embroidered areas.
You can scale the pattern by adjusting the print size on your printer.
Troubleshooting the Christmas Stocking Sewing Pattern and Embroidery
Problem
The fabric layers don’t stay lined up during sewing, leading to uneven seams.
Solution
- Use plenty of pins to secure the fabric layers before sewing.
- A walking foot attachment can help feed multiple layers evenly through the machine.
- Sew slowly and check the alignment periodically.
Problem
The fabric edges fray during sewing or flipping inside out.
Solution
- Use pinking shears or a zigzag stitch on the raw edges before sewing.
- Flannel frays less, but for fabrics prone to fraying, consider using interfacing or fusible webbing.
Problem
The sewing machine skips stitches, especially on thick fabric layers.
Solution
- Use a new needle, ideally a universal or heavy-duty needle (size 90/14 or 100/16).
- Adjust the machine tension and test on scrap fabric.
- Clean the sewing machine and check that the bobbin is threaded correctly.
Problem
The curved areas, like the toe, don’t come out smooth.
Solution
- Sew curves slowly and pivot the fabric as needed.
- Clip small triangles into the seam allowance around the toe to help the fabric lay flat when flipped.
Problem
Flipping the stocking or hanger right side out is hard.
Solution
- Use a chopstick, knitting needle, or pen to gently push corners and curves into place.
- Be careful not to poke through the fabric.
Problem:
After flipping it inside out, the stocking looks bunched or uneven and doesn’t lay flat.
Solution
- Press the stocking with an iron, focusing on the seams.
- Use steam to help relax the fabric, but avoid direct contact with embroidery.
Problem
The design doesn’t end up centered on the stocking.
Solution
- Measure and mark the placement on the fabric before starting.
- Use water-soluble fabric markers to outline the design area.
- Practice embroidery placement on scrap fabric before working on the stocking.
- Embroider the image after you’ve sewn the stocking.
Problem
Stitches are inconsistent in size or tension.
Solution
- Use an embroidery hoop to maintain even fabric tension.
- Work in good lighting to ensure better visibility of the design.
- Practice basic stitches on scrap fabric to build consistency.
Problem
The embroidery floss tangles or knots while stitching.
Solution
- Cut the floss into shorter lengths (12–18 inches).
- Keep the floss strands smooth and untwisted as you work.
- Use beeswax or thread conditioner to reduce tangling.
Problem
Colors from embroidery floss bleed onto the fabric.
Solution
- Pre-wash embroidery floss before use to prevent bleeding.
- Before starting the embroidery, test a small section by rinsing it with water.
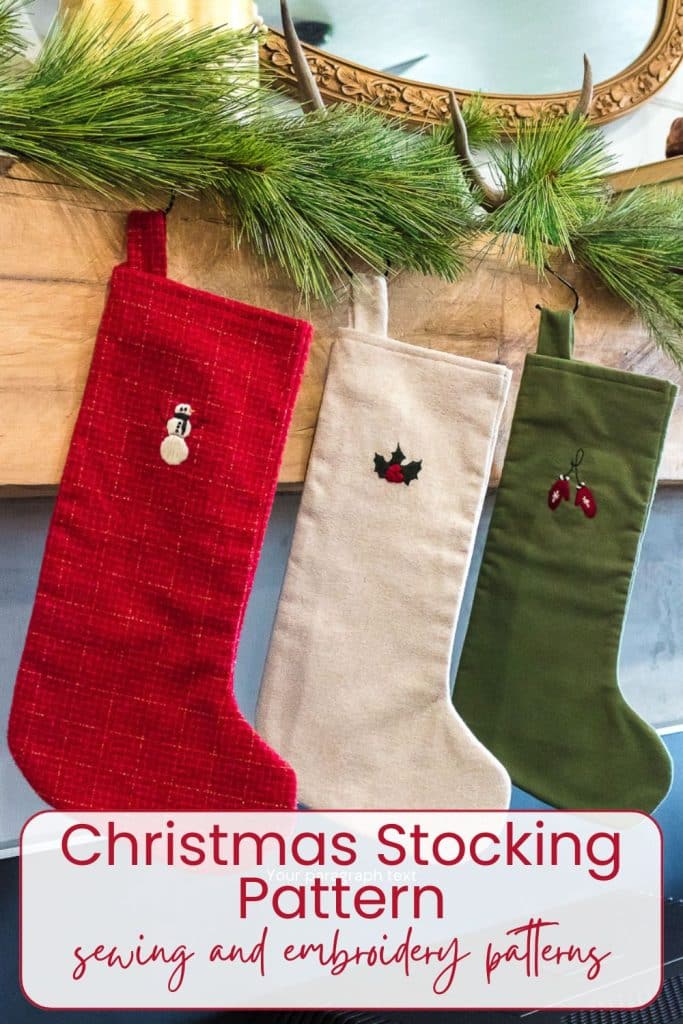
Bookmark this page or pin the following image to refer back to this Christmas Stocking Sewing Pattern in the future.
Thanks so much for spending a few minutes of your busy day with me!
To ensure you don’t miss future content, pop your email in the pale green box on the right or click here. I usually send one email weekly, so I won’t inundate your inbox. I’m sensitive to an overflowing email inbox!
We will only use your email address to send you emails, no more than 1-2 weekly. In addition, you will have access to my growing library of knit & crochet patterns and other printables. Check back often as this library will continue to grow. You can unsubscribe anytime by emailing me or clicking on the “unsubscribe” link at the bottom of all emails.
And you can access many of the products I refer to on my Nourish and Nestle Amazon Page. You can access it here.
So, if you’d like to participate in the ‘subscriber benefit’ action, simply subscribe to Nourish and Nestle here or use the form on the right sidebar. It’s slightly towards the top.
I have sent all my subscribers the link to the Subscriber Benefits Library. If you missed it or misplaced it, let me know.
Until next time…


